Exercise 13 - Input Devices
Measure something: add a sensor to a microcontroller board that you have designed and read it.
The power of buttons
The power of buttons
In my final project I would like to change the speed of the impeller of my filter while pressing one or more buttons. I am also a beginner in programming and in electronics so I thought that if I can understand simple inputs it would be a good starting point for more complex tasks.
Studing AVR - Input chapter
Because I am a beginner in electronics and in C programming I started the assigment studing the chapter about inputs on the book AVR - Programming.
I did the examples from the book and I modified a little the code in order to understand better what was happening.
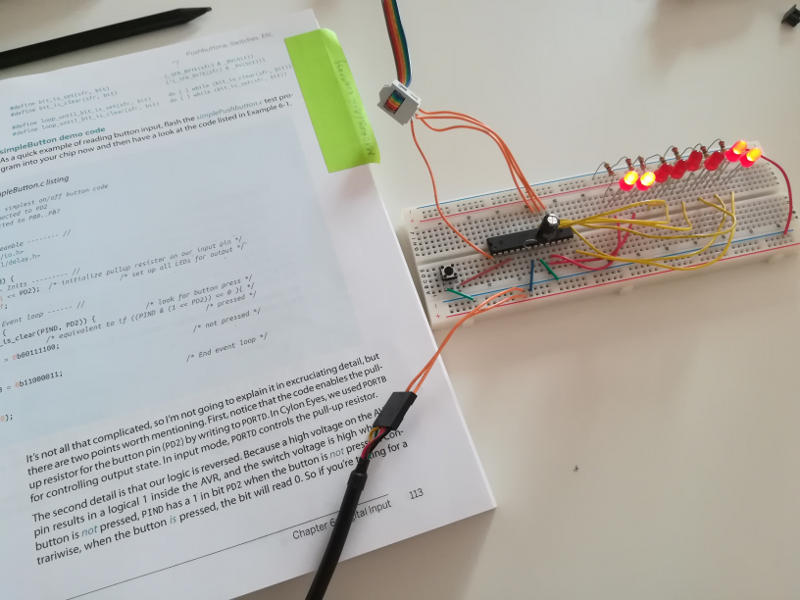
First we set all the pins as output with DDRx data-direction register.
In DDRx register "1" means pin configured as output and "0" means pin configured as input.
By default these bits are zero so we have to set "1" in register DDRB to turn on the leds.
In hexadecimal:
DDRB = 0xff
Equivalent to decimal number:
DDRB = 255
Equivalent to binary number:
DDRB = 0b11111111
Then I set PORTx port x data register. When DDRx bits are set for output: "1" means pin set logic high and "0" means pin set logic low. When DDRx bits are set for input: "1" set the internal pull-up resistor.
By default these bits are zero, so we have to set a "1" to Pin PD2 where the button is connected to enable the pull up resistor.
Finally there is the register PINx portx input pins address. Here I read the digital voltage value for each pin. I can read this registers like a normal variable in my code to see which pin have high and low voltage.
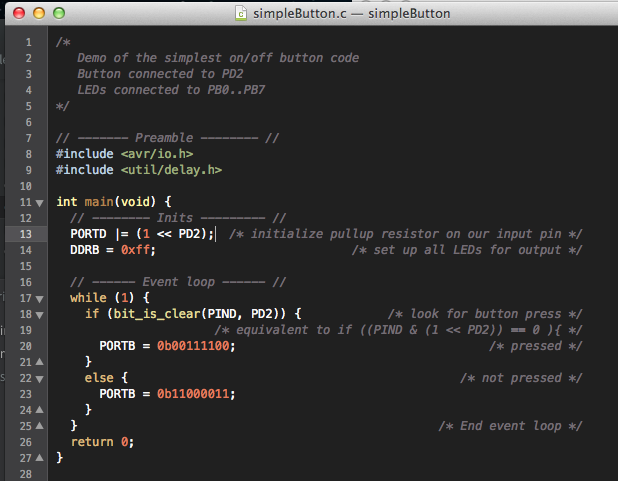
This is a Macro:
bit_is_clear(PIND, PD2)
PIND is the register mentioned above, PD2 is the pin where the button is hooked.
Equivalent to:
(PIND & (1 << PD2)) == 0
It checks if the button has been pressed and the voltage on that pin has been grounded to zero.
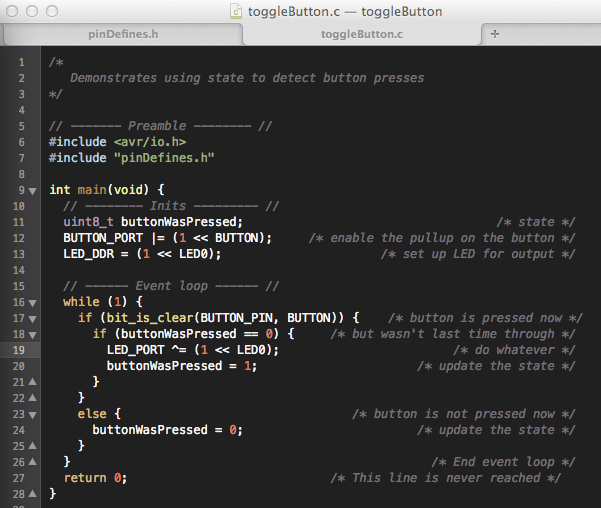
Then I changed code in order to check if the button have changed the state and not as in the previous example if the button was or was not pressed at each moment. This solution can be more interesting for my final project.
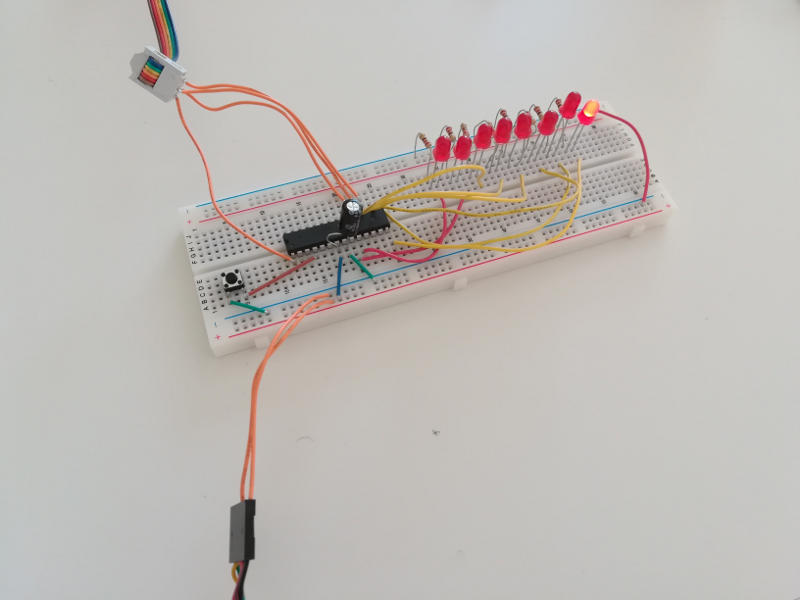
In the code the new part, define the variable to keep the state of the button:
uint8_t buttonWasPressed; /* state */
And the if statment to check the previous state of the button:
if (buttonWasPressed == 0) {     /* but wasn't last time through */
        LED_PORT ^= (1 << LED0);                        /* turn on LED on pin PB0 (see pinDefines.h) */
        buttonWasPressed = 1;                      /* update the state */
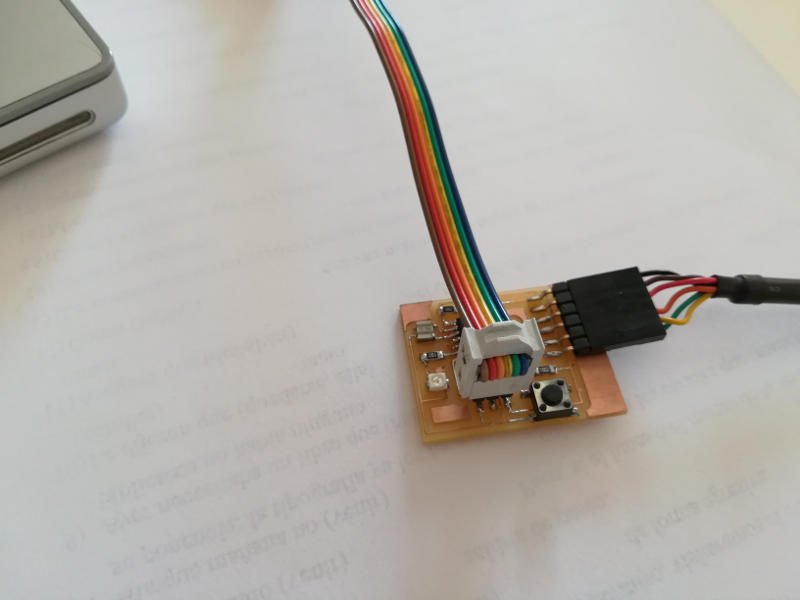
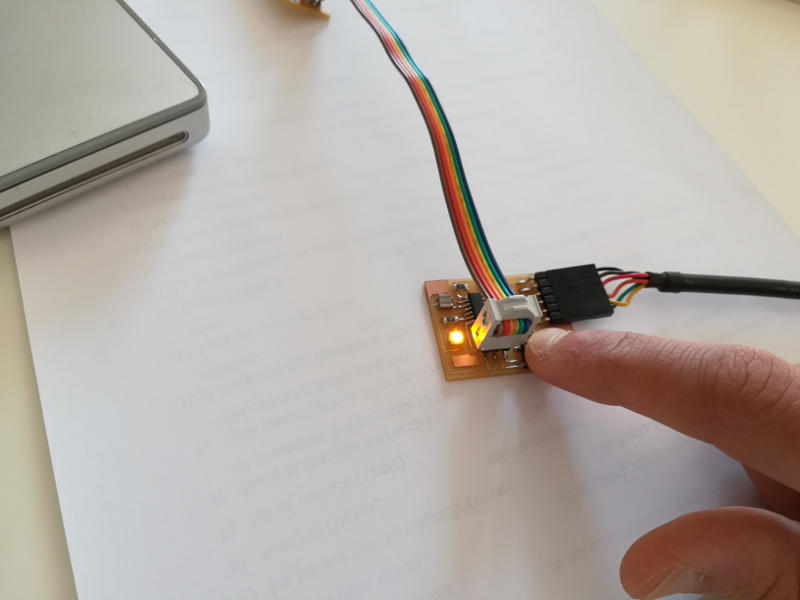
Hello Board as input device + led
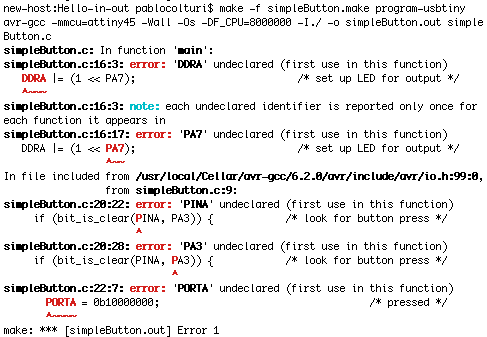
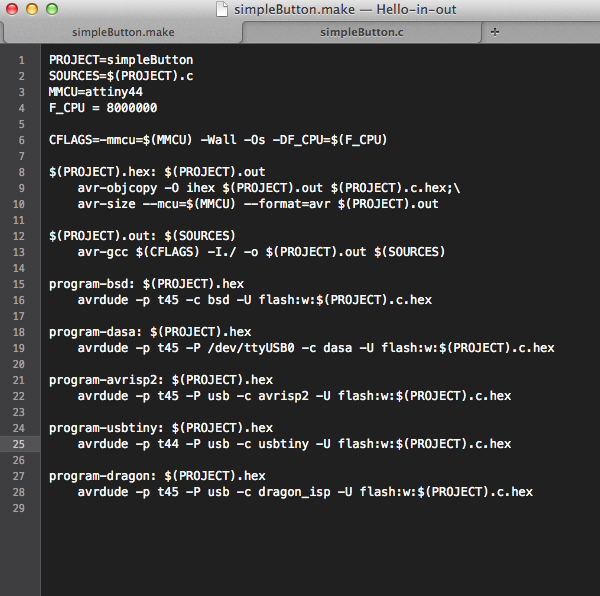
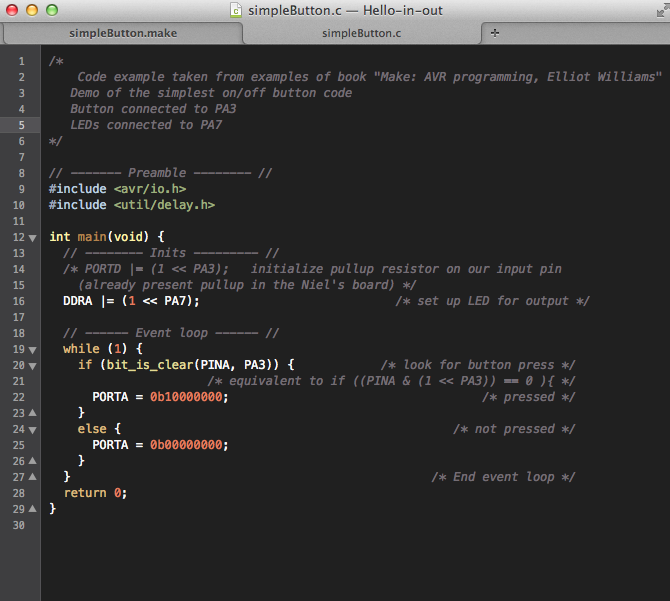
Before doing a new board that will control the speed of a DC motor for my final project, I thought to try to program my hello-board from exercise n.06 as an input device with its button. I took the make file from a Niel's example and the c sketch from the file simpleButton.c that I have already used in the top of this page.
Thanks to what I have studied on the book AVR: prgramming and also looking at the data sheet of our ATTiny44 I could easly modify the two files.
I did get an error compiling but after a quick search on the web I realised that the make file was simply written for a different processor an ATTiny45 instead of 44.
The two files correctly modified!
The board working perfectly!
Here the files to download for the Hello Board with button + led:
Light sensing board
I decided to make a board that could sense light changes. It could be interesting in my final project to have a sensor that can sense amounts of dust inside of the filter and this could be made with a light sensor.
I thought also that I wanted to learn more about scripts made with Python that could be useful for my final project.
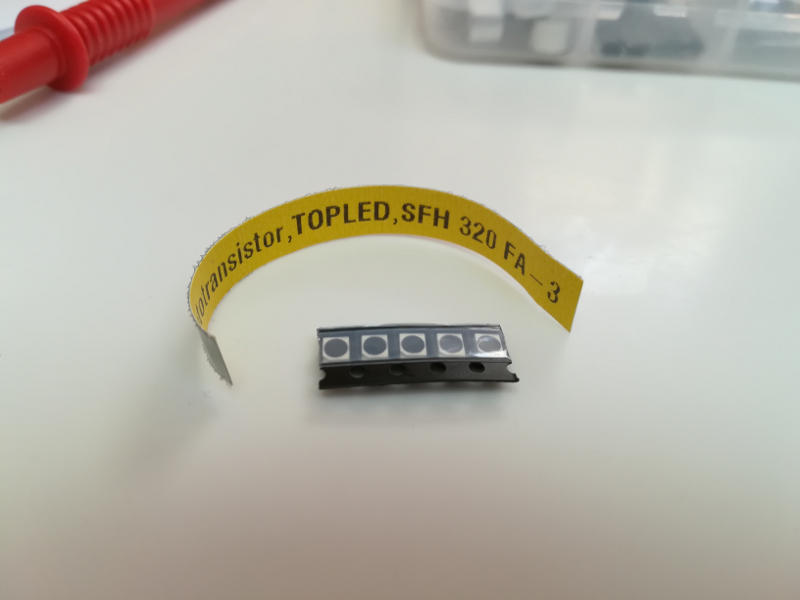
I started from the template in the archive and I redrawed it with Eagle making possible that the photoresistor available in my lab could match properly on the board.
The photoresistor that we had in the lab had a 1206 type of package.
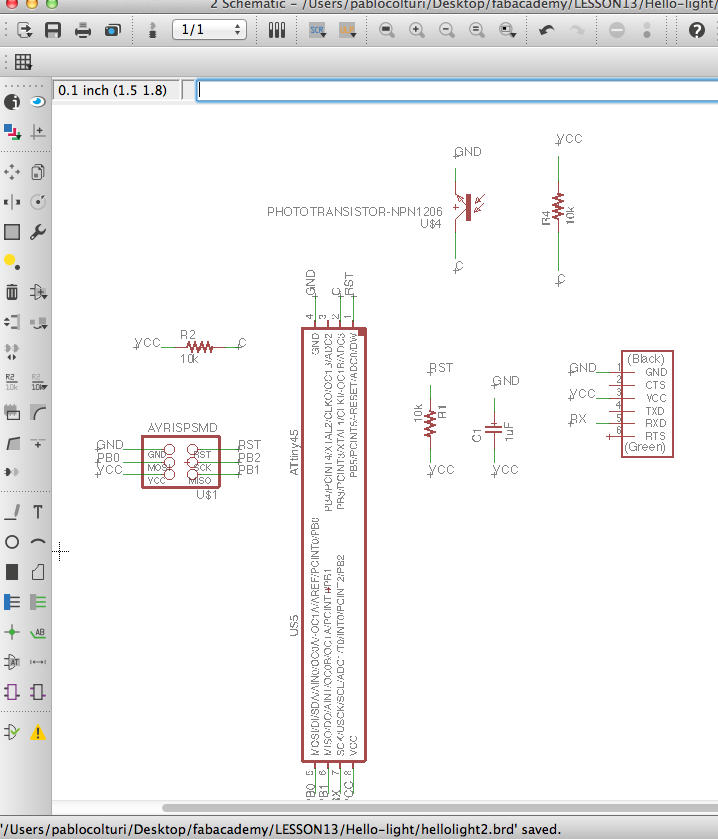
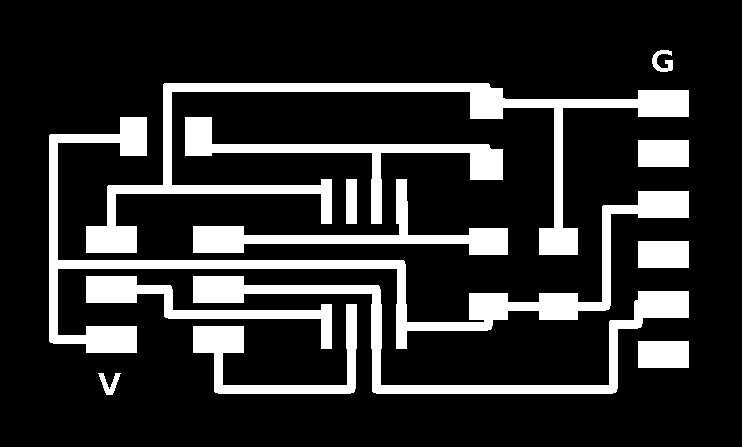
Here below drawing the schematics in Eagle.
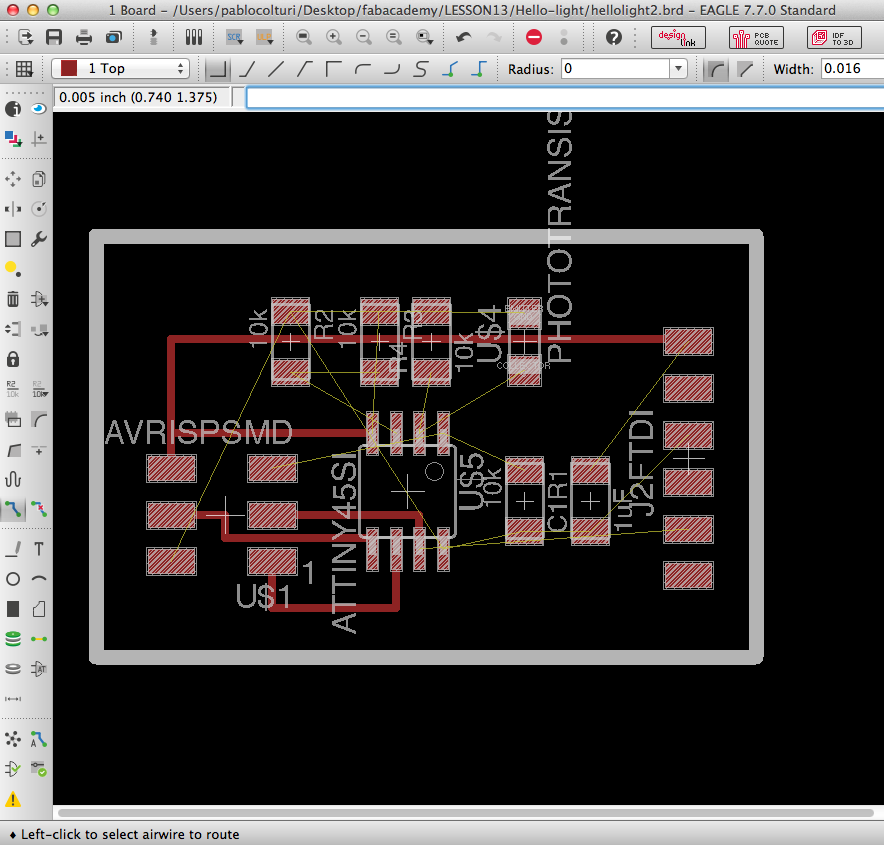
Here drawing the layout and the traces in Eagle.
Here the png file edited with Gimp.
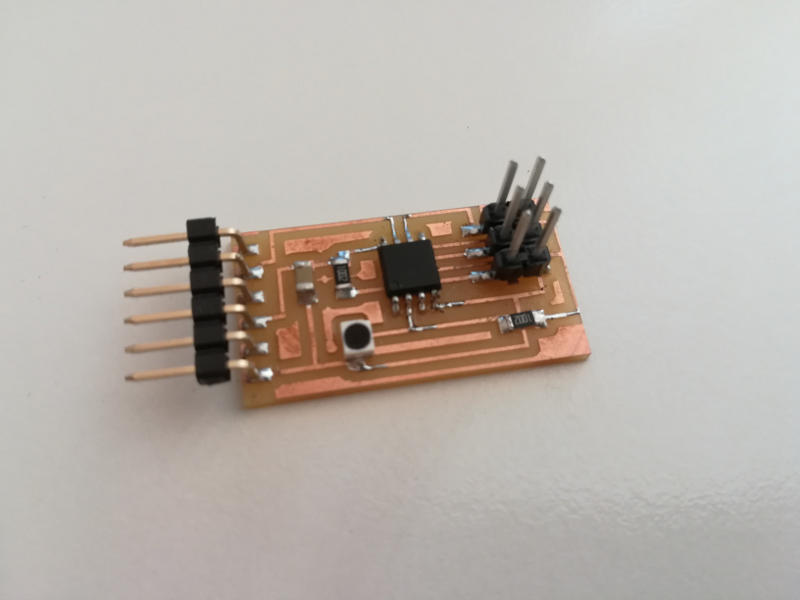
Here the board milled and soldered with the components.
Here the files to download for the light sensing board:
Python
I run the file hello.light.45.py from the archive.
It was my second time running a Python's script and I followed similar steps described in my exercise 15 but with no writing the baud speed.
To run the Python script I would enter, with the terminal in the folder where the script is located:
python name-of-the-file name-of-the-port
python hello.light.45.py /dev/tty.usbserial-FT9FWYH0
The usb serial port name can be found typing:
ls -al /dev/tty.usb*
The script run and here below is the video!
New input and output board for final project
See also Final Project - Electronics section where I designed a completely new input and output board with 6 header pins connected to three buttons that will turn the DC motor of my final project at three different speeds.