Laser cutting
Cork cushion
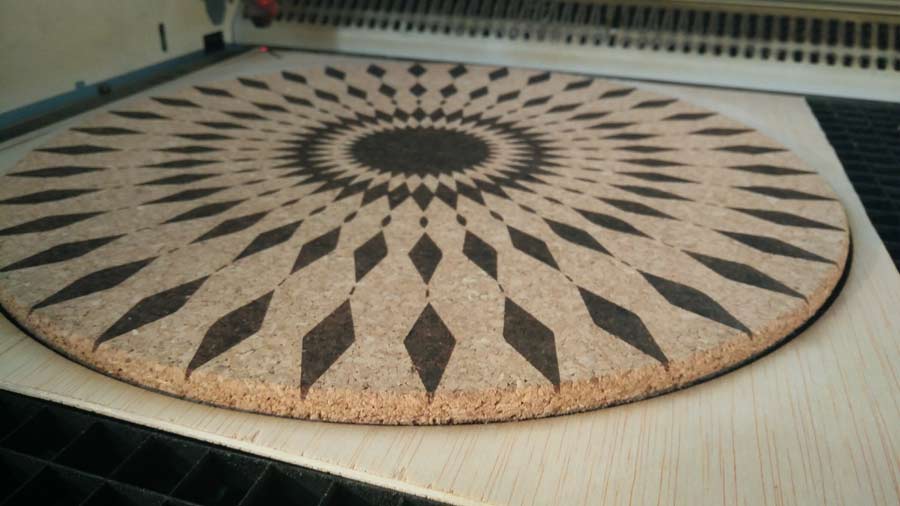
To enhance comfort for Twistab stools I created a cushion with natural cork. I use precut circle (30cm diam.) of 5mm thick compressed cork produced locally in Catalunya (100km from Barcelona). I laser engraved a pattern, coloured the cork and applied a finish to seal the pores and protect the material. I did versions with variations of the pattern and in different colors.

Preparing the image to engrave
I used a png image, vectorized it in illustrator and hatched the inner contours in rhino and exported it as . dxf for the laser cutter.
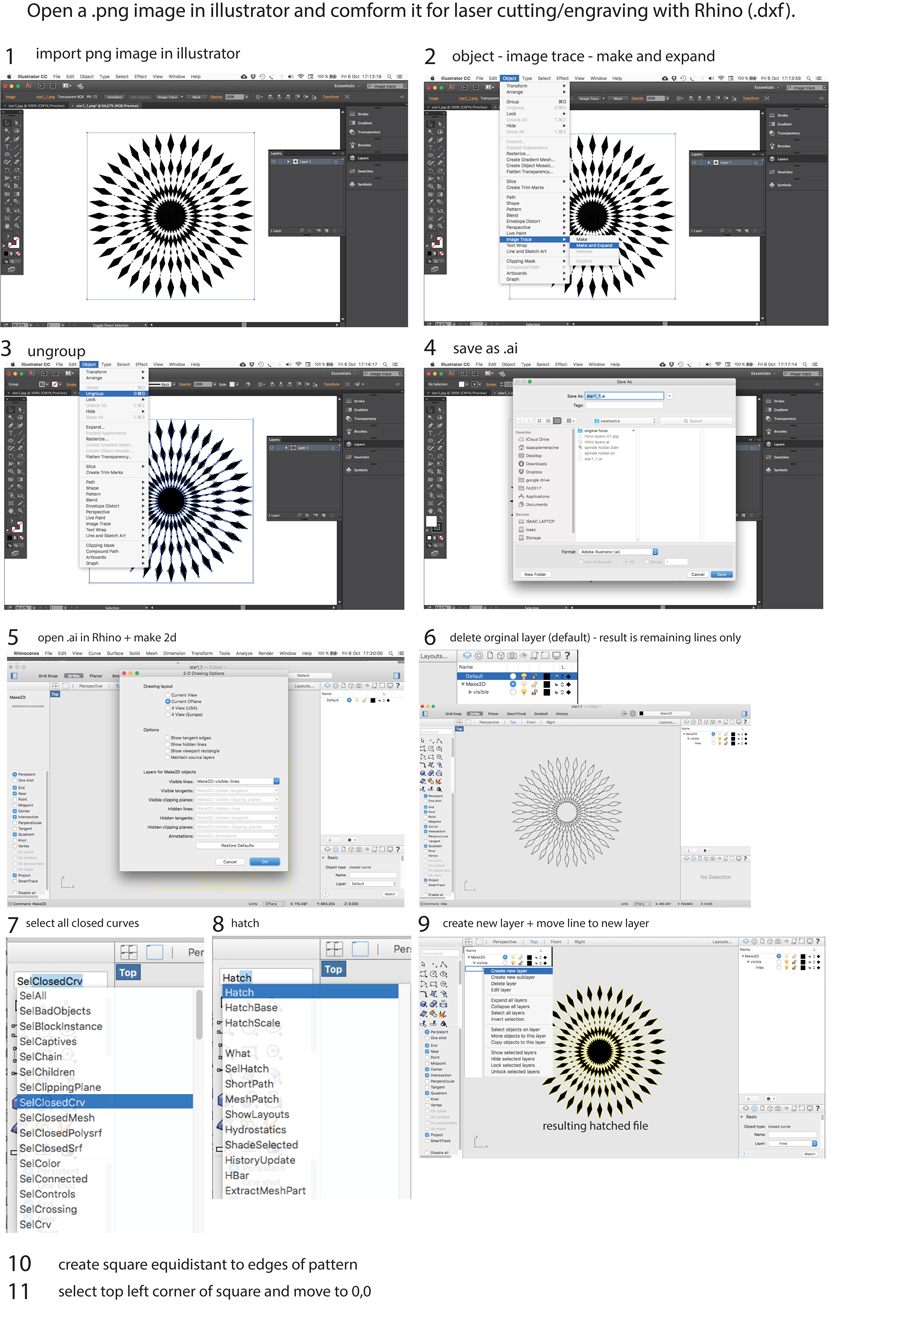
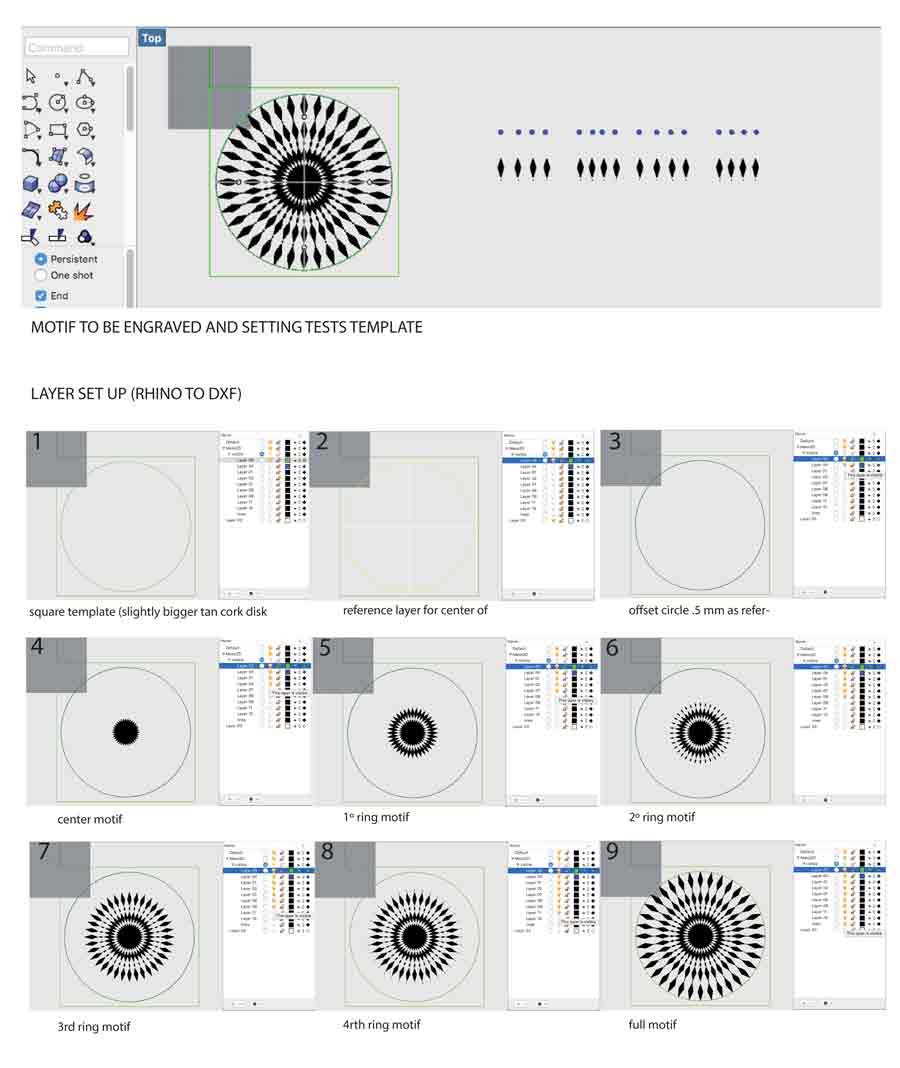
Once the image is vectorized and fit to be printed I distributed the different elements of the pattern in different layers of the rhino file so it would be easier to make variations engraving only selected elements.
It is important to place on respectiv layers the elements corresponding to each operation the laser will execute and have each of these layers in different colors. It is also important to choose colors that are compatible with the laser cutter software. IN the laser cutter software we associated colored lines with presets (ex: black is CUT, red is Engrave, etc..)
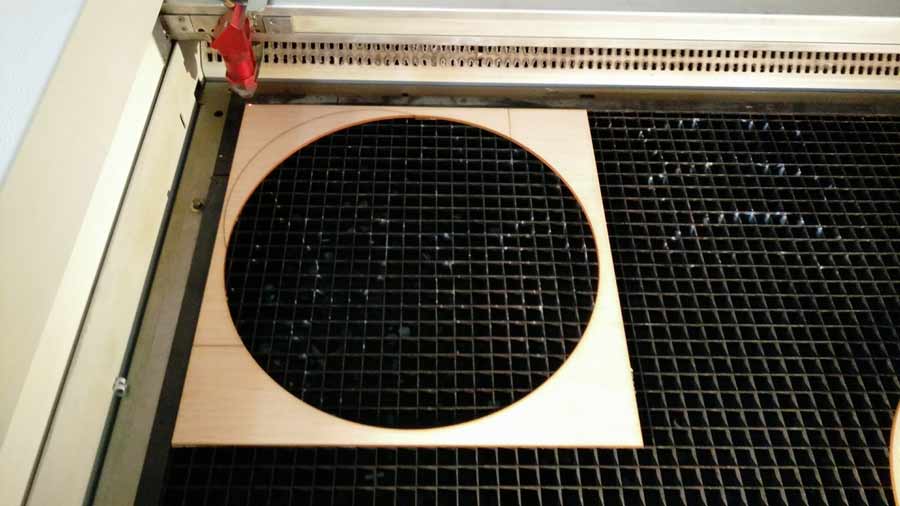
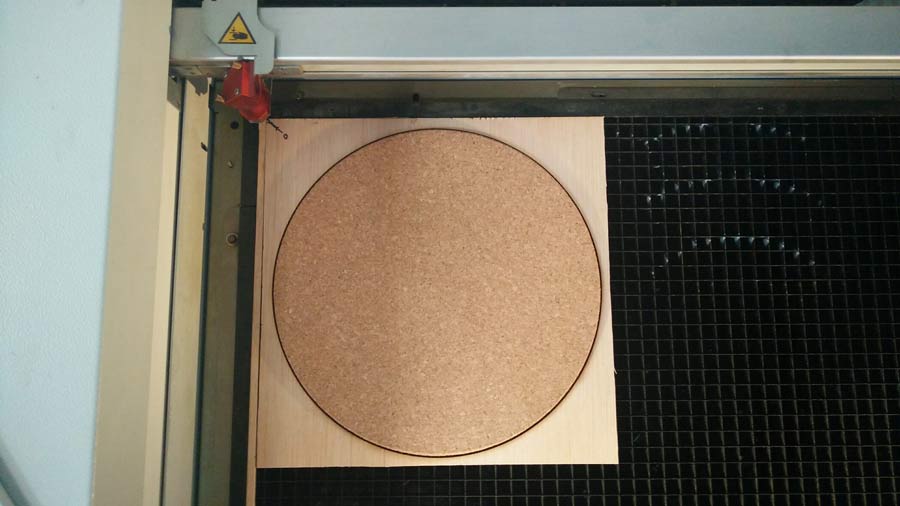
Because I want to repeat the engraving on various pieces of cork I integrated in my graphic file the lines ( a square a few cm. bigger than the diameter of the graphic pattern + inside the square a circle the exact same size as the cork disk I want to engrave on) that will serve to cut a template in 3mm plywood (or any flat material). This way I am shure the pattern with be engraved will always be engraved perfectly centered on the disk and that I can repeat the engraving with the same precision as many tme I want simply placing a new disk of cork in the template and resend the job with the same setup (reset job).
SENDING THE JOB
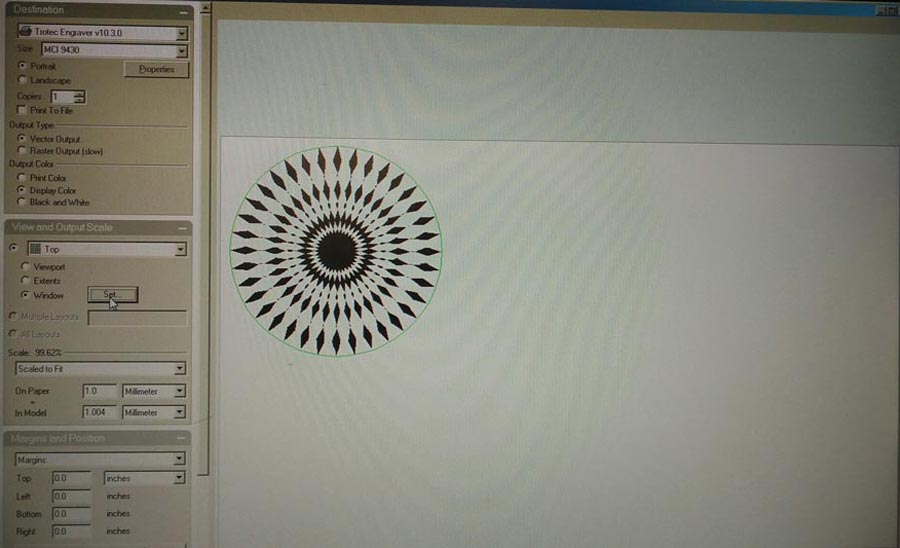
To send the file for engraving from Rhino enter "Print", choose the machine to print with (Trotec400). This launches the Trotec JobControlX interface. (In my case Rhino is already preset linked to the Trotec so it opens automatically when entering PRINT.) A new window opens asking to set some parameters concerning the job settings, material, window size, etc. Reading the JobcontrolX user manual. is highly recommended to get familiar, avoid mistakes and risks of damaging the machine.
I used "MCI 9430"(default) in portrait mode which corresponds to the full plate (600 x 1000cm) of the machine. In the property window I choose standard but yet do not define the engraving cut parameters.
I use Vector output, set my output scale as top (the laser beam will start from the top left corner of the plate) and press "set windows" (This allows to manually set the origin of the job - in other words the X and Y 0.)
This send back into Rhino and a square the size of the plate appears on the workspace. Snap on the right corner of the square and drag it until it snaps to the X/Y 0 of the object to be printed. It is important to have coincide the 0 of the graphic (Rhino) file with the laser cutter job origin.
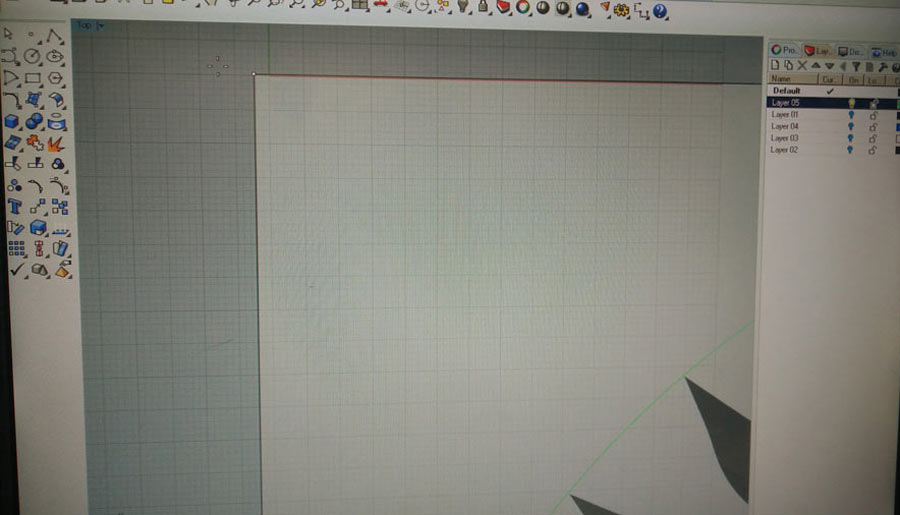
Note:The x/y zero in rhino is slightly offset on the Trotec400 so I use my template to establish the postion of the x/y according to this offset.
Once set just press OK and a new window in JobControlX pops up and after a few seconds the job appaers on the queue window. Click on the job file in the queue window and drag it on the plate window (main window) until it snaps to the corner. The job is now set on the plate of the Trotec and it is now when I define the cutting parameters for the specific material I am using.
Material settings - 5mm Compressed cork.
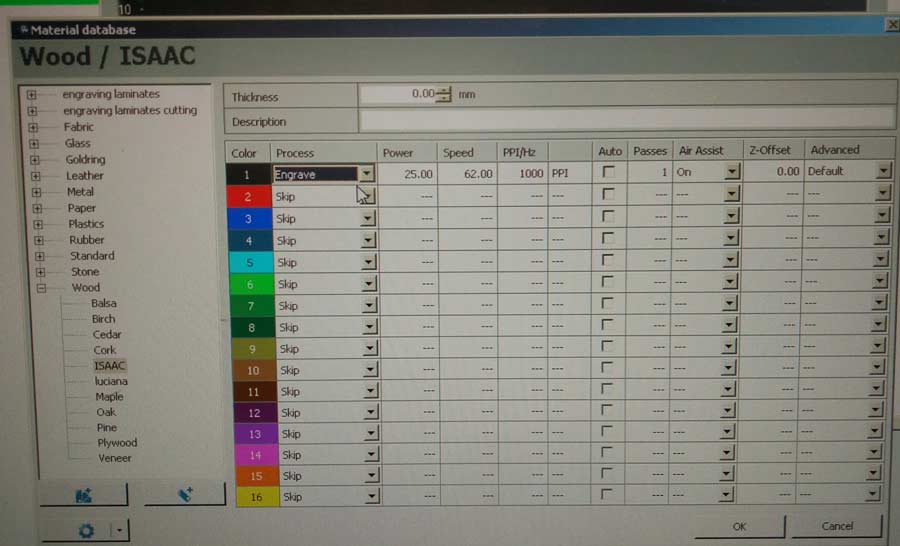
The material settings can be set in the Job control main window or in the "material settings" in the menu bar.
In the material setting window we will associate settings to the different coloured lines of our drawing. We will first set if we want to cut or engrave and set the power (power of the laser when cutting), the speed (velocity of movement of the laser, and the resolution/PPI per HZ (laser pulse). In case of cutting we also need to define the thickness of the material. In case of engraving it is not necessary.
I refered to theTROTEC400 FabLab berlin wiki to start defining the setting I needed for cork. The recommended settings (82/90/500) did produce a proper result but for some reason our Trotec would stop every few seconds when executing the file - an error message on the Control window declared an exhaust problem. For some maintenance reason our Trotec has a problem and do not function well at such high speed (velocity 82) and I was recommended to figure a setting with a slower speed.
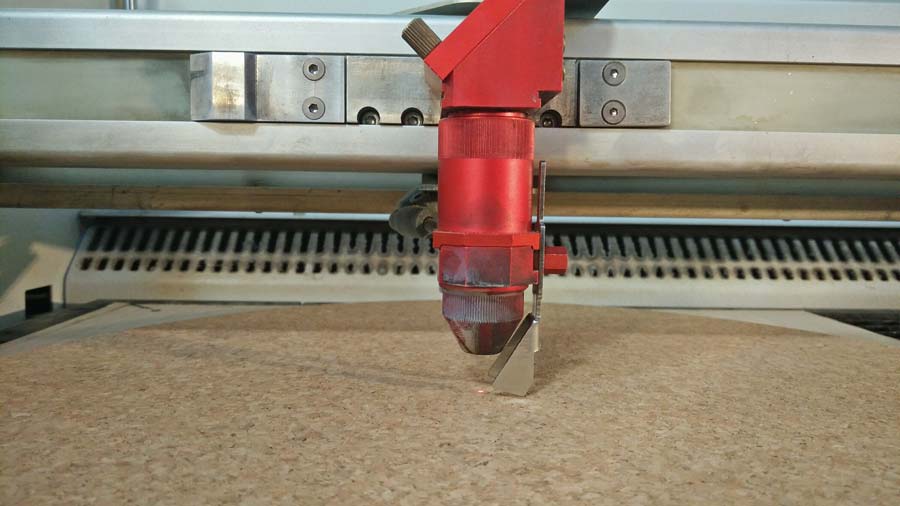
Before sending any job the laser needs to be focused to the surface of the material.
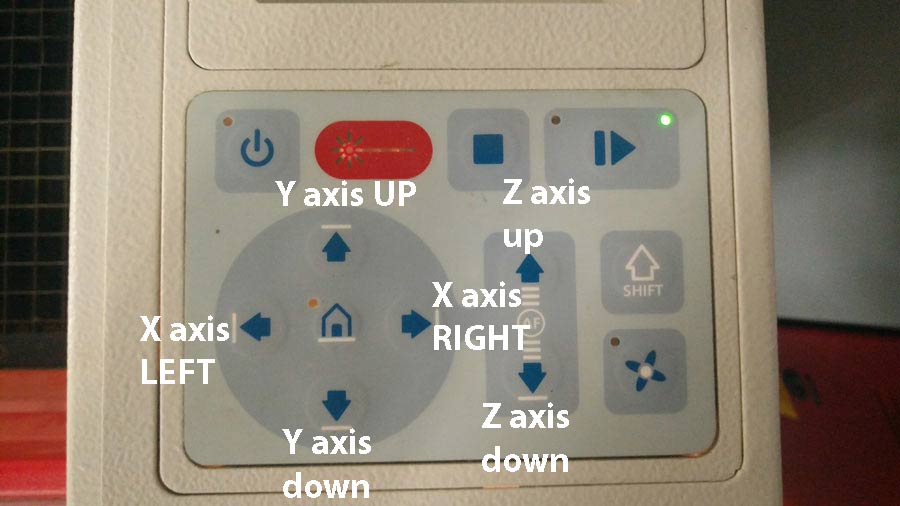
On the control panel of the trotec use the arrows to carry the laser beam to the center of the piece.
place the focus tool on the laser head (match the notch between the focus tool and the head so the focus tool is freely suspended.
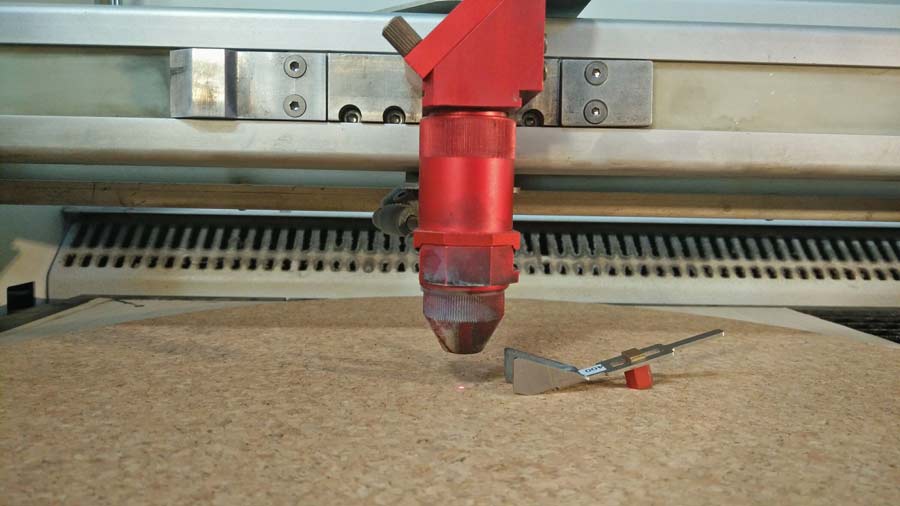
Lower the head pushing the down arrow (little by little) until the gauge touch the material and tip off the head. THAT is the focus point.
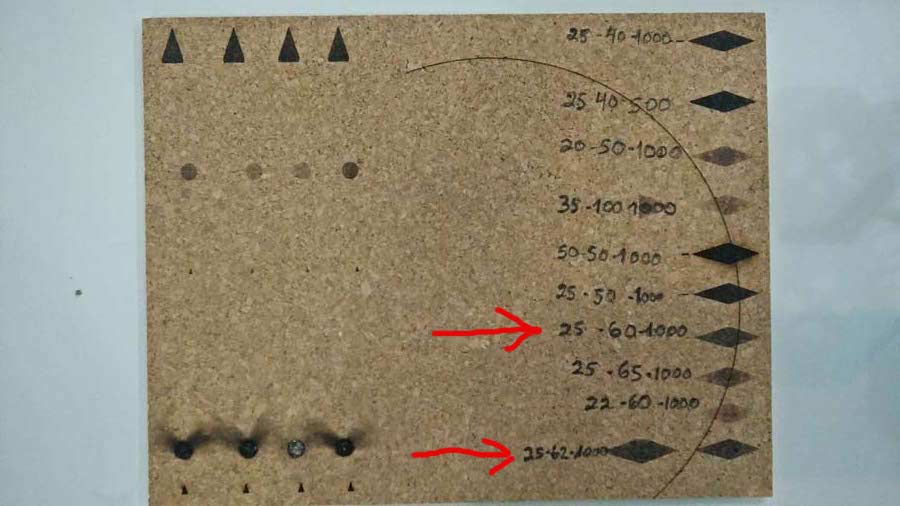
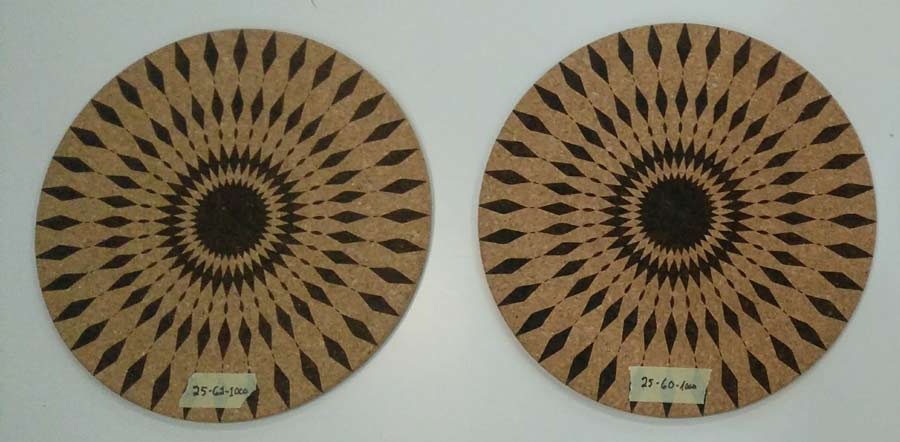
The following image shows the test I did to define the best setting for cork. It is difficult in the photography to appreciate the difference in the result for some setting but I concluded 25/60/1000 and 25/62/1000 settings responded best to what I was looking for: engraving to be as sharp as possible but letting through a slight transparency of the cork texture
Making a template
I cut the template and taped it to the bed machine - avoiding it to move when replacing the cork disk.
The difference between one setting and the other is very little by I finally decided to adopt 25/62/1000.
Coloring cork
>I could not find any eco dye that would penetrate cork so I went for "analine dye".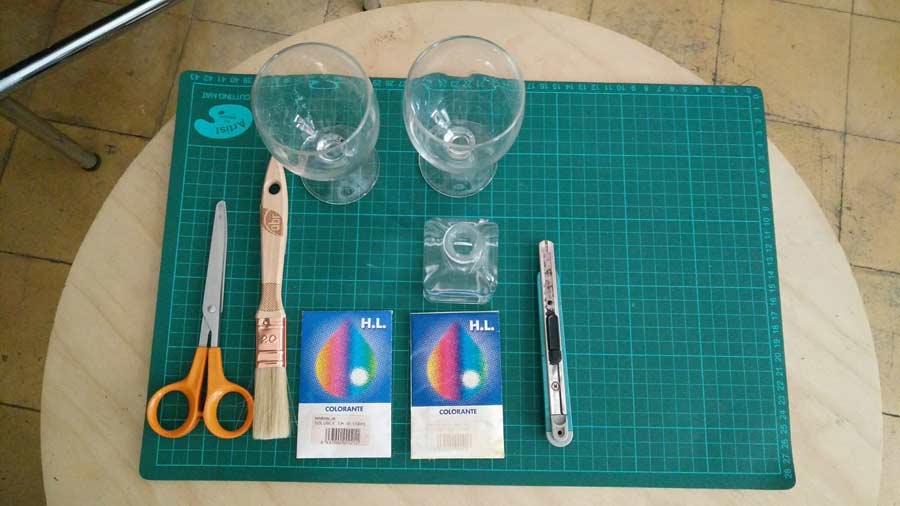
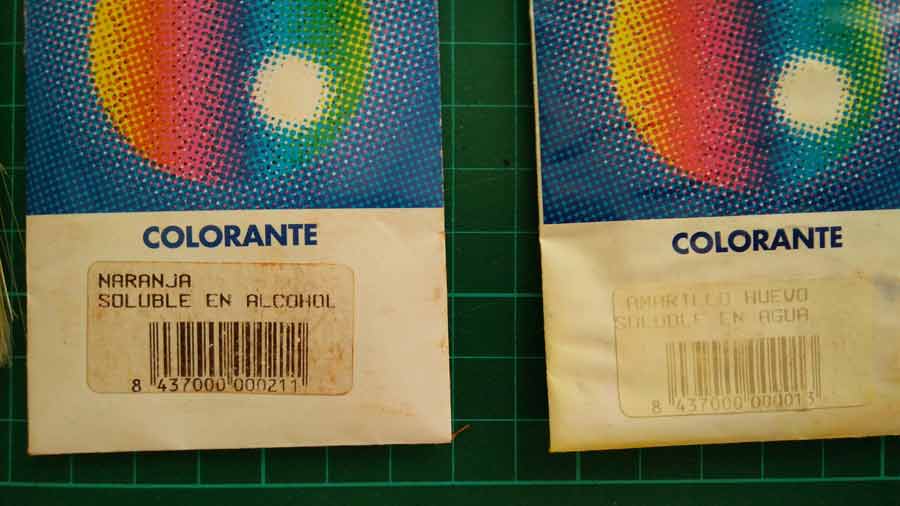
Analine is a natural powder chemical that can is synthetized to make dye used to tint natural materials (cloths, wood, leather, etc). There are 2 types - either to mix with water or with 96% alcohol. I tested both. The alcohol version penetrates much deeper into the cork. The proportion alcohol/analine affects the density of the color and is diferent for each color. In average a 1/20 proportion (5g analine to 100ml of alcohol) propduced the right density but I needed to adjust but testing each color.
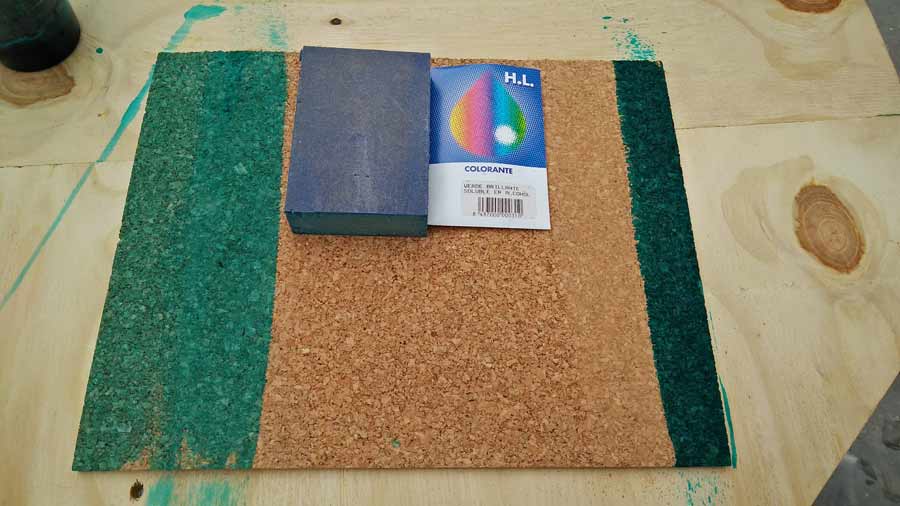
After lots of testing I figured sanding the cork before applying the color also help both the color to penetrate and the quality of the engraving. I also tested the difference between coloring before and after engraving but the difference was very slight, barely unperceivable. Nevetheless engraving before coloring is recommended as analine is a nasty chemical susceptible of producing hazardeous fume when burned by the laser beam
To protect and make the cushion easier to clean and maintain I tested water based varnish and flooring natural wax.
Wax gives a great result as it makes the laser engraved part practically melt into the cork, also helping creating gloss and nice aged or vintage "patines". But it requires lot more work than applying a simple varnish.
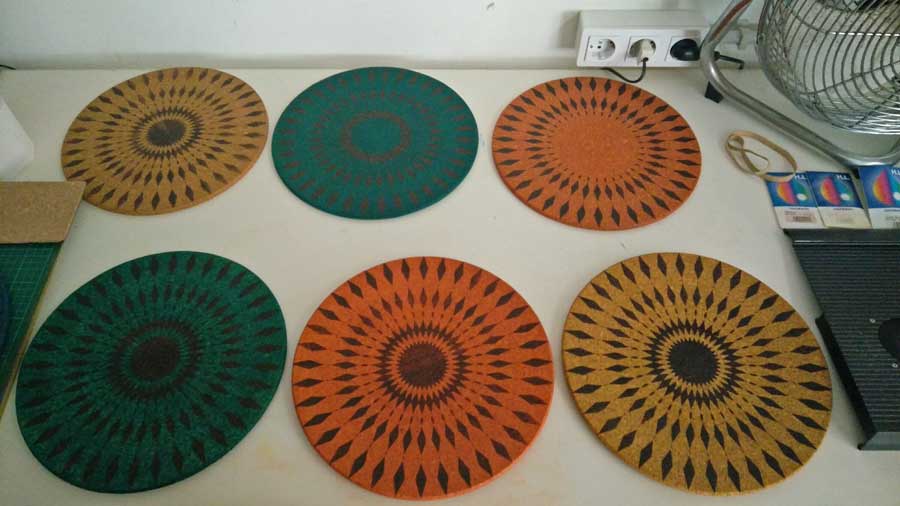
In the previous image one can see the variations in the engraving of the pattern as well as the different colors and tones I experiemnted with.