Assignment 13
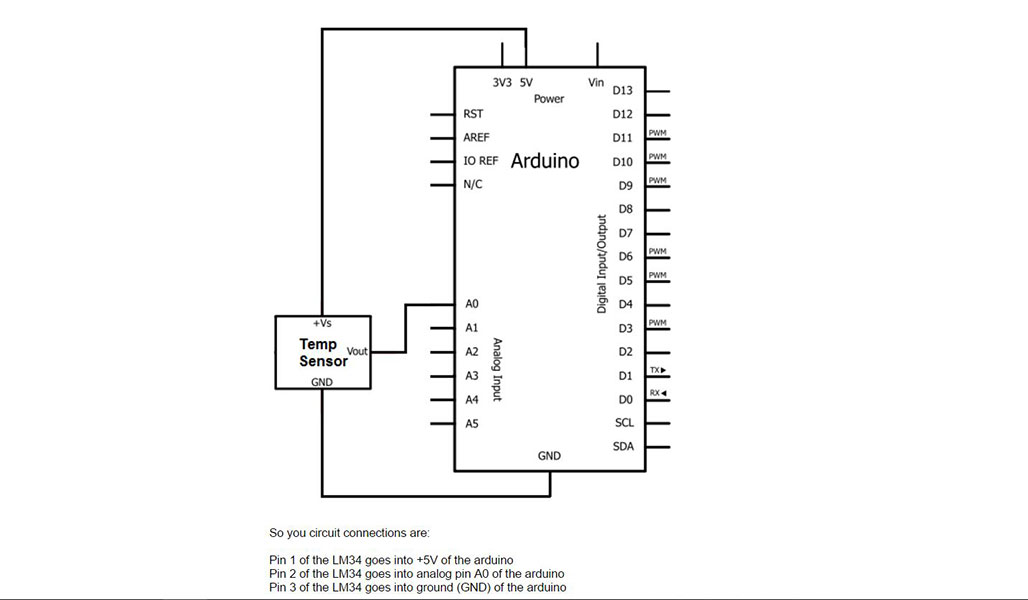
The Assignment for week 13 was to design a circuit to take advantage of an input device. For my circuit I decided to dive into the Arduino world and utilize one of the Arduino Nano boards that were given to us by our IT staff. They apparently ordered them and could not use them for the project so we inherited them. While this doesn't totally fall in line with what Neil asked us to do I still believe using this chip satisfies the assignment because I am still having to program the chip to not only talk to my input sensor I will also be asking it to communicate to an LCD screen on the output side. This circuit will be used for my final project as a visual to monitor the temerature inside the "oven" when baking my boards. The first step for me was to choose a temerature sensor that simply took basic measurements of the ambient air inside the box. My goal is to eventually be able to transmit this data to a remote so that while I am baking my boards I can monitor it much like the wireless BBQ thermometers that are available today.
UPDATE!!!! After 3connecting with Blair at Incite Focus I was told that I need to fab my own board. Because we had some experience with this in the Electronics design I felt confident that I would be able to do this. I did some research on the internet and found a "fabduino" design that Blair said would be a good starting point. Using Eagle and the basic list of parts I set out to fab my own Arduino Clone. I chose to work with the ATMEGA88 chip as it seems to be one of the ones that was widely used. The First step was to layout the schematic in Eagle.
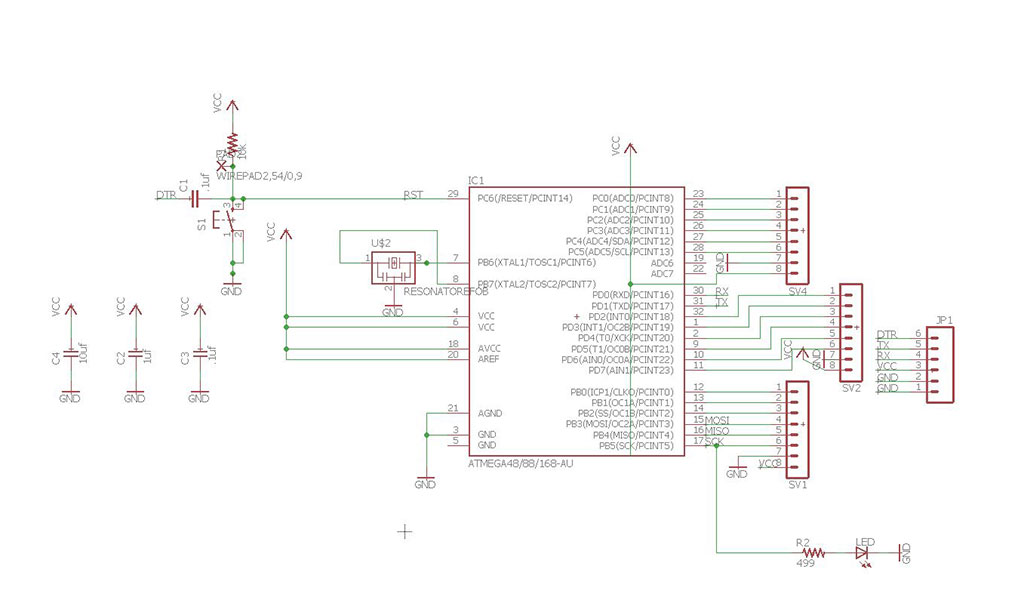
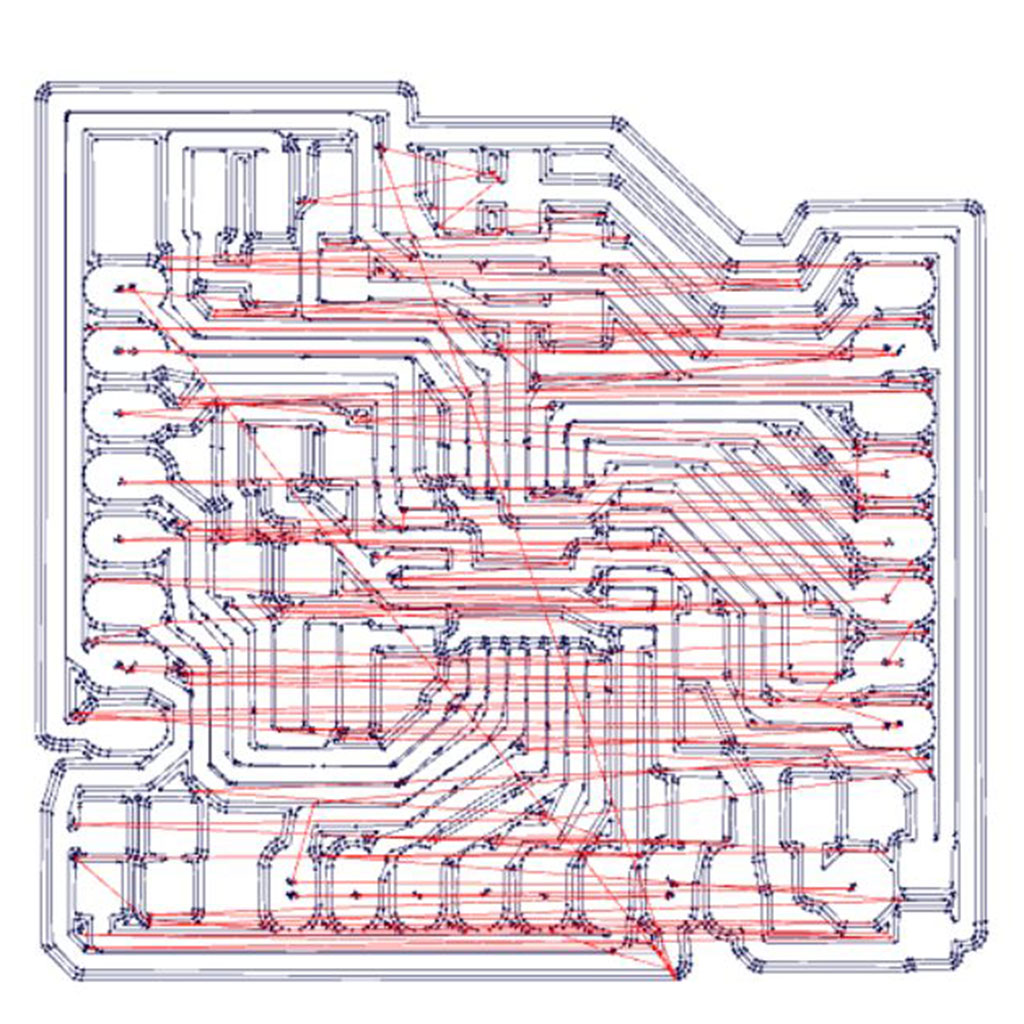
I next had to layout my traces and components using the board function in Eagle. Because I was using a pretty large chip I needed to make sure everything fit.
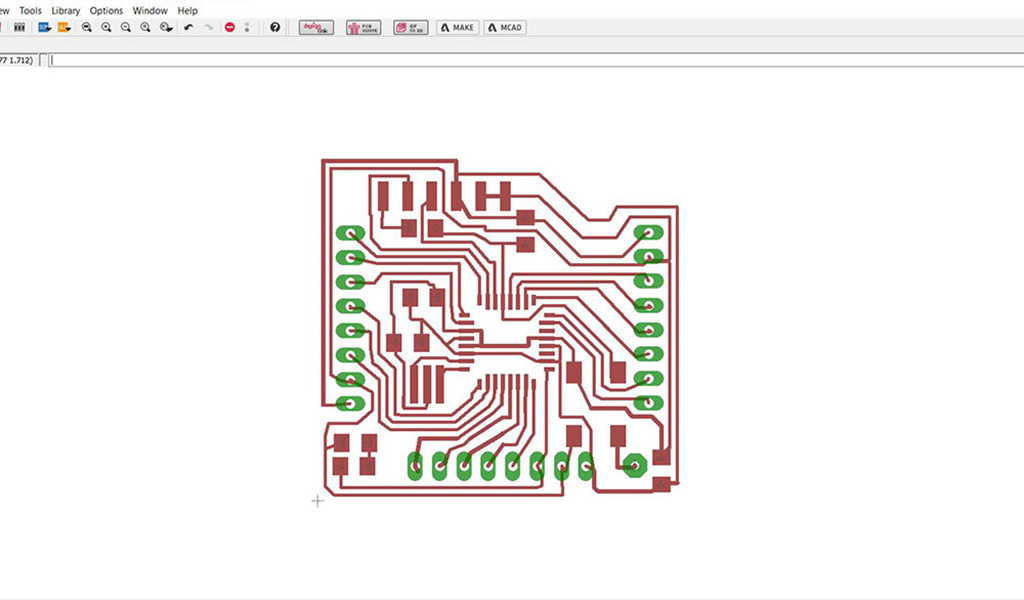
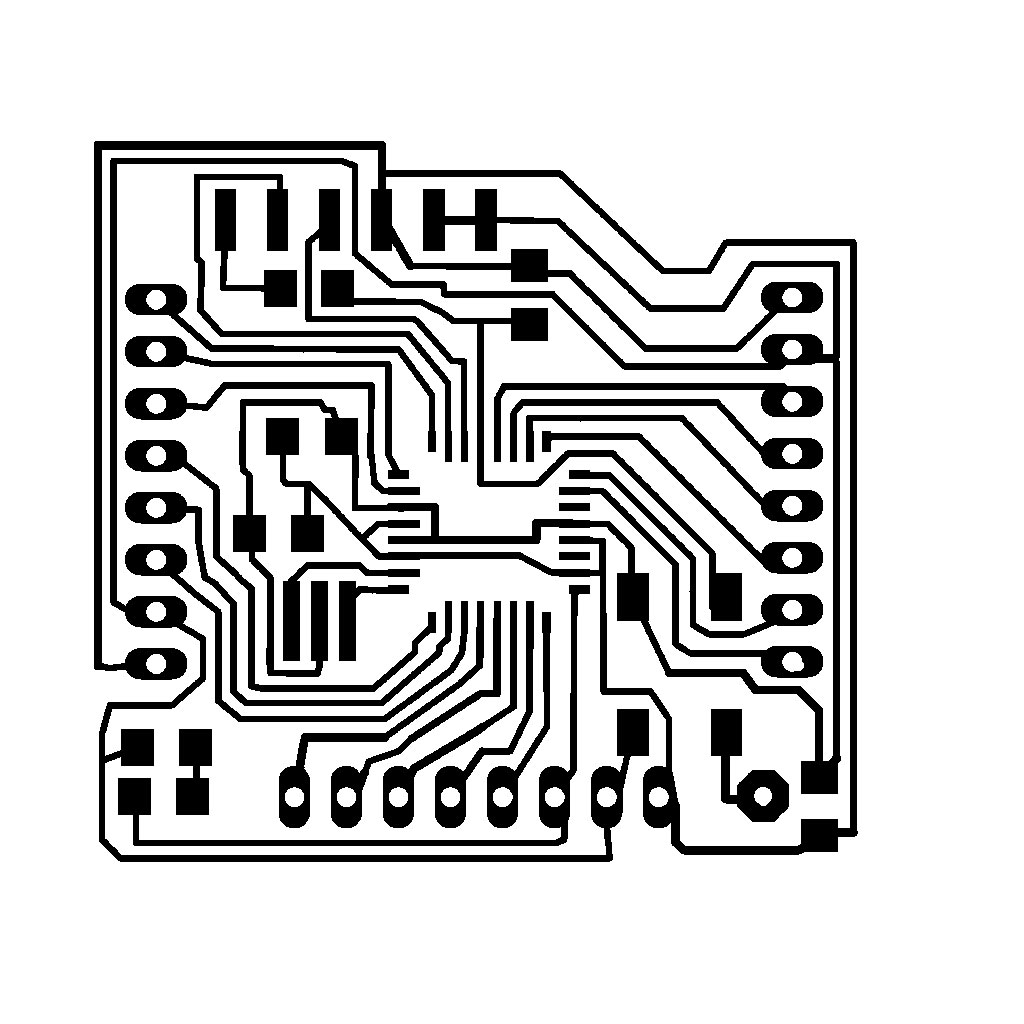
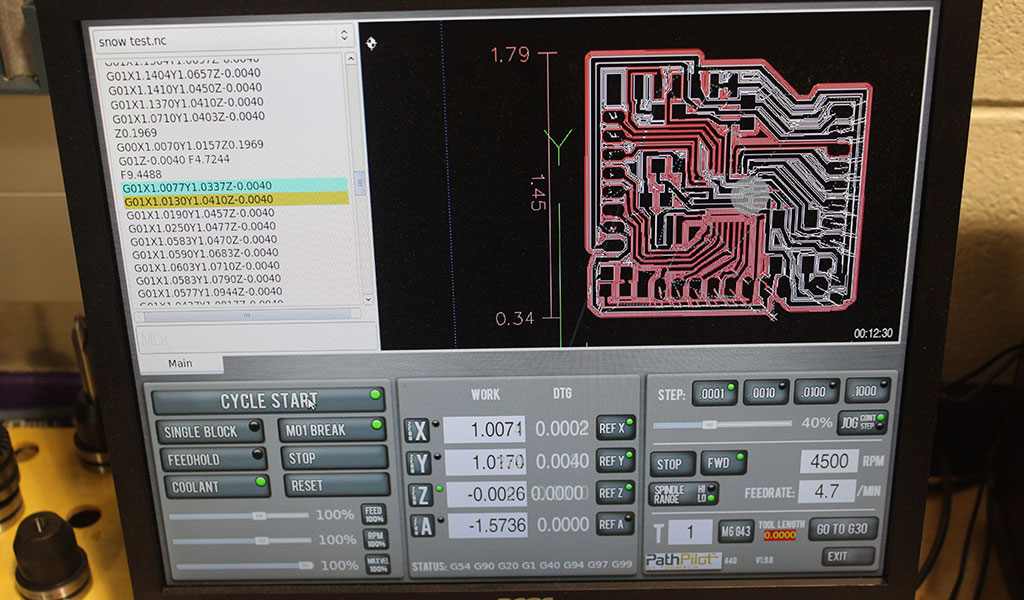
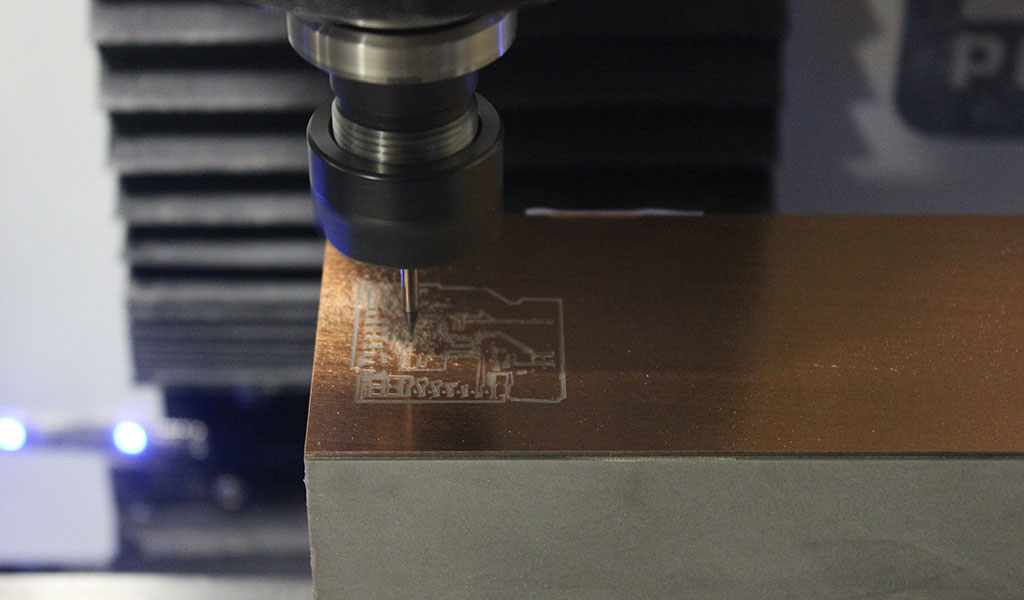
Once the board was laid out I proceeded to use the Fab Modules as we did in Week 4 to use our Tormach CNC mill to mill out the board. This went flawlessly and the board turned out well.
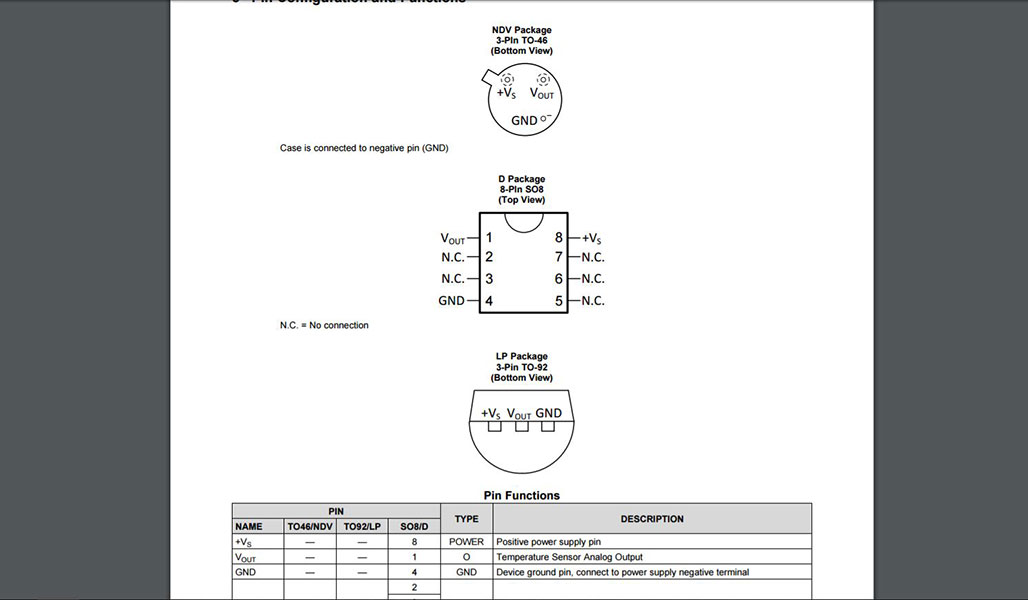
While looking around the web the LM 34 and LM 35 sensors seem to be abundant and quite cheap to source. The use 3 wires and are easily attached to circuit boards and even easier to program. The only difference between the two is that the 34 reads out in Farenheit while the 35 reads out in Centigrade. Seeing as we are in the US I opted for the Farenheit model and ordered it. Here is the data sheet for it.
Once I received my sensor I connected longer leads to the three connections using solder, taped them and then used shrink tubing on the entire lead as I wanted to keep the sensor neat as while it is inside the compartment of the hot box.
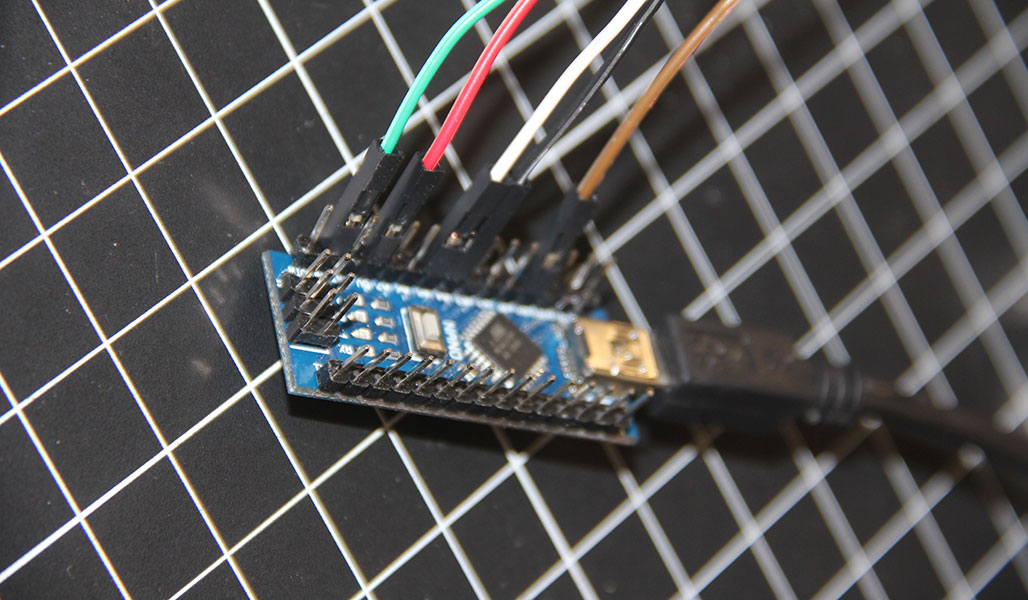
After constructing the sensor and lead wires I was fortunate to find some information on the internet showing me how to both connect the sensor to our acquired Arduino Nano and how to start looking at the code in order to make it work. In the picture below you will see more wires than needed as I was experimenting with connecting this to an LCD 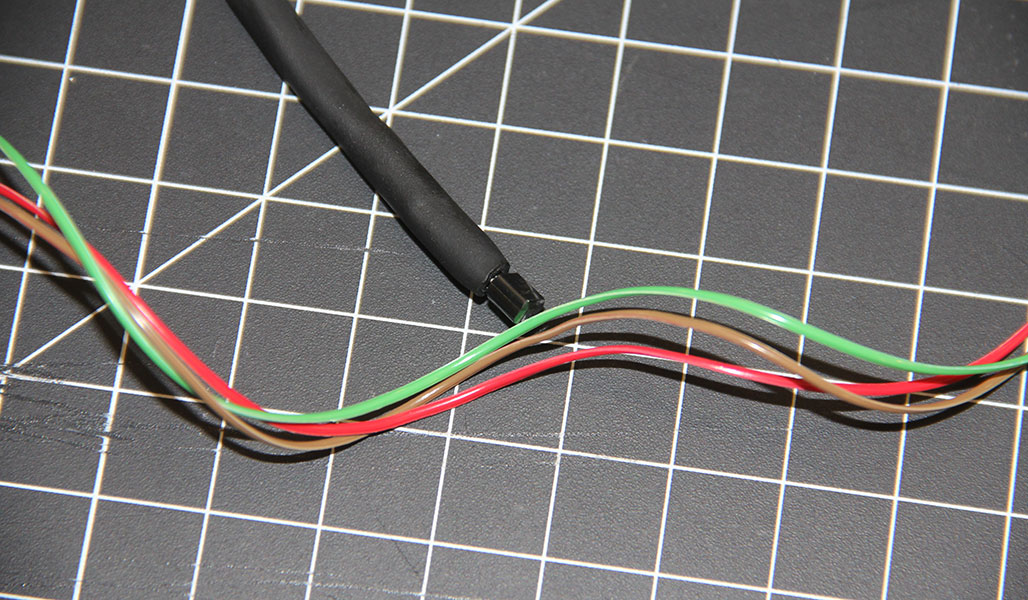 screen.
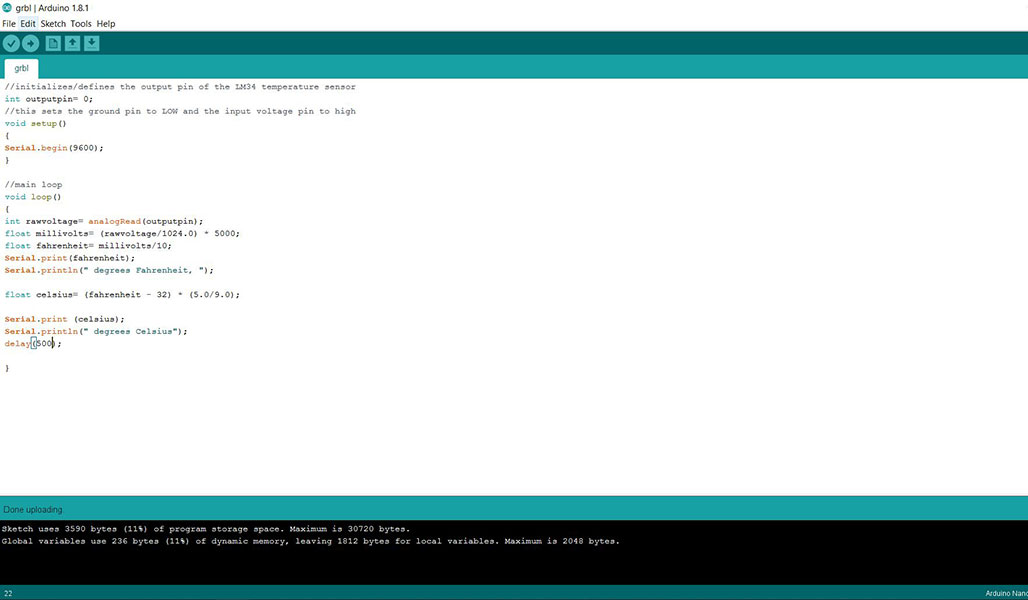
Once I had the sensor connected I started to work on the code for the Nano to read the LM34 and turn the analog signal into a temperature. To do this you need to convert known voltage into a corresponding temperature value. The coding looks like this in the Arduino IDE. After completing my own board I was able to simply load the same code from the commercial Arduino onto my fab'd board as it was the same processor family.
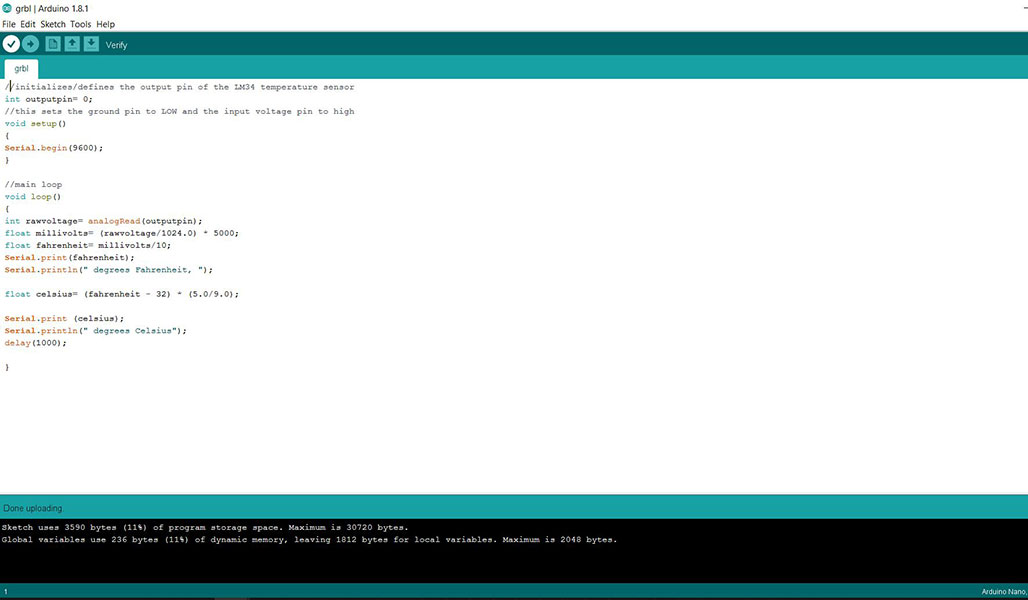 Temp Sensor Code
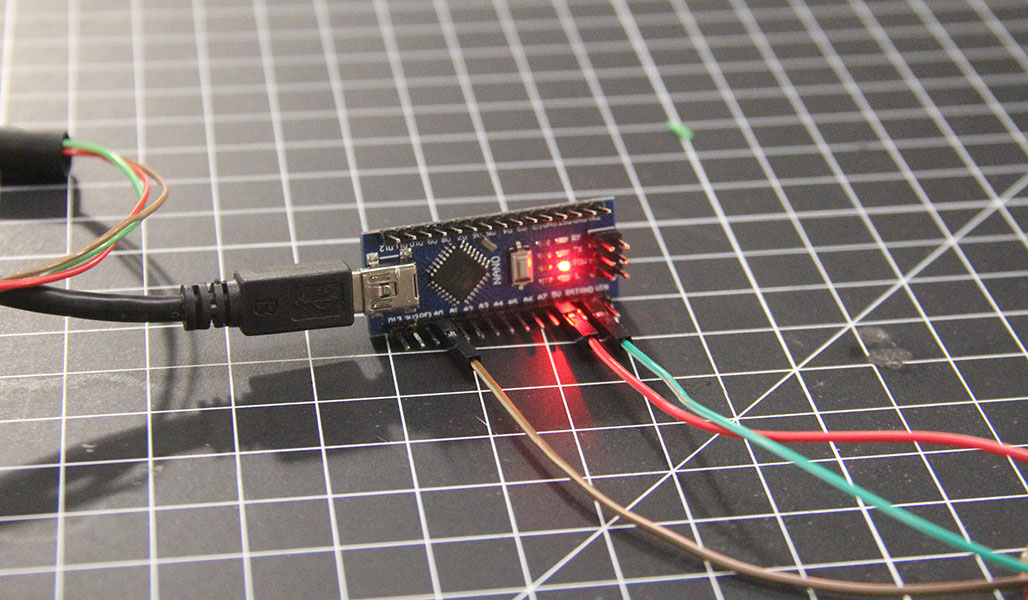
Once I had the code worked out I decided to give loading the code a shot and was hoping to see something on the Nano board. One of my earlier frustrations in the electronics units was never really getting any feedback from my circuits letting me know if I was on the right track. Using the Arduino IDE interface I was able to watch the screen and also see three different LEDs blink on my board while it was writing to it. I was also able to easily open the serial monitor screen to see if there was any communication going on and low and behold I started to get readings once per second!!!
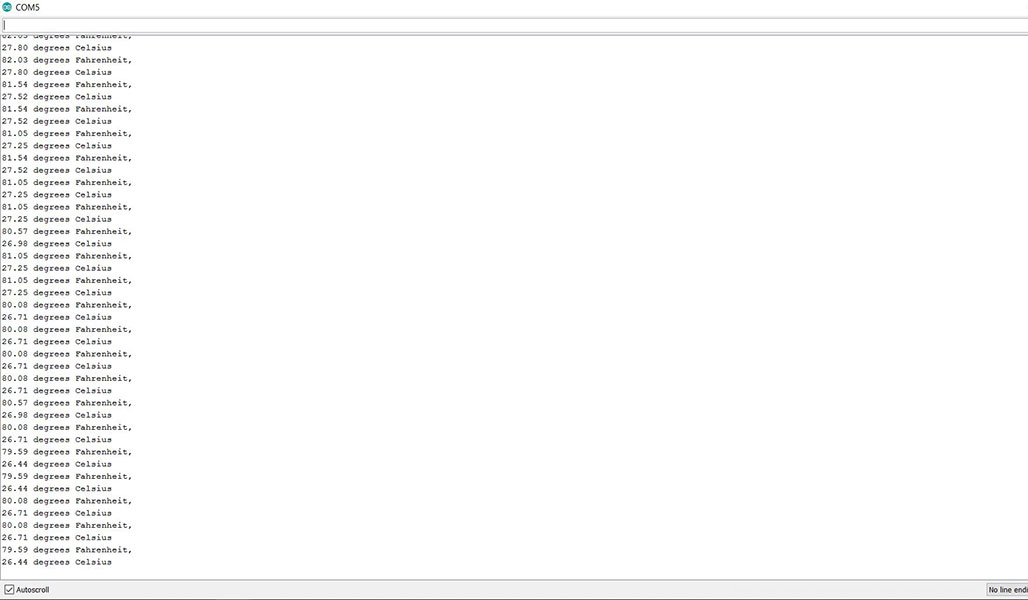
I wanted to see if I could use some prior coding knowledge so I tried to see if I could manipulate the reporting of the sensor to the Nano. I set it to take the temp reading once every half second instead once a second by changing the delay from 1000 to 500 milliseconds,
 Temp Sensor Code Edited
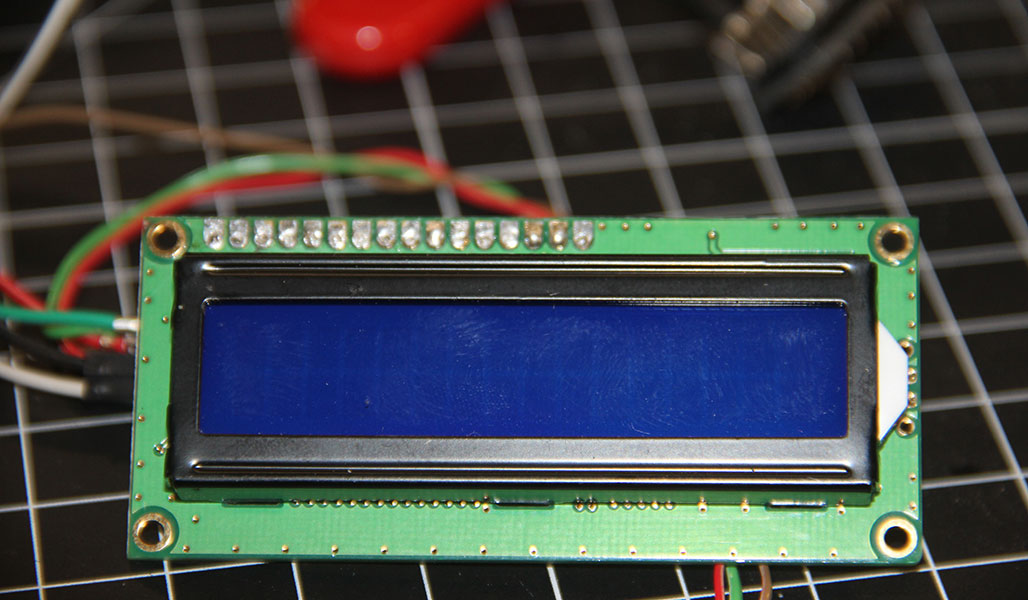
The next step is to work on connecting an LCD screen to the Nano/sensor so that I can have an easy to read display of what is going on in the compartment of the hot box. I will also explore the possiblity of a wireless transmitter so that I can monitor the system from a remote location in my house
This is StoneWork, a free, fully standards-compliant CSS template designed by TEMPLATED. The photos in this template are from Fotogrph. This free template is released under the Creative Commons Attribution license, so you're pretty much free to do whatever you want with it (even use it commercially) provided you give us credit for it. Have fun :)