Week 14, Assignment 14
Composites
Video - Week Fourteen, Lecture Fourteen
Goal
This week we have to design and make a 3D mold and use some magical materials that we can make at our labs, known as Composites, which Prof. Neil introduced us in class.
Introduction
A composite material (also called a composition material or shortened to composite which is the common name) is a material made from two or more constituent materials with significantly different physical or chemical properties that, when combined, produce a material with characteristics different from the individual components.
So basically a composite material is made by combining two or more materials – often ones that have very different properties. The two materials work together to give the composite unique properties. However, within the composite we can easily tell the different materials apart as they do not dissolve or blend into each other. Specially these materials are used for building boats, making light weight but solid things, mainly composite material are used to build aircraft, space-shuttles, gliders, armors, bumpers, even PCB's which we use are a example of Composite. Some good examples of different composites are,
Natural Composites:
Natural composites exists in both animals and plants. Wood is a composite – it is made from long cellulose fibres held together by a much weaker substance called lignin. The bone in your body is also a composite. It is made from a hard but brittle material called hydroxyapatite (which is mainly calcium phosphate) and a soft and flexible material called collagen (which is a protein).Early composites:
Some early examples of composites is Mud Bricks. Mud can be dried out into a brick shape to give a building material. It is strong if you try to squash it (it has good compressive strength) but it breaks quite easily if you try to bend it (it has poor tensile strength). Another ancient composite is concrete. Concrete is a mix of aggregate (small stones or gravel), cement and sand.Making composites:
Most composites are made of just two materials. One is the matrix or binder. It surrounds and binds together fibres or fragments of the other material, which is called the reinforcement.Getting Started:
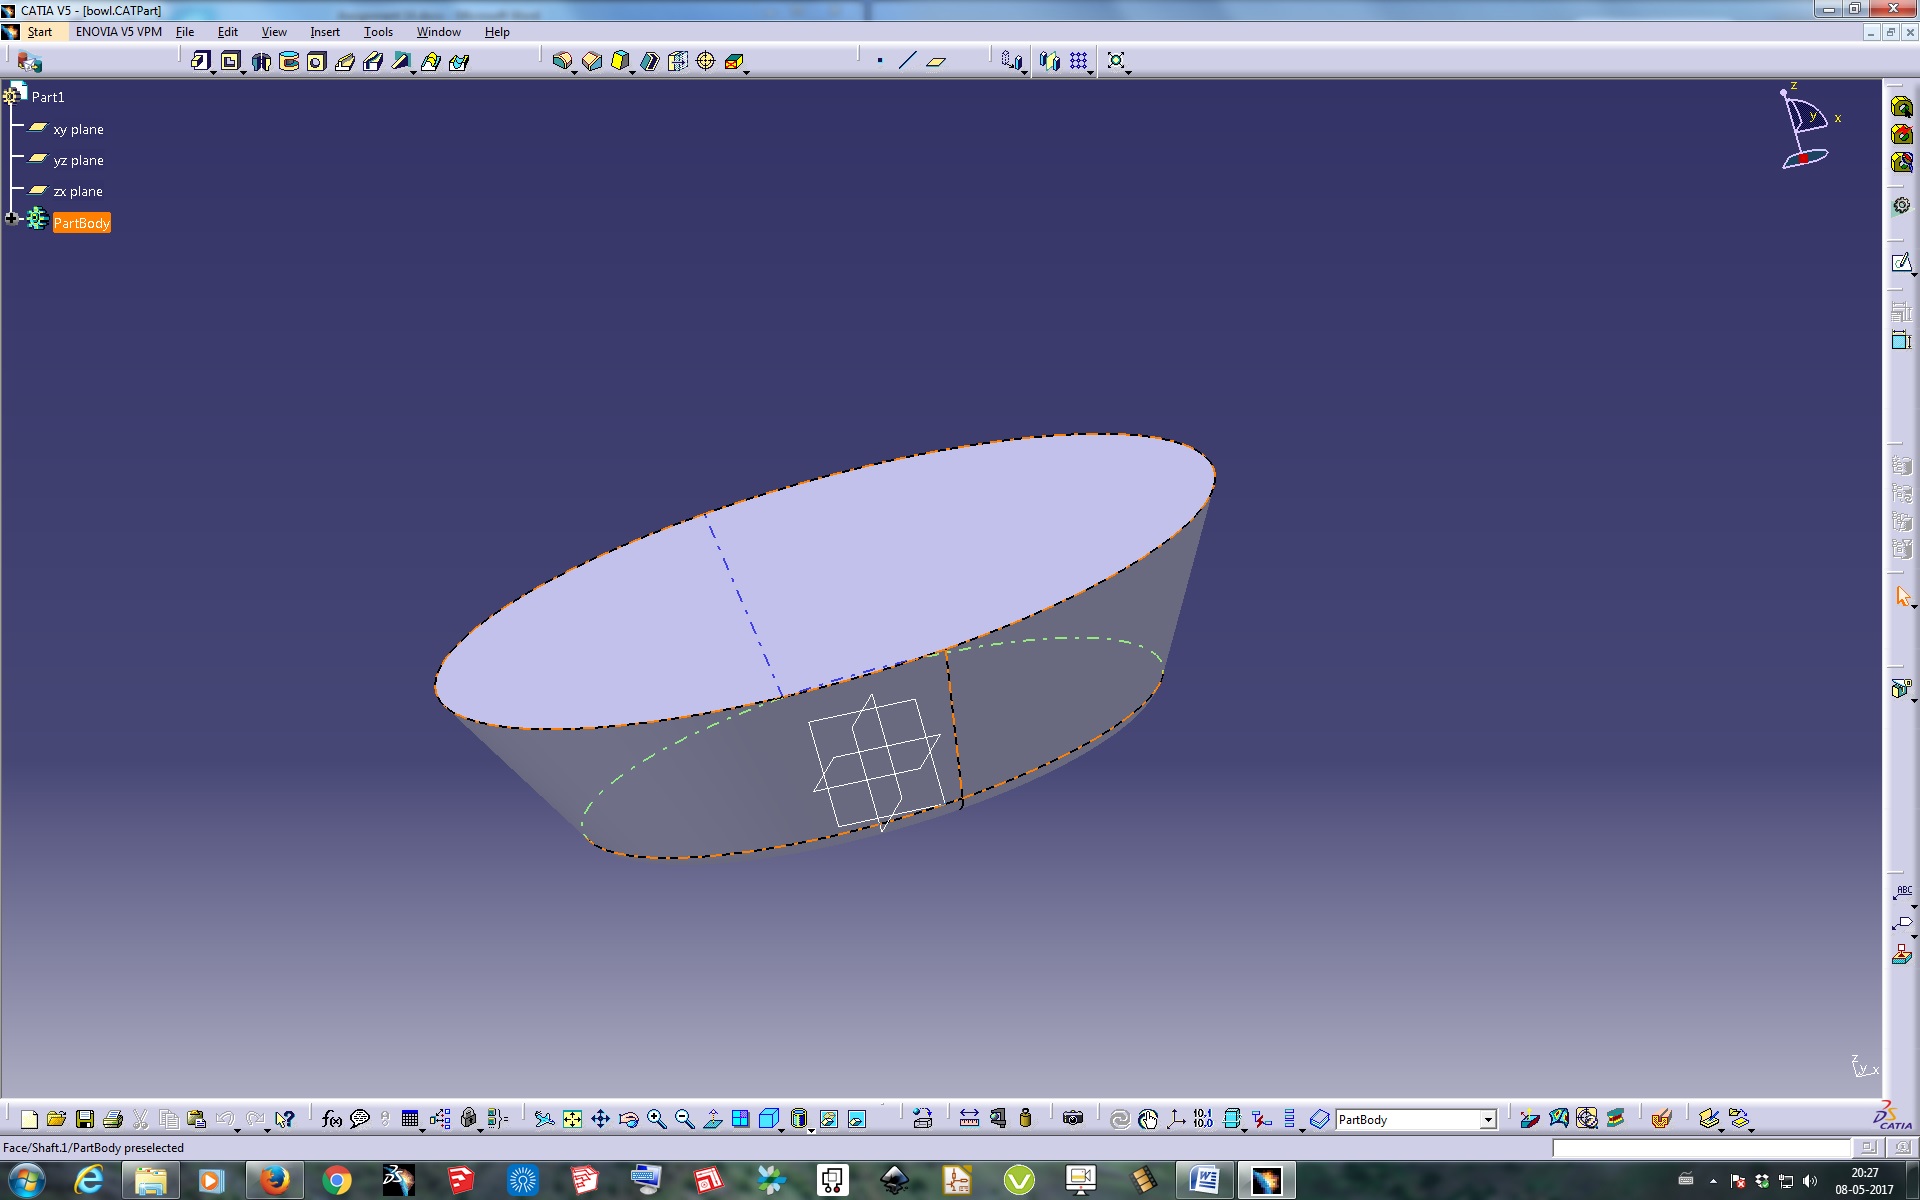
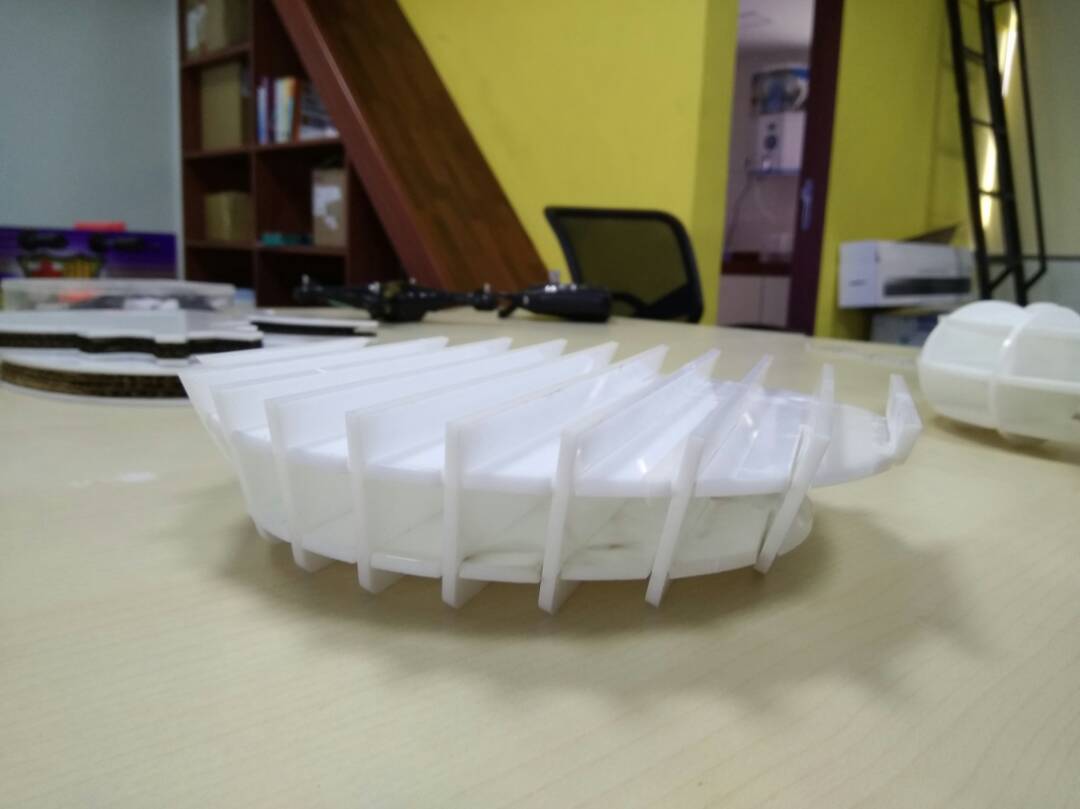
I first decided to make a semi circle in my composite assignment. So, to began with I Design it in Catia, but as the second motive of this assignment is to mill the design on ShopBot, Milling Machine or etc, but the ShopBot at my Lab is having some issues and I am not able to use it, and then the milling machine available in Lab is of small bed size which will not serve the purpose of making a mold of 1ft*1ft, so I decided to make the mold on Laser Cutter. I then started to design the mold according to laser cutter only. The design can be seen below;
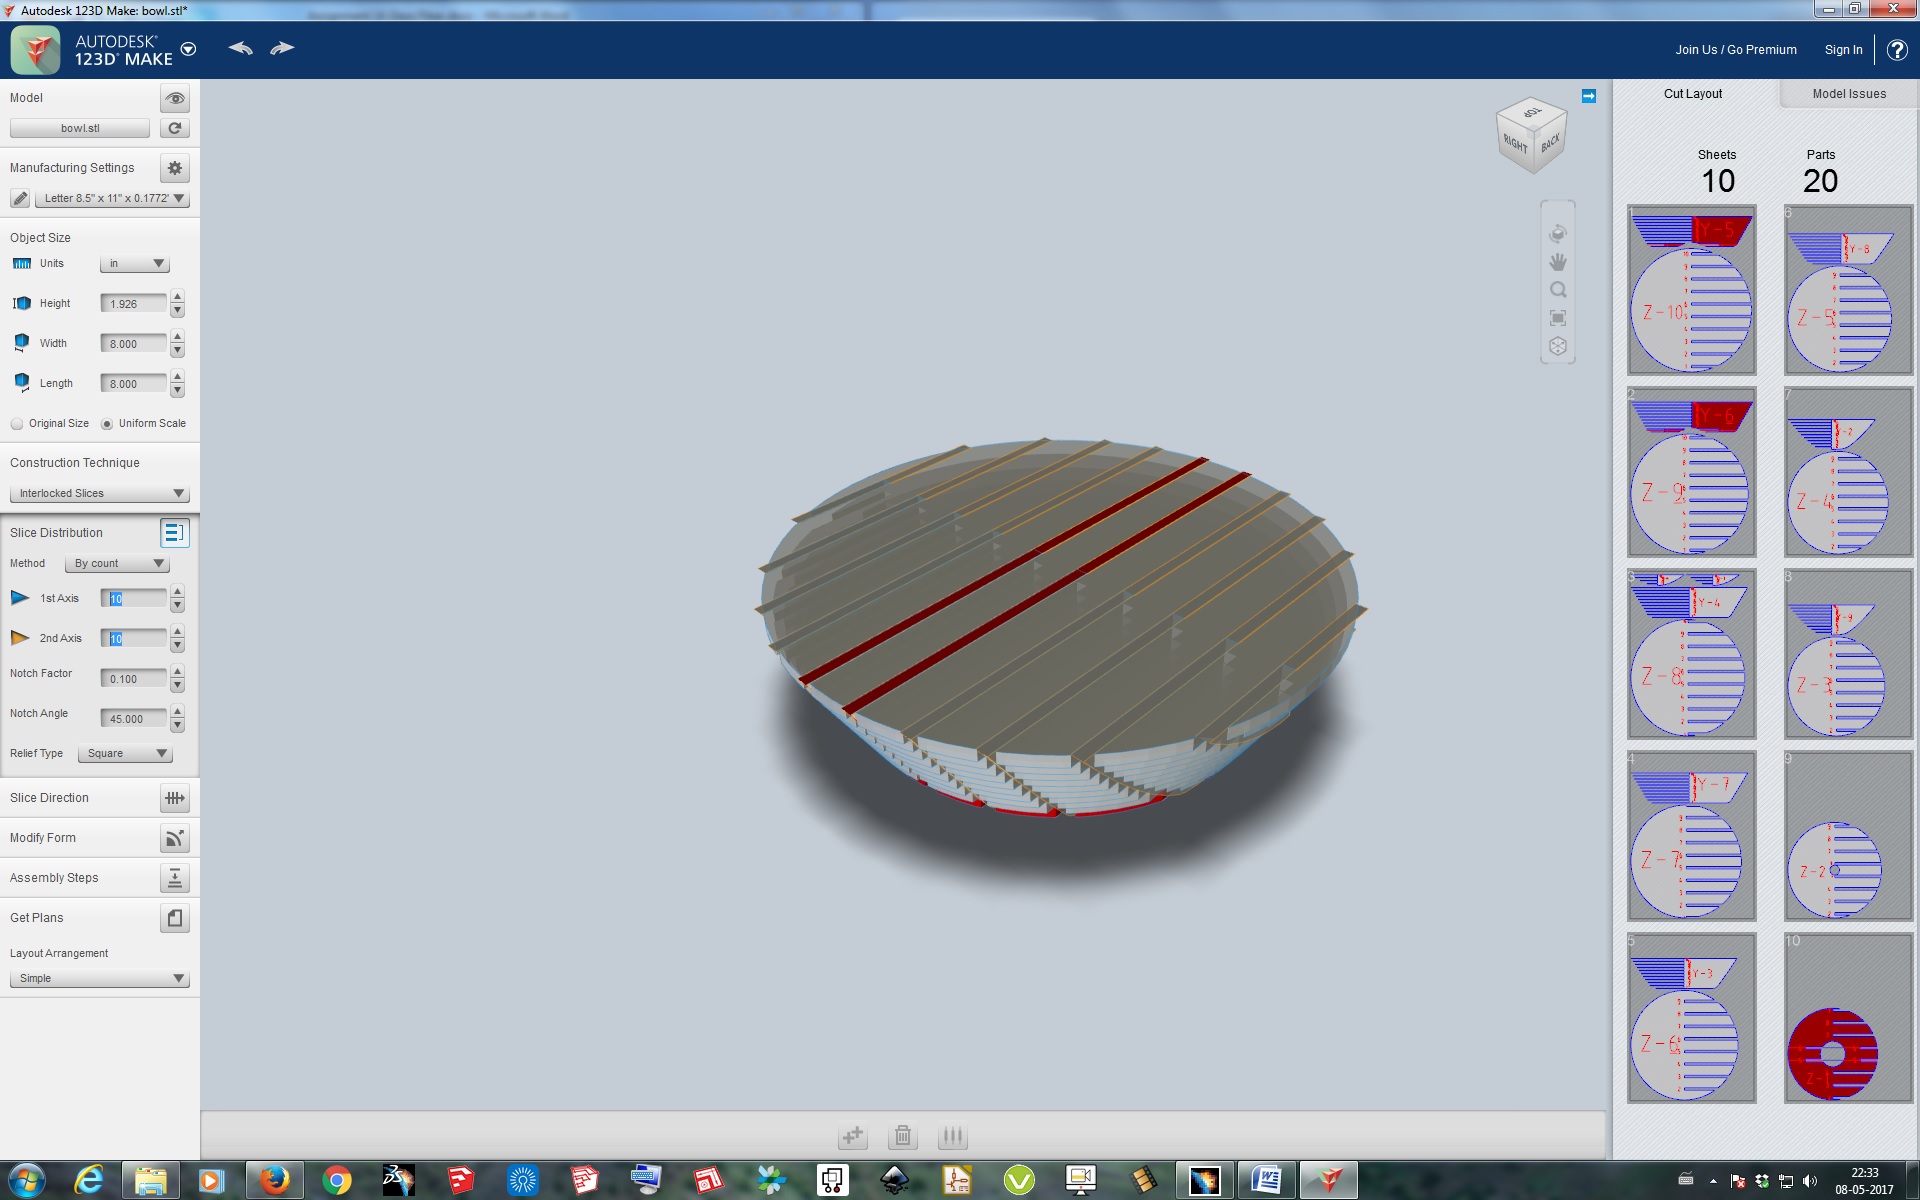
After making a 3D Design of the Mold which I was going to cut on laser cutter and as my design was not exactly compatible to cut on laser cutter, I then used 123D Make software to make it in 2D form for Laser Cutting. 123D Make is a Autodesk software in which we just have to upload a .STL format 3D design file and the can make it in 2D for however it is compatible with us to cut and assemble with different options of arranging the file in 2D such as Stacked, Interlocking, Curve, 3D, Radial, etc. So I choose Interlock for converting my design to 2D, and downloaded the Plan of it for cutting on Laser Cutter.
Machining:
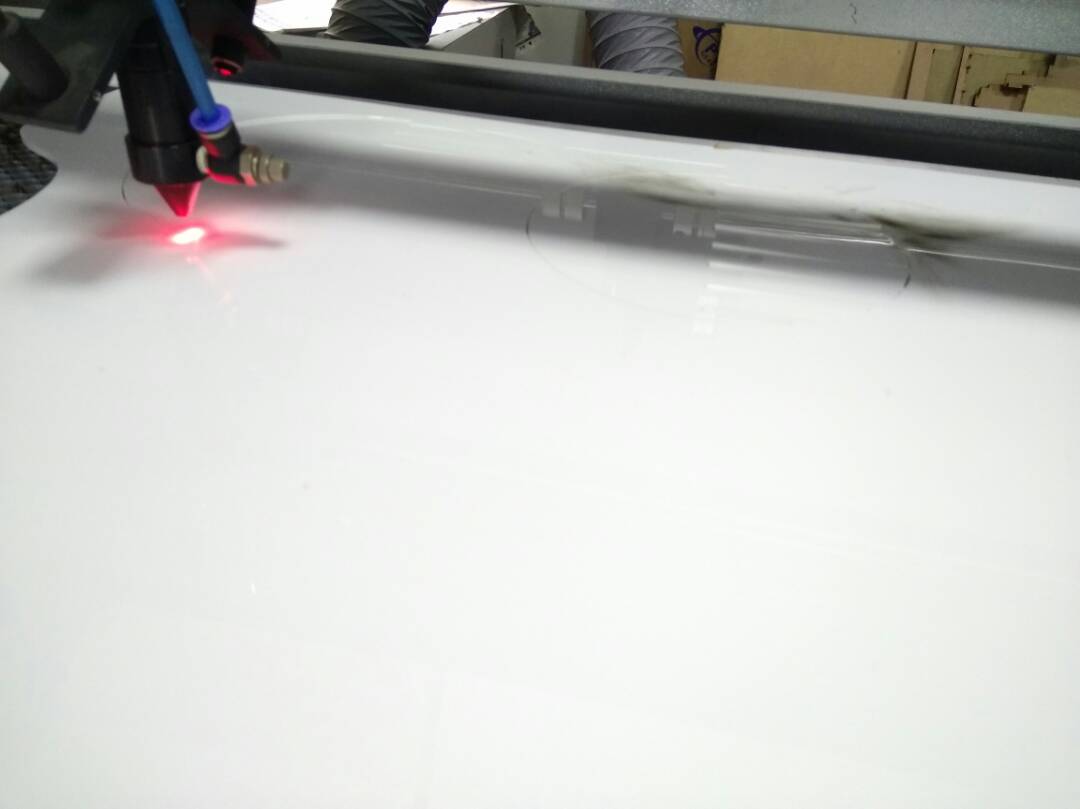
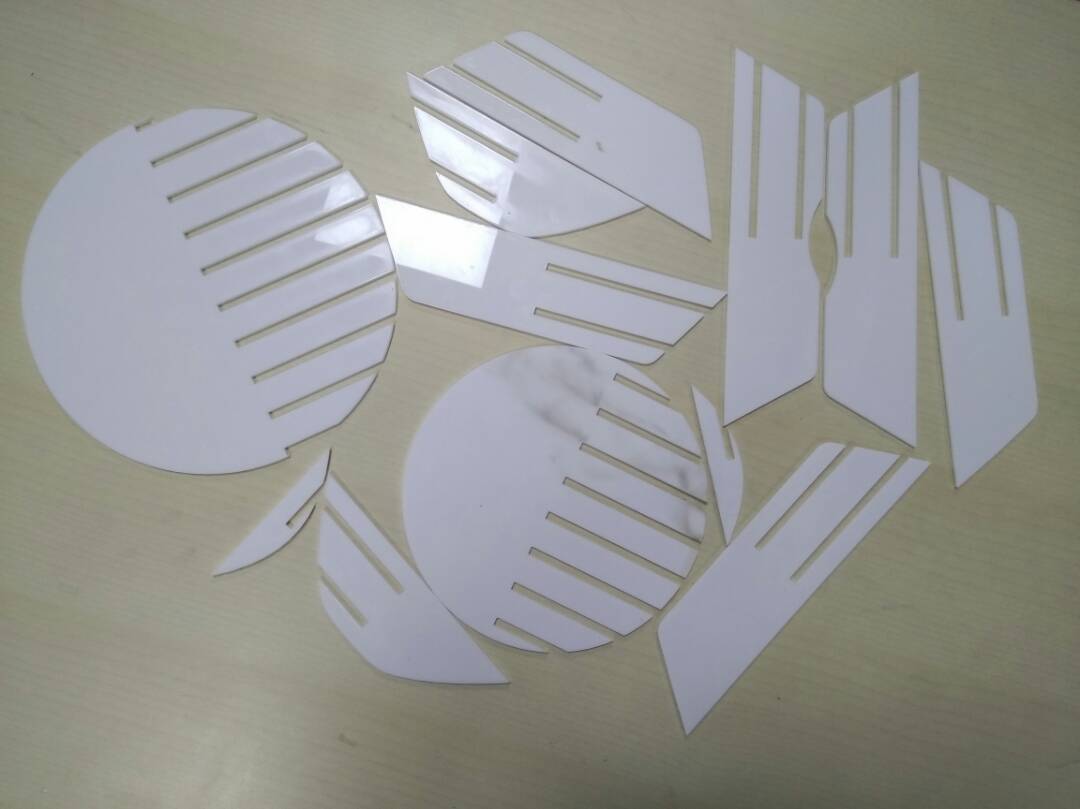
After designing and making the design ready to cut on Laser Cutter. I then opened my design on the Laser Cutter compatible software Coral Draw and Arranged it accordingly. I preferred cutting my design on Acrylic, so I gave the Vector Command and set the Power to 100 and Speed to 15 and started cutting it and assembled it accordingly.
Making of Composite:
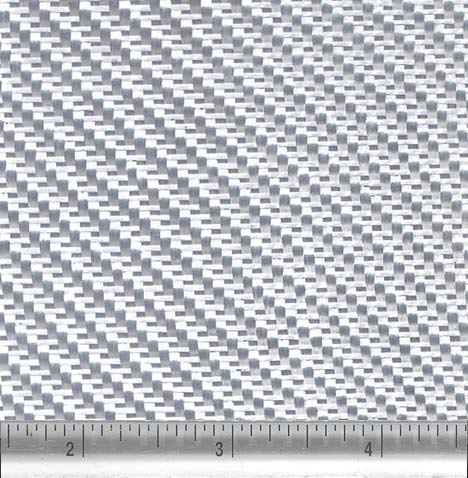
For making composite I then choose Glass Fiber as my composite material. Basically glass fiber is a material consisting of numerous extremely fine fiber of glass which is a type of fiber-reinforced plastic, and Glass fiber is formed when thin strands of silica-based or other formulation glass are extruded into many fibers with small diameters suitable for textile processing. As the glass fiber sheets are made then these plastic matrix may be a thermoset polymer matrix - most often based on thermosetting polymers such as epoxy, polyester resin, etc. Glass Fiber is unique in its strength and yet it is lightweight.
The manufactuing process of fiberglass is called Pultrusion. The manufacturing process for glass fibers suitable for reinforcement uses large furnaces to gradually melt the silica sand, limestone, kaolin clay, fluorspar, colemanite, dolomite and other minerals to liquid form. It is then extruded through bushings, which are bundles of very small orifices.
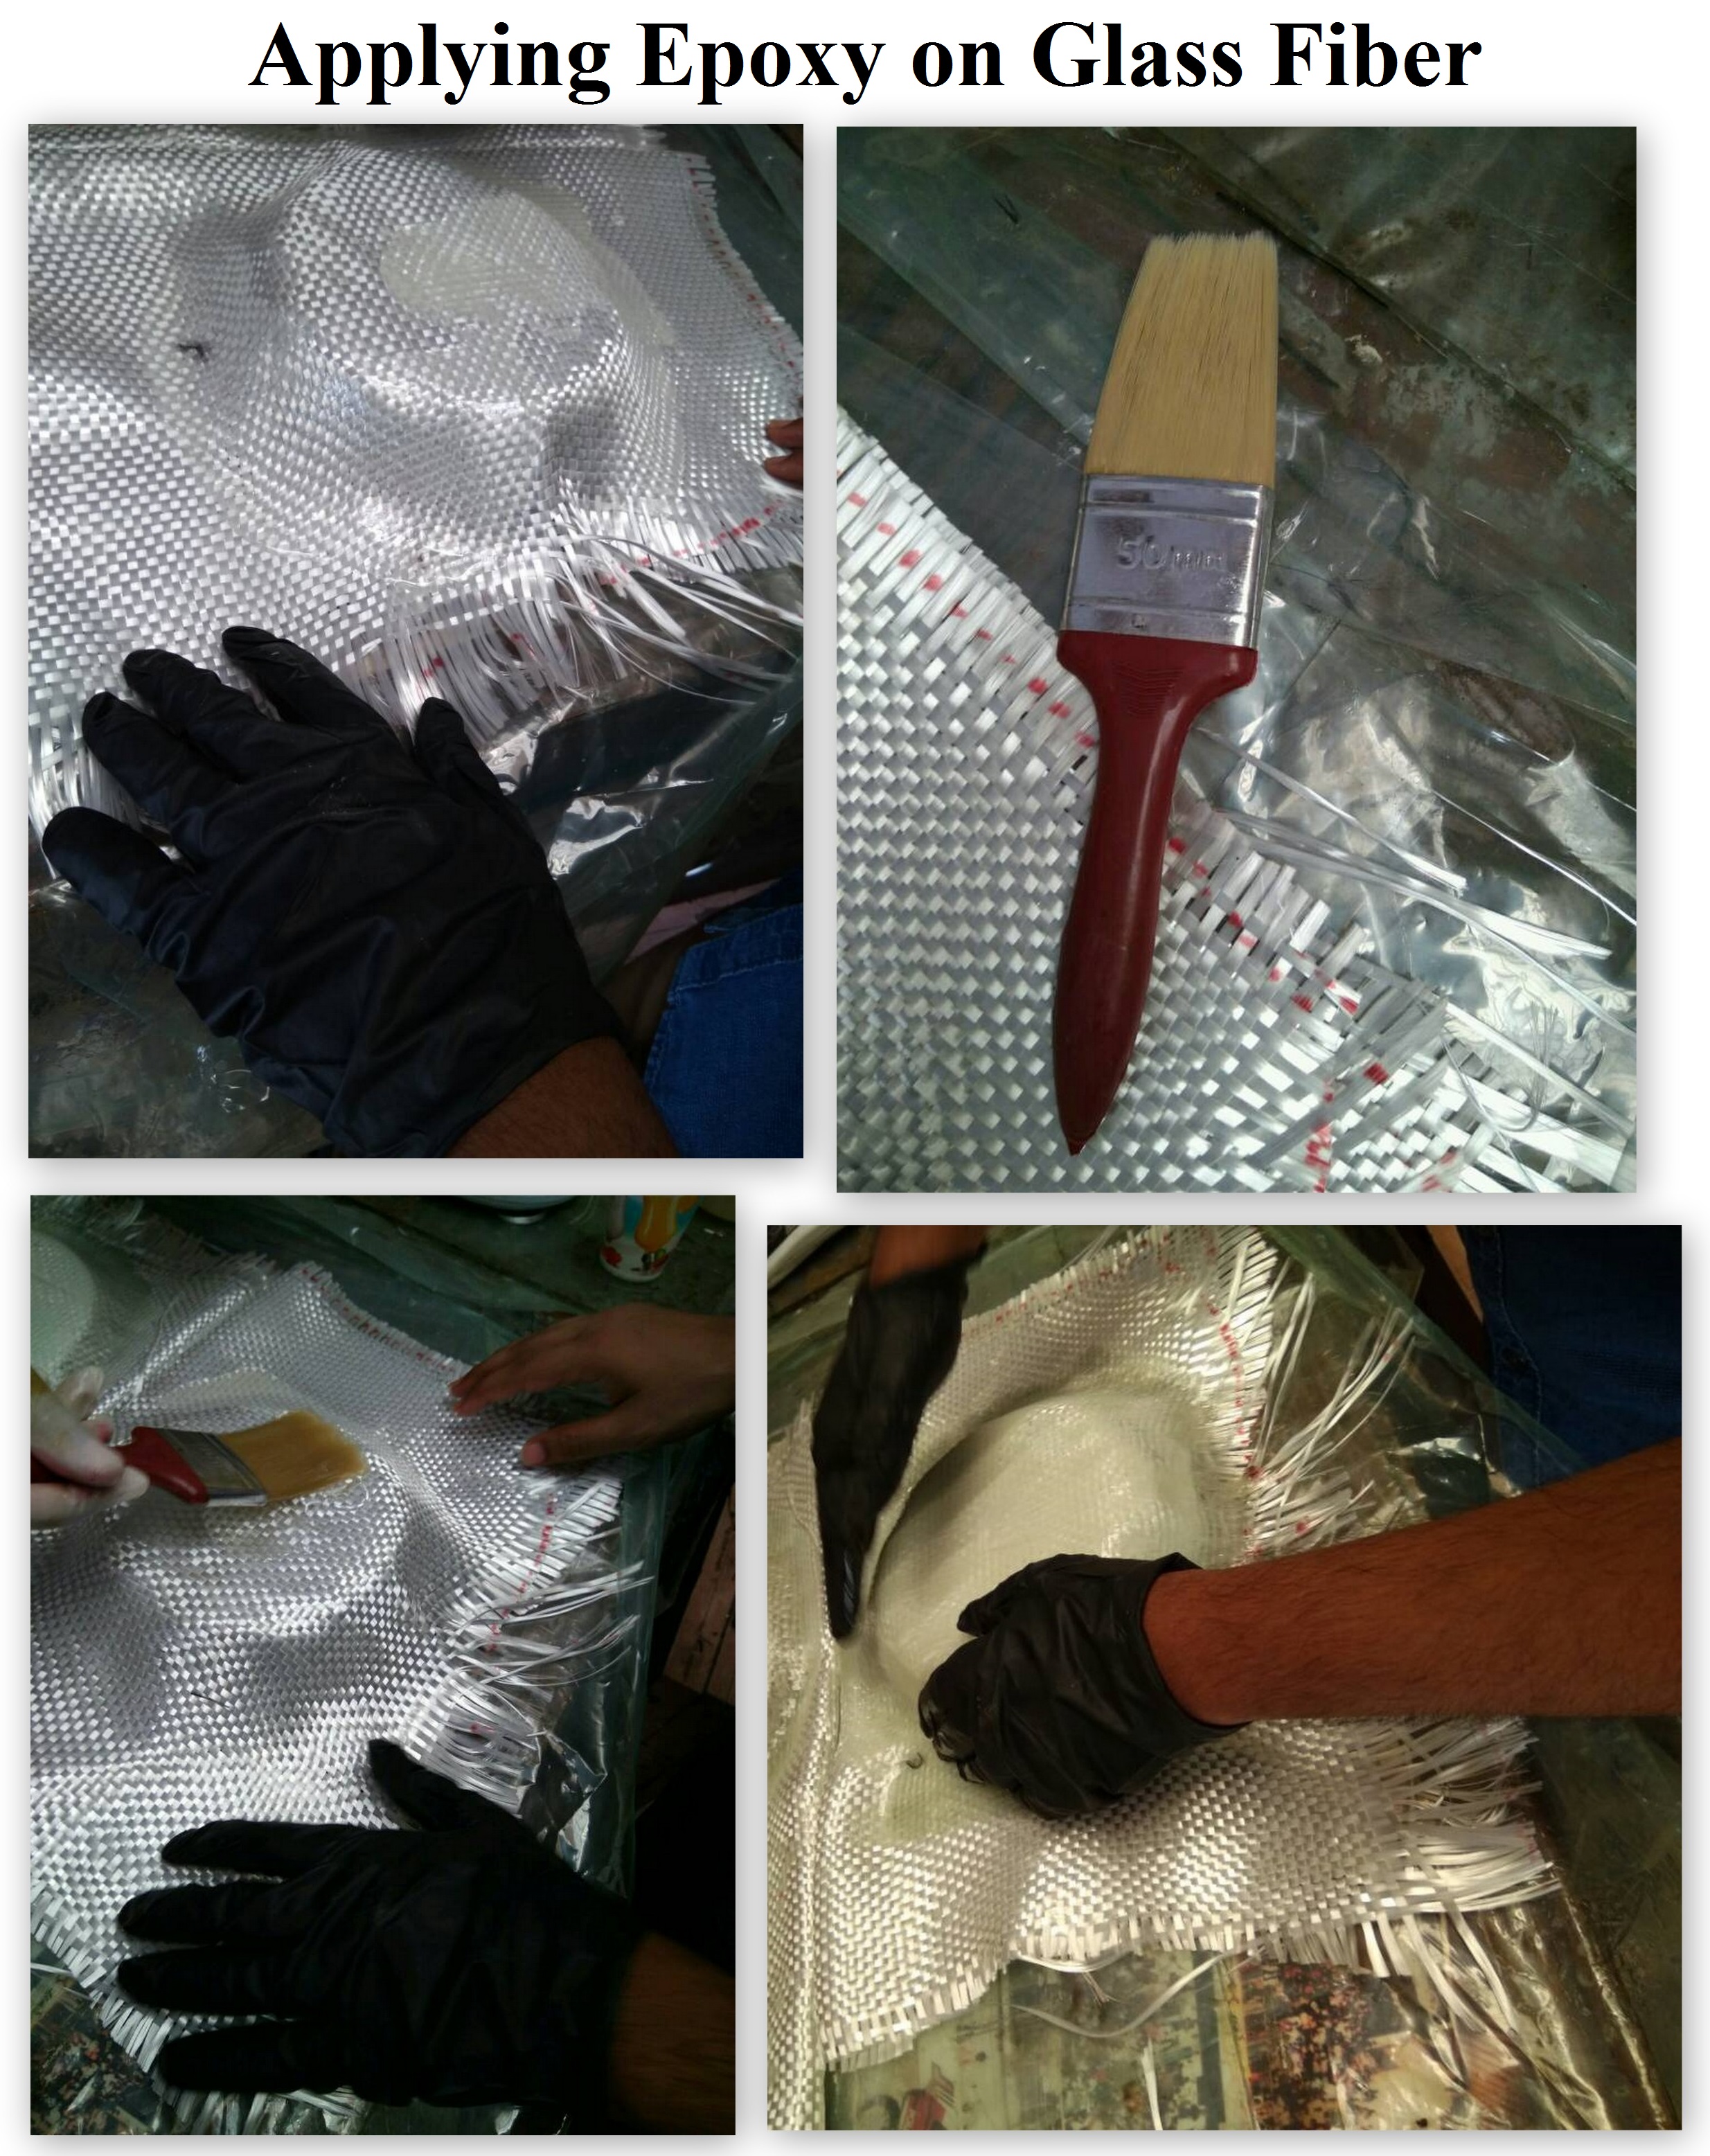
After Cutting the Mold and getting the glass fiber ready, now I first have to apply some releasing agent on my Mold so that when I place my glass fiber sheet over the mold and start applying resin and hardner's mixture over it, it should not get stick over on the mold and can easily be removed after the process is done. So the releasing agent which I used is just a Spray which is sparyed on the mold and the glass fiber sheet is placed over it.
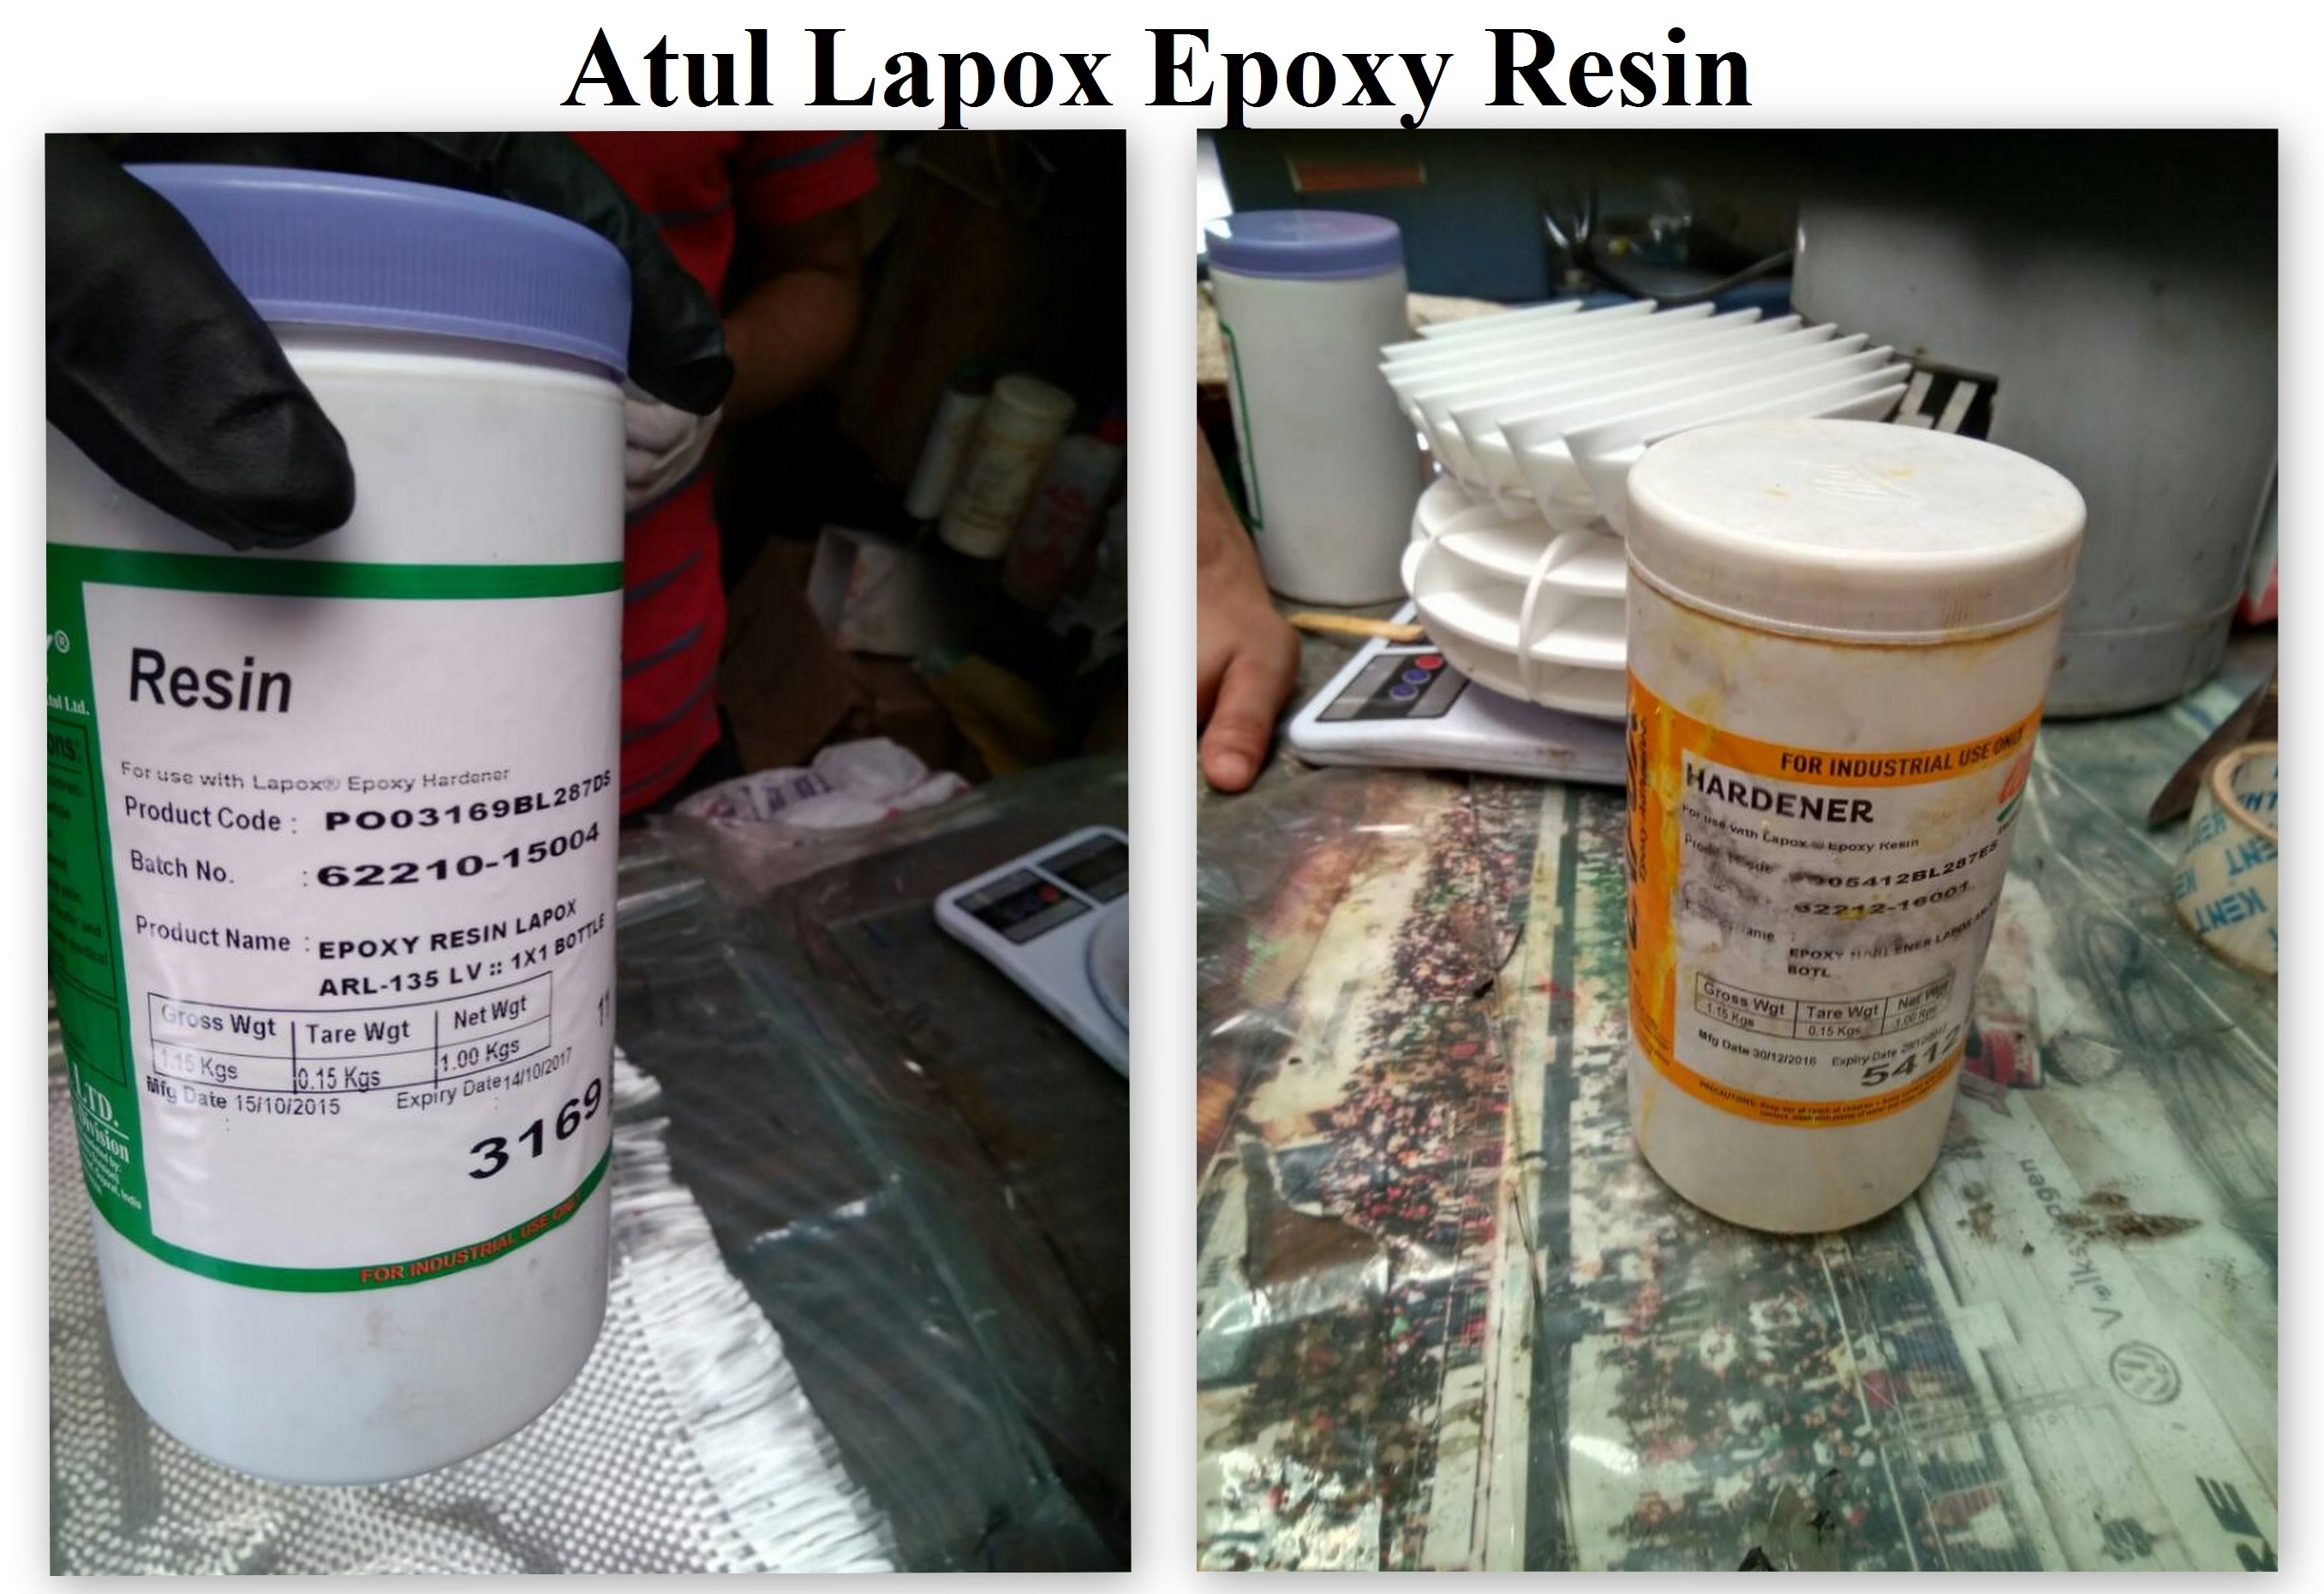
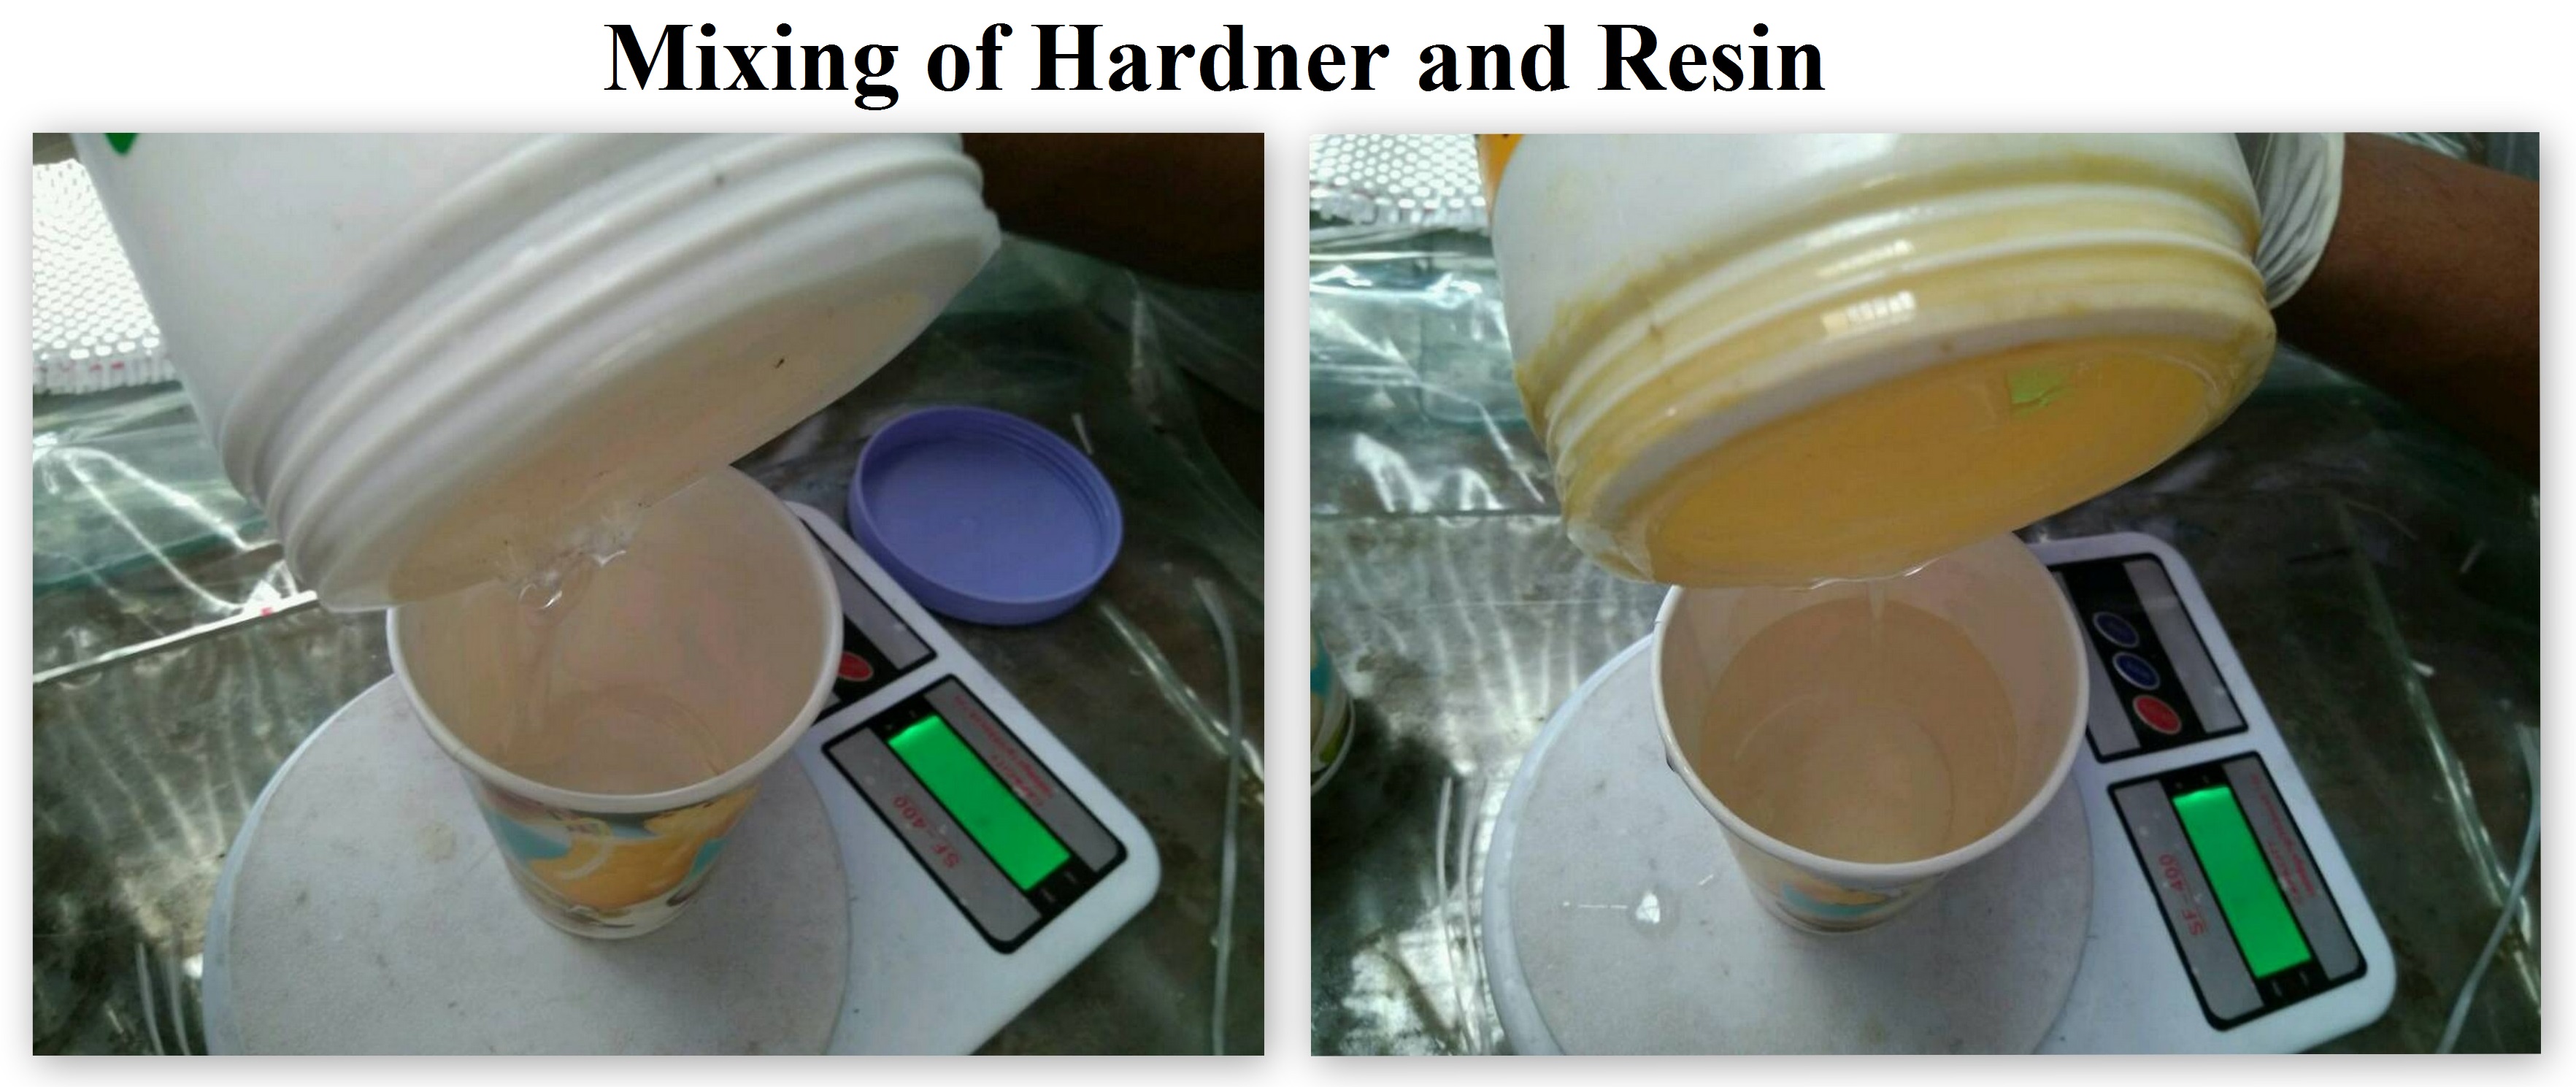
Epoxy resin comes in two part, one of which is hardener and other one is resin itself. Both individually can't do anything, when they are mixed the curation process starts and then after curing period it becomes rock solid. Curing time is depends upon the environmental parameters which are,
• Temperature
• Humidity
• Ratio of hardener and resin
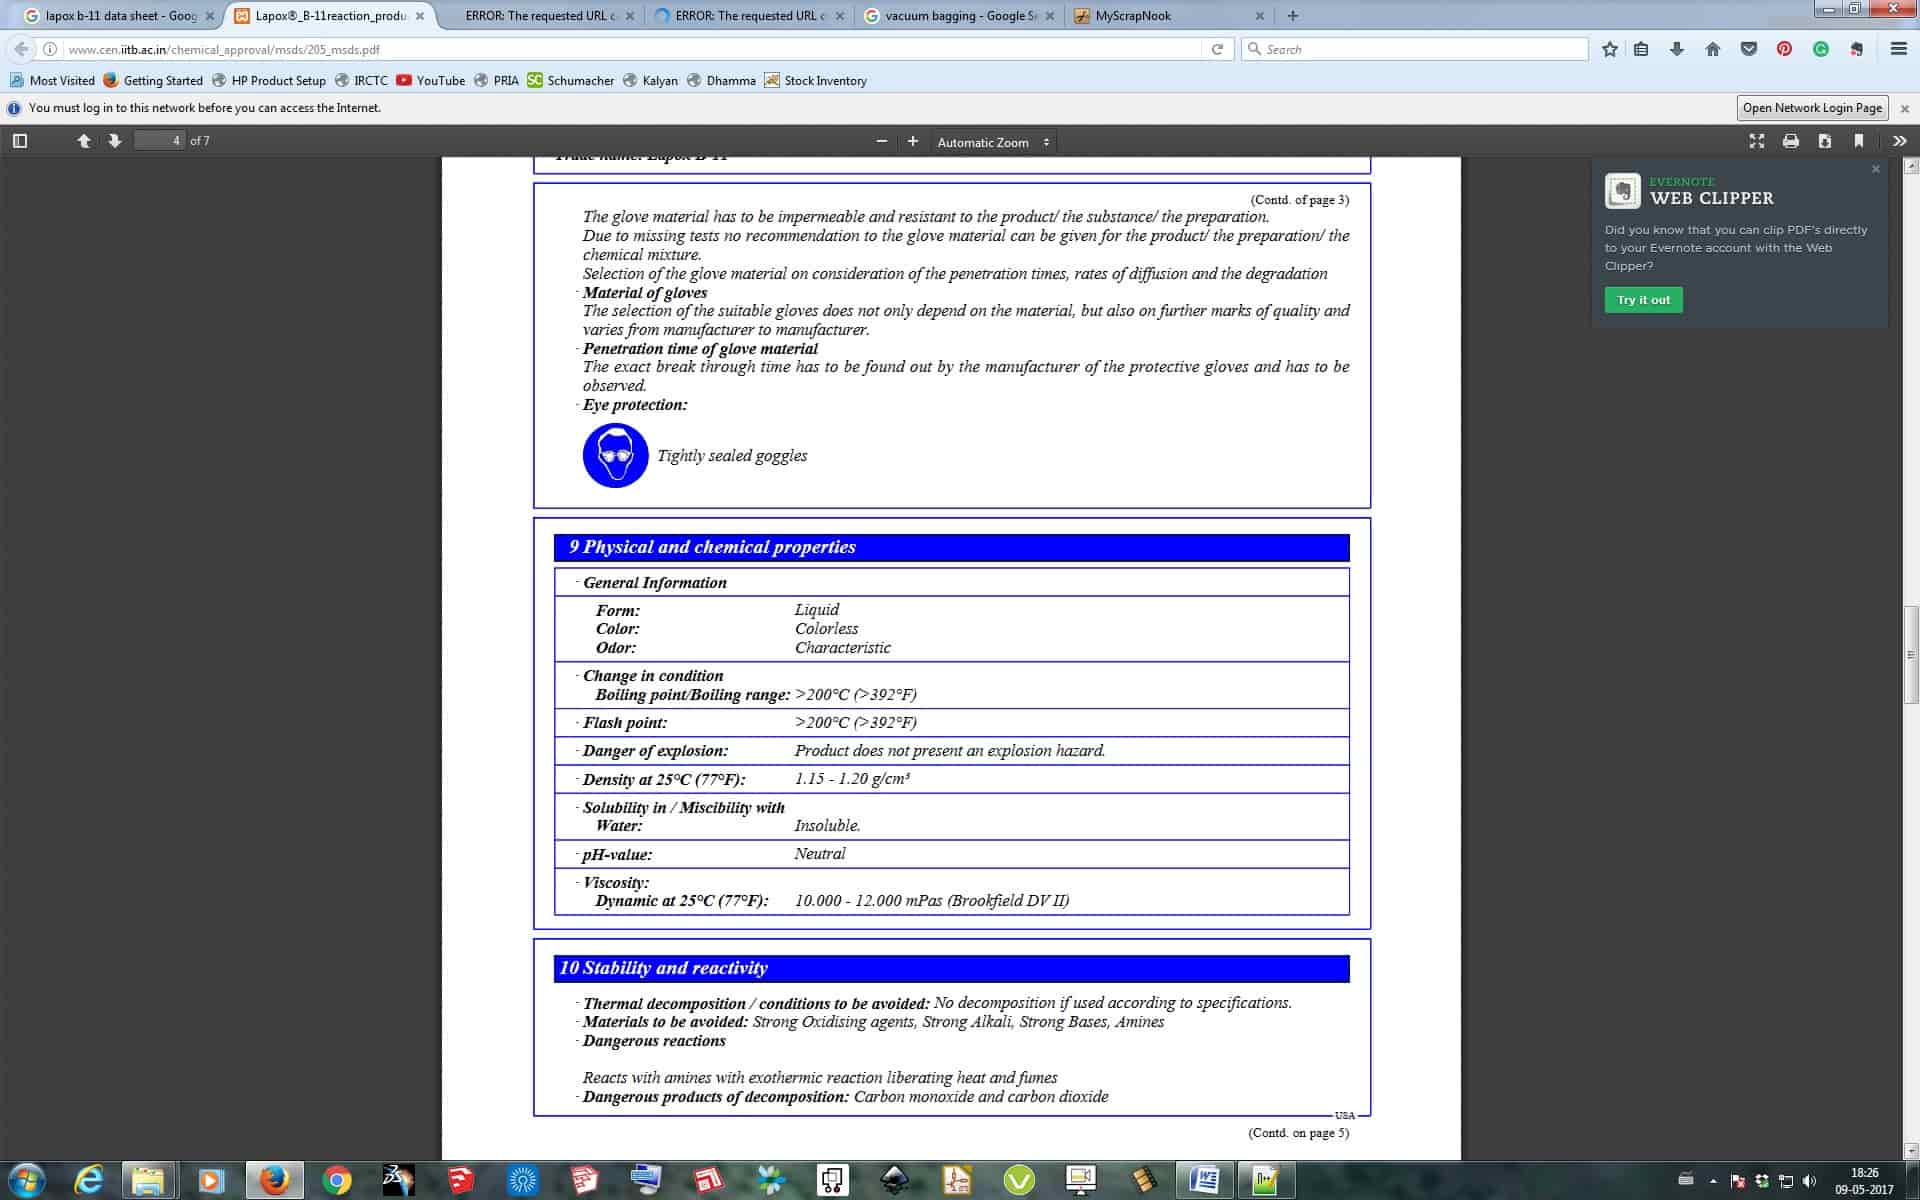
I am using the Atul Lapox Epoxy Resin which is available here. I first went through with the Data Sheet available of the Lapox Resin and then started using it, the detail of the data sheet is discussed ahead. I mixed both the Hardener and Resin in a Cup using stirrer, and mixed it well for about 1 minutes gave it the homogeneous mixture which was required before applying. After proper stirring the color of the mixture turn's to slightly Yellow which indicates perfect mixture stirred nicely. The Mixing ratio for the Hardener and Resin is given below:
• By Weight : 68R/32H
I then went through with the Safety measure of using Lapox Resin, which stated many precaution while working with Lapox Resin such as to avoid Skin Contact, wearing safety gloves, wearing goggles, wear safety marks to avoid inhalation, etc.

As I went through the Technical Data Sheet and Safety Measurement of using Epoxy I mixed it and started applying it on the fiber glass sheet, I here have to apply the epoxy layer by layer, so I went till 5 Layers of Epoxy on the Fiber Glass cloth which took almost 5-6 hours to cure.
Vaccum Bagging
As I was using Hand Pressing method, there wasn't any need for doing Vaccum Bagging for me in this assignment. So I just took the Glass Fiber and pressed it over my mold and slowly started applying the Epoxy and pushed it such that it should take the shape of the acrylic mold below the Glass Fiber, and layer by layer started appling the Epoxy cooting.
As finally the Epoxy get cured I somehow managed to remove my mold and get the glass fiber separated and then my final product was ready to be used. I had never known about this process till date but after learning and knowing about making composites like these, now I am willing to make few good useful customised things for me out of carbon fiber.
