Download the latest version of python and install it.
cmd. Or use the GIT BASH shell from week1.python If it is installed correctly it should respond like this: 
We need pip for adding libraries. Test if it is properly installed by running the command pip
If you can run both python and pip witout error then you can skip the next step.
EDIT: IF YOU HAVE THIS PROBLEM, TRY RESTARTING YOUR PC AND TESTING AGAIN
If you couldn't run python or pip in the previous step we can add them manually.
We do this by add the folder containing python.exe it AND the scripts folder containing pip.exe to the PATH environment so that you can run them from the command line anywhere in your system. Press the windows-key and type path:
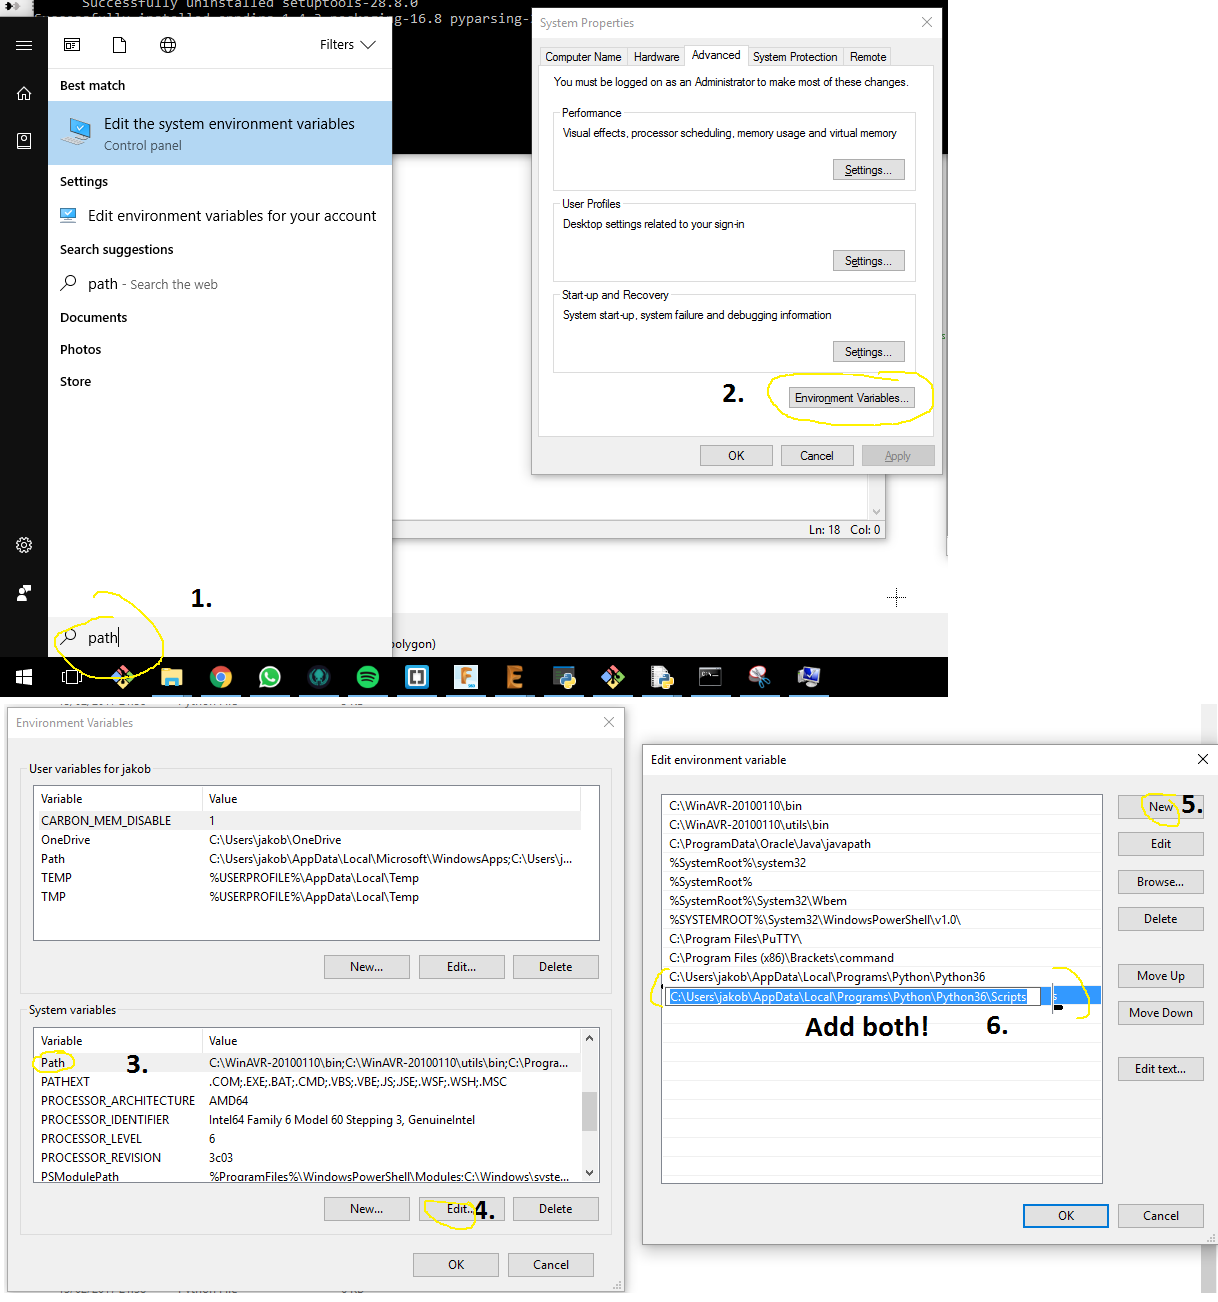
Close any command prompts that you have open so that it can refresh.
To run the serial tutorial (backup of the original code) from Fab Academany you need to first install the Serial library.
- First open a NEW command prompt. Win key + R, type
cmd. Or use the GIT BASH shell from week1. - Update the library installation tool "pip" by running
python -m pip install -U pip setuptools Troubleshooting
If you get this message'python' is not recognized as an internal or external command, operable program or batch file.
Then revisit Step 2, python.exe needs to be in a folder that your PATH environment points to. - Run
pip install pyserialto install the pyserial library from the PyPI Python Package Index.Troubleshooting
If you get an error, it probably means tha you have not entered the correct PATH for pip.exe in Step 2. above. There are several "Scripts" folders in the Python directory, you need to add the one containing "pip.exe" to your PATH environment.
Installing the serial library
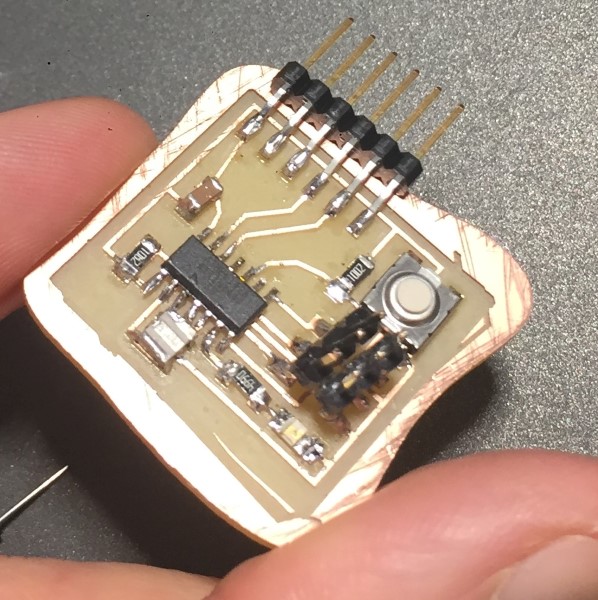
Connect your PC to something that can send serial data, for example use an FTDI cable and your Hello button board from Electronics design week6.
Optional:
Check that we have serial data incoming. I used the Arduino IDE and the Serial Monitor for this since I know that it is working.
Test which serial port you are connected to by opening a command promt (Win key + R, type cmd) and running
python -m serial.tools.list_portsThis will list connected serial ports like this:

Test recieving the serial data through the Python termial. In the command promt, start the python miniterminal by running:
python -m serial.tools.minitermSelect the correct port, in my case i choose Nr 1, the USB Serial port (COM4) that is my FDTI cable.

The text "$J=X10F100" is serial data coming from my jogging card I made in input devices week13.
For scandinavian keyboards the Quit command is Ctrl+^ instead of Ctrl+]
Using a Python program to capture the serial data
The serial tutorial code did not work straight away for me. I suspect that the syntax (the way you write the code) has changed since it was written. Nor did I get the rx.py code that Neil provided in the lecture notes for Input devices to work.
Here is my modified version of the serial tutorial code.
Download it, right click and select Edit with IDLE to open in the Python code editor.
It is setup to work with a board connected with FTDI cable which Windows sees as 'COM4'. Replace 'COM4' with whatever Step 7. told you that your connection is called.
In IDLE, press Run->Run Module or just press the F5 key. This should open a Python Shell window and you should be able to recieve serial data like this:
