
For this assignment we had to design a mold and manufacture it, using different materials, both for the main block and the covers for the realization of the plastic model.
We should understand the logic of full and empty spaces to be able to make the mold and make it with the proper specifications.
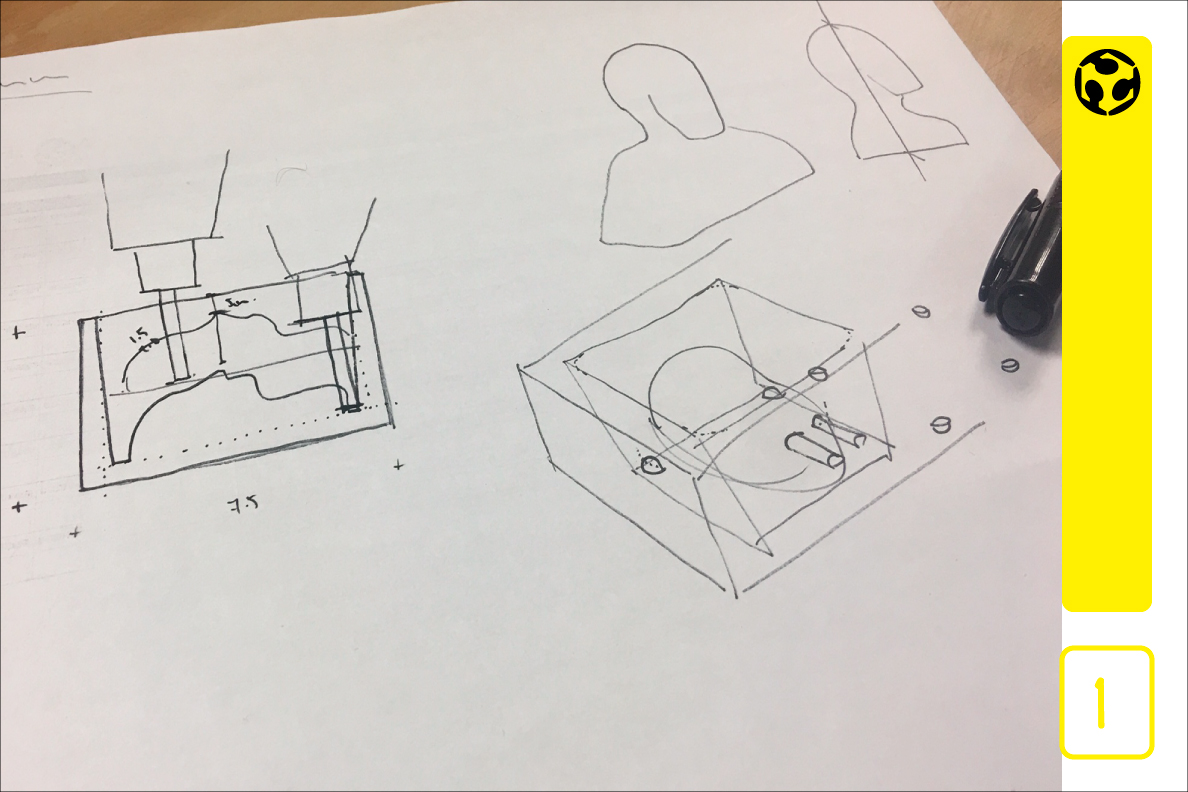
1. Understanding the functionality of the mold.

2. Paraffin wax size: l: 1750mm w: 750mm d: 350mm

3. Working with material measurements and full and empty spaces.
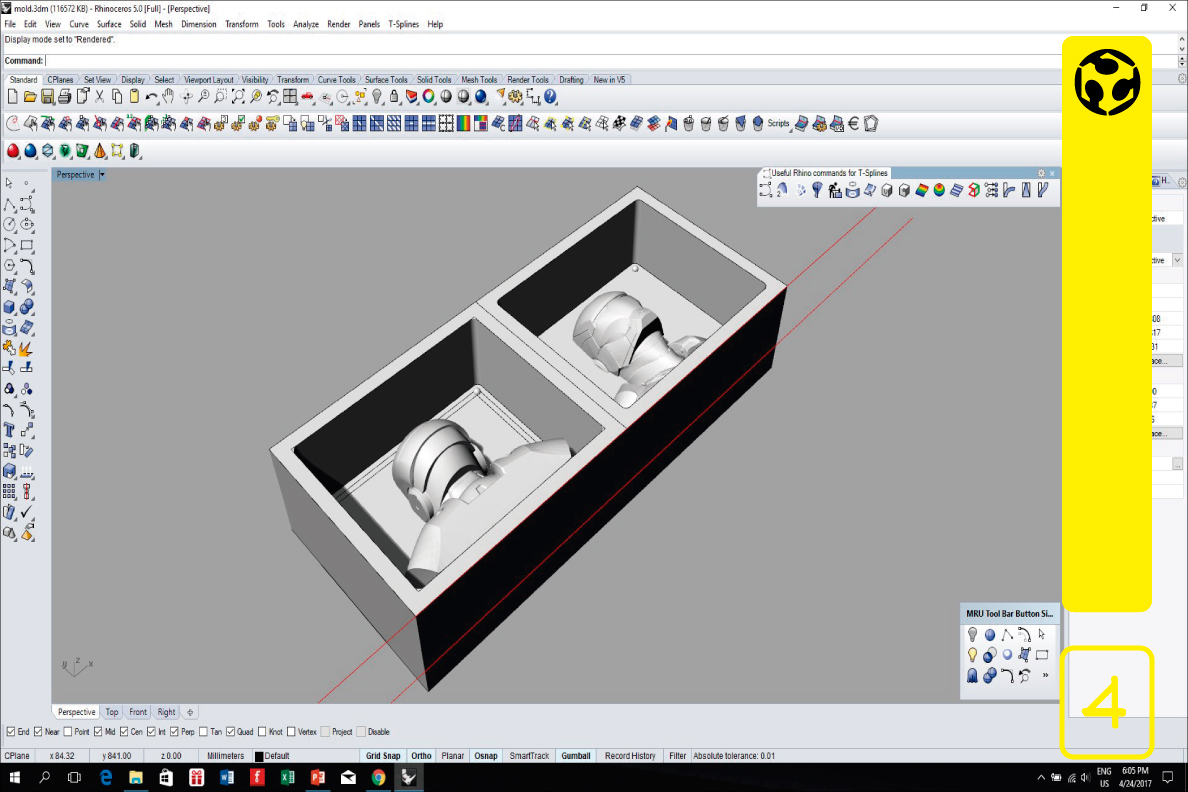
4. Use a bust of the armor of Iron Man.
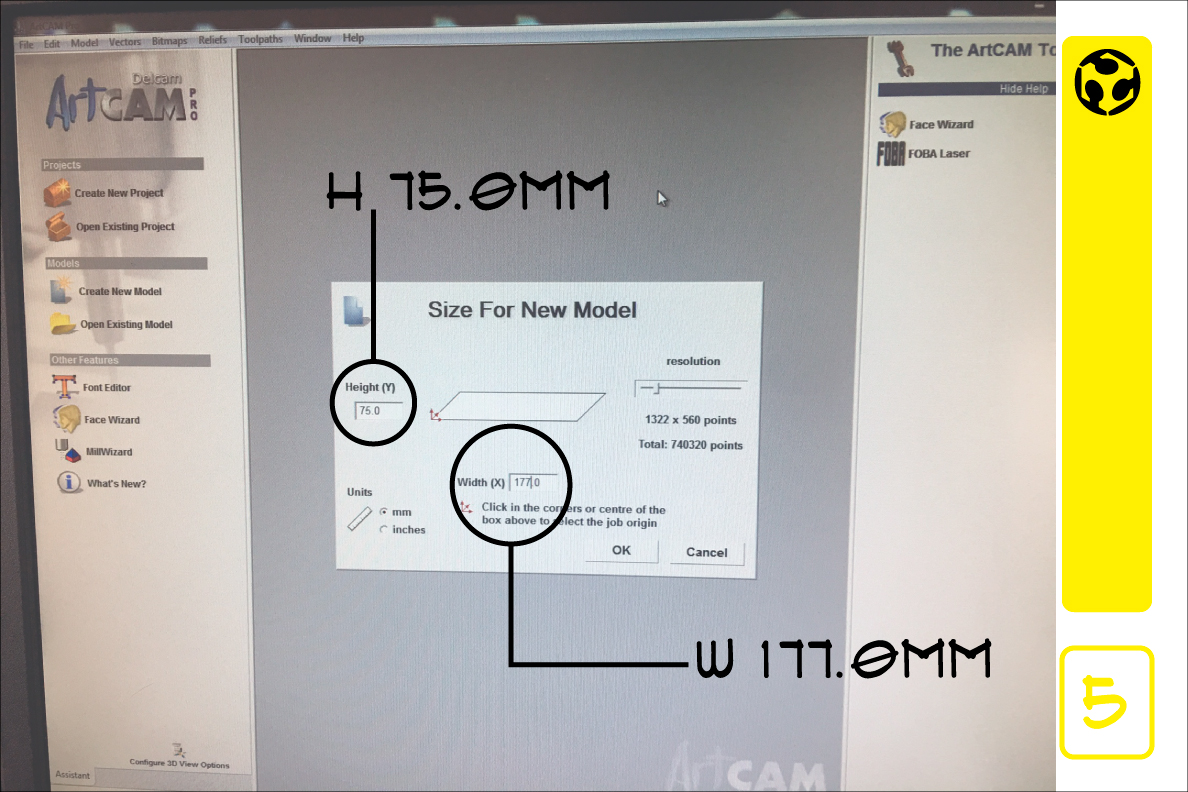
5. With the model ready, we use ArtCam to realize the size configuration and the drill bits to be used in the process.
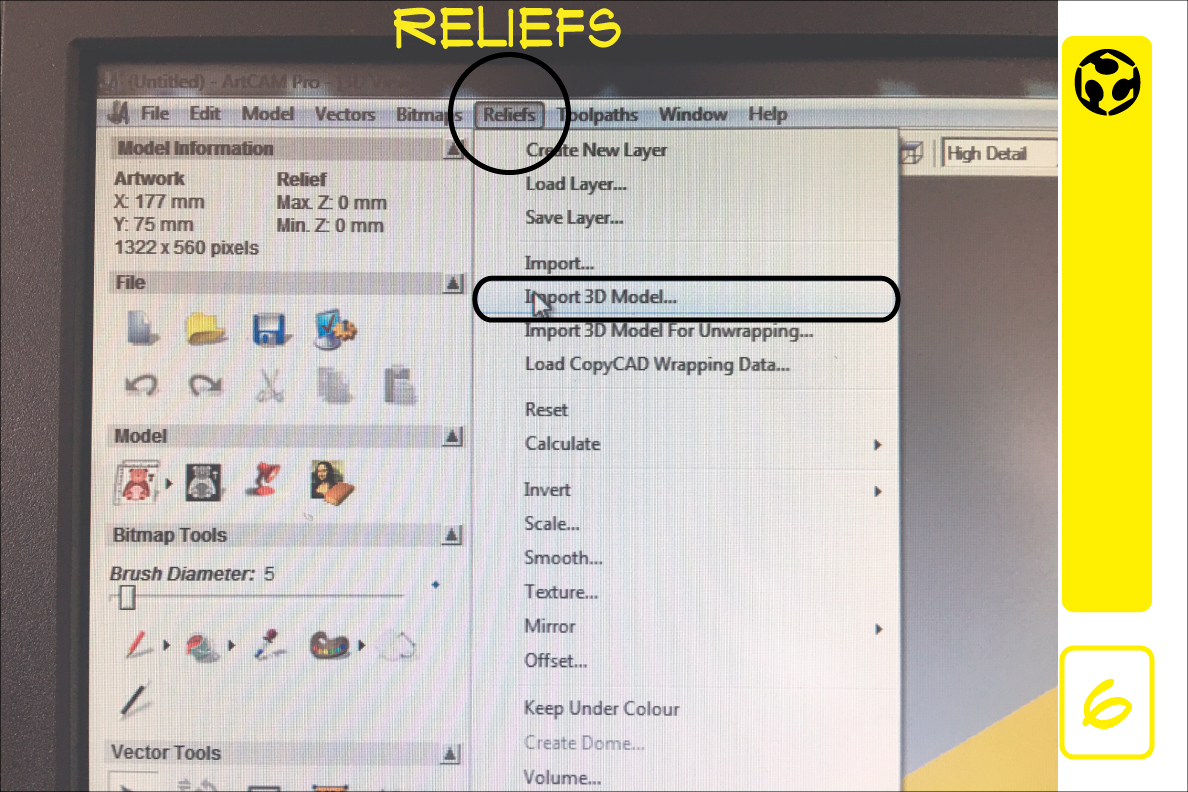
6. now import the 3d model to artcam software.
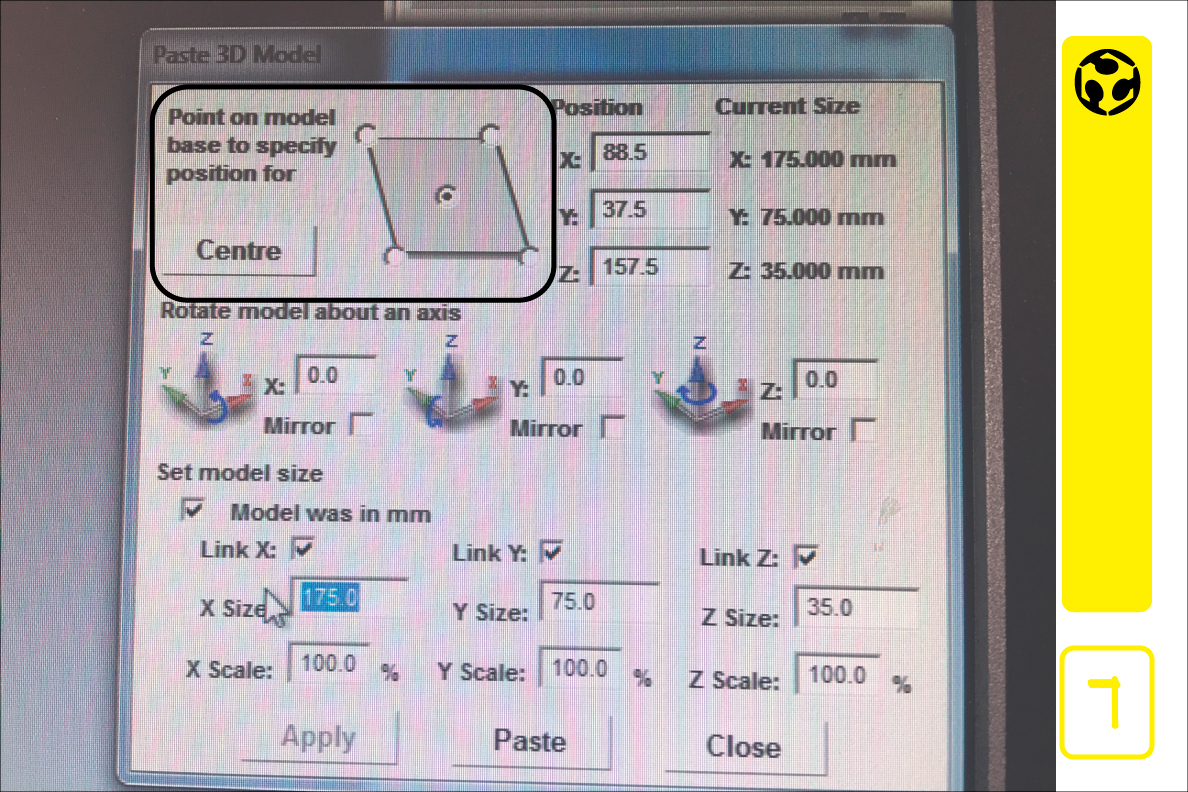
7. We set the position of the x, y, z axes in the model and verify the size.
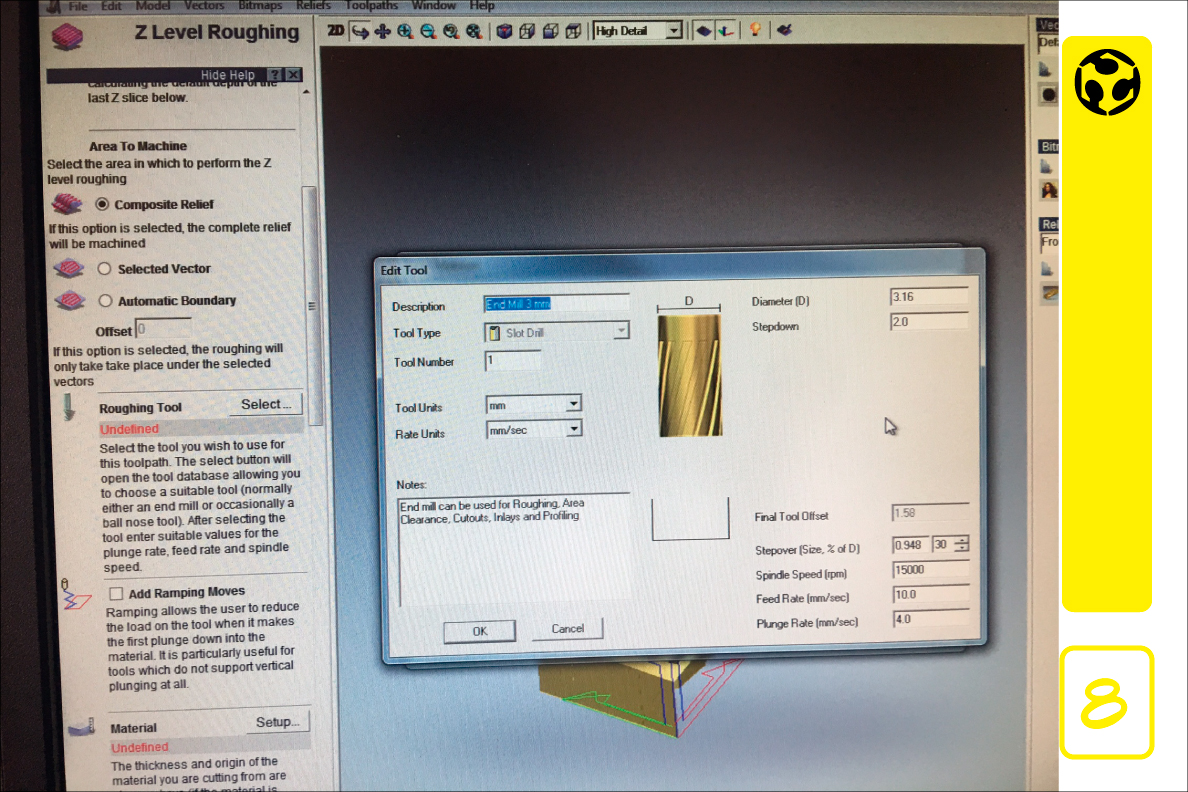
8. Two toolpaths were created for the model: one whith a 3,5 mm tool and other a 1,58 mm tool.
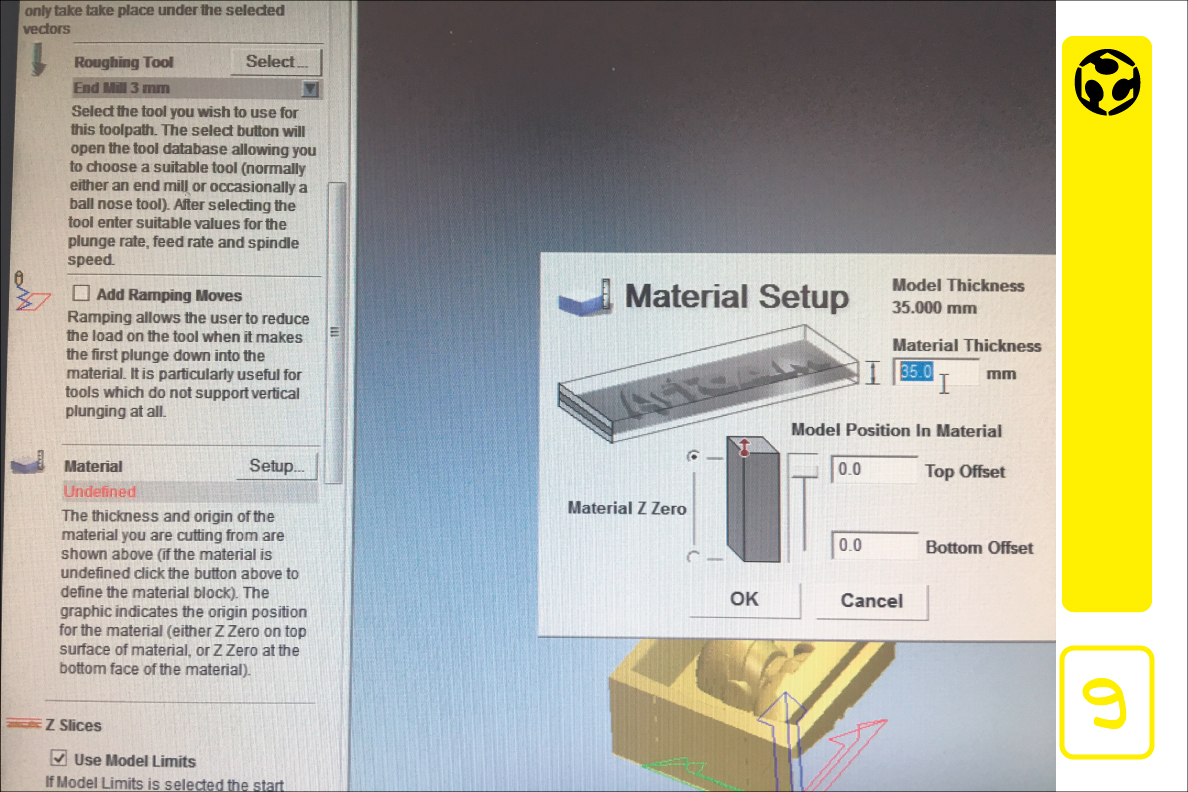
9. Set the parameters of the material, the thickness: 35.0mm, position on top.
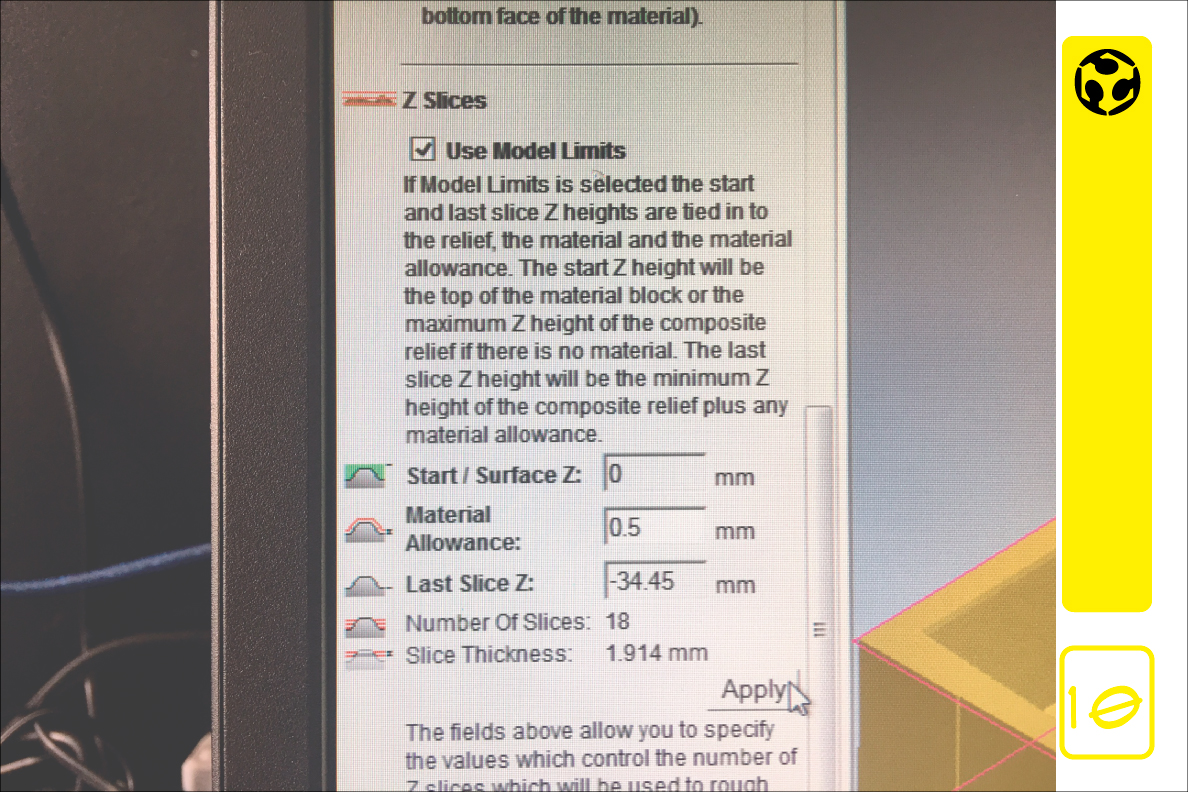
10. Set the model limits and number of slices.
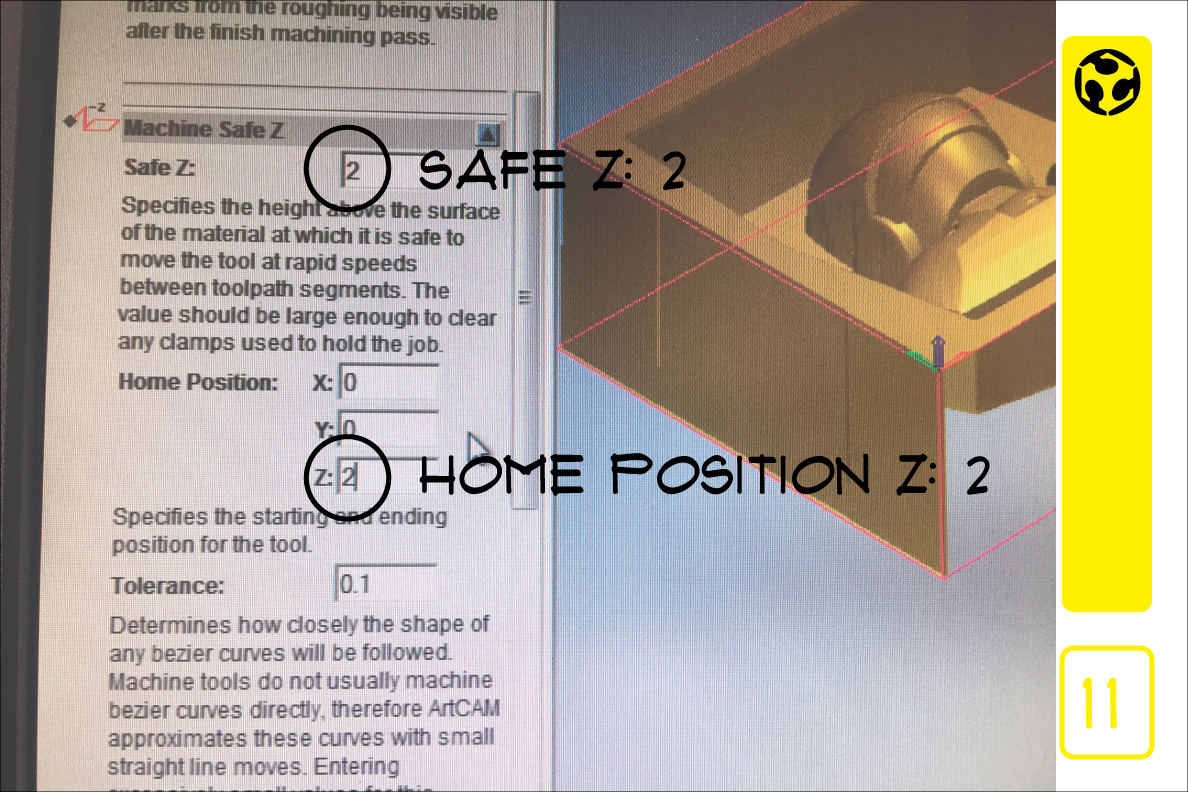
11. With the model ready, we use ArtCam to realize the size configuration and the drill bits to be used in the process.
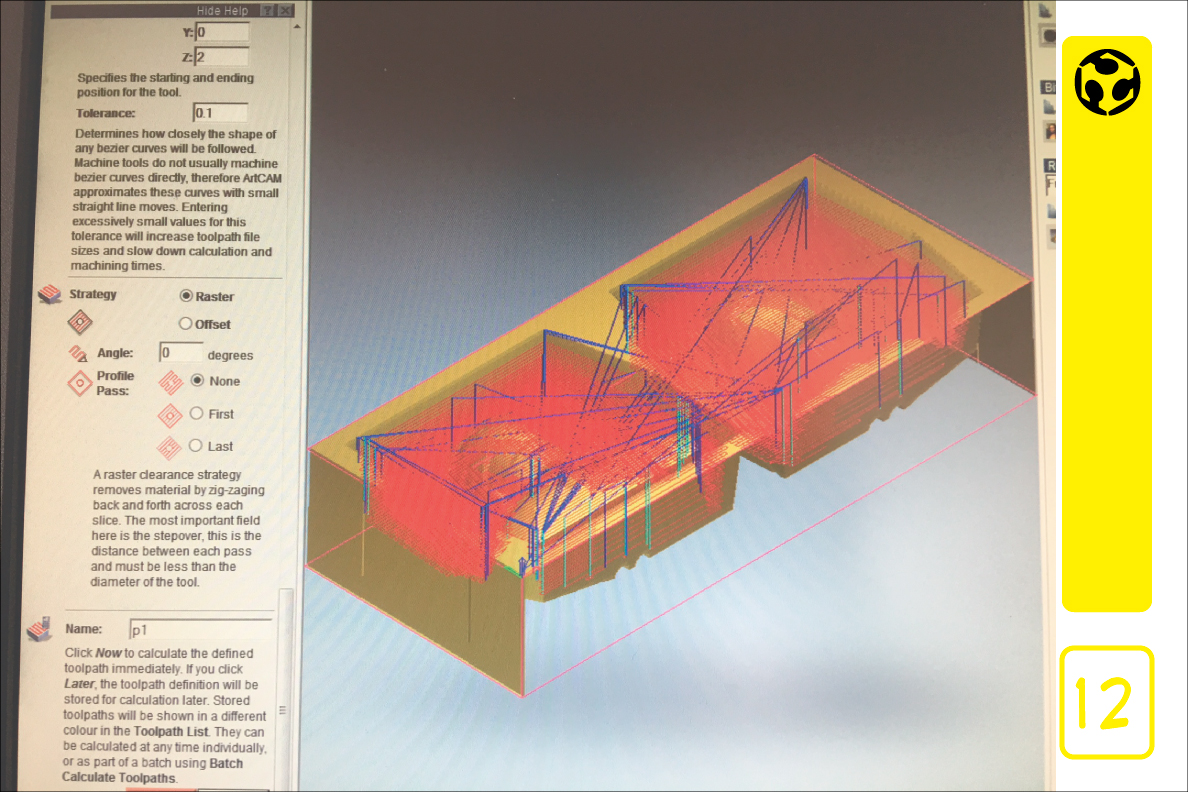
12. Save the strategy and name it.
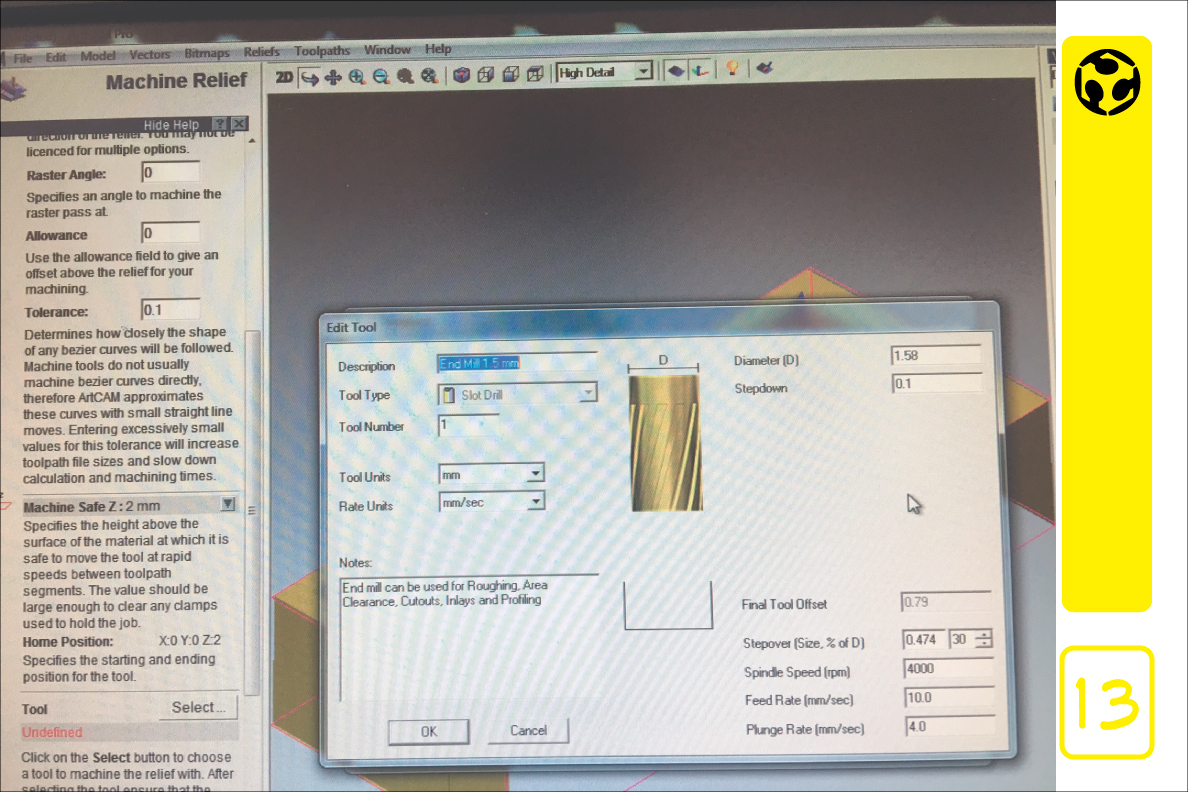
13. Edit the tool for the machine relief.

14. Top view of the strategy.
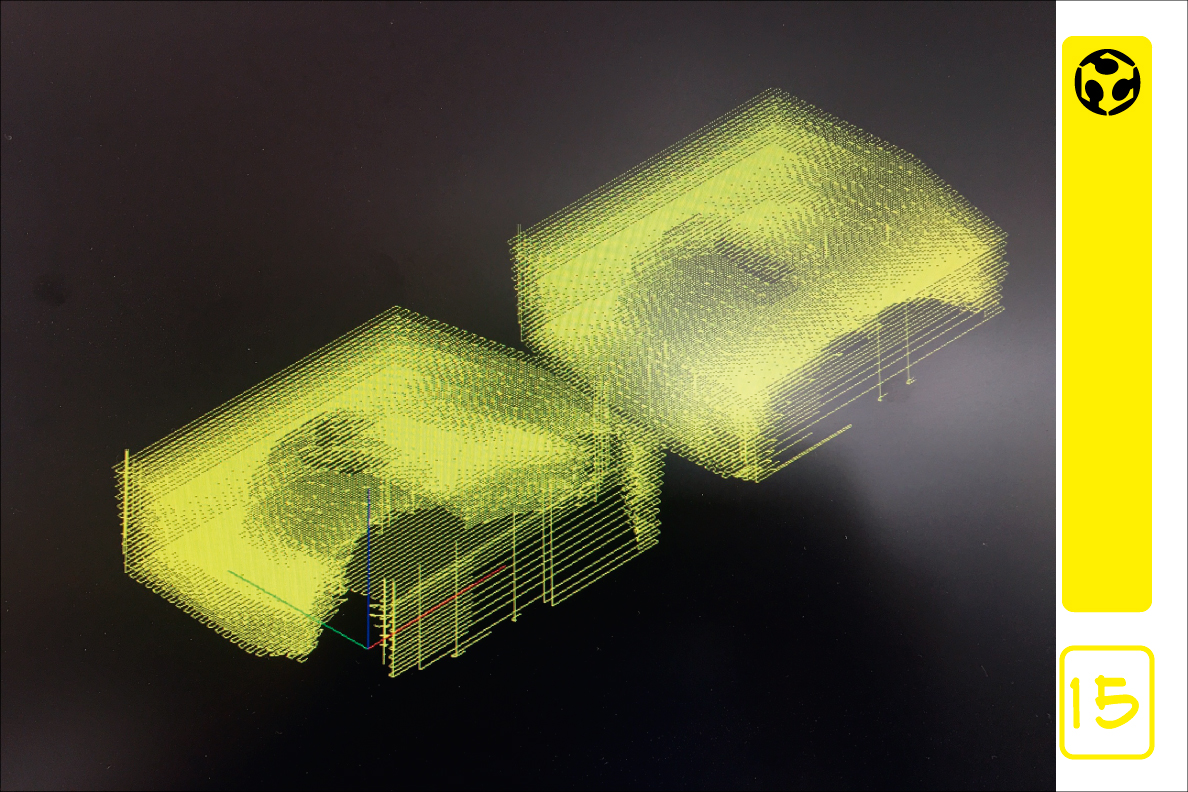
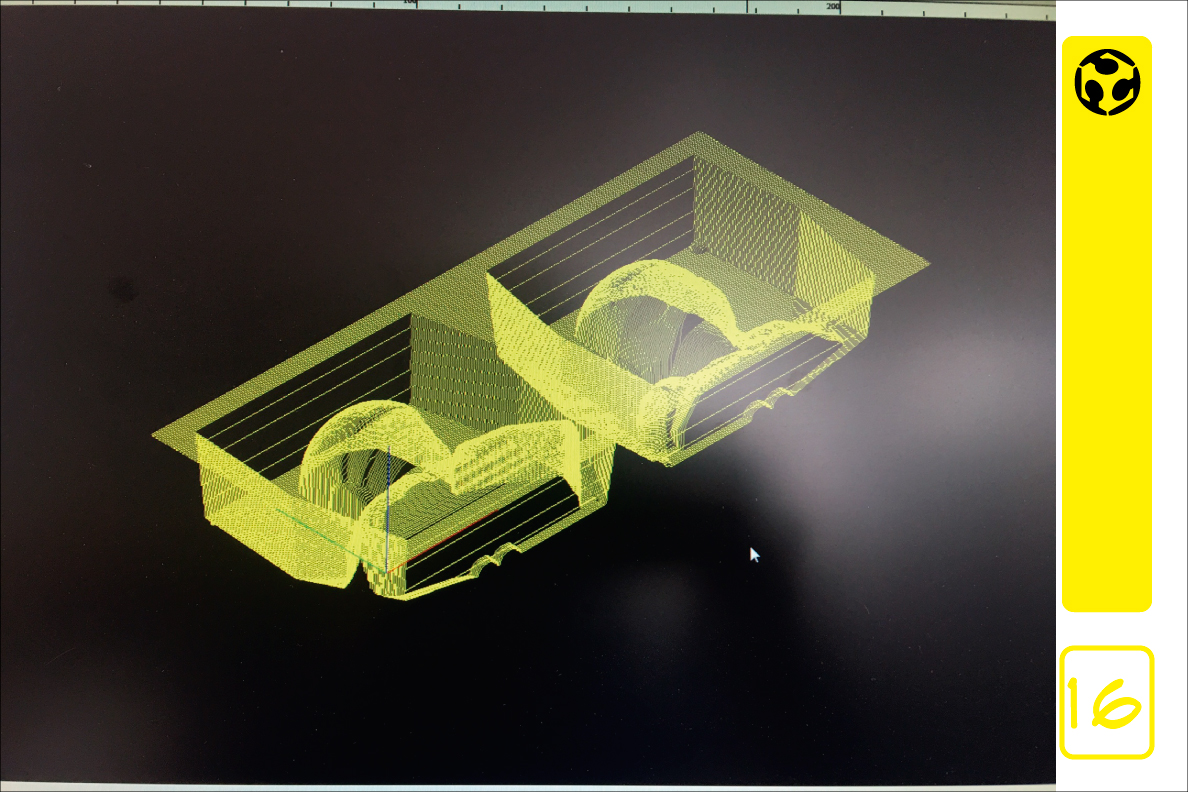
15. Isometric view of the number of slices.
16. Isometric view of the process.
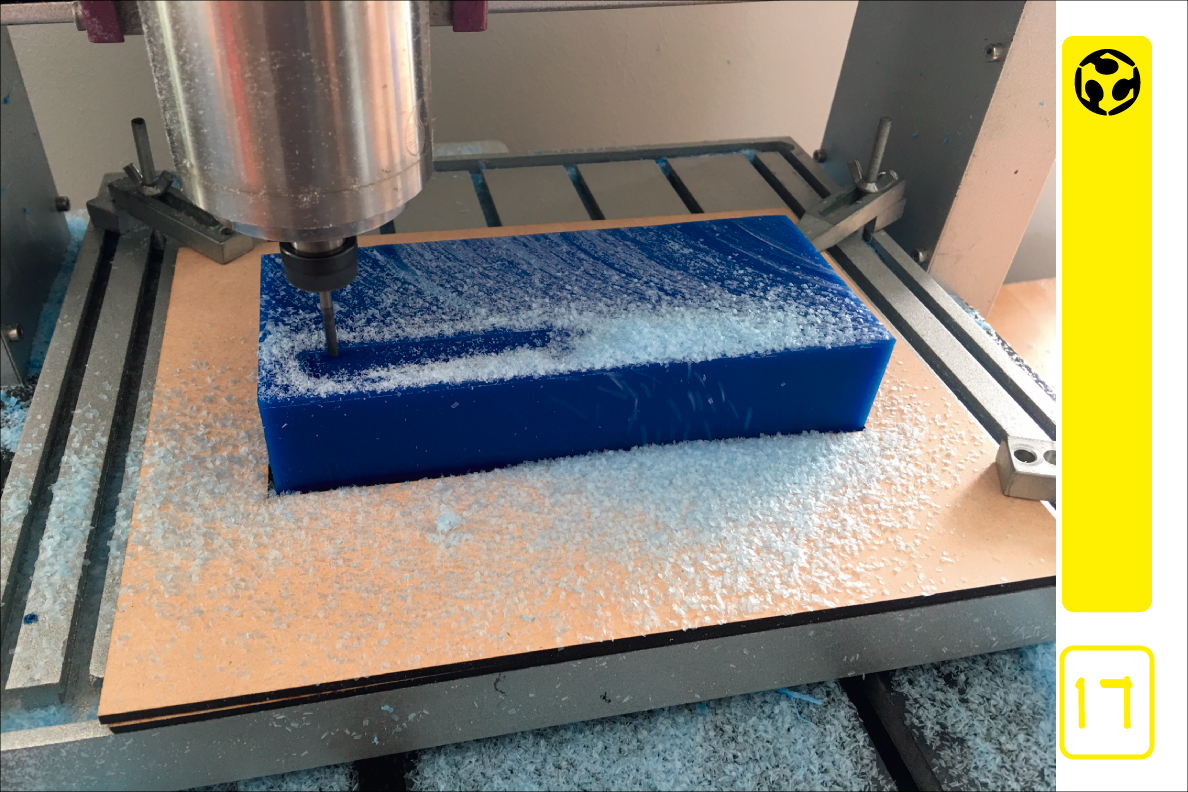
17. The the material was attached to the bed and the zero was set.
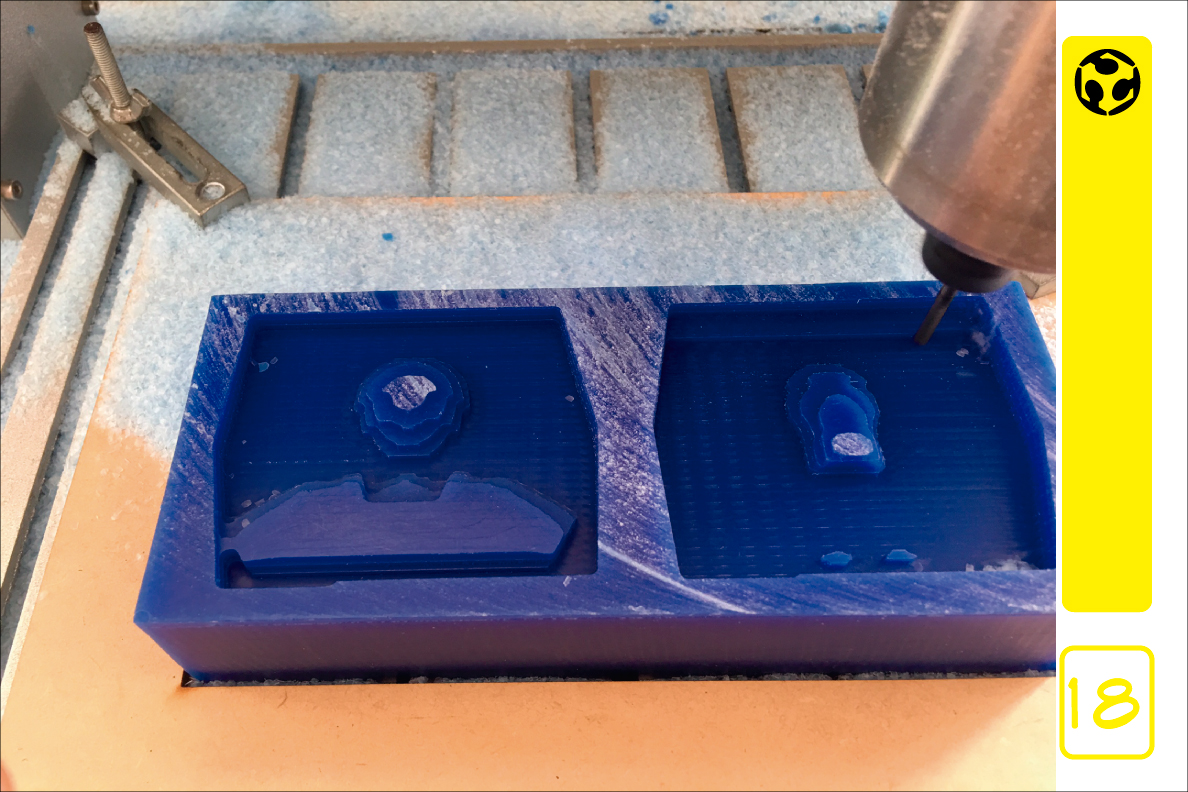
18. Process.
19. Process
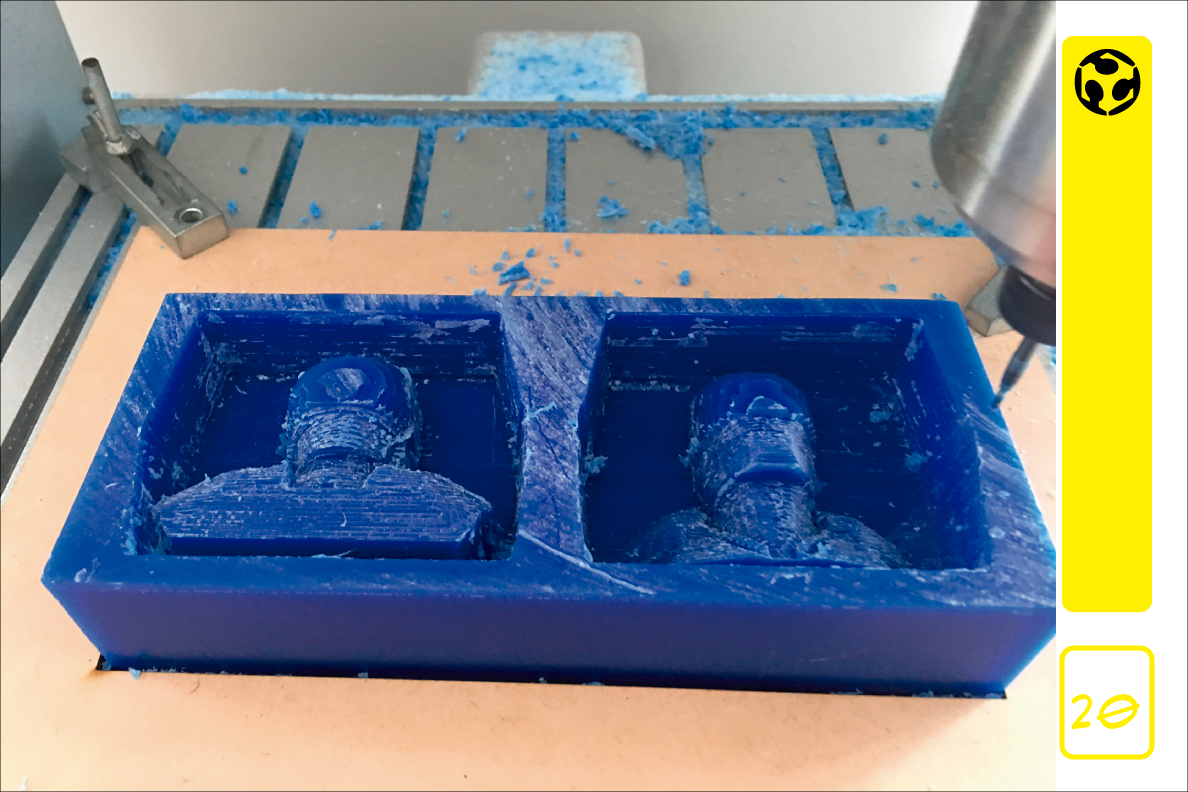
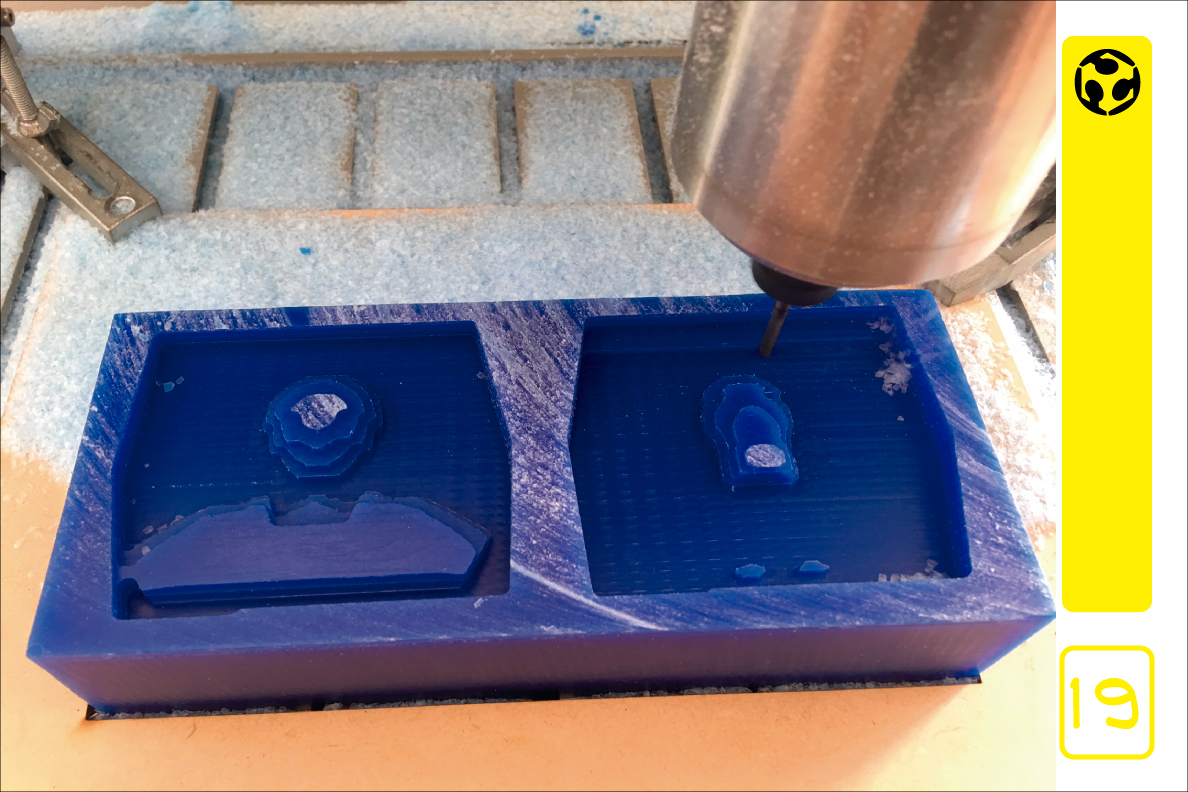
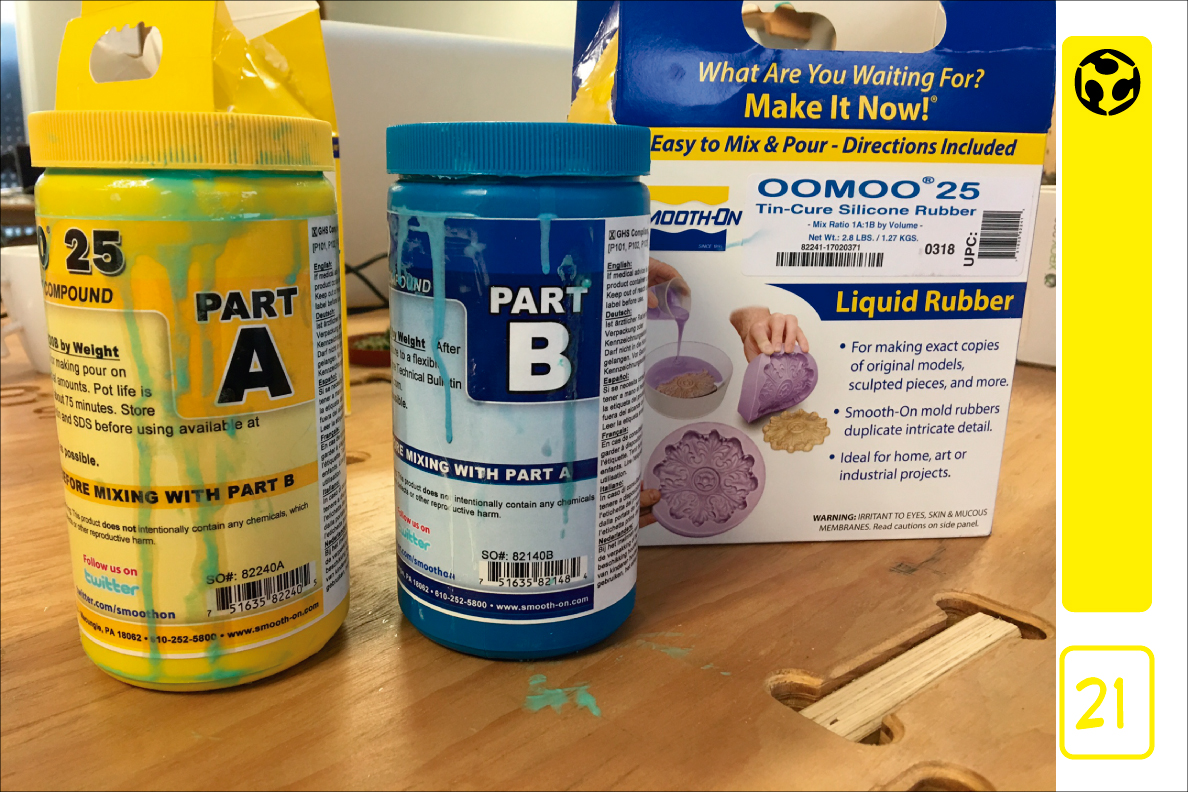
20. Mold ready to clean.
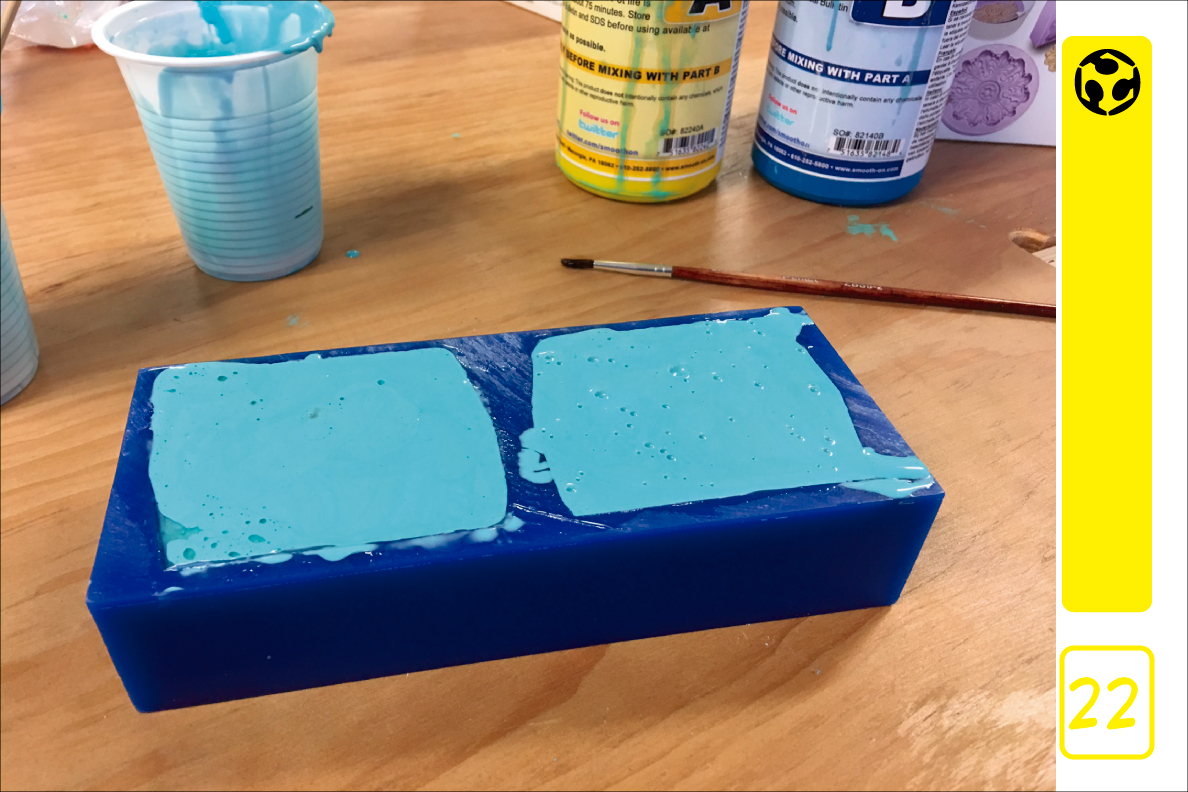
21. For the rubber mould we prepared the mix with equal parts of the compound. We used vegetal oil as release agent, and applied it with a brush to the wax.
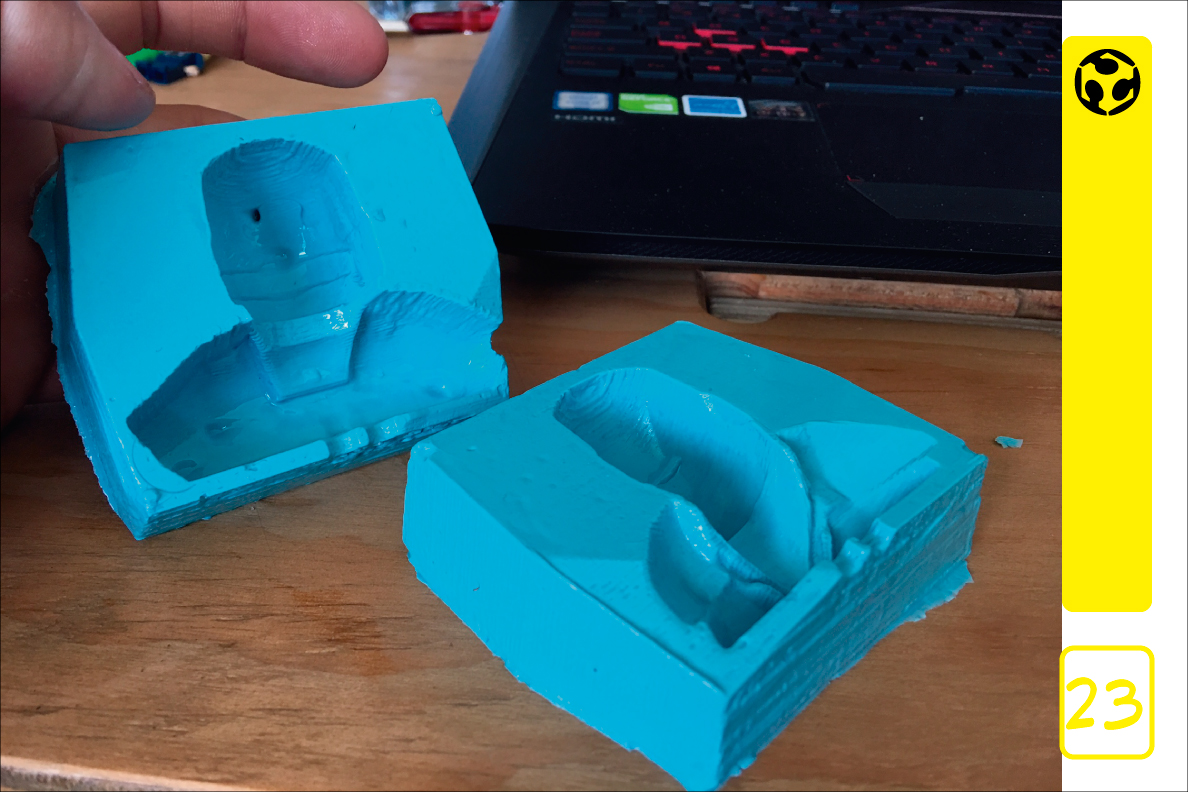
22. Finally, the model was gently hit to let air bubbles out, then it was let to rest.
23. we take out the two pieces of the mold.
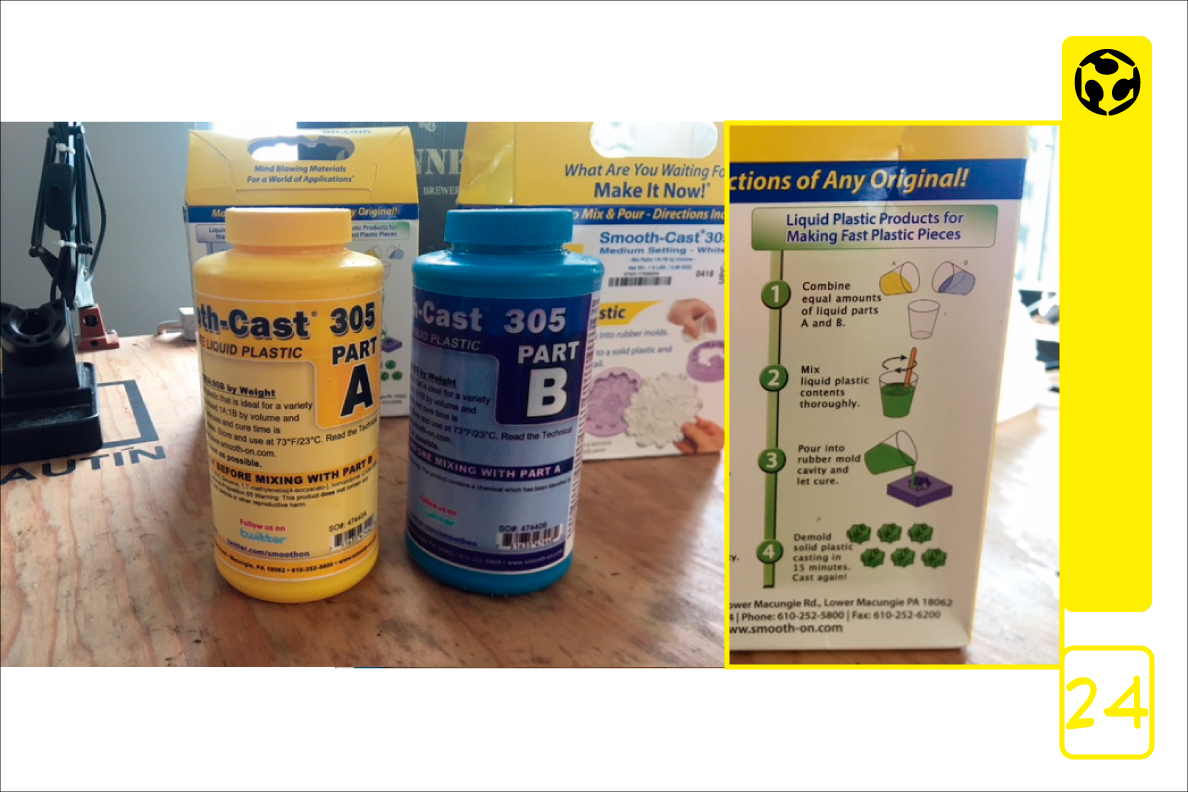
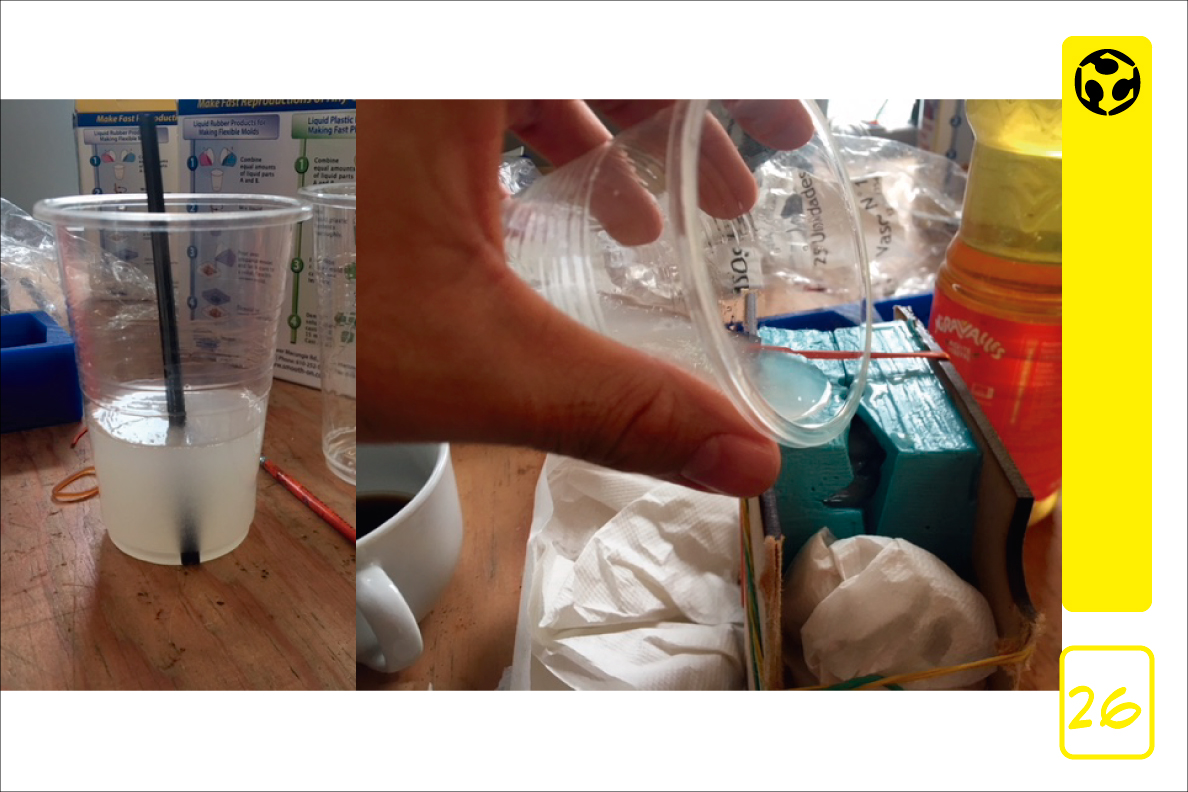
24. We take the liquid plastic mixture in equal amounts, part A and part B..

25. we join the silicone molds to pour the liquid plastic mixture.
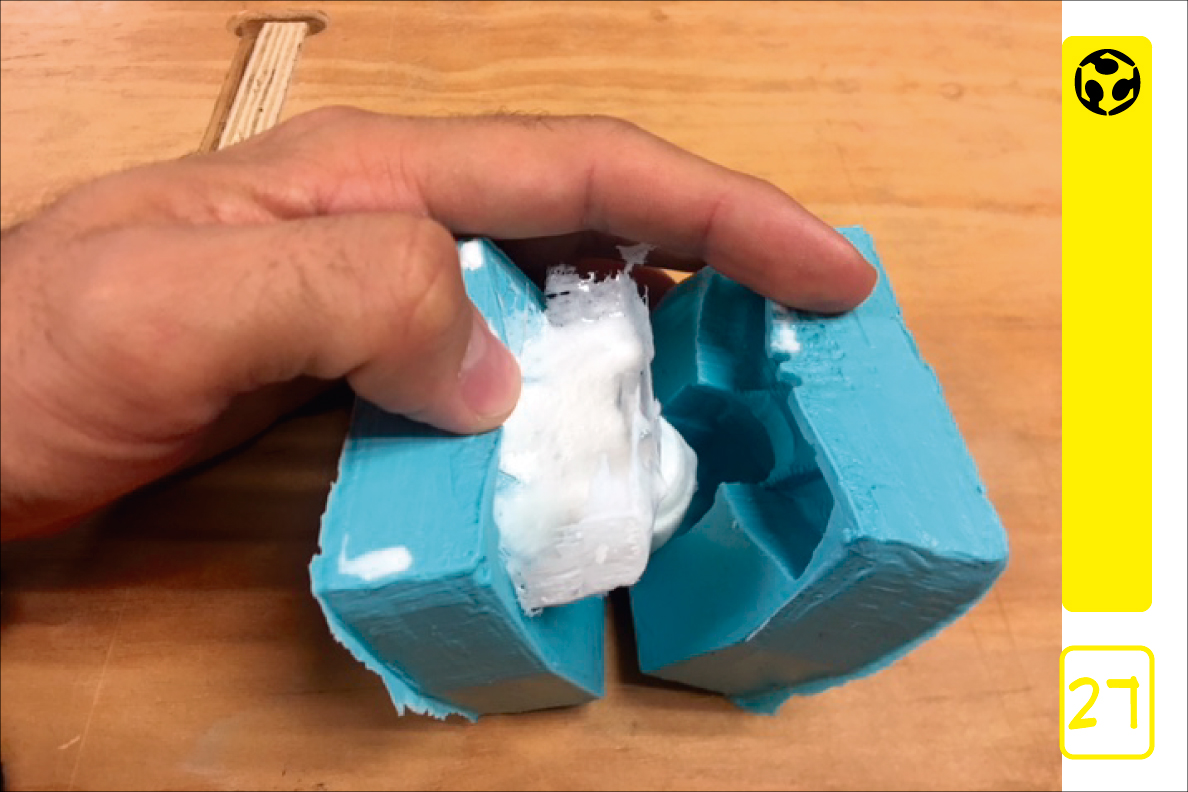
26. We stir well the plastic mixture and proceed to pour into the mold.
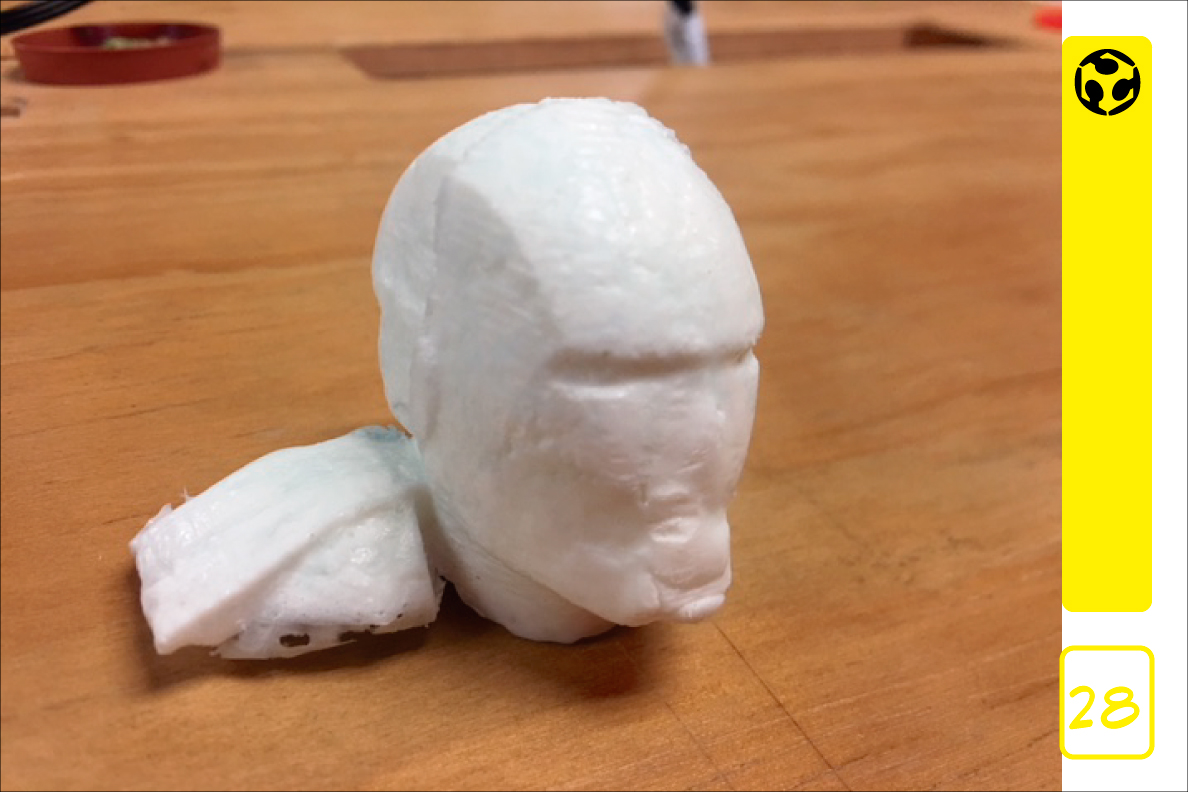
27. We wait 15 minutes to unmold and remove our piece of plastic.
28. We clean the piece of surplus plastic and it is ready..