5. 3D Scanning And Printing
Index
- Assignment
- Introduction
- Stratasys Dimensions SST 1200
- Ultimaker
- Cura
- Testing the limitaions of the 3d printer
- Getting started with 3d printing
- Creating the 3d models to print
- Printing the model
- Printed model
- Problem identification
- My second model
- Creating the 3d models to print
- Printing the model
- Printed model
- Problem identification
- 3d Scanning
- Scanning with kinect scanner
- 3 printing the scanned model
- Summary
A. Assignment
- Test the design rules for your printer(s) (group project)
- Design and 3D print an object (small, few cm) that could not be made subtractively
- 3D scan an object (and optionally print it)
B. Introduction
Cad softwares help you pull out your ideas from your mental space to you computer screens,
from here
you can enhance and share your design. Today with the advancement in technology we can make those 3d
design into real
world objects without much effort, All you need is a 3d printer. Application of 3d prining is endless,
this week we
are exploring 3d printing as part of the Fab Academy.
We have a couple of machines available in our
lab. They are
Ultimaker 2 and Stratasys Dimensions SST 1200.
B1. Stratasys Dimensions SST 1200
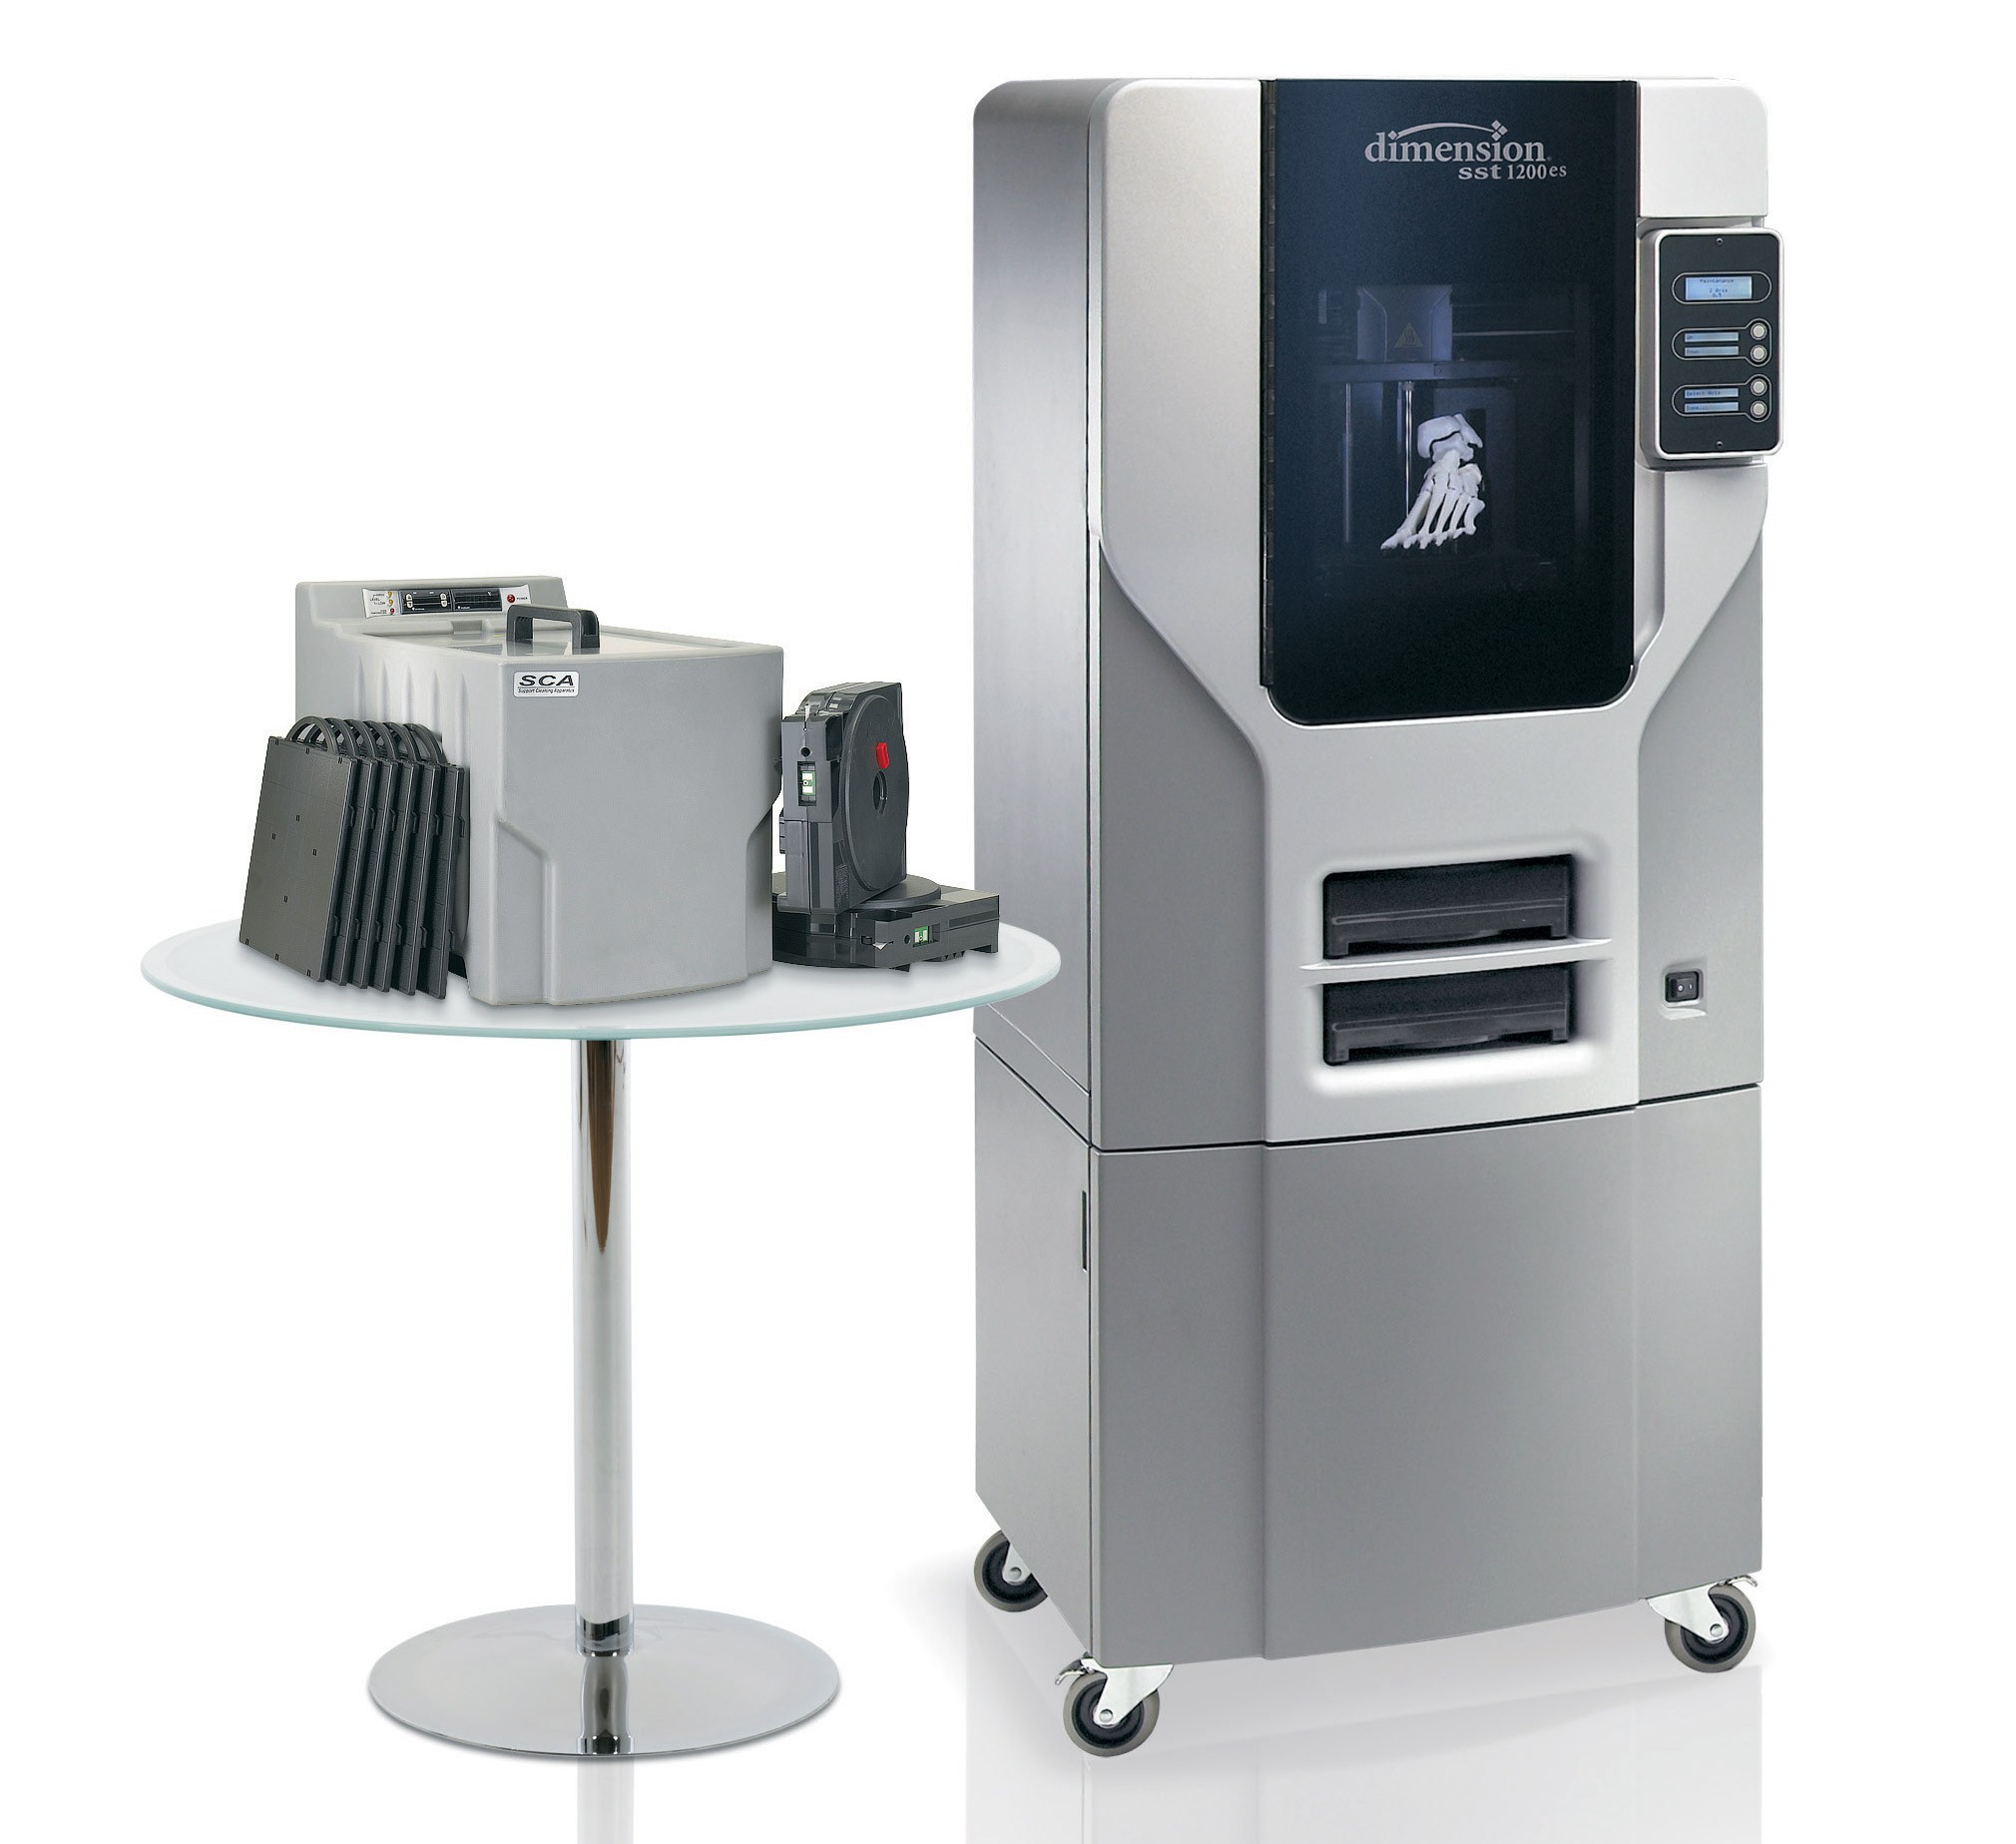
This is a bigger machine. It uses ABS plastics to make models and also has a soluble
support material. The technology employed is FDM Technology and can give a finer resolution print and at
a
greater spead. You can see that the machine is closed up and has strict temparature and humidity control
from inside. The machine can print with layer thickness as small as 0.254 mm( 0.010 in ).
I have
planned to use ultimaker for my printing purpose.
b2. Ultimaker 2
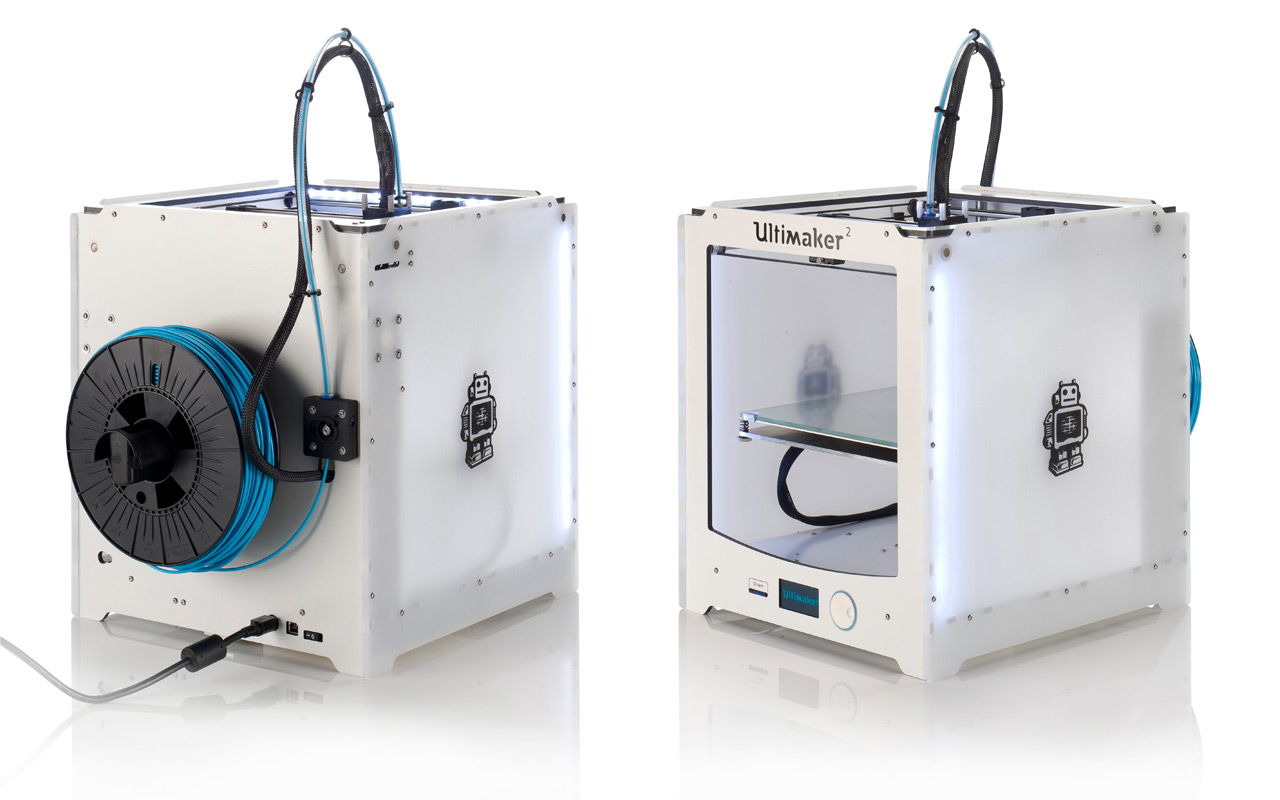
Ultimaker is a cheap and comparitively lightweight 3d printer. It has a build volume of 223 X 223 X 205 mm. The technology used is Fused Filament Fabrication where the printing material is headed to a liquid form and is extruded in layers to form the model. The size of the nozzle of the print head is 0.4 mm, the tempareture is 180 to 260 degree celcius. Though we can use wide range of material in this machine, the recommended thickneds is 2.85 mm. Layer resolution is up to 20 microns with a print speed ranging from 30- 300 mm/sec and traveling speed ranging from 30 to 350 mm/sec
b3. Cura
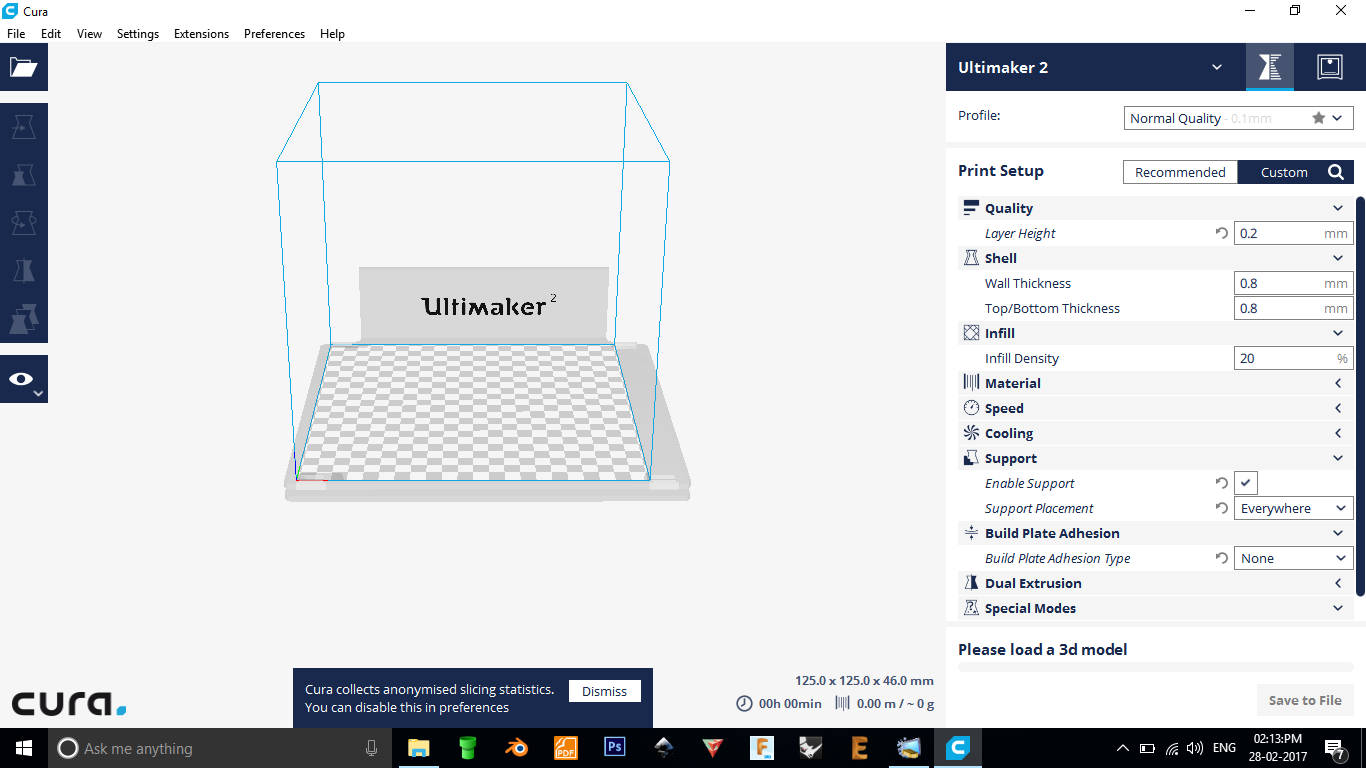
This is the software used to convert 3d models in different format like ply, stl, obj into machine unserstandable gcode format. This software is more advanced than a tpical gcode converter as it has features to view and position the model, scale, rotate etc. The ultimaker settings can be set using this software. We can set the layer and support material properties in this software. Another highlight of this software is that when we load the model it shows an estimate time and amount of material required for the print operation. This is very much helpful and also helps avoid insufficient material problems while printing.
C. Testing the limitations of the 3d printer
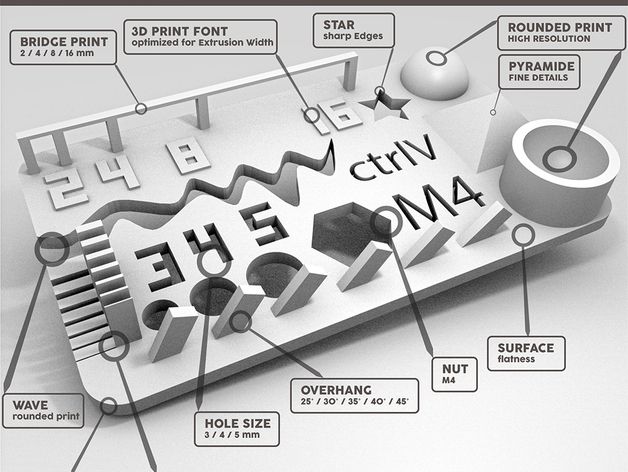
Sample taken from thingverse
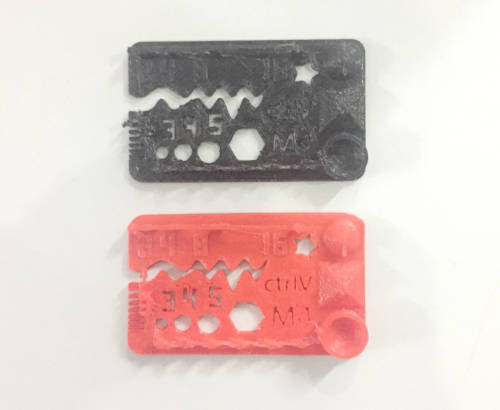
A testing design as in figure was pulled out from thingvere and it was printed in ultimaker to test the results.
The followig tests where included in this file
- size: the object is 2x50x30mm (baseplate)
- hole size: 3 holes (3/4/5mm)
- Nut size: M4 Nut should fit perfectly
- fine details: pyramide, cone, all numbers
- rounded print: wave, half sphere
- minimum distance & walls: 0.1/0.2/0.3/0.4/0.5/0.6/0.7mm
- overhang: 25°/30°/35°/40°/45°
- bridge print: 2/4/8/16/mm
- surface: all the flat parts
The actual and printed size comparisons are shown below.
| Sl.No | Paremeters | Visual Inspection | Physical Inspection |
|---|---|---|---|
| 1 | size: the object is 2x50x30mm (baseplate) | Size is OK, small warphage at corners | 1.6X48.83X28.9mm |
| 2 | hole size: 3 holes (3/4/5mm) | Visually OK | 2.7/3.84/4.74mm |
| 3 | Nut size: M4 Nut should fit perfectly | Visually OK | Can't fit the nut(deviation=1.2mm) Hole dia 6.6mm,Nut dia 7.8mm |
| 4 | fine details: pyramide, cone, all numbers | Visually OK | Minor deviations |
| 5 | rounded print: wave, half sphere | Visually OK | Printed correctly |
| 6 | minimum distance & walls: 0.1/0.2/0.3/0.4/0.5/0.6/0.7mm | Visually OK with minor defects | Exact measurements not taken but visually all printed |
| 7 | overhang: 25°/30°/35°/40°/45° | small breaks in walls | Visually verified,OK |
| 8 | bridge print: 2/4/8/16/mm | Visually OK | 2/4/8mm came correctly,16mm easily brokened |
| 9 | surface: all the flat parts | Visually OK | Small warphage at corners |
D. Getting started with 3d printing
D1. Creating the 3d models to print
I am using fussion 360, which is my favorite tool for cad. My idea was to print a removable gear inside
a
case, Which can be rotated inside the case. The following are the screenshots of me making the model.
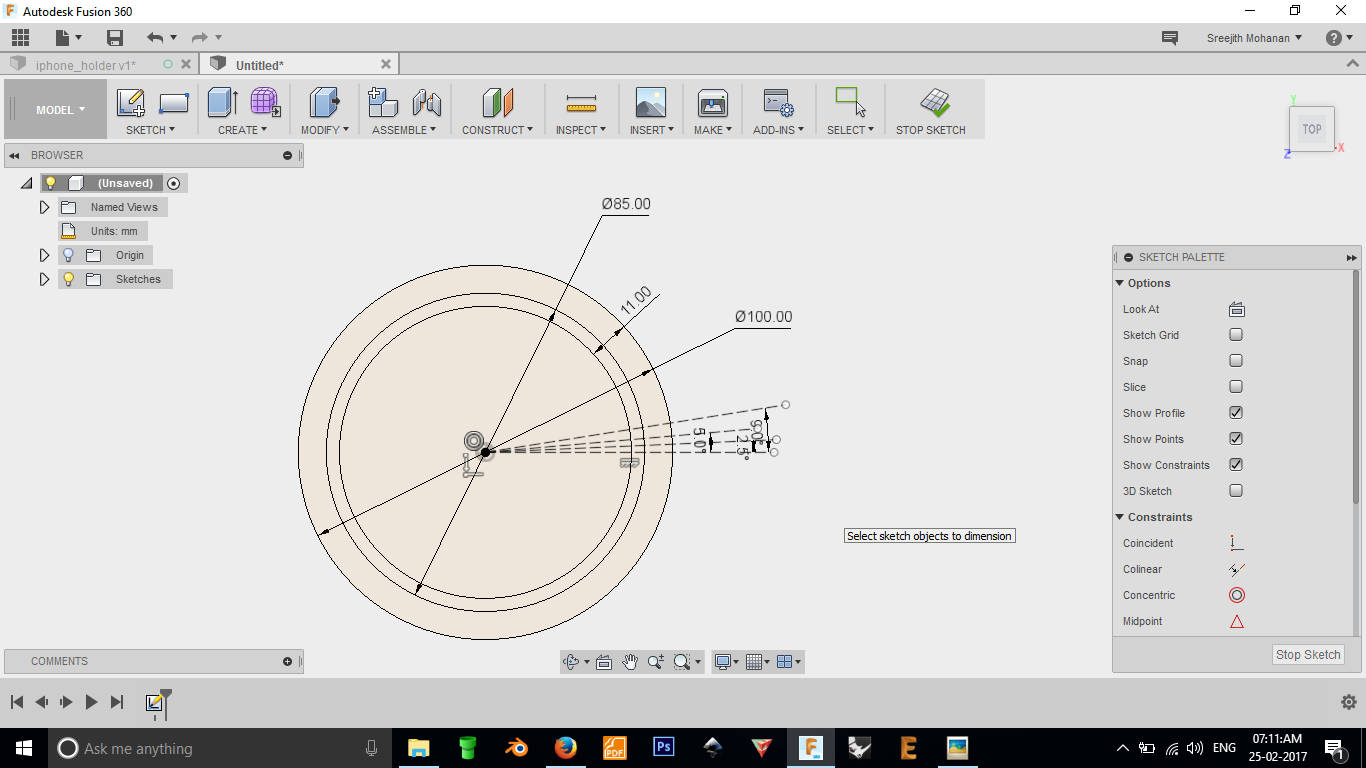 1. Creating the gear, starting with a couple of circles
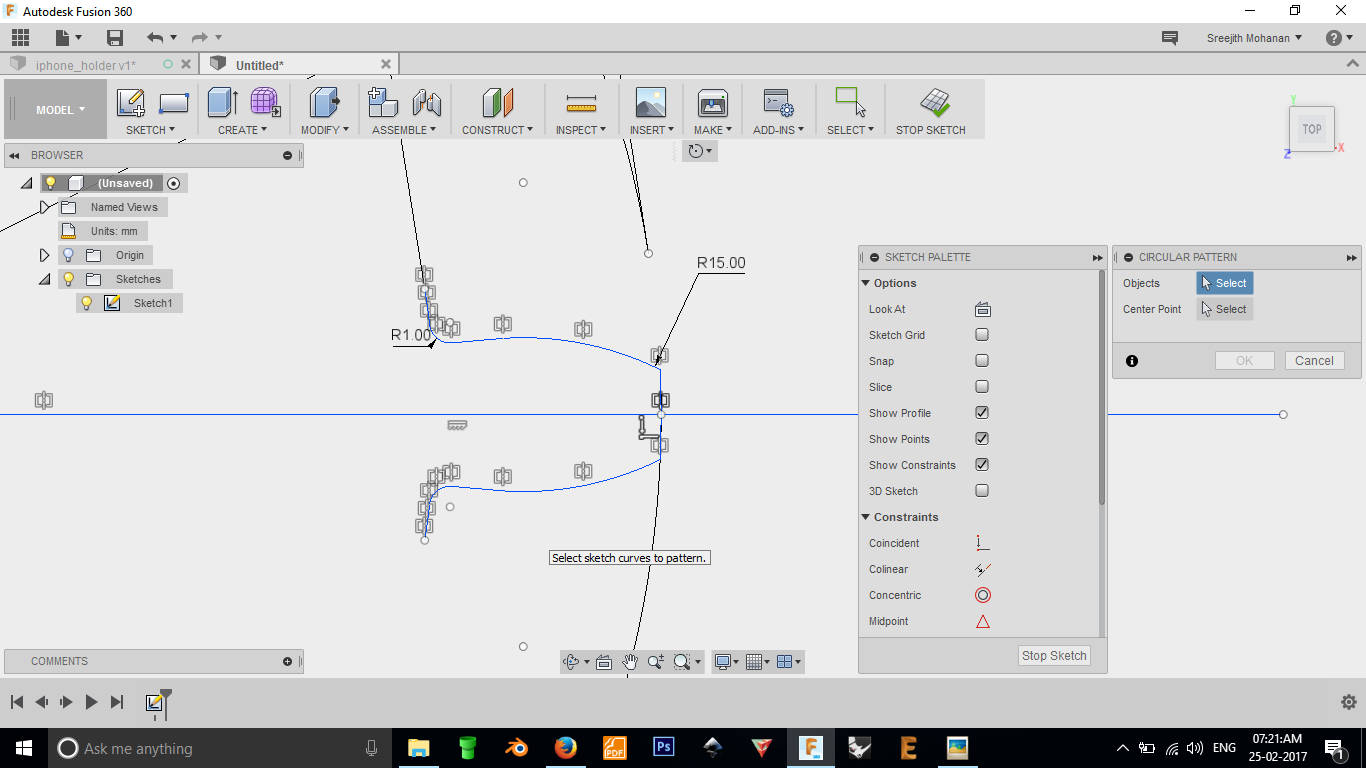
2. Creating the groove

3. Duplicating the groove to create the gear
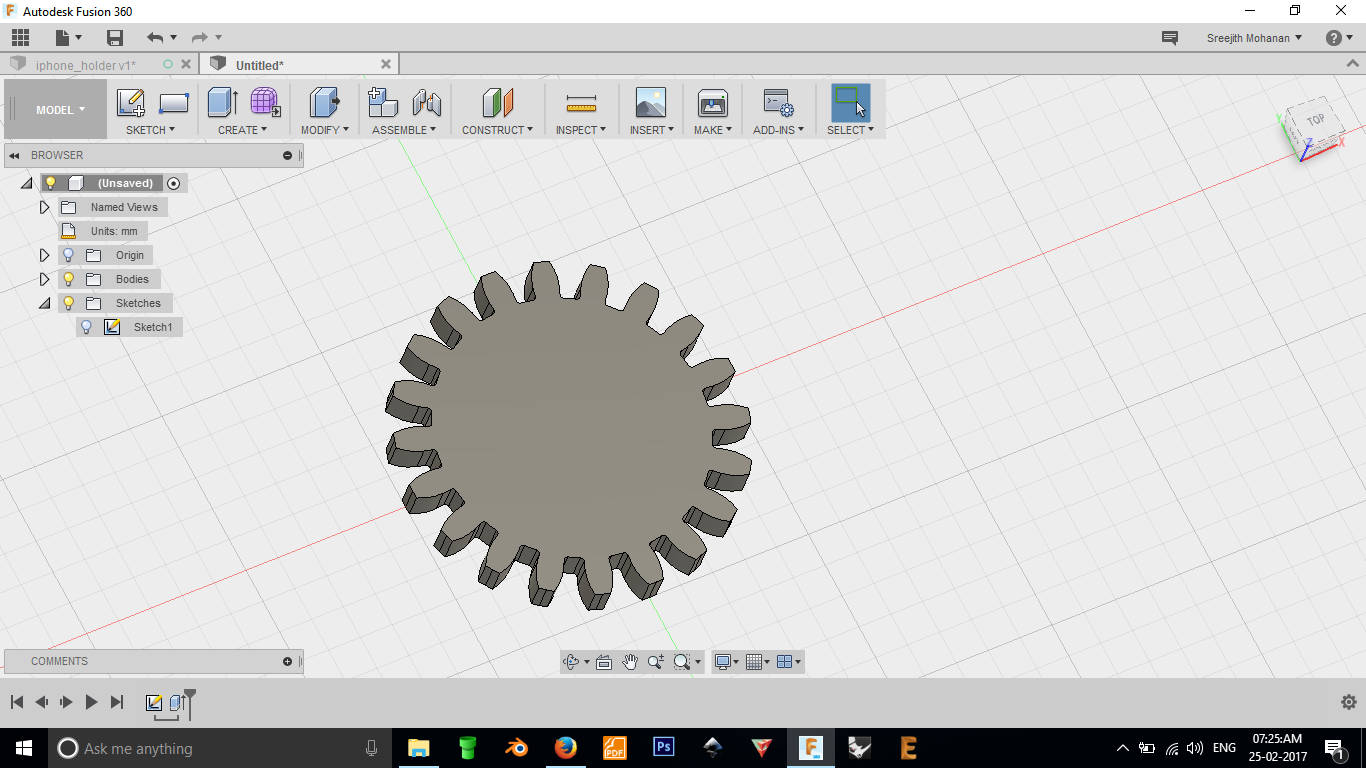
4. Extruding the sketch
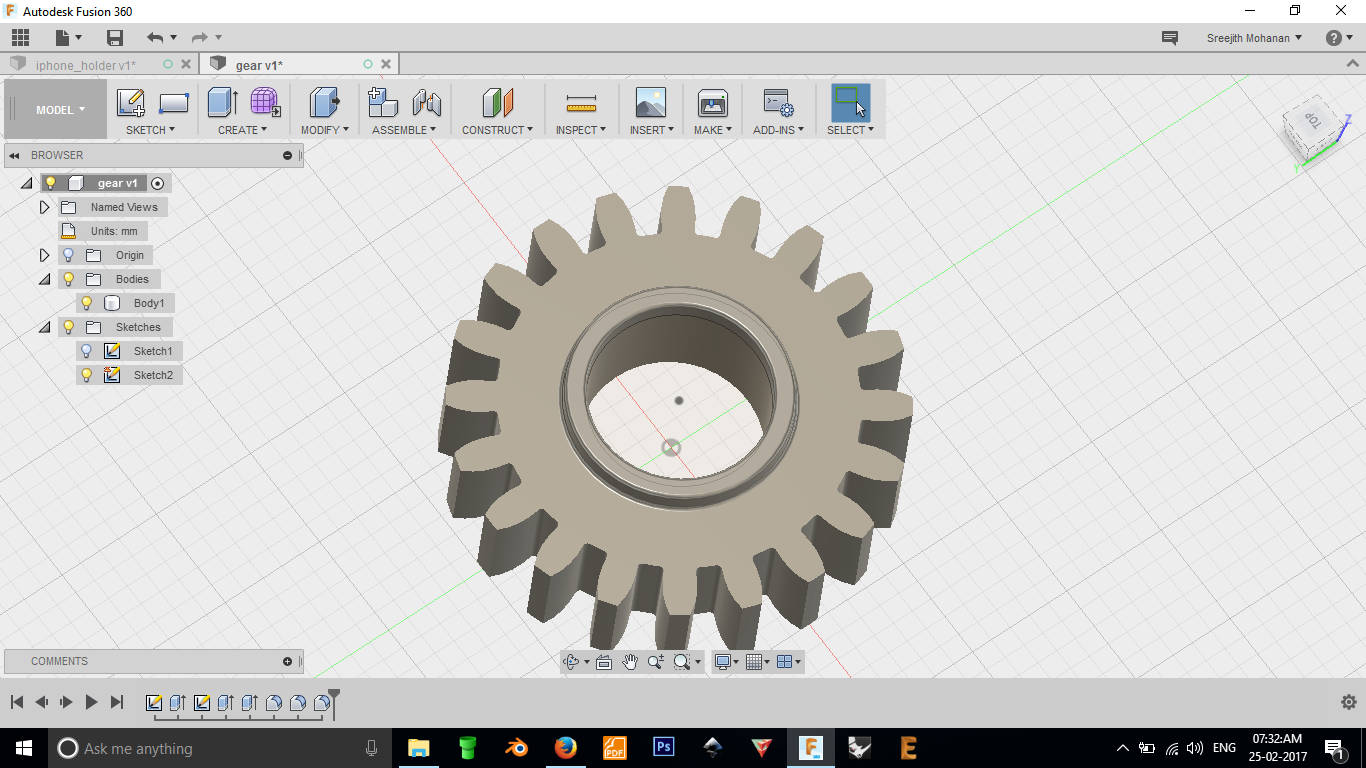
5. Making the hole at the center
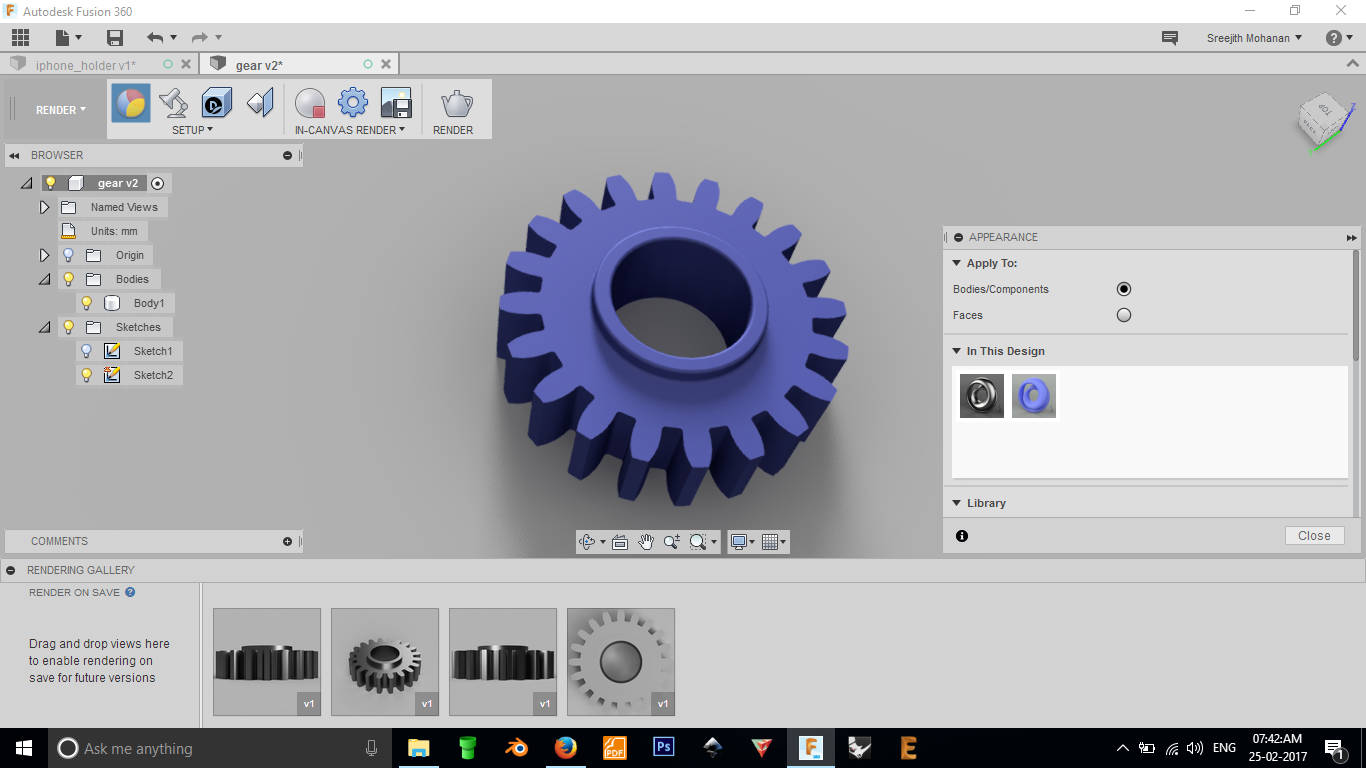
6. Applying material
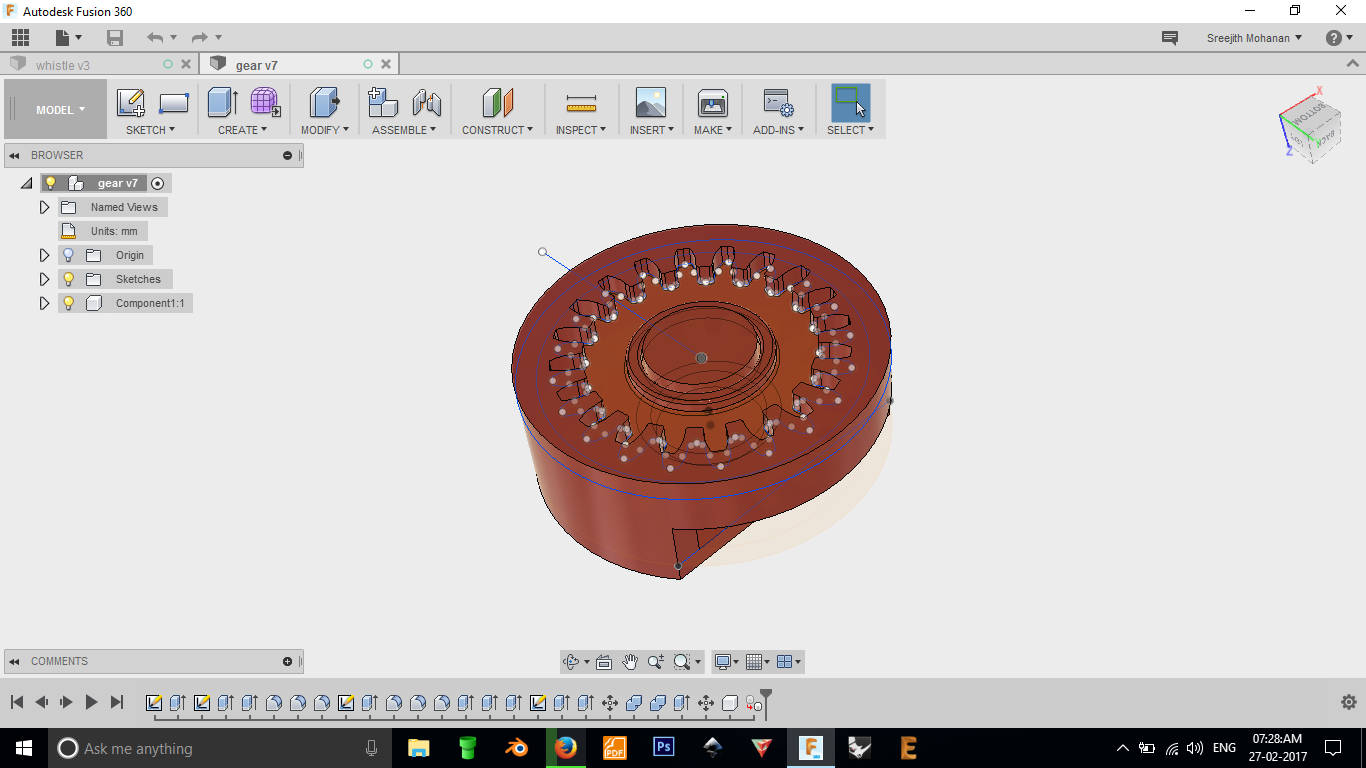
Gear placed inside the casing
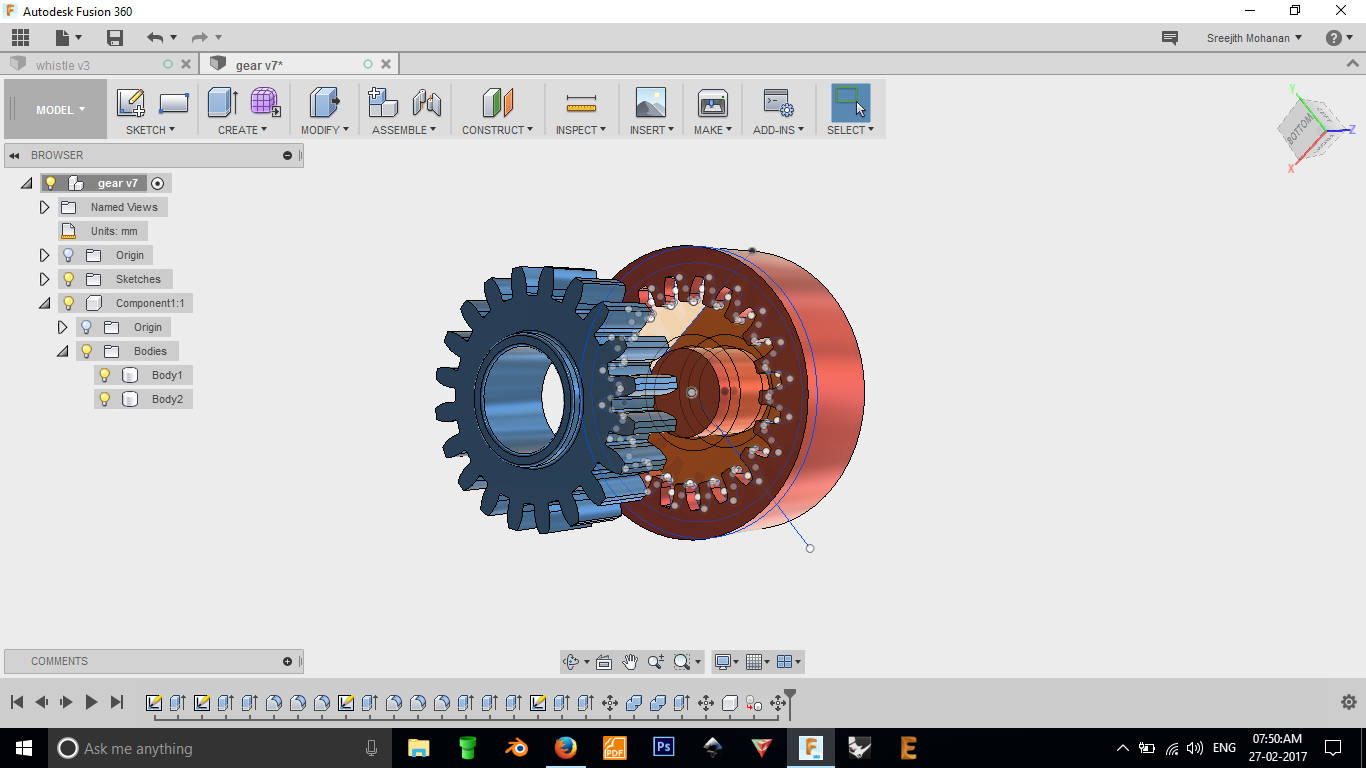
Detached view for better comprehension.
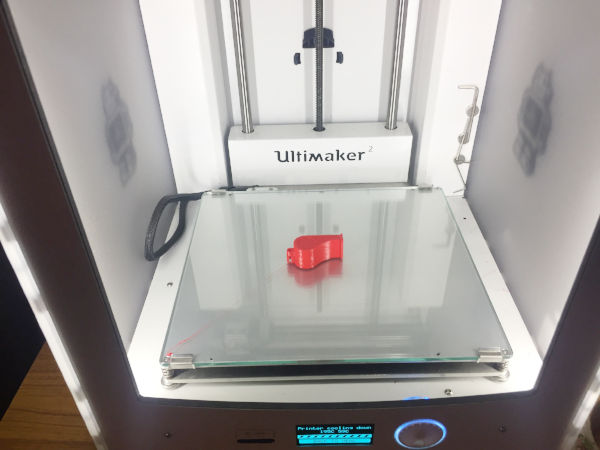
d2. Printing the model
7. Import the saved stl file into CURA for 3d printing,
Place the model properly, transform it if necessary. Now change the print settings and generate gcode.
This is gcode file is copied into a memory card and transferred into the ultimaker to print.
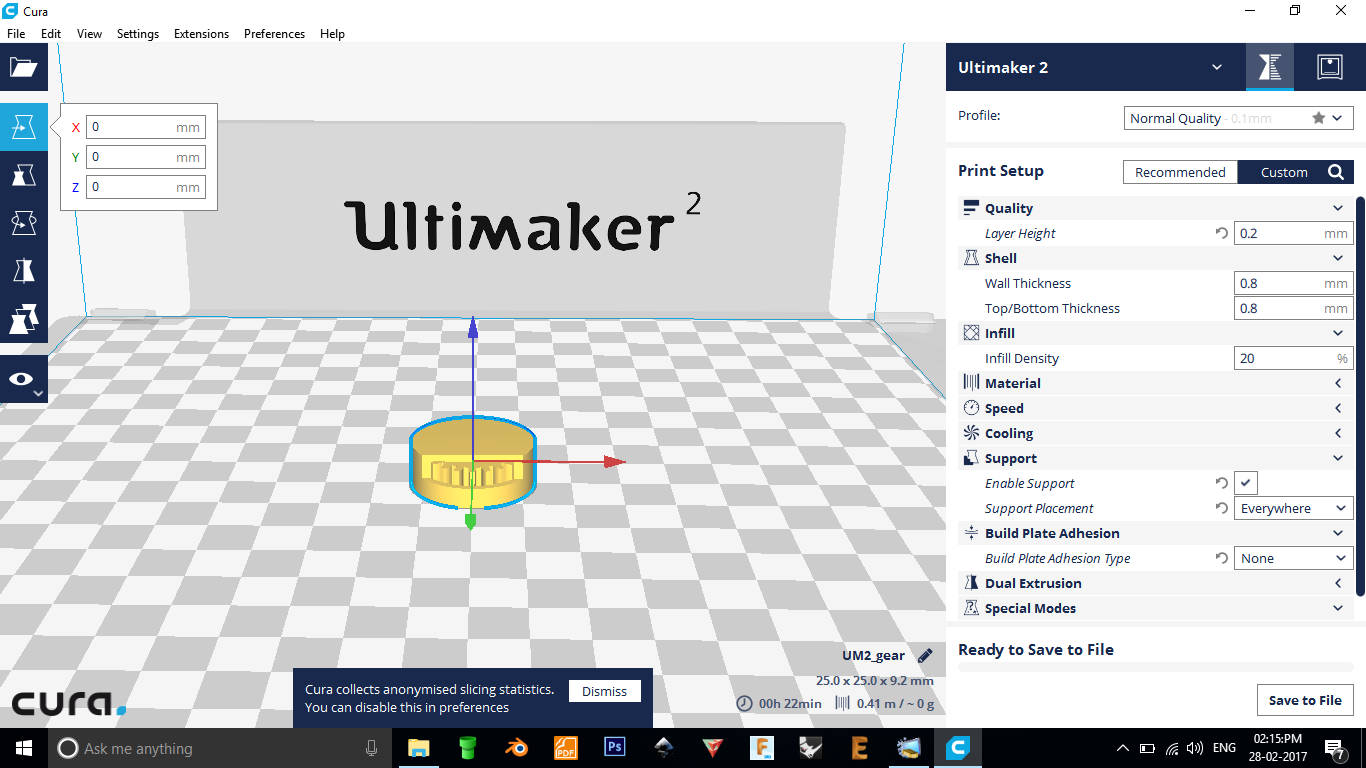
7. Model in cura.
Original fussion file
Original stl file
d3. Printed Model
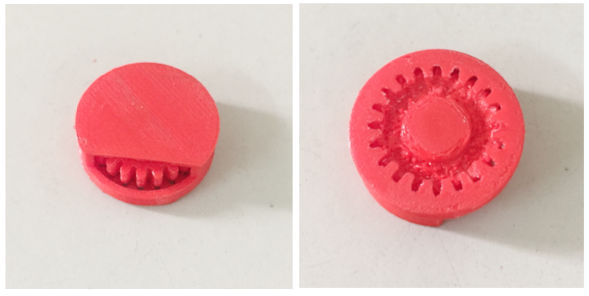
Front and back side of the printed model
Unfortunately for me the printing did not work well and the printed model was all fused together. i was not able to move the gear.
d4. Problem identification
- Though i have provided allowance at places, as i scaled down the model to one fourth its original size, the allowance was too small and the plastic which needed to stay separated fused on to each other.
- My placement of the model for printing was wrong. I placed it in such a way that the gear opening was on the bottom. But now i realize, it would have worked if i did it upside down.
- First when we started the machine to print, the extrusion was not happening, seems like the material has clotted within the nozzle. To fix that we had to pull out the filament and cut the clotted portion and reinsert it. This worked fine but unfortunately when we reinserted the filament to the tube.The stepper moter was not pulling it in. After consult with the lab technician it was found that a small bit of the filament was stuck in the stepper. Later we had to remove that to make the machine work fine. The point to appreciate is the maintainability of the ultimaker machine
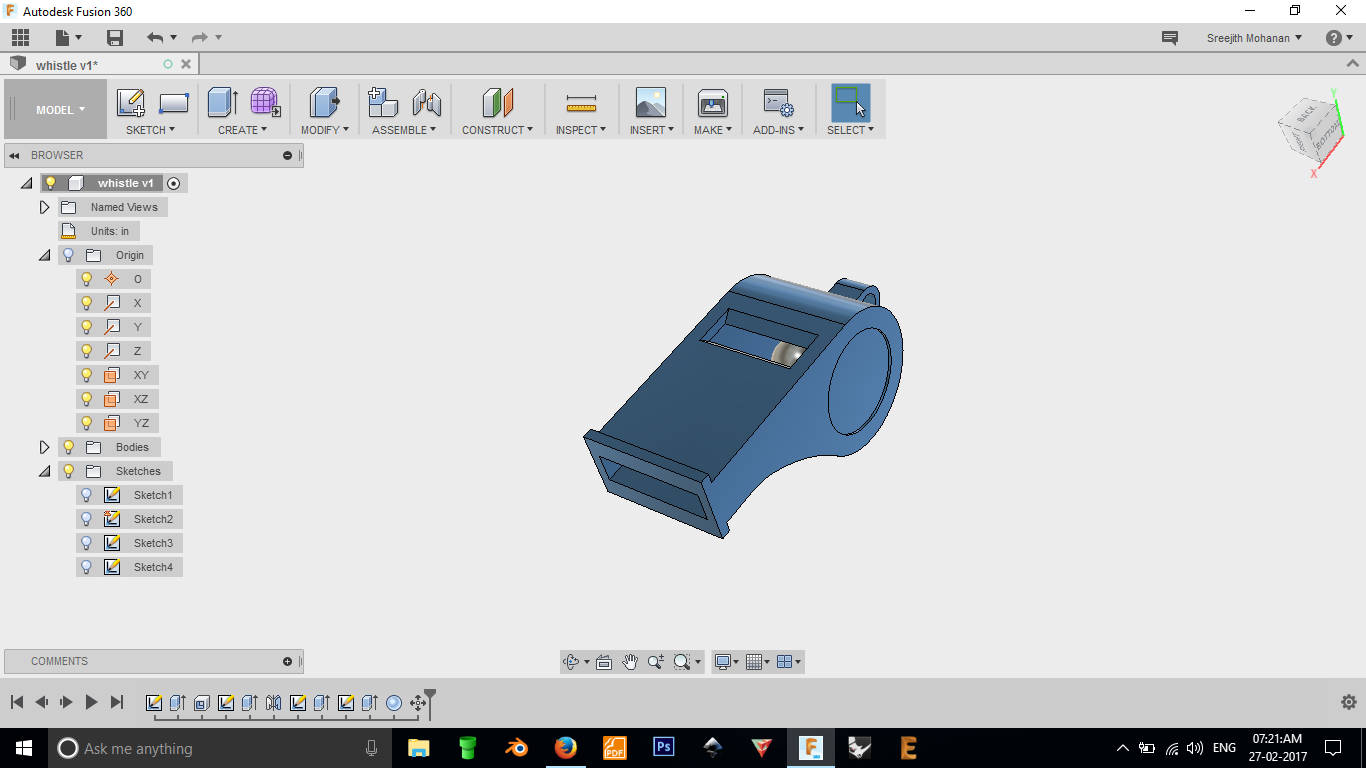
e. My Second Model
I made another model, that was of a whistle with a ball inside.
This models has a ball inside it as well as it is a shell kind of object and therefore it cannot be made
by
any substractive methods.
Step by step procedure
of making the whistle in fussion is shown below.

1. Creating the basic shape
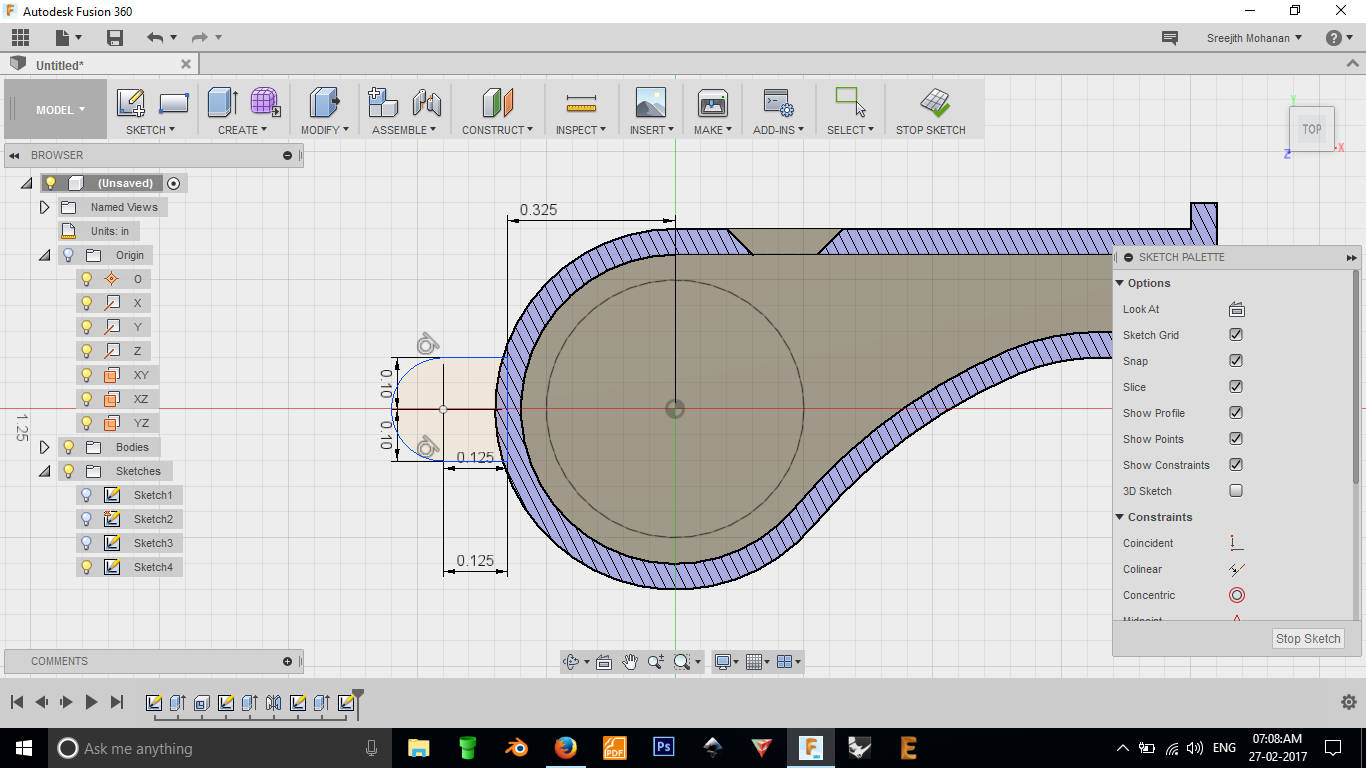
2. Creating the cuts
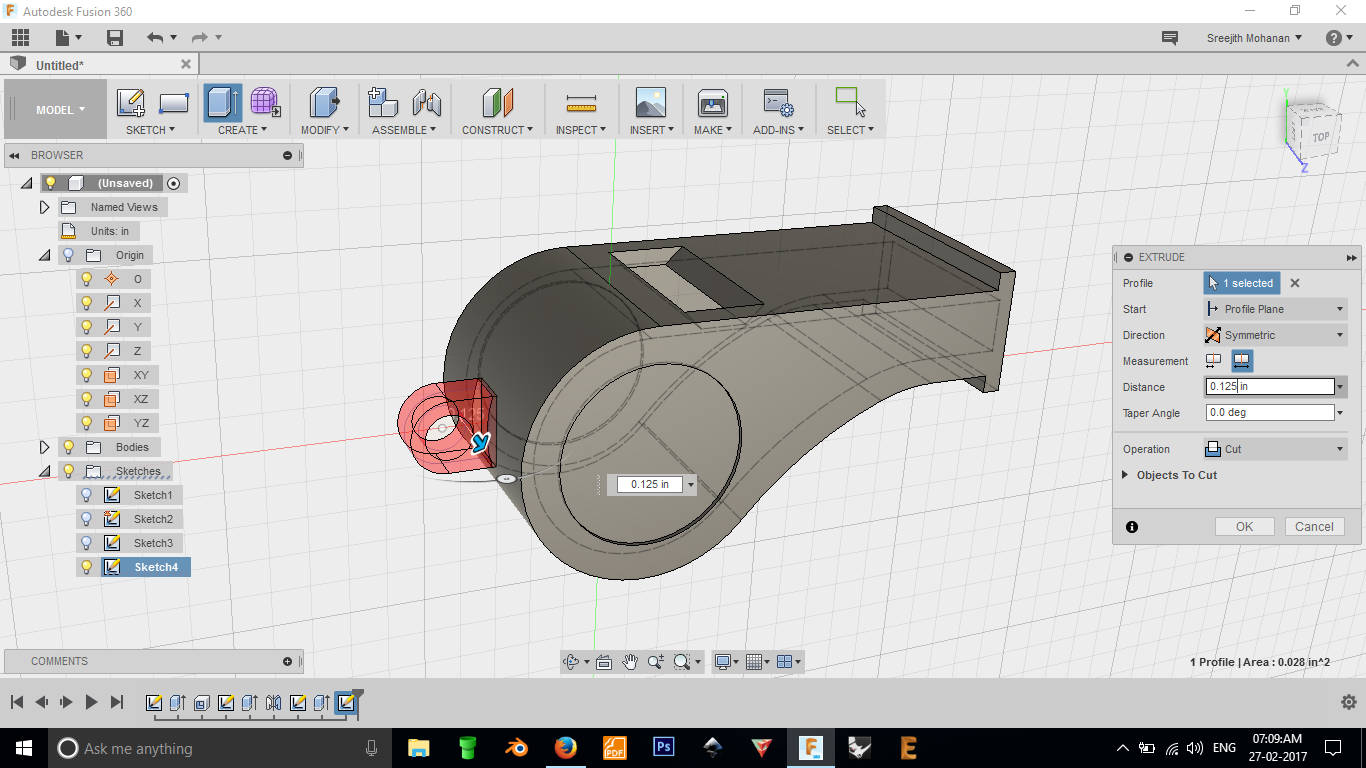
3. Creating the holder
4. Finishing up

Final rendering of the whistle
Model in 3d
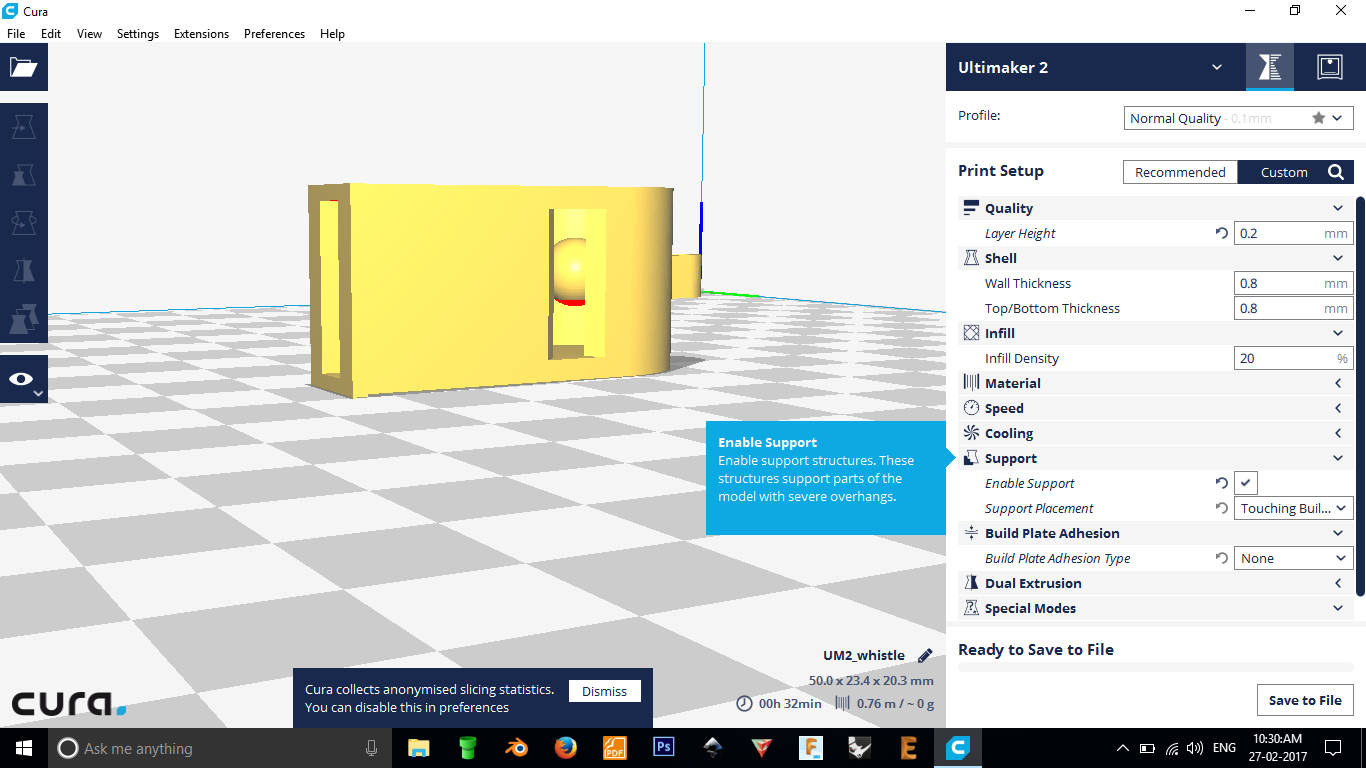
7. Model imported in cura
Original fussion file
Original gcode file
e2. Printed Model
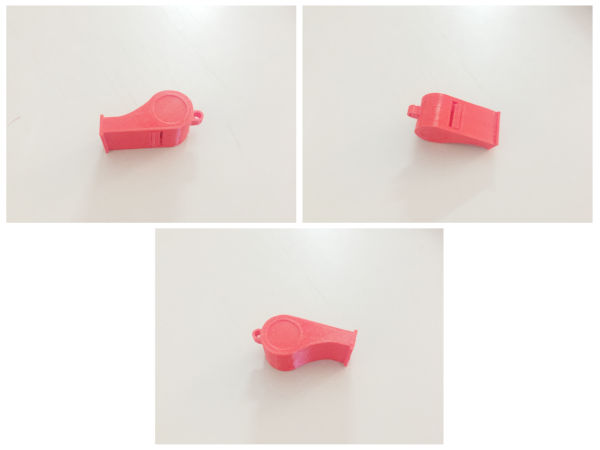
Different views of the printed model
This time the printing worked well and the only issue was that of the support material. The inside of the model was filled with support material which i had to manually remove and that was a tedious process.
e3. Problem identification
- Removing support material is a challenge if you print these kind of models in a priniter like ultimaker. This should have worked better if i printed this in Stratasys Dimensions SST 1200 where the support can be dissolved away.
f. 3D Scanning
We can 3d print a real world object by first creating a 3d model of them.
This
is where 3d scanners come handy. There are a wide range of 3d scanner which work on different priniples.
The most popular among them is kinnect 3d scanner. First introduced as a part of the xbox gaming
platform , the senson started
to gain popularity as a 3d scanner. Now many companies are makeing 3d scanners like kinect independently
as the
sensor itself. One such product it realsense by intel. These both devices share the same technology.
They have a
infra red projector, IR camera and normal RGB camera. The projector projects circular patterns of light
at the object.
The pattern projected on the body is recoded by the IR camera and this correspandance is used to find
the 3d spale
of the object. These devices work in real time, ie 3d estimation happens many times in a second.
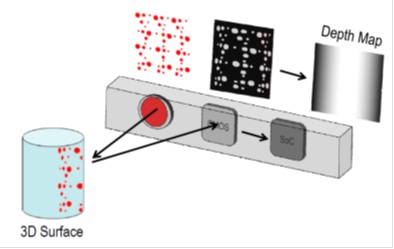
Image source depthbiomechanics
f1. Scanning with Kinect Scanner
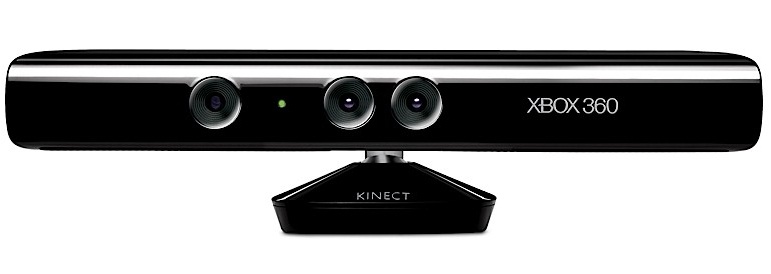
image source www.gamerassaultweekly.com
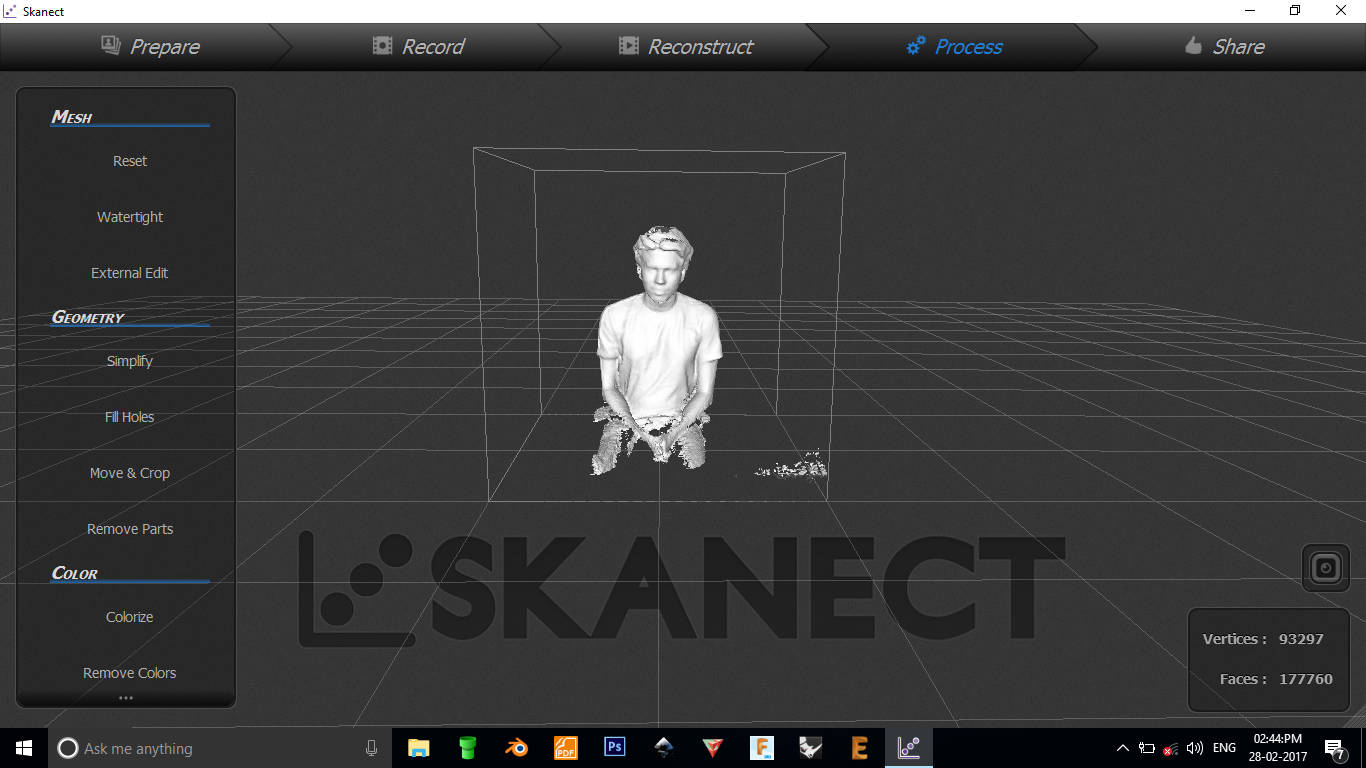
I used the software Skanect for 3d scanning. Skanect is a propiratory software
i could only get a free version with limited features. The limitation include the model resolution. The
free
version of the software only lets you save a low resolution model. Also you cant export a texture in the
free
version. We had the kinnect and a camera stand but fixing the kinnect on the stand was a mess. Thanks to
Rahul and Syed
who 3d printed a the kinnect holder for the stand we had , they also tweked an office chair to make the
scanning easy.
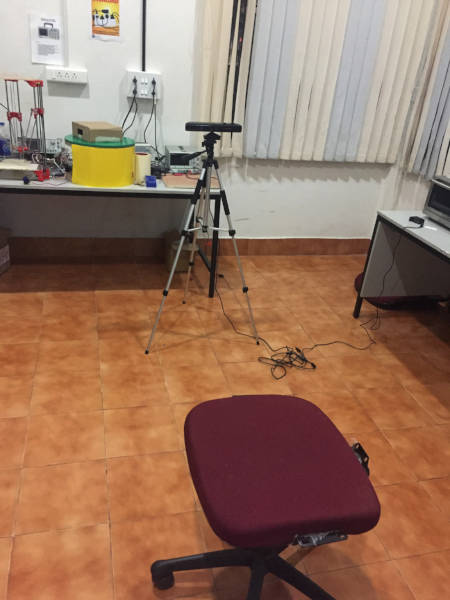
This it our scanning setup, we use the kinnect and a modified revolving chair for
the process.
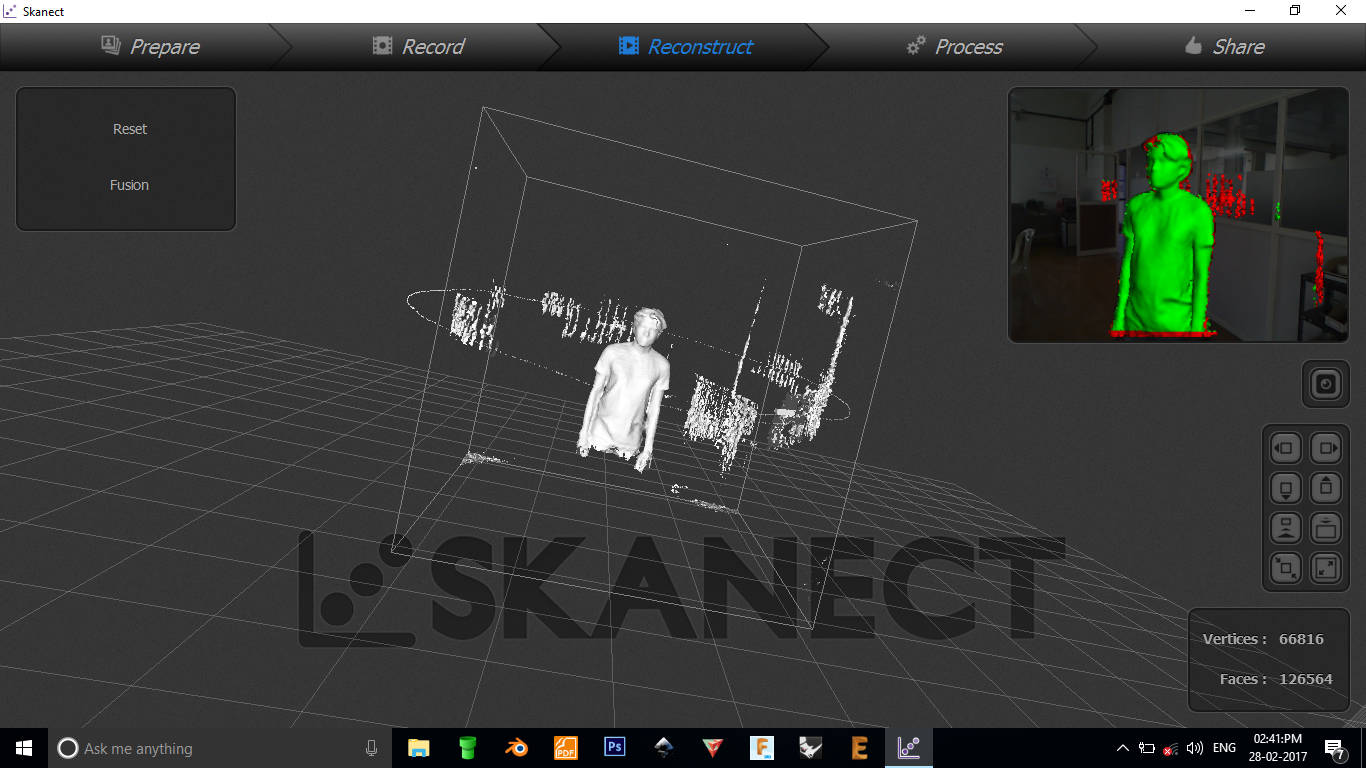
Scanning with skanect
Scanning with skanect is very easy,the following link from instructables will
get you started
with it. link.
The model generated by skanect often have some additional things
such as a nearby wall or stand.So its often necessory to remove the unwanted parts from the model before
going
ahead with printing it. I use blender for this process. I opened up the model in blender and then
selected the
unwanted vertices/faces in edit mode and then deleted them. Now i had the model alone ready to
print.
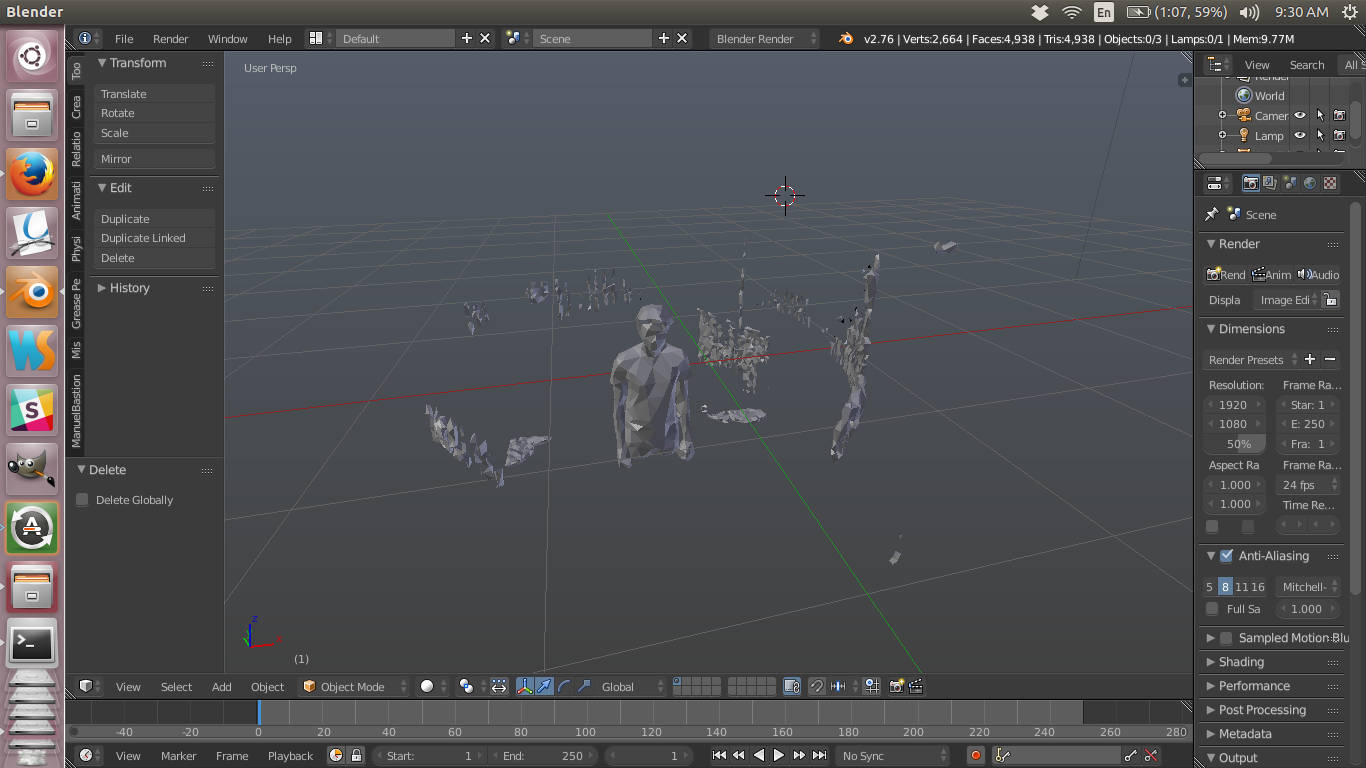
Correcting the scans in blender
Original blender file of
standing
pose
Original stl file of standing
pose
I did one more scan, now in a sitting pose.
Scanning with skanect
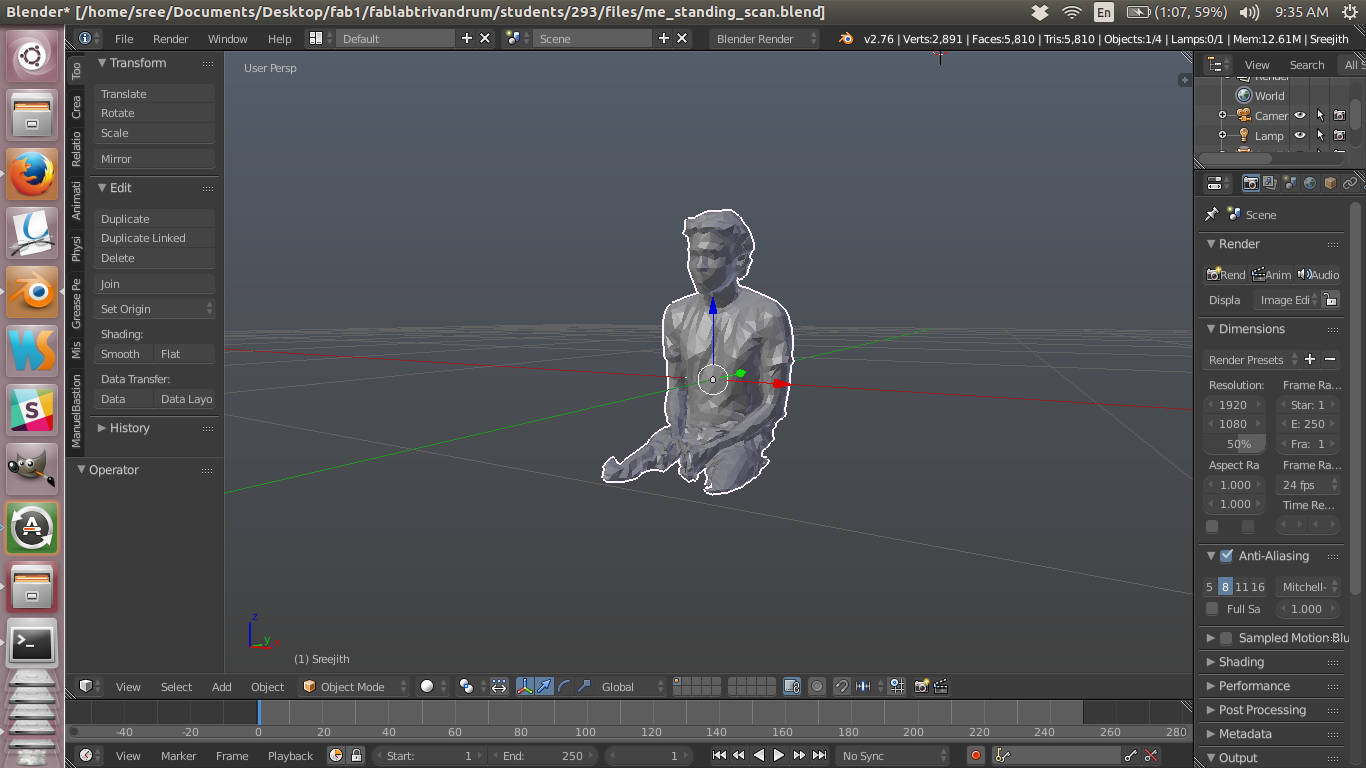
Correcting the scans in blender
Original blender file of sitting
pose
Original stl file of sitting
pose
f2. 3d Printing the scanned model
The scanned model which was further refined with blender was exported to cura
for printing. I also applied a sub-surf modifier to smooth the model and also added a base to the model
as you can see in the following image. The files are attached below.
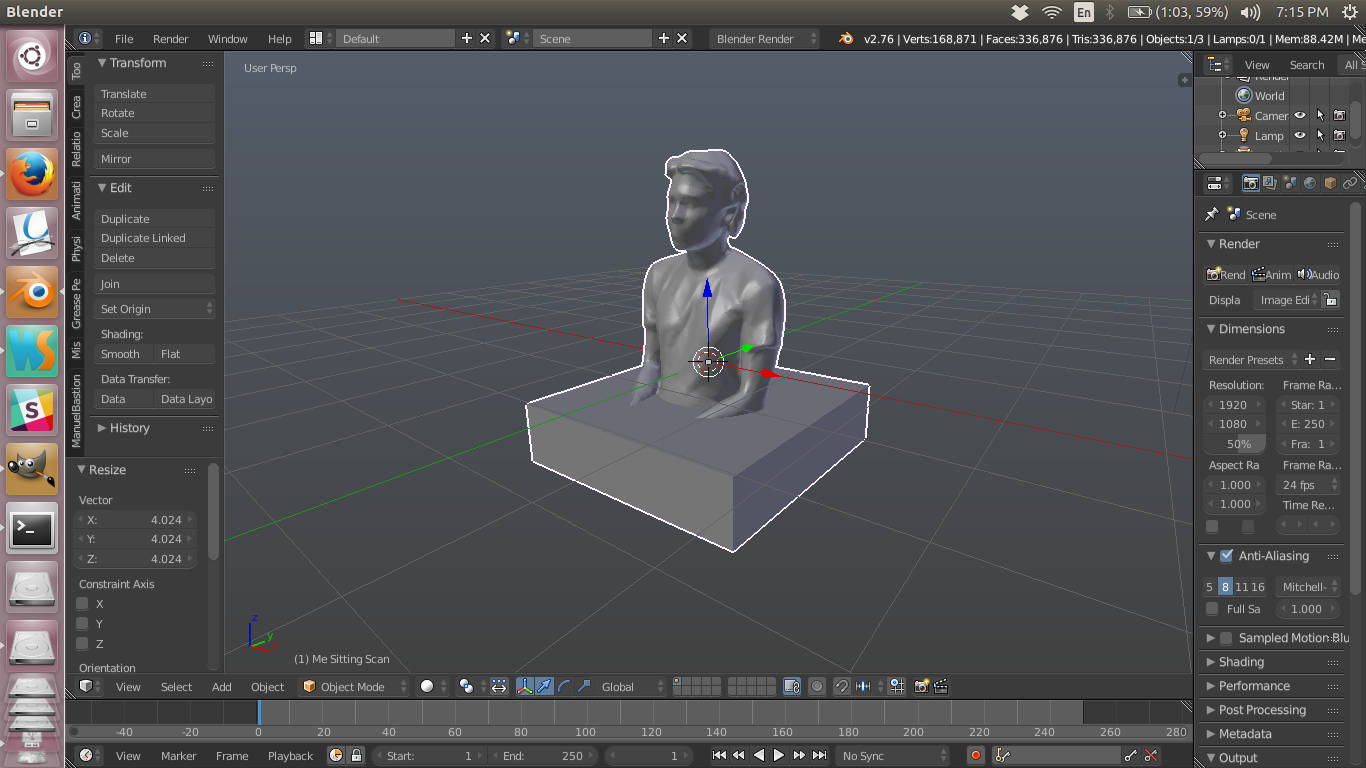
Final model used to print
Original stl file of sitting
pose
with base
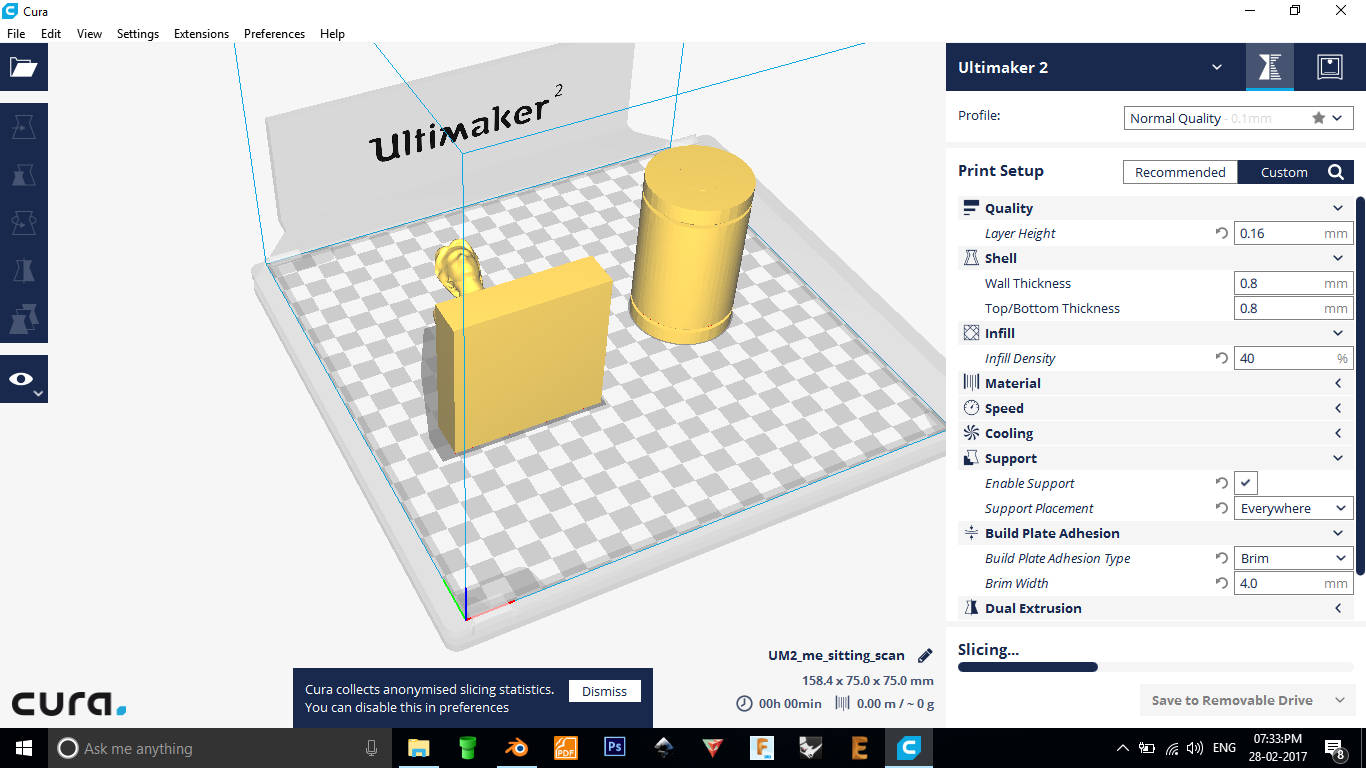
Model in cura: The model was placed in a lying pose so that there wont be support
for the
face and therefore can avoid damages to the face while removing the support material. The model was
printed along with
another model which you can see in the right.
The gcode was generated and the model was given for printing. But
unfortunatily
unlike other times, the filament was not being extruded. On close inspection it was found that the
filament was damaged
so that the stepper motor at the back was not able to pull it up. So the only option was to remove it,
cut out the
filament near the damaged part and reinsert it again.
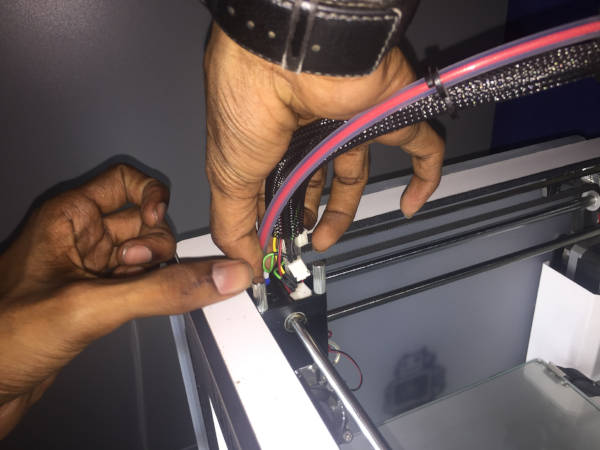
1. Removing the filament by pushing the white thing and pulling the tube
containing the
filament
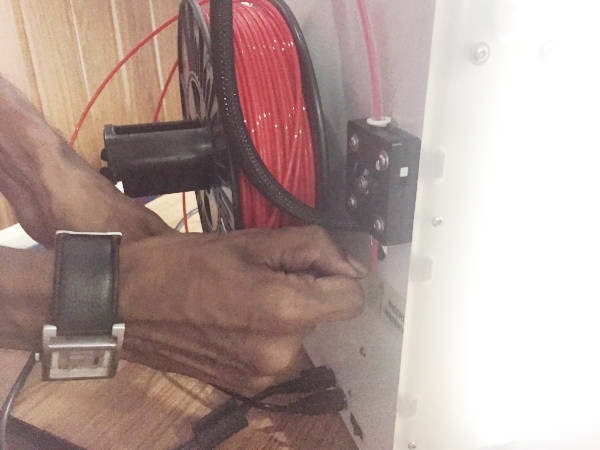
2. Trying to push the filament, may be some external support might help
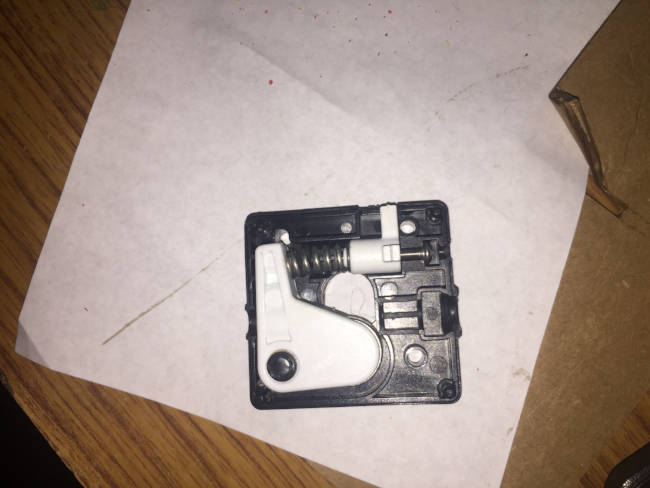
3. The above step did not work so we had to remove the stepper case.
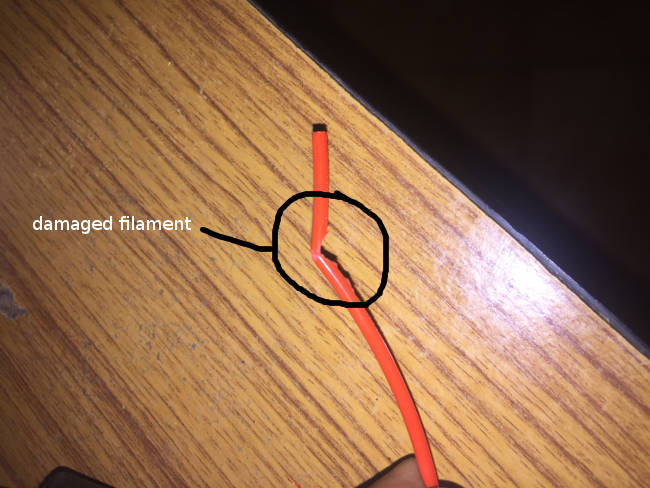
4. This is the damaged filament
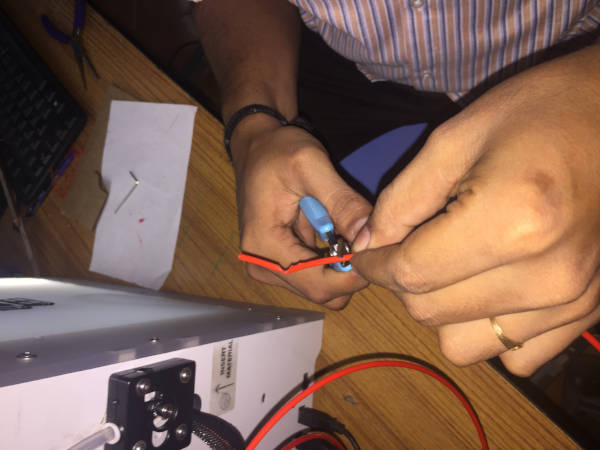
5. We had to cut out this part.
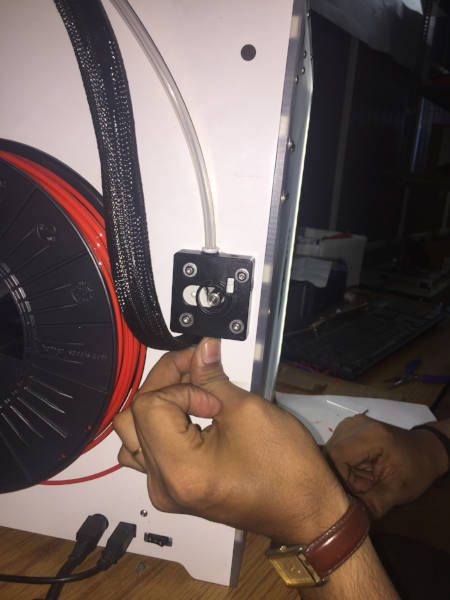
6. Finally reinserting the model
After a long period i got my model printed.

G. Summary
- Learned to use 3d printer.
- Make a couple of 3d prints
- Learned and make few scans with kinect and scanect
- Troubleshooted issues with the ultimaker

This work is licensed under a Creative Commons Attribution-NonCommercial-ShareAlike 4.0 International License.