Computer-Controlled Machining
Goals
- Make something big (on a CNC machine)
Design the object
I understood long ago that I lacked any artistic sensibility, so for this week I took a look around my lab, looking for something that could be useful in any way. It came to my attention that our wood working area could have used a table, preferably a tall one, something close to a workbench.
So I fired up Onshape (I switched from FreeCAD during week5) and, after more than a cursory glance at OpenDesk in search of inspiration, I made this:
Finished the assembly I exported every component as a 2D drawing in .dxf format, opened them in Adobe Illustrator in order to check that every path was indeed closed (just select a path and press ctrl+j in order to close it) and imported the drawings inside VCarve in order to start making the toolpaths.
First of all I took care of the Tbones/dogbones a.k.a "how to solve the inside corner problem": any time you want to cut out an inside angle, you need to keep in mind that you can't reach all the way into an inside angle with a rounded bit, so you have to compesate for it, pushing a circle into the corner of the drawing.
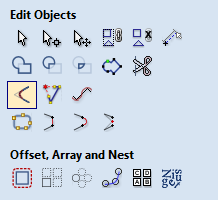
At first I started making the dogbones manually, adding half circles at any given inside angle, but it struck me as a very impractical way to accomplish my goal; a quick search pointed out that VCarve Pro has a tool that automates such a task, called "Create fillets" (inside the drawing menu):
Creating the toolpaths
In order to create the toolpaths to successfully machine your work you have laid out all the parts on your VCarve work area, select all the parts that will share the same path and choose the rigth option for that cut; as an example here is my work and a summary of my toolpaths options:
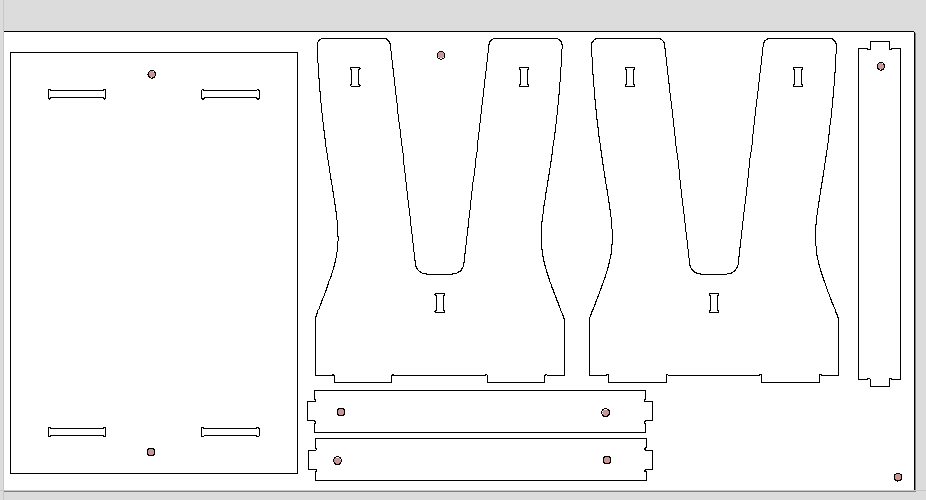
Let's break it down a bit: I have 3 toolpaths (internal cuts, external cuts and shallow pockets in order to safely place the screws (and whashers) that kept my OSB sheet from flying around during the milling) and this is an overwiev of the settings I chose for each of them:
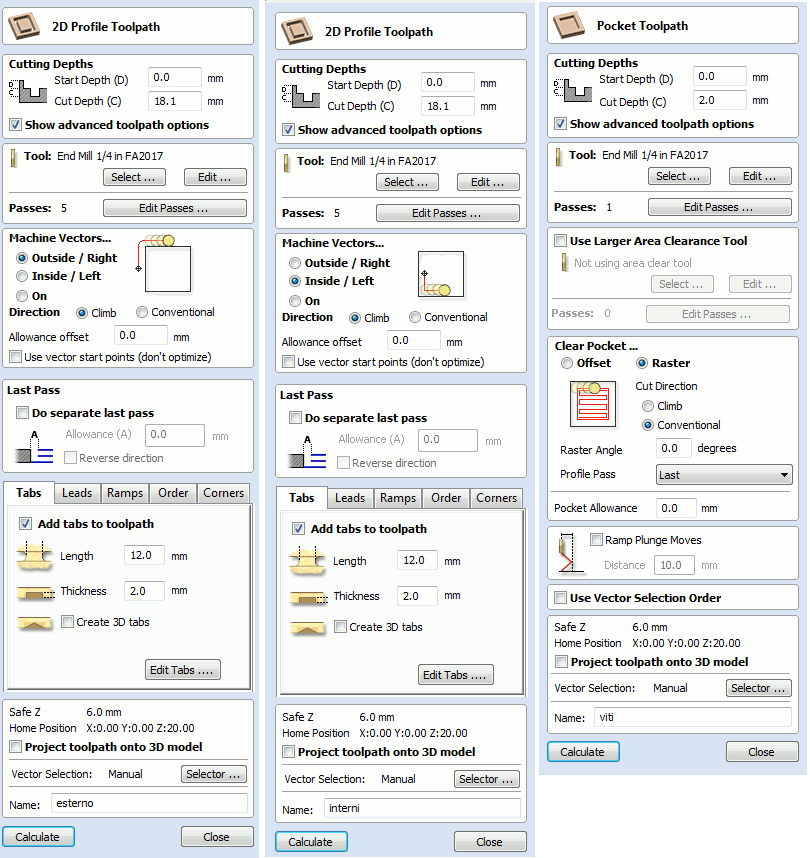
Most of the settings are quite self-explanatory, so let's focus a bit on the "Tool" section: here you can select your end mill from a list and set the its parameters. In order to set the right parameters for your end mill of choice you have to keep in mind 3 simple formulas:
- Chip Load = feed rate / (rpm x number of cutting edges)
- Feed Rate = rpm * chip load * number of cutting edges)
- RPM = feed rate / (chip load * number of cutting edges)
These are the settings I used this time:
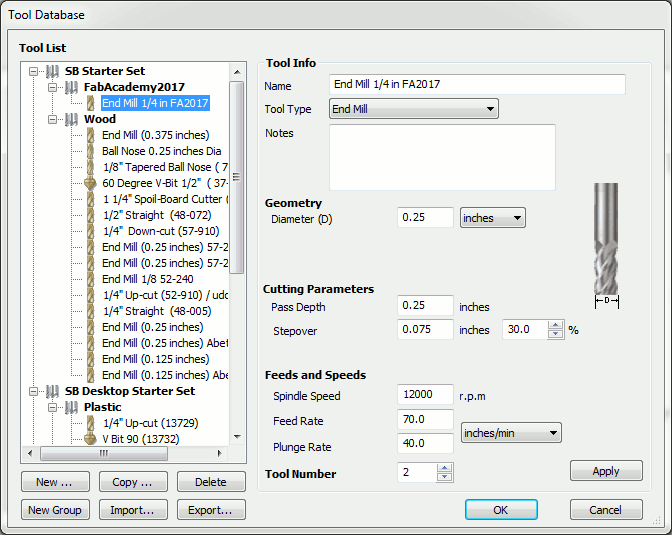
You may have noticed that my feed rate is quite low, according to the formula (with a chip load 0.010 - according to the specifics given by Onsrud website - my feed rate should have been around 240 inch/min); I chose to lower it because with a higher setting the machine made a high pitched, quite unsettling sound.
Once you finished setting the options you can export the toolpaths and set up your ShopBot for the actual milling.
ShopBot!
Enter the ShopBot.
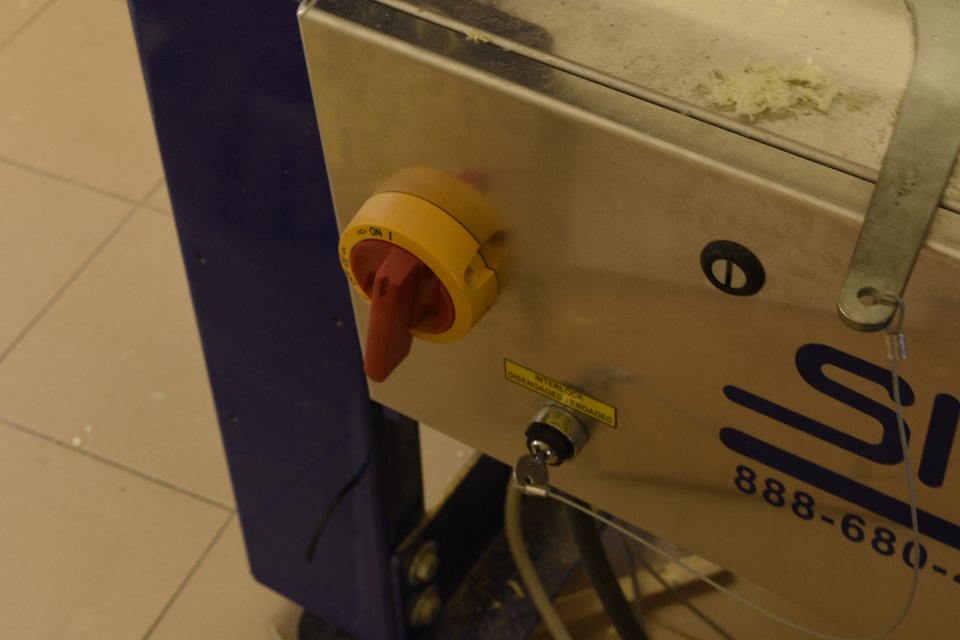
The power on procedure for the shopbot involves turning on two switches: one for the machine itself (on the left in the photo) and one for the spindle; the spingle one will turn only if the key attached to the wrench used to change the end mill is inserted: this safety measure will prevent any accidental spindle start while the operator is operating on it.
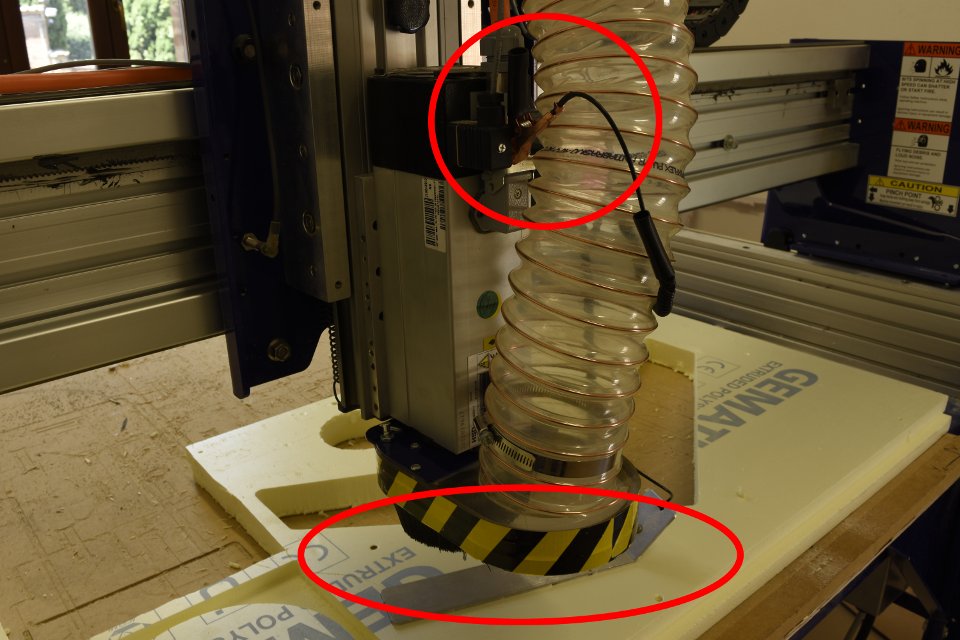
With the machine turned on it's time to start the spindle warm up routine (from the machine control panel, go to "Cuts > C5 - Spindle Warmup Routine"), otherwise you could damage the machine with a dry run cut. With that taken care of you can move the spindle over the work area and set your home on the XY axis with "Zero > Zero [2] axes (X and Y)" and on the Z axis using the zeroing plate with "Cuts > C2 - Zero Z axis w/ Zzero plate" (remember to attach the alligator clip to the spindle mount!). Now we are ready to begin the actual cutting: just click on the green "Cut Part" button and select the right toolpath (following the usual order: pockets, internal, external).
After the machine finished its job all left to do would be breaking the tabs with a chisel, extract the parts, smooth them with sandpaper and assembly your work:
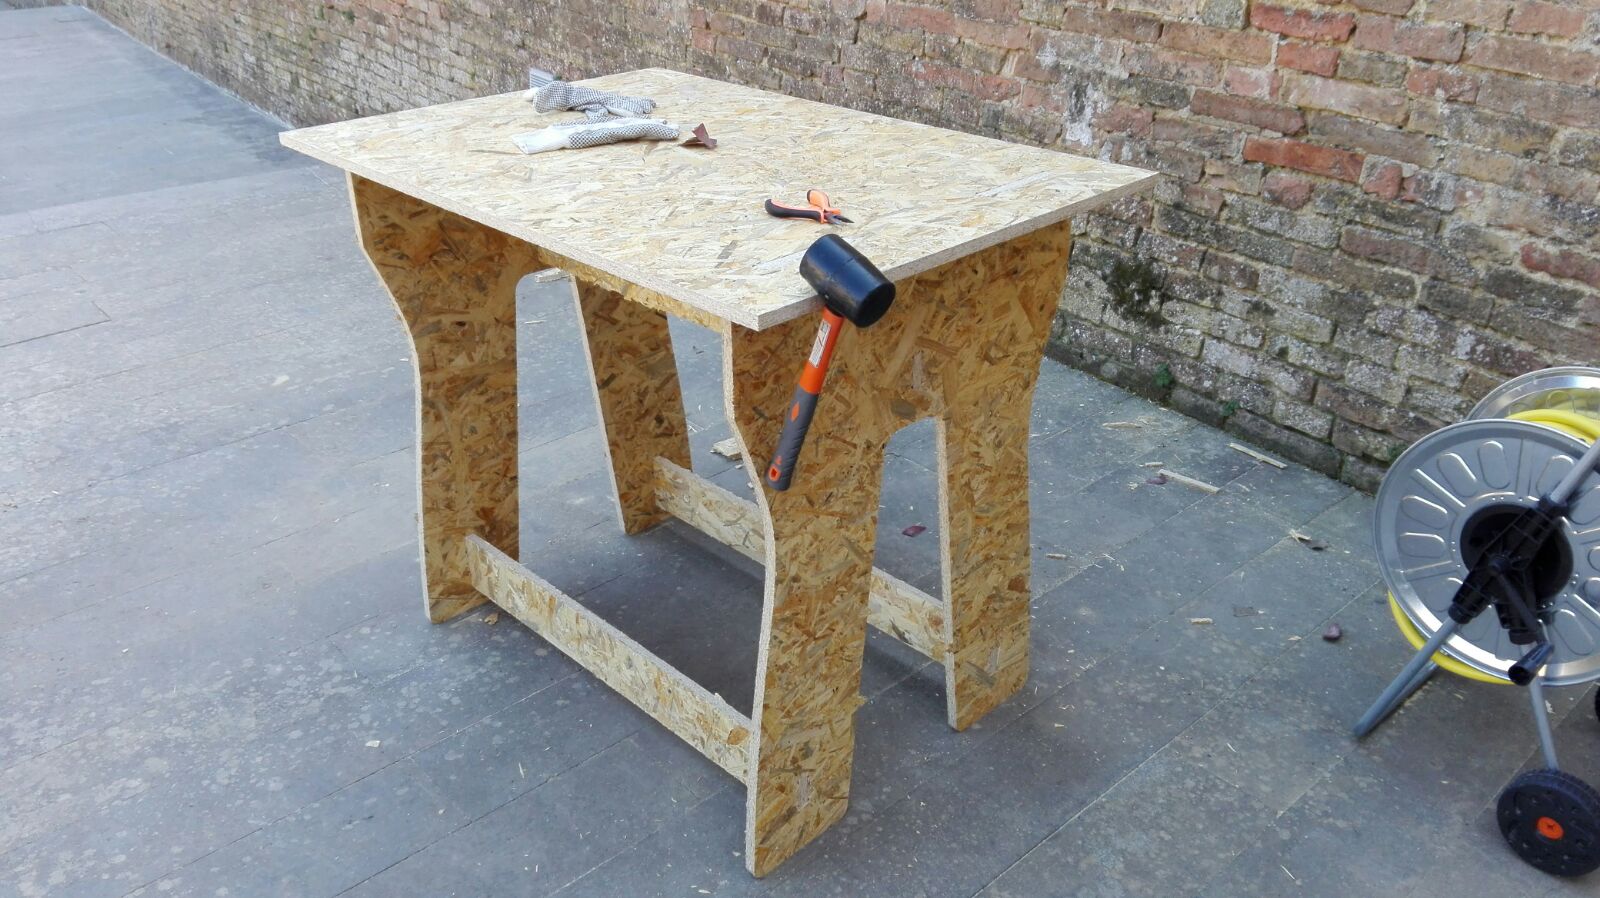
I'm quite pleased with the result, the bench doesn't wobble as much as expected, I even dare say it's pretty stable.
Files and links
- tar.gz - archive containing all the files (stl model, dxf drawings, Vcarve project, toolpaths)
- The "inside corner problem"