WEEK 5 - 3D PRINTING AND SCANNING
Introduction
The assignments of this week were:- Design and 3D print an object (small, few cm) that could not be made subtractively
- 3D scan an object (and optionally print it)
- GROUP ASSIGNMENT: Test the design rules for your printer
3D PRINTING
This week I have started with 3D printing. First of all I have done a sketch of my model. I have decided to build a simple bracialet with a geometrical pattern.
I didn't know how do that, so I have looking for some tutorial on Internet and I have found this one (here). Yes, I know that it is a tutorial for a lampshade, but the procedure is almost the same.
I have started with a 2D sketch of my bracelet and then I have used revolve command for complete the entire shape.
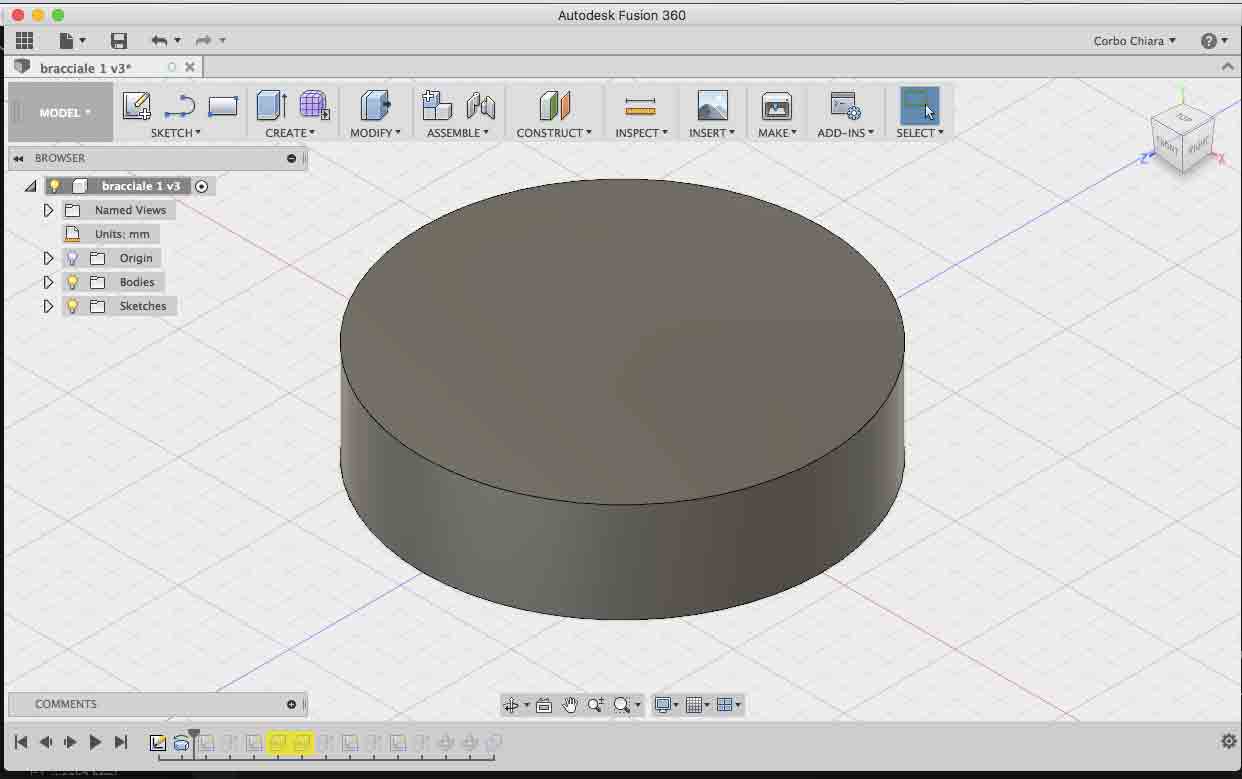
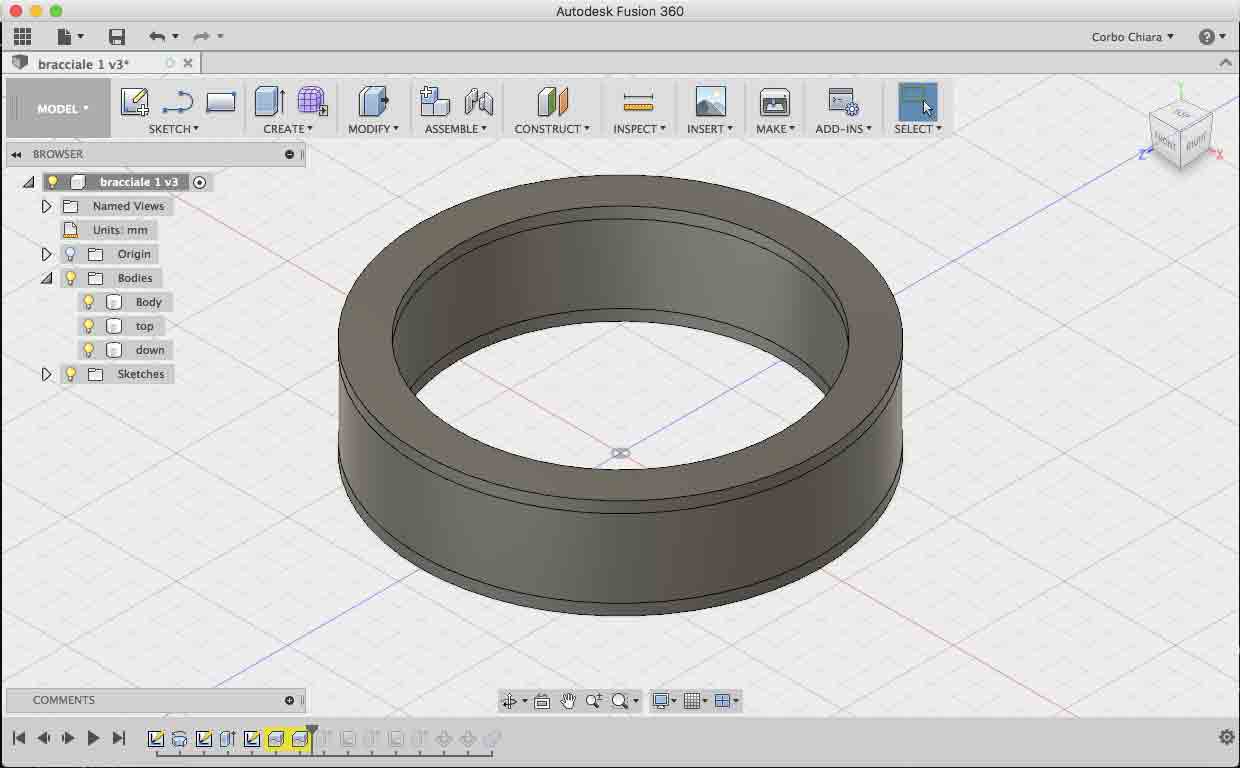
Then I have used extrude command for doing an hole in the middle of the cylinder. Then with Offset plane command I have cut two parts of the cylinder, one on the top and the other at the bottom of shape.
After that I have worked on the body of my bracelet for create the pattern. I have used sketch mode for have a 2D view of my model. Now I have drawed two parallel lines for create the shape that I'm going to extrude. Than I have reversed the selection for save only the sketch parts.

At this point I have used again 2D sketch for create my pattern. I have used the same proces of before. For create two different of pattern, I have sketched two lines with different measures and position.
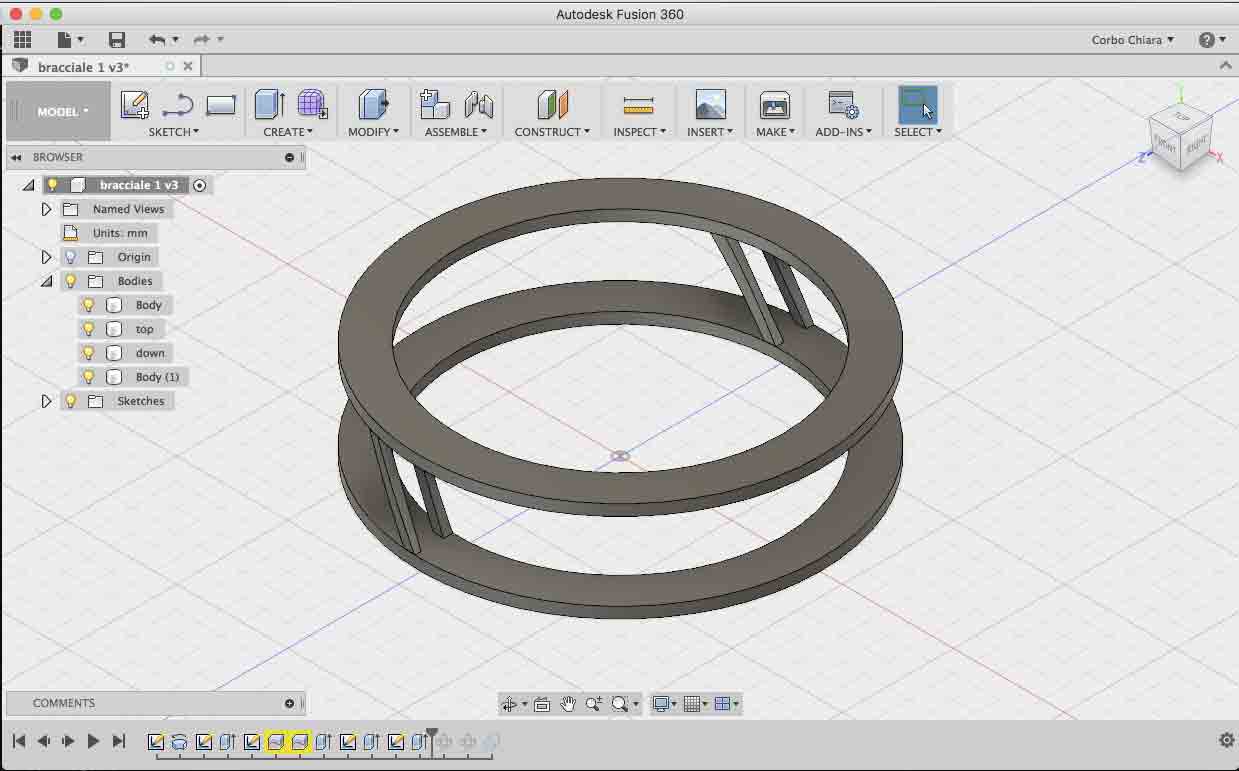
At this point I have created the pattern. In Create menu I have selected pattern -> circular pattern. I have selected the right object and the axis and then I have wrote I many times it should repeat the sketch. I have done the same with the other piece and then I had my pattern.
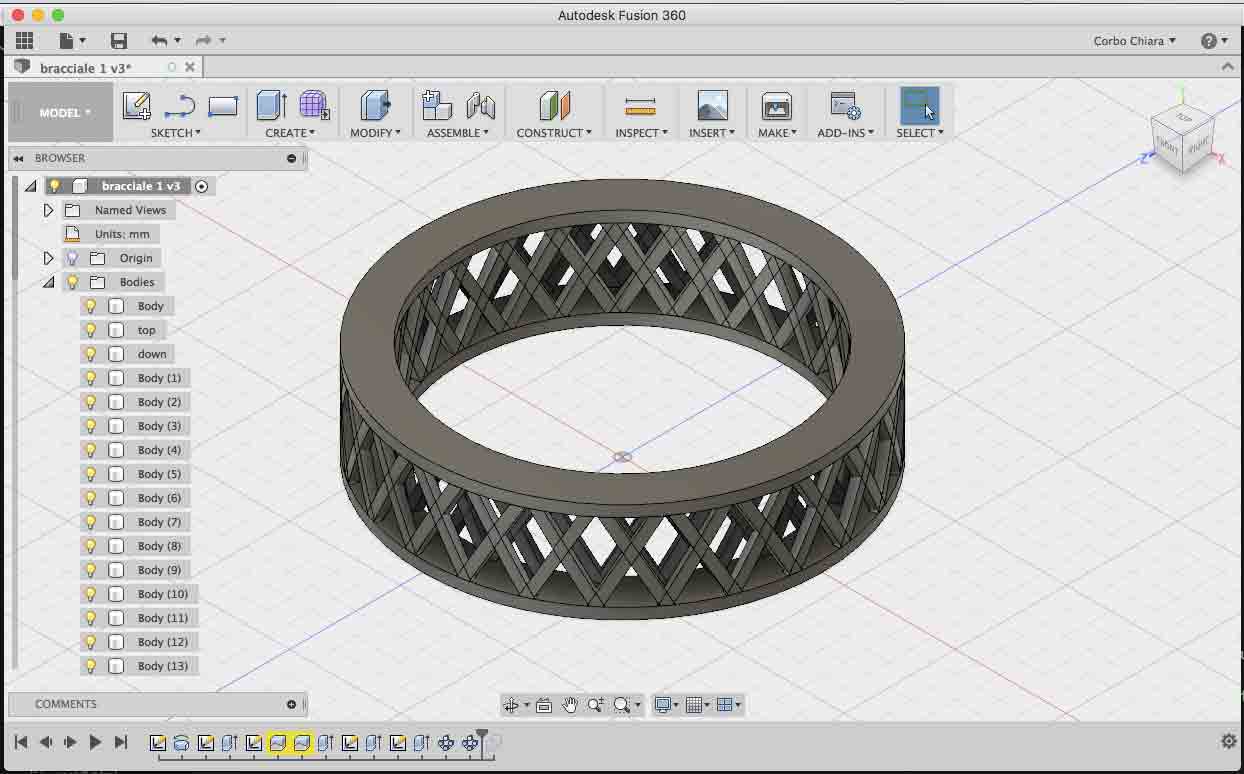
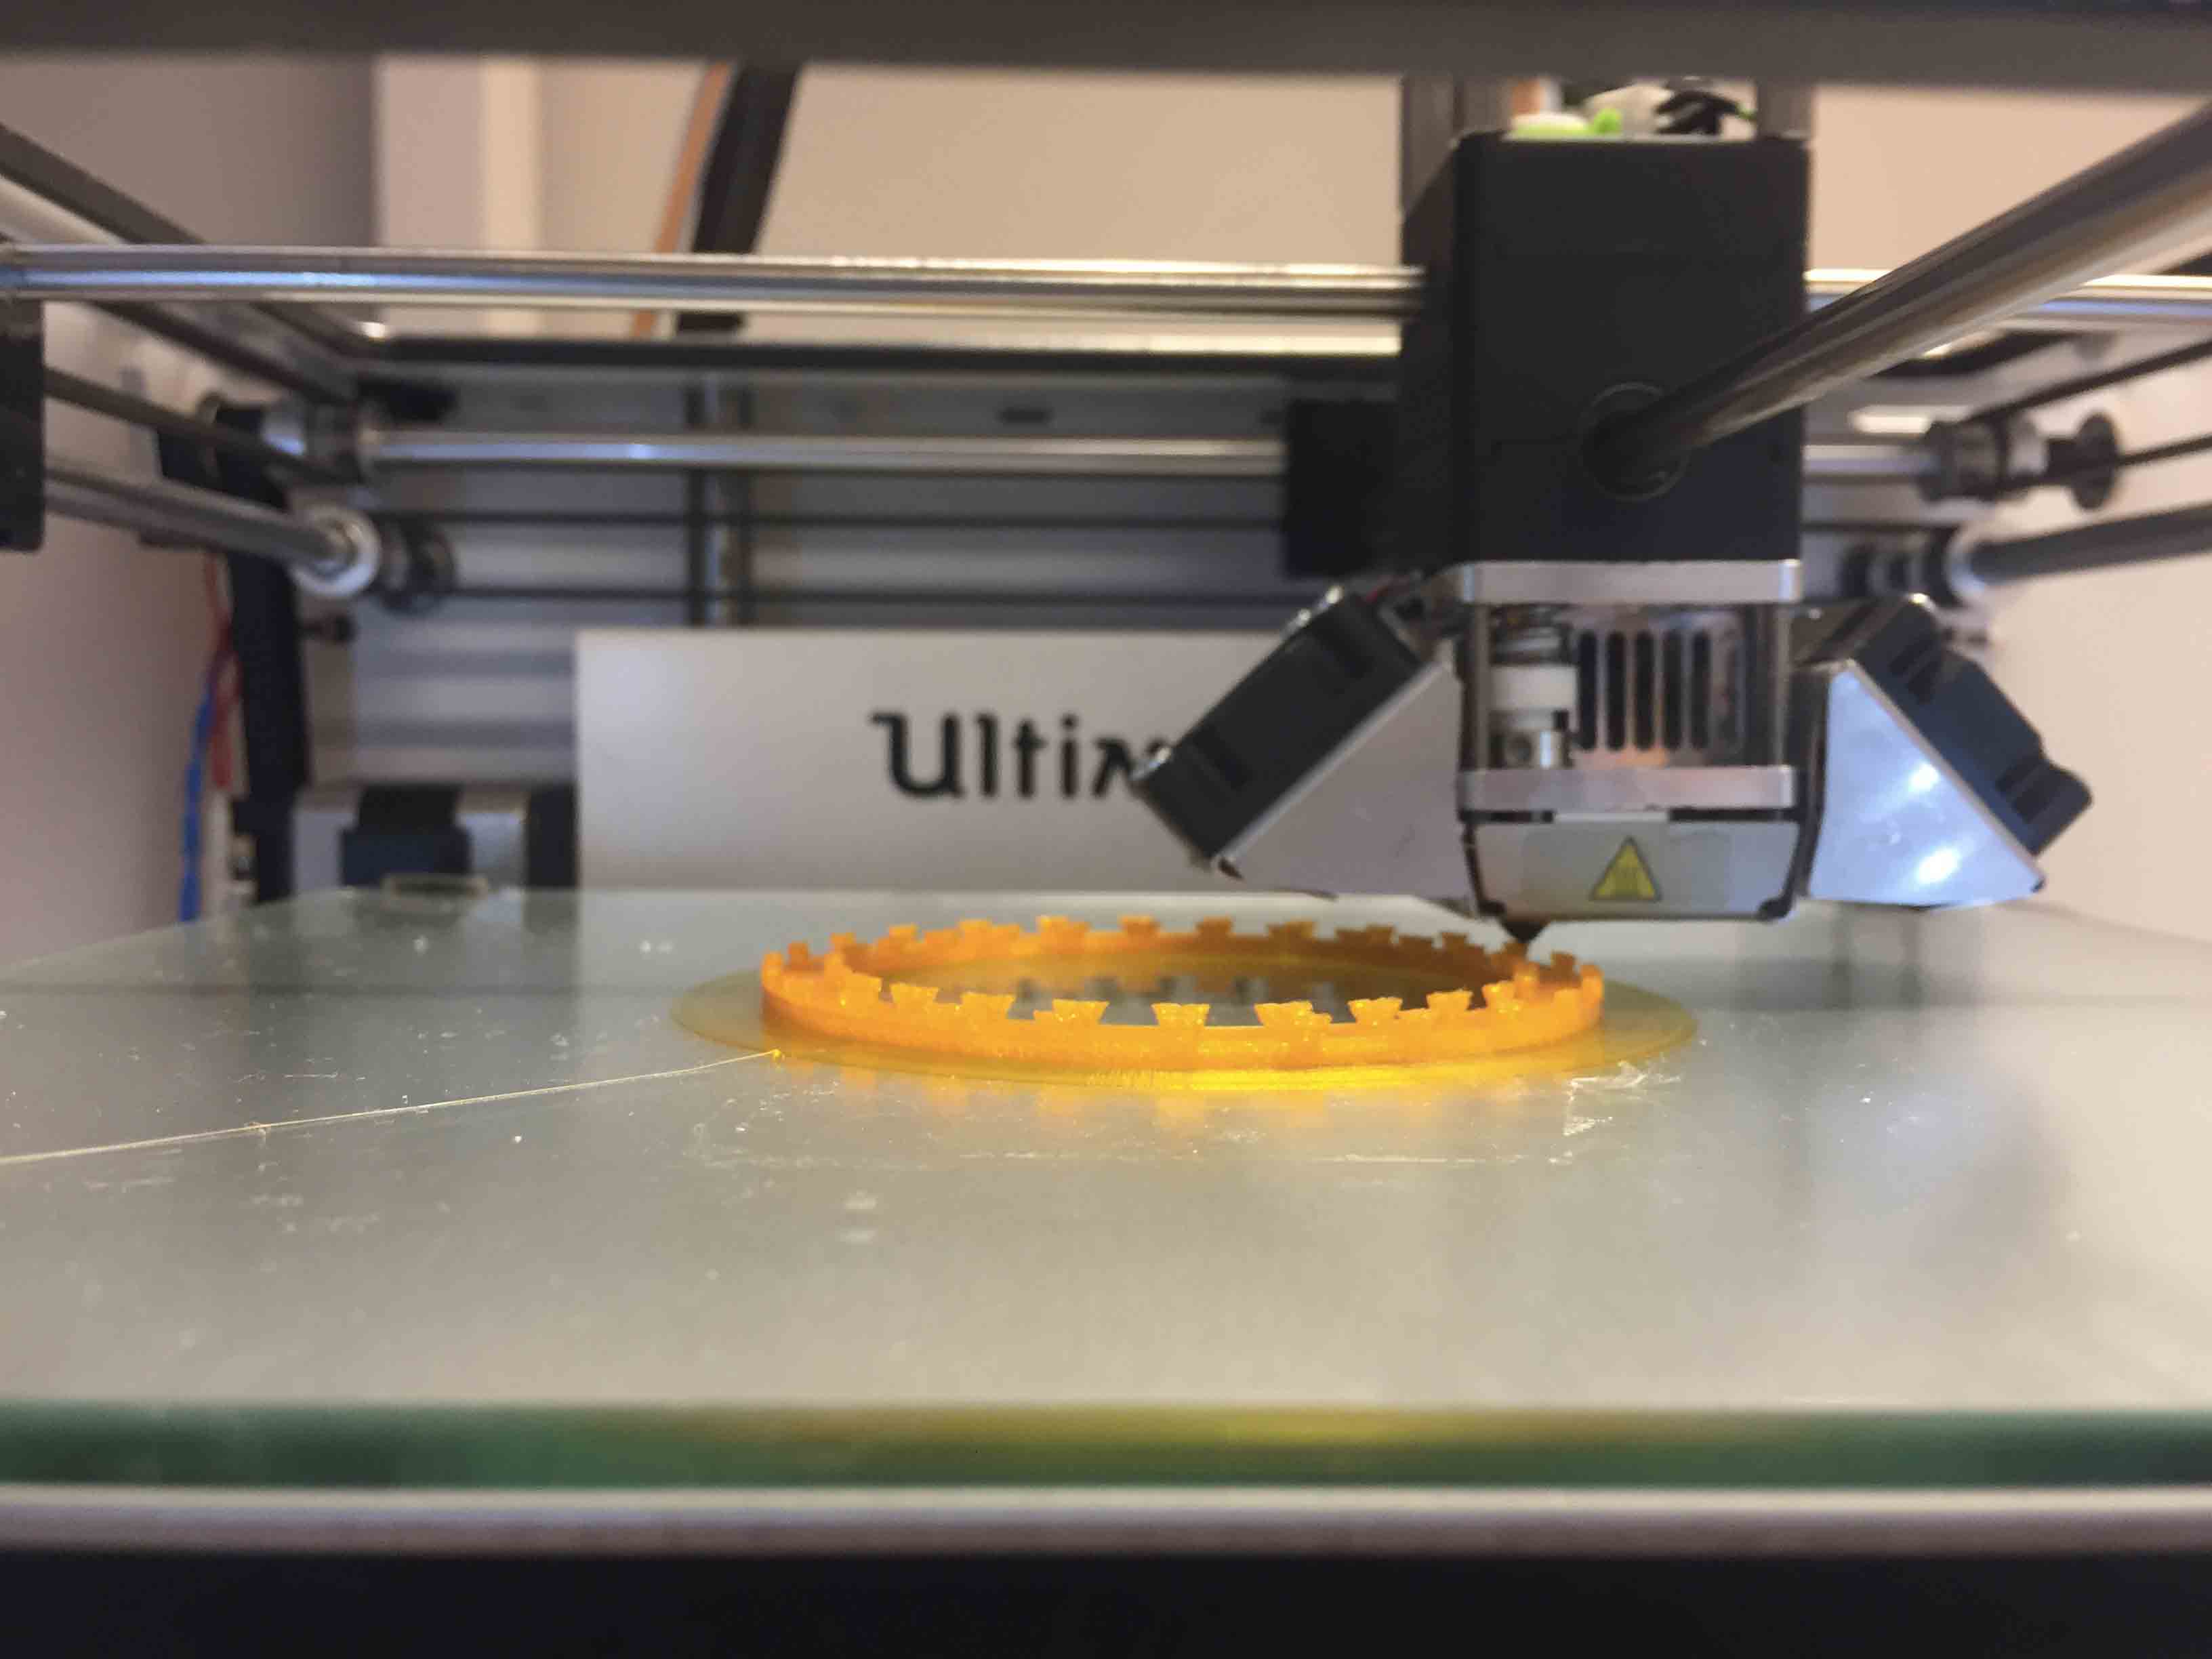
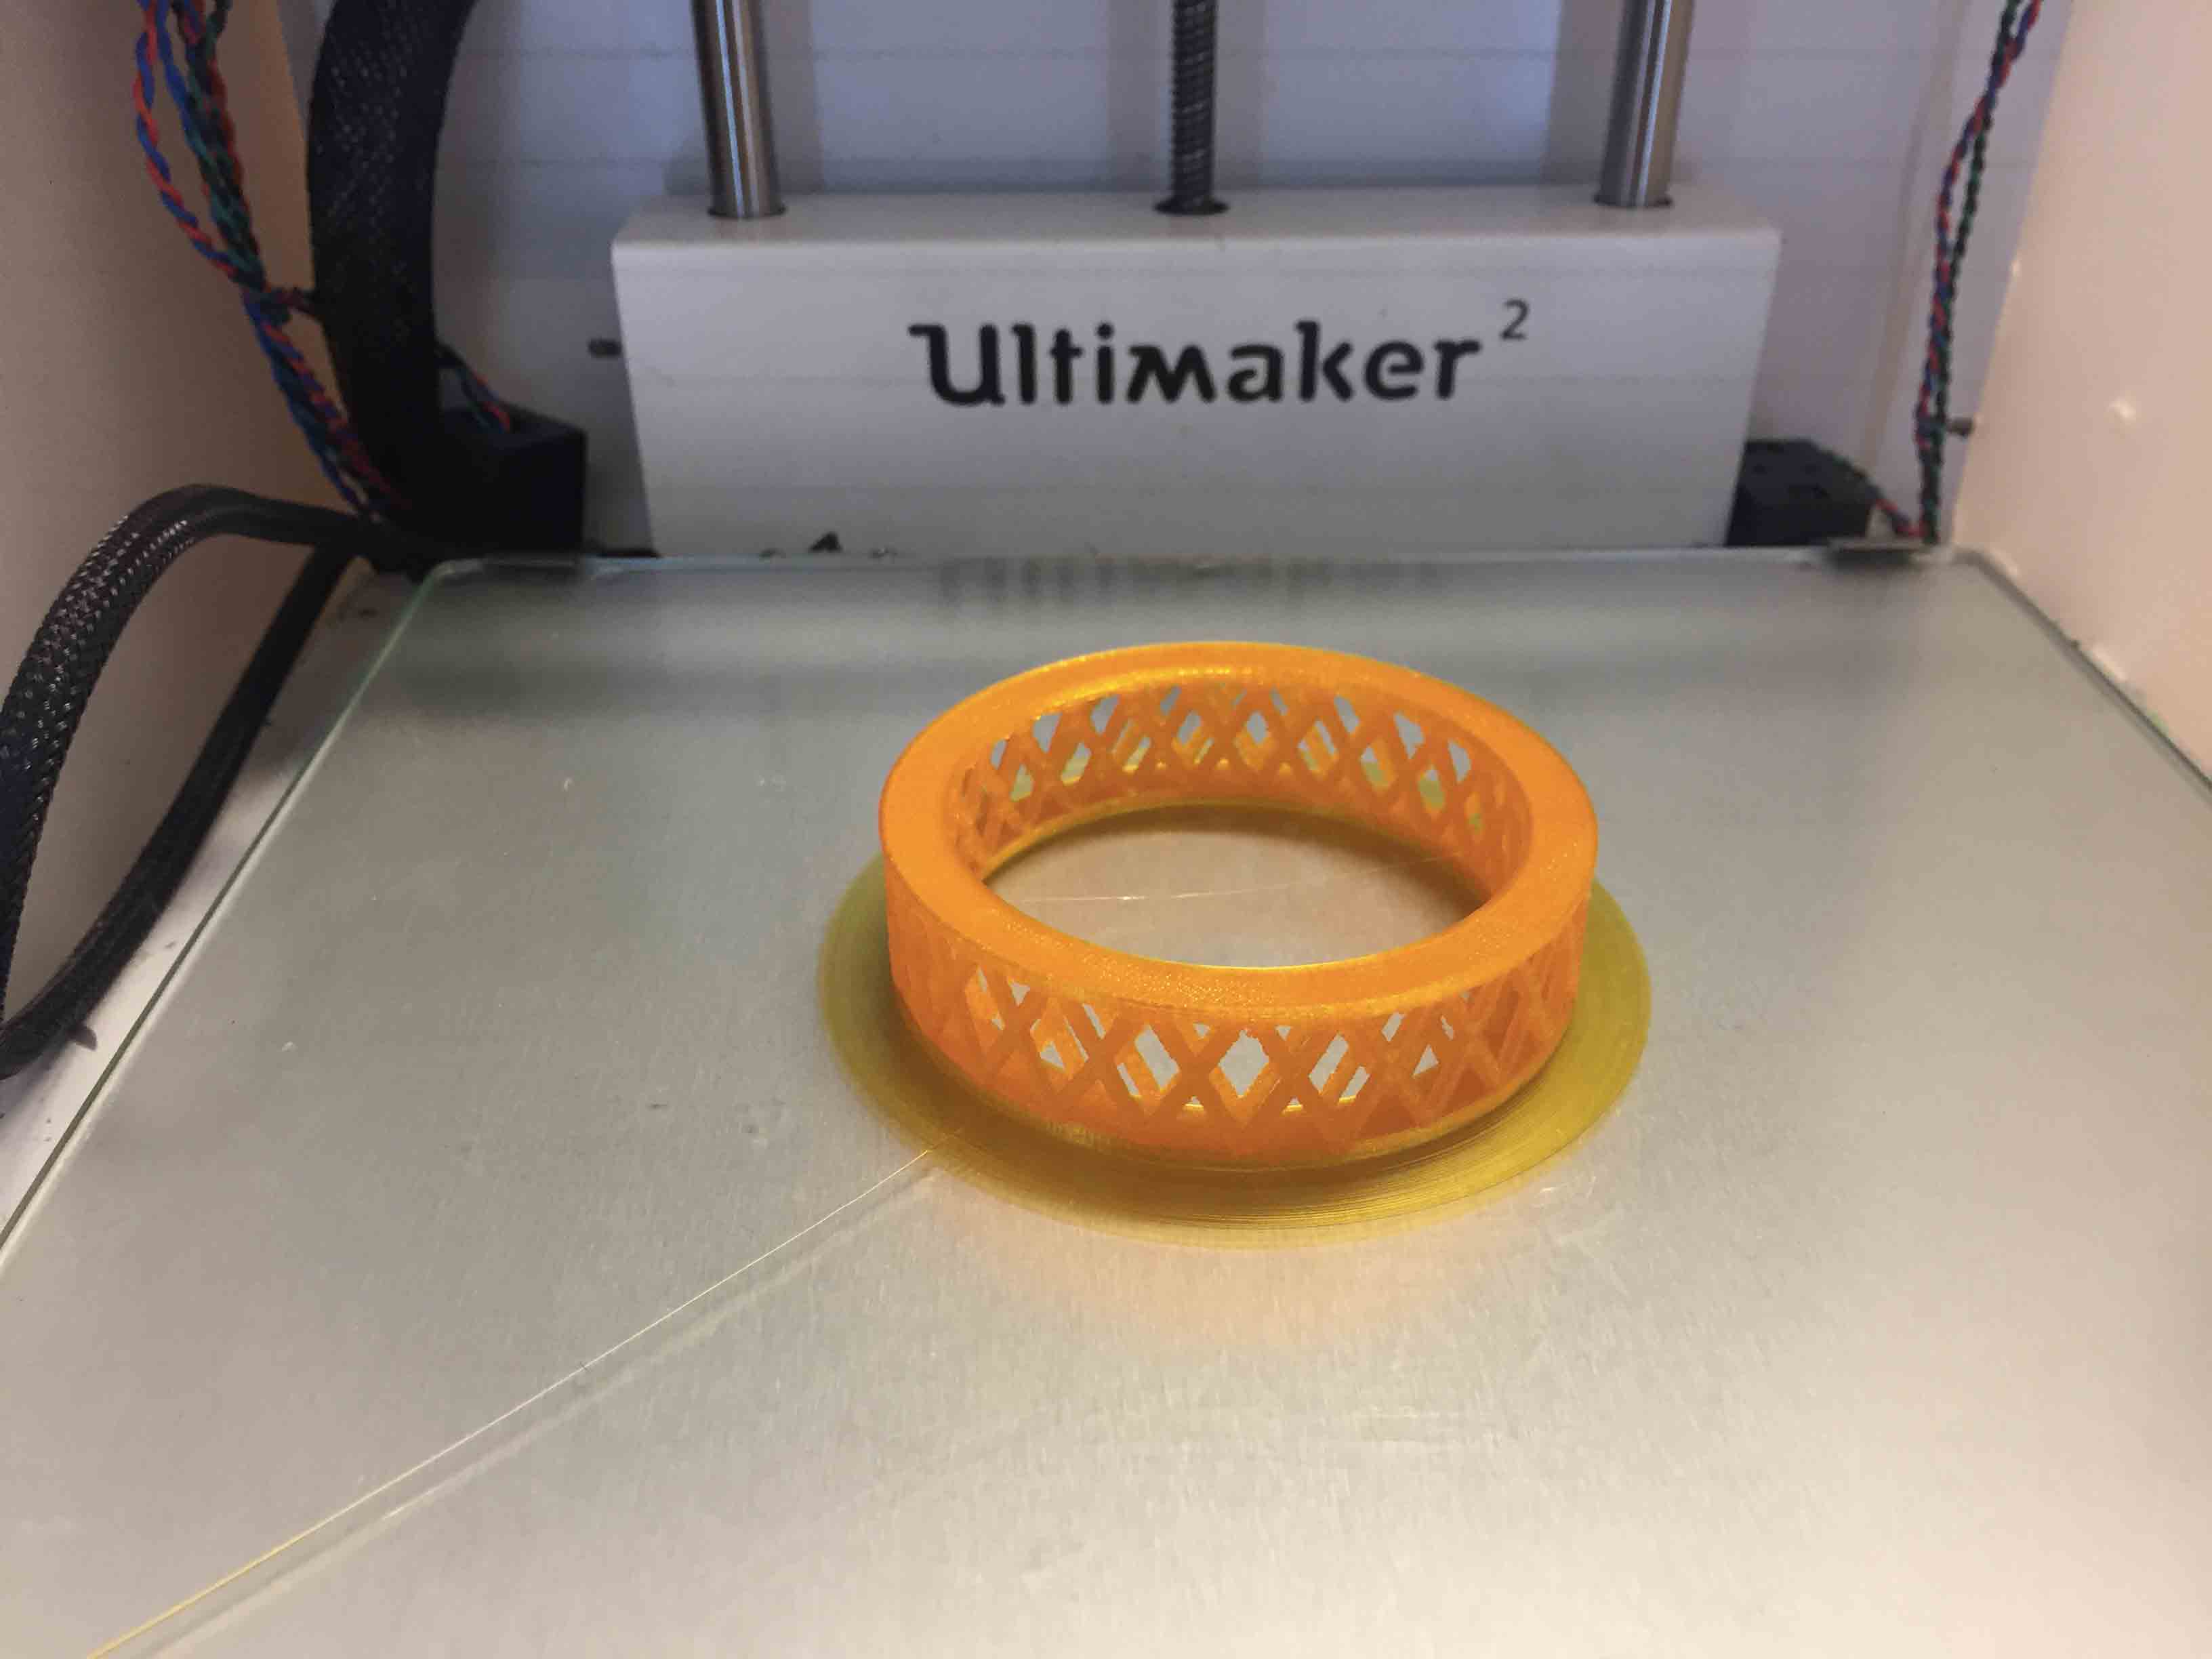
The assignment of this week was design something not be made subtractively. What mean? It means that I can't do the same thing by removing material, from a cube on wood for example. I don't know if is visible from the picture but my model respects this aspect. Internal and external pattern have a different shape, so if you try to do that subtractively you can't do it. Before exporting it I have used Combine command for create a single object. Then I have export .stl file and I have open it with Cura. Cura it's the Ultimaker's software for setting paramenters and then print your object. You can use this software also with other kinf of 3D printers. I have imported my file on this software and then I have prepare it for the print.
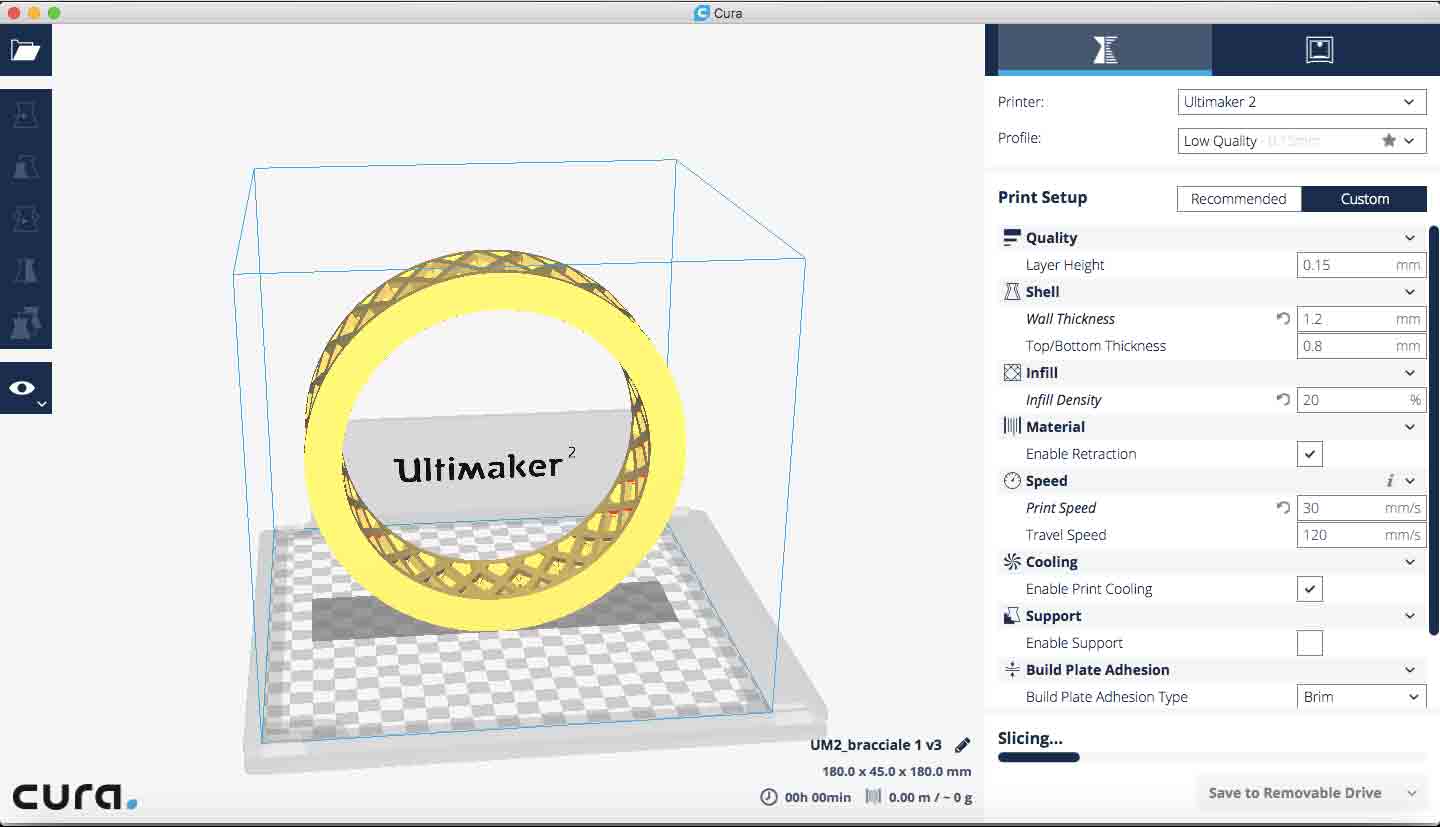
First of all I have resized my model because it was to big. At the begin it was 18 cm of diameters and now I have changed it in 8 cm. Then I have re-aimed it horizontally on the plate for eliminate all support.
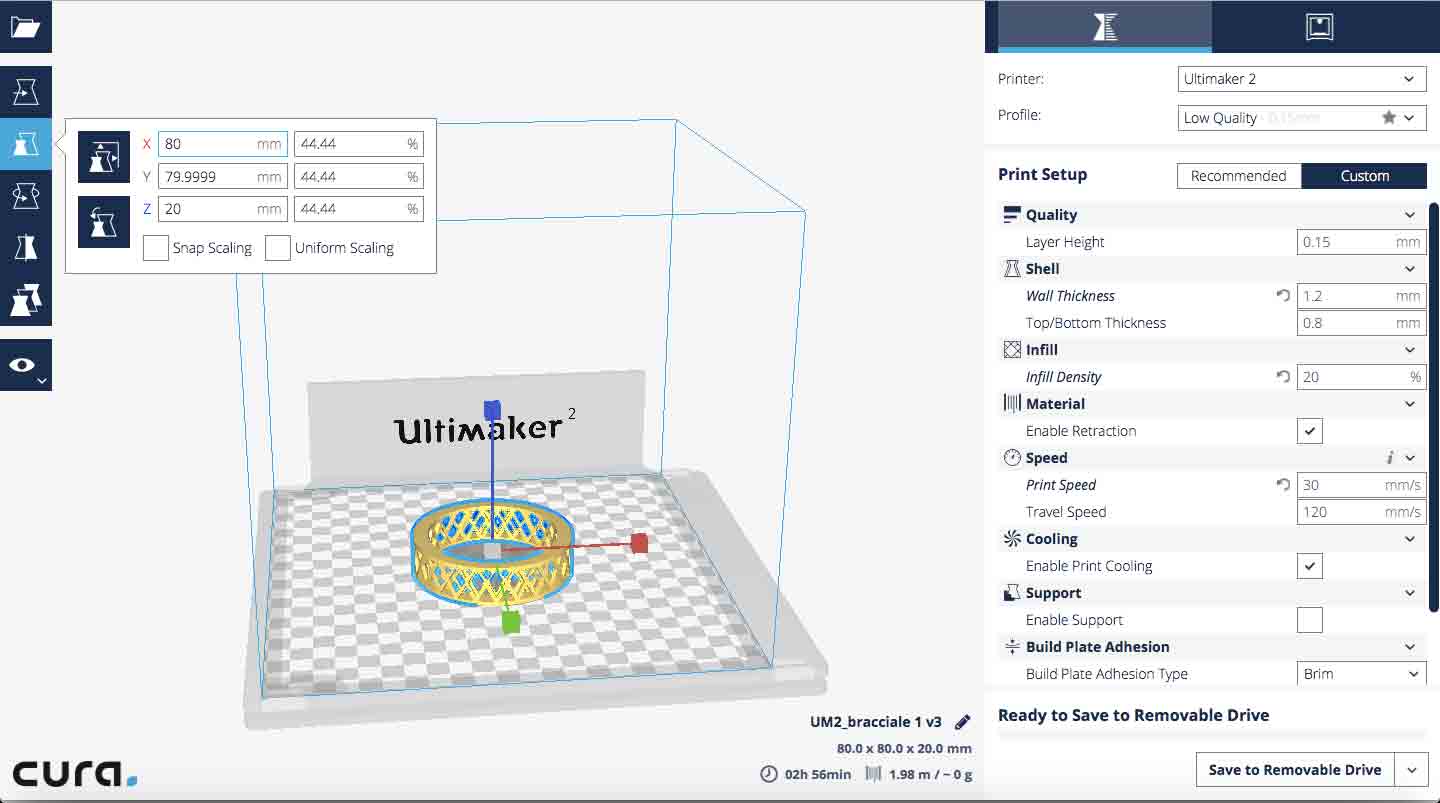
At this point I have setted the right values for the print. I have used the same value that we have found in our group assignment (see our work here).
The values was:
- Material: PLA
- Layer Height: 0,15 mm - With this value you can set the height of material for each layer. Best value is 1/4 of extruder diameter.
- Wall Thinkness: 1,2 mm - It is the thickness of the external side.
- Infill Density: 20% - Is the percentage of material inside my model. If you needed of a stronger model you must increse this value.
- Print Speed: 30 mm/s - Is the speed with which I will entrude material to print my model. The perfect value is between 30 and 60 mm/s.
- Travel Speed: 120 mm/s - Is the speed with which extruder moves from a point to another point.
- Temperature: 210 °C - This value set the temperature of material when it will be extrude. Each material have a different Temperature, you can find it on Internet or on the material box.
3D SCAN
For doing this part of assignment, I have use the photogrammetry technique. I have used PhotoScan and Meshmixer as softwares for creating and editing my model. For understand how photogrammetry works and for decide how technique was the best one for my case, I have watched this tutorial. After that I have prepared my photocamera on a tripod and I have placed my object to scan in my softbox. My object was a little shiny, so I have putted a polorized lens on my camera lens.
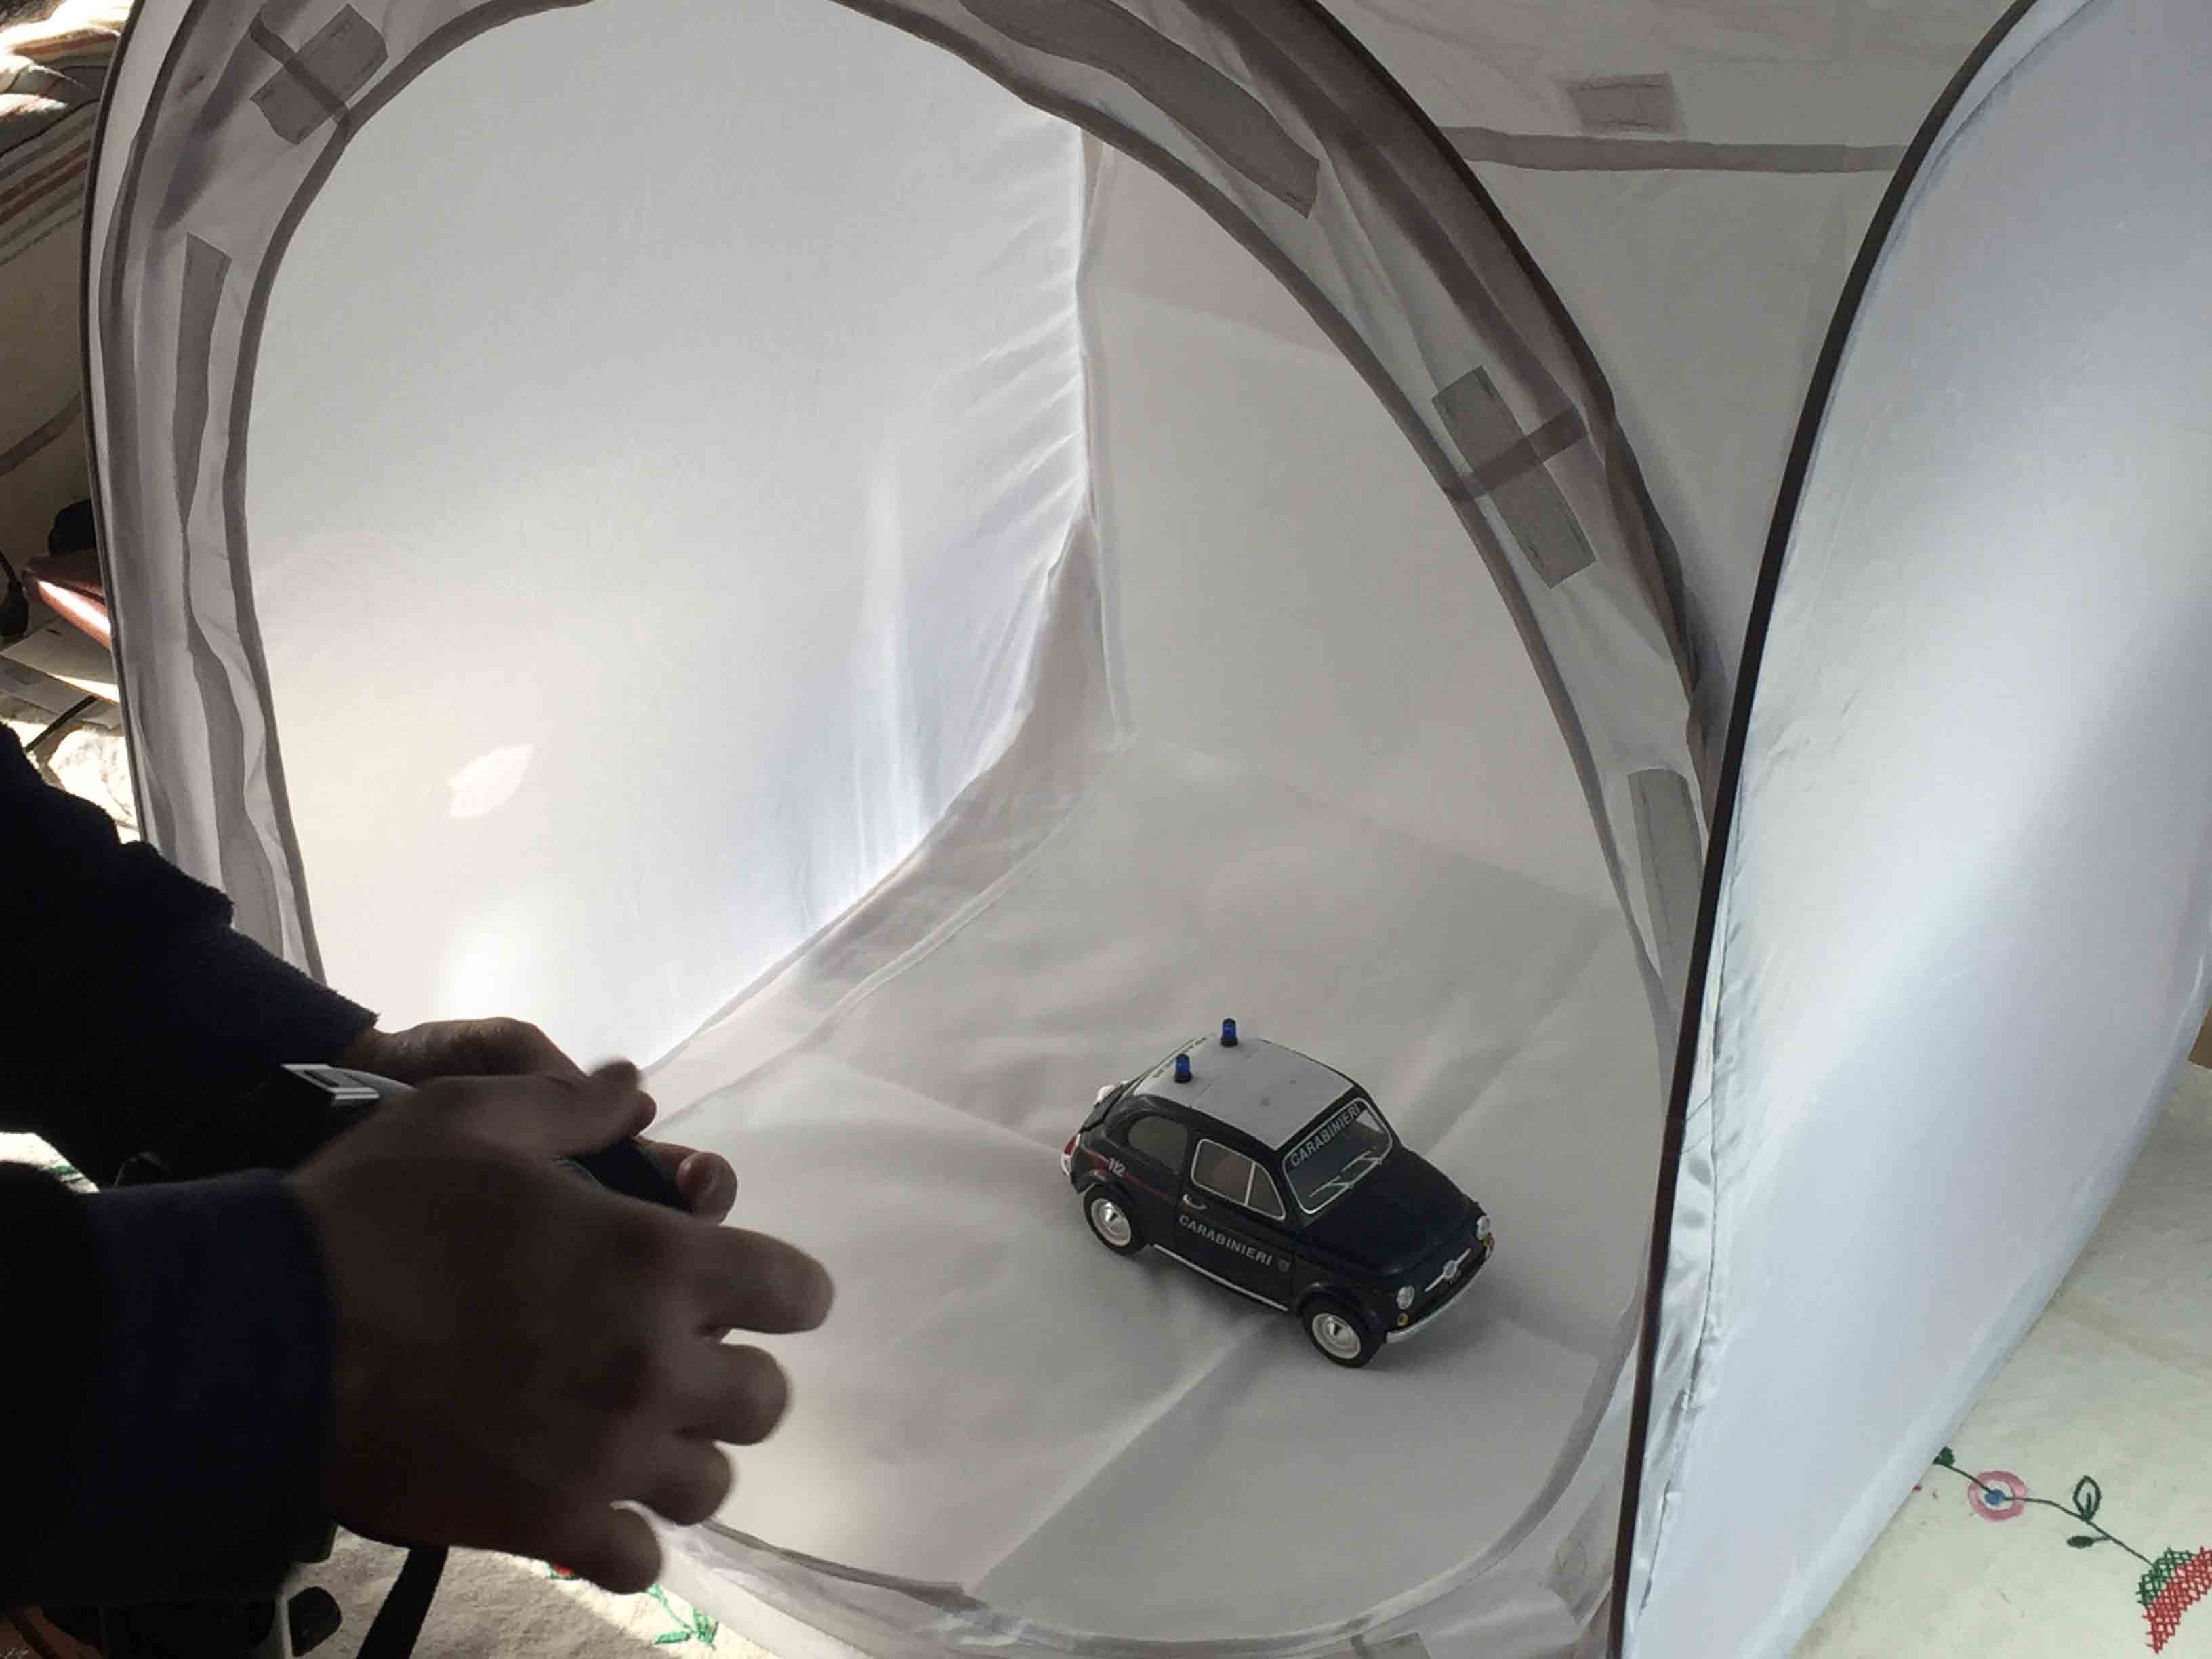
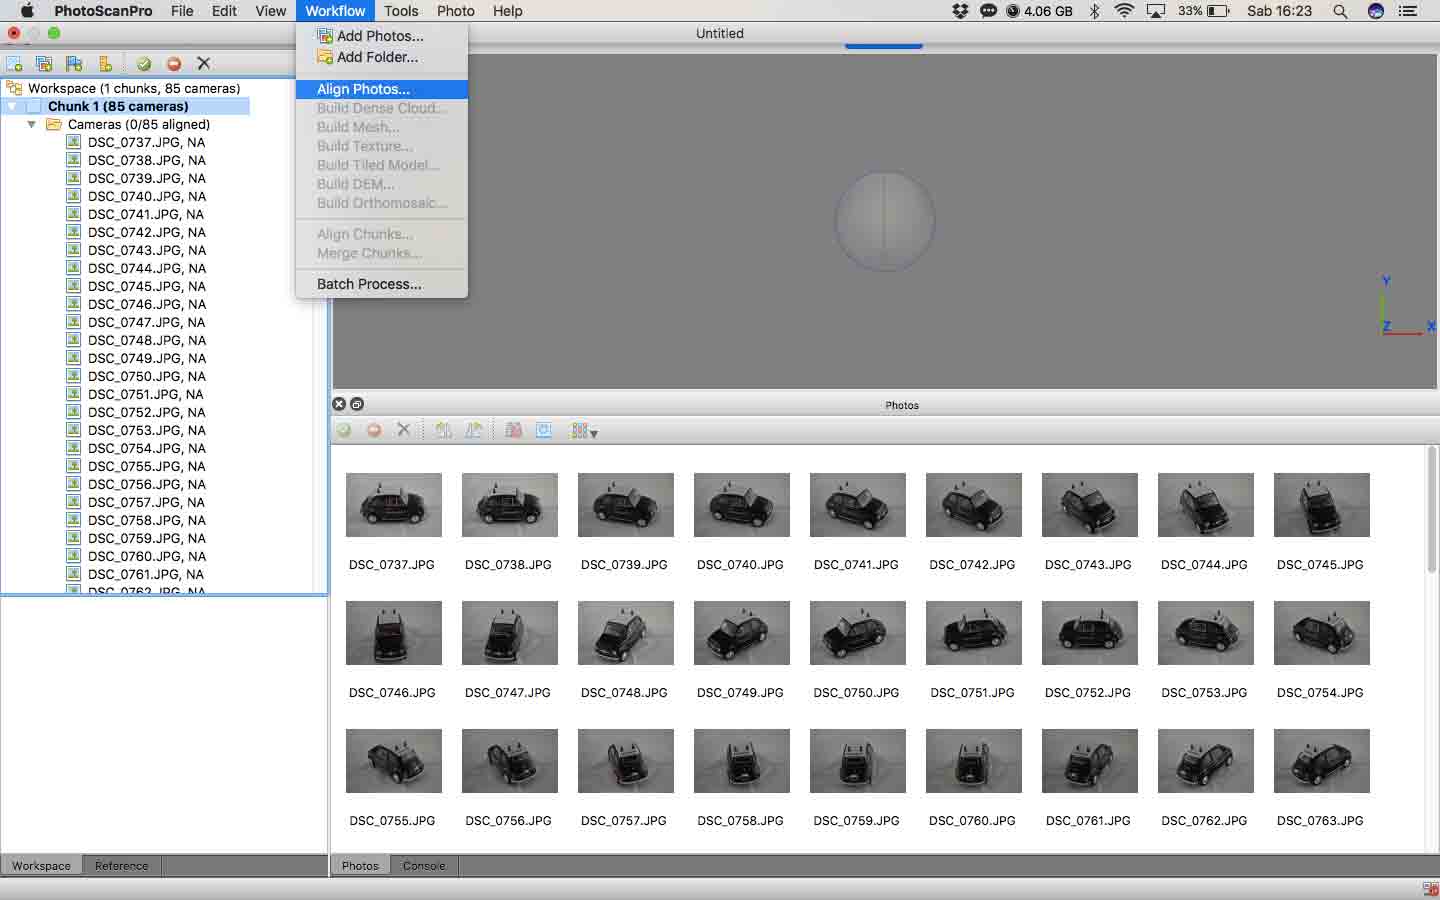
I have done 87 pictures at the object by turning it of few centimeters at once, then I have imported it on PhotoScan. For understand how this software works, I have followed this tutorial. In Workflow menu I have clicked on Align Photos.
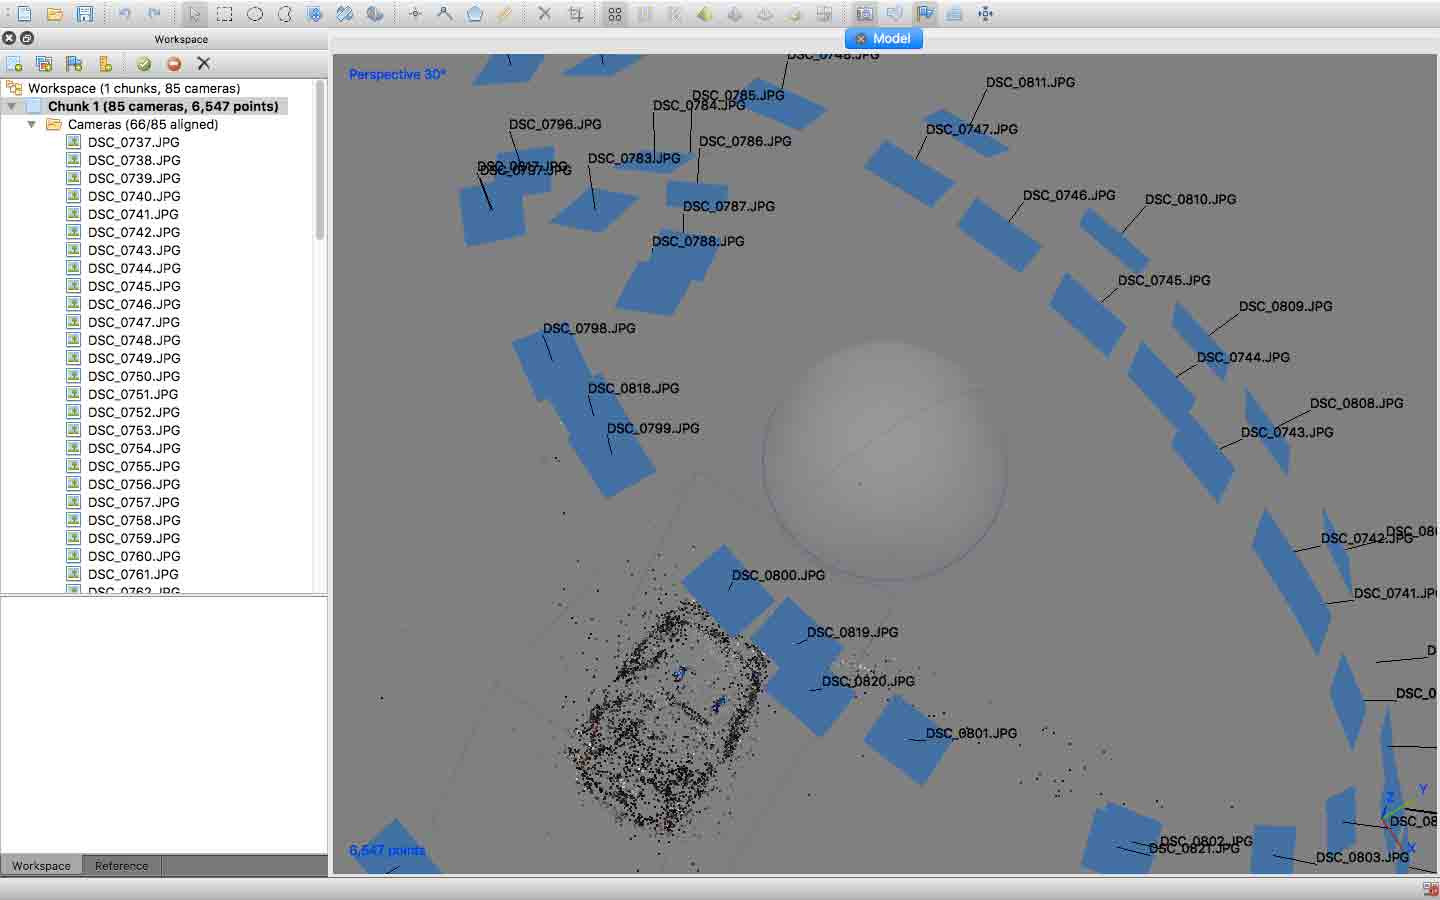
After a few minutes of processing I have obteined a first model of my object. On the screen there are a lot of points which represent the tracking points that the software have token from the picture. For underestand which picture software have used, you can see on the screen the blue objects which represent the photo. I have hidden it for have a better view of my model.
The first thing that I had to do was delete the points on the screen that I didn't use. More accurate is this process and best is the result. After that, the next step was click on Build dense cloud from the Workflow menu. After a few minutes of work, this is the result.
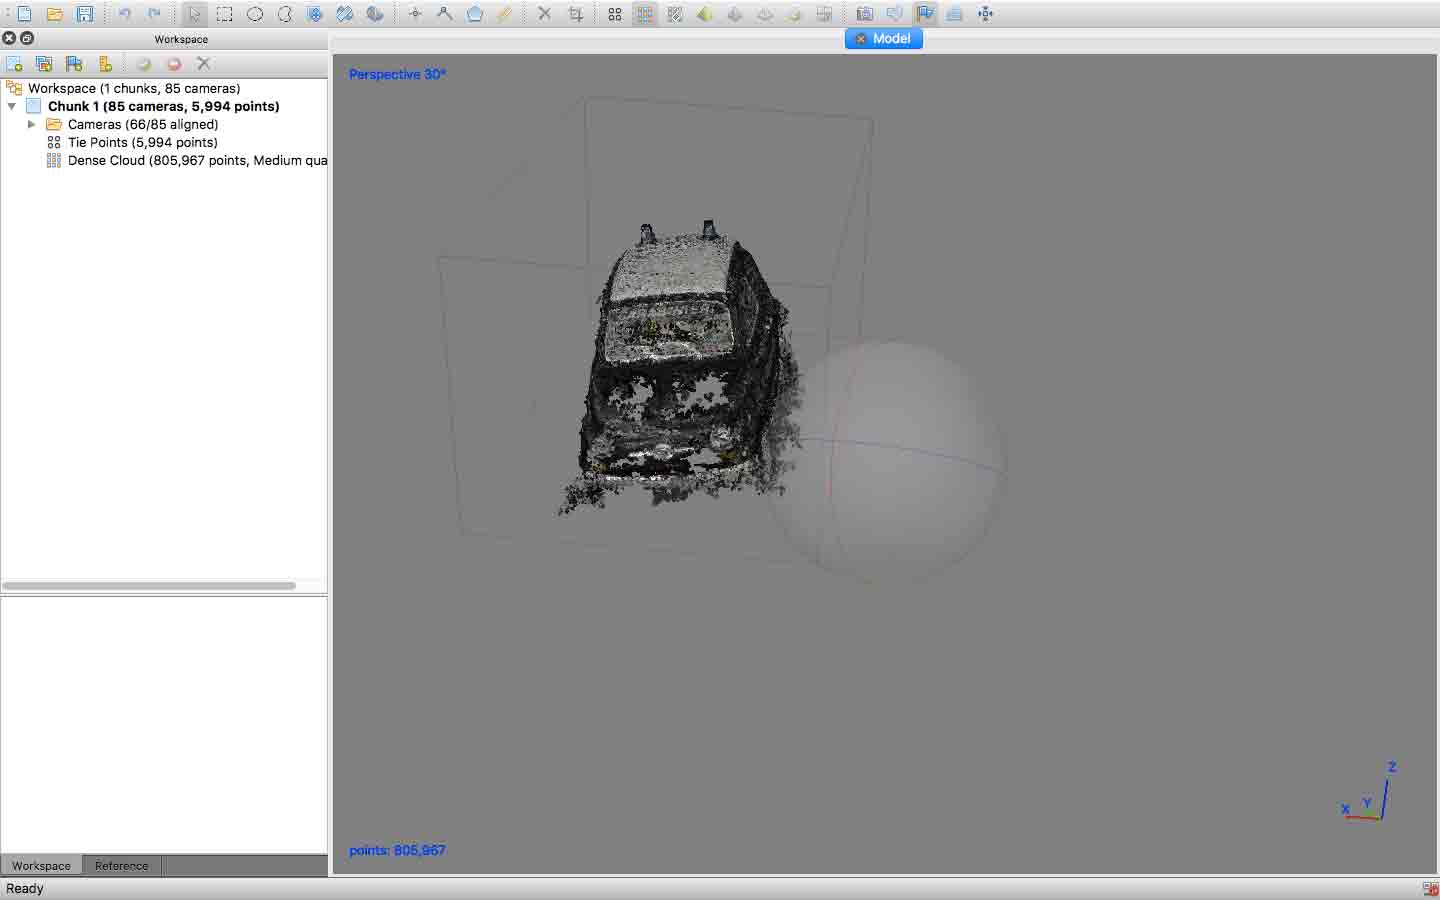
When I have obteined this view I had the same process of before, I have deleted the tracking points who interfere with my model. After that I have clicked on Build Mesh in Workflow menu. After a few minutes of work, this was the result.
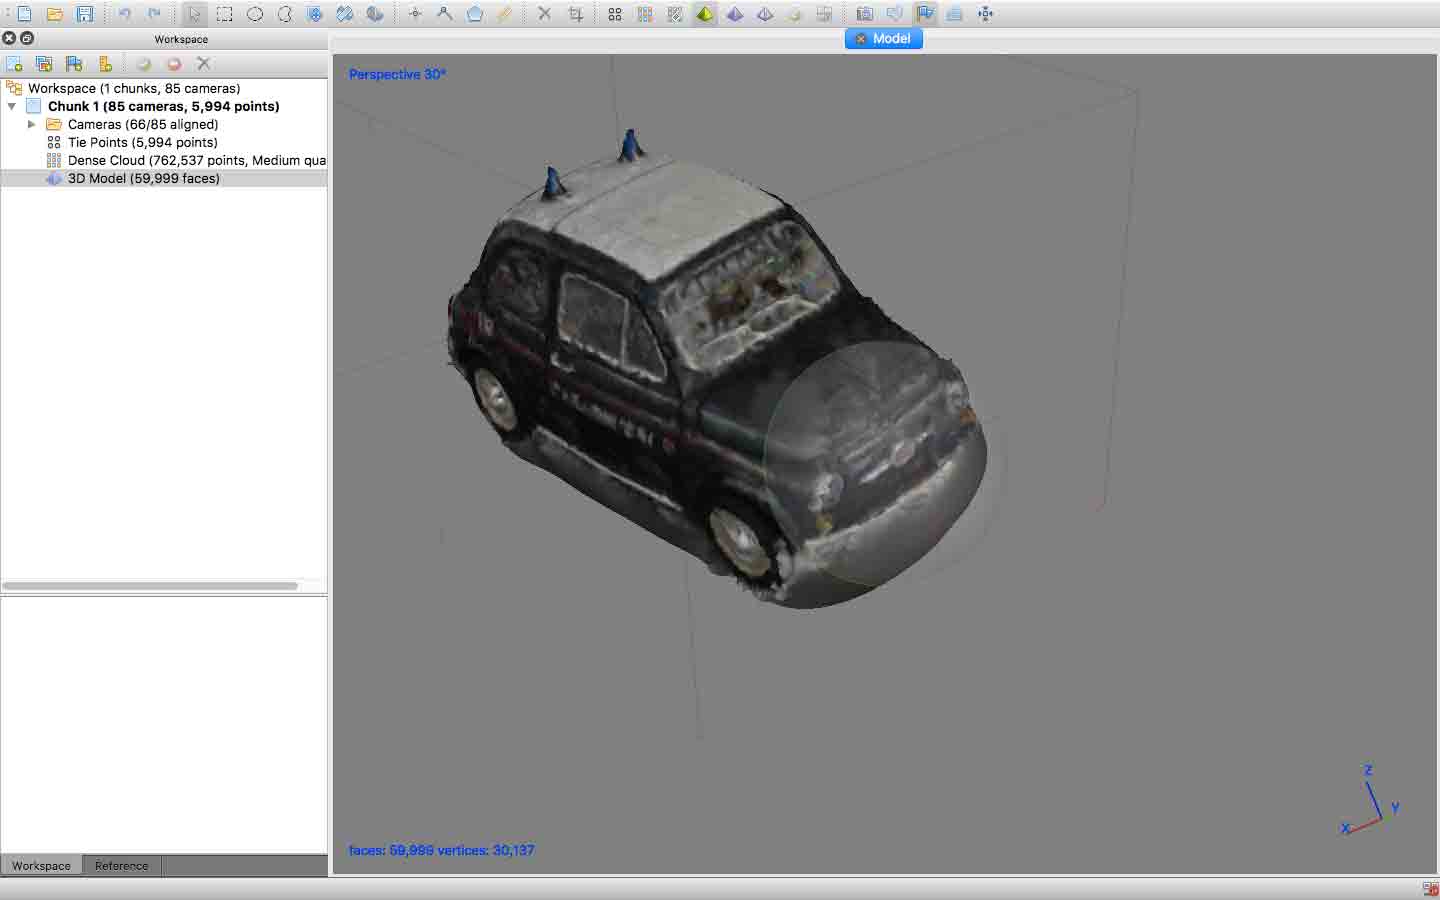
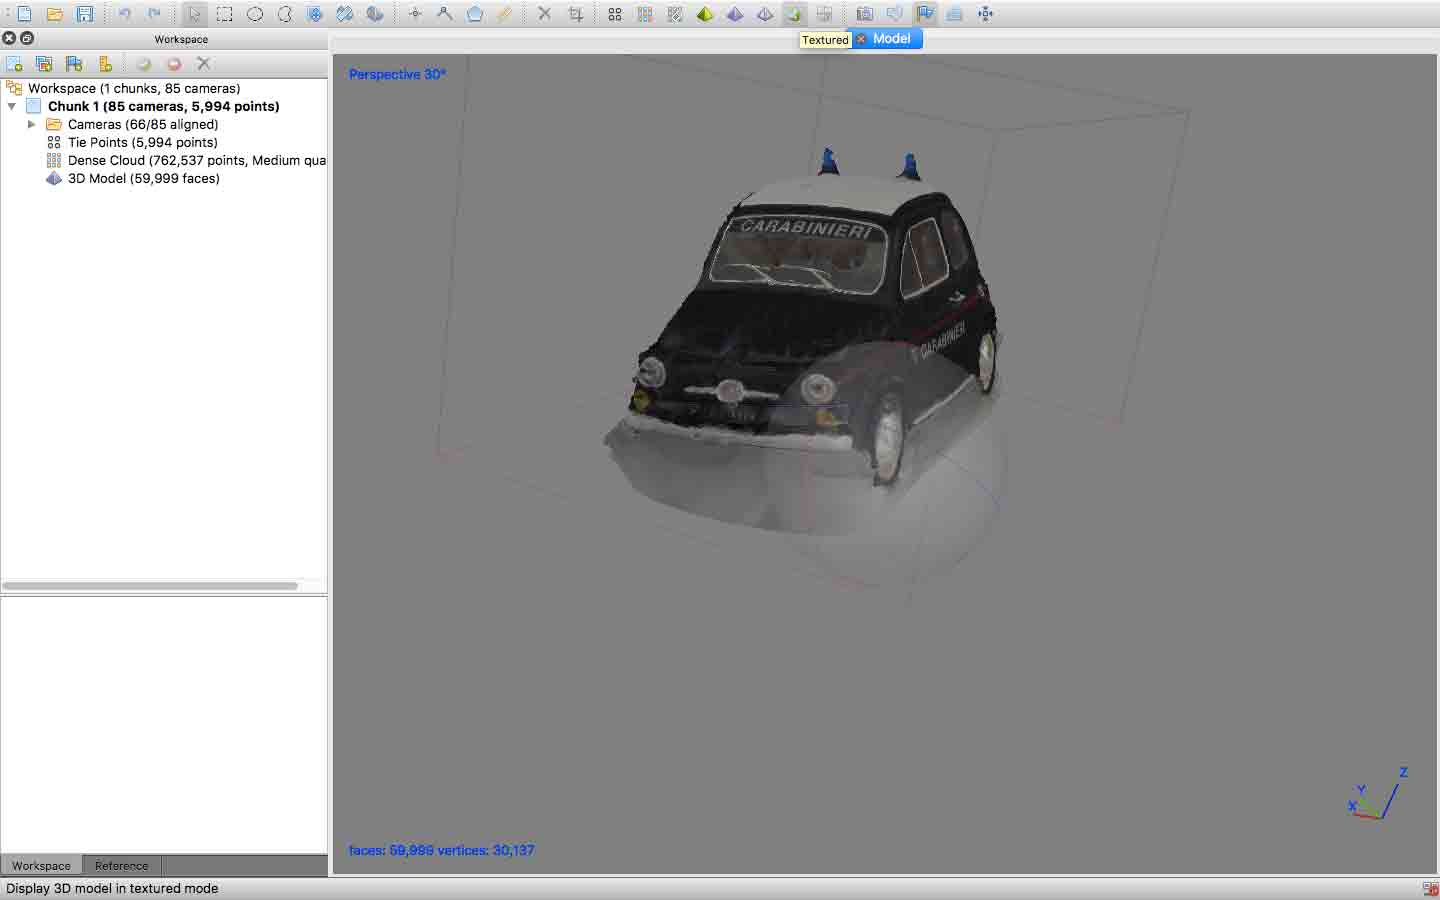
The result was a first 3D model, but it isn't the final one. For complete all process I have done another step. I have click on Build Texture.
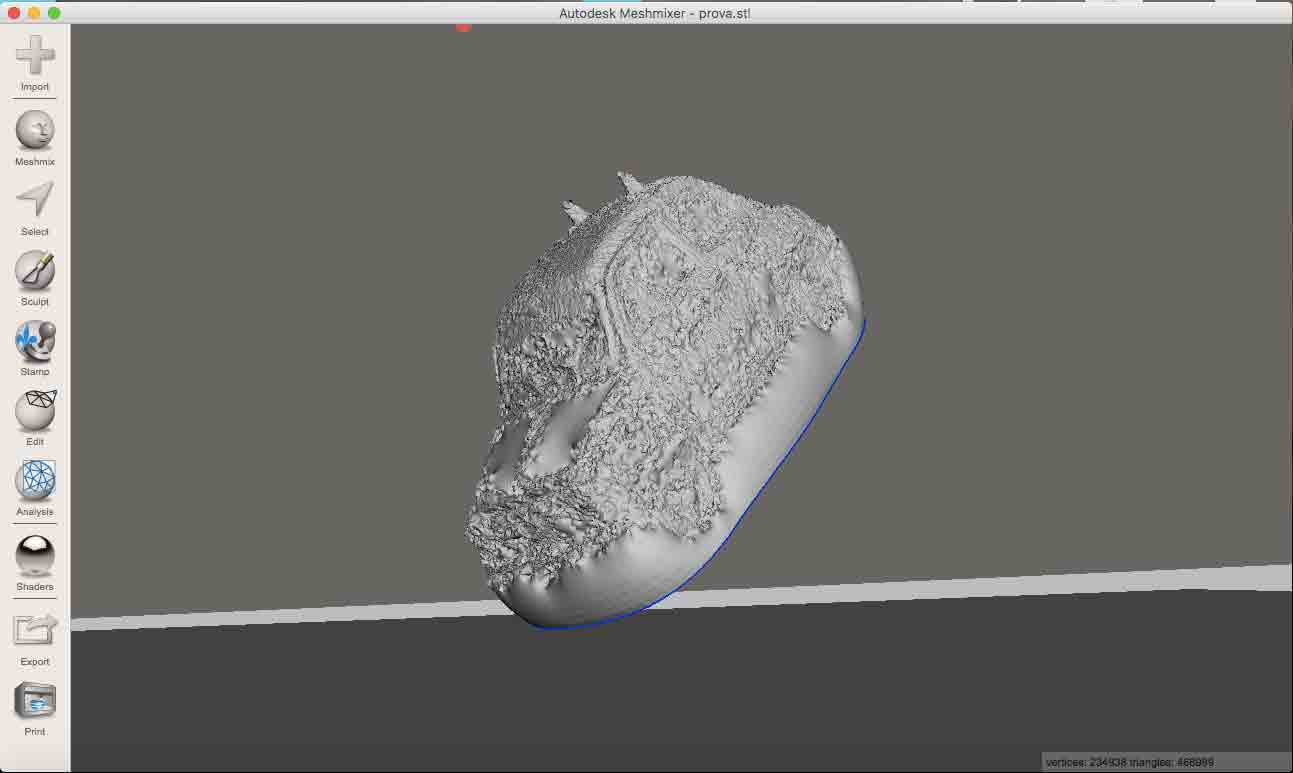
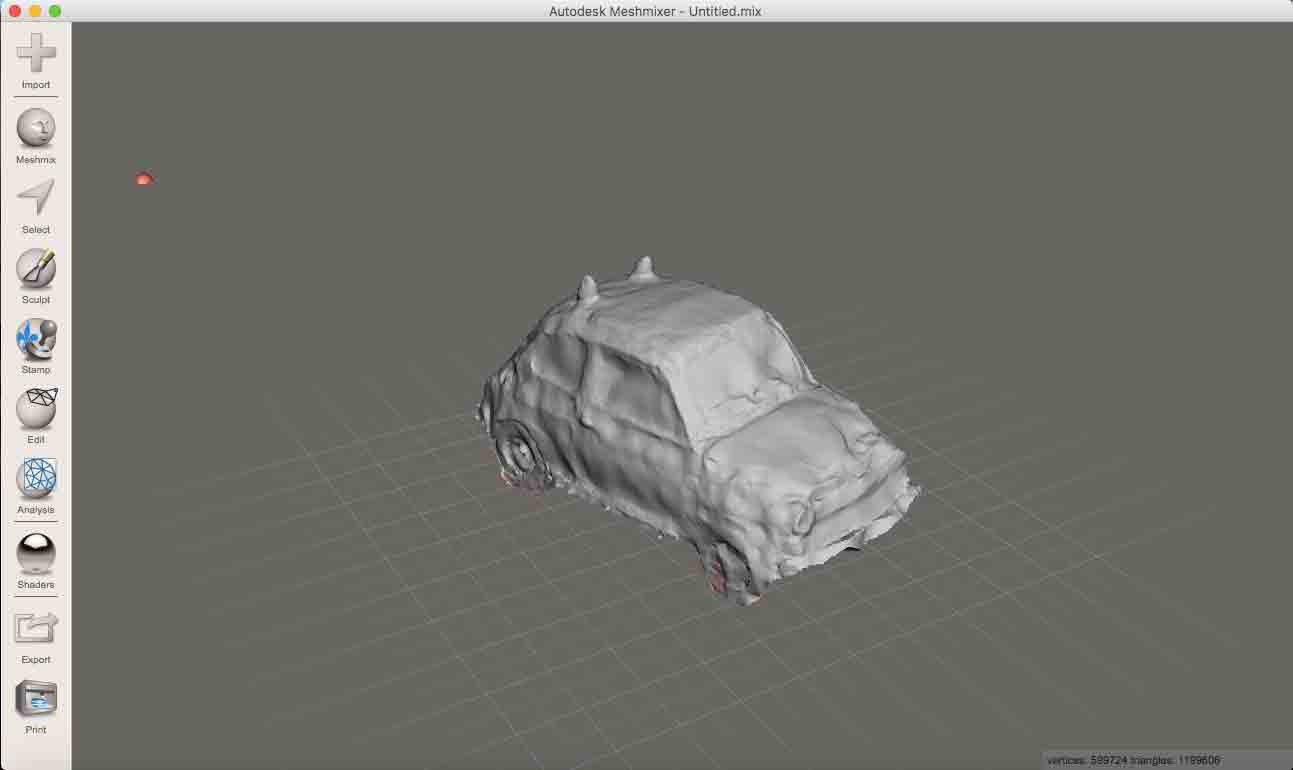
At this point I have exported it on MeshMixer. With this software I could correct the most of imperfection of my model. When I have imported it in the software, it seemed "crinkled".
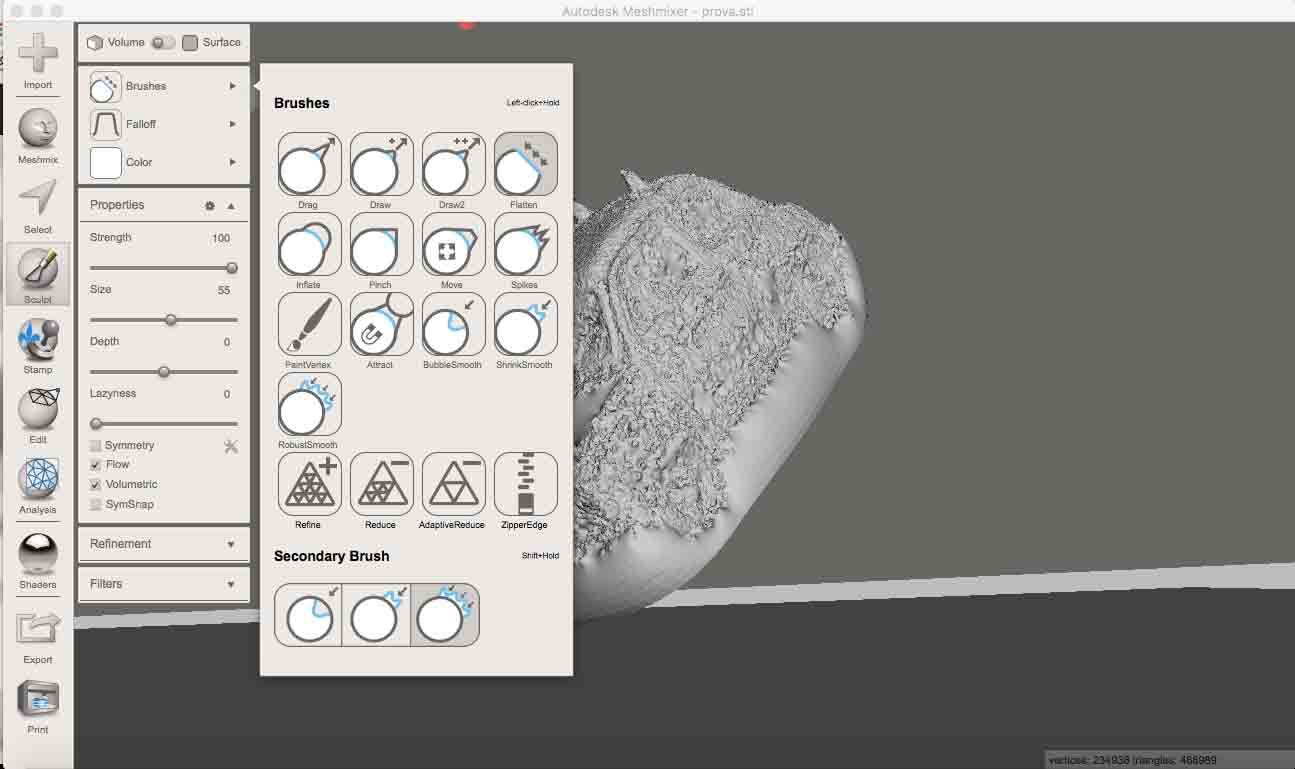
For try to make it better I have used Sculpt tool and then I have selected Flatten Brush.
After a lot of work, this is the result. As you can see this isn't a good result, because during this process I have lost a lot of details. For sure I need to do more practise with this kind of work. (I couldn't download this file on SketchFab because it was to big, but you can find it in the Download section).
CONCLUSION AND DOWNLOAD
This week was really interesting for me. Was beautiful design and print something that you have thought. Also 3D scanning was interesting. I found curios how with your photocamera you can do a complete scanning. You can find all files here

This work is licensed under aCreative Commons Attribution - ShareAlike 4.0 International License.