Introduction
The assignment of this week was:- Write an application that interfaces with an input and/or output device that you made, comparing as many tool options as possible.
PROCESSING
For this week I have decided to use PROCESSING. It is a very simple software who allowed me to create a simple interface integrating with Arduino sketch. I have decided to use it to create a simple interface for my Hello Board milled during past weeks.
Basically it used Java as programm language. I already knew a bit of Javascript so was easier for me design a simple interface with Java. First of all I have downloaded the software from their site.

After having installed it I have designed my interface. I have tried to do a "Magic 8-ball".
I decide to do that, because I have already done it during an University lessons, so I decide to adapt it to use with my button. I have drew all the shapes by defining each measure in pixel. Together with the measures I have setted their position in the interface.
There is an example:
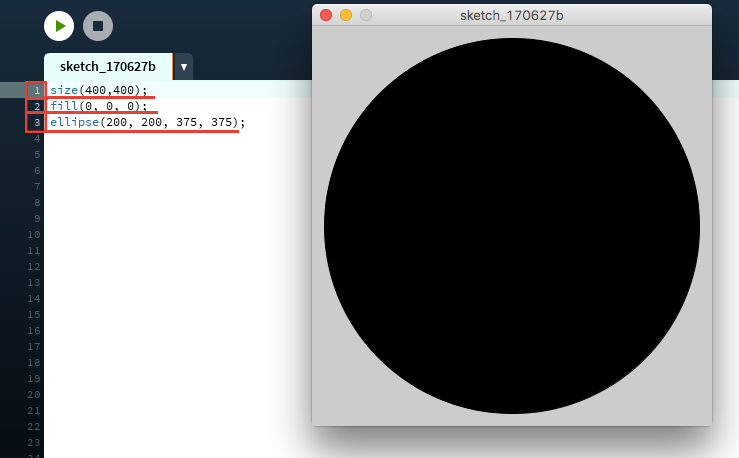
In LINE 1, with command size, I have defined canvas size (400x400 px)
In LINE 2, I have defined shape color. You have to use RGB value to define it.
Then, in LINE 3, I have drew an ellipse. The first two value are the meausure values (X and Y), and the last two value are the position coordinates.
I have found useful the referencing manual to see each command available and their function.
Anyway this is my Processing code:
background(255, 255, 102);
fill(0, 0, 0);
ellipse(200, 200, 375, 375);
fill(60, 0, 255);
triangle(200, 104, 280, 280, 120, 280);
fill(255, 255, 255);
size(400, 400);
int answer = floor(random(1, 5));
if (answer == 2) {
    fill(0, 255, 0);
    triangle(200, 104, 280, 280, 120, 280);
    fill(8, 8, 8);
    text("FAB ACADEMY", 159,219);
    text("2017", 189,242);
}
if (answer == 1) {
    fill(255,0,0);
    triangle(200, 104, 280, 280, 120, 280);
    fill(255, 255, 255);
    text("INTERFACE", 170, 200);
    text("PROGRAMMING", 158, 229);
}
if (answer == 3) {
    fill(242, 255, 0);
    triangle(200, 104, 280, 280, 120, 280);
    fill(8, 8, 8);
    text("SANTA", 180, 200);
    text("CHIARA", 176, 229);
    text("FAB LAB", 172, 259);
}
if (answer == 4) {
    fill(213, 0, 255);
    triangle(200, 104, 280, 280, 120, 280);
    fill(247, 247, 247);
    text("WEEK 16", 174, 240);

}
if (answer == 5) {
    fill(0, 238, 255);
    triangle(200, 104, 280, 280, 120, 280);
    fill(247, 247, 247);
    text("HI NEIL!", 178, 229);
}
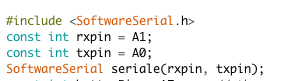
This code it's only for the graphics part. To integrate the interaction with my board I have wrote other lines. First of all I have wrote Arduino code on Arduino IDE to upload on my board. To create the interaction I had to use SoftwareSerial library. I have declared RX and TX pins
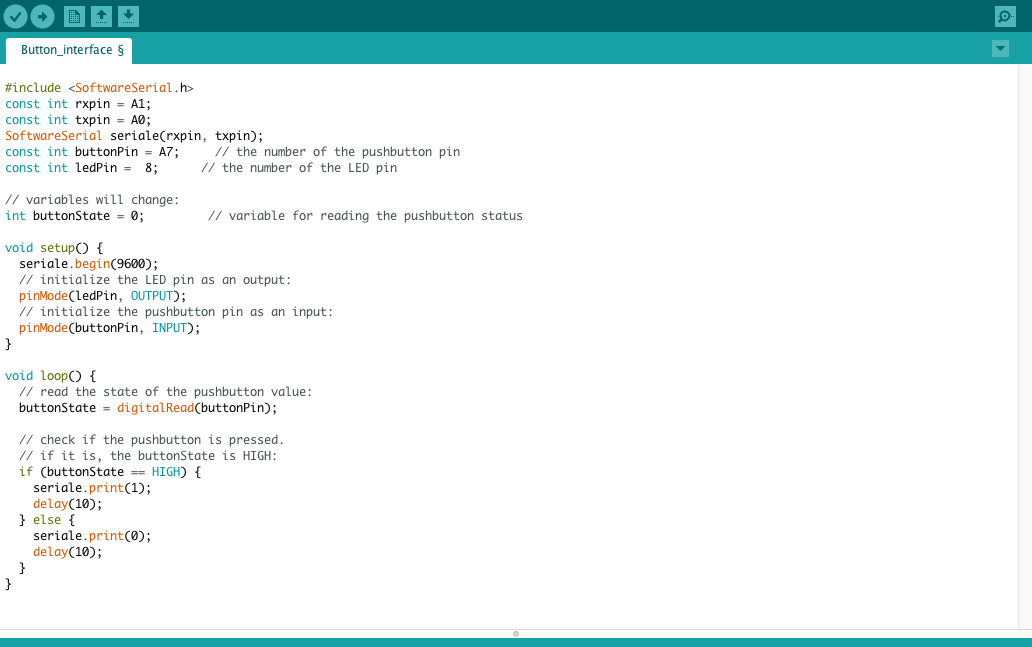
After that I have wrote the Arduino code to create an interaction with a button. This is the code:
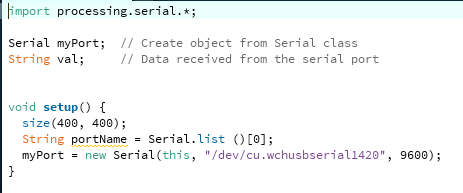
To include the communication part in Processing code, I hade to add serial libray in it and declared the serial port where I have connected the board.
I have tried my sketch, but it didn't work. I haven't been able to create the interaction. I don't understand which were the errors, I have understand only that something missing.
PROCESSING #2
I have done another sketch but this time to control a led on my board with an interface. So I have wrote another sketch with a simple interface:
Three button to controll a Led with in different ways.
To set the right port I have send this code by terminal,
ls /dev/tty.*, and I had a lists with all my port.

This is the Processing code:
import processing.serial.*;


Serial myPort;

//defining the shapes
int rectX, rectY;
int rect1X, rect1Y;
int rect2X, rect2Y;
int rectSize = 100;
color rectColor, rect1Color, rect2Color, baseColor;
color rectHighlight, rect1Highlight, rect2Highlight;
//setting the booleans for the mousover interaction
boolean rectOver = false;
boolean rect1Over = false;
boolean rect2Over = false;

void setup() {
  size(750, 400);
   myPort = new Serial(this, "/dev/cu.wchusbserial1420", 9600);
  //colors of the buttons
  rectColor = color(150, 255,90);
  rectHighlight = color(100);
  rect1Color = color(230, 255, 80);
  rect1Highlight = color(100);
  rect2Color = color(150, 55,90);
  rect2Highlight = color(100);
  //position of the buttons
  rectX = width/4 -rectSize;
  rectY = height/2+rectSize/4;
  rect1X = width/2-rectSize/2;
  rect1Y = height/2+rectSize/4;
  rect2X = width/5+4*rectSize;
  rect2Y = height/2+rectSize/4;

  background(255, 247, 237);
  //texts on the interface
  textSize(40);
  fill(244, 143, 2);
  text("INTERFACE", 260, 100);
  textSize(20);
  fill(17, 150, 10);
  text("test one", 90, 200);
  textSize(20);
  fill(247, 209, 22);
  text("test two", 330, 200);
  textSize(20);
  fill(155, 26, 86);
  text("test three", 550, 200);

  noStroke();
  fill(100);
  rect(0, 450, 900, 50);

}

void draw() {

  update(mouseX, mouseY);

  //to get the opacity on mouseover
  if (rectOver) {
    fill(rectHighlight);
  } else {
    fill(rectColor);
  }
  rect(rectX, rectY, rectSize, rectSize, 15);

  if (rect1Over) {
    fill(rect1Highlight);
  } else {
    fill(rect1Color);
  }
  rect(rect1X, rect1Y, rectSize, rectSize, 15);

  if (rect2Over) {
    fill(rect2Highlight);
  } else {
    fill(rect2Color);
  }
  rect(rect2X, rect2Y, rectSize, rectSize, 15);

}

//gets as input the mouse position and checks whether the cursor is on top of any of the three buttons
void update(int x, int y) {
  if ( overRect(rectX, rectY, rectSize, rectSize) ) {
    rectOver = true;
    rect1Over = false;
    rect2Over = false;
  } else if ( overRect1(rect1X, rect1Y, rectSize, rectSize) ) {
    rect1Over = true;
    rectOver = false;
    rect2Over = false;
  }  else if ( overRect2(rect2X, rect2Y, rectSize, rectSize) ) {
    rect2Over = true;
    rect1Over = false;
    rectOver = false;
  } else {
    rect1Over = rectOver = rect2Over = false;
  }
}
//events when the mouse is pressed: send a value through serial. Also, a check on the monitor is done to see whether the values are actually sent.
void mousePressed() {
  if (rectOver) {
 myPort.write('1');
   println("1");

}
  if (rect1Over) {
       myPort.write('2');
   println("2");
}

  if (rect2Over) {
       myPort.write('3');
   println("3");
  }
}

boolean overRect(int x, int y, int width, int height)  {
  if (mouseX >= x && mouseX <= x+width &&
      mouseY >= y && mouseY <= y+height) {
    return true;
  } else {
    return false;
  }
}

boolean overRect1(int x, int y, int width, int height)  {
  if (mouseX >= x && mouseX <= x+width &&
      mouseY >= y && mouseY <= y+height) {
    return true;
  } else {
    return false;
  }
}

boolean overRect2(int x, int y, int width, int height)  {
  if (mouseX >= x && mouseX <= x+width &&
      mouseY >= y && mouseY <= y+height) {
    return true;
  } else {
    return false;
  }
}
To create an interaction with a button, as you can see in the code, I have add string mousePressed, so when an event inside it occurs, something happens. For example: If I press on rect 1, Led on my board blink in as I have define. I have wrote the code with Arduino IDE and this is what I have upload:
#include <SoftwareSerial.h>


const int rx = 0;  //Andiamo ad assegnare al pin 2 l’indirizzo di ricezione dati (e lo colleghiamo al pin TXD del modulo)
const int tx = 1;  //Assegnamo invece al pin 3 l’indirizzo di trasmissione dati (collegandolo al pin RXD del nostro componente
char c=0;
int LED=8;
SoftwareSerial mySerial(rx, tx);

void setup(){
pinMode(LED,OUTPUT);
mySerial.begin(9600);
delay(50);
}

void loop(){
  mySerial.print("ok");
  mySerial.println();
  delay(50);
if (mySerial.available()>0){
  c = mySerial.read();
  if (c== '1'){                //LED blinks one time
   digitalWrite(LED,HIGH);  //LED on for 300ms
  }
  if(c=='0'){                //LED blinks two times
      digitalWrite(LED,LOW);   //LED turns off
     }

}
//delay(50);
}
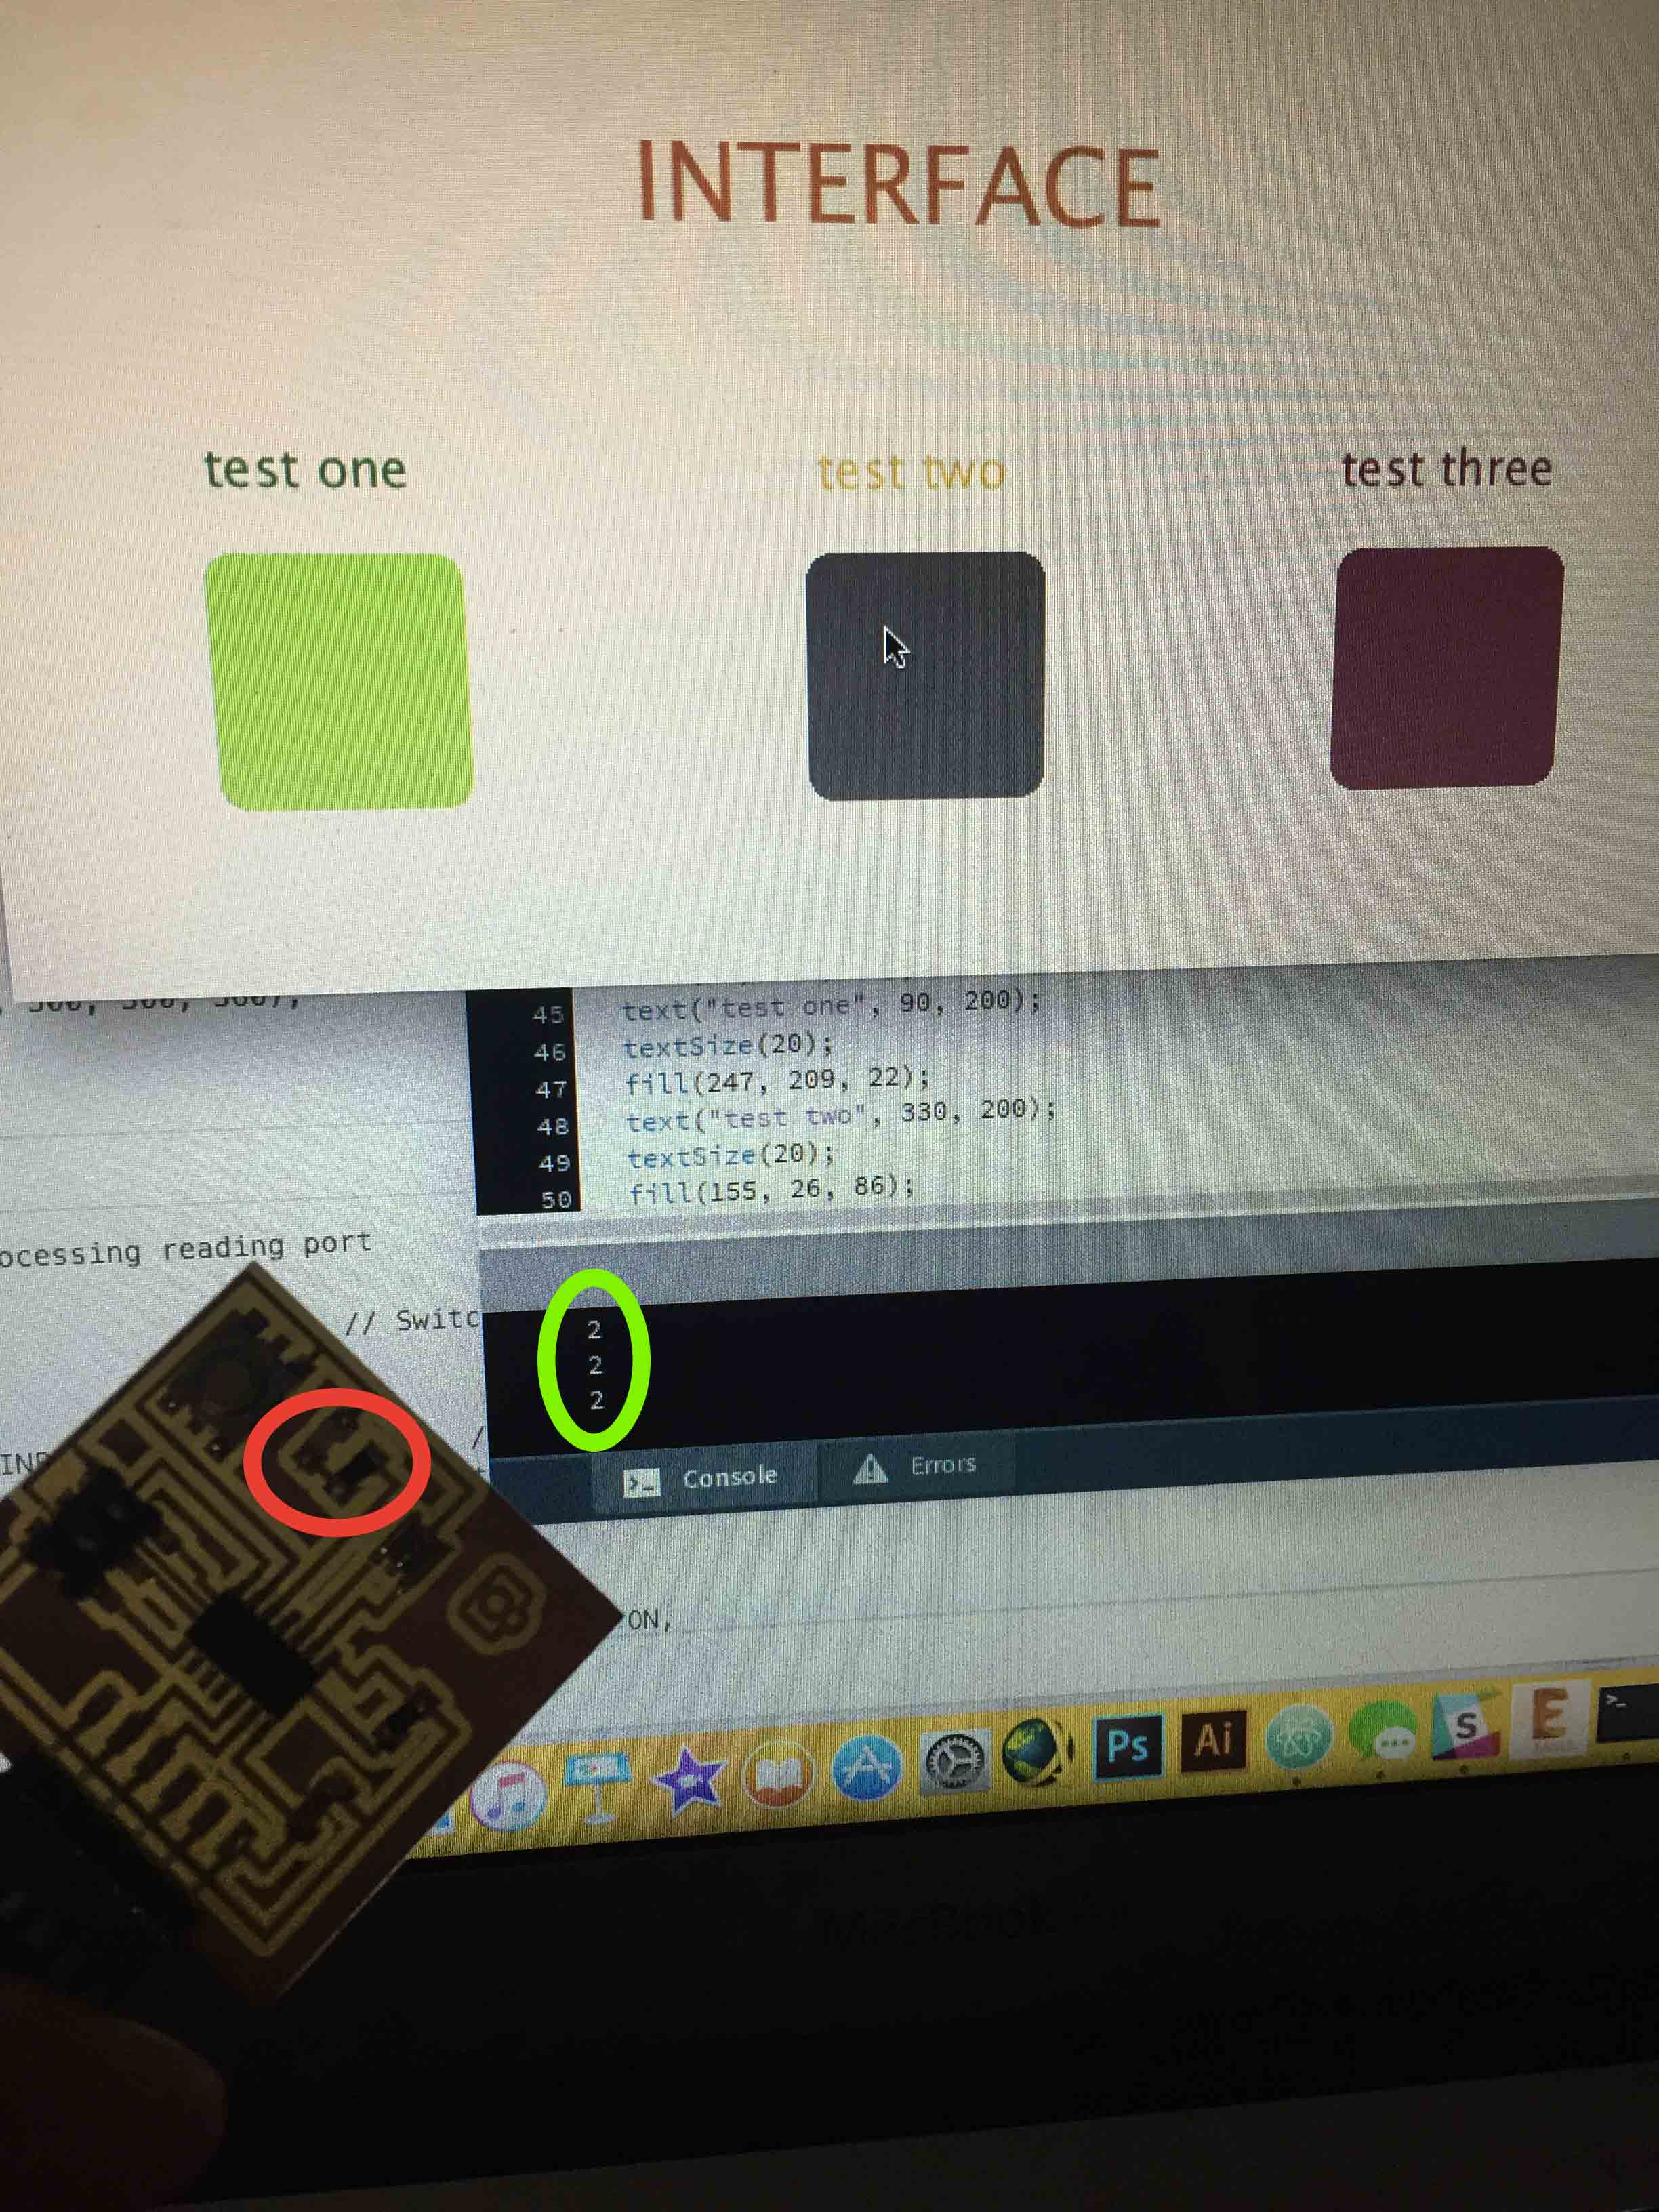
At the end I had some problem also with this sketch. I don't understand where is the problem. I thought that problem where in my serial port, but after some reserch, I understand that it was correct. So I have tried to understand if the problem was my Hello Board. I have tried to upload on it a basic Blink sketch to debug. It works correctly. So I have checked if RX and TX pins were correct, and they were. I have tried to change board, but nothing, it doesn't work. I have tried to change FTDI cable but it doesn't work either. I have tried to exclude every problem, but I don't understand what is wrong. I had only a monitor answer (as you can see in the photo below), but led doesn't work.
PROCESSING #3
In Italy we said "Third time lucky", so I have done another Interface always with Processing. With the other two attempts, I have understand that the problem probably was in Arduino code. So under Simone suggestion I've tried to change my code.
#include <SoftwareSerial.h>

#define tx 1
#define rx 0
#define LED 8
int led = 1;
SoftwareSerial mySerial(rx, tx);
void setup () {
  mySerial.begin(9600);
  pinMode (LED, OUTPUT);
  digitalWrite (LED, HIGH);
}

void loop() {
  while (mySerial.available() > 0) {
    led = mySerial.read();
    if (led == 1) {
      digitalWrite(LED, HIGH);
    } else {
      digitalWrite(LED, LOW);
    }
  }
  delay(10);
}
First difference was how I have define my pins. Before I haven't define them as integer, now I had a constant name at my pins.
This code allowed me to turning ON and OFF a led on my Hello Board.
This time Processing code is more simple, I have desing two button, ON and OFF.
import processing.serial.*;

Serial myPort;

//defining the shapes
int rectX, rectY;
int rect1X, rect1Y;
int rectSize = 200;
color rectColor, rect1Color, baseColor;
color rectHighlight, rect1Highlight;
//setting the booleans for the mousover interaction
boolean rectOver = false;
boolean rect1Over = false;


void setup() {
  size(650, 500);
  myPort = new Serial(this, "/dev/tty.wchusbserial1420", 9600);
  //colors of the buttons
  rectColor = color(0, 255, 0);
  rectHighlight = color(100);
  rect1Color = color(255, 0,0);
  rect1Highlight = color(100);

  //position of the buttons
  rectX = width/10;
  rectY = height-300;
  rect1X = width/2;
  rect1Y = height-300;


  background(0,150,150);
  //texts on the interface
  textSize(40);
  fill(255,255,255);
  text("Turn ON/OFF - Interface", 100, 70);
  textSize(30);
  fill(0, 255, 0);
  text("ON", 140, 170);
  textSize(30);
  fill(255, 0, 0);
  text("OFF", 390, 170);


  noStroke();
  fill(100);
  rect(0, 450, 900, 50);

}

void draw() {

  update(mouseX, mouseY);

  //to get the opacity on mouseover
  if (rectOver) {
    fill(rectHighlight);
  } else {
    fill(rectColor);
  }
  rect(rectX, rectY, rectSize, rectSize, 15);

  if (rect1Over) {
    fill(rect1Highlight);
  } else {
    fill(rect1Color);
  }
  rect(rect1X, rect1Y, rectSize, rectSize, 15);


}

//gets as input the mouse position and checks whether the cursor is on top of any of the two buttons
void update(int x, int y) {
  if ( overRect(rectX, rectY, rectSize, rectSize) ) {
    rectOver = true;
    rect1Over = false;

  } else if ( overRect1(rect1X, rect1Y, rectSize, rectSize) ) {
    rect1Over = true;
    rectOver = false;

  }  else {
    rect1Over = rectOver = false;
  }
}
//events when the mouse is pressed: send a value through serial. Also, a check on the monitor is done to see whether the values are actually sent.
void mousePressed() {
  if (rectOver) {

   myPort.write(1);
   println("on");

}
  if (rect1Over) {
       myPort.write(0);
   println("off");
  }

}

boolean overRect(int x, int y, int width, int height)  {
  if (mouseX >= x && mouseX <= x+width &&
      mouseY >= y && mouseY <= y+height) {
    return true;
  } else {
    return false;
  }
}

boolean overRect1(int x, int y, int width, int height)  {
  if (mouseX >= x && mouseX <= x+width &&
      mouseY >= y && mouseY <= y+height) {
    return true;
  } else {
    return false;
  }
}
This time I had a small success, I was able to turning OFF my Led with the interface, but not to turning it ON. It was a little success, but I keep trying to work on it to understand where was the problem.
DOWNLOAD AND CONCLUSION
As I said, unfortunatly my sketch didn't work correctly. I have tried to understand where was the problem but I need more time to understand it probably. But I can said that this week was very interesting. Was fun create an interface using Java code.

This work is licensed under aCreative Commons Attribution - ShareAlike 4.0 International License.