Exercise 14 Composites
Assignment Requirement
- design and make a 3D mold (~ft2)
- produce a fiber composite part in it
Introduction
According Wikipedia Overview on composites - Composites are made up of individual materials referred to as constituent materials. There are two main categories of constituent materials: '''matrix''' (binder) and '''reinforcement'''. At least one portion of each type is required. The matrix material surrounds and supports the reinforcement materials by maintaining their relative positions. The reinforcements impart their special mechanical and physical properties to enhance the matrix properties. A synergism produces material properties unavailable from the individual constituent materials, while the wide variety of matrix and strengthening materials allows the designer of the product or structure to choose an optimum combination.
Engineered composite materials must be formed to shape. The matrix material can be introduced to the reinforcement before or after the reinforcement material is placed into the Molding cavity or onto the mould surface. The matrix material experiences a melding event, after which the part shape is essentially set. Depending upon the nature of the matrix material, this melding event can occur in various ways such as chemical polymerization for a thermoset polymer matrix,or solidification from the melted state for a thermoplastic polymer matrix composite.
A variety of moulding methods can be used according to the end-item design requirements. The principal factors impacting the methodology are the natures of the chosen matrix and reinforcement materials. Another important factor is the gross quantity of material to be produced. Large quantities can be used to justify high capital expenditures for rapid and automated manufacturing technology. Small production quantities are accommodated with lower capital expenditures but higher labour and tooling costs at a correspondingly slower rate.
Many commercially produced composites use a polymer matrix material often called a resin solution. There are many different polymers available depending upon the starting raw ingredients. There are several broad categories, each with numerous variations. The most common are known as polyester, vinyl ester, epoxy, phenolic, polyimide, polyamide, polypropylene, PEEK, and others.
Epoxy Resin
I sort of referred to our local instructor past documentation for the epoxy resin that we were using in this exercise.
From Mr Steven page, I knew that the local epoxy supplier is Wee Tee Tong. The two environmentally friendly and low volatility expoxy we have are:
- Epicote 1003 - low volatility, gel in 5-10 min, tack free in 2 hrs, 3:1 ratio of resin:activator
- Epicote 1006 - low volatility, gel in 30 min, tack free in 12 hrs, 10:6 ratio of resin:activator
The resin we decided to use is Epicote 1003, where the working time is 5-10mins and curing time is around 2 hrs. The reason is that we can get to know the outcome of composite making using our mold after a couple of hours.
We were informed by Mr Steven that this is an equivalent epoxy resin similar to bisphenol-A based Epoxy resin, so we refer to bisphenol-A based Epoxy MSDS for the safety precaution and handling procedure. As our Fablab is consider quite airy and properly ventilated non aircondition room, no additional respirator was being used. We only used latex gloves when handling the Epicote 1003 liquid and hardener.
Tooling
The mold and mold inserts are referred to as "tooling." The mold/tooling can be constructed from a variety of materials. Tooling materials include invar, steel, aluminium, reinforced silicone rubber, nickel, and carbon fiber. Selection of the tooling material is typically based on, but not limited to, the coefficient of thermal expansion, expected number of cycles, end item tolerance, desired or required surface condition, method of cure, glass transition temperature of the material being moulded, moulding method, matrix, cost and a variety of other considerations.
In this exercise, the recommended material by our local instructor for our tooling is non other than extruded compress blue foam; which we used before in the molding and casting week. Base on previous experience, I was thinking that blue foam can be machined rather quickly to produce the tooling intended. As the mold is not intended to be used for repetitive high volume continuous replication of part, so it should do just fine for our experimentation.
Mold Design
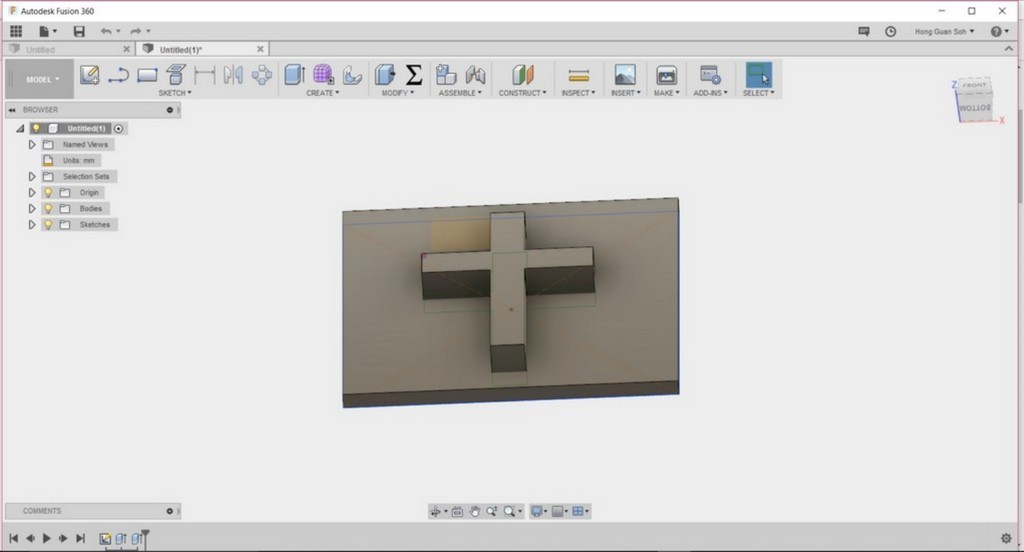
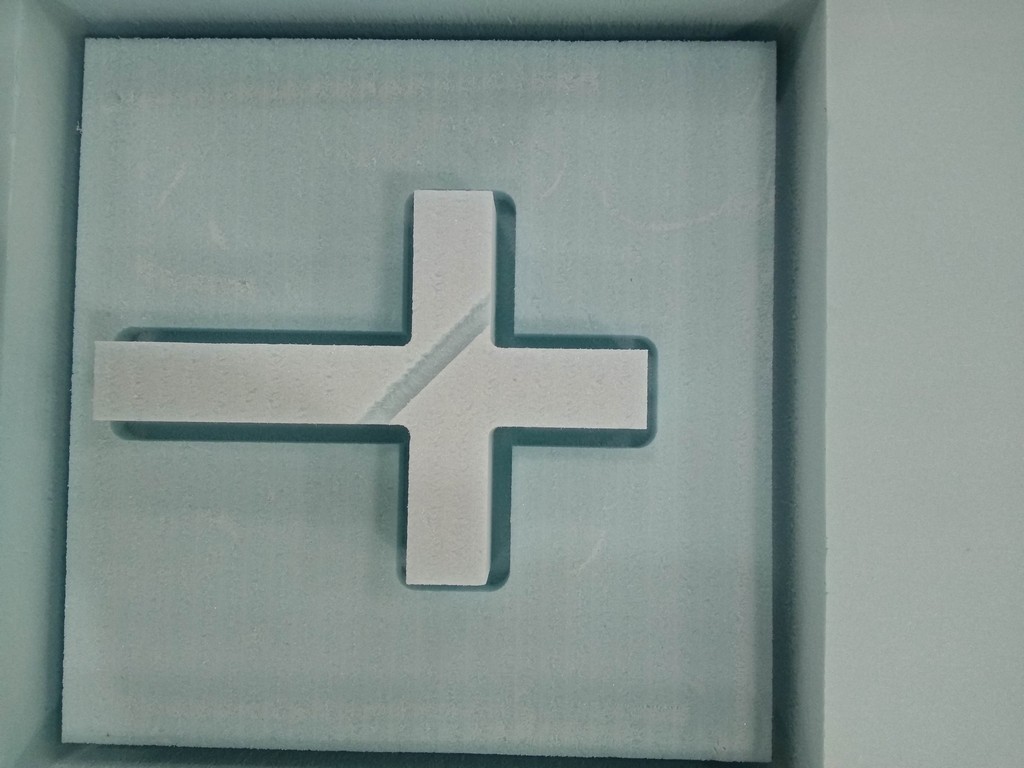
The software that we were thought to use at Fablab Singapore Polytechnic is Autodesk Fusion 360. To begin with, I utilised the "cross" design I CADed; which my fellow classmates said it is too simple a mold. But end up there were quite some challenge to do the molding with hydrostatic/ clamp compression process. Expecially, with the 90 degree sharp profile of the "cross".
With just the simple mold as above, I can't figure out how I going to use hydrostatic compaction method to cast my workpiece. I got my inspiration from the serving tray mold created by my local instructor Mr Steven chew last year, from there I decided to laser cut a piece of slightly bigger size acrylic to enable the clamping and just enough to allow some number of sheets of burlap to be lay-up underneath as illustrated.
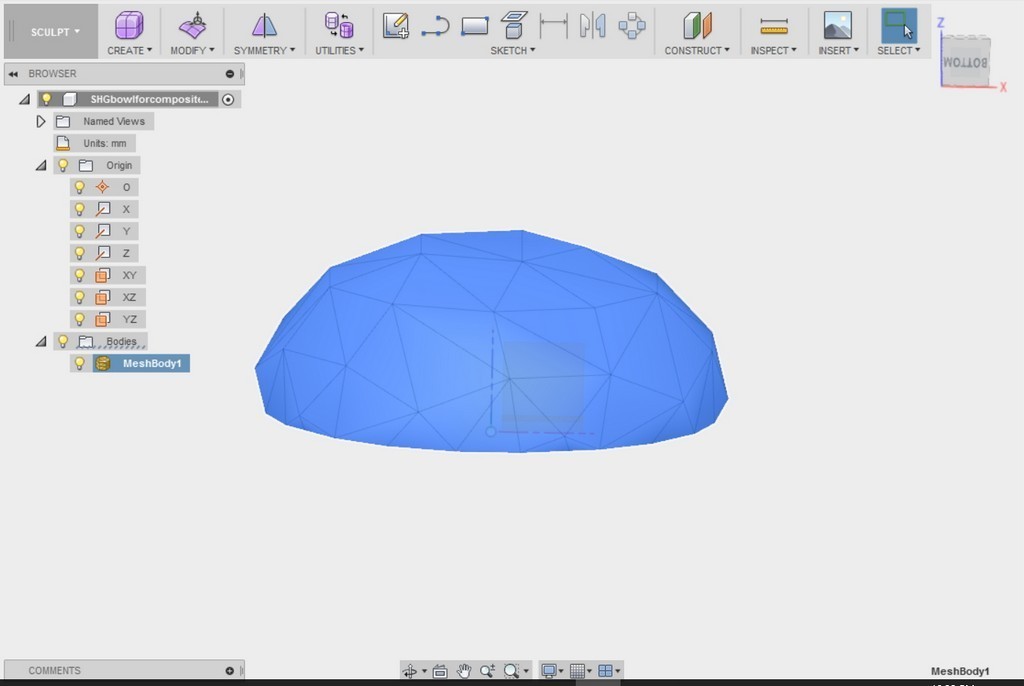
At the same time, I also experiment in Fusion 360 by importing STL file that was created by past year students and try to modify and alter the design as shown. Somehow, I was not able to alter the design at all. The STL model when imported into Fusion 360 appeared as a meshbody which I don't know much how to alter the design.
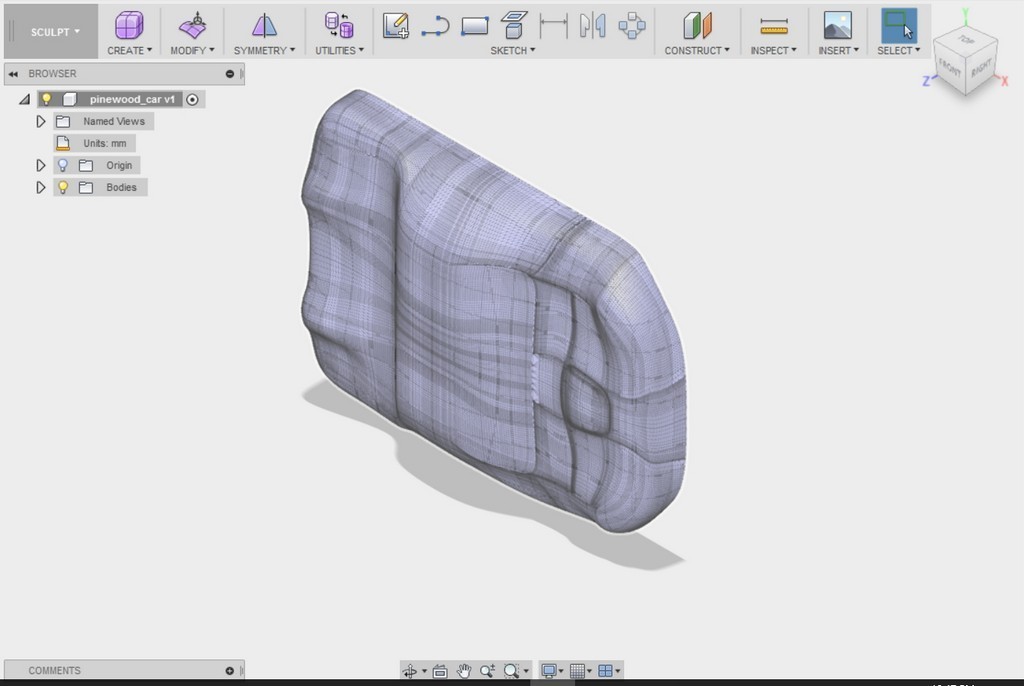
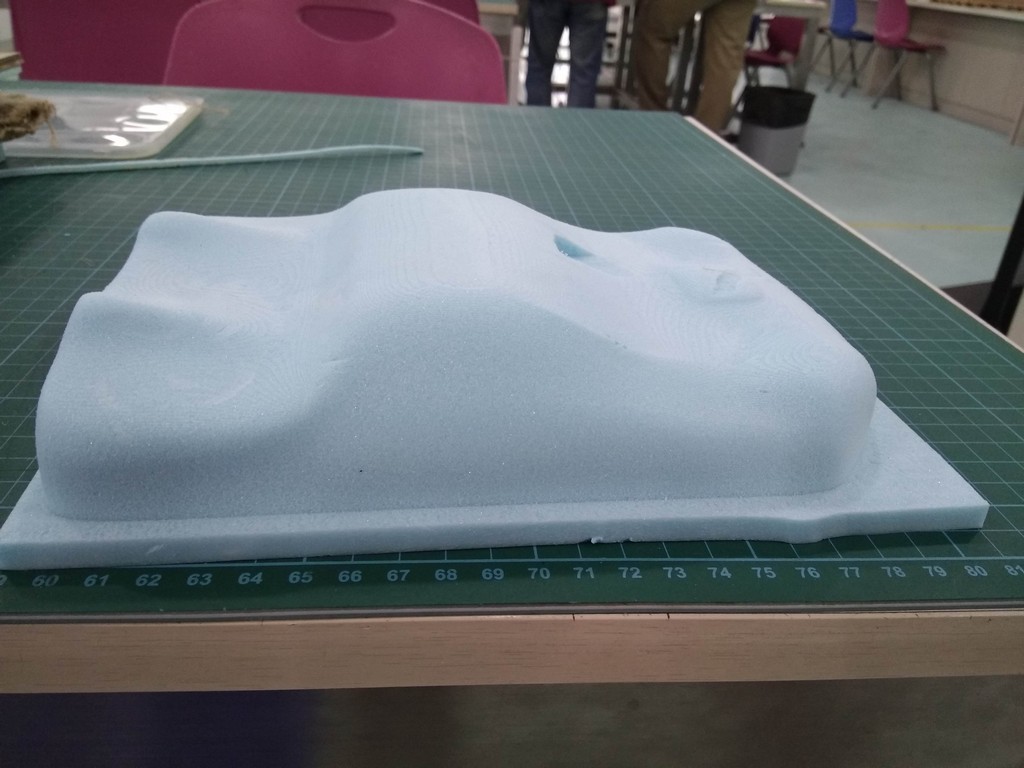
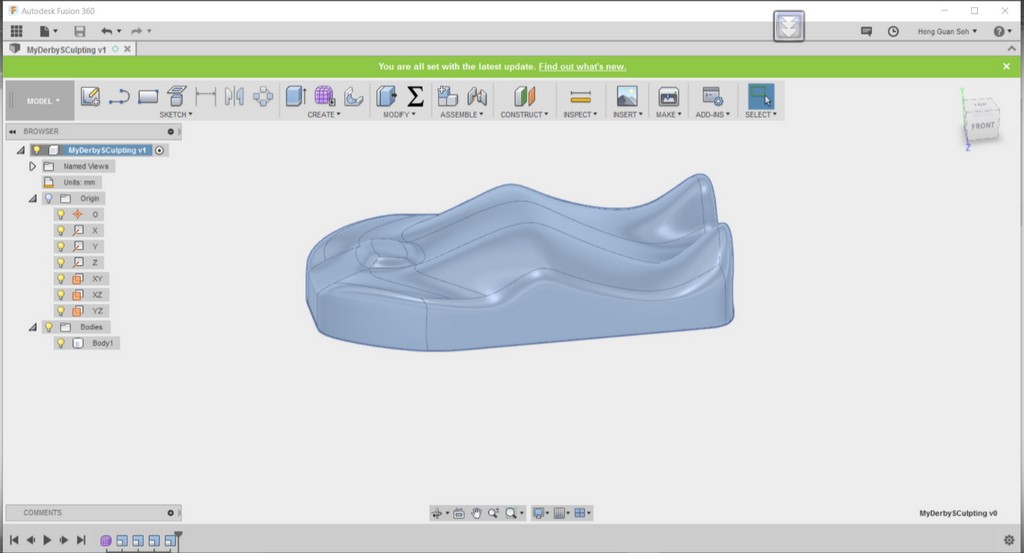
In my last attempt, I tried to create a mold using Patrick Rainsberry modelled pine-wood-derby sport car design in STL file using Fusion 360. To really able to create the pine-wood-derby by my own in fusion 360, I would probably need to spend at least half a day or maybe longer to follow the youtube video to learn to use the sculpting function in Fusion 360.
So for a rapid modelling I decided to used the STL file provided in Patrick Rainsberry in his website teaching about 3D Sculpting Pinewood Derby Sport Car; and with that I tried to mill out the Derby Sport car in extruded blue foam.
Milling process
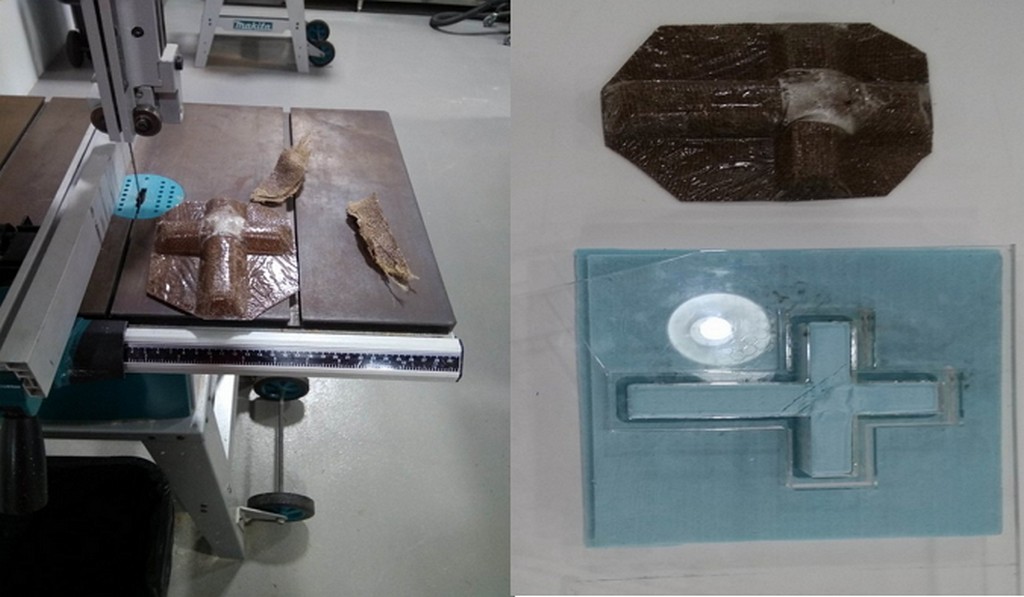
With that I decided to go ahead to mill out my "Cross" tooling, for the simplicity of design in Fusion 360. I proceed to convert the design into STL file and transfer in to the SRP software for Roland MDX-540 for the subsequent milling processes- as describe in my Week 12 - Molding & Casting page.
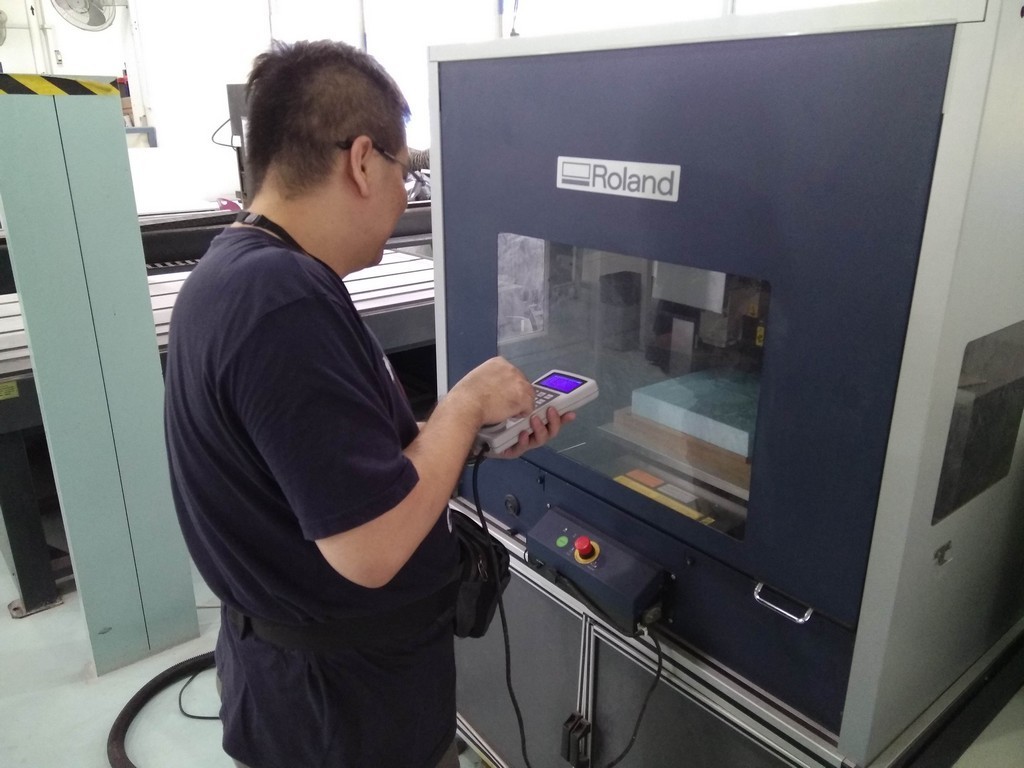
Next I started the milling process as shown.
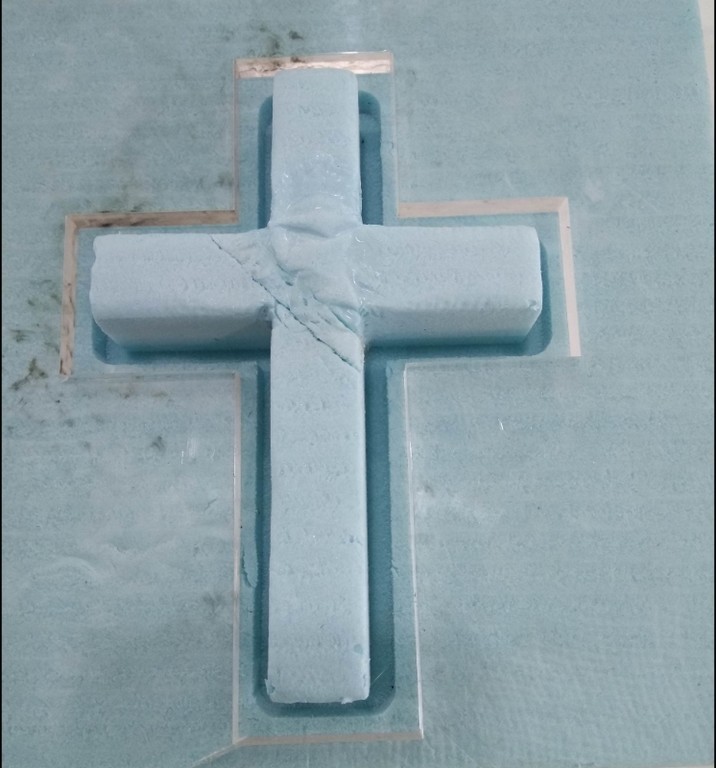
Valla! After about 1.6 hours machining time, I made my first simple 3D mold, but with a scar go diagonal accross the upper center. Anyway, I managed to do some minor patching up with double sided 3M tape sticked on a small little piece of extruded blue foam; and I am all ready to do my wet lay-up.
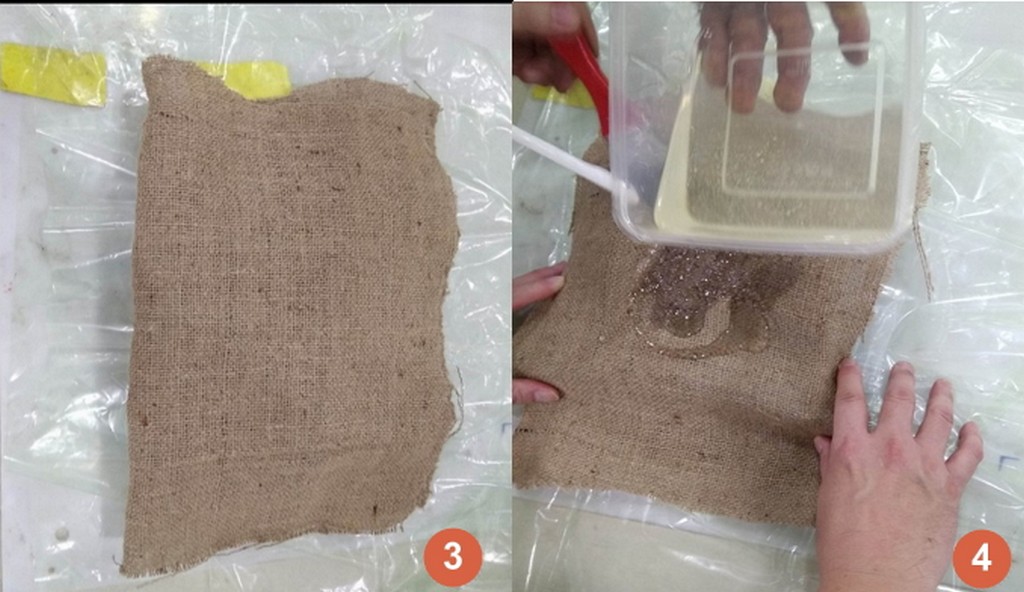
Making of Coupon
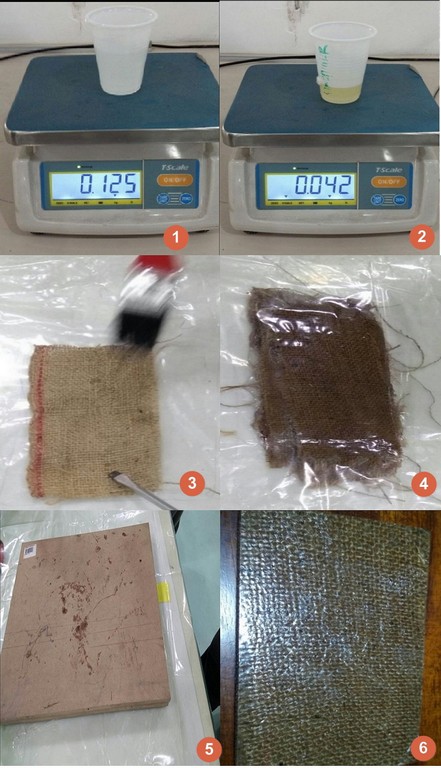
While waiting for my turn to use Roland MDX-540 to perform the cutting of my positive "Cross" tooling, we did a coupon making using burlap and the exposy resin and hardener that we will be going to use for our experiment.
As this is a group experiment, some perfomed the burlap cutting and some did the epoxy and hardener weighing with an electronic weighing scale in a plastic cup containers as shown.
Compaction using Hyrostatic/ Clamp Process

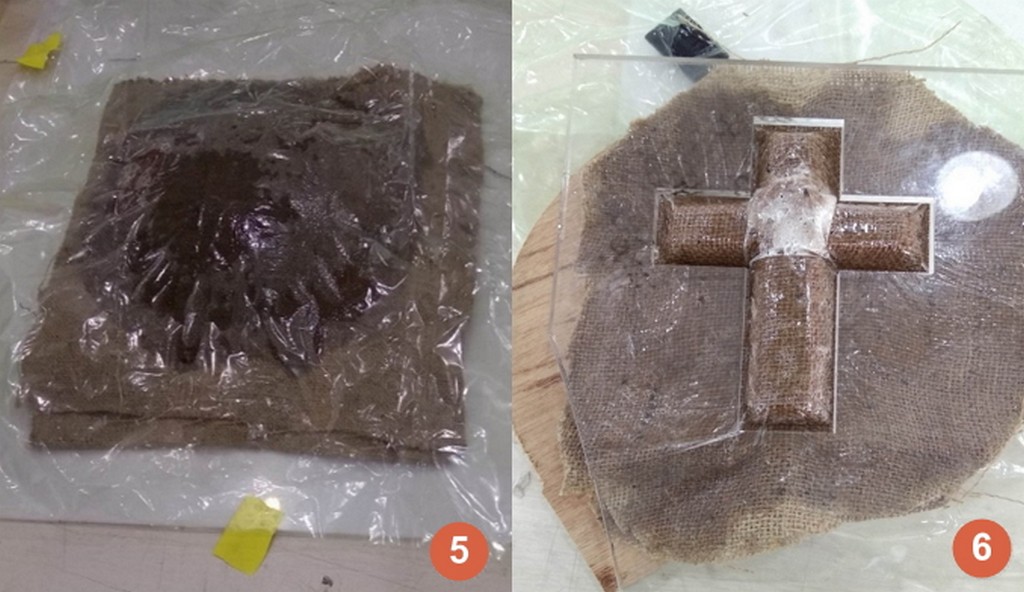
Allow composite to Set for 30 minutes and remote the top peel-ply. Further allow composite to cure for 2hours before removed the composite part from the bottom peel-ply.
After finished this week assignement, then I revisited the youtube video by Patrick Rainsberry and sort of learnt to create my own verison of the Derby sport car as follow
As every single mill of ~ft2 mold might probably take about one to three hours based on previos two milling experiences using Roland MDX-540, so I have decided not to go ahead with the task of milling out of my verison of Derby Sport Car. Futhermore it was on the late evening before a public holiday(Wesak Day)-Tuesday, 10 of May 2017; that I CADed the mold in Fusion 360.
Reflections
It has been a fun packed week playing with machining, mold design and composite part making. As we are having a short production week again because of Wednesday Public Holiday. From start I was not able to confirm what I intended to make and thus end up trying out a few option for mold creation without must success. Lastly settle with my simple cross design. To me mold design is one of the most important step that I could never master within a week. Most of us would either go for a simple shape and learn about the process. From the process I also learnt that as a rule of thumb, lay up results in a product containing 60% resin and 40% fibre, whereas vacuum infusion gives a final product with 40% resin and 60% fiber content. The strength of the product is greatly dependent on this ratio.
Download Week 14 work files
The Fusion 360 files for my cross design and Derby Sport Car can be download using the link below. Similarly, I have also provided the STL version too.
References
- Layup Process
- Composites wet layup
- How To Make Your Own Carbon Fiber (Fibre) Parts.
- How to make a mould for a carbon fiber (fibre) part