Exercise 12 Molding and Casting
Assignment Requirements
- design a 3D mold
- machine it, and
- cast parts from it
After Lecture's Debrief
As usual we had our's "after-lecture-debrief" on Thursday morning and discussed about this week exercise requirements and how to go about to doing it.
.After the debrief, our local instructor Mr Steven Chew showed to us a sample silicone rubber mold he made in the past. He used compressed blue foam to cut out a chinese character - “平" as the possitive of the mold with Roland MDX-540 CNC cutter. From that possitive, he produced his negative silicone rubber mold that could be used to cast out the Chinese Character repetitively.
With that, Steven leave us to design our own 3D mold, before he can gave us a demontration on the Roland MDX-540 to cut out the possitive mold.
3D Mold Design
From the sample, we were inspired to create our very own unique Chinese Character. Perhaps, our own name or family name as a start.
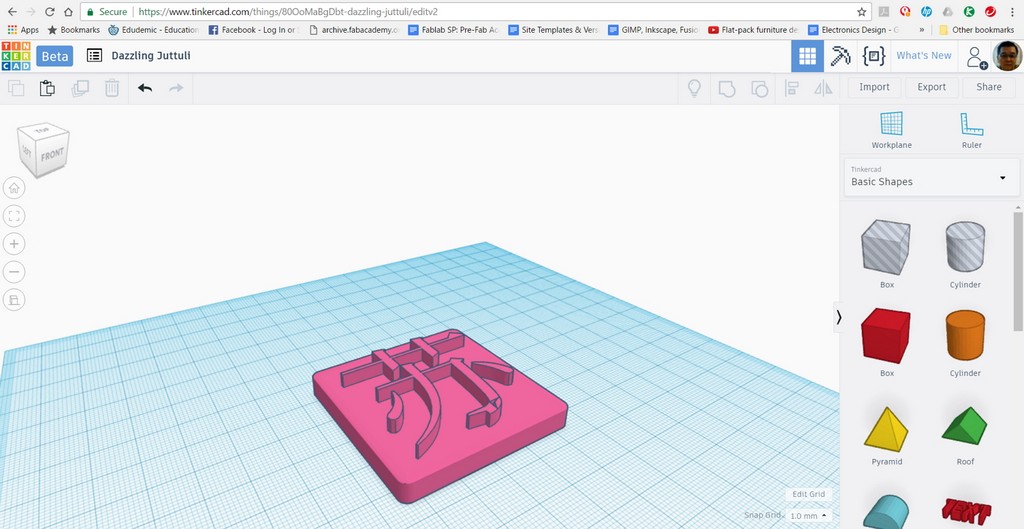
As I don't have a software that can produce a chinese character image of the chinese calligraphy type, I used the Google search Engine to search for my family name/surname- "苏" in SVG format. At first I wanted to test out whether the chinese character in SVG format that I downloaded from internet could be used straight away to create the 3D mold model and cut out a feasible positive mold.

To do that, I imported the svg format file directly into tinkercad and extrude the 2D chinese character into a 10mm 3D model which sit on top of a 5 mm thick base with rounded corners. The 3D model is saved in STL format and open in meshmixer and a snapshot was taken as follow:
Machining of my positive 3D mold
With this STL file created, I proceed to open the file in SRP player (accompanying software and controller for our Roland Modela Pro MDX-540 CNC cutter). Which the machine, MDX-540 User Manual can be downloaded.
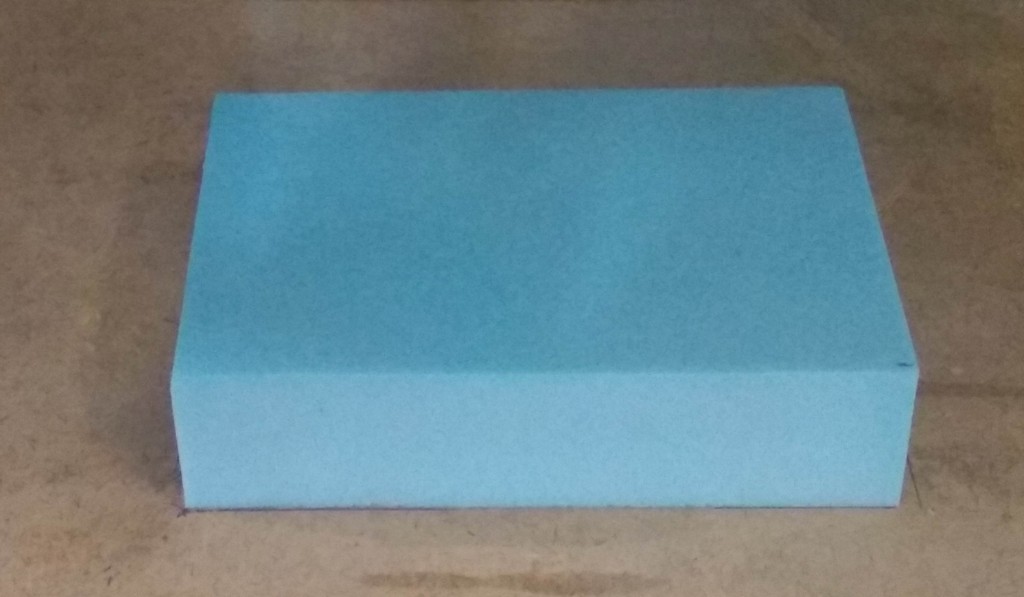
Next we prepared the material that we going to use- extruded blue polystyrene high density foam of the size 100mm x 70mm x 25mm. The foam is attached to the machine platform using double sided adhesive tape. To play safe we also have ensured that the foam is securely fixed onto the sacrificial wooden underlay.
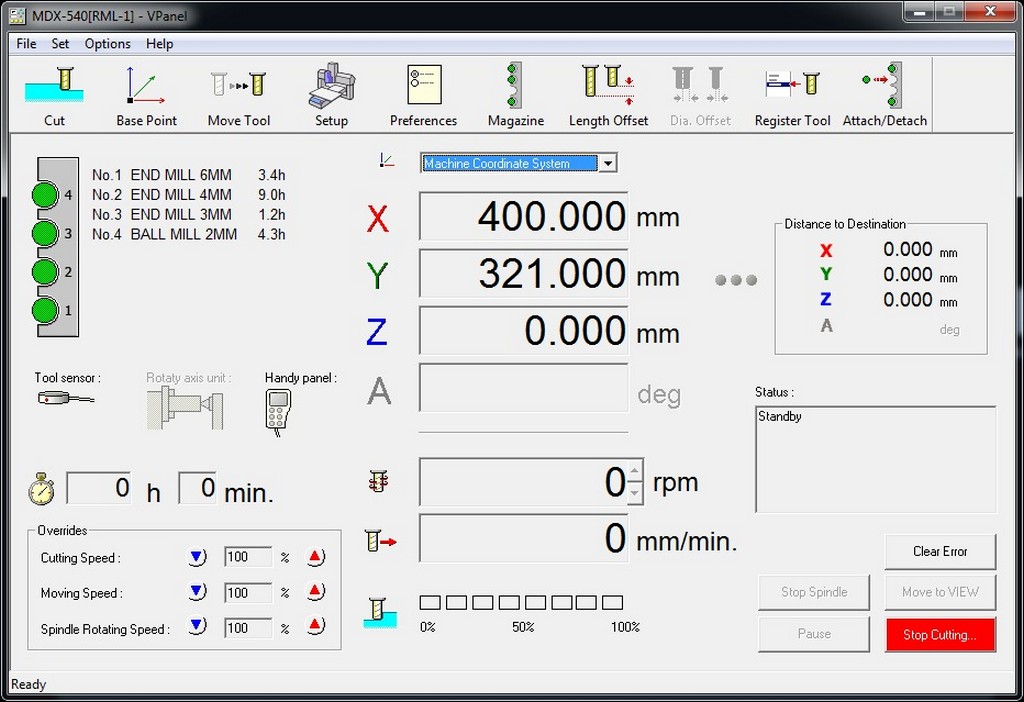
Our local instructor Mr Steven Chew started the demo on how to perform the tools calibration and to take measurement of the tool lenght for the 6mm,4mm,3mm,2mm milling tools. These tool lenght were registered in the machine control panel - Vpanel.
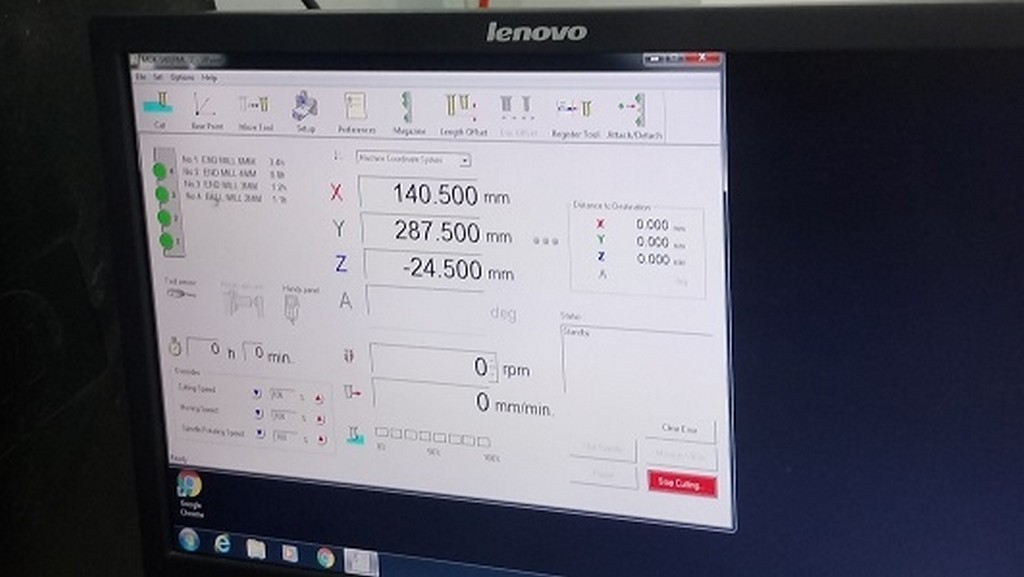
Next we proceed to define the workpiece position with respect to the machine origin and valla we are almost ready to start cutting...
First Trial Cutting Using Roland MDX-540
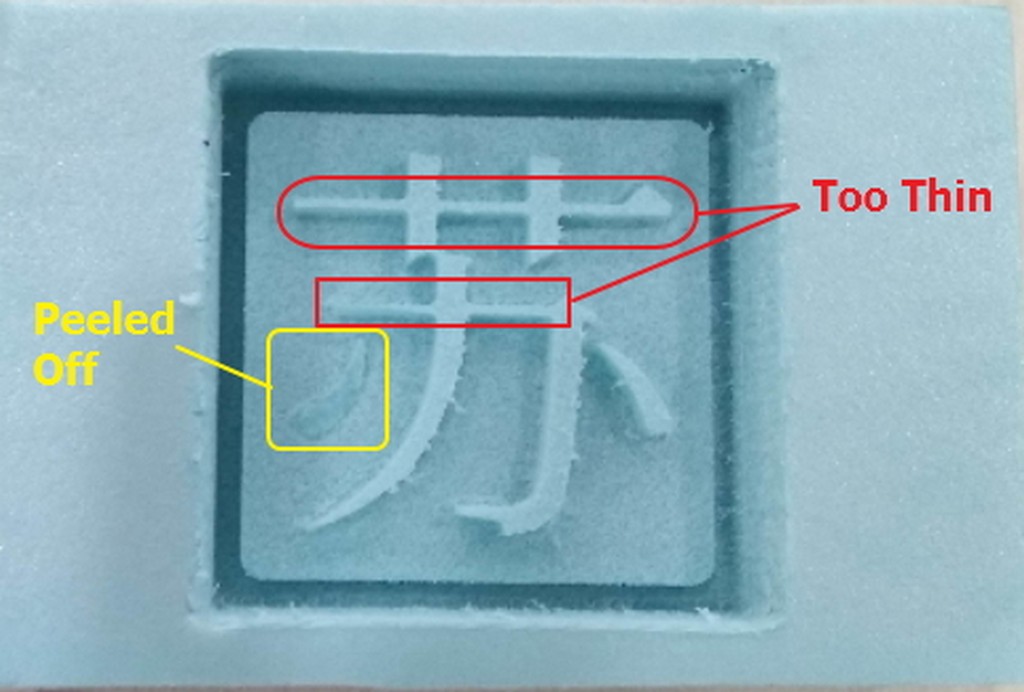
The first cutting with 3d mold created directly from SVG file found from Google search without modification ended with a section of the character peeled off and two lines were too thin for making the positive mold.
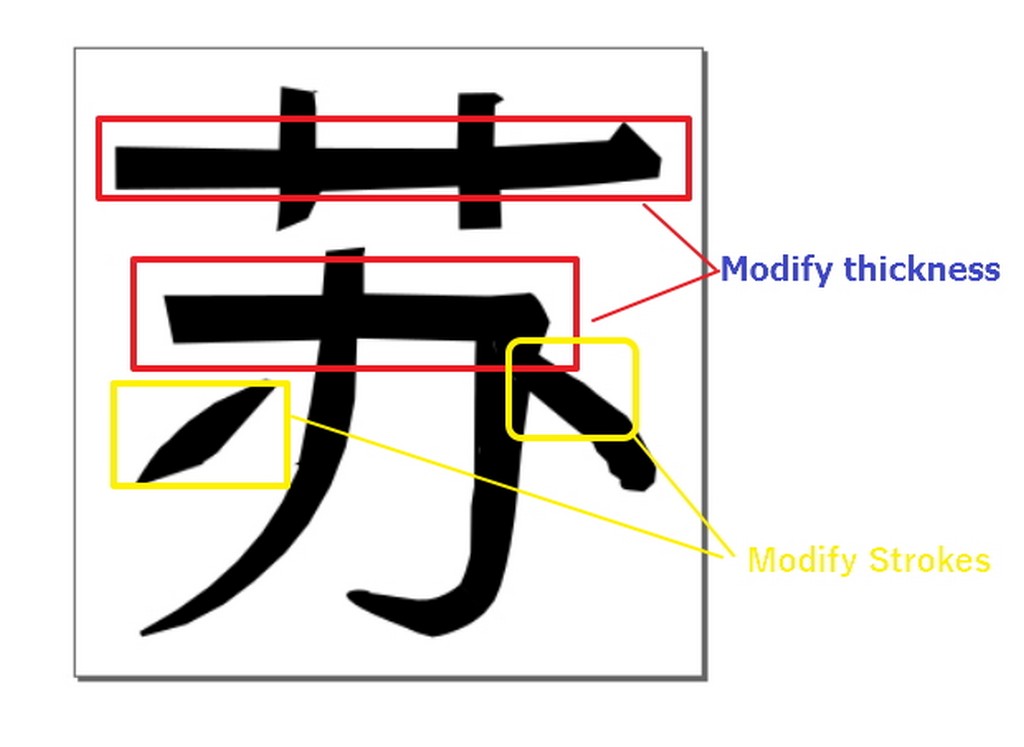
No more time on Thursday for second trial as we started quite late and there were five of us taking turn to cut ours mold. As such I gone back to the 3D mold design phase again to modify the character by thickened the lines and stroke slightly and created a new SVG -new-su.svg as shown in the screen shot below:
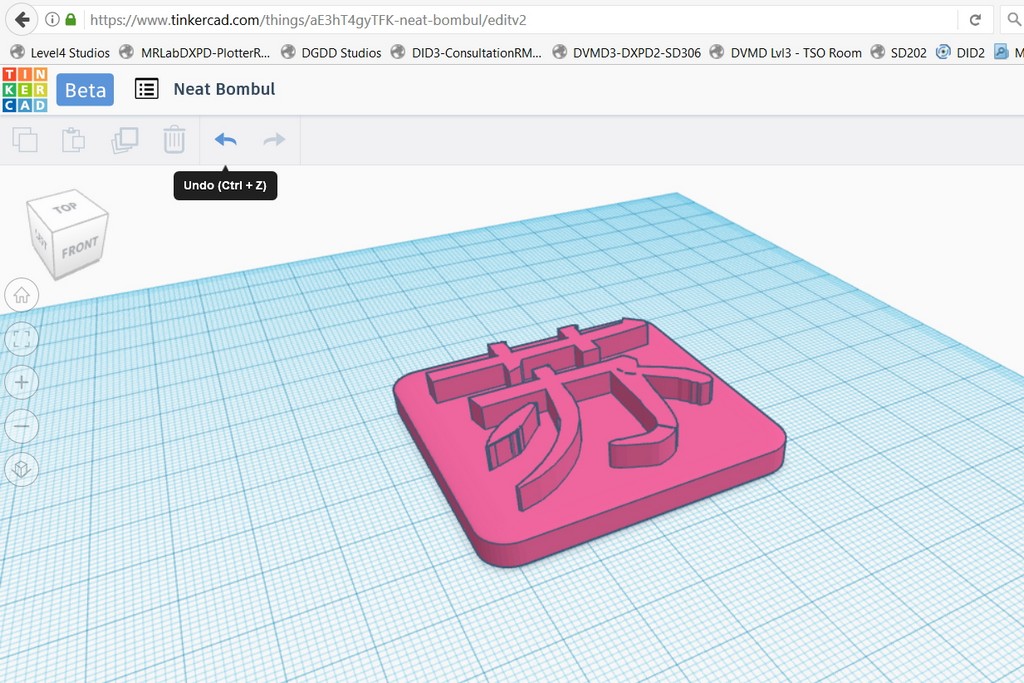
Second trial with modify chinese character.
Using the new-su.svg file, I created my surname 3D mold once again in tinkercad and saved it as new-su.stl file for open in SRP player software controller
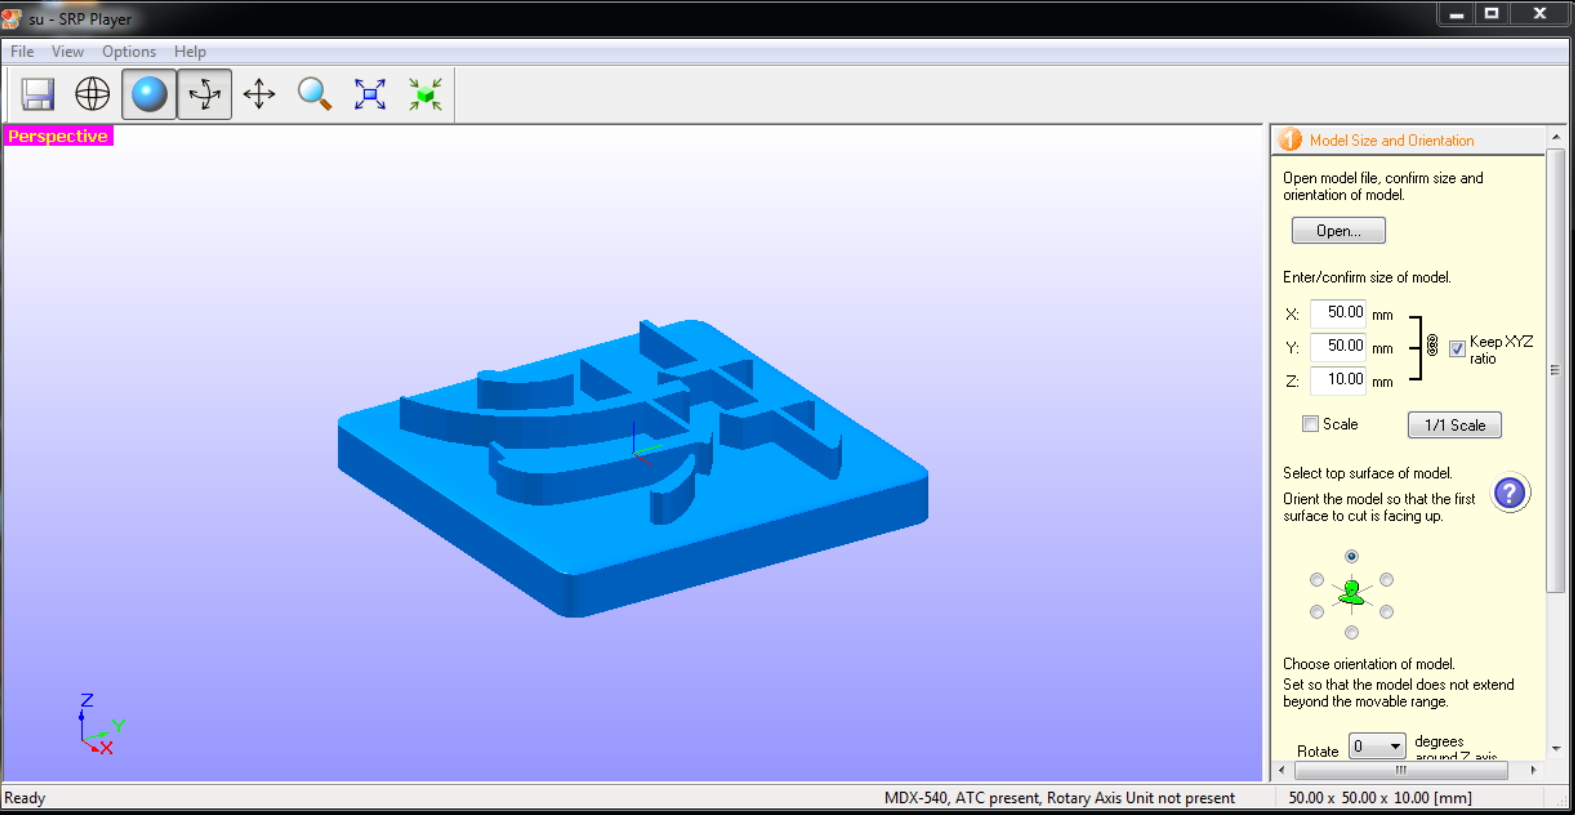
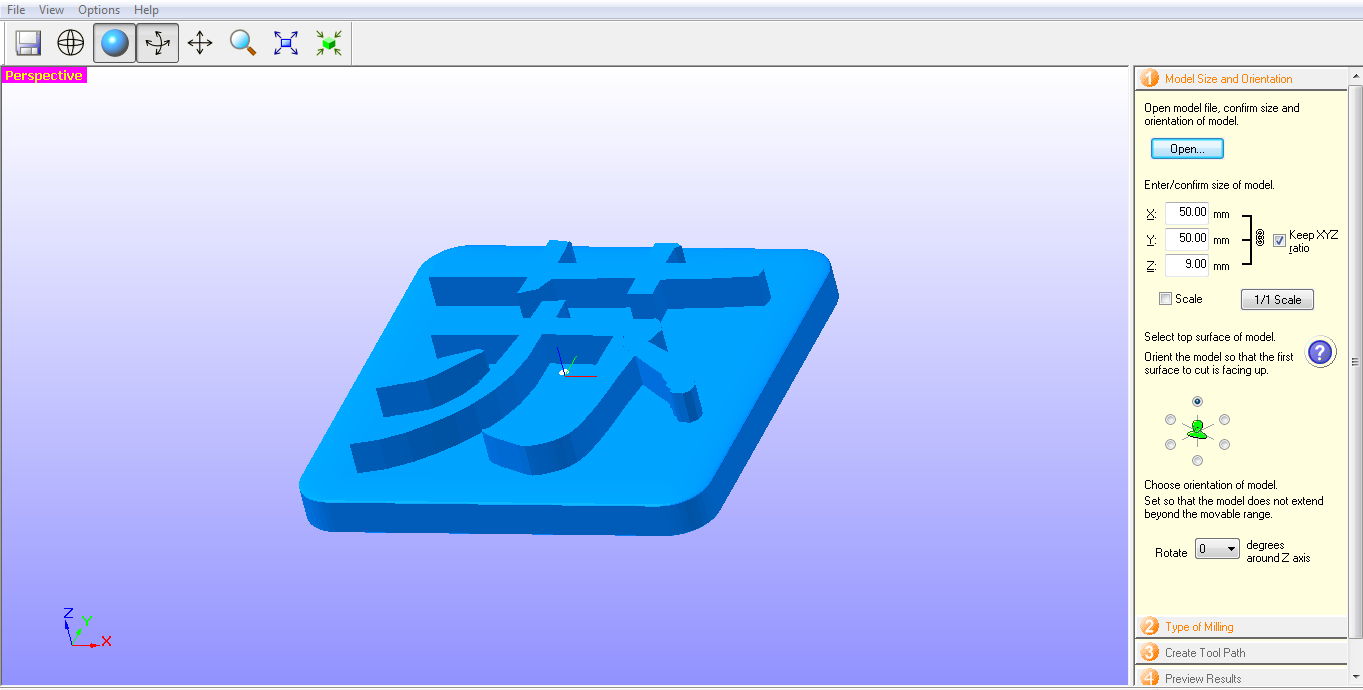
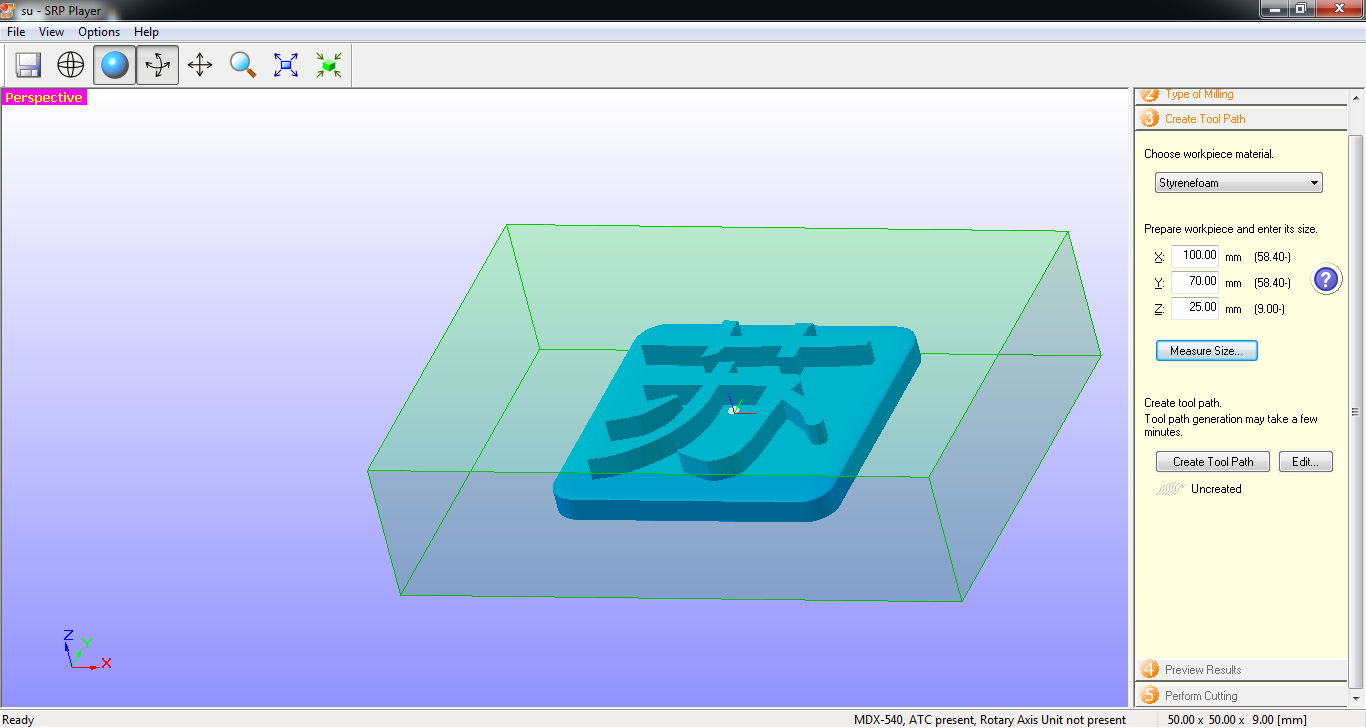
Next up I opened up the newly created new-su.stl file in SRP Player and start to performed the necessary setup required before starting the machine for milling out of my positve 3D mold in extruded polystyrene foam/depron of size 100mm x 70mm x 25mm.
The size of the mold is defined as 50mm x 50mm X 9mm and I defined the origin is at the center of the polystyrene foam block we prepared. In short, I have created a pocket where my positive is sit in it, for pouring of Silicone rubber to create the negative mold later.
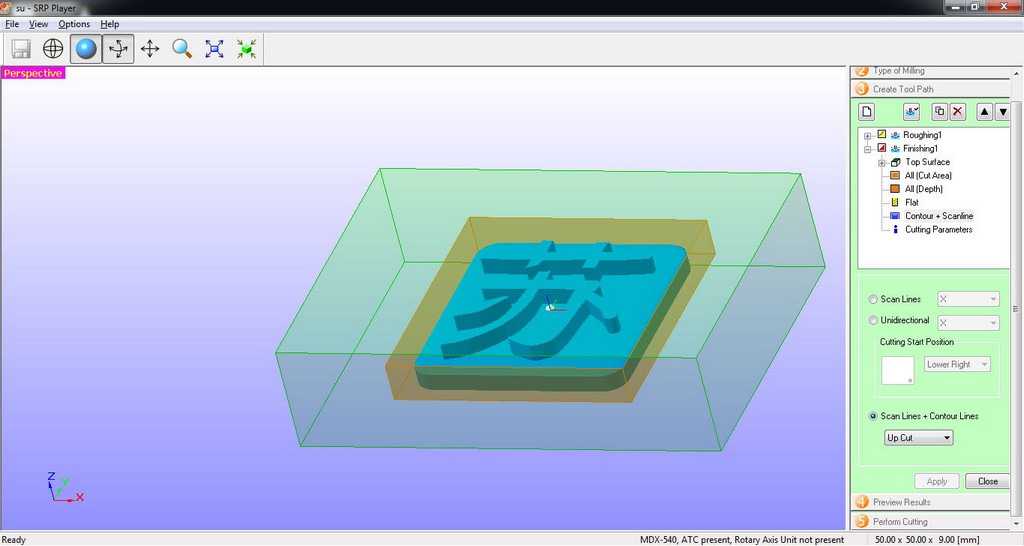
Following that, I went on to create the cutting tool paths for both the rough cut and fininishing cut. For both roughing and finishing I defined the scan lines + contour lines as "Up Cut". At the same time for the cutting tool use for roughing1, I selected the 4mm cutter, and for finishing1 cut I used the 2mm.
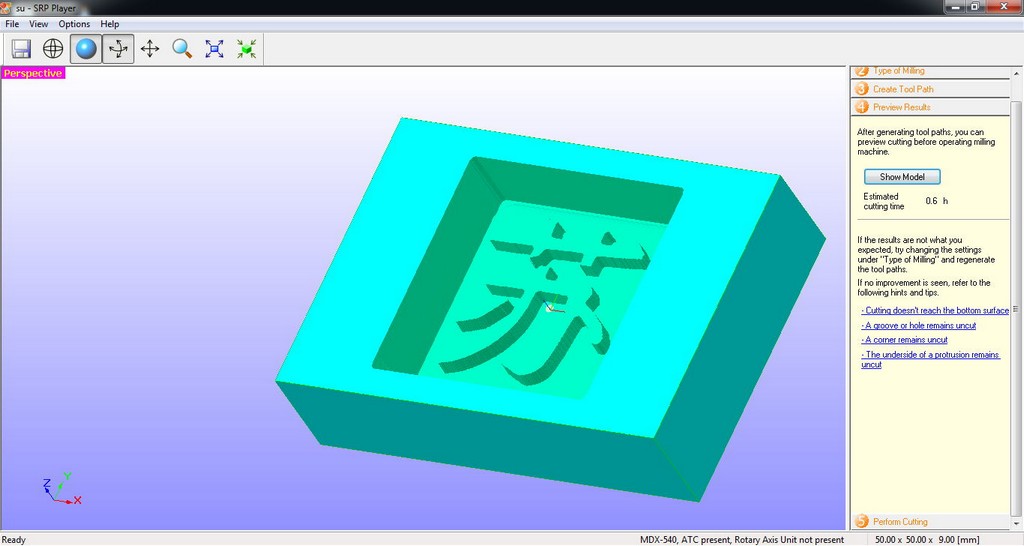
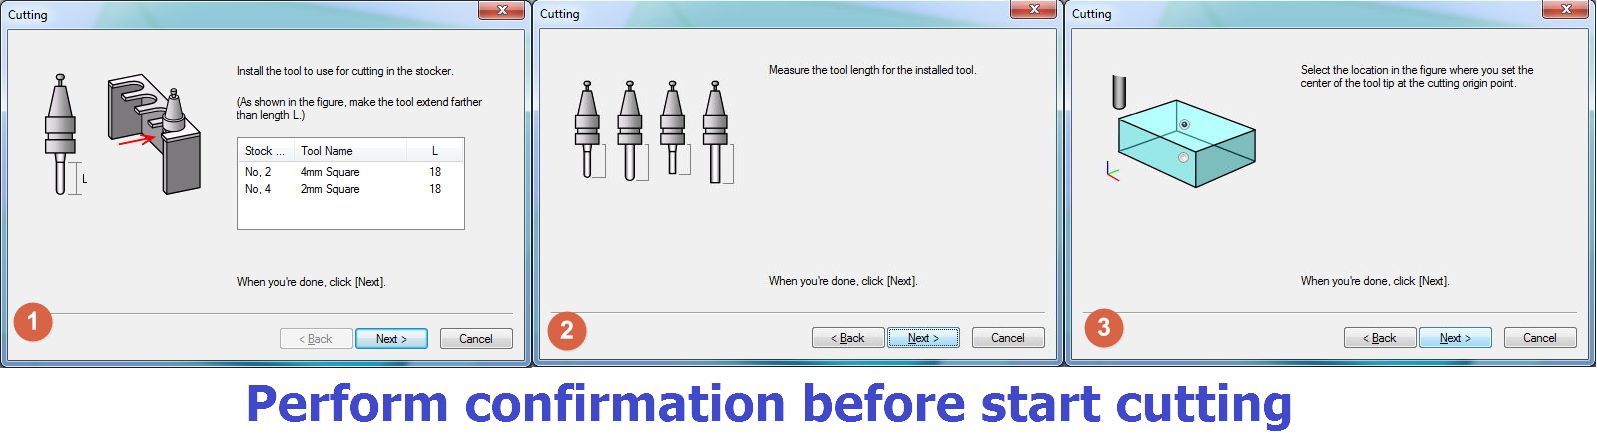
Upon setting up, SRP player can show a preview cutting and give an estimated cutting time required.
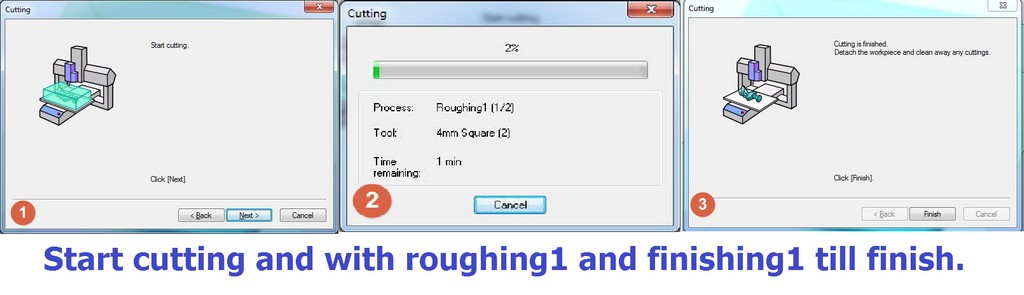
I then proceed to perform cutting operations with the settings. To begins SRP Player would performed a series of confirmation checking like the tool chosen, tools lenght measurement, workpiece center position with respect to machine origin.
After all the confirmation, I had started the cutting operation and waited for about 45 mins for the rough and fine cuts to be finished.
A video of the machining of my 3D polystyrene extruded foam mold is as shown:

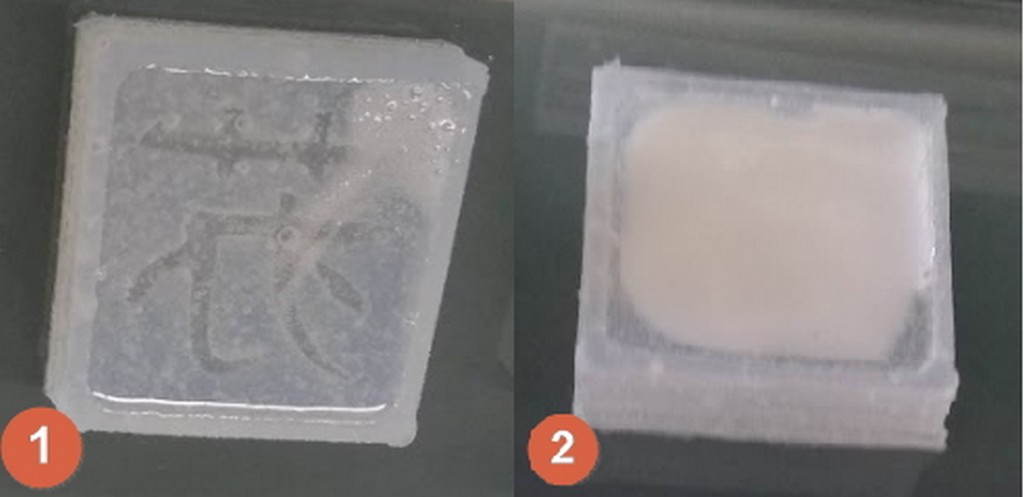
Making my silicone rubber negative mold
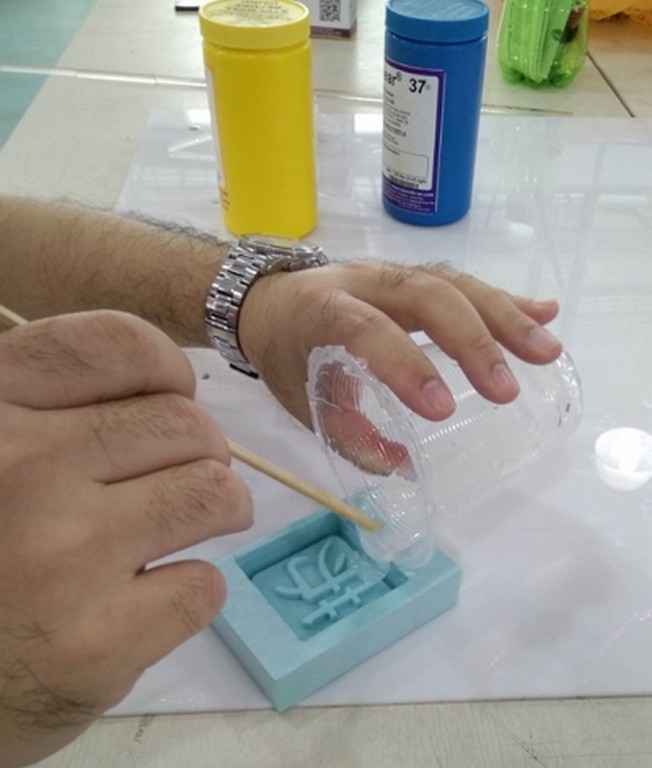
With the 3D positive polystyrene foam mold being machined out, I began to cast my negative silicone rubber mold using the SMOOTH-ON SORTA-Clear®37 to make the mold. The instructions on how to use Sorta-Clear®37 can be found at the same page. As we are handling some sort of chemical, I started to refer to the Safety Data Sheet from Smooth-on webpage.
- As our 3D mold was machined on polystyrene foam of slightly larger than the original postive, a pocket was formed with the 3D pattern sitting in it. I just sprayed some mold release prior to the making of my clear negative mold.
- I then measured equal amounts of parts A and B by volume about 5mm each and blend uniformly.
- Pour a thin stream to one side of the pocket and allow mold to cure naturally 4 hours.
As we are not equipped with vaccum degasing chamber this time round , I resource to removal of bubbles by knocking the polystryrene extruded foam mold continuously for 5 minutes against the tabletop.
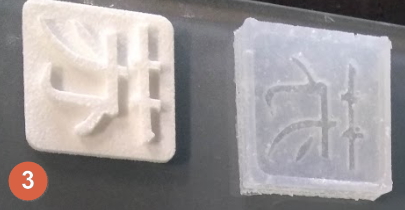
Casting Parts from silicone rubber mold
I am using the Smooth-Cast® 305 to make the mold. Instructions can be found here. The Safety Data Sheet for Smooth-Cast 305 can be found at MSDS.
There are some video reference, such as this clip: How To Use Smooth-Cast 320.
After mixing the resin and hardener together uniformly, I poured the content into the silicon mold and let it cure for another half and hour.
Reflection
I suppose that guys love to play with machine. This week exercise let me have the opportunity to learn and play with the Roland Modela Pro MDX 540 milling machine for mold machining on extrude polytstyrene foam. But again I find myself running out of time, and have no chance to do other casting- for instant we have yet to experience the metal casting processes. I am looking forward to another session to learn how investment casting is being performed and carry out and perhaps learn to make my own metal cross.
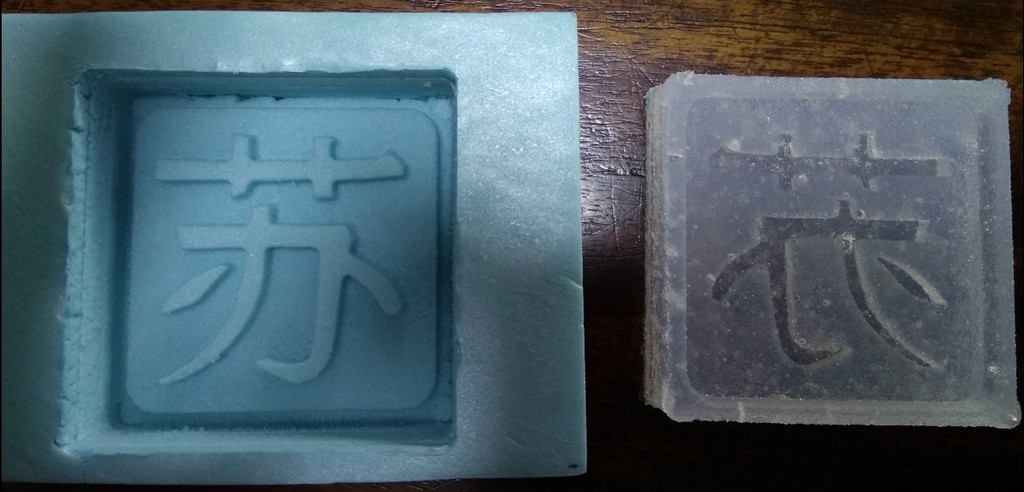
It is not easy to have no buble at all in the silicone rubber mold making process without the vaccuum degassing chamber. But as part of learning experience, the casting using my "not" buble free mold was able to create an output with special textual