~ Git and web development: HTML, CSS page.
~ post date: 2017.2.1, recent update: 2017.2.21
Communicate. Collaborate. Develop.
$ git init
Git is an actively maintained, open source, distributed, version control system originally developed in 2005 by Linus Torvalds (Linux). Version control systems help software development teams collaborate and manage changes to source code. Version control keeps a full history of changes and that clock can be turned back in the event of a mistake. The distributed architecture maintains a full history of all changes in every developer's local working directory. Redundancy. Git is flexible. Git works across all platforms, supports branching and tagging as first class citizens and operations within, such as merging or reverting.
I access GIT via the terminal app on my macbook. If using Mac OS, launch terminal and enter:
git --version
If a version number is read back, Git is installed. If not, one easy way to install Git on Mac OS is to install Xcode, available free via the Mac App Store.

Now that Git is your new friend, it would be prudent to introduce yourself:
git config --global user.name "your name comes here"
git config --global user.email you@yourdomain.example.com
How about importing a new project? First you need a Git project. Fablabs manage projects at the Fabacademy Git. This page can be reached via a Fablabs.io account.
Copy the address and create a local directory (anywhere) for your working files.
tar xzf git@git.fabacademy.org....
cd "your local folder, can drag and drop into terminal window"
git init
Now ask Git to copy the most recent version of the file tree into your local directory.
git pull origin master
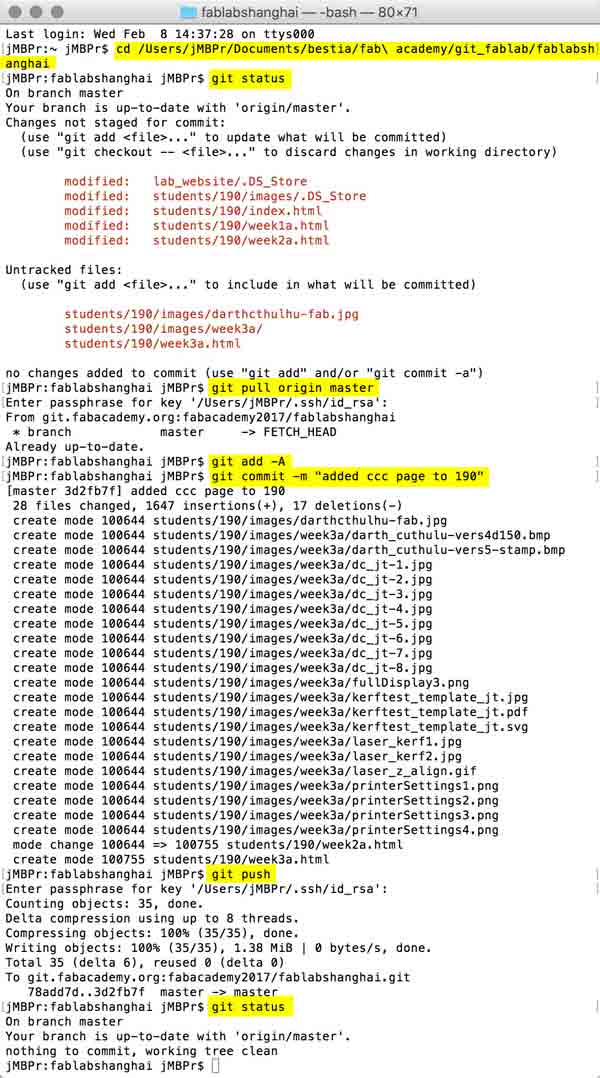
The working file tree will now be on your computer. My use of Git is thus far restrained to creating and editing files for this fablog. When I have versions of the files prepared to go live, I use the following six Git commands in sequence:
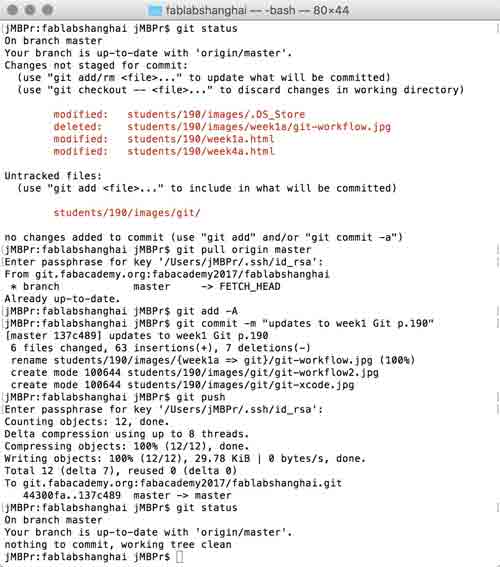
git status
git pull origin master
git add -A
git commit -m "your description of changes comes here"
git push
git status
"Git status" will report changes within my local folder not reflected in the repository. The "pull origin..." command updates my working directory with all the changes that have been made by others since my last engagement. "Add -A" tells Git I intend to upload all my changes. "Commit" is what it sounds like. Within the quotations, add a remark so others know what you are up to. "Push" resolves the changes with the repository. Finally "Git status" will check that your local directory is up to date with Git. That looks something like this:
I foresee one annoyance: Every time I clone a working directory I am asked for my administrator password. If you know a workaround, please hook me up. I will post the solution here if/when I have it.
Update: I added the passphrase to my keychain using this command and Git no longer prompts me for this information when cloning. Enter the following, Git will prompt for your password one last time...
ssh-add -K
I will post links to resources I have found helpful here.
- Basic GIT tutorial : Stripped down Git tutorial I used to get going.
- Learn Git : Loads of background information about Git, version control, installation and user tutorials.
- FabLabs.io : Social network for fablab members.
- FabLab Git : Your FabLab Git projects.
- Git passphrase prompt : Discussion to solve the annoyance.
HyperText Markup Language
HyperText Markup Language (HTML) is the standard language for web pages and web applications. The language is written into a document that could be made in any type of word processing (i.e. textedit, notes), specialized webcoding application, or sometimes within a browser. That document is then saved on a webserver. A domain directs a visitor to that webserver and their browser renders the code. There is a basic structural semantic for levels of headings, paragraphs, sections, lists, everything. HTML is not meant to include stylization (font types, alignments, borders, everything). Adding that makes coding too unwieldly. The best way to work is with Cascading Style Sheets (CSS). Little bits of code in CSS can change the appearance of any number of elements throughout the pages of a website. Finally JavaScript makes cool things beyond my current level of experimentation. These three are the web triad, aka, the illuminati of the web.
These are tags:
< >
HTML is made up of elements which are not visualized and dictate to the browser how to render the content. This is an element:
<element>
This is a closed element:
</element>
Okay, now, how about we build a website? HTML documents need these things:
<!DOCTYPE html>
<html>
  <head>
    <title>bēstia.xyz</title>
  </head>
  <body>
    <h1>Welcome to the desert of the real.</h1>
  </body>
</html>
The "head" is where you place information about the site that will appear in the browser tabs. The body is for the content in the browser window. Post that to a webserver, point a domain, and it will render as a site. Do not believe me? Click here sheepdog. And while you are there, most browsers will let you see the page source by right-clicking on the browser window. Go ahead, try it out. Congratulations, you are now self-actualized. Go out and do your great things.
Want a little more? Within the body you can write paragraphs:
<p>Remember... all I'm offering is the truth. Nothing more.</p>
Headings helps visualize hierarchy:
<h1>Free your mind.</h1>
<h2>Whoa.</h2>
<h3>I made this one tricky.</h3>
Free your mind.
Whoa.
Throughout human history, we have been dependent on machines to survive. Fate, it seems, is not without a sense of irony.
My headings have been customized with CSS. More on that later. Yawn... so much text, yet no images... try this:
<img src="system-failure.jpg">

There is a direct correllation between image size and page loading speed. Try to find tricks to reduce the image size as much as possible without rendering it ineffective. No image in this site is more than 100kb. The more experienced I get with parring down image size, I find most sizes are hovering around 50kb. For screen grabbing I use a straightforward free tool called Skitch. Then I use Photoshop, which works well because I can easily crop and edit an image before reducing the file size all within the same application. To do this, use the File>Save for the Web... command. Here are some basic settings I may use:
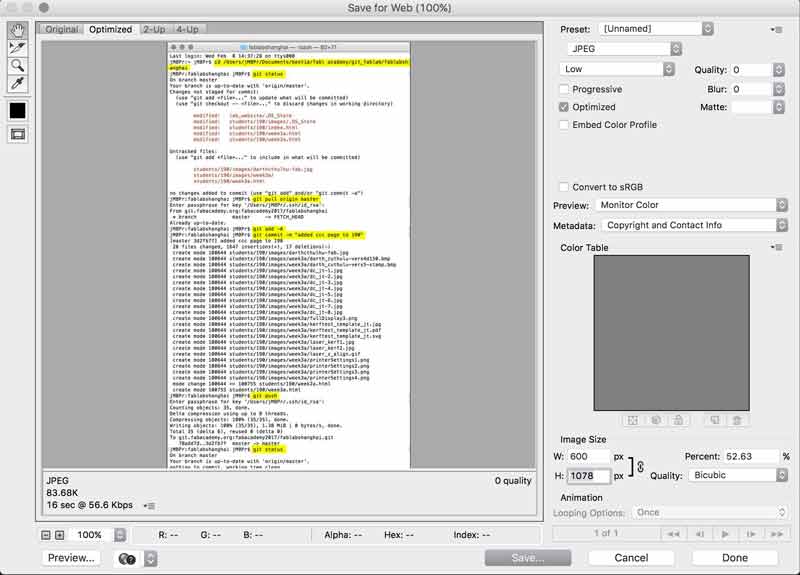
Adjust image size near the bottom (I tend not to go beyond 800px wide) and quality near the top. It all depends on the image: what level of clarity communicates the intention? I could push that number to 100 and add loading time or I could drop it to 0 because you probably do not care about the beauty of this particular image more than your time or the information it conveys. Another trick is to save a copy, drop it into your site for a test in the browser, then you may find you need to increasse or decrease the quality or size and can simply save over the top of the file you created with the mods. Then hit refresh on the browser and it will recognize the changes. And now links:
<a href="URL-goes-here.com">Link Title!</a>
Lists can be ordered or unorderd. "ul" is for unordered. "ol" is for ordered.
<p>My favorite types of cats</p>
<ul>
  <li>Hungry cats</li>
  <li>Playful cats</li>
  <li>Sleepy cats</li>
  <li>Wild cats</li>
  <li>Shy cats</li>
</ul>
To make the special little rectangles where I am placing the code examples, I use divisions. Anything within the div will be effected by the special rules applied to the div (typically through CSS, more on that later).
<div> </div>
Finally, you can add video like this:
<video width="320" height="240" controls>
  <source src="movie.mp4" type="video/mp4">
  <source src="movie.ogg" type="video/ogg">
</video>
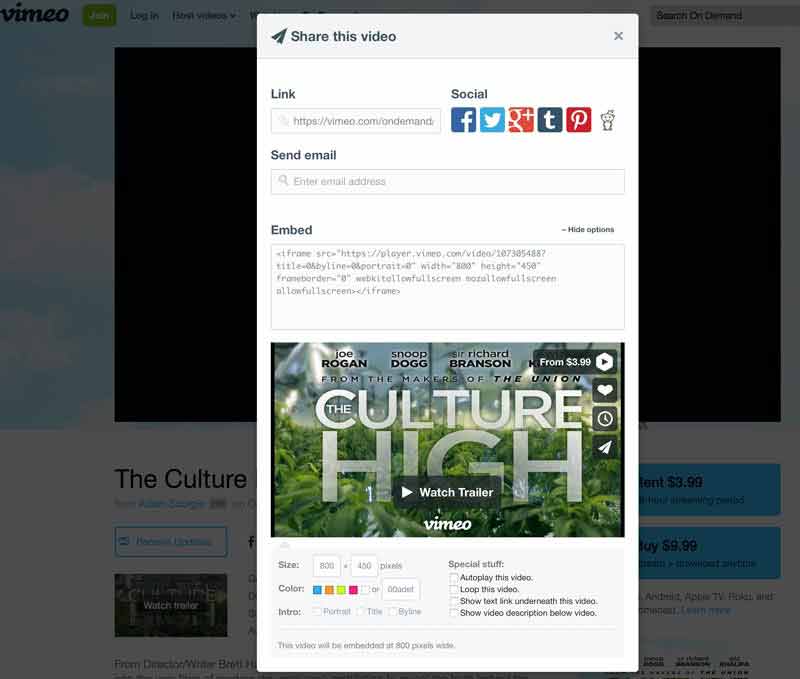
For BIG videos, it may be preferrable to use a video serving site like vimeo or youtube and embed a player window from that server on your site. These two sites even give you the necessary code to do so. Cool...
The code for this site was written from scratch mostly. Other parts were copied from other sites and modified for this one. Btw, that is a really helpful way to learn. Find pieces of sites you like and look at the code. Copy and paste it into your site and play around with it. I used brackets. The application is free and open source. Goooooood. Built in are features such as auto completion, highlighting different bits of the code in differing colors, and a live preview through Google Chrome (illustrated in the screenshot below). In terms of design, I am aspiring towards the lowest common demoninator in terms of aesthetic, code complexity and straightforward ux.
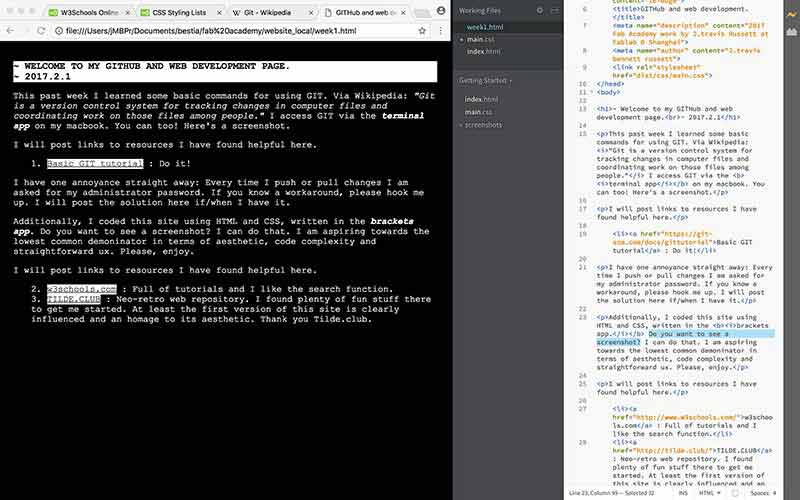
To ensure the live preview works properly, you need to avoid having errors in the code. The lightening bolt in the upper right hand corner should be yellow. Red is bad. Also, save your .html files somewhere on your own computer for editing. With brackets, point the application to that folder. File > Open folder...
When the site is ready for the web, you will need to upload the files to your webserver. Fab Academy students do so via Git. The explanation of this process is in the previous section of this page. This illustrates one process of pushing to the web I did via terminal. My commands I highlighted.
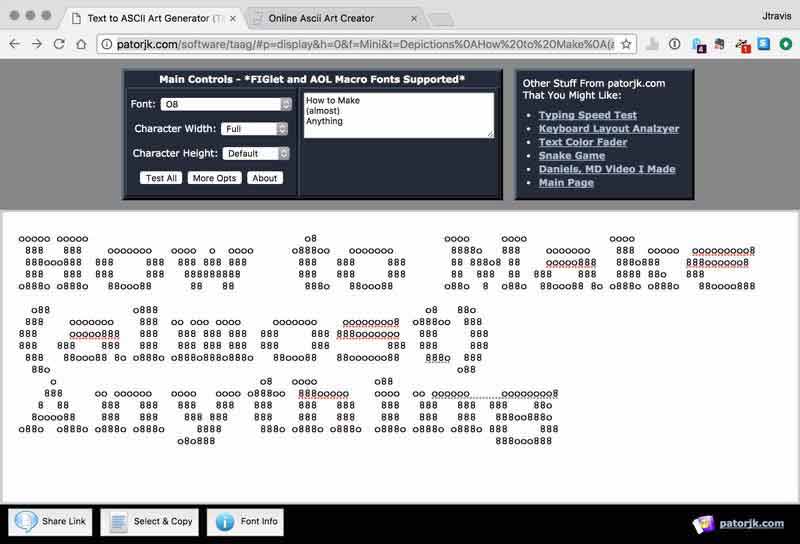
For the Ascii artwork I used this great online tool for the text and ascii-art-generator.org for the Fab Academy logo. Each were done with some mods, the easiest way for macro changes to symbols is to drop the text into a simple word processor like TextEdit or Wordpad and use the find and replace command. The HTML was written with the pre tag.
I will post links to resources I have found helpful here.
- w3schools.com : Full of tutorials and I like the search function.
- UTF-8 Miscellaneous Symbols : List of codes needed for special characters like a snowman: ☃
- TILDE.CLUB : Neo-retro web repository. I found plenty of fun stuff there to get me started. At least the first version of this site is clearly influenced and an homage to its aesthetic. Thank you Tilde.club.
- neocities : Free web hosting, HTML editor built into browser, good company.
Cascading Style Sheets
CSS describes how HTML elements are displayed. Because one piece of CSS code can alter the behavior of all of any single HTML element throughout all the pages of one website (or even multiple websites), writing CSS can save loads of time and effort customizing appearances. CSS can add background images or color, borders, change font attributes such as: style, color, and/or typeface, set margins, adjust website sizes for different devices, create image galleries, all sorts of great stuff.
This is CSS:
selector {

            declaration: value;

}
Or from the version of this website dated 2017.2.21:
body {

    font-family: 'courier new';
    font-size; 12pt;
    color: white;

}
Selectors can be used to control entire elements. Just use the element's name as the selector. Or a selector can be individualized by using CLASS and/or ID in an HTML element. This is a class followed by an ID:
<p class="your_class_name"> yoga </p>
<p id="your_id_name"> spinach </p>
Then within your CSS, you can identify specific style attributes to the class and/or ID.
.your_class_name {

    font-weight: bold;
    text-align: center;

}


#your_id_name {

    font-weight: bolder;
    color: orange;

}
CSS can be added to your website in three ways.
Inline CSS uses the "style="declaration: value"" within an HTML element.
<a style="color: red;" href="URL-goes-here.com"></a>
Internal CSS is added in the body using the "<style>" tag. Usually, this is organized at the top of the body element.
<style>
  .class{
    background-image: URL("hungry_cats.gif");
    background-color: red;
    font-family: courier;
    }
</style>
External CSS is an external CSS page linked within the head element of your HTML page. This is a good way to have CSS code effect multiple pages.
<head>
    <link href="/style.css" rel="stylesheet" type="text/css" media="all">
</head>
That is the basics of CSS. For in-depth attributes, I recommend W3schools' CSS Introduction. There you will find everything.
I will post links to resources I have found helpful here.
Jump : Index
J.travis Russett © 2017
 All the work contained within is licensed under a Creative Commons Attribution-NonCommercial-ShareAlike 4.0 International (CC BY-NC-SA 4.0) License
You may remix, tweak, and build upon my work non-commercially, as long as you credit me and license your new creations under the identical terms.