Assignments:
            - read a microcontroller data sheet
            - program your board to do something, with as many different programming languages and programming environments as possible
            - extra credit: experiment with other architectures
Making and programming Fabduino
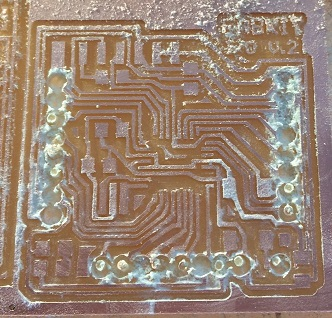
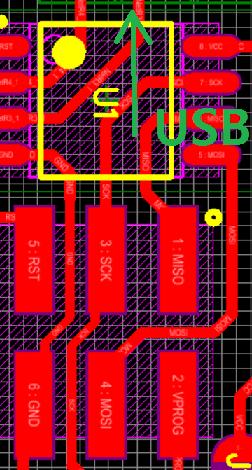
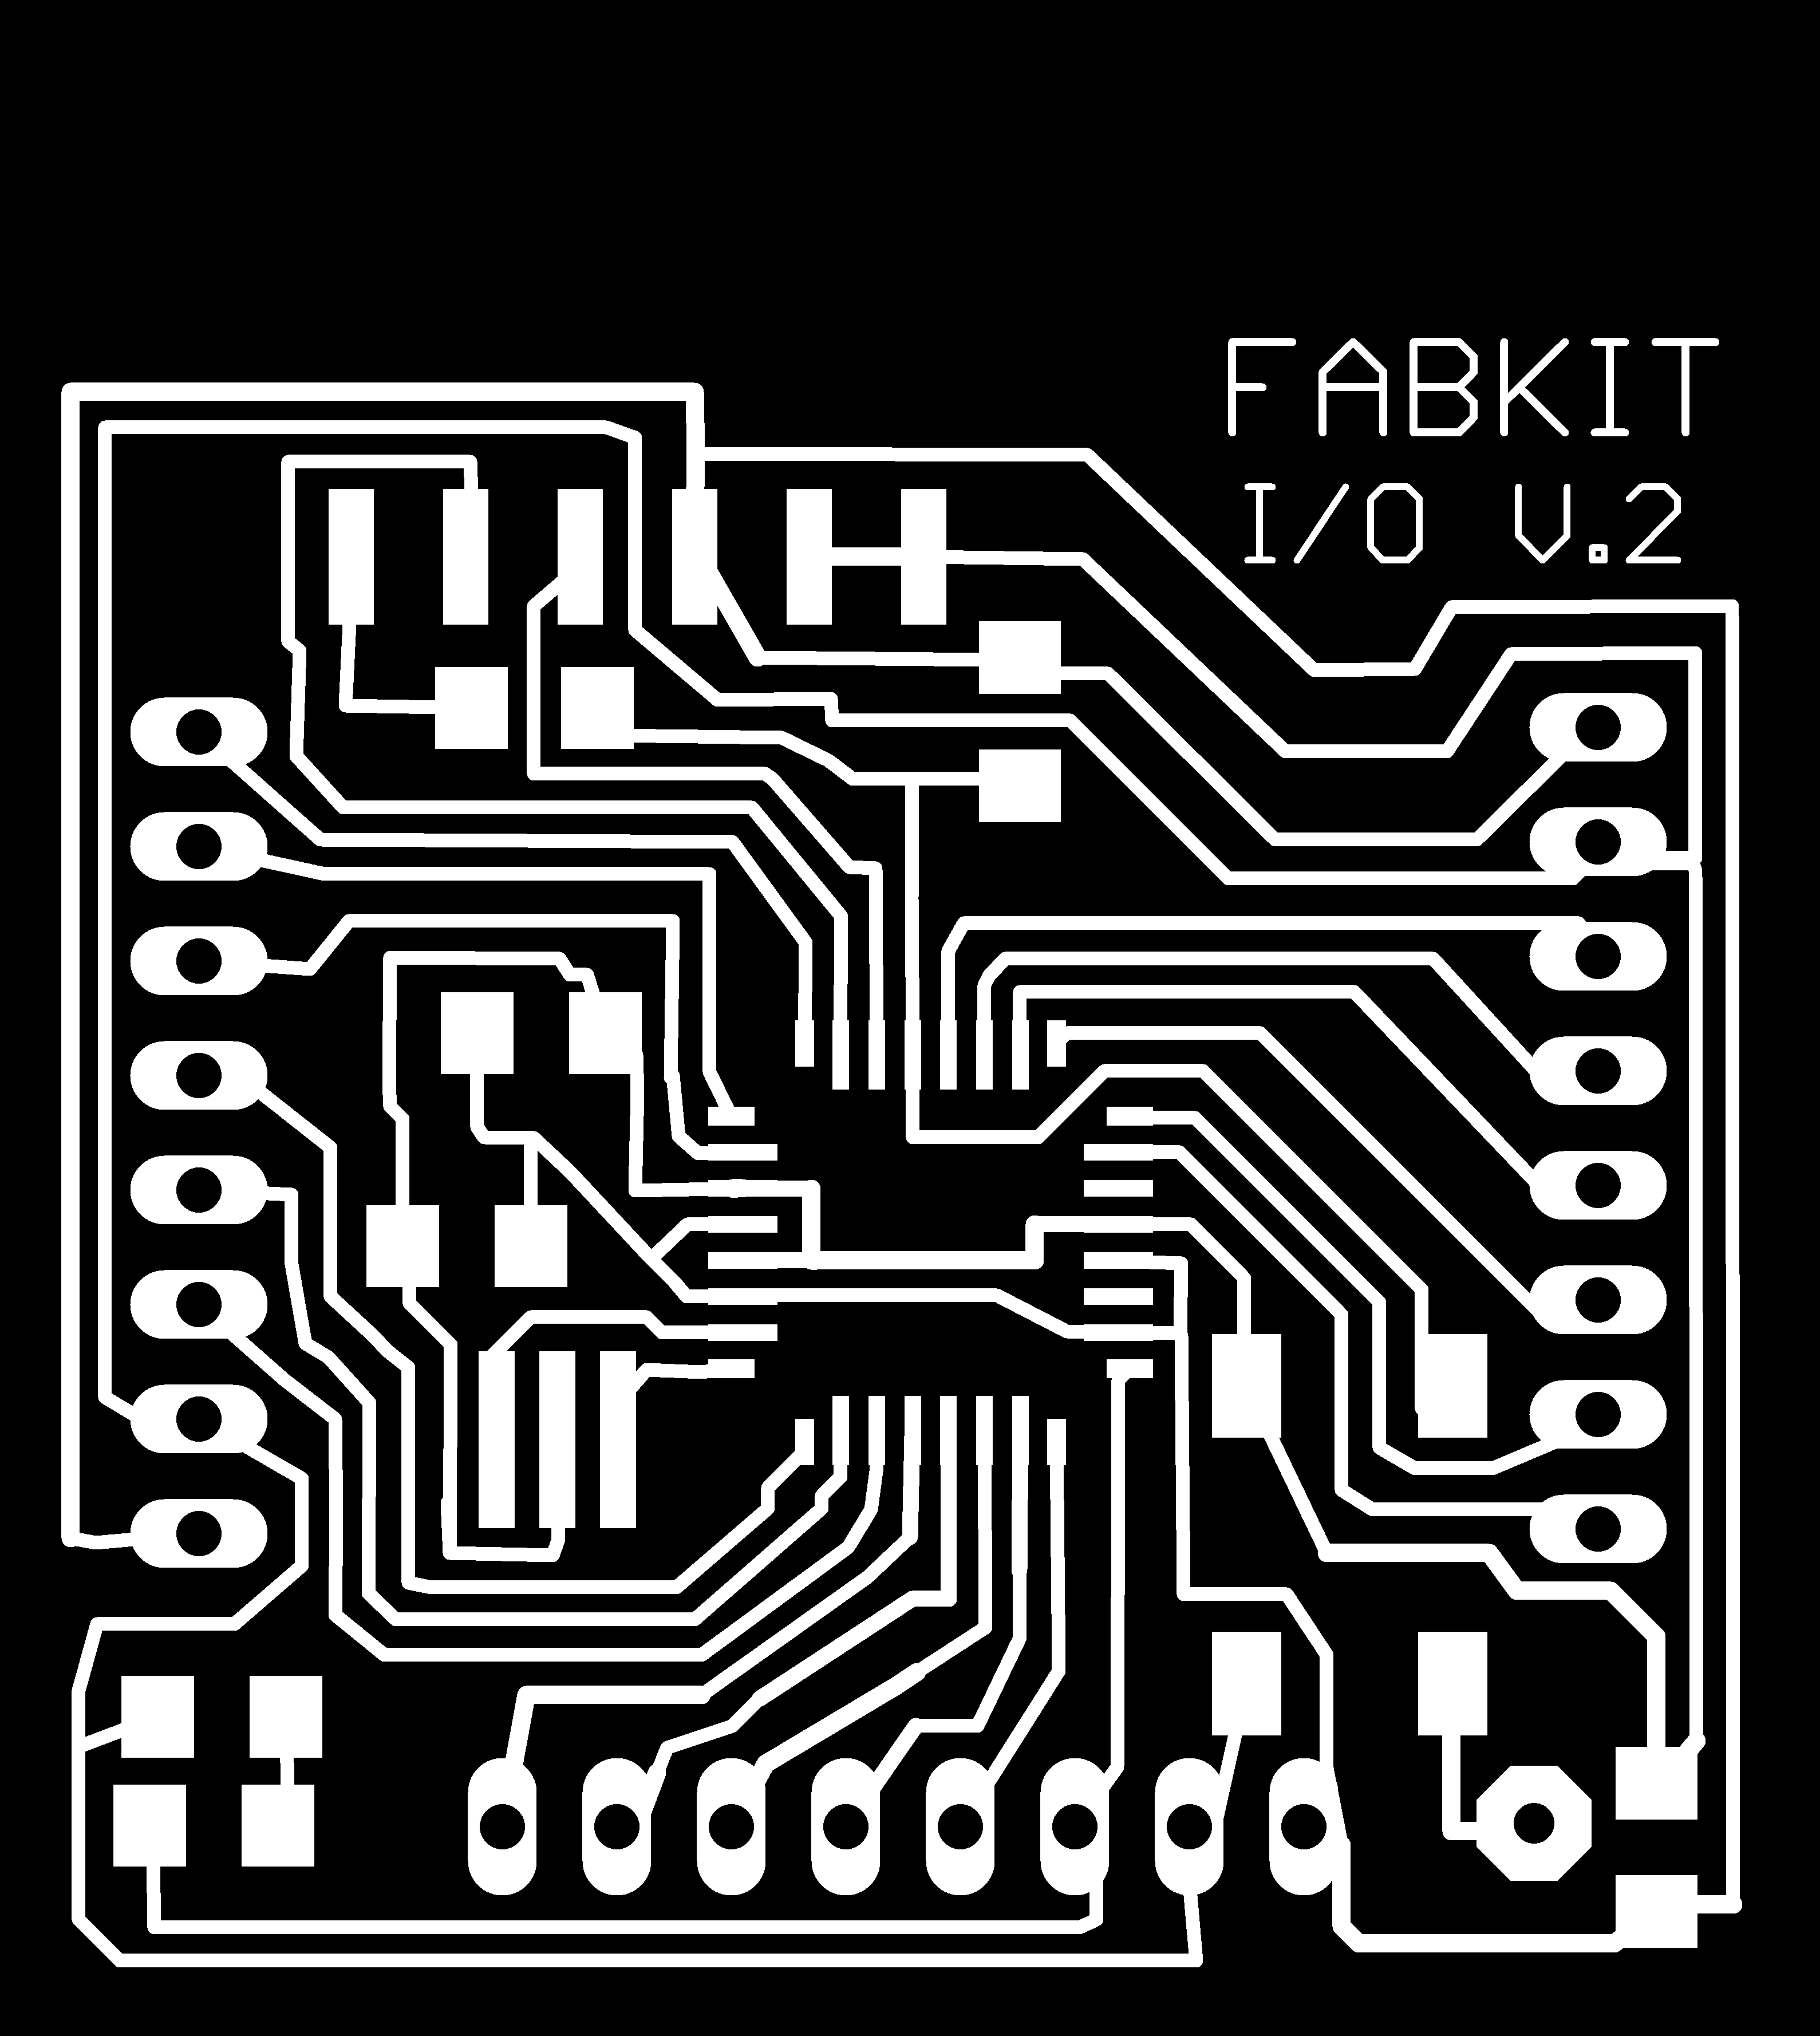
1. Making PCB
- I made Fabkit(Originally I used v.2, but this link does not exist anymore). There is another one: Satshakit
Making PCB is just the same as before, but there are a few things to remember:
1) It needs to be made with three files: Top, holes, and outline. Top can be cut with 1/64in (speed=4), but both holes and outline should be cut with 1/32in (speed=0.5).
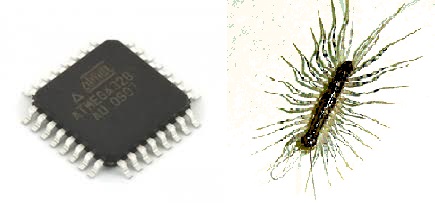
2) The image for the holes should be inverted. I didn't, and see what happened.. 3) Components: capacitors:1x10uF, 1x1uF, 2x0.1uF (0.1uF was written as .1uF, and it looks like 1uF. So at first I thought I need three 1uF), resistors:10k, 499, one LED, omron 6mm switch, resonator(8mHz)-optional, female header(8pins), male header(6pins), Atmega328P or Atmega168 (I used 328P. 'boards.txt' file should be different from 168 case.)
(By the way, ATmega328p/168 reminds me of a house centipede, and everyone said I should add this picture to my webpage. Do you also think they look alike?) 4) Red LED requires higher resistance than about 80~90, and 499 is more than enough not only for red, but for many other colors.
5) For the outline, a problem occured. It didn't cut the outline on the surface. Like the aircut of CNC machine, it cut in the air. I don't know why, but it stopped when I released the endmill (1/32in) a little bit. Maybe it was pushed too deep.
2. programming Fabduino through arduino IDE
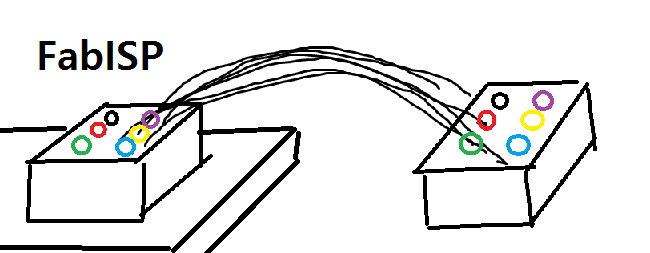
1. connect with FabISP:need to know which pin is which. Since the position doesn't change, it is easy. We only need to know which pin is which on FabISP and Fabduino. (If the red one on FabISP is for SCK, then the red one on the right is also for SCK.) I connected using the following two: FabISP from Brian's weppage and Fabduino.
(As for the reset pin, hold down with your finger while burning bootloader with Arduino IDE.)
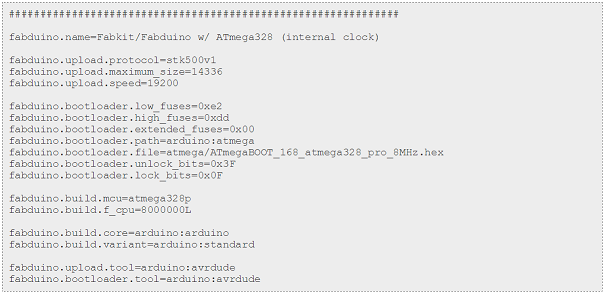
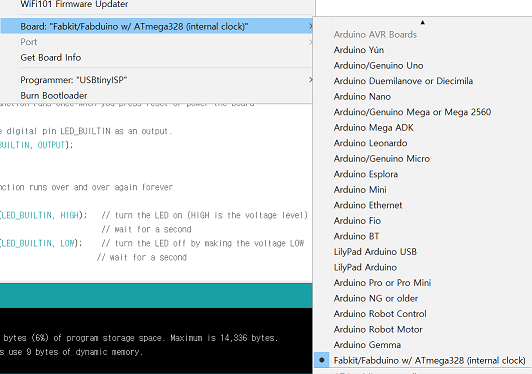
2. I changed boards.txt file in C:\Program Files (x86)\Arduino\hardware\arduino\avr:
I simply added the features of Fabduino at the end of the original text,
and now I can see this:
You can find the text to add and much more explanations here
Note: I couldn't find the corresponding folder and file in Mac. Do I need to choose Arduino pro instead of modifying 'boards.txt' file?
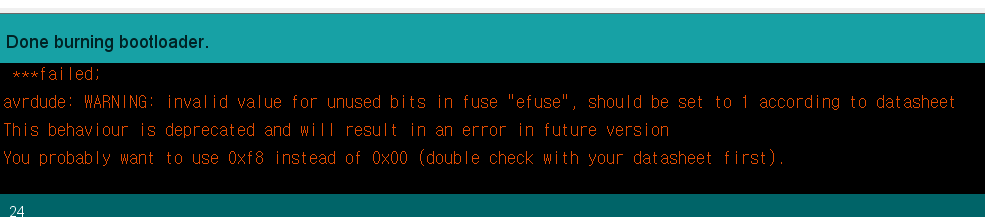
3. "Tool> Burn bootloader" I modified boards.txt file accordingly, but didn't work. Anyway, it successfully burnt bootloader, so I decided to ignore.
4. I opened arduino file (download), but "Sketch>Upload using programmer" also gave an error, but it was resolved when I modified boards.txt according to the error message (so I added 'fabduino.build.board=avr_fabduino').
(For both burning Bootloader and uploading program, I had to connect rst pin as well as other pins.)
3. programming Fabduino through command prompt
1,2. Same as the above
3 . Save arduino code(.ino) in some folder. That folder is where the hex files will be saved.
4. Click "Sketch>Export Compiled Binary". Two files are generated: (1)"filename.ino.arduino_standard.hex", and (2)"filename.ino.with_bootloader.arduino_standard.hex"
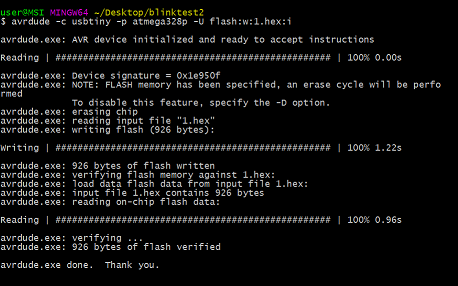
5. Since I already burnt bootloader, I uploaded the first one: Open the command prompt, go to the folder where all the files are, and type the following: avrdude -c usbtiny -p atmega328p -U flash:w:filename.ino.arduino_standard.hex:i
Note: - If I want to test with hello_world board, I only need to change atmega328p to attiny44. I will mention it again. - I tried with the second hex file, and it worked, but took much longer time since it had to burn bootloader first. See the difference. :Just Upload,:Burn+upload
4. programming Fabduino with FTDI
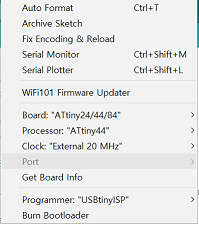
1. "Tools>Board>Fabkit/Fabduino" didn't work. ('boards.txt' should be modified since I added external 8mHz resonator. Maybe that's the reason. Or not.) Choose "Tools>Board>Arduino Pro or Pro mini", "Processor>ATmega328, 3.3v, 8mHz", and burn bootloader once again.
2. Disconnect usbisp and connect FTDI.
3. Click Upload!
Note: Be careful when you connect FTDI. (1) The orientation of pins might be reversed. Helloworld and fabkit have opposite direction. (2) check the switch on FTDI: choose 3.3v.
Programming hello world board
With arduino IDE, after choosing attiny44 for the board, I uploaded
(Download arduino file here)
and with command prompt, I did what I mentioned for fabduino: after burning bootloader, export compiled binary to the folder where I have the file, and go to that directory in command prompt, type:avrdude -c usbtiny -p attiny44 -U flash:w:filename.ino.arduino_standard.hex:i
For both cases, it works perfect.
(But I failed to upload the program using FTDI. Edu said the fuse configuration is not properly set, or something like that.)
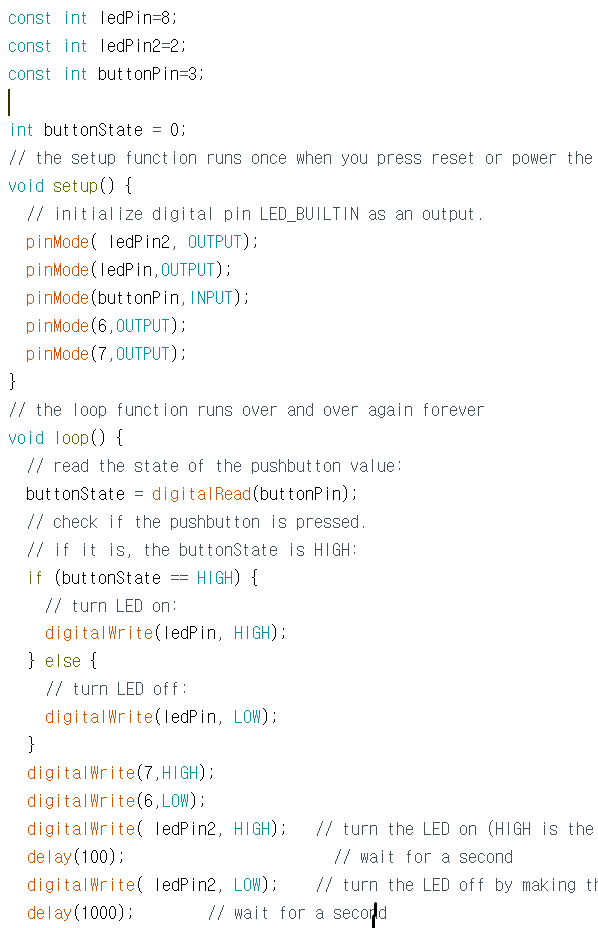
Note: I tried with different settings, and noticed the differences among three LEDs:
- I have 3 LEDs:(1) LED connected to Vcc and pin2, (2) LED connected to GND and pin8, (3) LED connected to pin6 and pin7
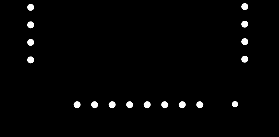
where the pinout is like this: - For (1), getting HIGH input turns off the light and getting LOW input turns on the light since it is already connected to Vcc.
- The led(3) needs two input, and was on only for pin7:HIGH and pin6:LOW.
One more note: With Attiny44, it generates only one hex file without burning bootloader function.
Update! Programming hello world board with C
avr-gcc -mmcu=attiny44 blinkledctest.c
==>check if a.out file was generated.
avrdude -c usbtiny -p attiny44 -U flash:w:a.out
ATtiny44(45) datasheet
Where it was helpful:
- For the final project, I had to pick two pins where PWM is possible for servo motor, and four pins with ADC for phototransistors.
- Knowing rx, tx pins (attiny45) was helpful understanding networking/ receiving data.
- When I had problems in understanding given c code such as hello.45.temp.c, I could get helps from the datasheet (about CLKPR,ADMUX,ADCSRA,ADCL/ADCH,AREF,...)
- It definitely gave help in using pins on fabkit. It has a lot of pins to use!
 FabISP from
 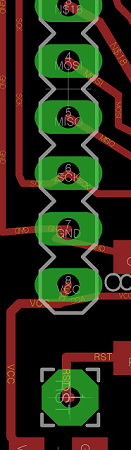 Fabduino.
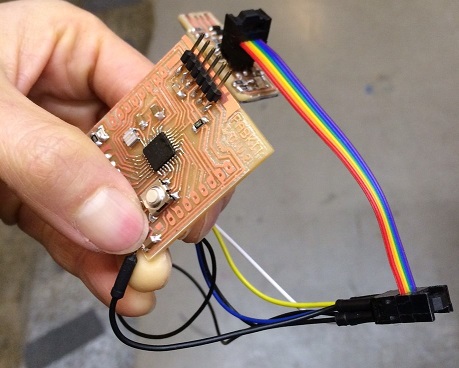
 :Just Upload,
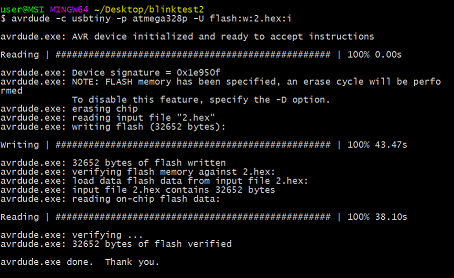 :Burn+upload

