Assignments:
  - Design a 3D mold, machine it, and cast parts from it.
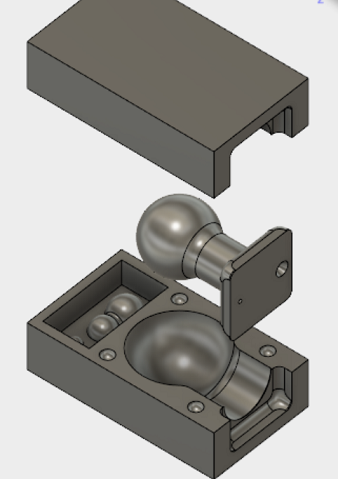
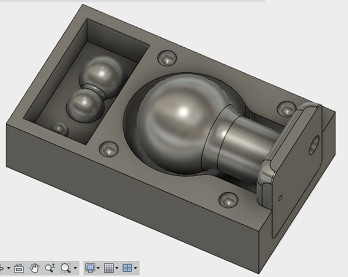
Flexible Bulb
1. Design - fusion 360
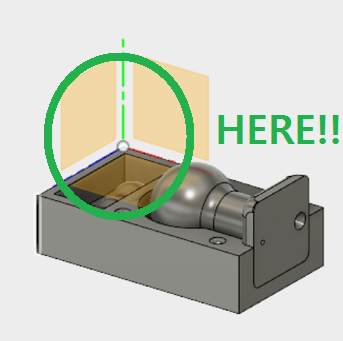
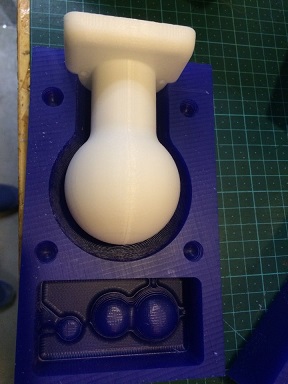
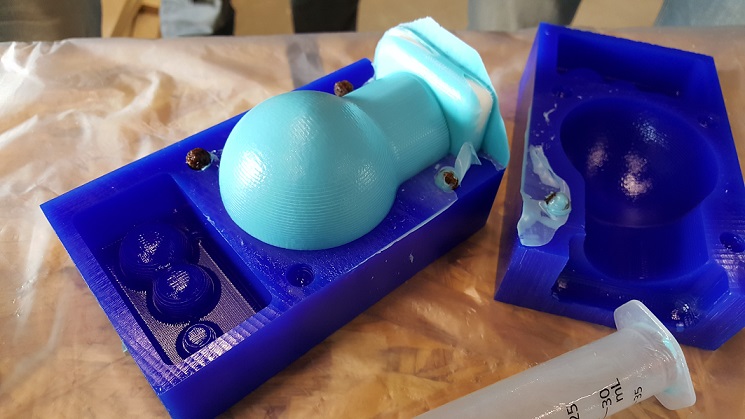
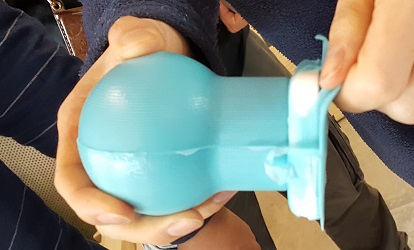
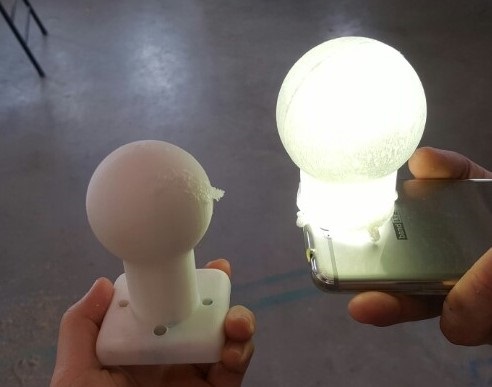
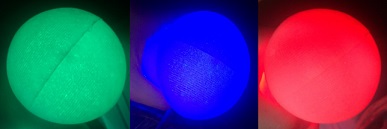
- I used 3 piece wax mold (top, bottom, inside) that makes silicone bulb. I used 3 pieces since the inside of bulb should be emptied. - The 5mm gap between rigid outer boxes (top, bottom) and the inside will be filled. giving this flexible bulb.
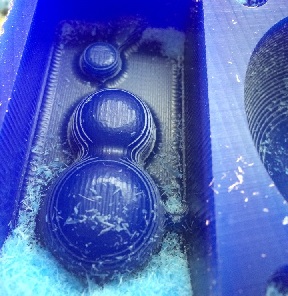
- Four tiny holes around the bulb were supposed to (but couldn't) be filled with tiny balls made by another mold - rectangular one right next to the bulb. There is a mold for small ball and a snowman for chocholate.)
(Functions that I used the most to model this: 1. revolving, 2. modify->combine(cut), 3. fillet, 4. loft)
2. Making mold
- First, I cut for the outer box. Since I used Rolland, not shopbot, it was easy to work on it.
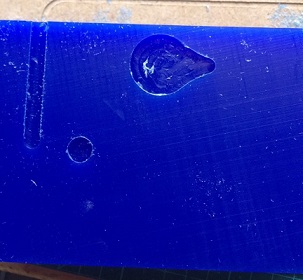
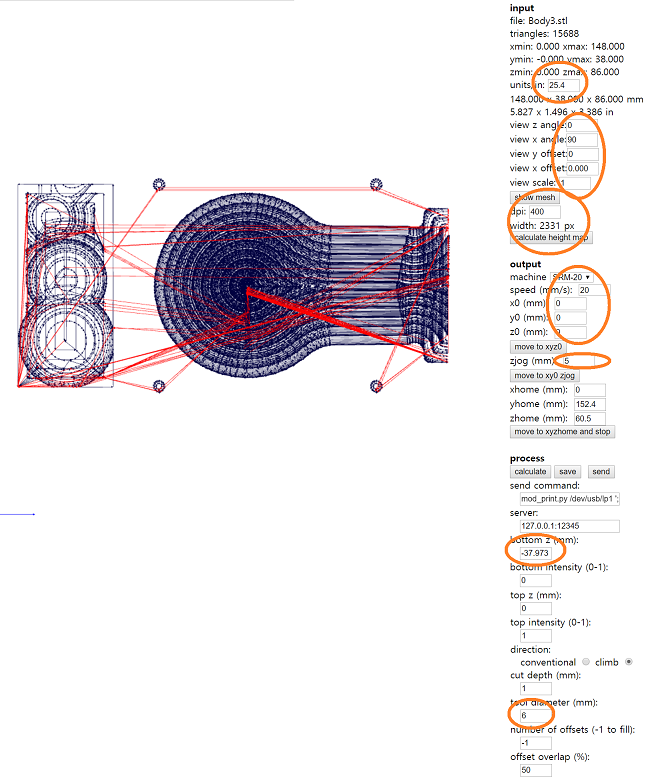
- Due to the milling time, I used 6mm flat (2 flutes) for rough cut, and 6mm round for finish cut (I needed to change the collet, too). - Instead of having one - I used machinable wax (148mm x 38mm x 86mm). - Calculating with fabmodule takes really long time, and it had some error as well. See where the origins are: Due to this discrepancy, the first cut was in wrong position. I adjusted y axis a little (-29.5mm) so that it was almost at the center.
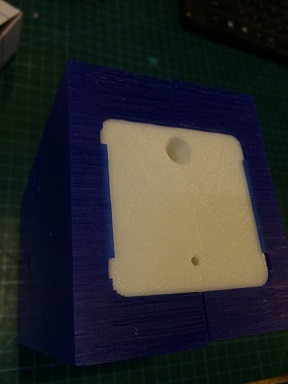
- For the inside, I used 3d printer (without support).
(* Fabmodule setting *)- Rough cut - Angles: depends on the .stl file I made.
- Choose low dpi first (100 in my case), click 'show mesh' and then click 'calculate height map'. It will change your .stl file into 2 dimensional information. (If it does not show any picture, then rotate upside down.)
- Then change dpi back to higher value (but not too high. Reasonable if width stays less than 3000px.)
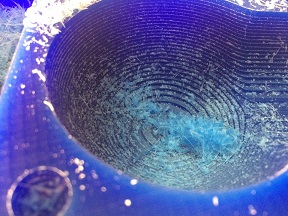
- For finish cut, you can use almost the same settings for common parts, and since my tool diameter was 6mm, tool overlap=90% was good enough. But the result was not quite good. - The problem was this:
I should have chosen 'ball end' instead of 'flat end'. I cut several times more with lower z origin, but still not quite smooth. Anyway. The bulb doesn't need to be very smooth, and I can use something else instead balls to fix the position. Next time.
Anyway, I think I am ready to cast now.
(not really...Edu said I need more/bigger holes for pouring and breathing. I made 4 bigger holes, but it turned out not to be enough.)
3. Casting
I used (A) silicon smooth-sil 940 part A+mold star 16 fast part B to test if the mold works fine, and then (B) flex foam it V part A+B and (C) mold max 10t part A+B.
(A) silicon smooth-sil 940+mold star 16 (Smooth-sil 940 Safety Datasheet and Mold star 16 Safety Datasheet)
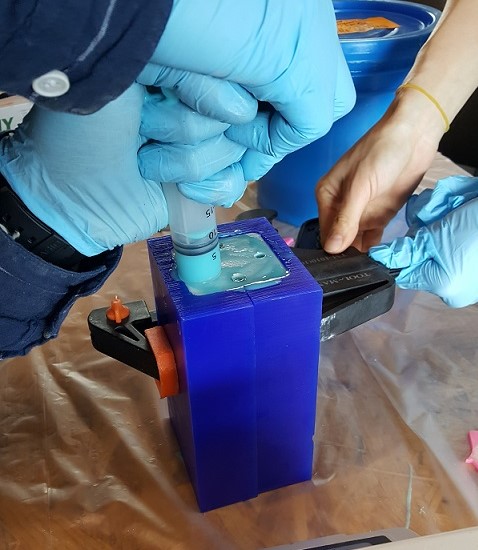
- 0. prepare gloves, tissues, trash bin, clamp, etc. and put them nearby.
- 1. measure the volume of the inside. Mine was about 100ml. Then I will make 30% more=130 to be safe.
- 2. spray release agent ('ease release 200') over the mold. Wear mask and open the window.
- 3. datasheet (see here) says I can mix 1A:1B by volume. So I need 65:65.
- 4. It also said I have to mix and pour within 6 min (starting from the moment I pour one into another. pot life.), and then cure it at least for 30 min.
(....pouring wasn't as easy as I expected even with 4 bigger holes. The viscosity of silicon was a bit high. It blocked all the holes, so we had to use injection.) After 30 min!!
(By the way, I could use raisins instead of balls. It worked fine!)
(If I squeeze it, I can see some small bubbles.)
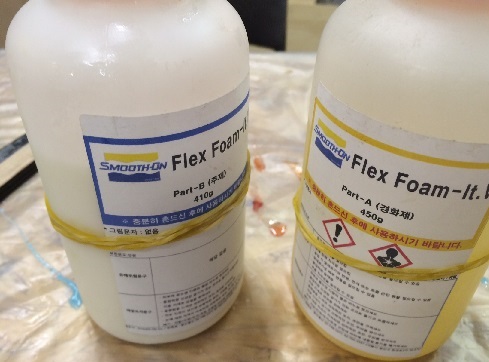
- By datasheet (here), I shouldn't use silicon based release agent for Flex foam it.V. I used soybean oil for release agent instead.
- pot life=50 seconds, cure time 2hr, but actually I can open it after 30 min.
- Mix Ratio By Volume 1A:1B and Mix Ratio By Weight 105A:100B
- Most importantly, it expands 11 times bigger! So pour just 1/11~1/10.
- it is easier to mix (since the volume was just 1/10) and pour (more runny).
- By datasheet (here), mix ratio by weight is 100A:10B. I planed to use 120g:12g, but I made a mistake in pouring part B since it was very thin comparing to part A which was really thick. I used more part B, but I still used it since I wanted to see the result of using more hardener. Next time, I would pour part A and B separately, so that I can use the exact amount.
- Pot life=45min: mixing time=3min, vacuum degassing for 2-3min. With a big clamp, it wasn't easy to vacuum, so I skipped it. The mixture was much thicker, so I had to use injection from the beginning.
- cure time=24hr at room temperature (no less than 65F/18C), Post curing time= additional 4 hours at 150F/65C
- After 24hr, this came out fine.
I can see many bubbles, but it still looks fine considering that I didn't vacuum.
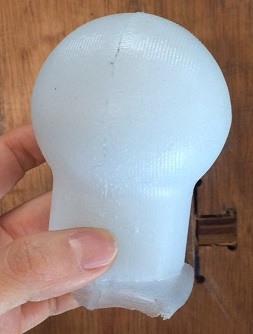
 giving
 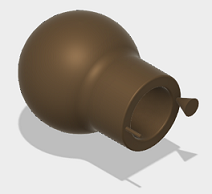 this flexible bulb.
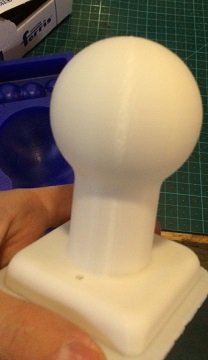
 I should have chosen 'ball end' instead of 'flat end'. I cut several times more with lower z origin, but still not quite smooth. Anyway. The bulb doesn't need to be very smooth, and I can use something else instead balls to fix the position. Next time.
 (By the way, I could use raisins instead of balls. It worked fine!)
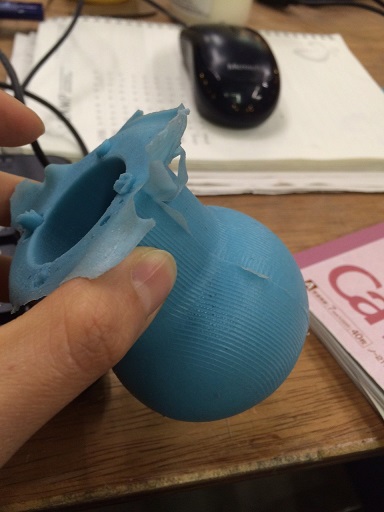
 (If I squeeze it, I can see some small bubbles.)

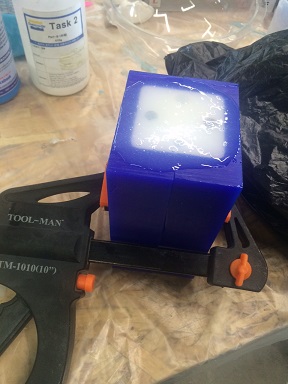
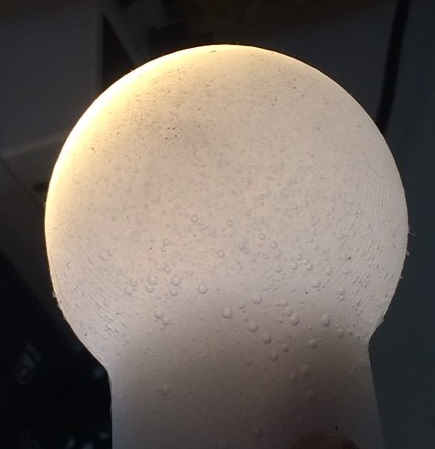 I can see many bubbles, but it still looks fine considering that I didn't vacuum.

