Week 11: Machine Design
Assignment
This is group assignment: automate your machine, document the group project and your individual contribution
We now continue from Assignment 9. The assignment is documented on this page (a combined effort). There are a couple additional videos on the group page (see link at the bottom of the page).
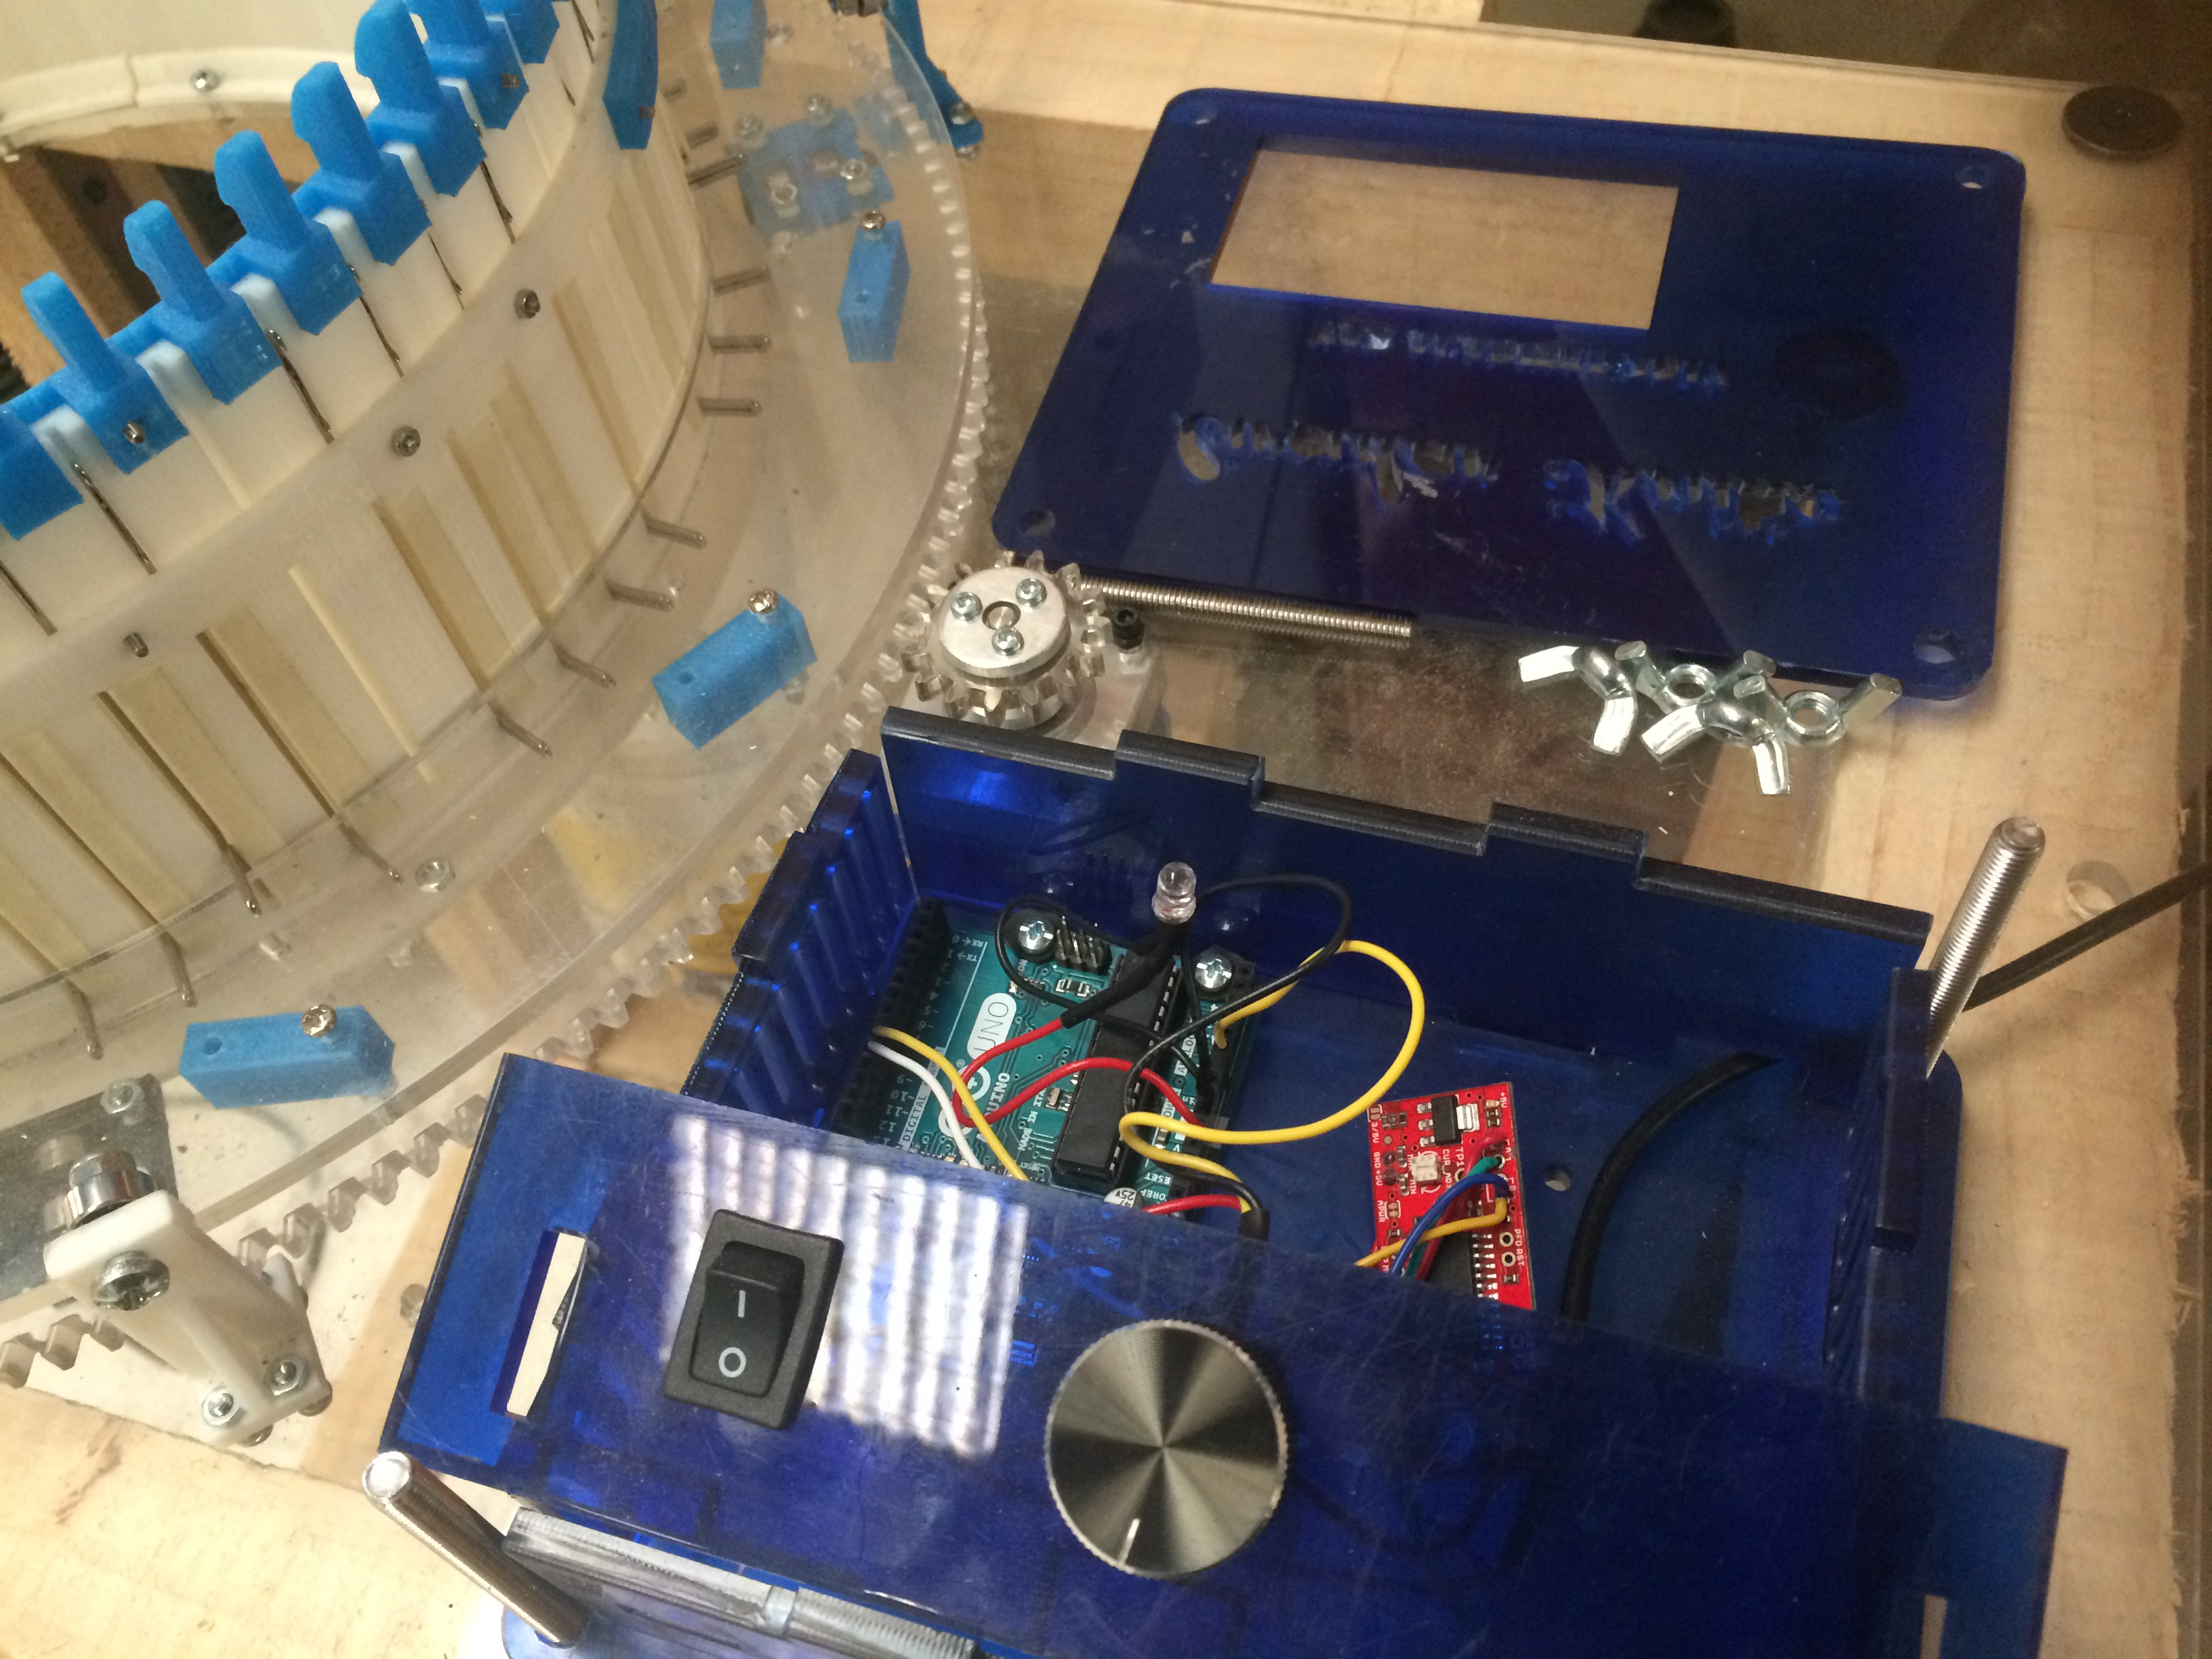

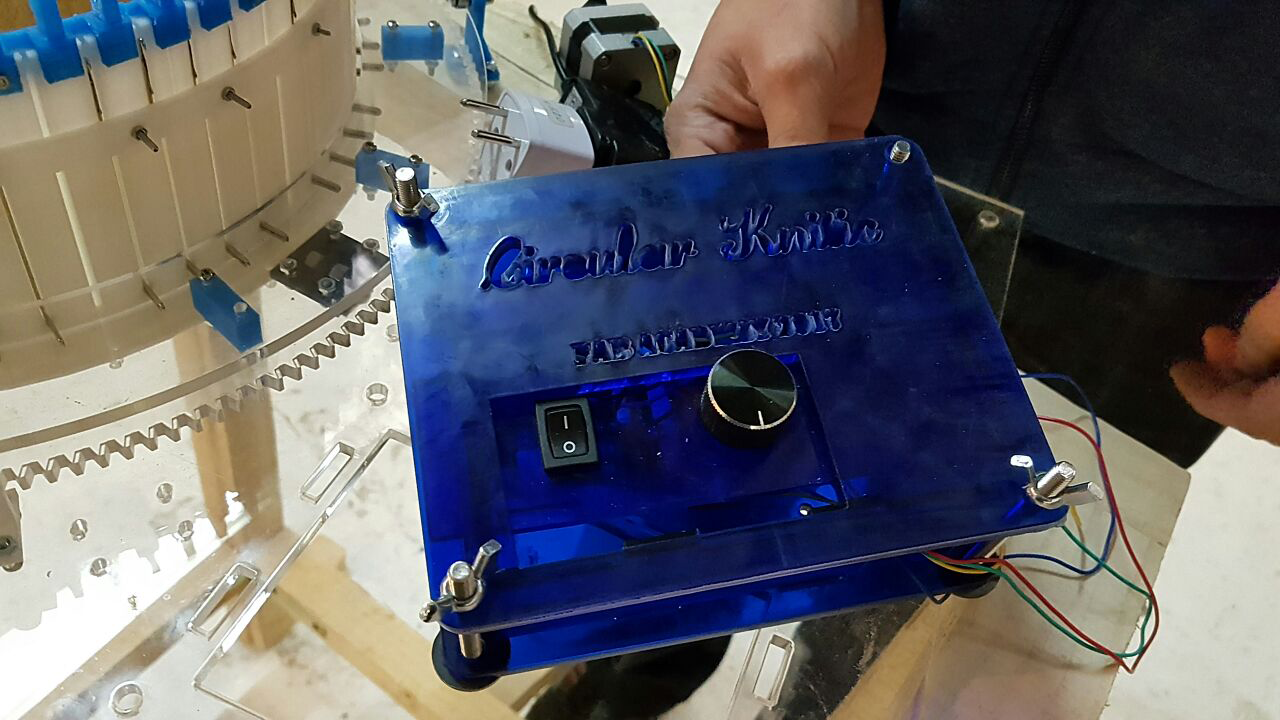
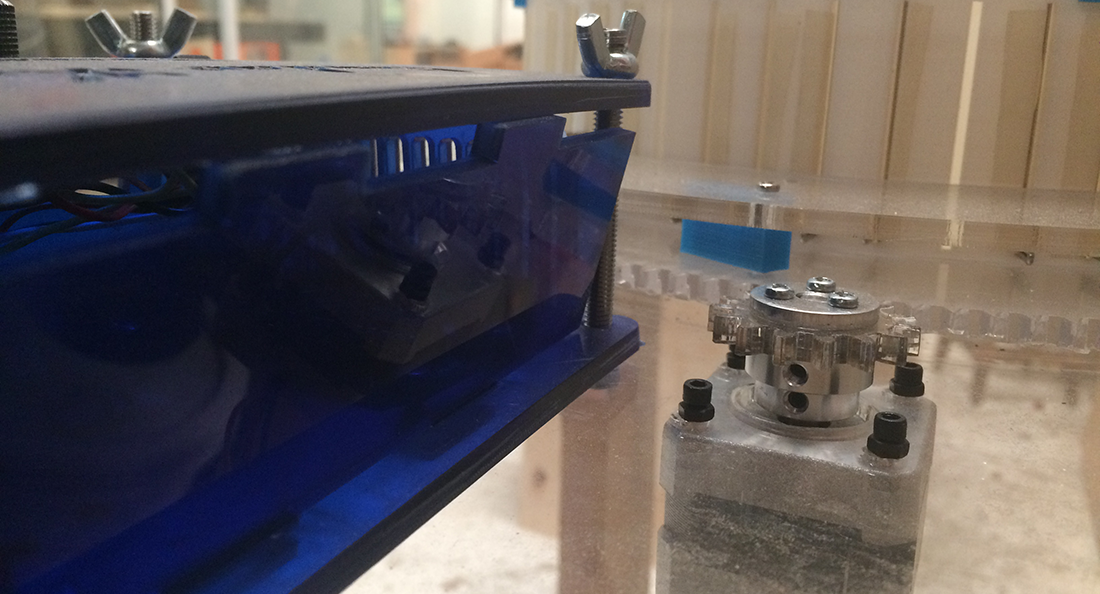
Step 7: Electronics, Mount electronics, motor and box to the base of Circular Knitic.
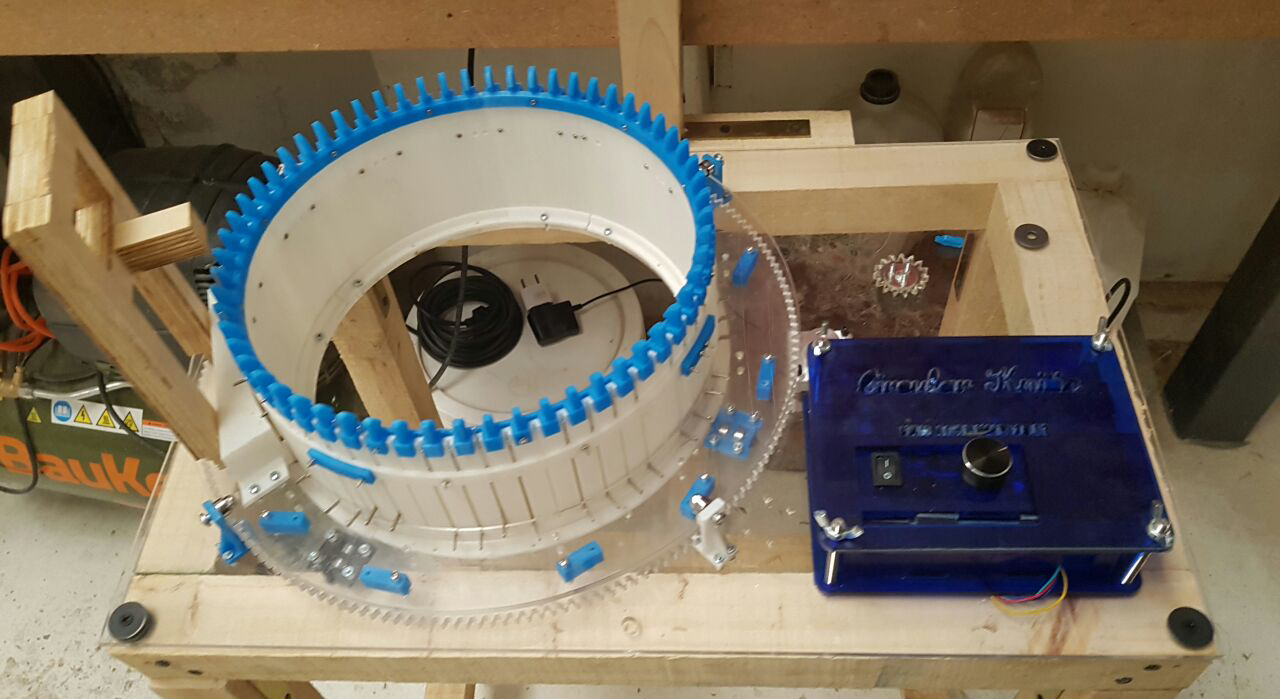
Step 8: Mounting Outers, Mount 3d printed parts called outers to the base and fix with the screws and nuts.
Machine Design Try 1 from Norella Coronell on Vimeo.
Step 9: Place Needles, 3d-printed parts called Inners serve for holding needles. Circular Knitic uses 60 needles and 12 inners. It makes 5 needles per an inner. Place needles to an inner and then fit it to the outer. Fix with m2 screws and nuts. Make sure that the needles are moving smoothly up and down. if not, make sure that you are placing the parts right and file them if needed. Leave one inner not placed.
Step 10: Program the speed control of your knitting Machine.
Machine Design Try 1 from Norella Coronell on Vimeo.
Step 11: Mountain, Make yarn feeder from the listed makerbeam parts and fit to the laser cut upper surface. Afterwards use 30mm m3 screws to fix the 3d-printed connectors to the surface. Next place the mountain to its place and fix with screws.Use the empty entrance to place the upper surface to the Circular Knitic. Make the needles to enter the mountain, connect upper surface and big gear, and place the last inner with the needles. Now make sure that the needles are moving and following the mountain shape.Place also 4 outer-connectors and try that everything moves well. This instruction sound very nice, but we had a problem, the needles we purchase where too small and didn't move along, but we made it work.
Machine Design Try 1 from Norella Coronell on Vimeo.
Step 12: Yarn Holders, Now place yarn holders on top of the inners. Look that the parts enter until the end and fix them with the screws and nuts.
Step 13: Yarn Feeder, Make the yarn feeder holder from wood and attach it to the main structure.
Problems we faced
:- Buying components
- Laser Cutter not cutting
- Replacing missing components with what we had
- Not having enough hands to have the job done on time
- Screws not fitting and at last minute trying to replace them
- Tying to make the machine knit after all the changes, basically it turned in a circular way, but form there to making it actually knit, we need more time and to change lots of thing to make it work in a proper way.
- Finally one good advice is that before you try to make a machine (any machine) make sure that you can get all your materials in a local way, this will save you a lot of time!.
Improvements
:Below details issues and modifications with the help of pictures:3D Printed Bearing Holders: we had to adapt to non-standard bearings. The following images illustrate. We ended up redesigning the bearing holders from scratch rather than adapting the original stl files. Although I learned how to do this in Fusion, there were so many triangular slices in the model that it was near impossible to make changes in dimensions.
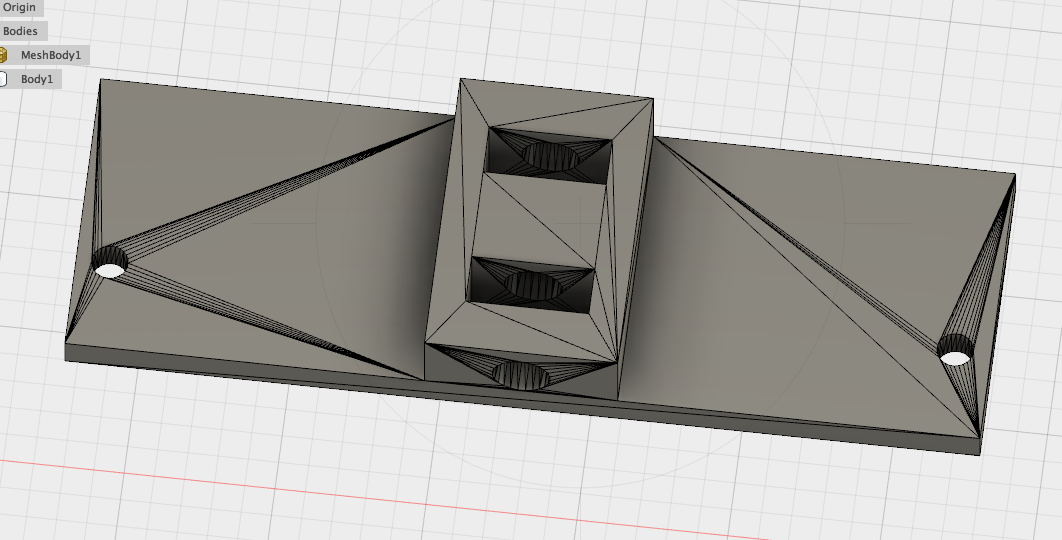
Instead, I used the stl for guidance and original dimensions, and then sketched and extruded new ones. I made them parametric, which was very useful as we had to print multiple versions. It turne out to be difficult to estimate the precise dimensions needed, because the bearing had to turn freely in the holder without being too loose. This required a lot of trial and error. In the images below, the first is the stl, and the others show the new holders being modelled (there were 2 sizes that needed redesigning).
Needles
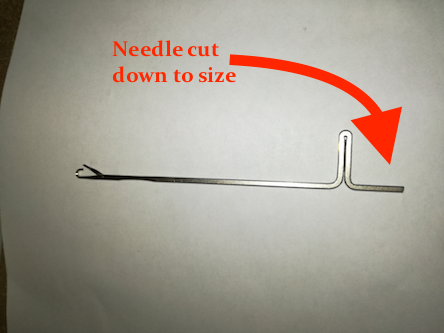
We could not source the correct needle size. This created a great deal of trouble as the 3D printed parts were precisely designed for the size of the needle.
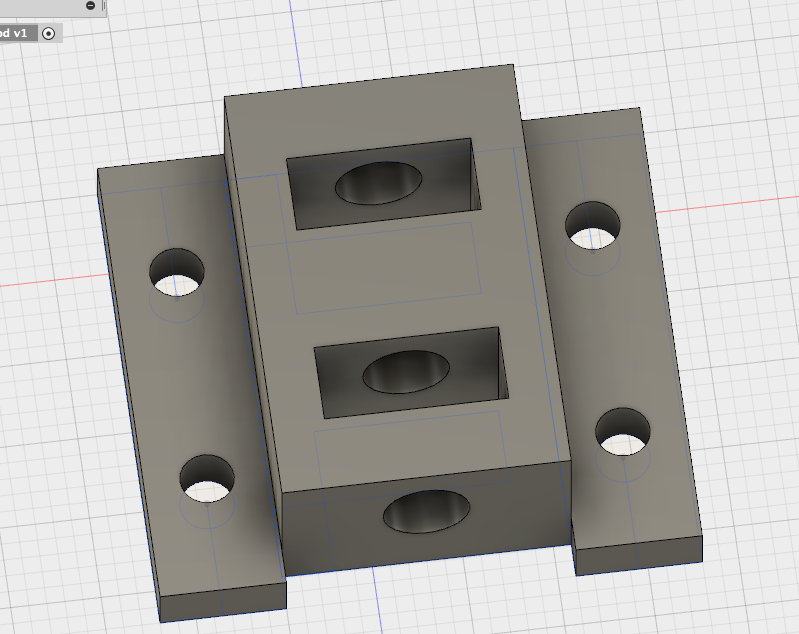
3D printed 'inners'
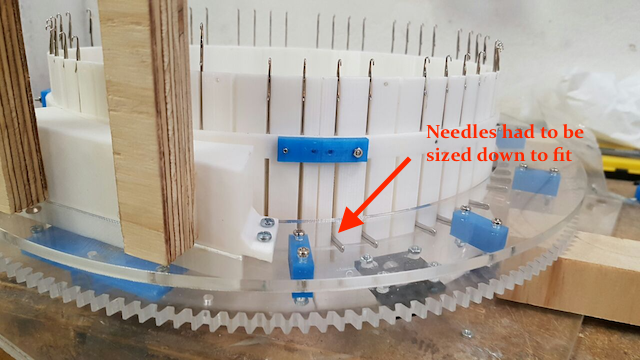
These inners hold the needles, and thus had to be adjusted by adding tape to the slots to account for the width of the needles we had.
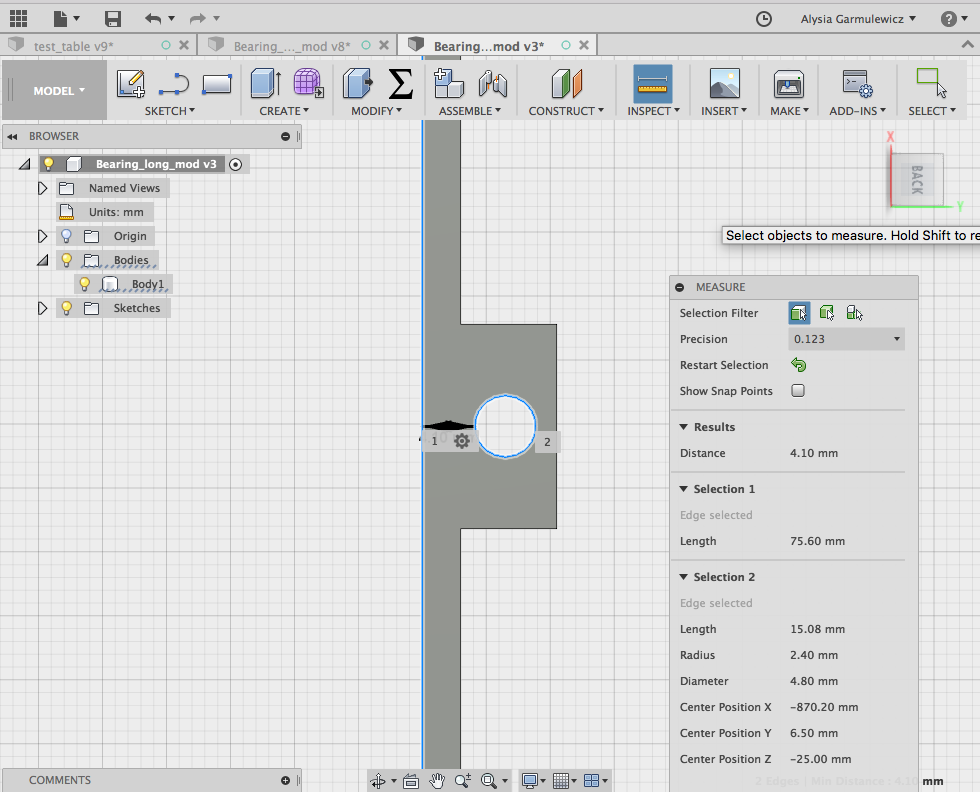
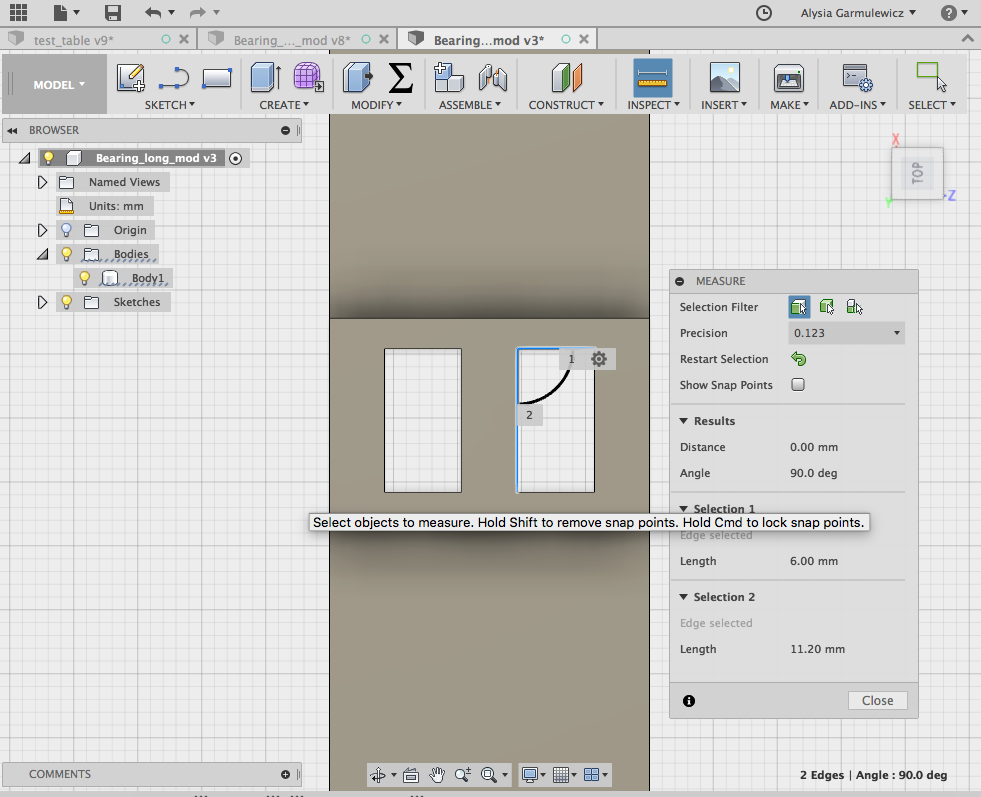
As an extra improvement to the project, I created a new inner piece, this time with a thinner slot (16mm instead of 18mm). This was a very involved process of using the original stl and sketching its exact dimensions (only changing the slot size). Like the bearing holders, the process involved (a) changing the mesh into a BREP (see the first picture below), and then (b) sketching the dimensions of the part in Fusion (see the second picture below). This got me to learn the tricks of Fusion in sketching angles and dimensions, as I had to copy the precise curve from the BREP model. I also added the new slot dimensions in the sketch.
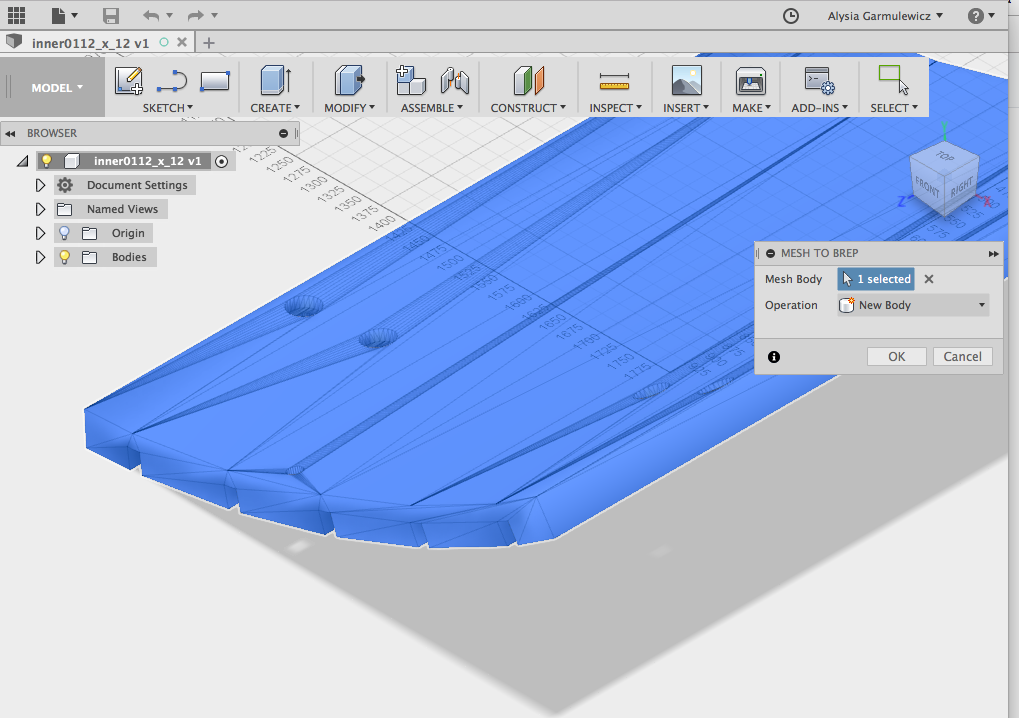
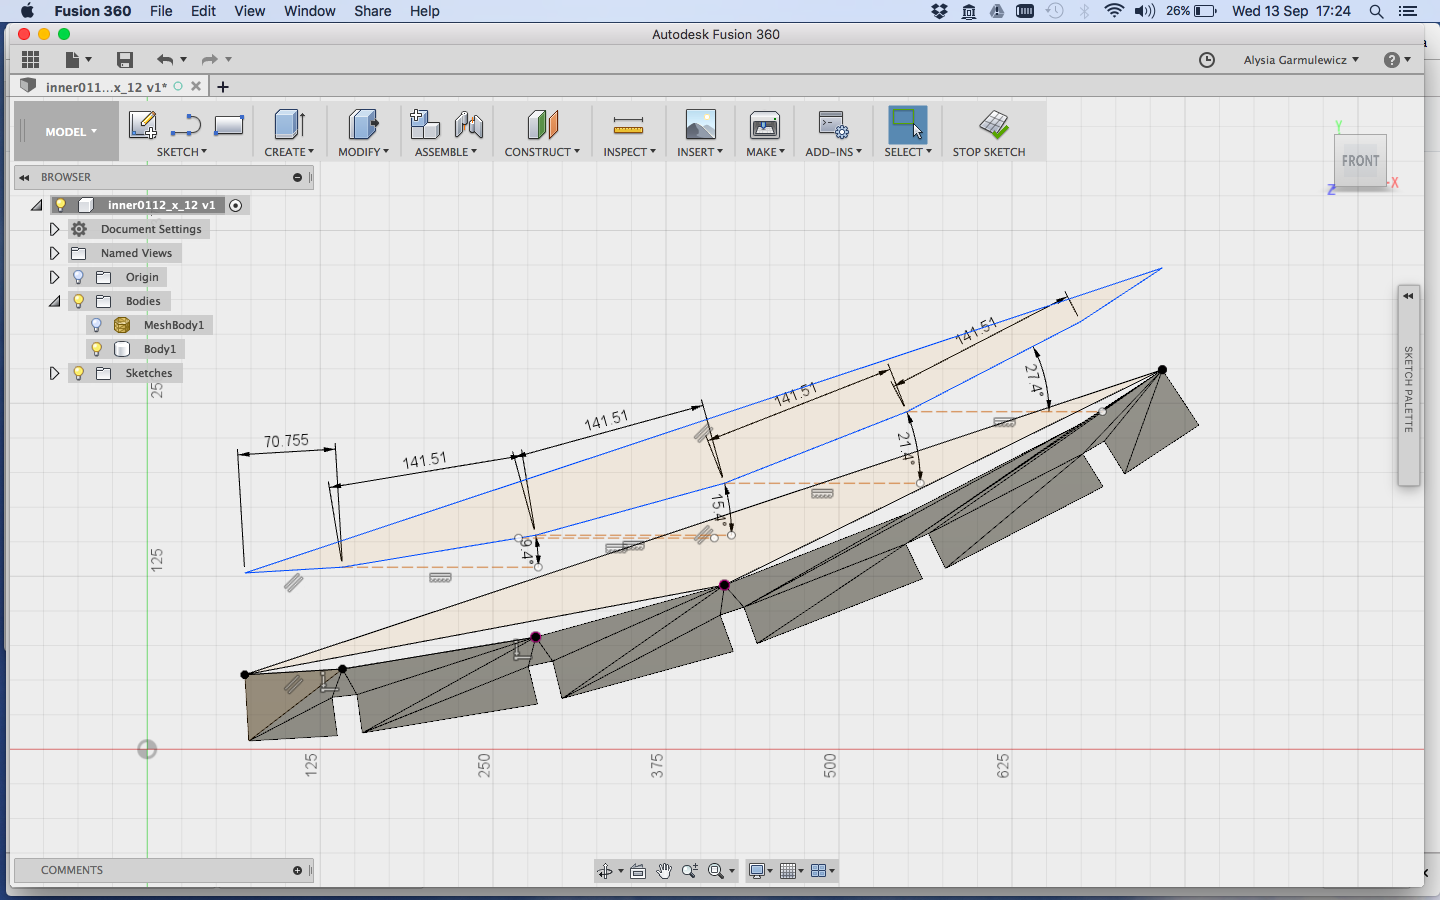
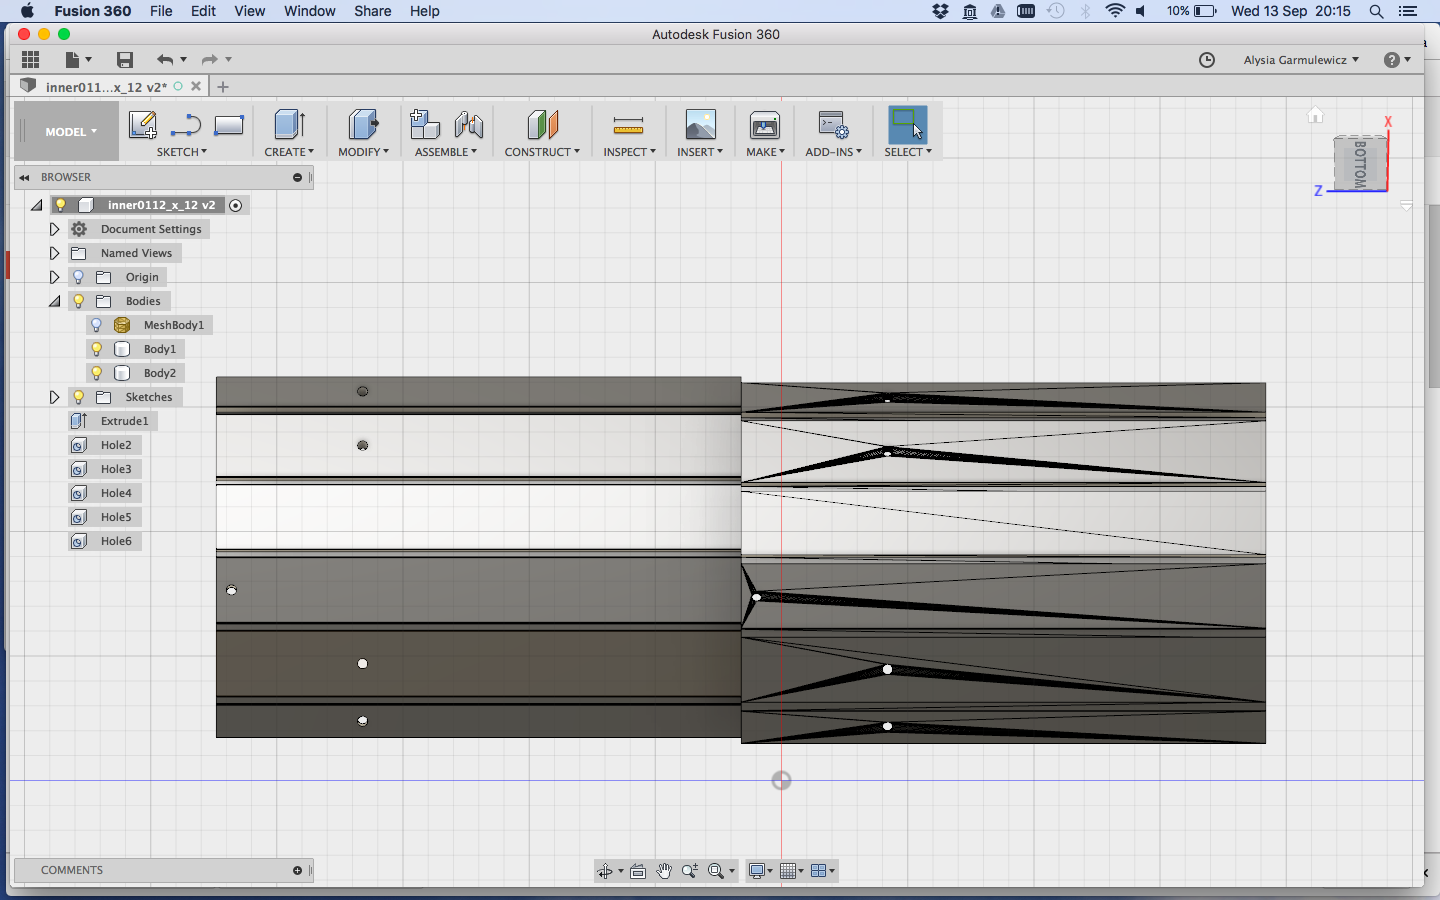
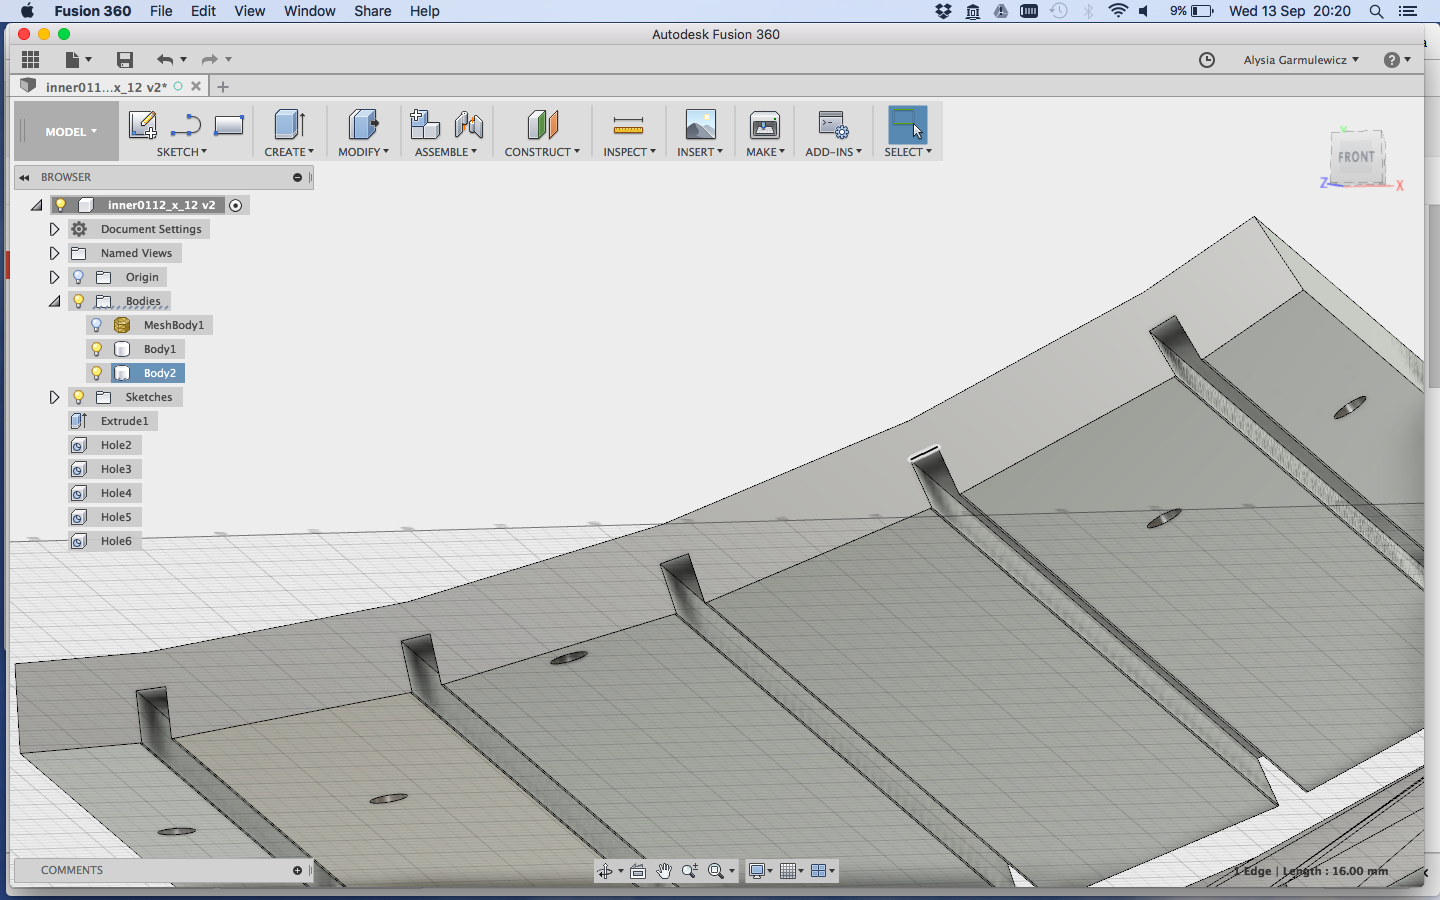
Then came the steps of (c) extrusion, and (d) modifying the model by adding holes. The last step required a seperate sketch on each of the (slightly) curved faces. This took some experimentation. I first tried to create a sketch for the holes on the same plane, but of course this diverged from plane of the actual faces. I finally figured it out by creating the holes one by one (see first picture below). After each hole was made, Fusion then allowed me to sketch the circle for the next hole directly onto the next curved surface.

'Mountain yarn feeder'
We had to make this from scratch because makerbeam parts were not available

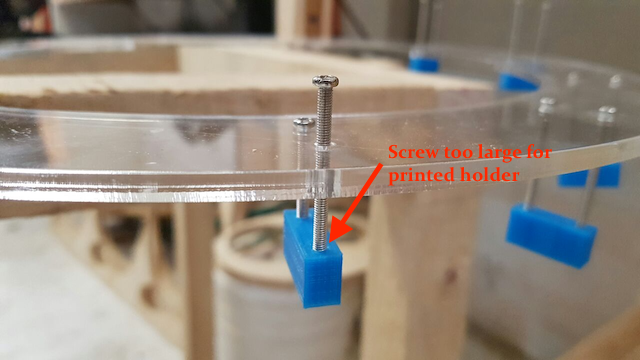
3D printed connectors
These connectors are where screws are mounted: we had issues with the screws that came as they were too large for the holders. This led to delays as we had to use other screws.
Lessons Learned
:To create a machine made by someone else where most of the materials couldn't be found is not comforting even though they have all the instructions available. We had to do considerable improvisation to make up for this. One of the root causes was the needles: if the parts were designed for a more generic type of needle, we would not have had to alter the needle guide nor the inners. It would also be beneficial for the design to replace maker-beams with wood to make it a more easy to source and more or a natural structure. The acrylic could even be replaced with wood.
Individual Contributions
We collaborated on the building the main parts of the machine. I contributed individually by making the alternative parts in Fusion - the bearing holders and the new Inner piece.
Download Files here:
Large bearing holder
Small bearing holder
New Inner
Circular Knitic Instructable
Group Page
Video