The assignment this week has 3 distinct phases:
1. group project: test the design rules for your printer(s)
2. design and 3D print an object (small, few cm) that could not be made subtractively
3. 3D scan an object (and optionally print it) (extra credit: make your own scanner)
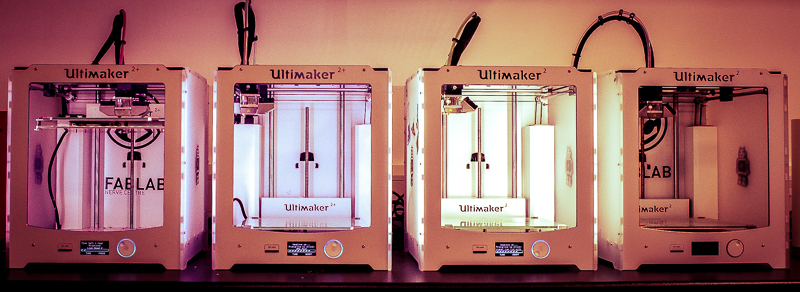
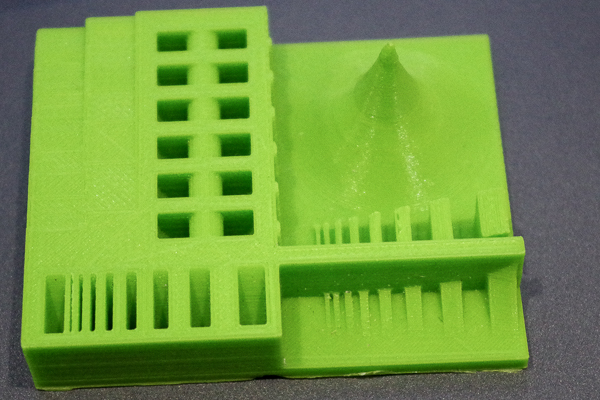
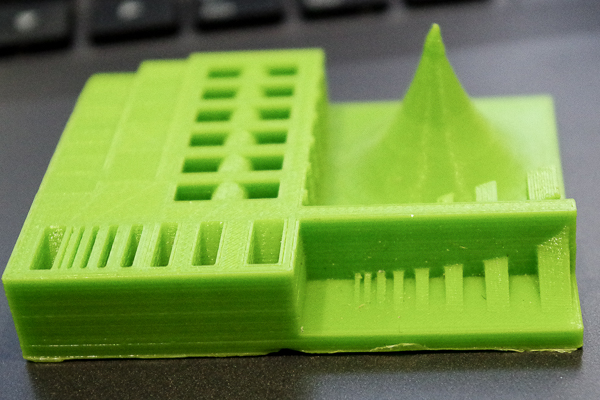
We have a few FDM printers within the lab. For this test, I downloaded the suggested test file from Thingiverse, and loaded it into Cura for preparation for printing on an Ultimaker 2+.
Observations
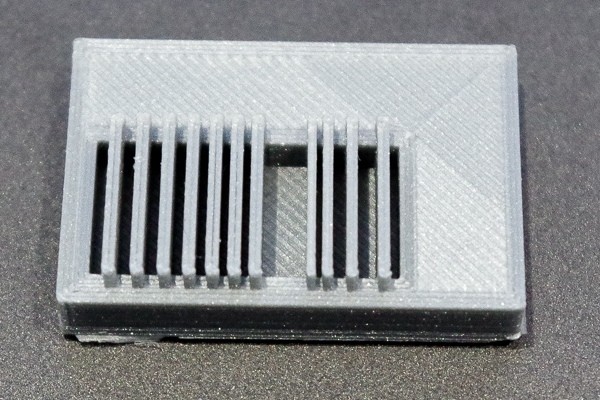
First off, the quality of print was quite high. All of the bridges printed particularly well without the use of support, but the very tip of the conical section was just ok.
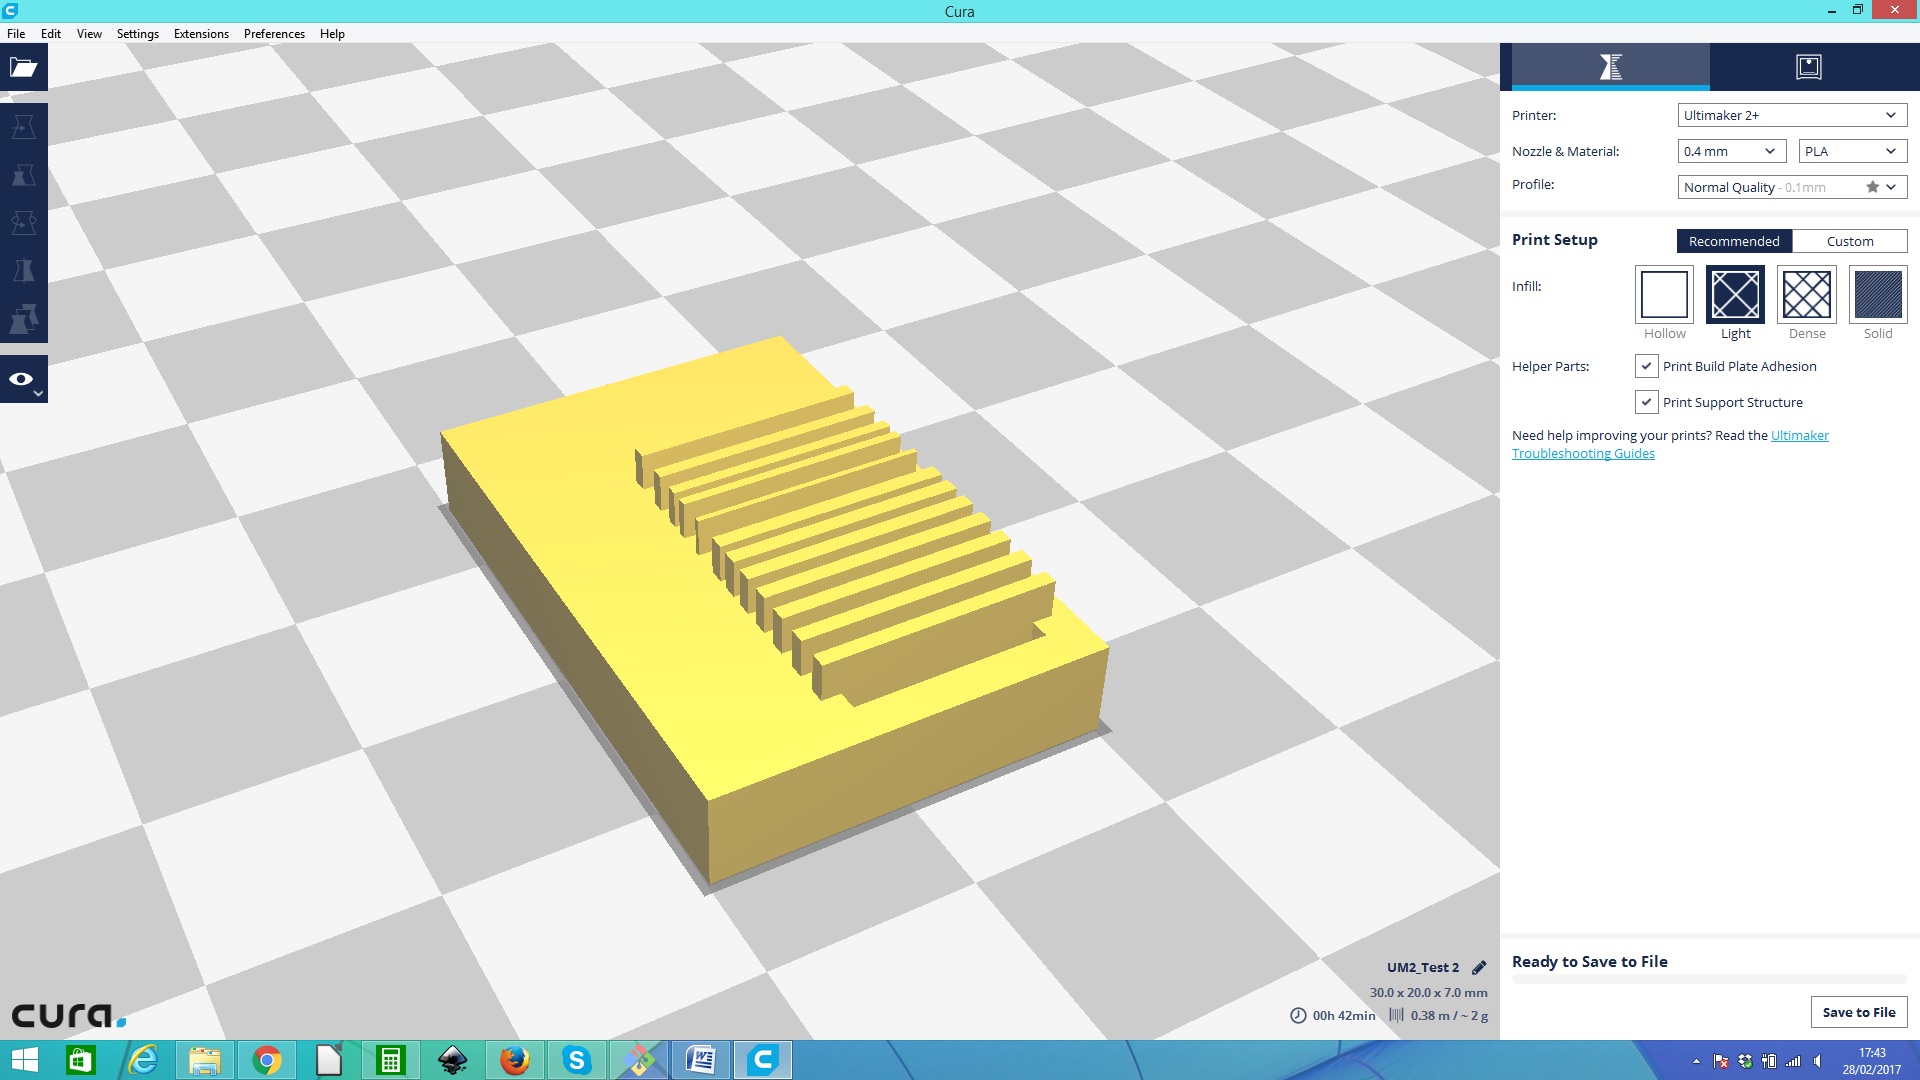
In order to ascertain the thinnest printed wall, and the thinnest clean gap between walls, I utilised a set of calipers to achieve decent qualith measurement,
The thinnest wall that printed was .52mm thick. With a nozzle diameter of .4mm, this was quite an acceptable result.
The thinnest clean wall break was .59mm, again an impressive enough result.
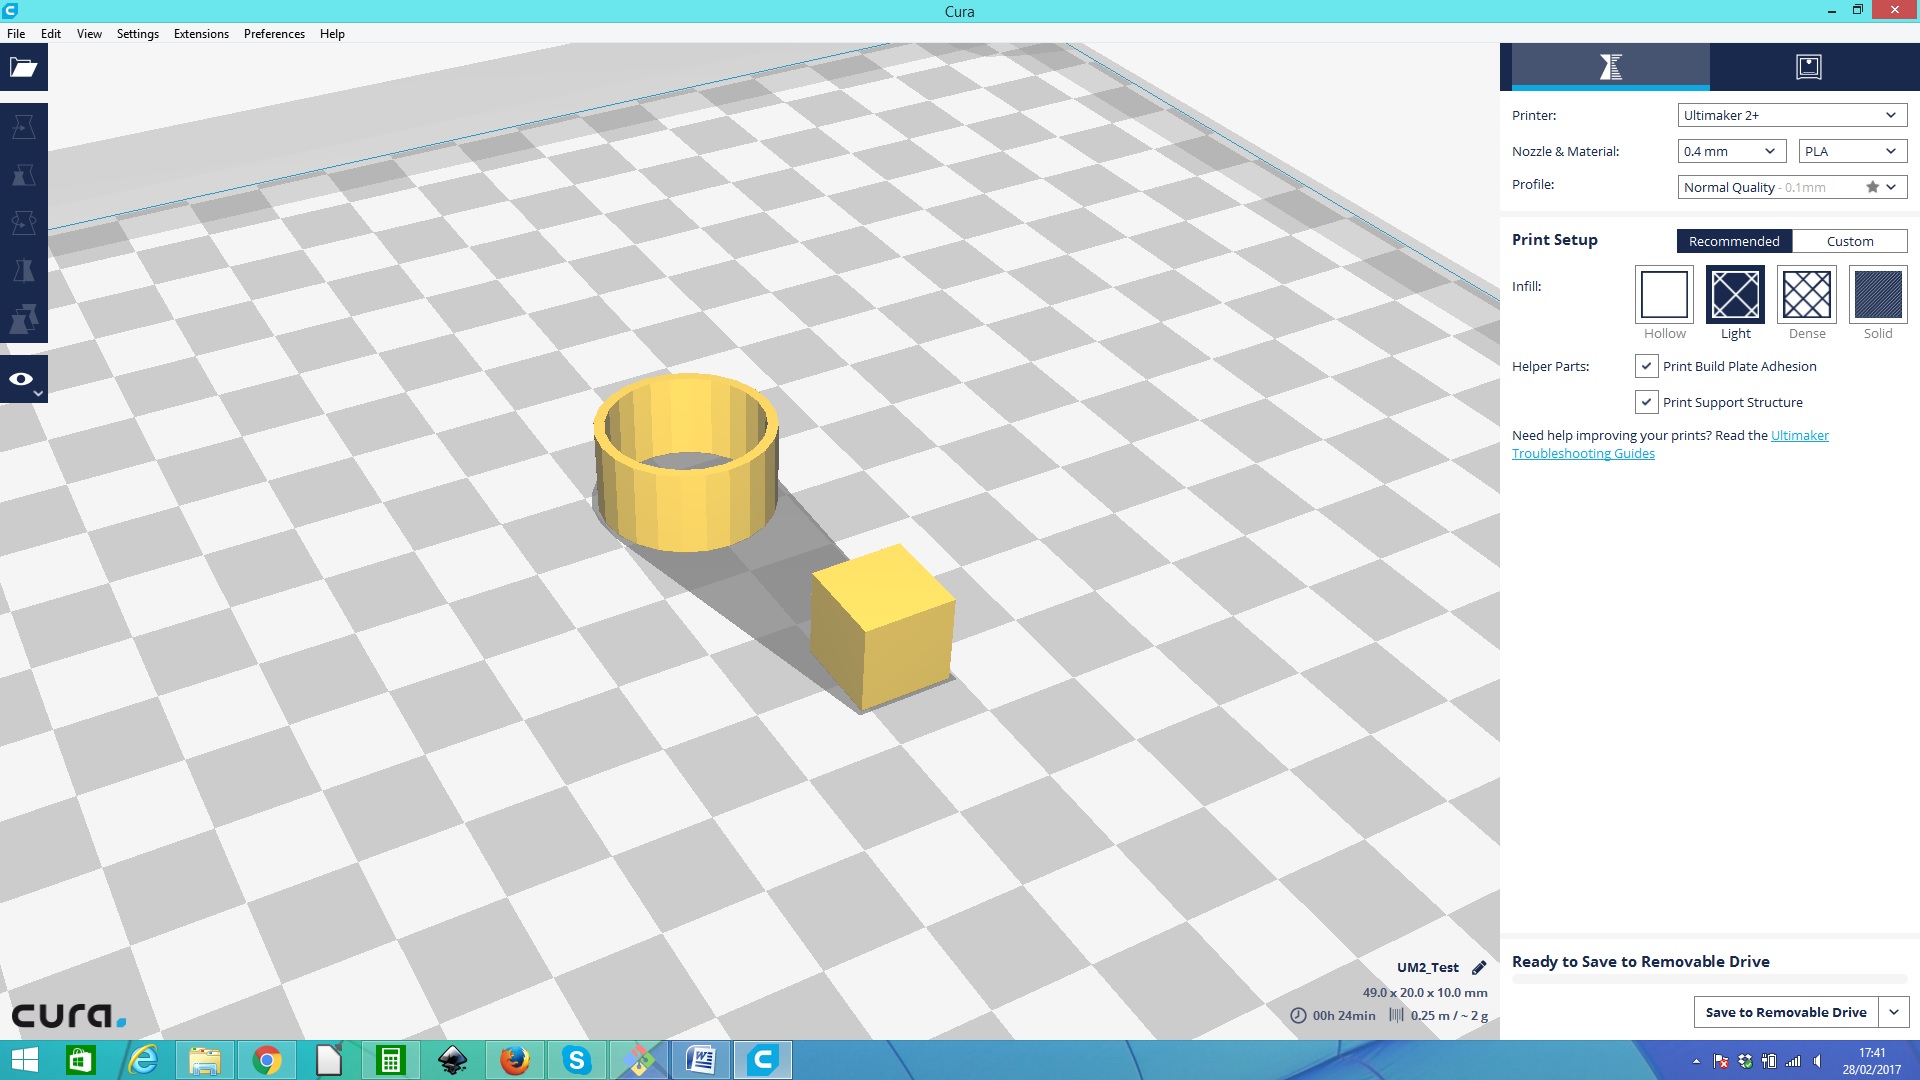
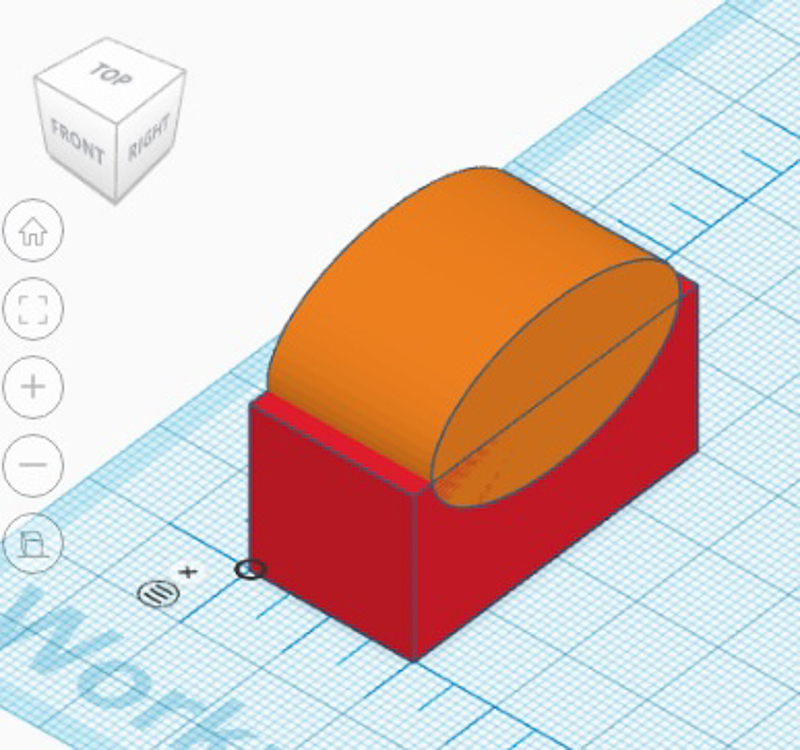
 I found the downloaded file a little hard to measure accurately, so we decided to make up a further file that would allow us to test with greater intent. The file was drawn in Tinkercad, then exported as a .stl file for preparation within Cura fro print on an Ultimaker 2+.
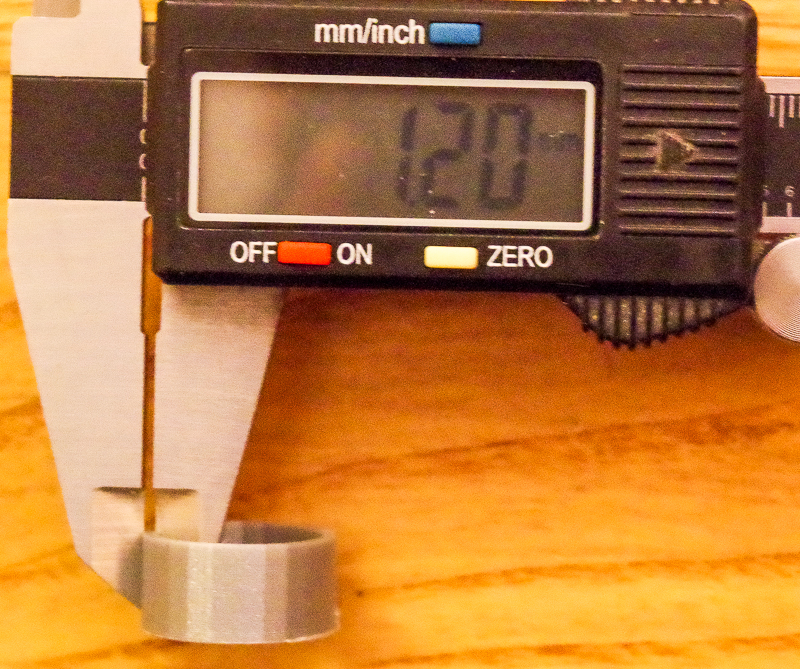
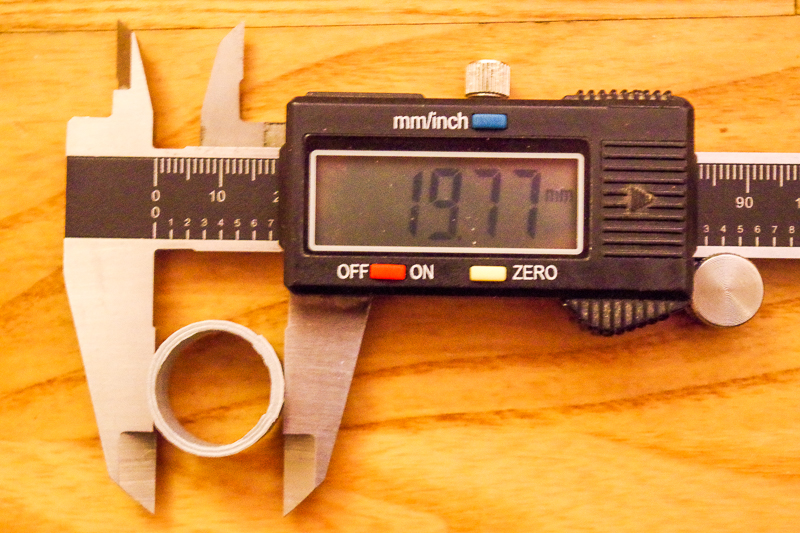
We also decided to print a 10mm cube and a 20mm pipe in order to test for accuracy. The wall of the pipe was set to 1.2mm as this was 3x factor of the extruder diameter.
I found the downloaded file a little hard to measure accurately, so we decided to make up a further file that would allow us to test with greater intent. The file was drawn in Tinkercad, then exported as a .stl file for preparation within Cura fro print on an Ultimaker 2+.
We also decided to print a 10mm cube and a 20mm pipe in order to test for accuracy. The wall of the pipe was set to 1.2mm as this was 3x factor of the extruder diameter.
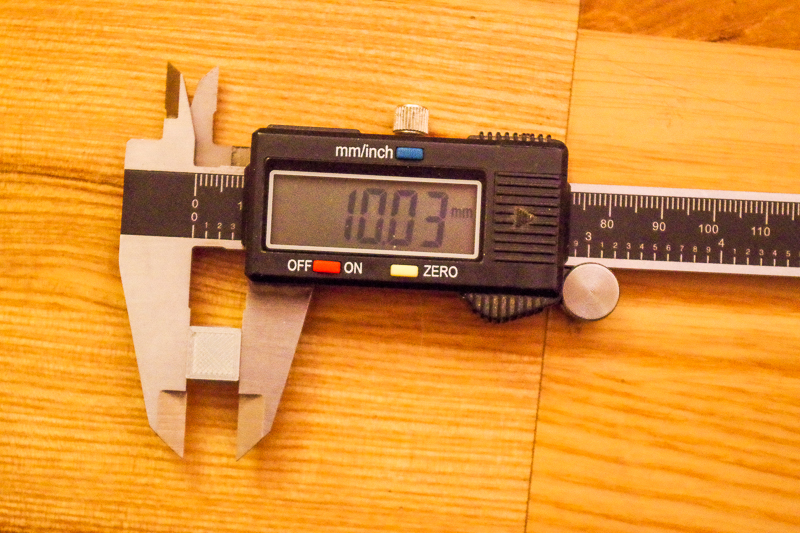
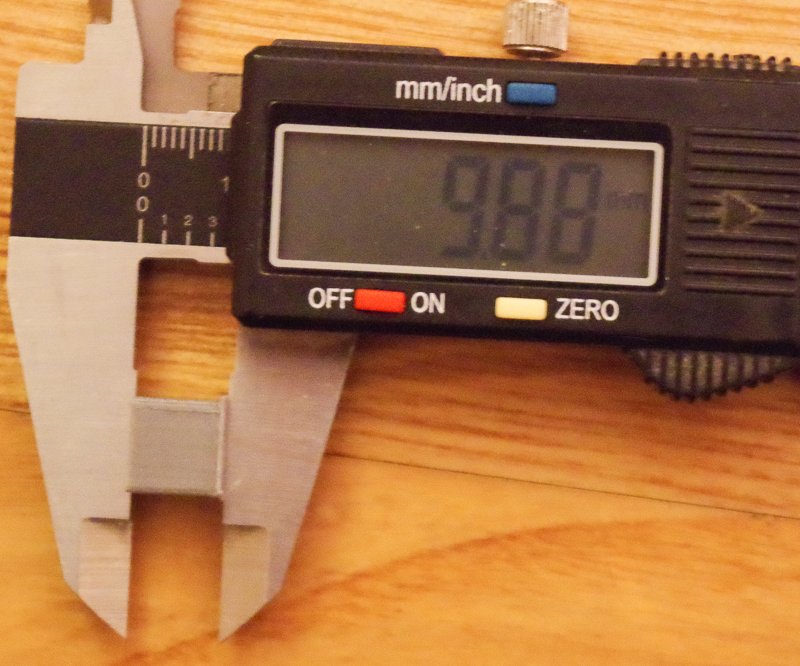
 On this occasion the results were varied. I the horizontal plane the actual printed cube measured 10.03mm, and on the vertical plane it measured 9.88mm. I can guess that this might be due to increased compression due to the force of further extrusions putting weight and therefore force on the layers below before they have fully cured. I will conduct a further test with a larger cube to ascertain if the same results will be observed.
FabLab Nerve Centre is primarily community focussed. The vast majority of users have little or no 3d design experience. In recognition of this, I decided to use Tinkercad for this part of the assignment, as the models designed could have potential use in future workshops.
We get a lot of music based groups and also visual arts based groups., so I decided to use these disciplines as the inspiration for the designs.
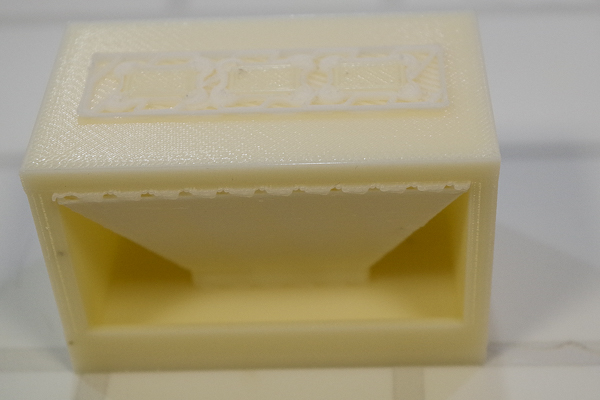
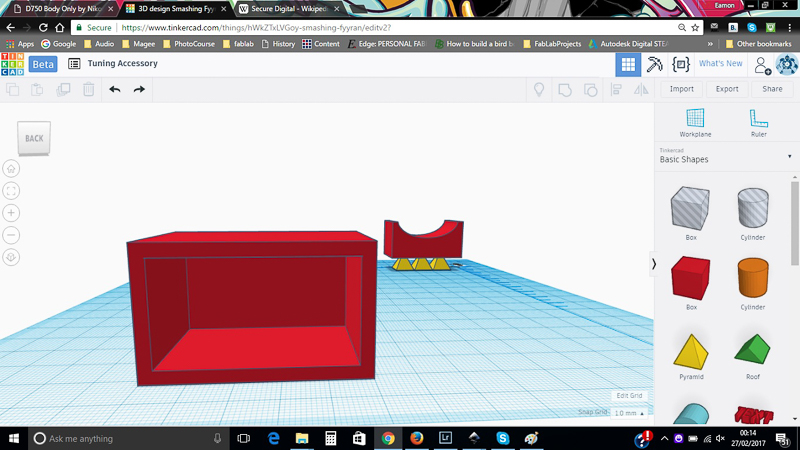
1. Guitar Neck Support Rest
When tuning a guitar, especially is a side stage location, it is usual to lie the guitar on its back in order to feed the string through the bridge assembly. The problem is that most guitar headstocks are raked backwards in order to attain better tension over the nut. This means that all of the weight on the neck is concentrated at the end of the headstock, which is far from ideal. The simple solution for this is to have a raised rest that will support the neck, taking the strain off the head.
In this design, I simply prepared a neck shaped upper, some pyramid supports, and an open base that can be used to store plectrums, another vital ingredient when tuning guitars. This form of support, coupled with the open storage beneath would not be able to be realised with a standard 3 axis subtractive fabrication process, so 3d printing is the most convenient form of manufacture here.
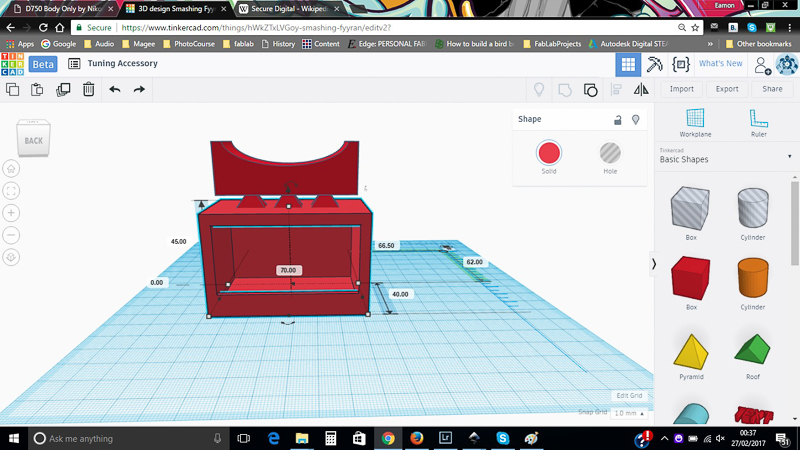
Start of design process on Tinkercad
Hollowed out base section
Almost complete
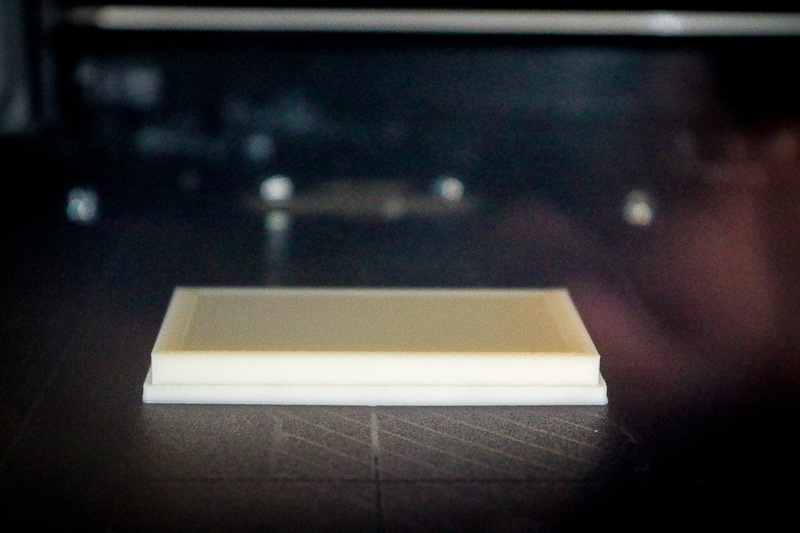
 Due to the complexity of the support required, I decided to opt for a 3d printer that utilised soluble support. This will cleanly remove the material from the delicate areas just under the neck support, and also leave a clean storage compartment. The Ultimaker does handle support quite well, but no matter how much care is used during manual removal, some evidence of its presence remains. We have a Stratasys U print SE+ in the lab, so I loaded the ,stl file into the catalyst software package for preparation, and then sent the make file to the printer. The U Print uses dual extruders. One for build material and one for the soluble support. The printer is generally very reliable, and the ABS+ material usually produces a very high quality print.
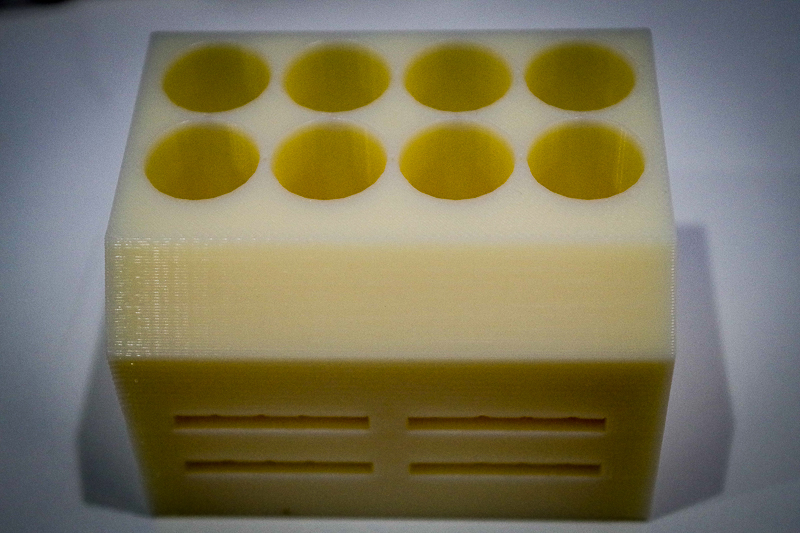
2. Photo Accessory Storage Unit.
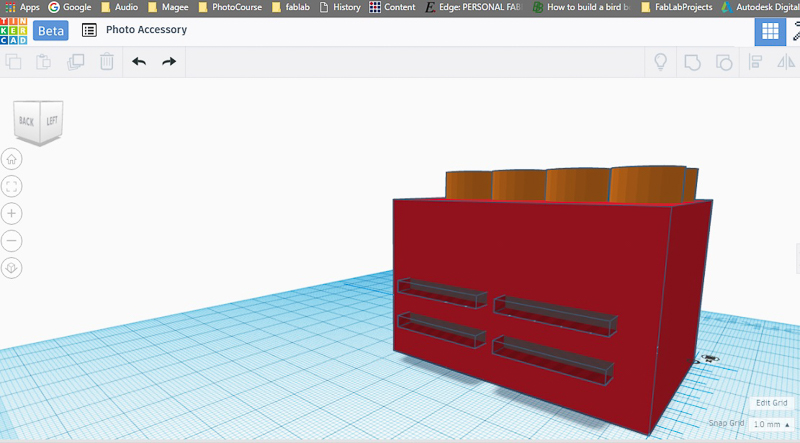
As a keen photographer, I am constantly misplacing both batteries and SD cards, both of which are vital for most photo shoots, The idea here was to design a small desktop cube that could hold both depleted and charged batteries, and also up to 4 SD cards. Placing the unit on my desktop beside the computer used for photo editing will ensure I can find the necessary items when I need them.
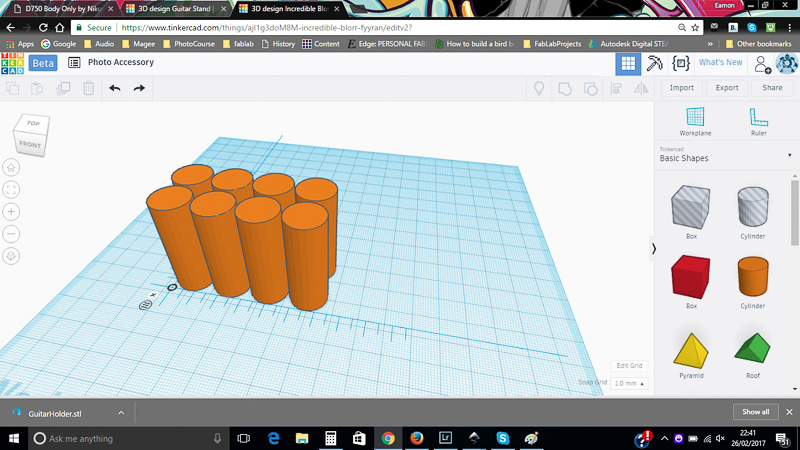
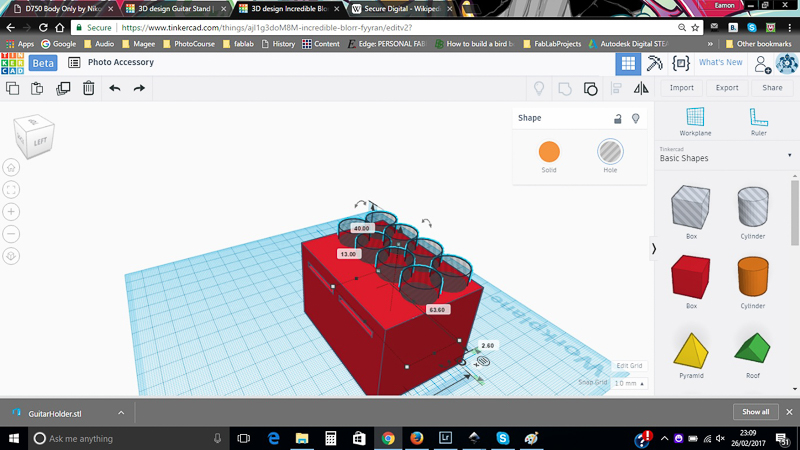
In order to achieve the design, I first constructed a simple rectangular box. The next step was to create a cylinder that would serve as the receptacle for the batteries.
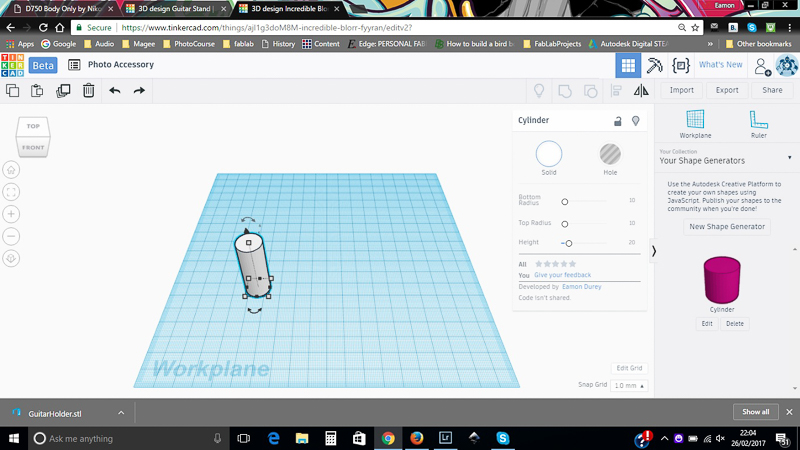
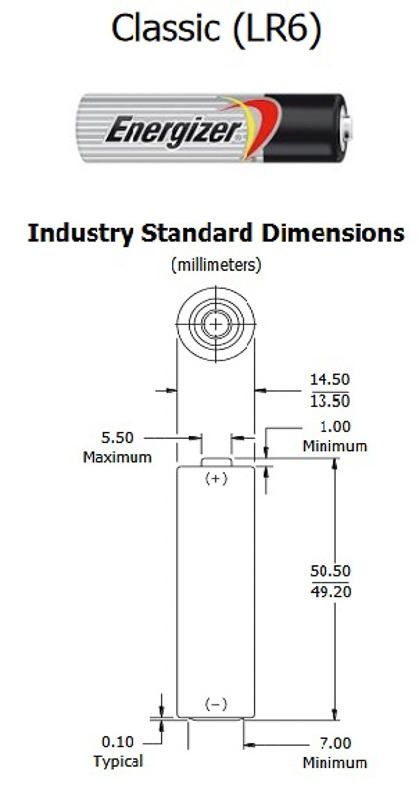
I investigated the specification for AA batteries, and settled on 15mm diameter and 40mm in height. I then duplicated the cylinder 7 times to give the required amount.
Tinkercad does not have auto alignment tools, so I had to manually place each cylinder by adjusting its positional parameters on both x and y axis with reference to a ruler I had established at the front left of the main rectangle. This was quite straightforward, but a calculator was handy for doing the maths. I placed the holes 1.2mm apart.
Next the slots were designed for the front in keeping with the international specification for sd cards.
Lastly, the model was exported as a .stl file for 3d printing.

As the Ultimaker printers were all busy, I decided to try the U Print for this model also. The model was loaded into catalyst software where it was processed and sent to the printer. I decided to print support in the sd card slots so as to guarantee there would be no sag on the bridged parts.
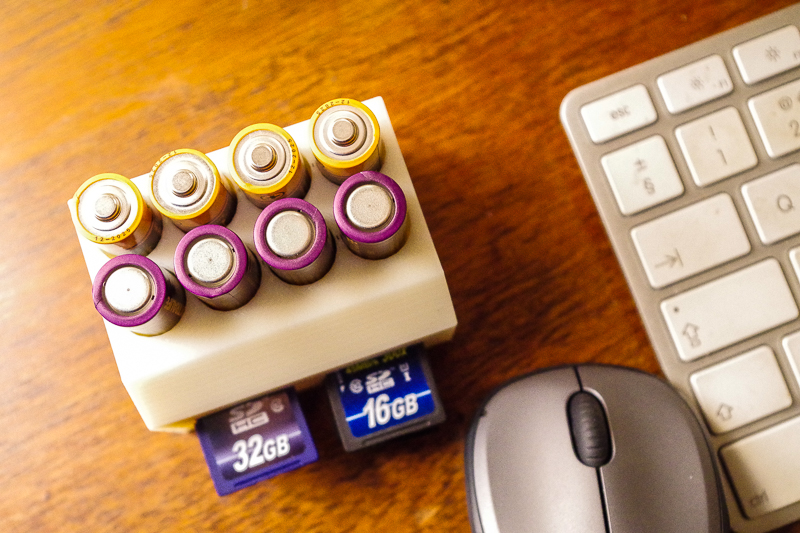
Conclusion
The print worked out very well. Dimensionally all of the associated media fitted the engineered slots without any issue. The unit has now taken up residence beside my computer at home.
I will however make one change. If I deepen the slots for the sd cards, I will have space on top to create a holder for dedicated camera batteries.
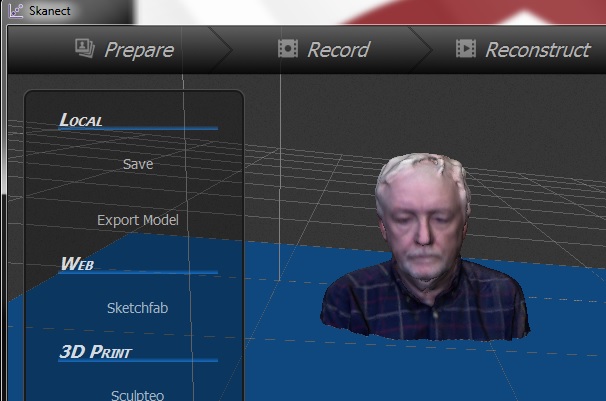
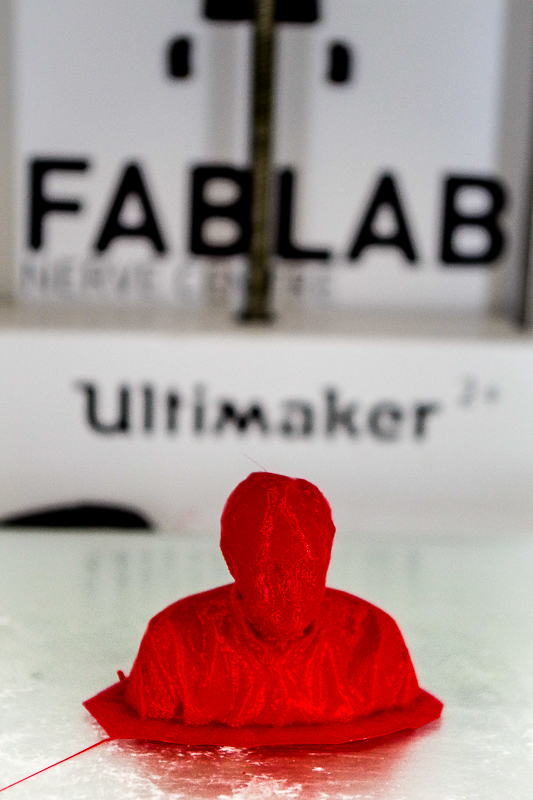
Gaming is very popular amongst the main demographic that we aim to attract to the lab, teenagers and young adults who have disengaged from education, and in many ways society in general. With this in mind, we decided a few years ago to adopt the x-box kinect as one of our main methods of 3d scanning. The idea is that the kinect is familiar to them, so this should break down any initial fear and build better association with the task at hand. One of the activities we do as an Ice Breaker, is to get the group, in pairs, to scan each other using the kinect, and subsequently produce a 3d print, so for this exercise, I decided to scan my fellow Academite Liam Maskey.
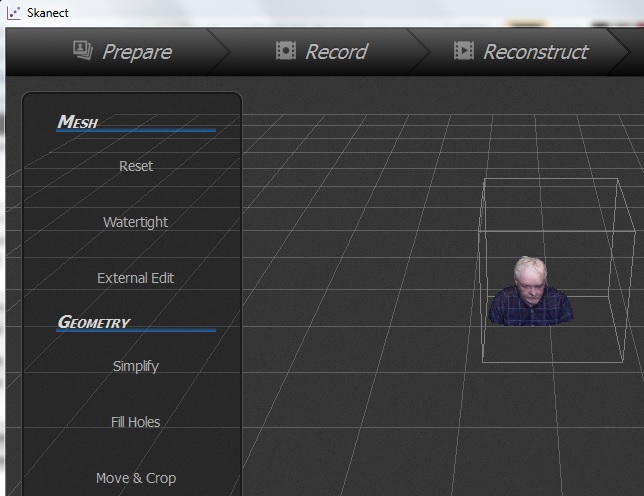
Skanect is a very simple software package that automates a lot of the scanning process.
Firstly the kinect is connected to the computer via usb, and the subject is positioned in a place where there is sufficient, even lighting. Now the software is set to record, and either the kinsct is held steady and the model rotated through 360 degrees, or you walk around the model maintaining a slow steady speed and even distance from the model.
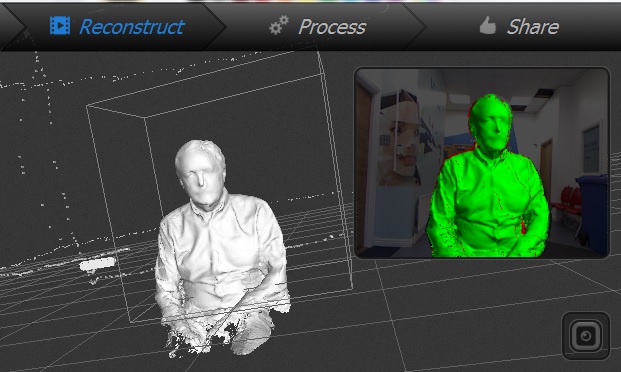
The scan created was then made watertight, and holes filled in, then exported as a .stl file.
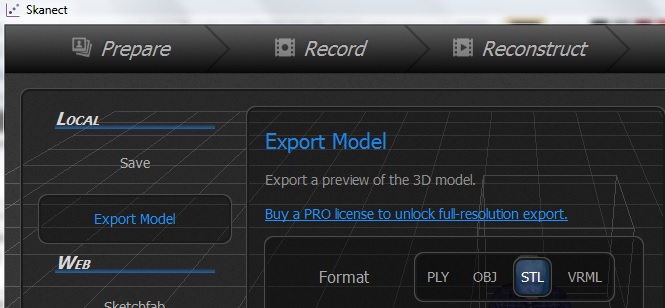
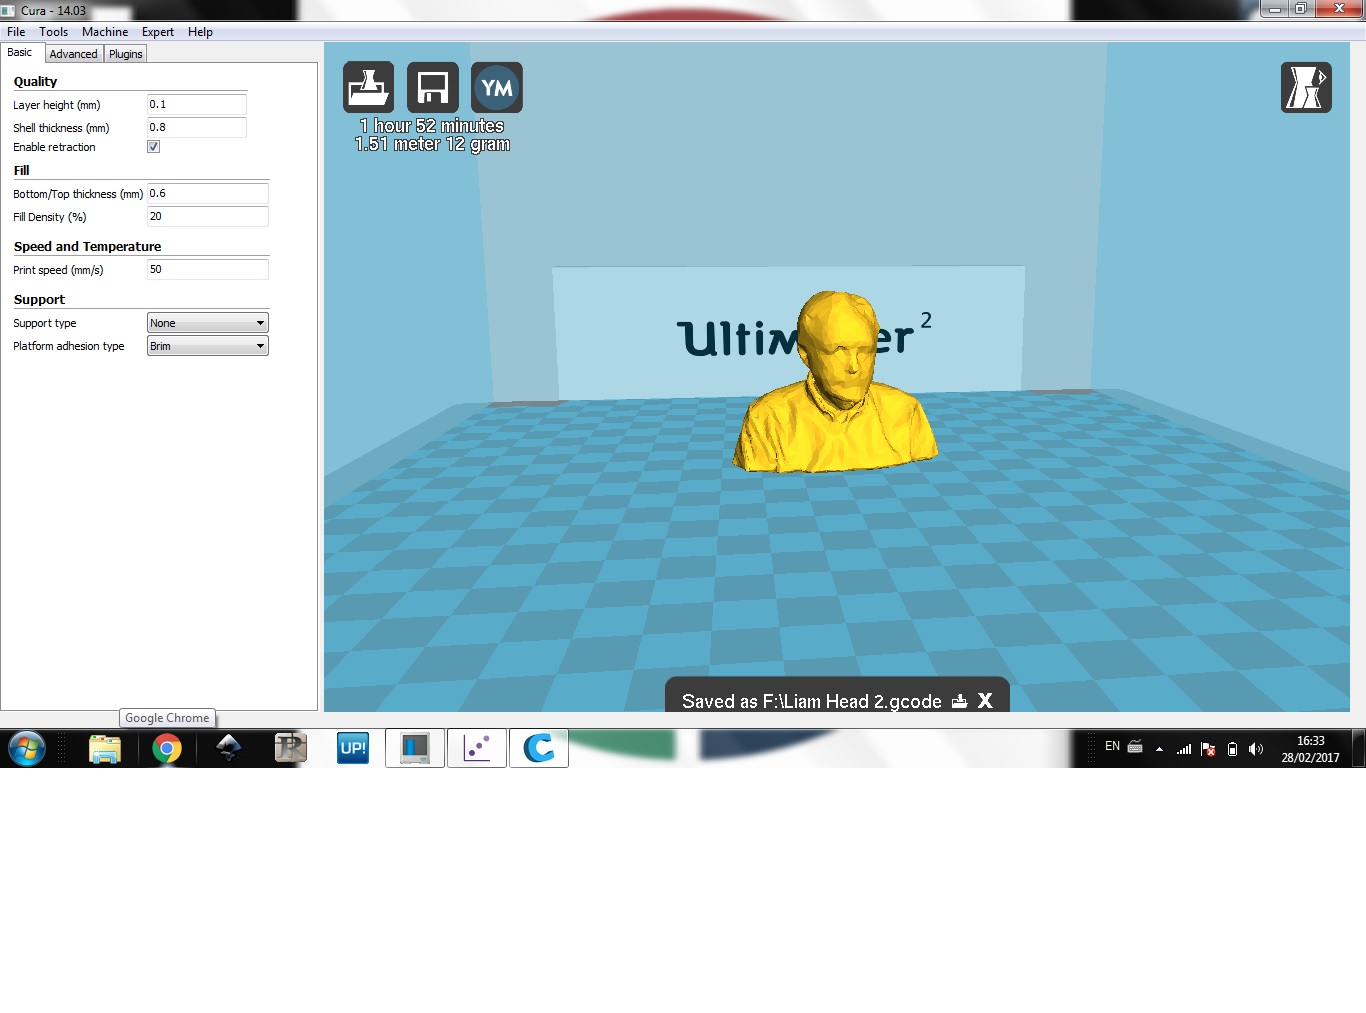
The resultant file was opened within Cura for prepration for peinting on an Ultimaker 2+.
The results can be seen below.


3d printers require a lot of attention and maintenance in order to keep them moving smoothly. I had cleaned the extruder on thre Ultimaker before proceeding with the tests so as to guarantee maximum efficiency and accuracy. This needs to be done on a regular basis.
Problems/ Failures
When printing the guitar tuning accessory, I left the print on overnight, as the UPrint has an auto turn off facility.
When I returnred in the morning, the support material had run out, so the build was not complete. To further compound the problem, the machine malfunctioned when trying to unload / reload new support material, so the print had to be started again. The original print had progressed as far as this:
It is also important to be aware of the time it takes to produce 3d prints, and it it a good idea to reserve the printer in the Lab well in advance so as to guarantee access.
It is also good practice to not only make sure that you keep your design within the design rules, bur also give respect to the extruder diameter. I will use this in my prints from here onwards.