Making A Mould Through Milling
Design Brief
This week's assignment was to cast an item from a custom designed mould.
The process can be broken down into discrete phases:
Design a mould in a 3d software package;
Mill the resultant design in modelling wax;
Make a silicone mould;
Cast your design using a variety of materials;
Design
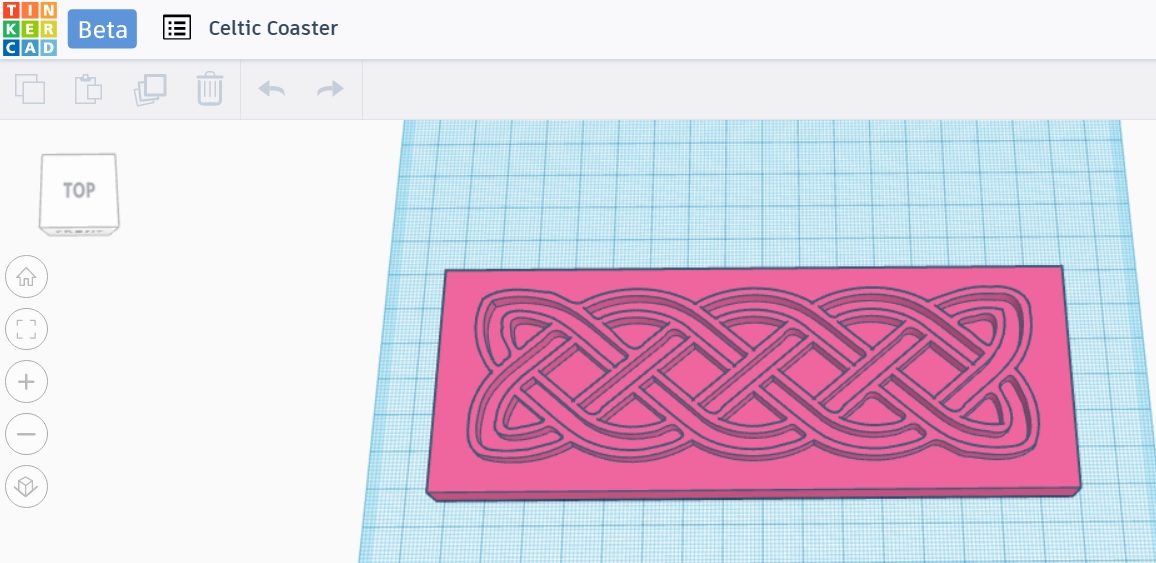
The initial part of the process involved formulating a 3d design suitable for moulding.
I wanted to make a plaque based on a simple Celtic rope knot design, so I first of all downloaded a 2d bitmap, then i traced vectors from this within Inkscape, loaded the resultant .SVG file into Tinkercad, and extruded the shape to the desired height.
Next i drew a base for the design to rest on, and saved the finished file in the .stl format.
Milling the Design
To mill the design from moulding wax, the .stl file was loaded into fab modules. An rml file was transcoded and sent to the Modela. A 1/8th inch 2 flute bullnose bit was used.
2 passes were performed. First a roughing pass, whereby most of the material was removed, then a smoothing pass, with took much longer, but left a more detailled and smoother finish on the wax.
Fab Modules has dedicated presets for performing both the roughing and smoothing pass, so these were selected as a starting point. The only change I made was to change the cut depth for each pass on the roughing sequence to 1.5mm in order to increase speed, and analyse whether the machine coupd cope with this. As my mould was to be quite shallow, the stress on the bit should not be too much.
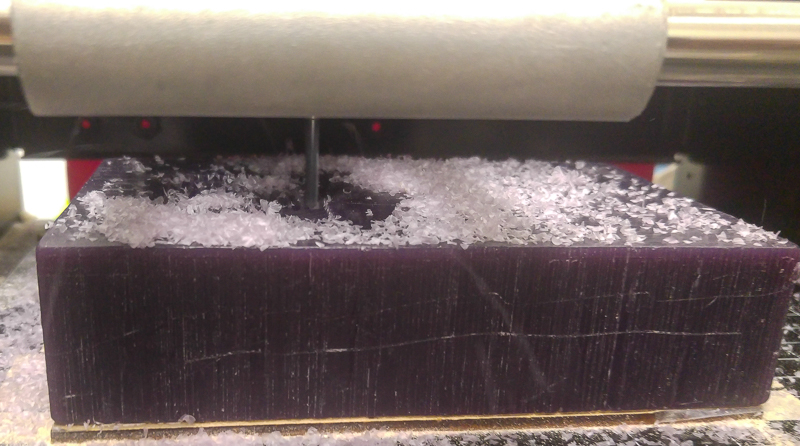
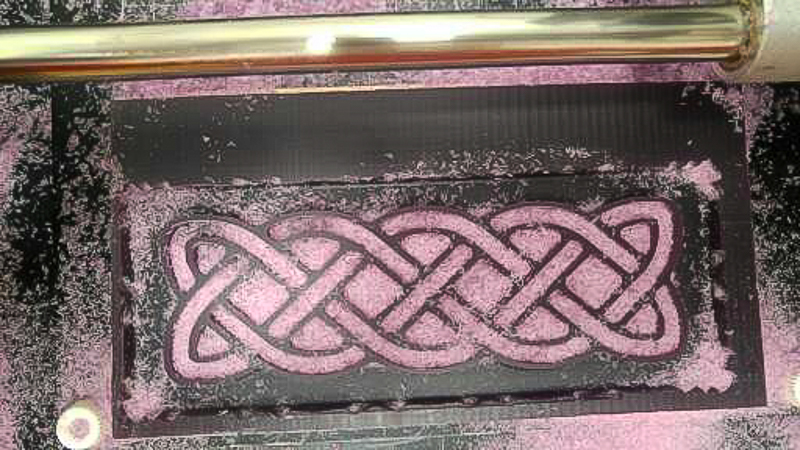
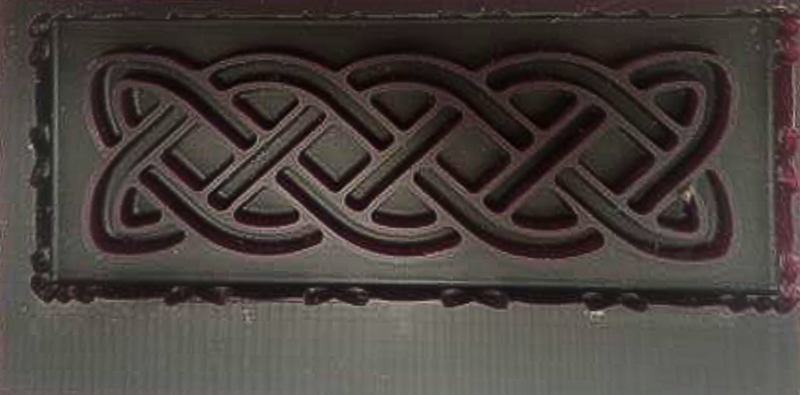
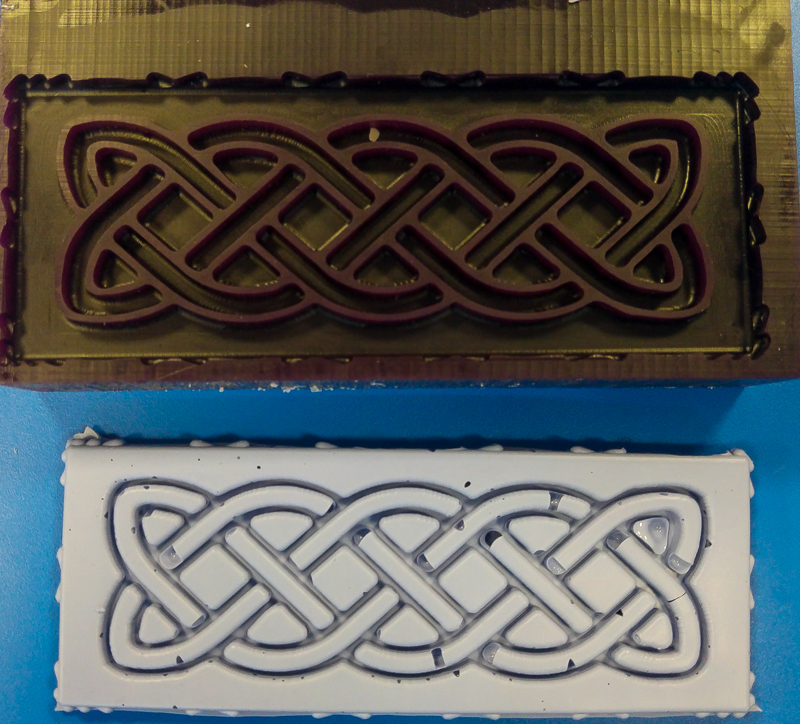
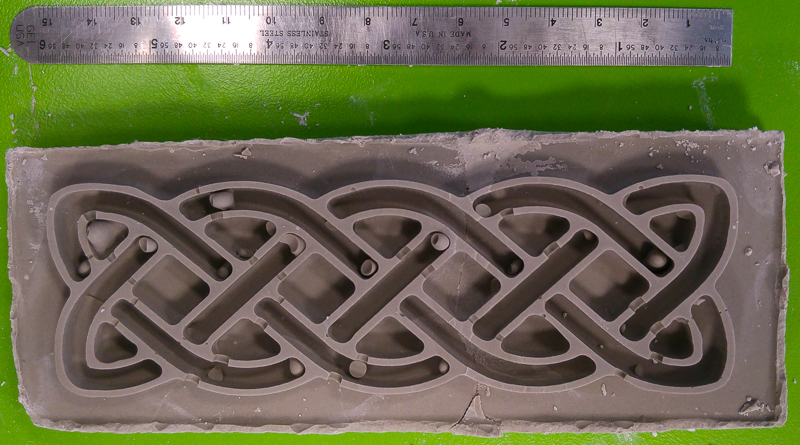
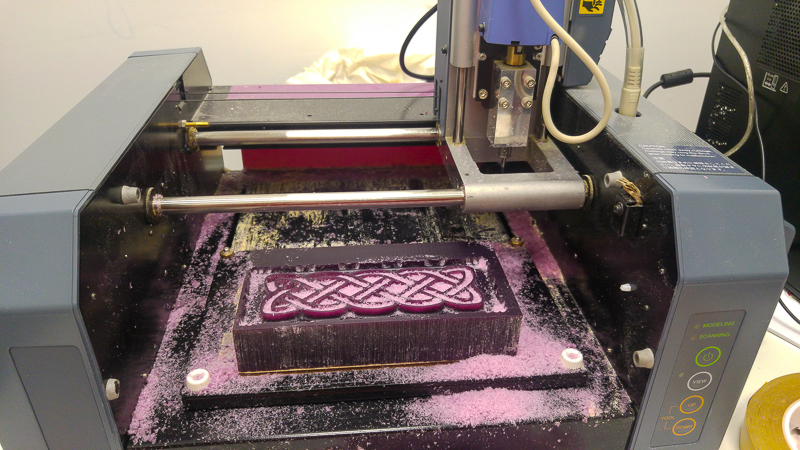 Moulding wax produces a highly detailled result. The design i had chosen was intricate enough, and it transferred perfectly to the wax.
Making a Silicone Mould
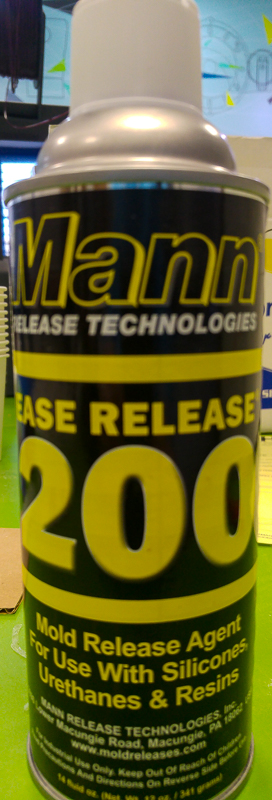
Now that the milling is complete, we need to make a negative mould that will be used to cast the final part. Ease release 200 was applied to the mould to assist in easy release of the silicone mould.
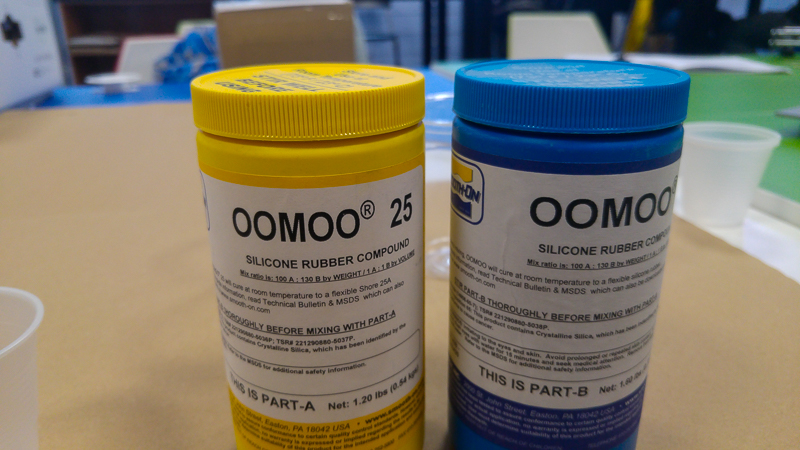
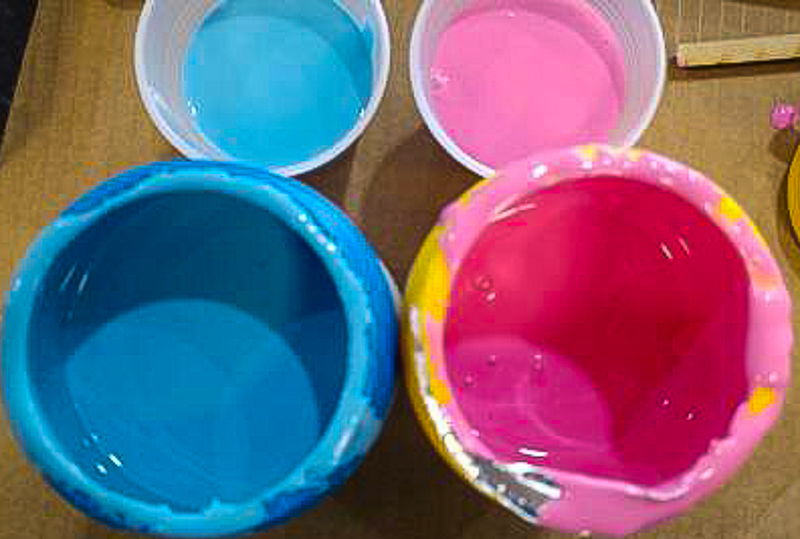
For this I will be using Oomoo30, a silicone based product.
After stirring extensively, equal amounts by volume of parts A and B are mixed together in a clean container. Oomoo 30 has a pot life of 30 mins, so no great rush is needed when pouring.
 The mix is then slowly poured into the wax mould and left to cure. Oomoo 30 has a cure / demould time of 6 hours, so this was set asid overnight.
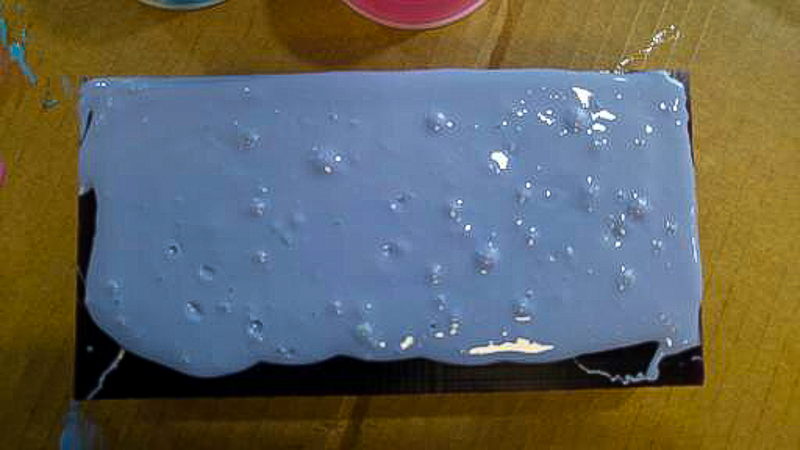 Although i did pour slowly, and tapped the mould once poured, i did still get some bubbles within the silicone mould. Oomoo 30 mixed a little thicker than 25, and this may have been the reason. I think in future it might be a good idea to construct a self made degassing station. On a positive note, the imperfections introduced with the bubbles are quite in keeping with celtic design, so I did not feel the need to re cast. You can see the bubbles coming to the surface in the photo above.
Once cured, the silicone negative mould is separated from the wax mould. We are now ready to mix up the finish material and beging to cast the final mould.
Final Cast
With the mould prepared, all that remains is to mix the finish material and apply this to the silicone mould. Again i used some release agent to ensure a smooth extraction due to the delicate nature of the shape being moulded. The first material that I decisded to try was hydrostone. There is very precise mixing instructions on the rear of the container, so these were followed with regards to mix volumes, but due to the small amounts being used, it iwas simply mixed using a lollypop stick in a plastic cup and not an attachment on a drill as advised. On further research, both talking with local ceramicists and theough online tutorials, there are various was of effectively mixing hydrostone without the precision as stated by the manufacturer. Putting water into the cup and then gradually dding the powder until it takes about 5 seconds to sink below the surface, then letting sit for 1 minute and then mixing worked quite well also.
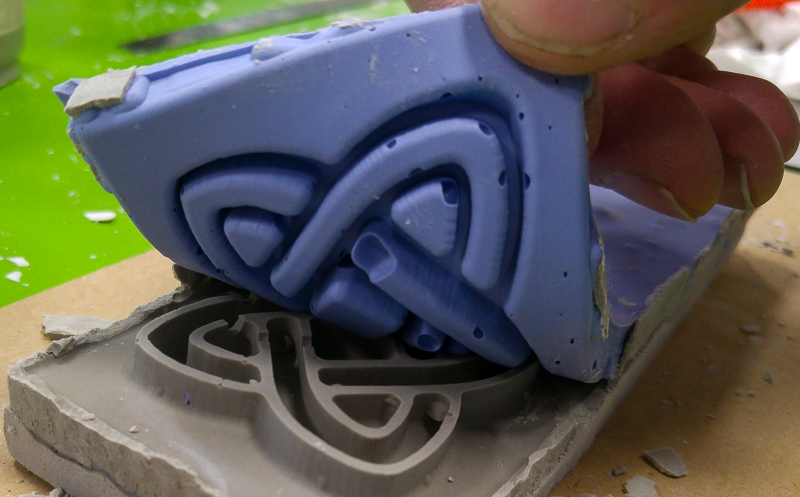
Once mixed the hydrostone was poured into the mould and left to set for around 1/2 hour. At this point the silicone mould can be peeled off leaving the finished product.
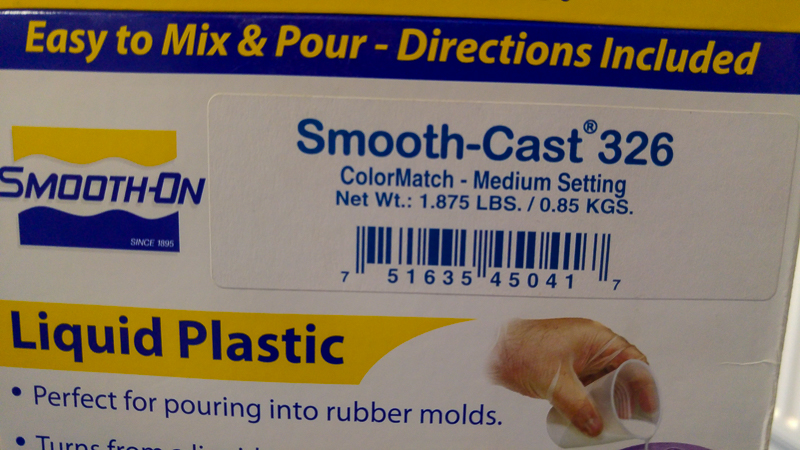
 As an alternative to hydrostone i decided to try to create a plastic mould also, without the base. For this, the process above was repeated, only this time i used smoothcast 326, which is a 2 part mix, equal by volume. The process for preparation is similar to preoaring the silicone, although this material is a little thinner in nature.
 Once poured in to the mould, and the demould time had elapsed, the hardened plastic was removed from the mould.
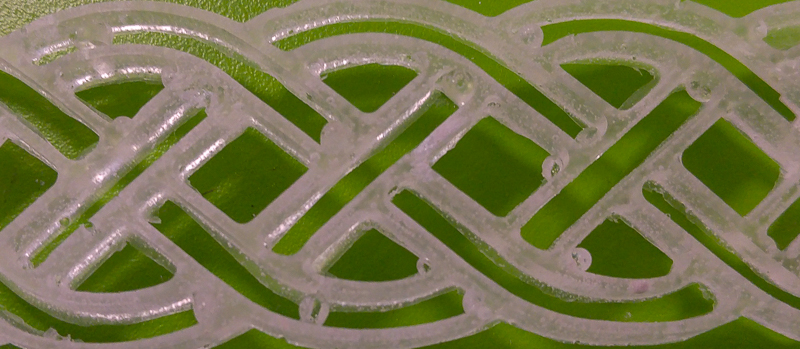 Again, there was the presence of small bubbles, so degassing would have improved the final result, but the finish was adequate.
Conclusions
Moulding and casting was a very interesting and indeed creative process. The are so many applications for this. Also, there are so many alternative ways of making moulds that do not require the use of the modela and modelling wax, particularly if you are looking to replicate a pre-existing item, and when this is coupled with the vast array of finish materials available there is an almost infinite range of possibilities. I will be extending the use of this process to school and youth groups who are regular Fablab users.