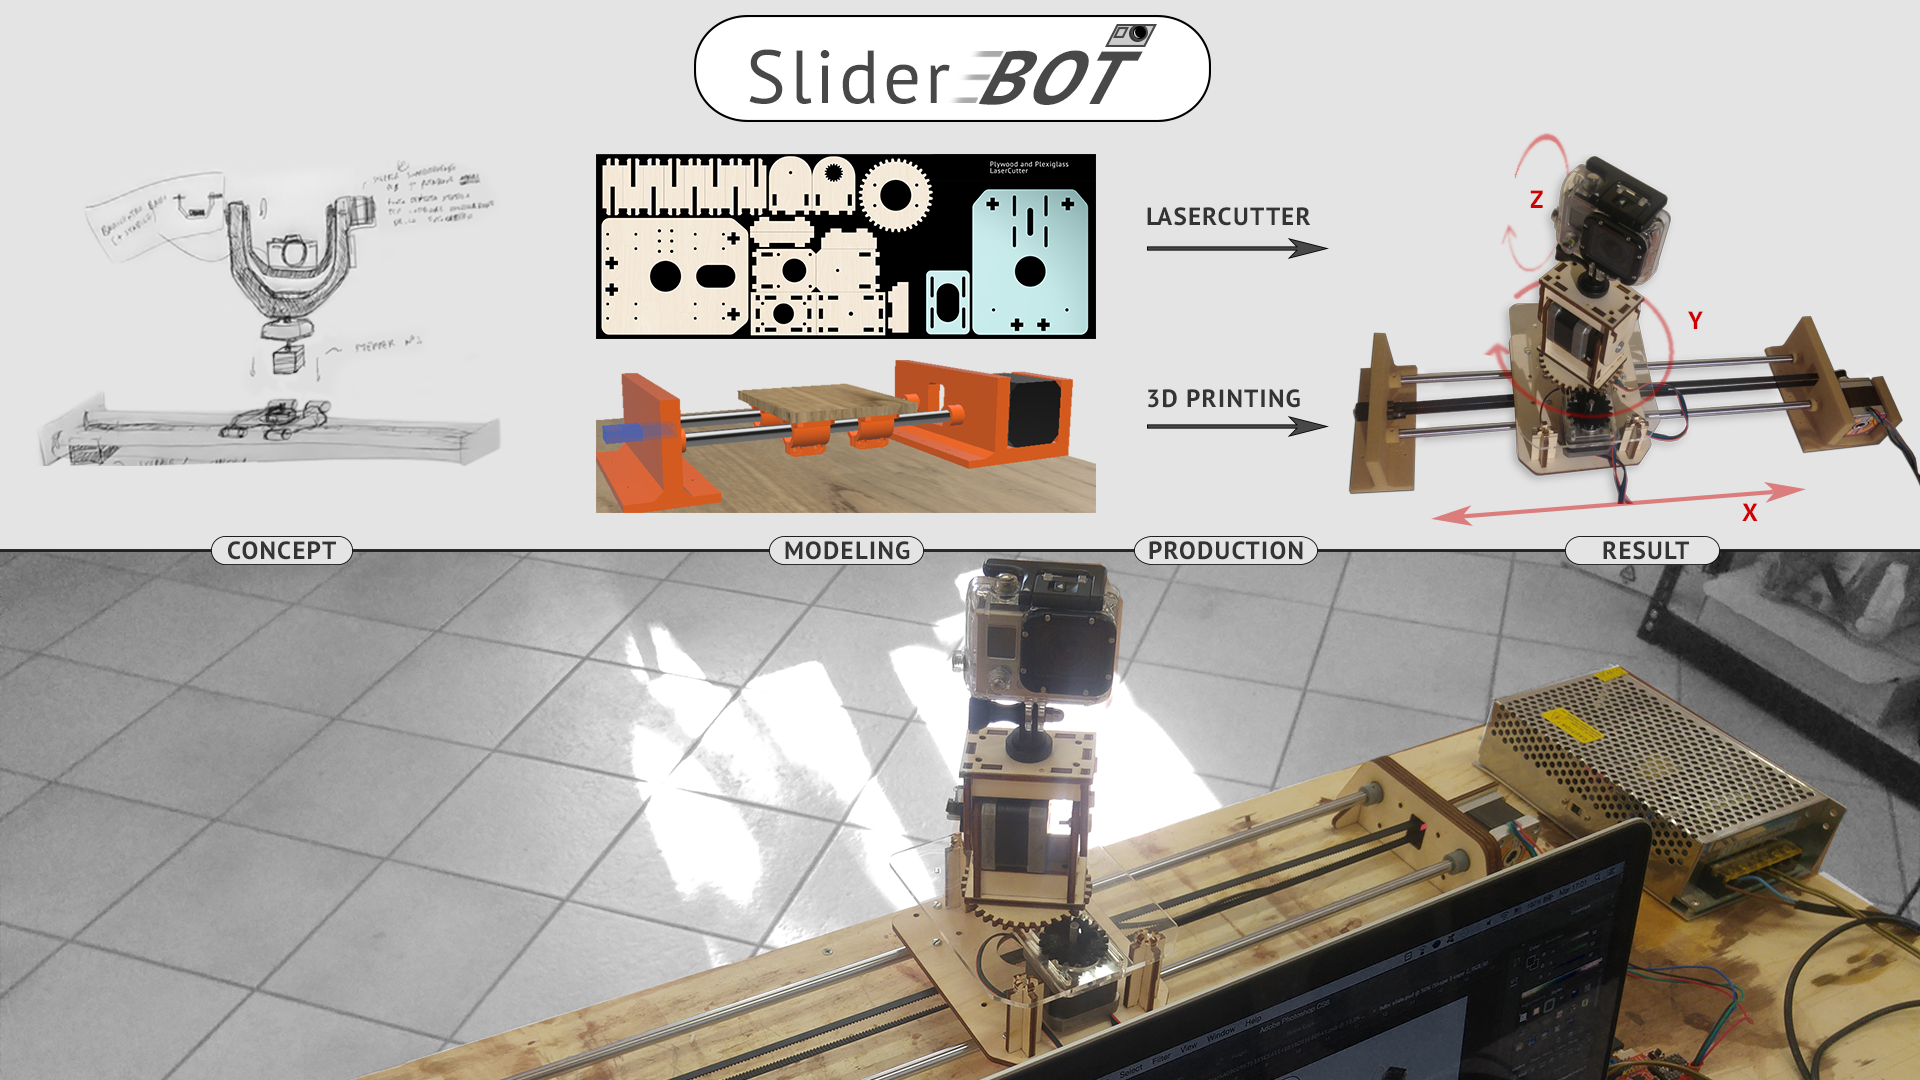
Since we didn't have a camera slider for cool presentation videos, we decided to built one, as a useful and easy machine to make, for the first time. It has 3 axis, 1 translation axis (X), and 2 rotations axis (Y,Z). For the transmission we decided to use for X axis a belt system, for Y axis 2 gears-system and for Z Axis we fixed directly the stepper into the moving part.
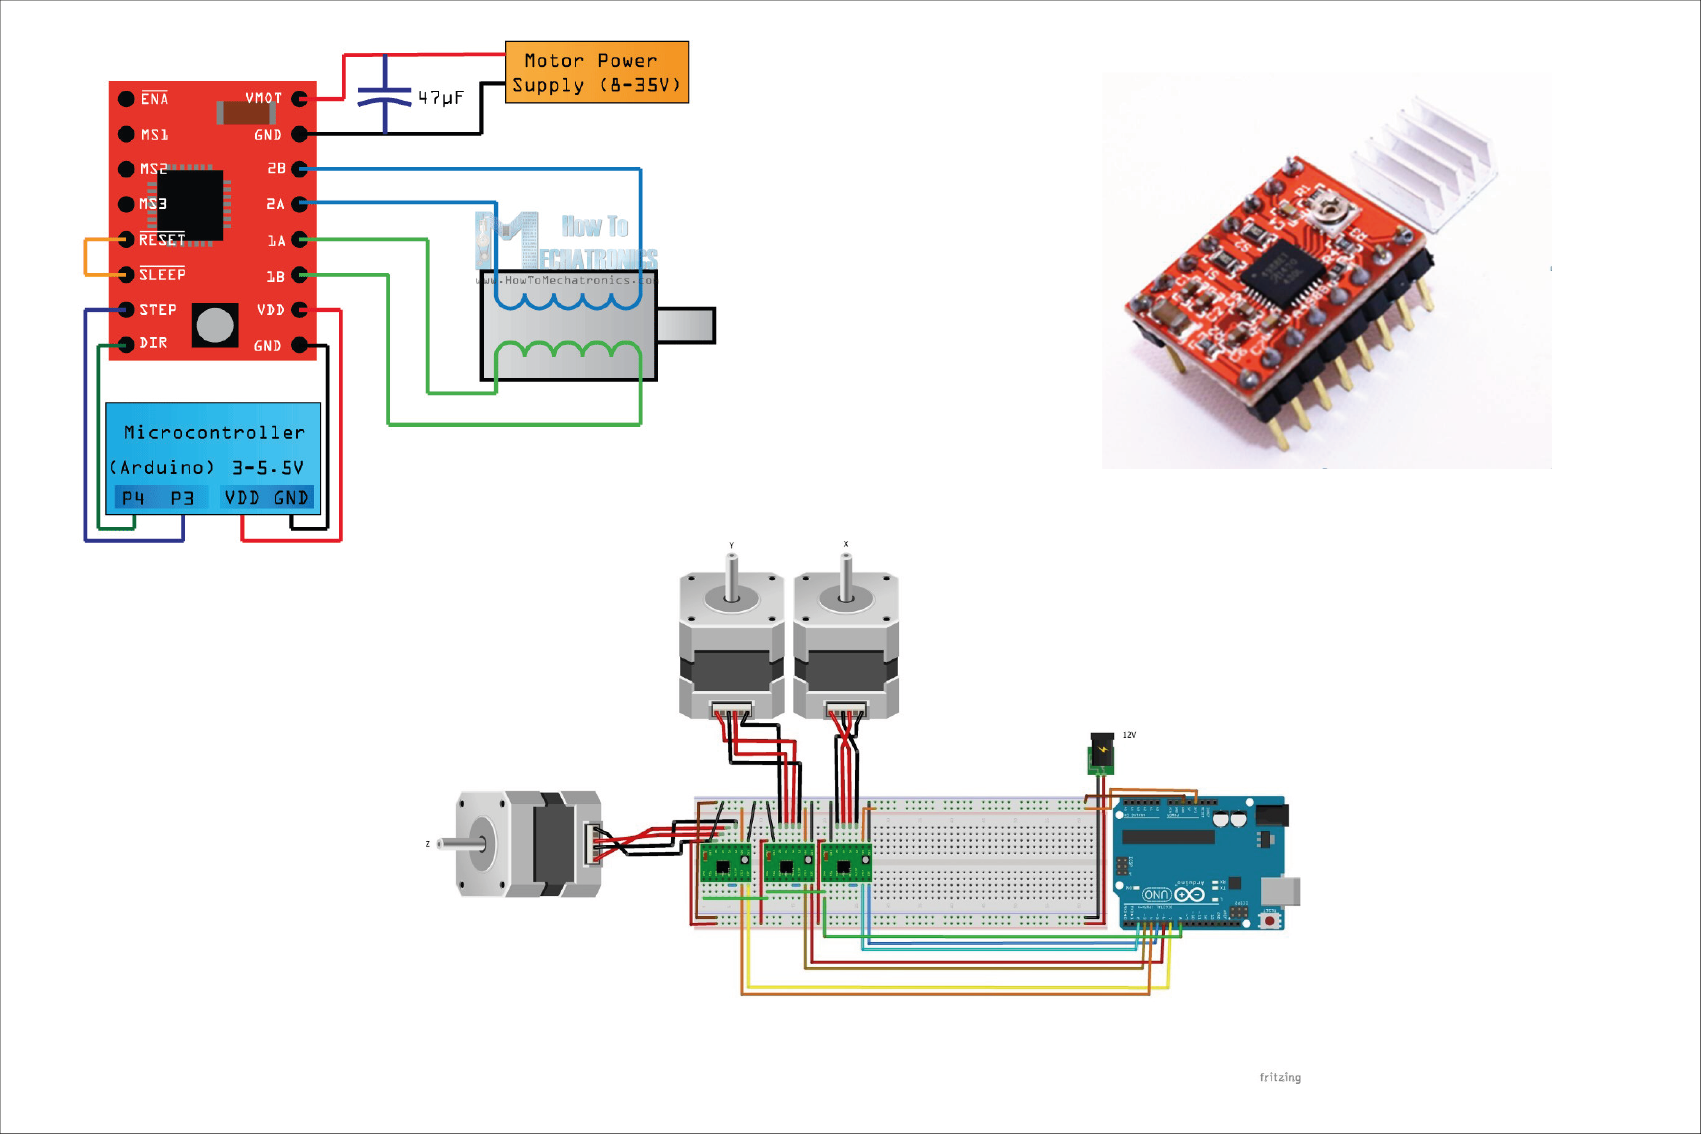
We decided to use a CNC shield combined with arduino to operate the machine. At the beginning, after flashing Arduino UNO with GRBL, we succeeded to use the machine through UGS. At a later time, we also succeed to build a simple definition in Grasshopper and run it through Firefly plugin.
Let's understand what is GRBL: "Grbl is a free, open source, high performance software for controlling the motion of machines that move, that make things, or that make things move, and will run on a straight Arduino."
We followed these instructions step by step available at this link.
After flashing Arduino UNO with gbrl through Arduino IDE, we connected all the hardware with a power supply, using 24V for the stepper motors. But before doing it we
checked again the correct value with a multimeter on the potentiometers. Correct value are around 0.40-0.55 for a Nema 17.
After downloading UGS, it is possible to open the zip file and run the .jar application.
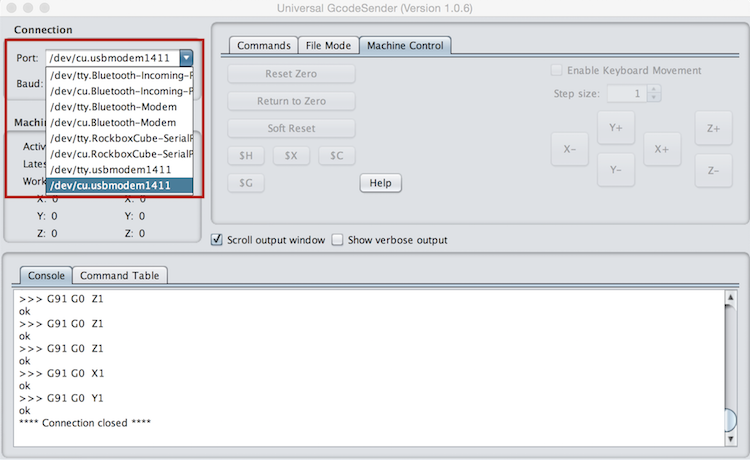
After that we had to set the correct port, as showed in the following picture.
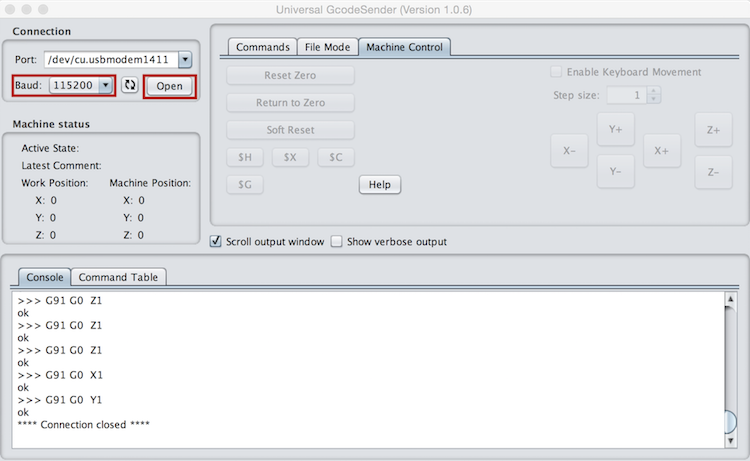
Baud, which is the number of symbols transmitted, will be set on 115200. After that, it is possible to open the port in order to send GCode.
Here is the first test we did with GRBL and UGS. A very important issue was that the Z axis has to be fixed in order to keep the position. As a matter of fact, once we started to move the camera, the stepper was rotating and then not holding position, makeing the camera falling down. To fix this issue we have applied a solution we have found on a forum: "Step idle delay($2) should have been set higher. Setting it to 255 keeps grbl from idling the steppers. Downside they get hot, upside they stay put!".
On the website, is it possible to download and watch some tutorials. After installing the latest version, we had to install the Firmata into the Arduino ONE.
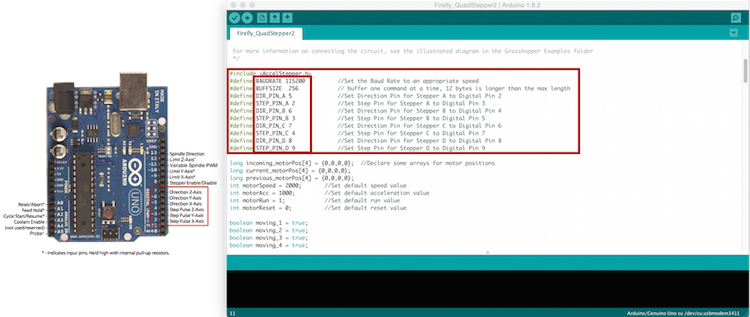
To install the Firefly firmata is pretty easy. Once opened a new sketch in Arduino IDE, we have loaded the sketch FireFly_Quadstepper, in File/sketchbook/FireFly_Quadstepper. Since we are using stepper motors with a CNC shield, we loaded this sketch. Otherwise, for simple application, Firefly_firmata is recommended to upload on Arduino. VERY IMPORTANT!Since we are using a CNC shield, the motors are connected in certain pins. So, to make it works, it is necessary to assign the right pins to the right DIR and STP of each motor. So we had to check again the DIR and STP pin of every motor from CNC shield to Arduino and changed to values on the sketch.
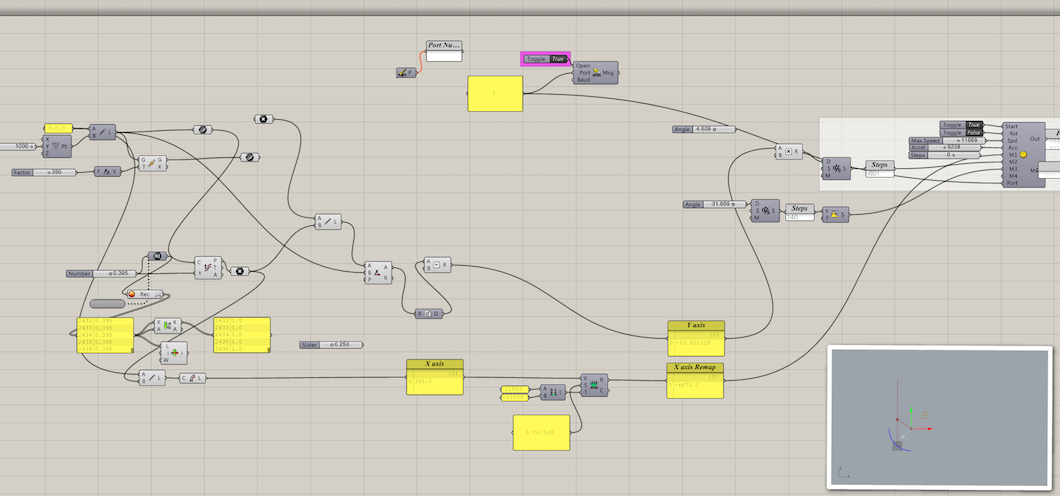
After that, we succeed to build a definition using Grasshopper and Firefly components. Also, we made a reference between a point (which represent the camera target) and the stepper movements, so that, once you will move the point in Rhino, the camera will change its position and follow the target.
Here is the Canvas that shows the definition in Grasshopper and an explaining video.
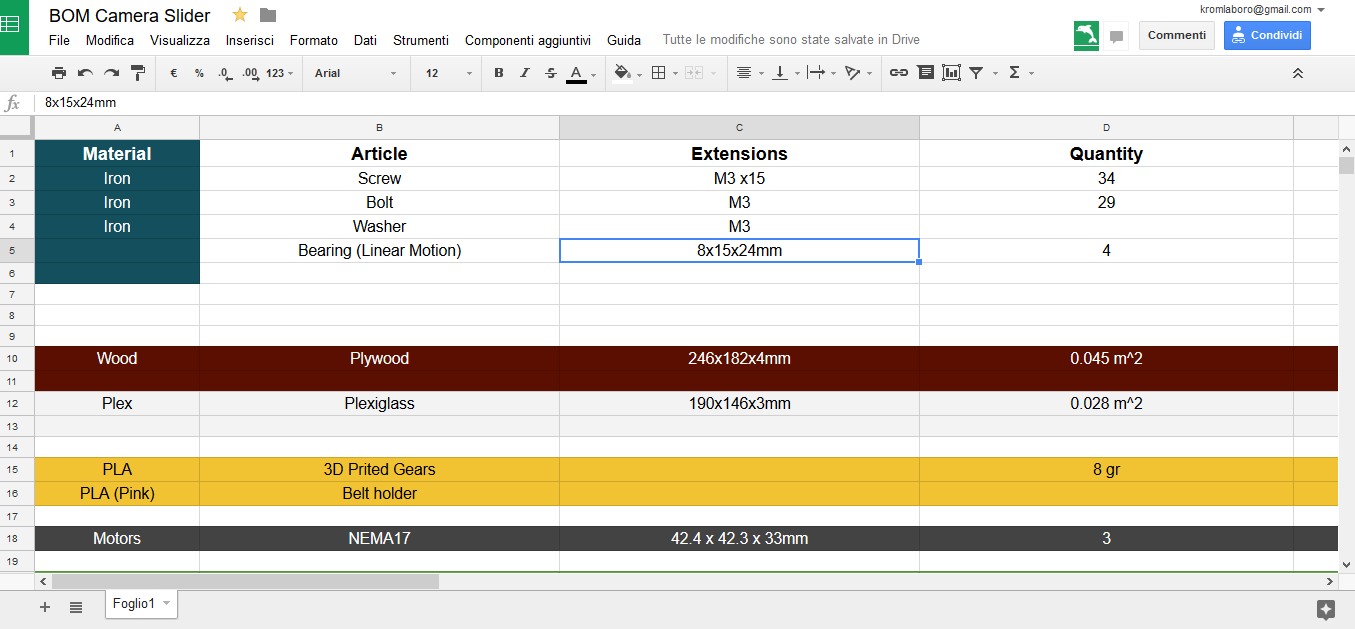
 Here a screenshot of the BOM: