*THIRD*WEEK: Computer-Controlled Cutting
Assignment
1. Group assignment:
- Make lasercutter test parts, varying cutting setting and slot dimensions
2. Individual assignment:
- Explane how do you parametrically designed your files.
- Shown how you made your press-fit kit.
- Incluided your design files and photos of your fineshed project.
- Explaned how you drew your vinyl files.
- Shown how you made your vinyl project.
- Incluided your design files and photos of your finished project.
Group Assignment
2. LASERCUTTER TEST PARTS:This week we had to do group assignment where we designed a template with different shapes and sizes for calculate the kerf and know the parameters like speed or power by cut and engrave for each material
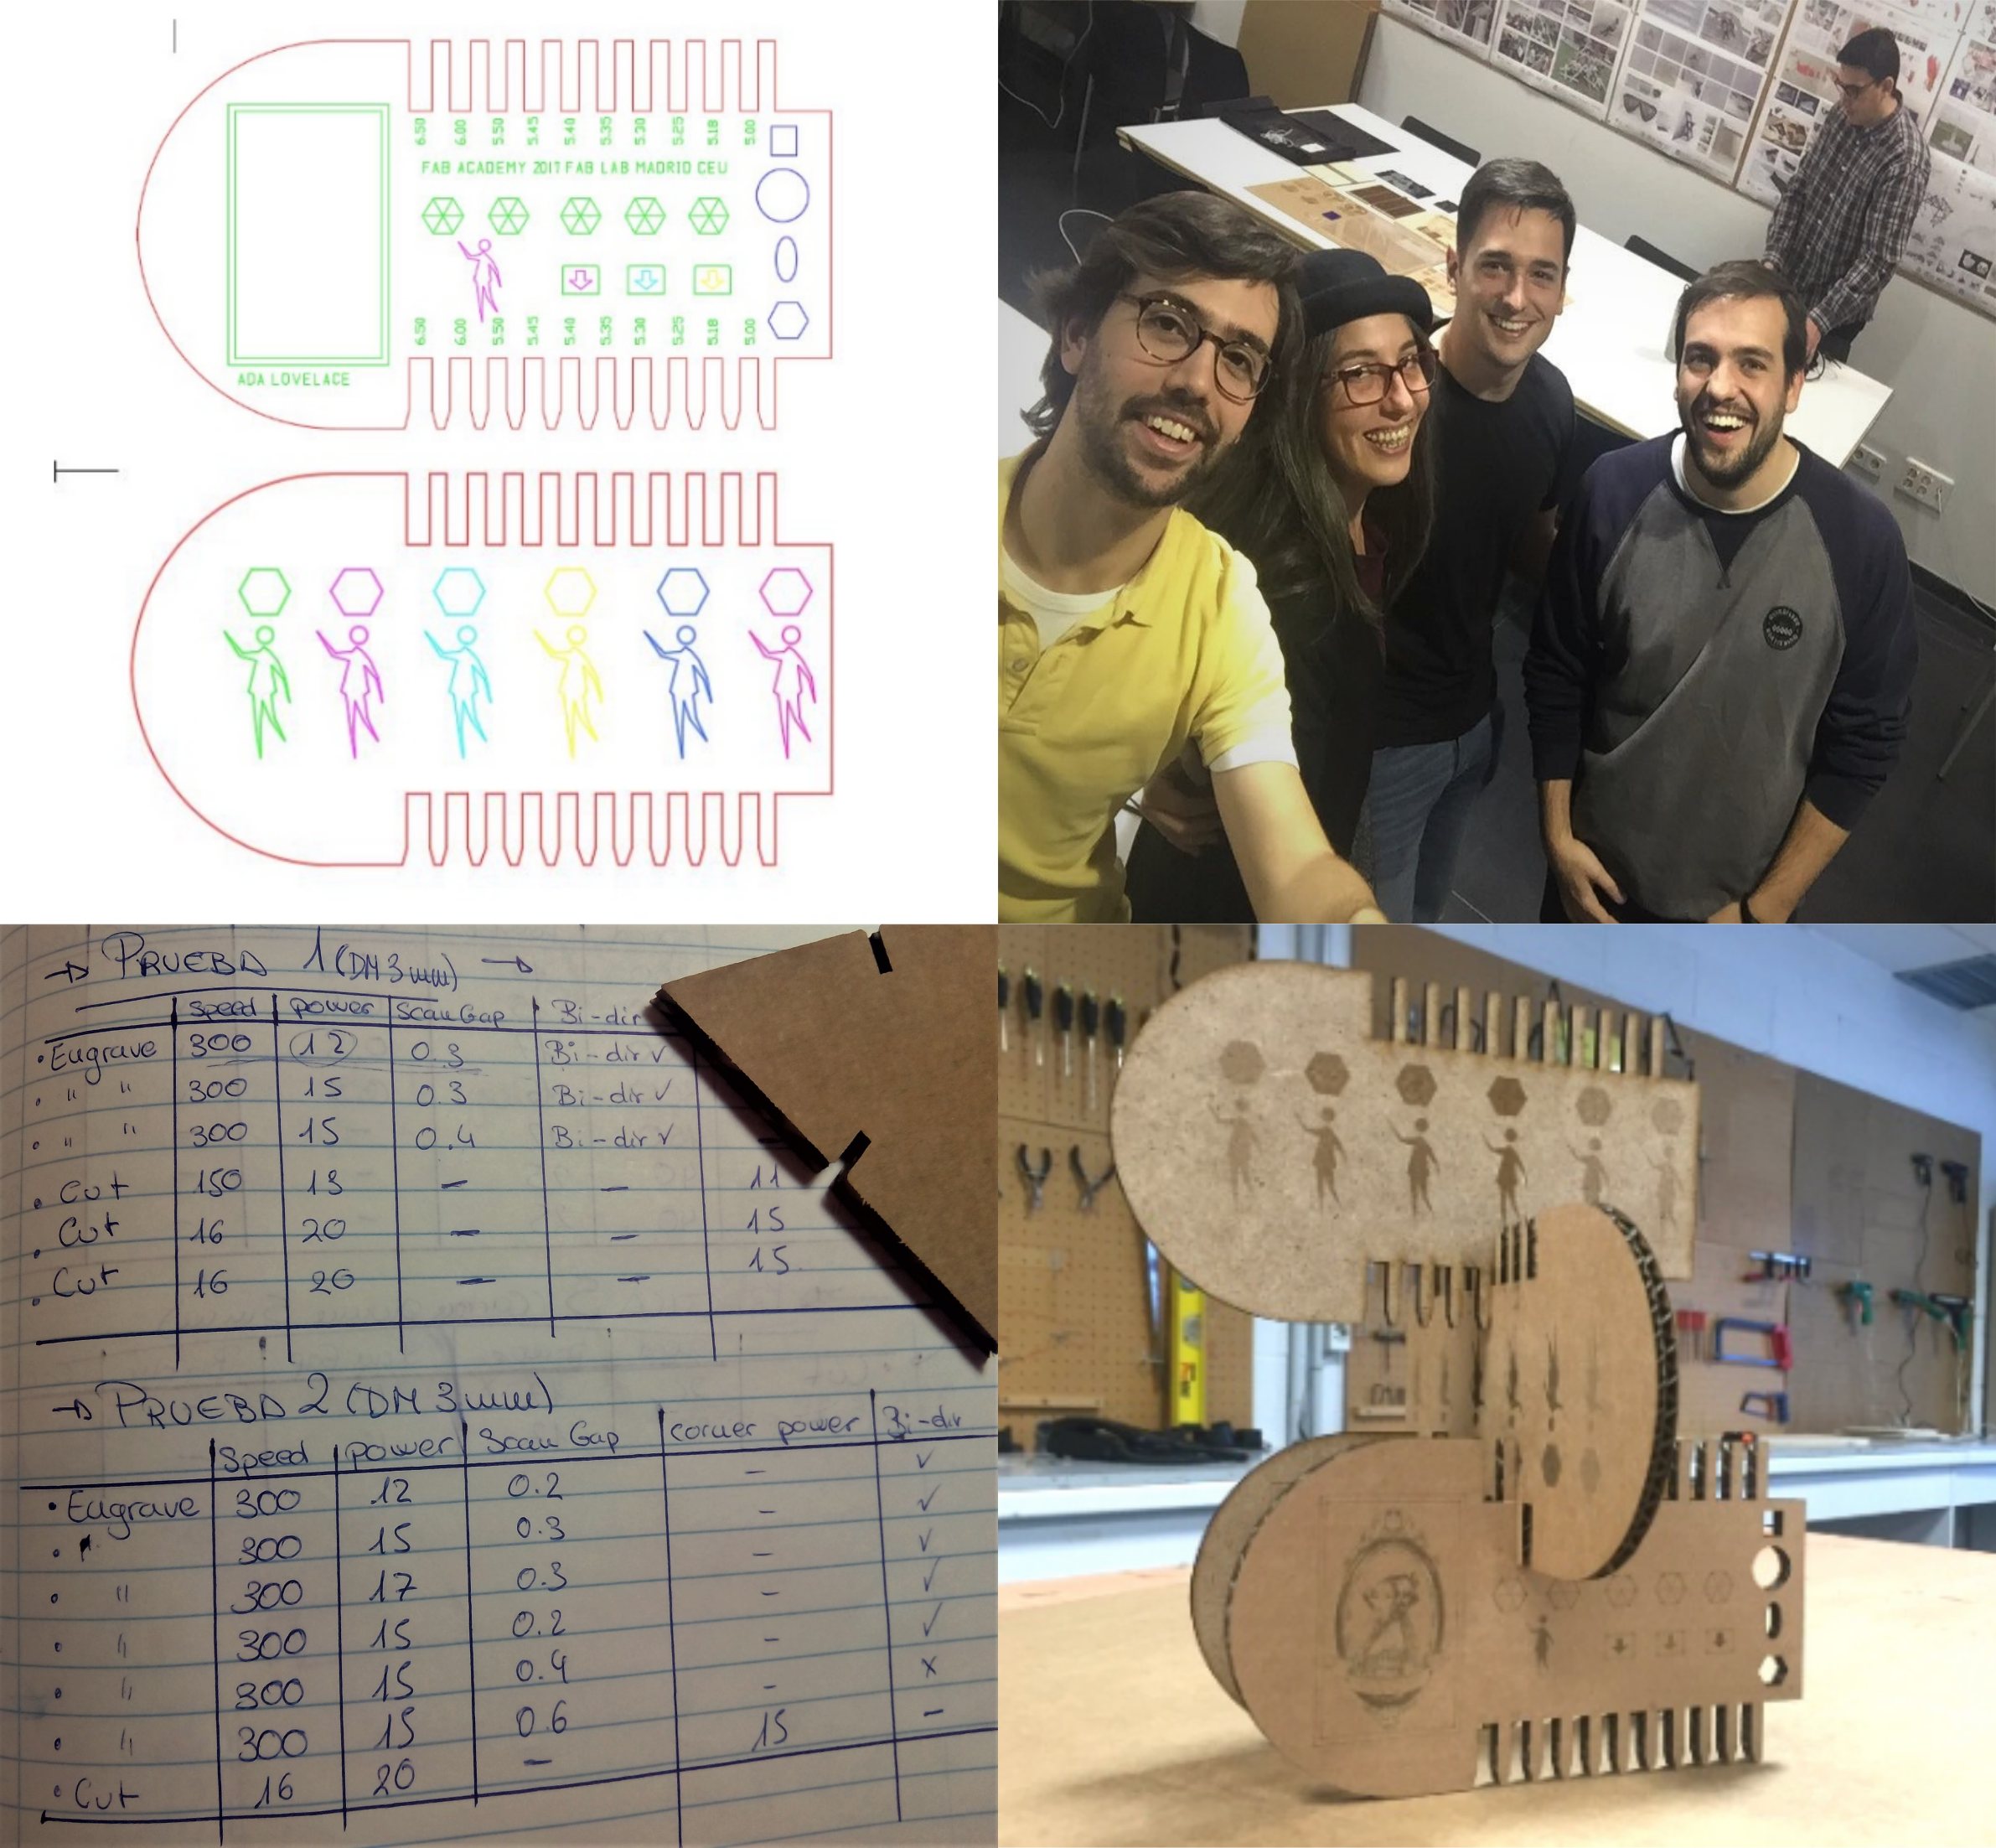 You can see the group web HERE
Individual assignment
VINYL:
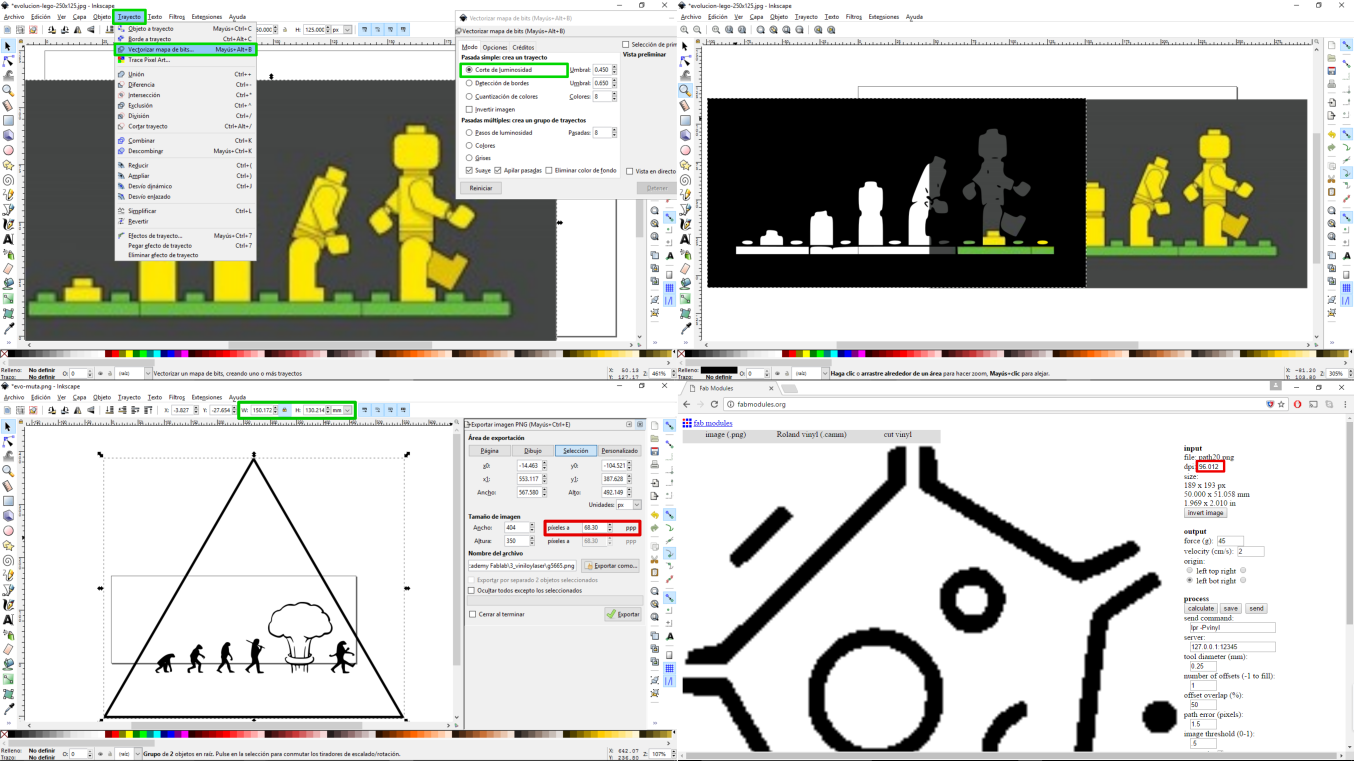
I used several internet images to make my vinyl. These images, I had to vectorize them for printing. I used inkscape and quickly vectorize an image with "Path> Trace Bitmap" and the brightness cut filter. I had a small problem because I resized, but I didn't change the resolution that had to be 1000 dpi. Finally, I saved some images in "png" and others in "svg".
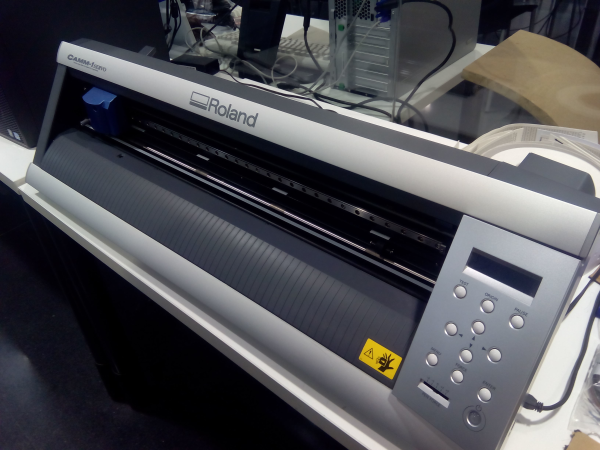
 I picked my files and I load in the computer to make them on our Ronald vinyl cutter . I used two programs by conected the computer with vinyl machine.
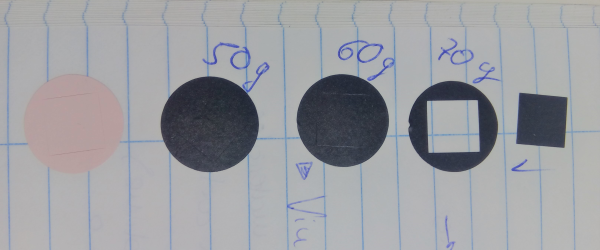
1. Fab modules: first I opened the server and execute this comand "./fab_modules" and next I selected png format, Roland vinyl output format and cut vinyl. also I put 2 in the speed and 70 or 80 g of forge depending of the vinyl roll. Finally I calculated and sent. But I had a end problem, I had done all this with the machine off.
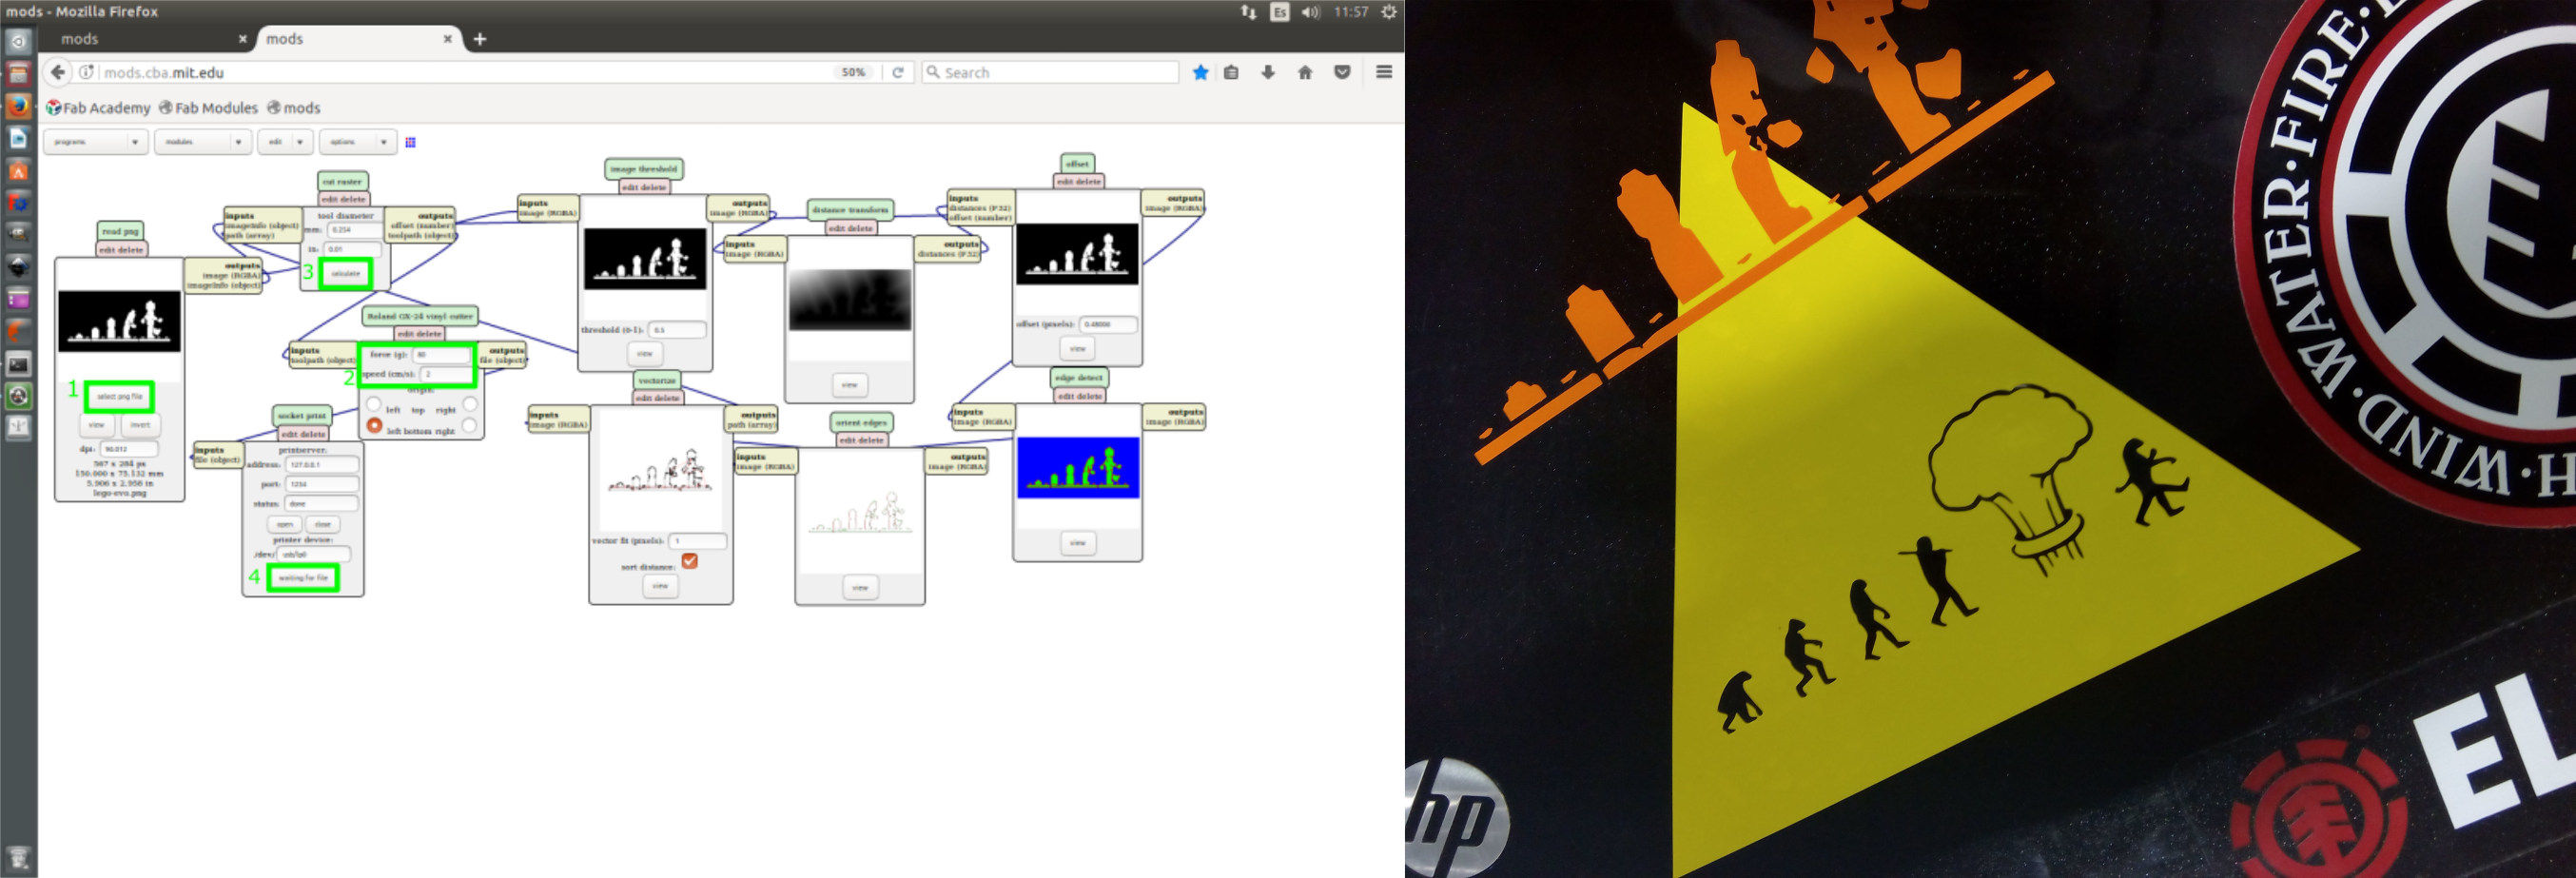
2. Mods: By open this program I needed to execute for "./mods_usb" command. The first time I see the screen, I didn't know how continue. I asked my local tutor for help and I anderstood that the first was open the server programe and cut png. in the next screen I had so much boxs and so many information. I only seleceted png file, force and speed and I picked calculate and send file to printer.
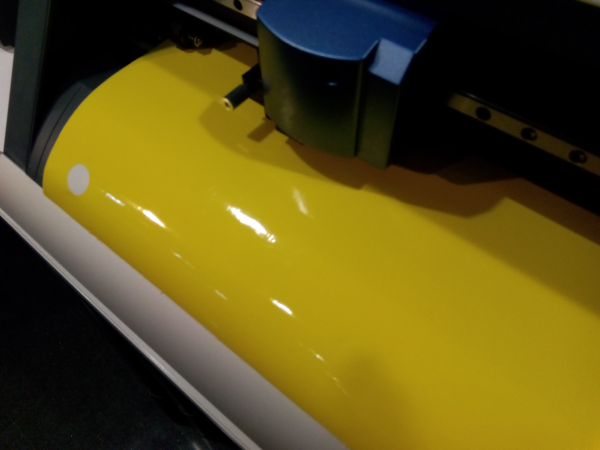
3. vinyl machine: We used a Roland vinyl cutter machine. the first step for cutter vinyl was test g of forge, for this I cut circles and note the correct force. After test I cut the image in diferents vinyls and finally I got them in my computer with the help of masking tape.
 - First vinyl of cell
- Second vinyl of evolution; from paleorama.
- Third vinyl of lego evolution; from LastresllavesdePablo.
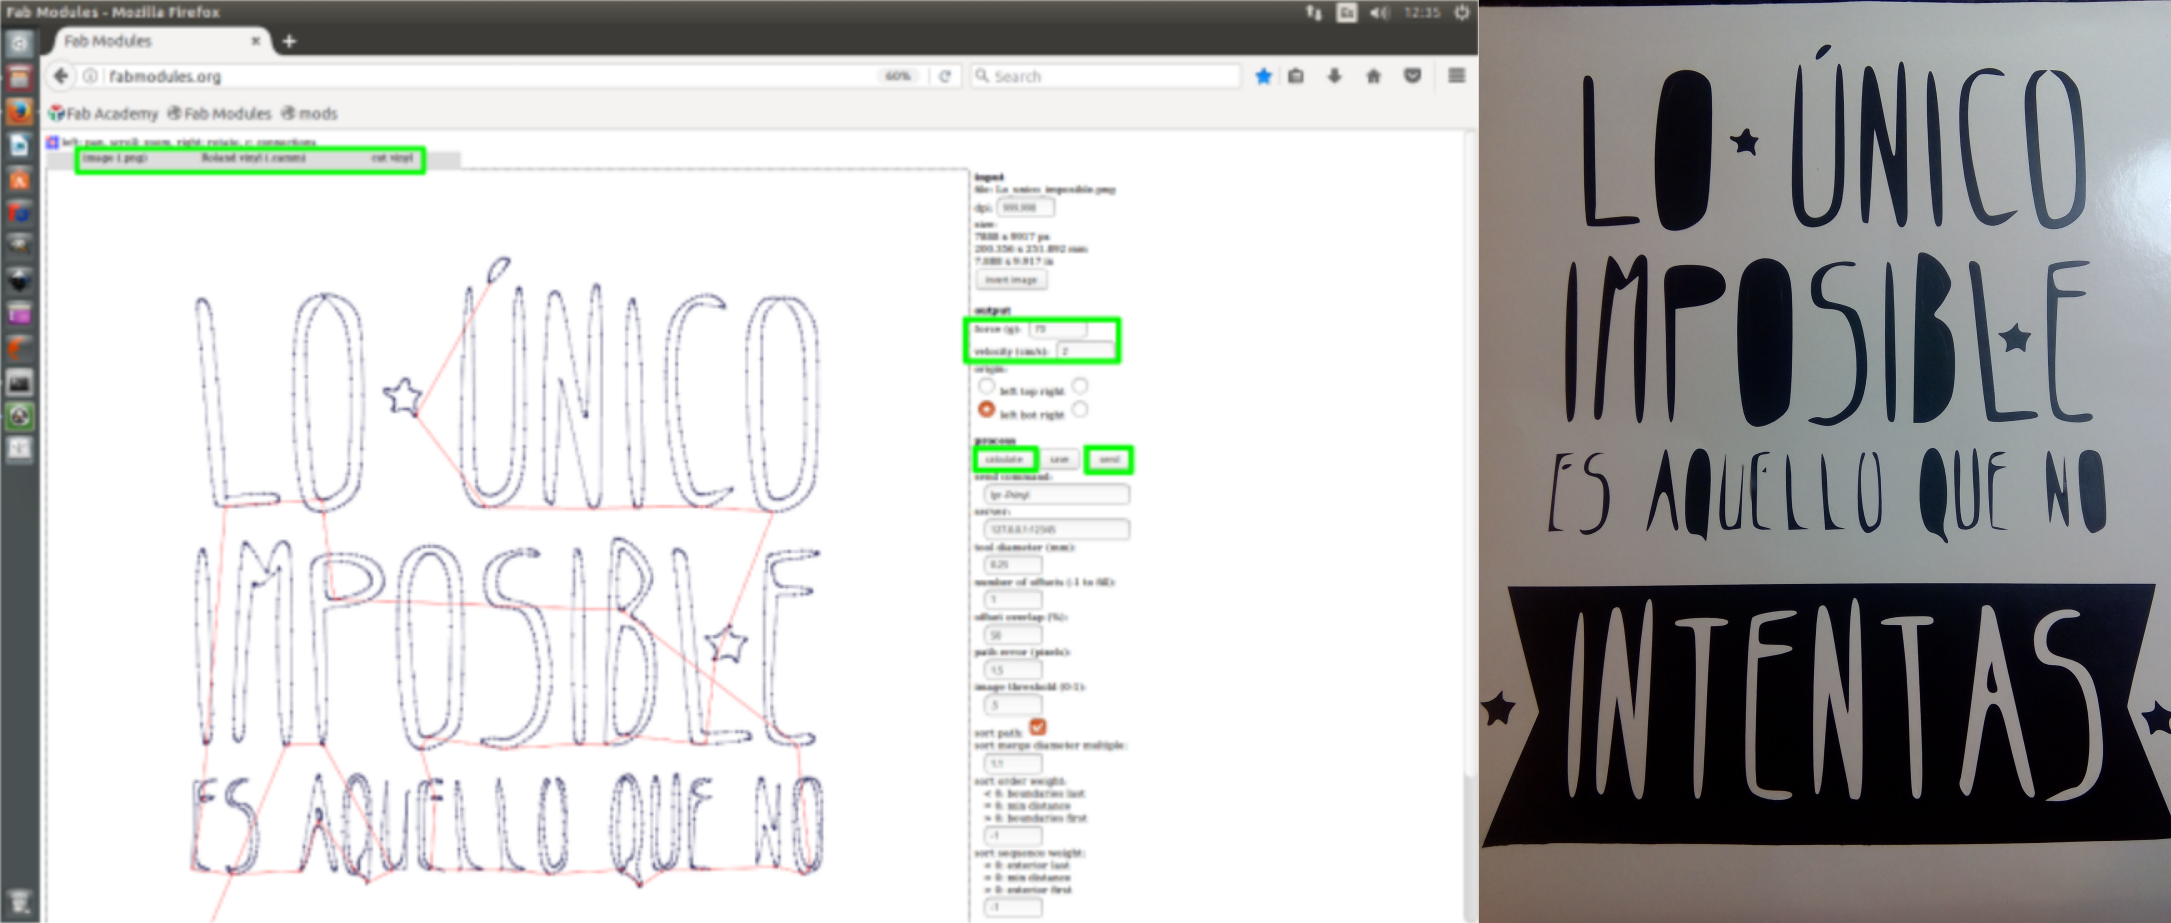
- The fourth letter vinyl; from pinterest.
PRESS-FIT CONSTRUCTION KIT: The programm that I used to design the parametric model, was Fusion 360. Although I proved the parametric design with inkscape, I didn't obtain a good results. I spent morning time to learn Autodesk Fusion 360, and I had a problem when designing my first triangle because I used a lot of relationships between lines and I relationed incorrect lines. Finally, I decided to do the triangle step by step.
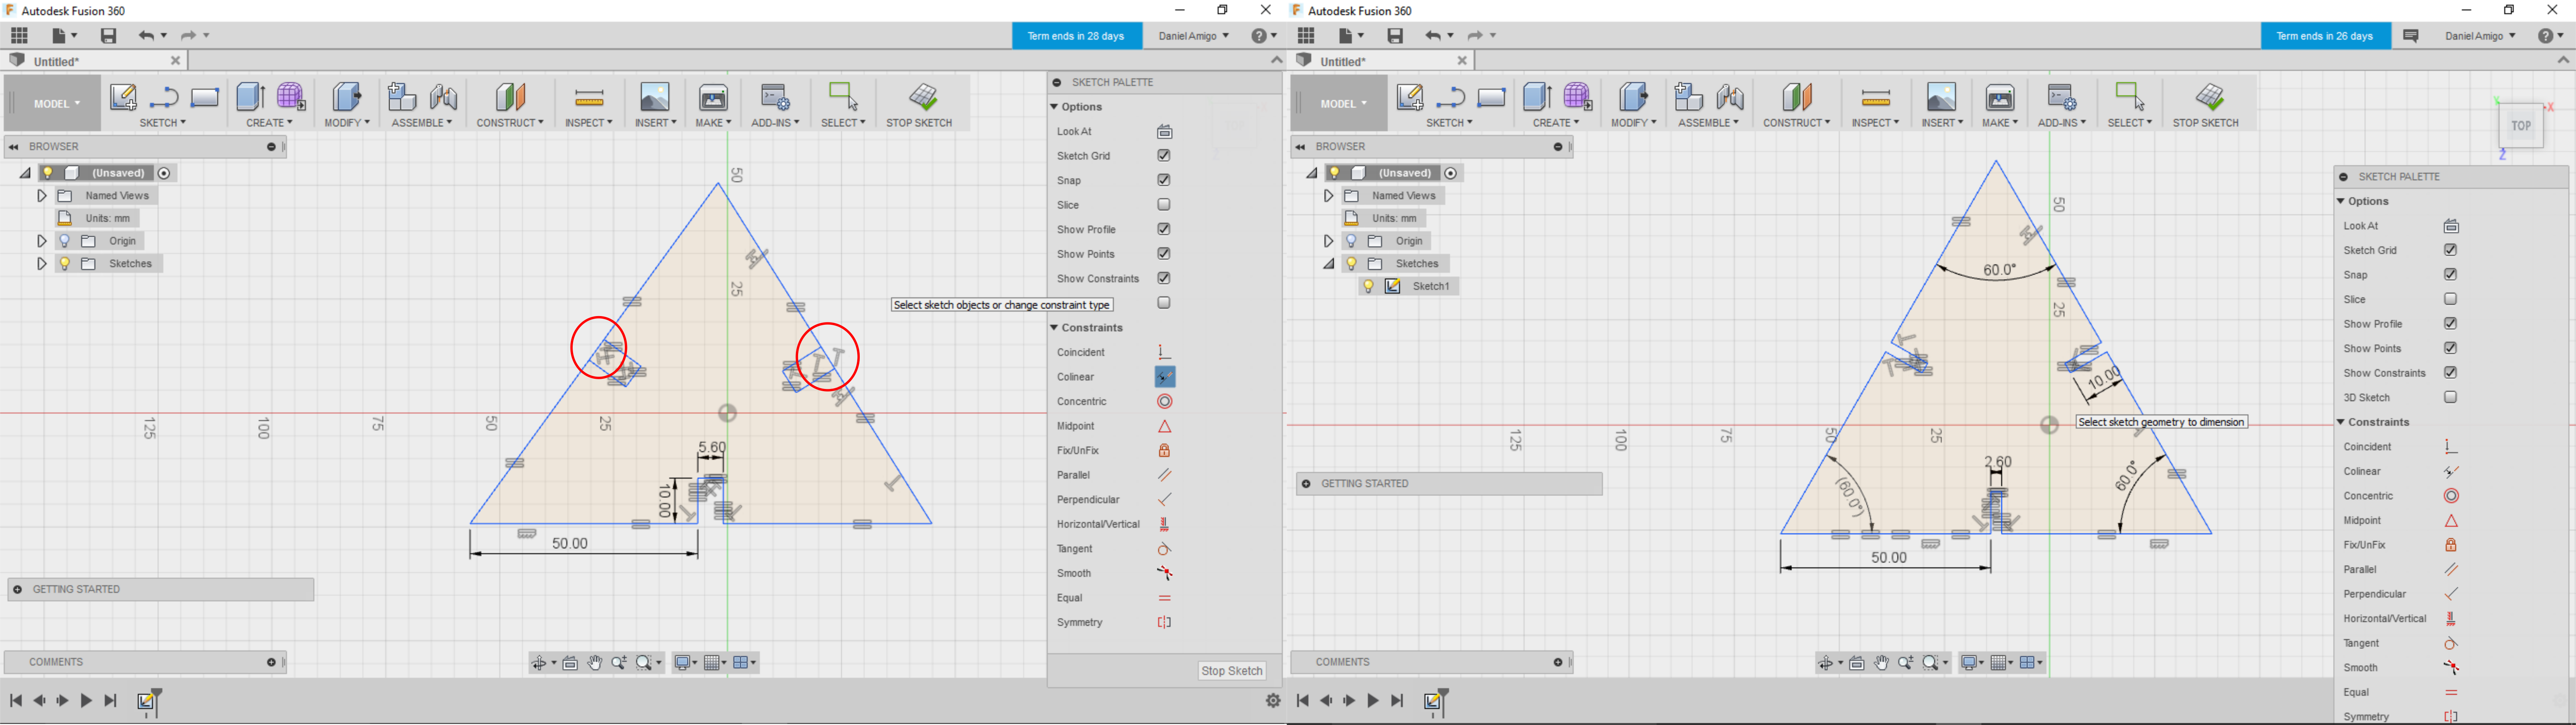 I created another sketch to link the triangles. I thought that this part could be more small so that I used the parameters for a 3mm brown cardboard to hook with a 6mm brown carton.
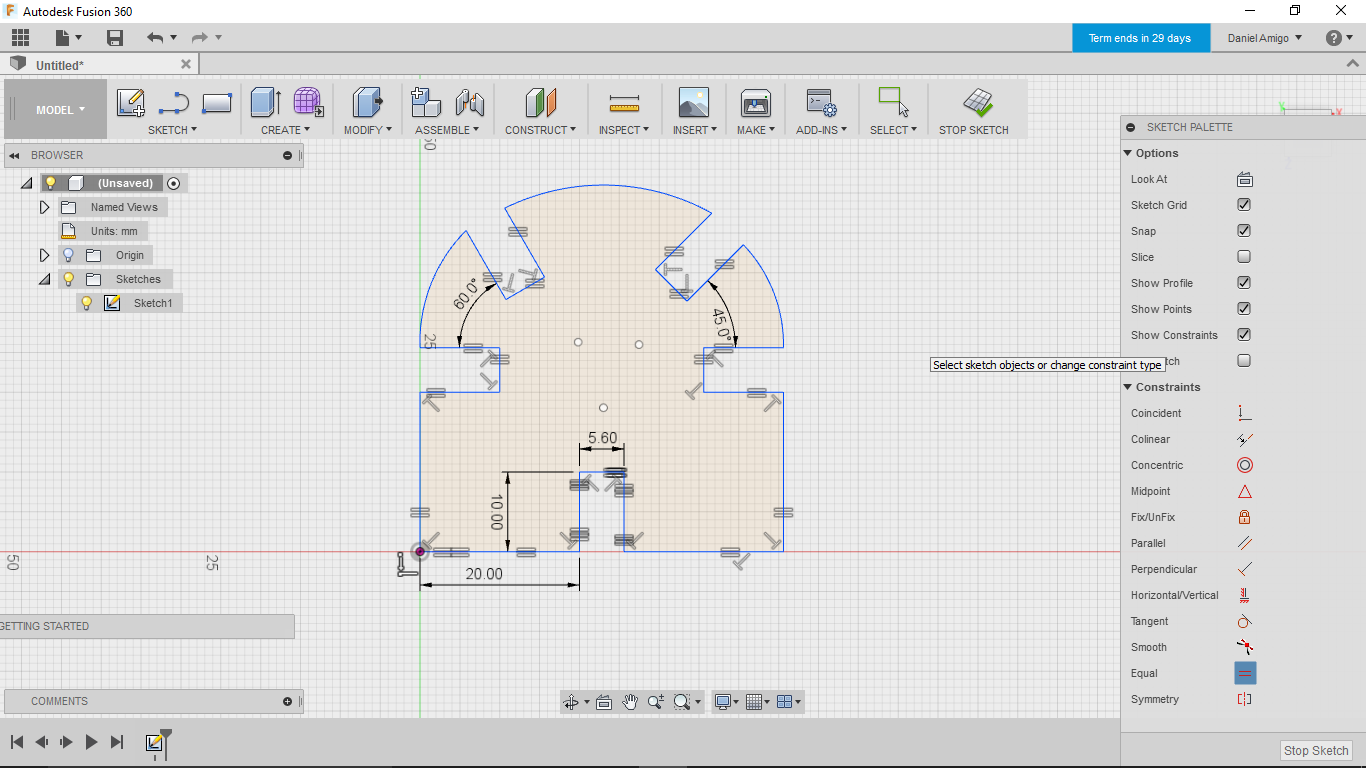
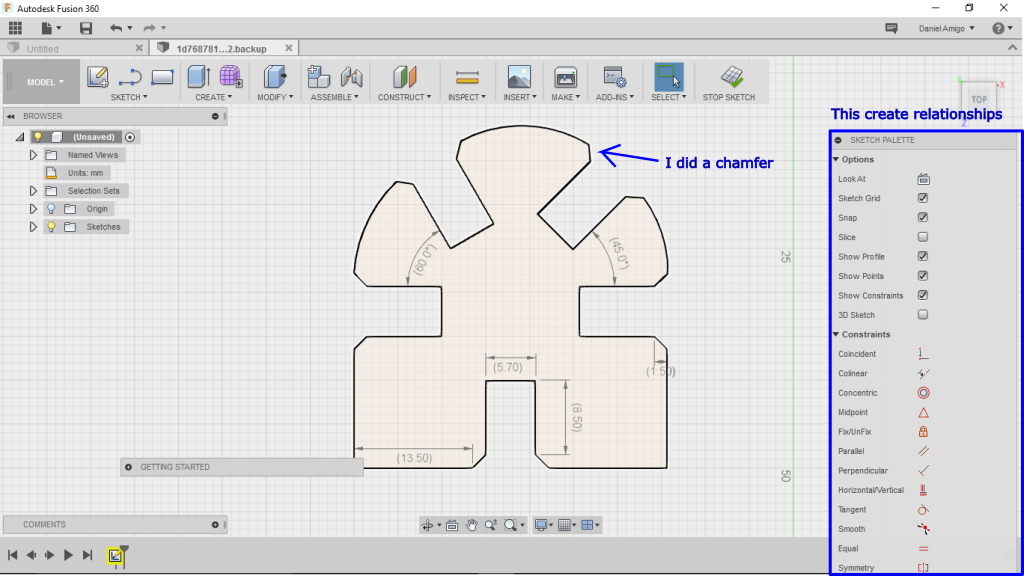 Later, I extrudered the sketch for created a body where I could to make a chambers in the vertices of the hooks. Finally, I created a sketch with the bodies and I export the dxf files, also I tested the lasercutter machine and I developed this parameters for my press-fit construction.
| Brown cardboard | 6mm | 3mm |
|---|---|---|
| Speed | 40 | 80 |
| Power | 21 | 20 |
| Corner power | 15 | 13 |
| Kerf | 0.57 | 0.44 |
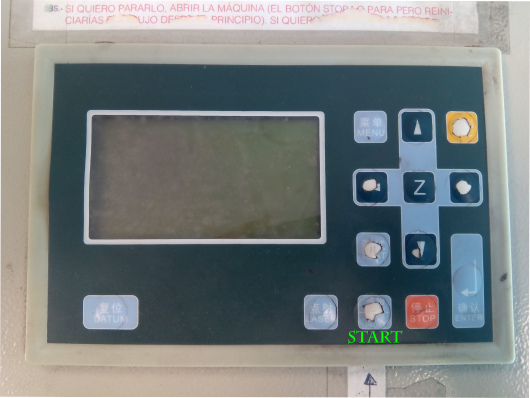
To cut in the laser machine, had to load the file in a special program and select in the right menu the power and the cutting speed, once this is done the file is loaded and it is handled from the menu of the machine, moving with The arrows the head of the machine until the origin that is wanted and after it is given start.
And finally I got it !!!!
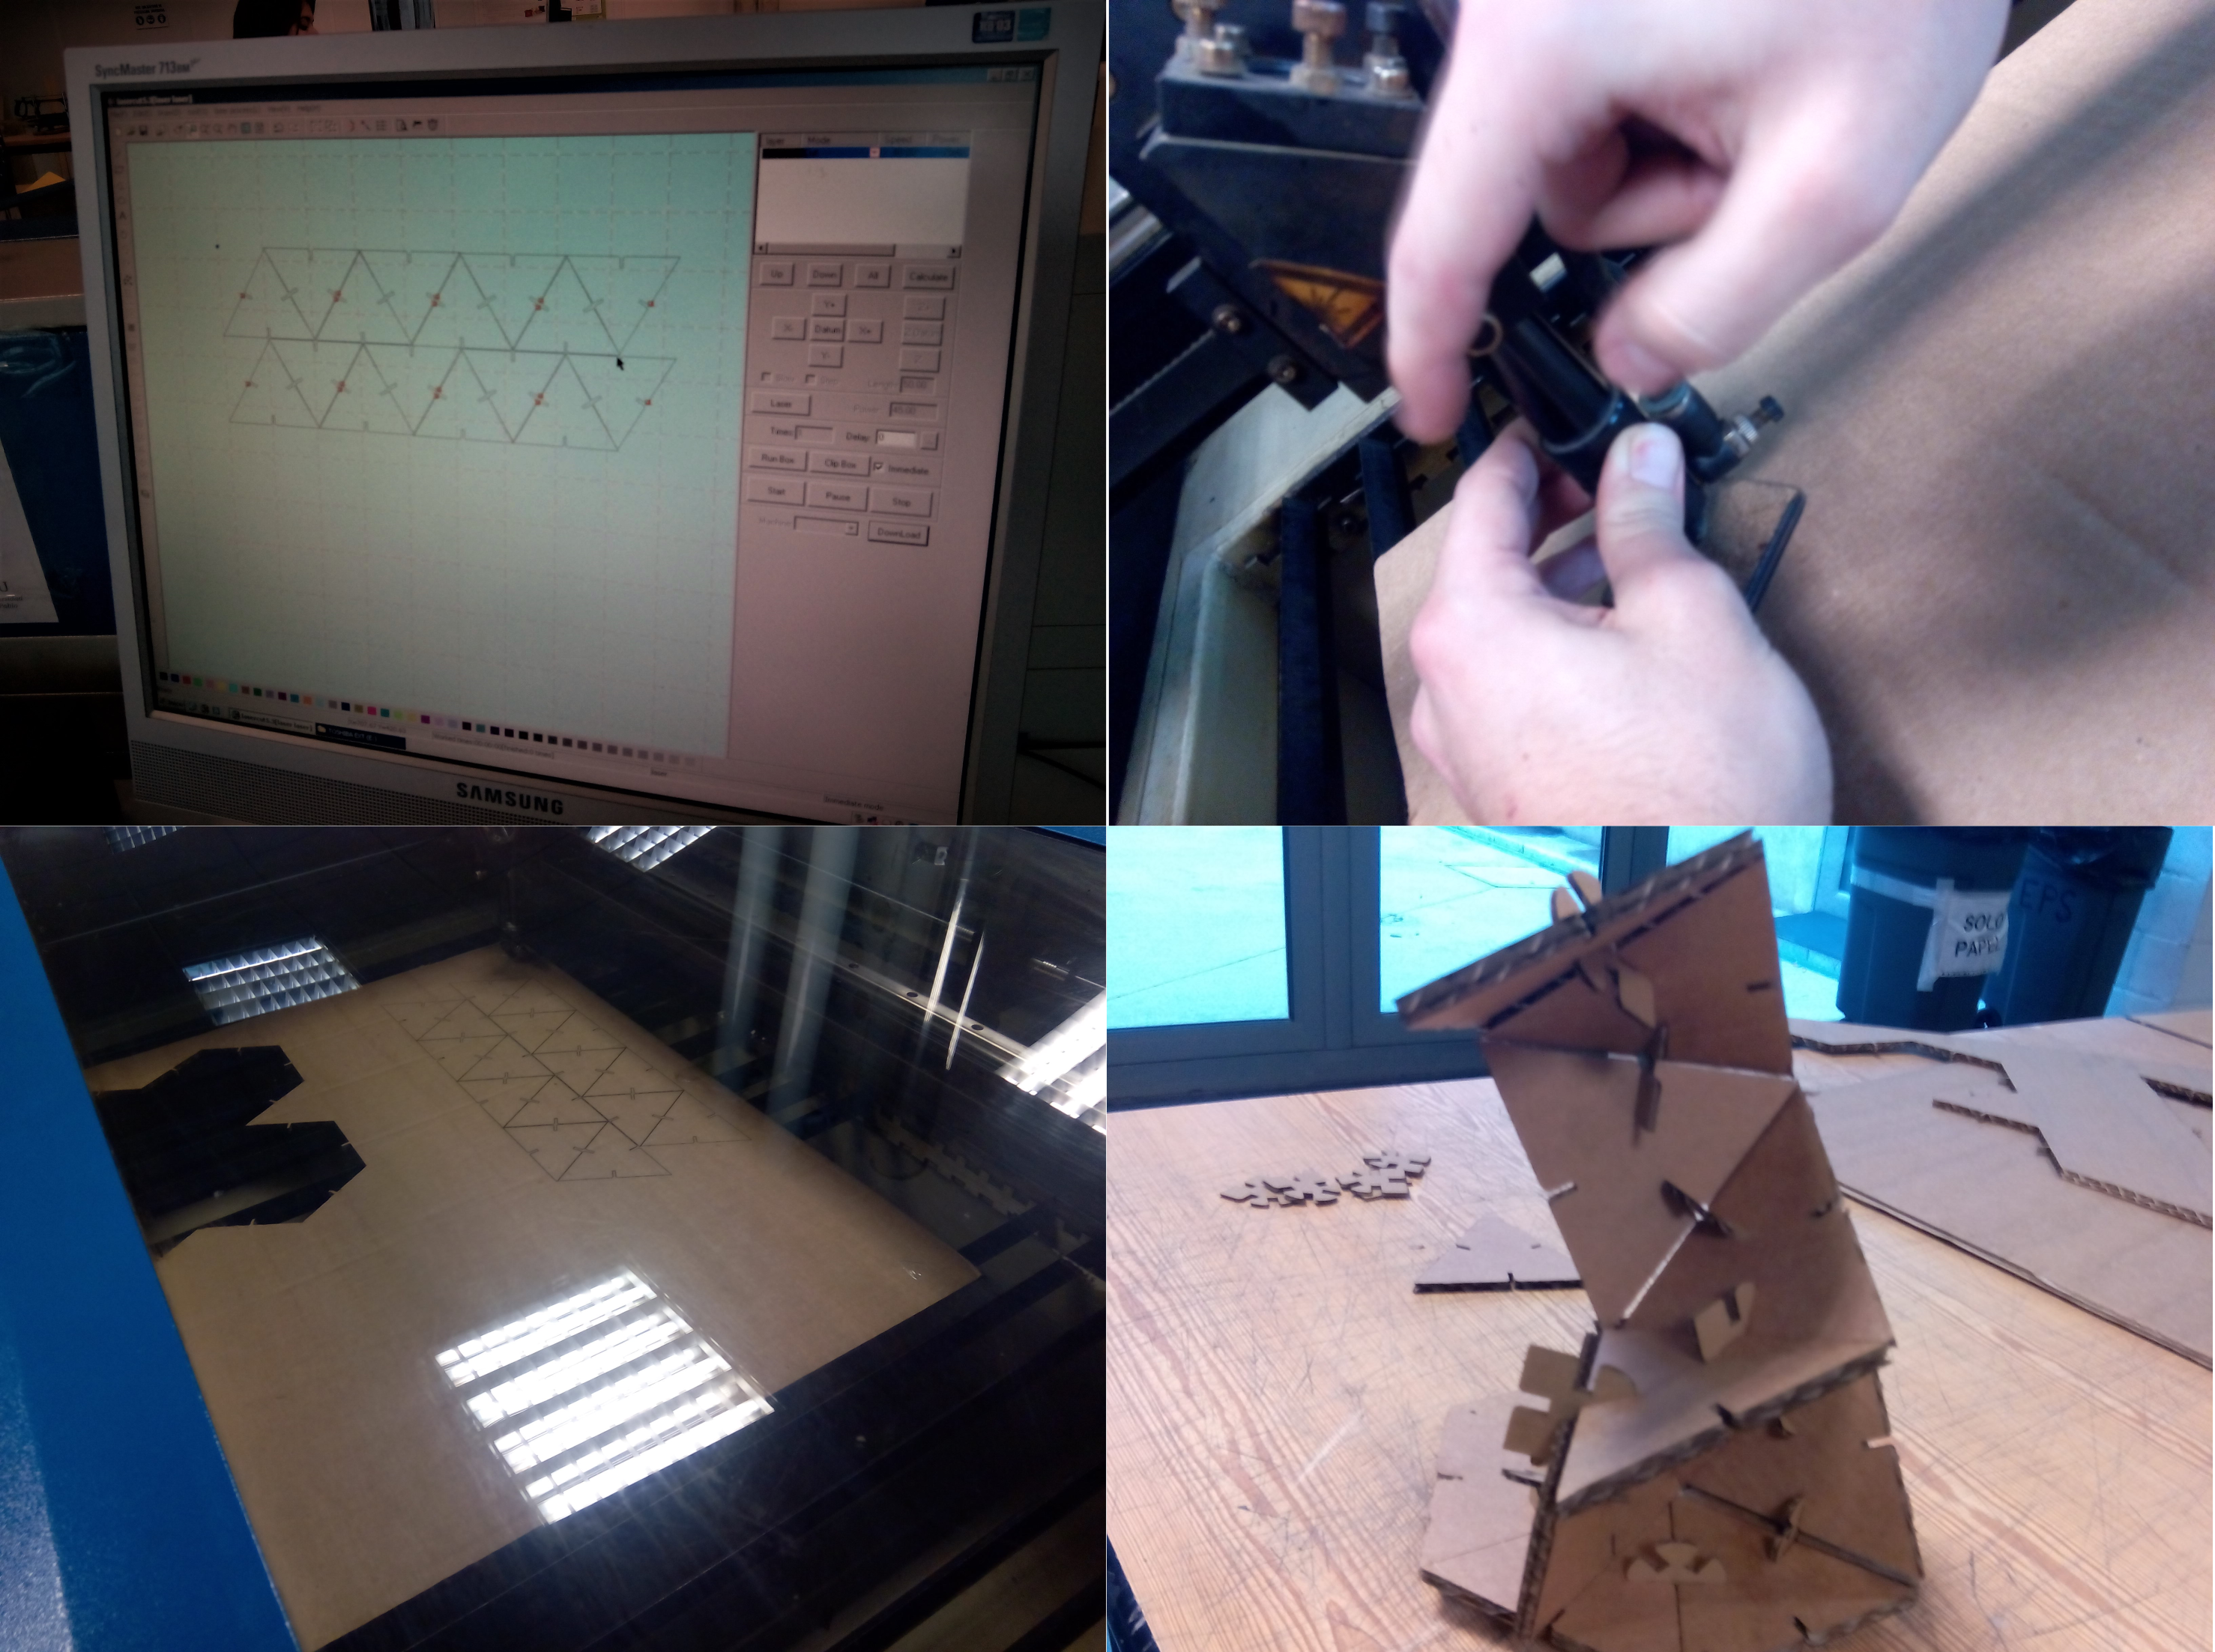
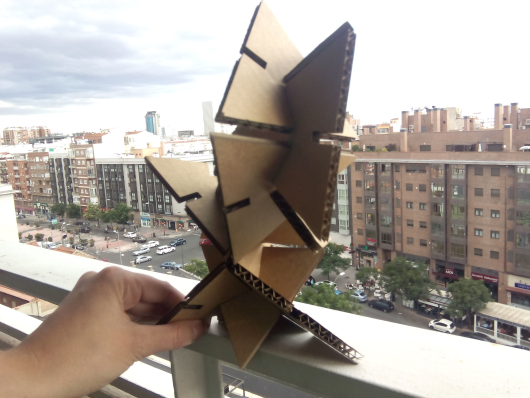 - Press-fit triangle
- Press-fit union
- Press-fit triangle Fusion360
- Press-fit union Fusion360
Conclusion
1. Parametric design:
| Program | Intuitive | Full | Favorite |
|---|---|---|---|
| Inkscape | NO | NO | NO |
| Autodesck fusion 360 | YES | YES | YES |
2. Vinylcutter:
| Printer drivers | Intuitive | Full | Favorite |
|---|---|---|---|
| Fab modules | YES | NO | NO |
| Mods | NO | YES | YES |
3. Cutting Machine:
| Machine | Intuitive | Full | Adjustment | Design in | Utilization |
|---|---|---|---|---|---|
| Vinylcutter | NO | YES | Easy | Inkscape | Drawings |
| Lasercutter | NO | YES | According to material | Fusion 360 | press-fit construction |