Fabacademy 2017
Fourteenth Week. Composites
Index
Fourteenth task
design and fabricate a 3D mold and produce a fiber composite part in it
SR Greenpoxy 56 and SD Surf Clear hardener
I will be using this resin and hardener. SR GreenPoxy 56 –Material Safety Data Sheet and Techical Datasheet– is an epoxy resin which has up to 56% of its molecular structure coming from plant origin. From reading the material safety data sheet I learned that it can cause skin irritation and skin sensitisation so I will wear gloves and a disposable protective clothing. It also can create eye irritation so I will be wearing glasses and as Respiratory protection a carbon activated filter mask. The resin is also hazardous to the aquatic environment so I will make sure that used resin and hardeners are entirely mixed and cured before disposal.
In the technical data sheet it specifies that the mixing Weight ratio Volume ratio is 100 / 37 g. The exothermic peak on 500 g mix is 265ºC so I will be using aluminum foil containers when handling the mixing. Also, the time to reach exothermic peak is 28 minutes. Gel time on 1mm thickness is around 3hours for an enviroment of 25º, this gives plenty of time to handle the process. The curing cycles are 7 days @ 23 °C or 24 hrs @ 23 °C + 24 hrs @ 40 °C or 24 hrs @ 23 °C + 4 hrs @ 40 °C + 8 hrs 60 °C So I will be using an oven to cure the resin in a couple of days
The design: A toddler scale Eames fiberglass chair tribute
I am a great admirer of Ray and Charles Eames work, they developed a truly transdiciplinary work including furniture, houses, films, exhibitions and graphic design. Their fiberglass chair is one of the most recognizable XX century designs and was one of the first design in using fiberglass reinforced resins in furniture. The original design was a stamped metal bucket seat which won the Museum of Modern Art's international competition for Low Cost Furniture Design in 1948. The fiberglass version was introduced in 1951 by the Herman Miller Furniture Company.
There are some versions for kids but none for toddlers so I decided to make one for my daugther.
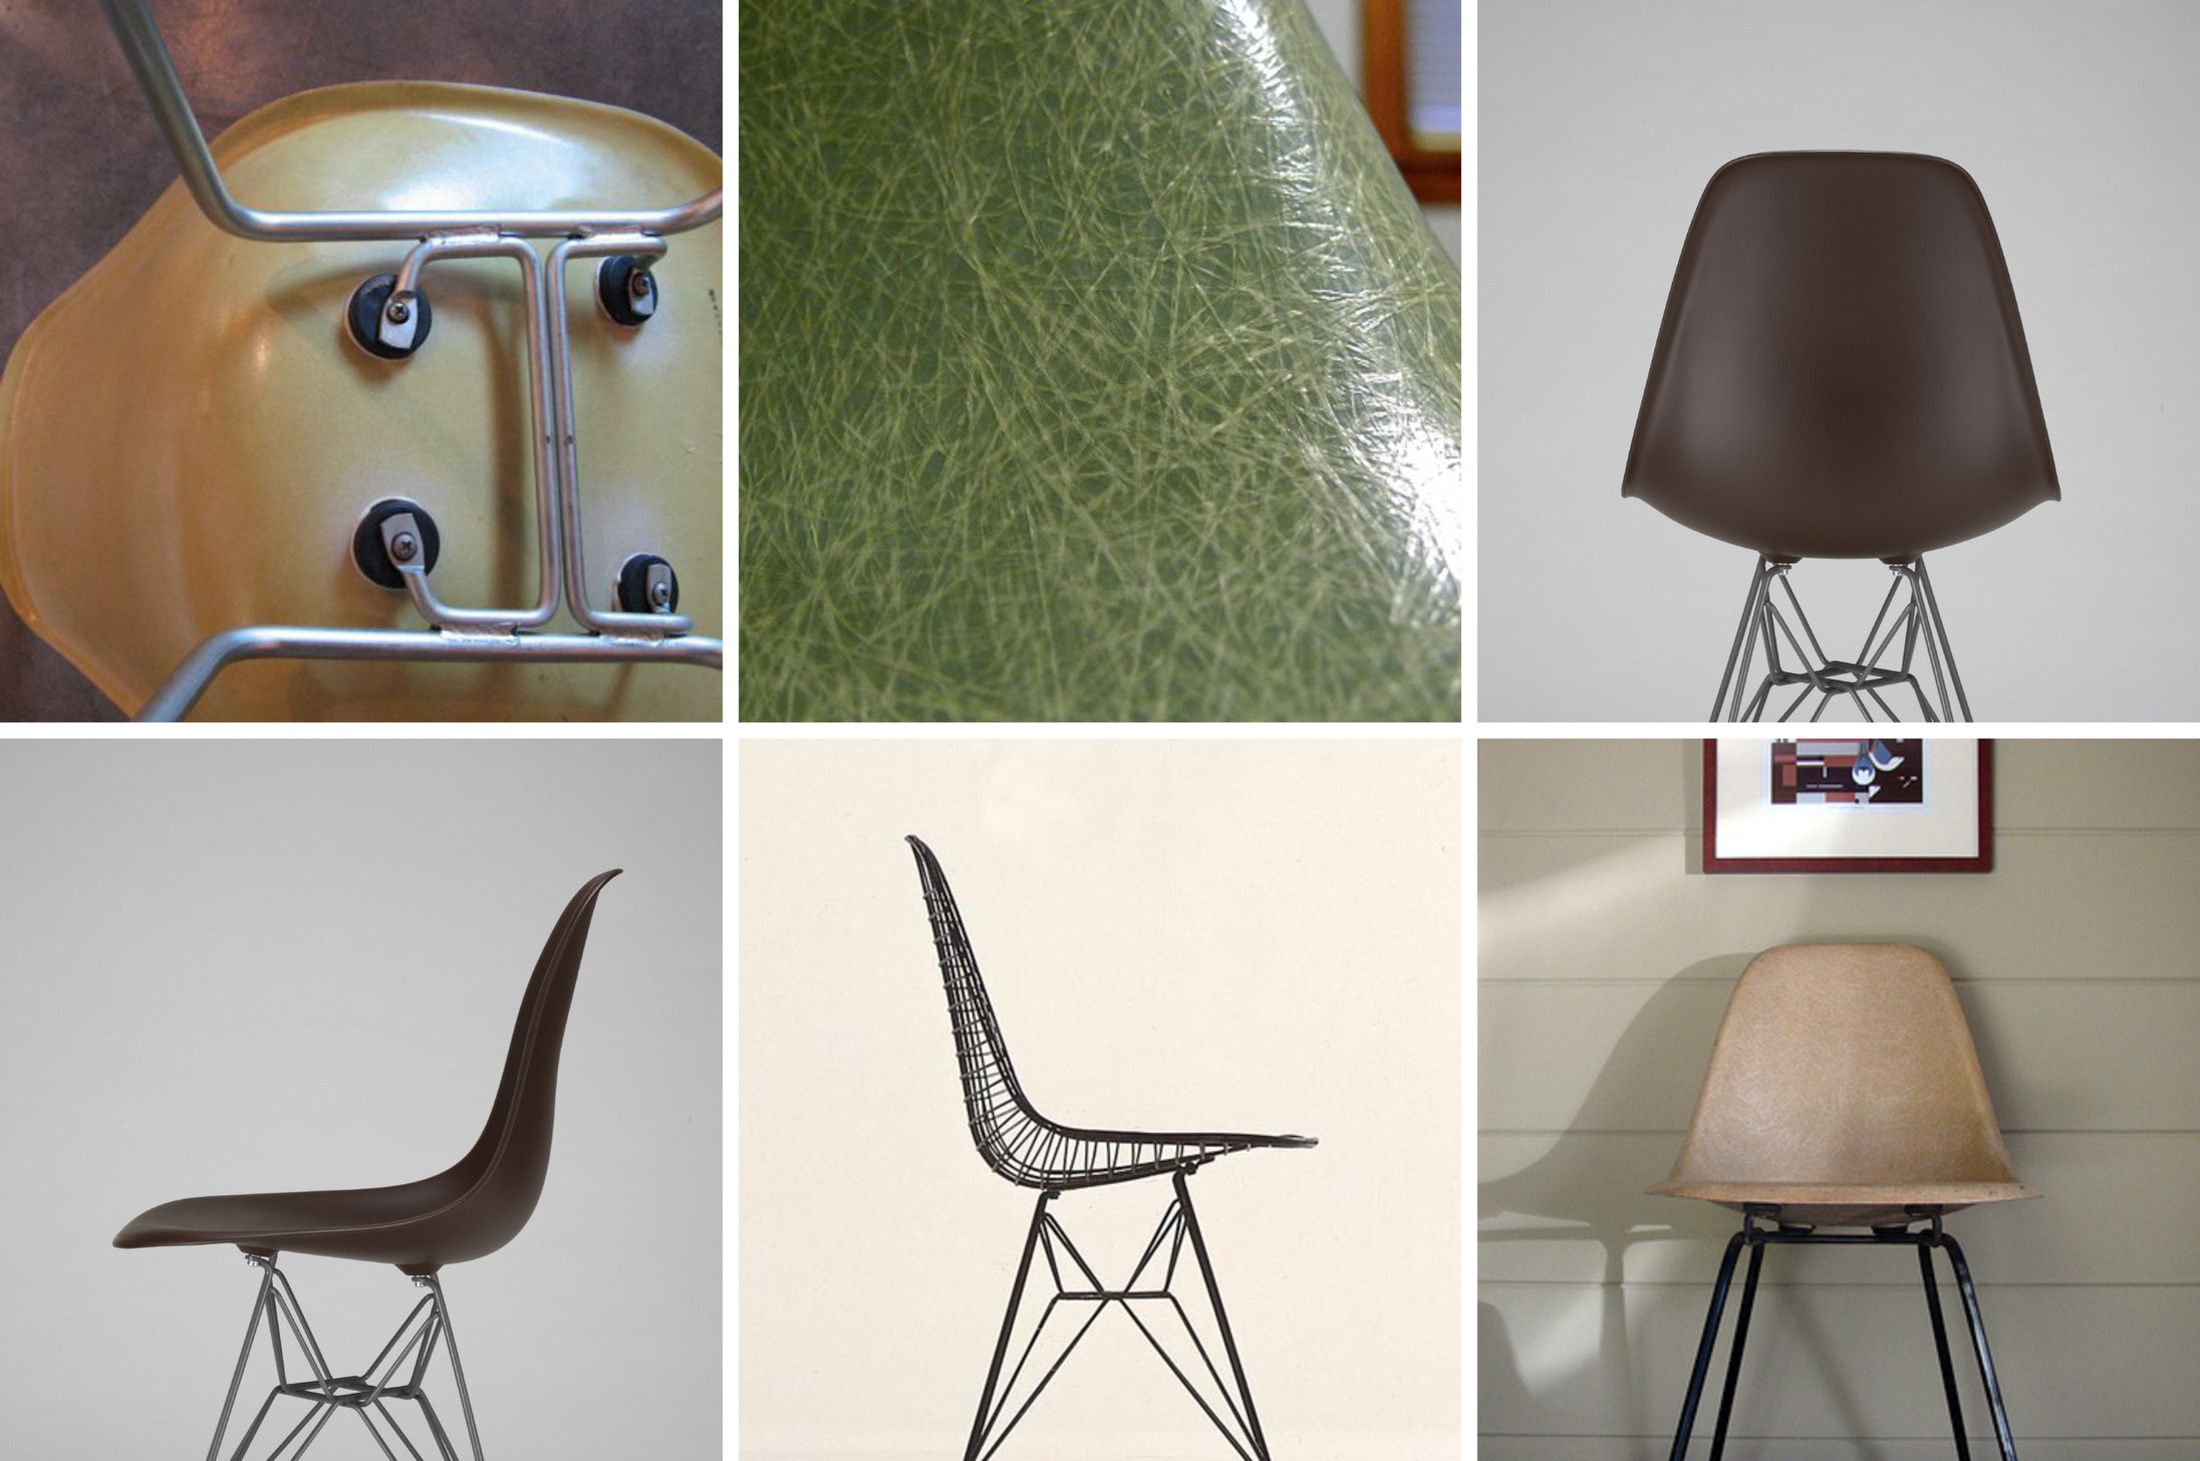
In the recent years this design has been released by cheap manufacturers y a myriad of variations, the vast majority made from ABS injection molds but there are still some companies producing them using the traditional fiberglass technique. I think there is something quite unique about the fiber material as it gives an unique texture and material quality than ABS can reproduce. The eames were very good at documenting their work, this is a short film which describes the complete design and manufacturing process of this chair.
As you can see in the video, the original manufacturing process used a positive and negative metal mold. I was interested in trying the vacuumn technique though as I never did it before and the toddler scale was perfect for this type of moding technique.
Designing the mold
I decided to do a positive mold so the seating side would have a better finishing. To model the shape I first sketched a front and side elevation of the chair based on online photos and documentation, then I scanned the drawings and imported them into Rhinoceros for reference.
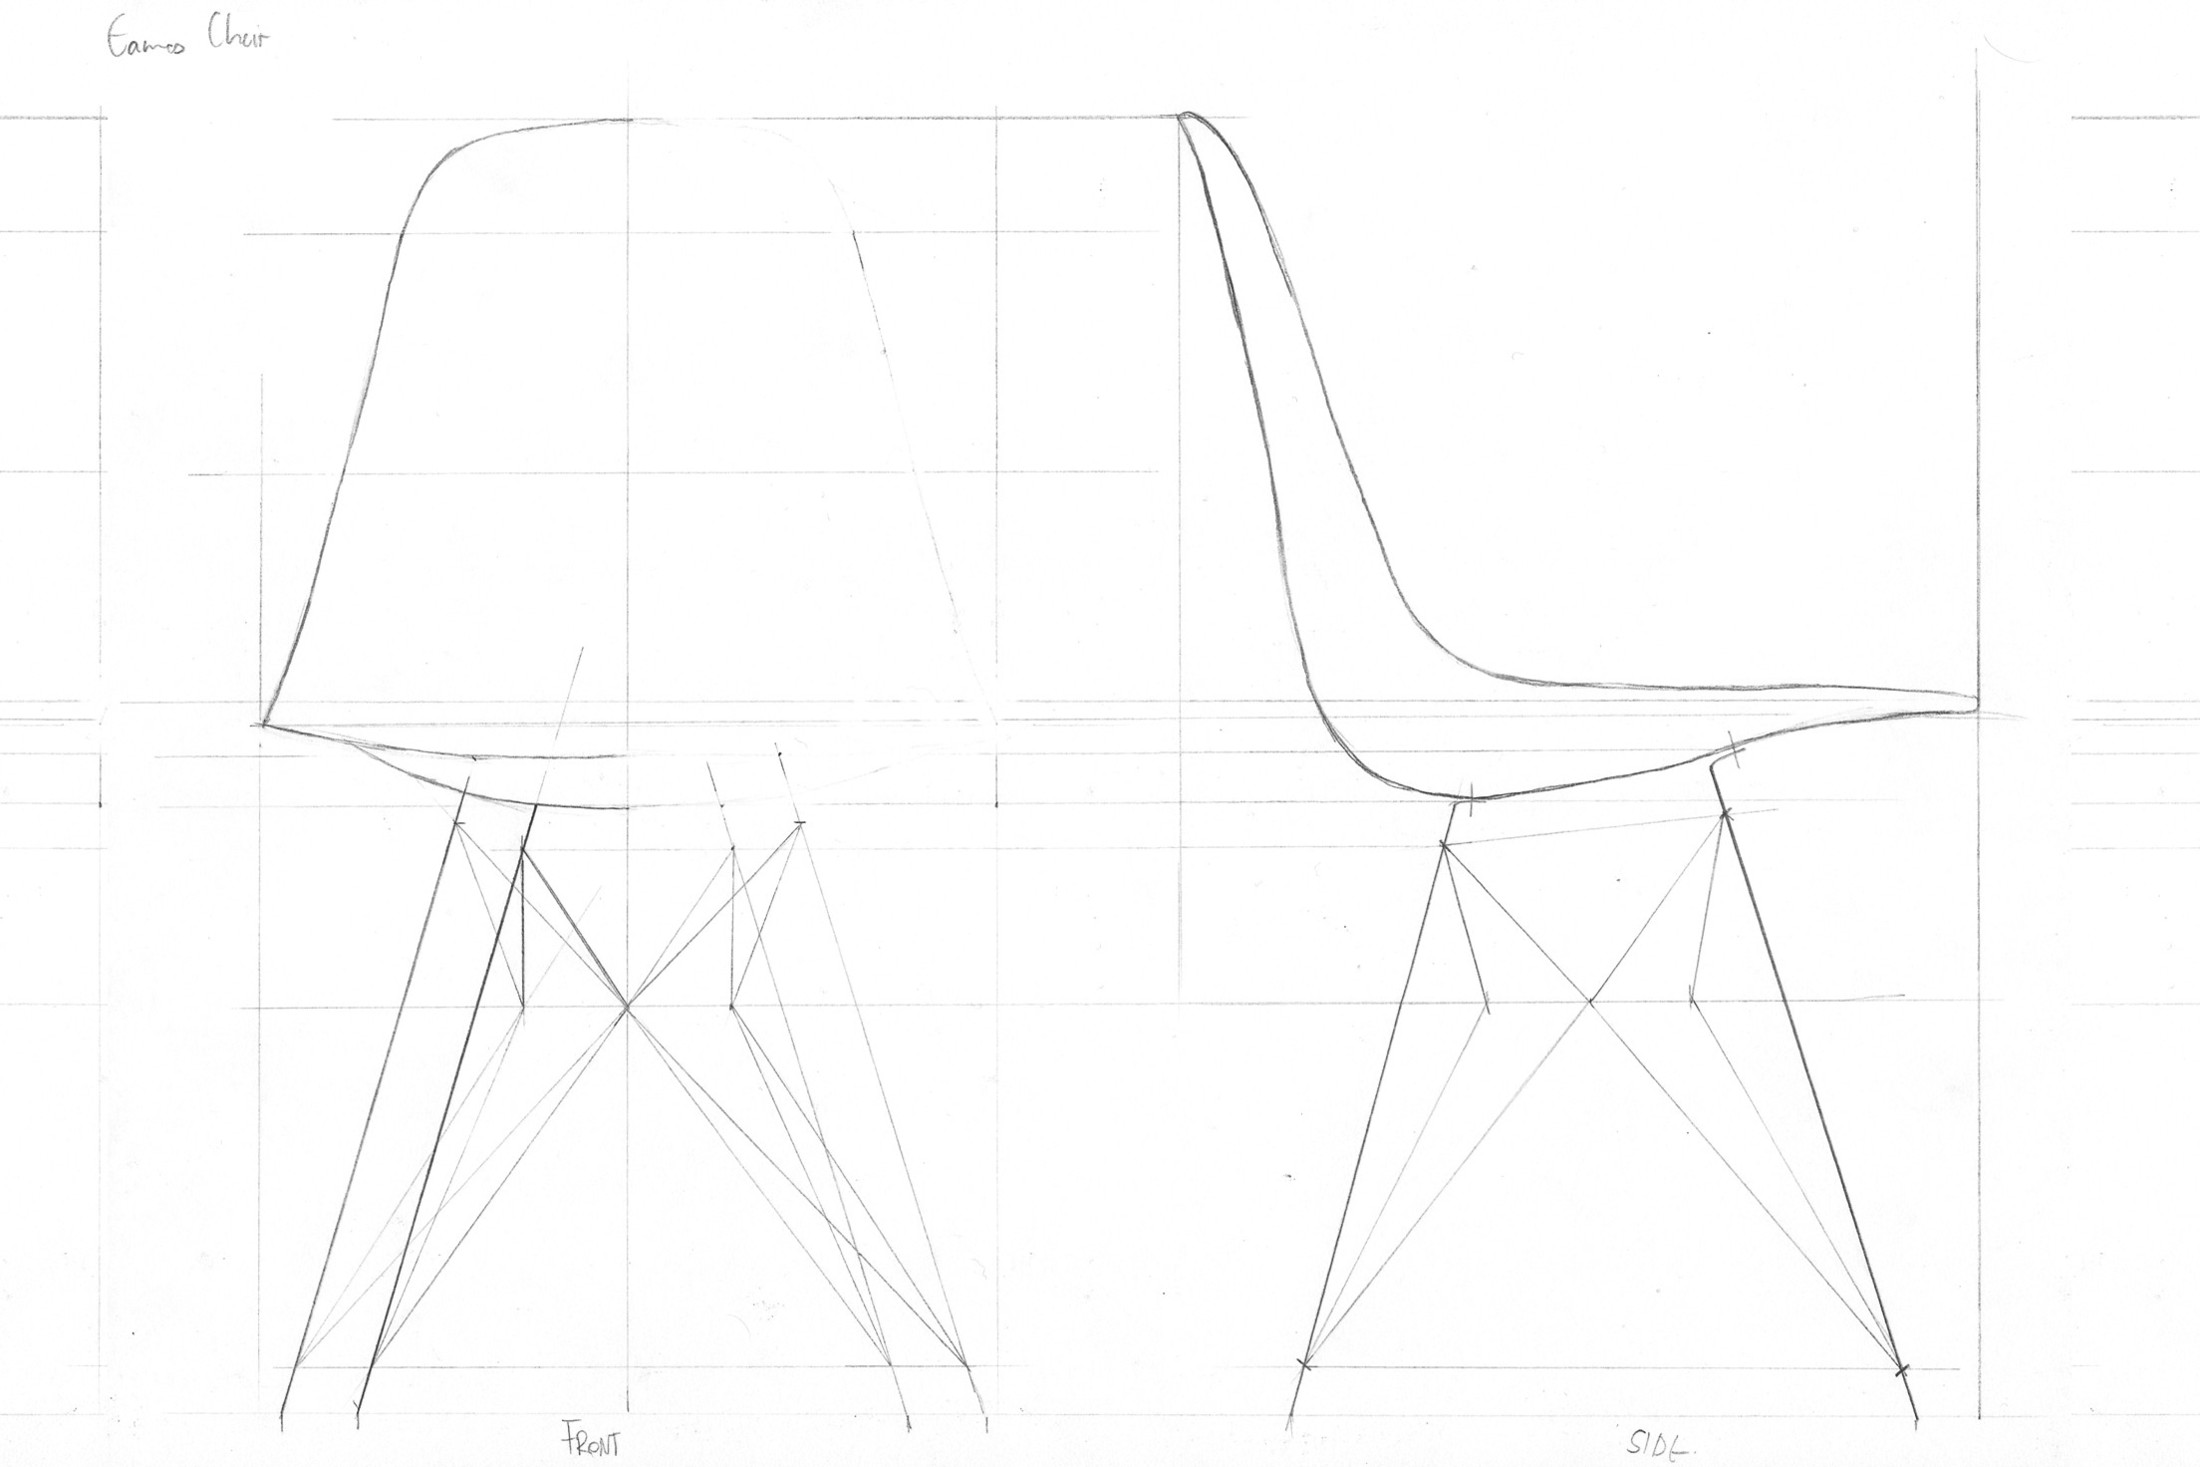
In Rhino, I traced the curved profiles in x and y direction and also the curved edge of the chair. Rhino is a nurbs based modelling software so it has a lot of commands to make precise surfaces based on bidimensional and tridimensional curves. I used the Network Surface command which builds a surface by defining two curves from different directions and a contour for the surface. The result surface is quite satisfactory and close enough to the orignal design.
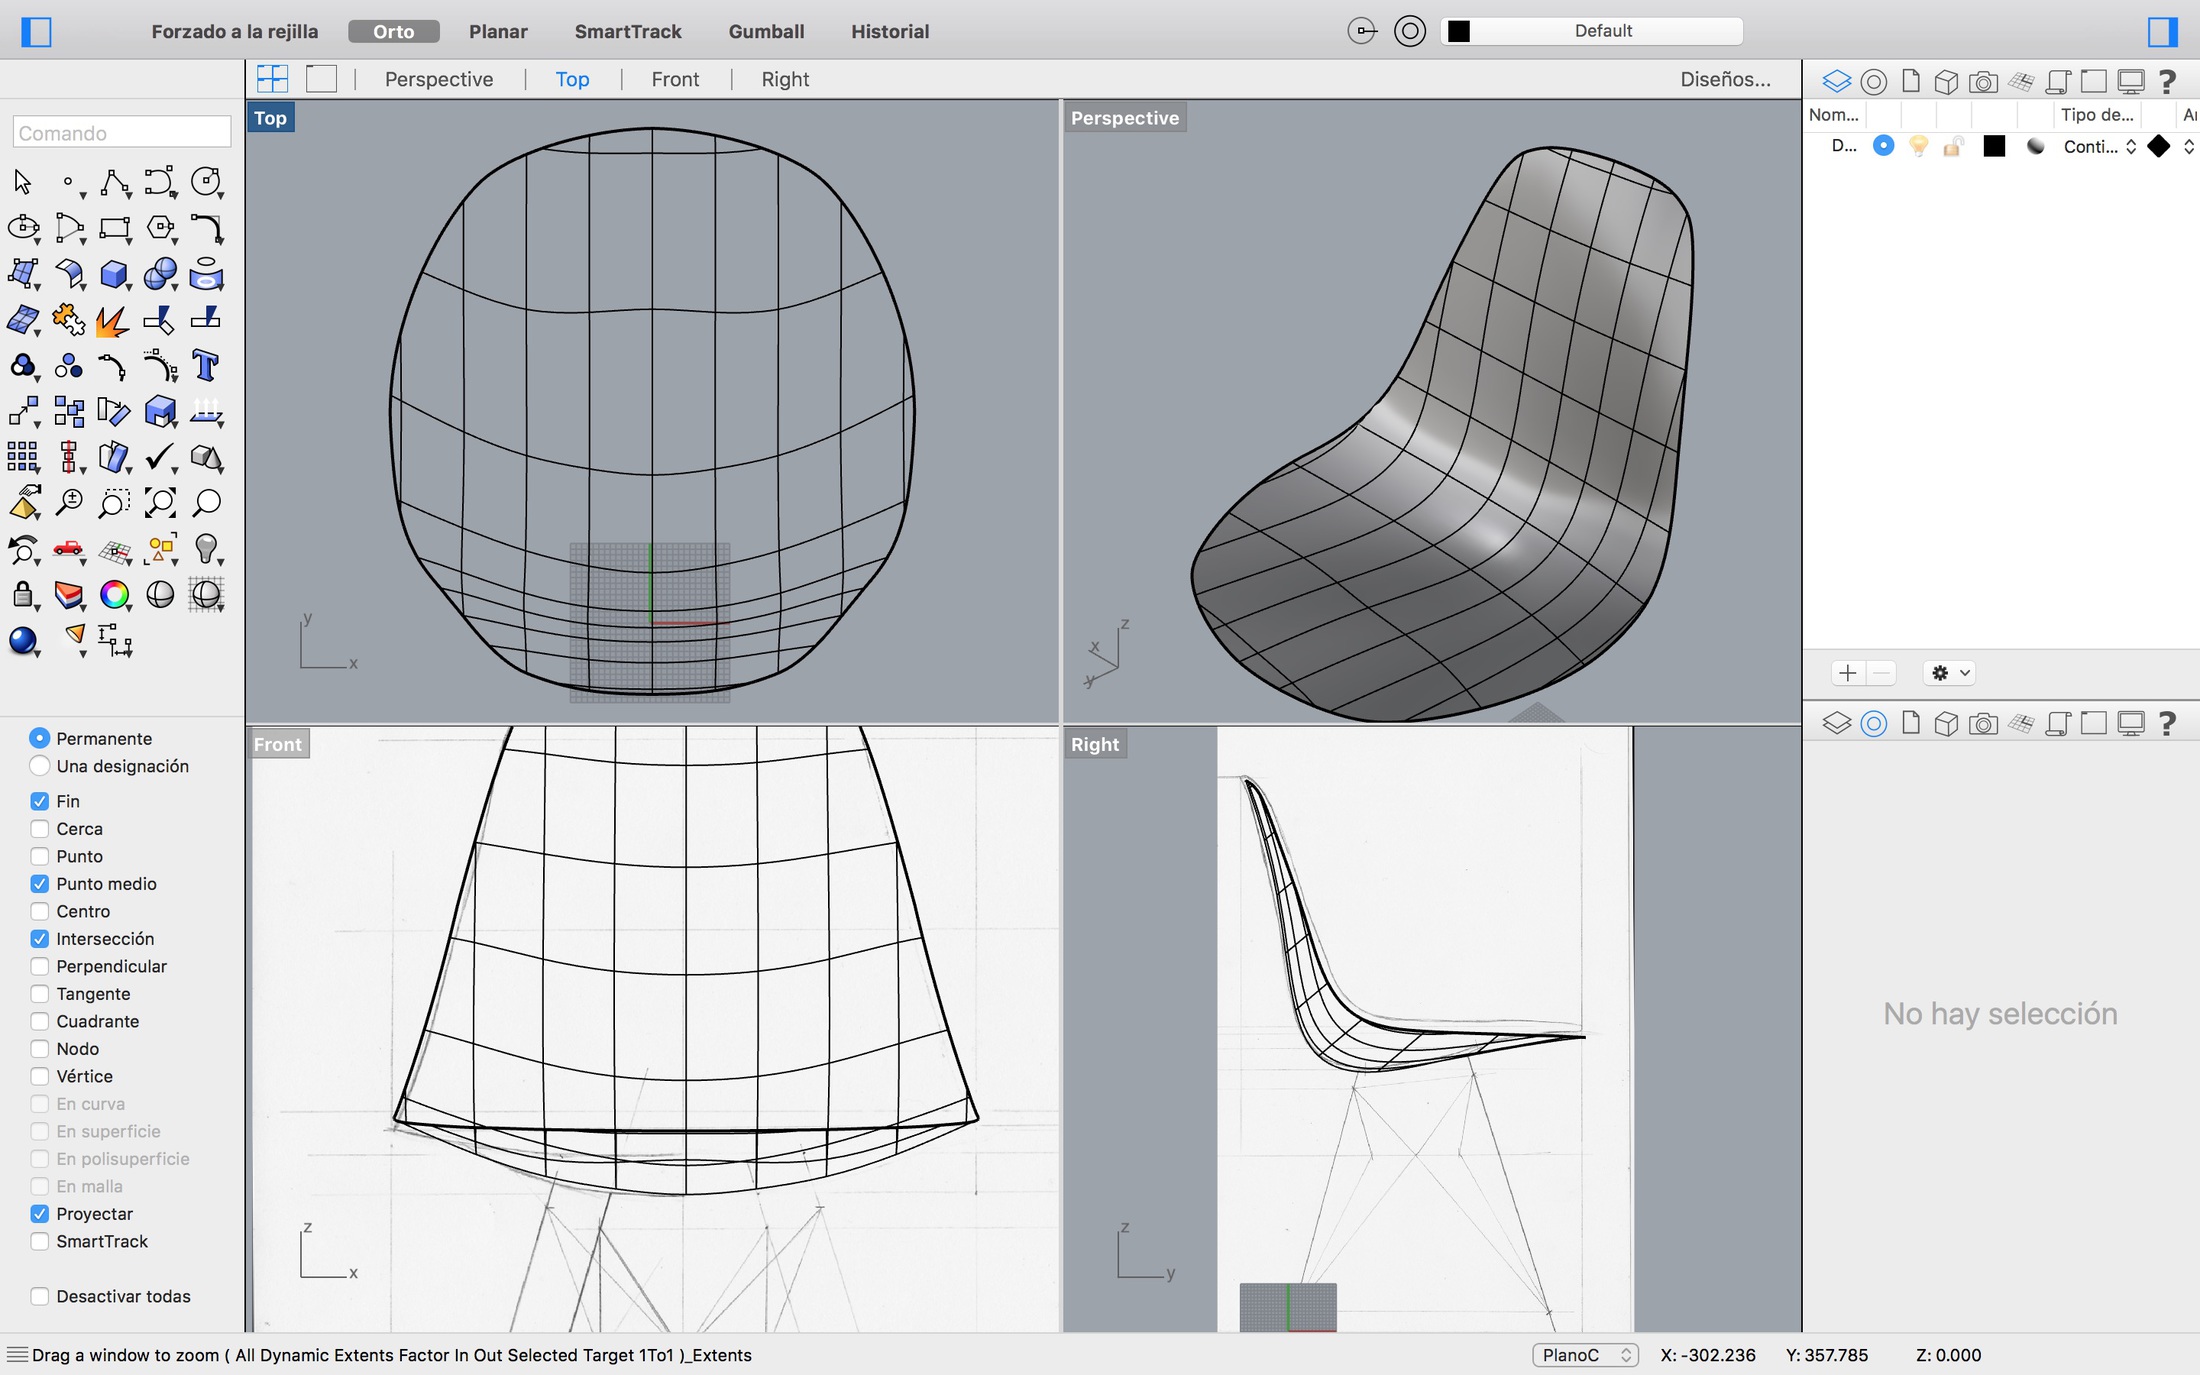
The next step would be to create the positive shape, scale it to fit the scale of a 15 month old baby –approx 24cm in the widest part of the seating surface– and slice it in three sections on it can be carved using 38mm MDF. I decided to use MDF so mold could be used multiple times and possibly make a full dinning set in the future.
Fabricating the mold
For the fabrication I used our 8x4 Shopbot, 38mm MDF and vcarve pro. The newest version of vcarve pro has great new features for 3D carving including optimized finishing calculation paths. I also used a 1/4" down cut bit for the rough and profile paths and a 1/8" Tapered Ball Nose bit for the finishing path.
| Flutes | RPM | Feed Rate | Plunge Rate | |
|---|---|---|---|---|
| 1/4” Downcut End Mill | 2 | 14,000 | 3 ips | 1 ips |
| 1/8” Tapered Upcut Ball End Mill | 2 | 12,000 | 2.5 ips | 1 ips |
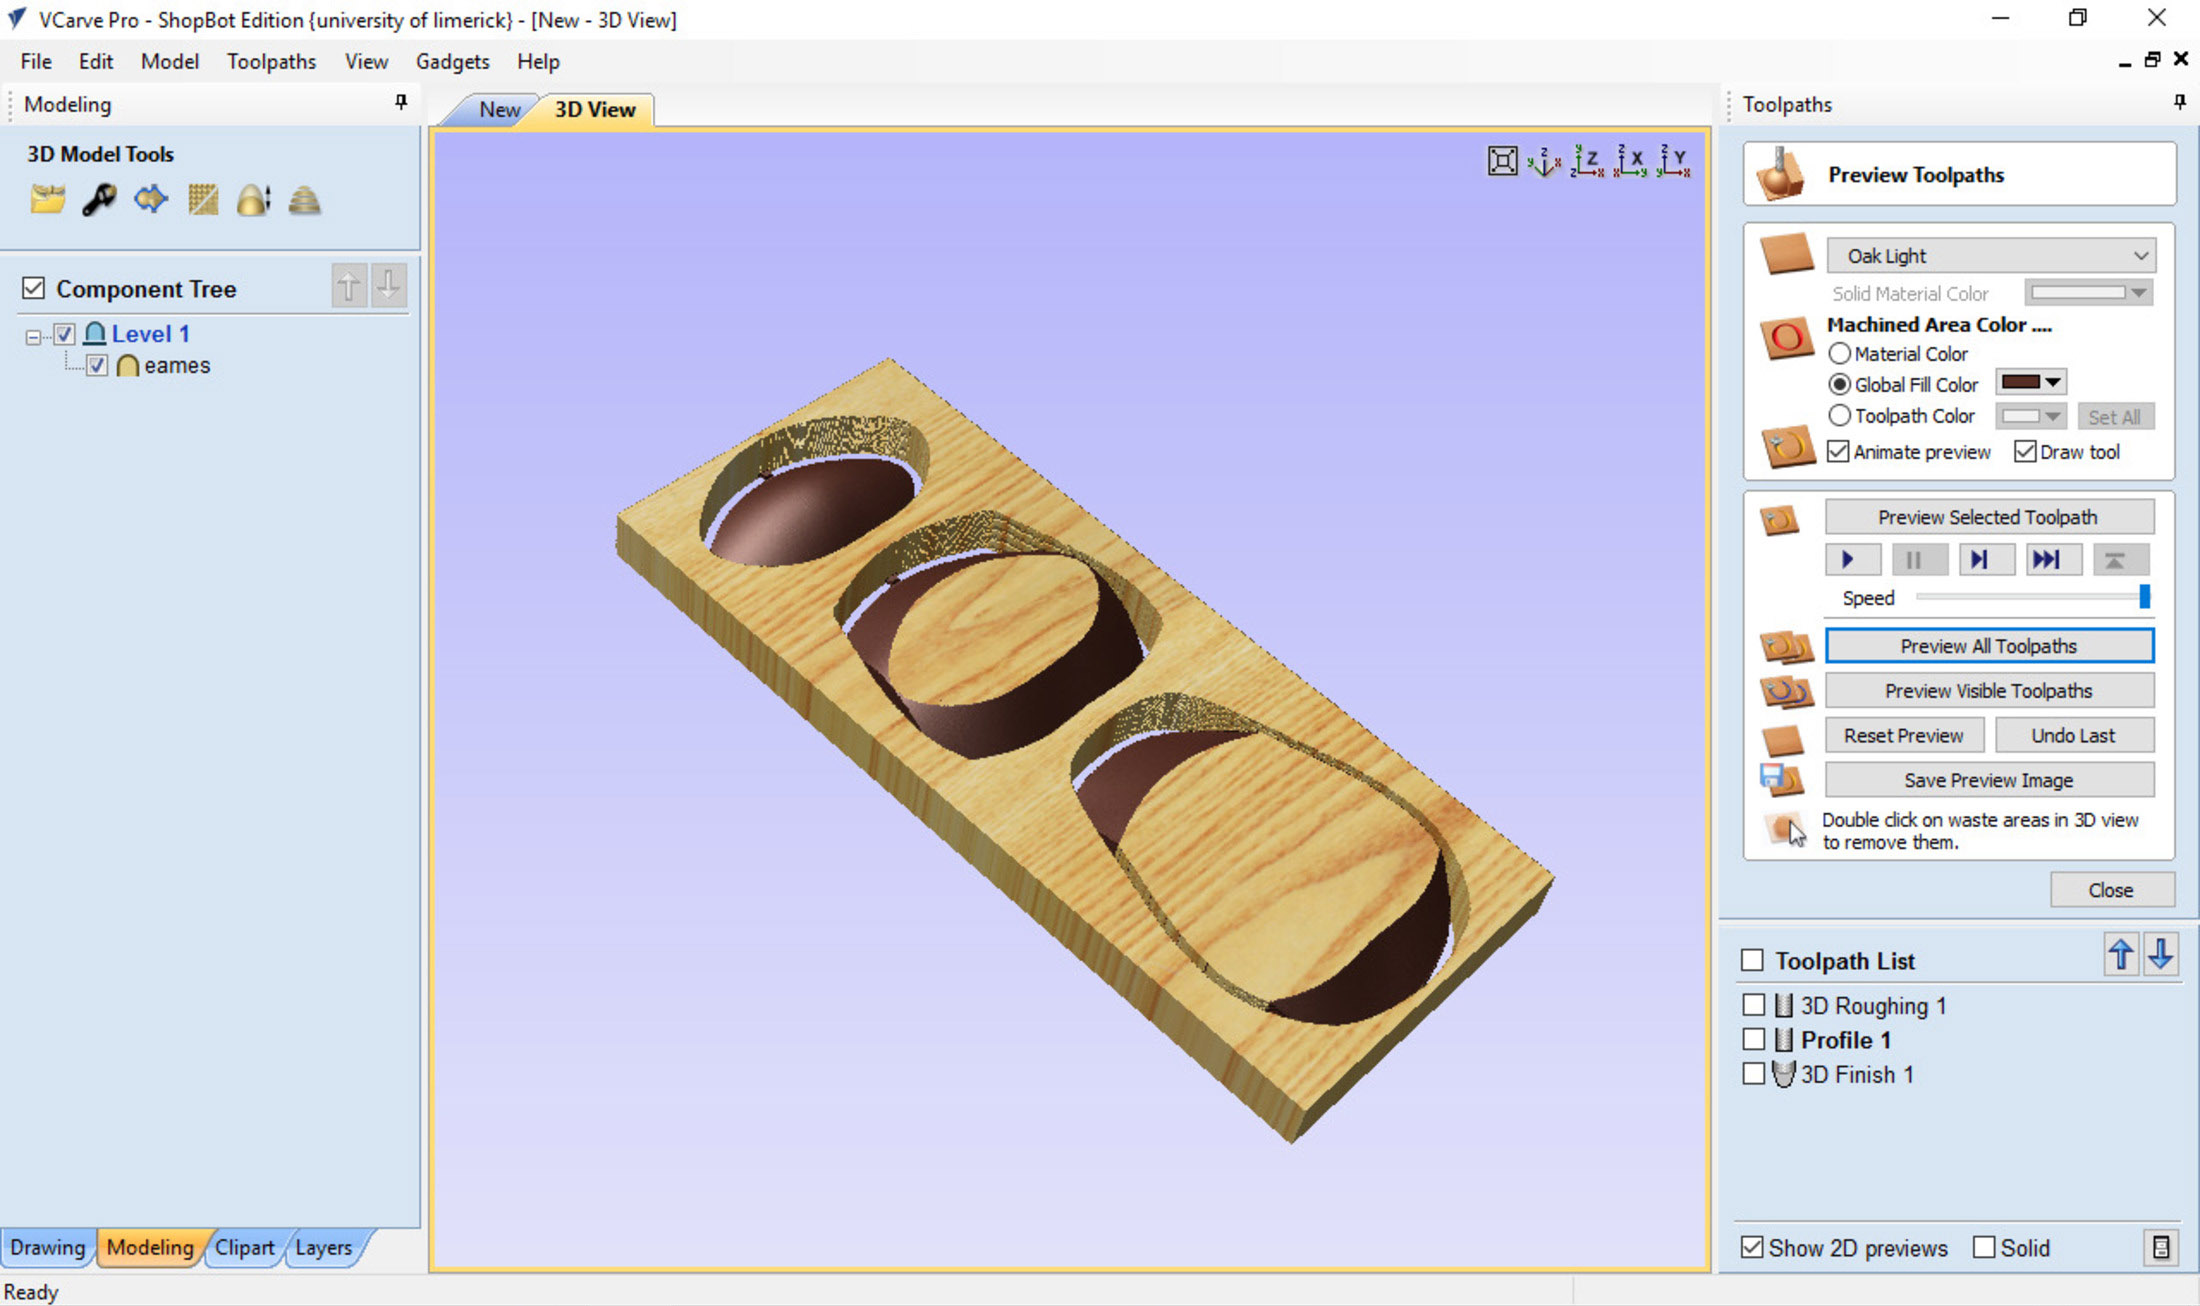
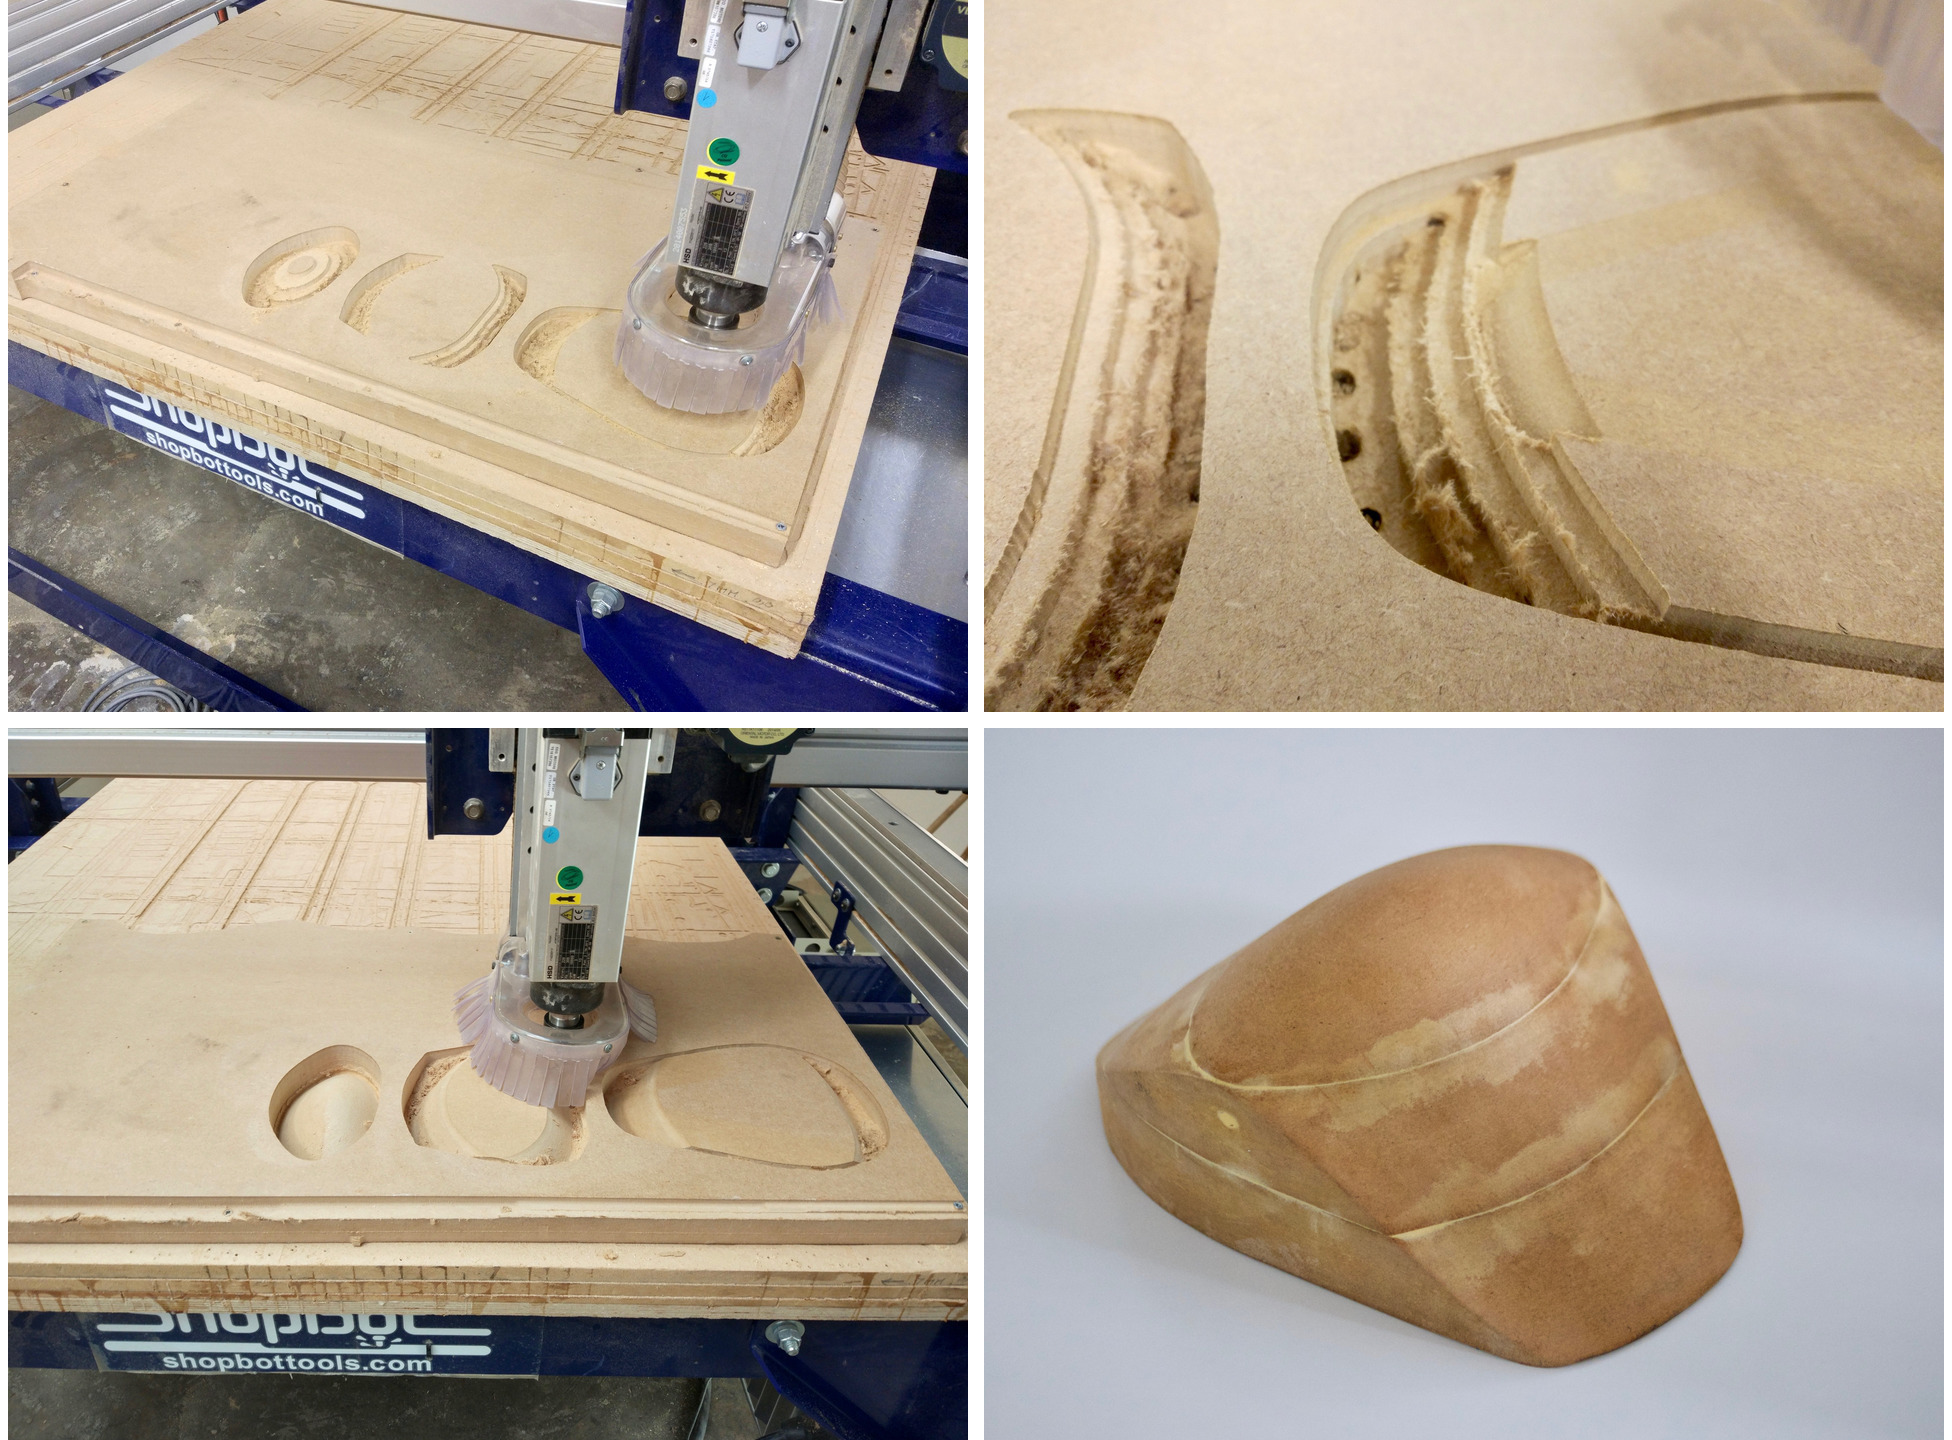
Once the three sections were carved, I stacked and glued together. The day after I applied wood filler on the joints and sanded everything until the entire mold surface was seamless.
Producing the composite
Before producing the composite a couple of coupons were made with 5 and 10 layers. For my chair 5 layers of approximately 4mm thickness in total would be sufficient as I wanted to keep certain flexibility on the part for extra confort.

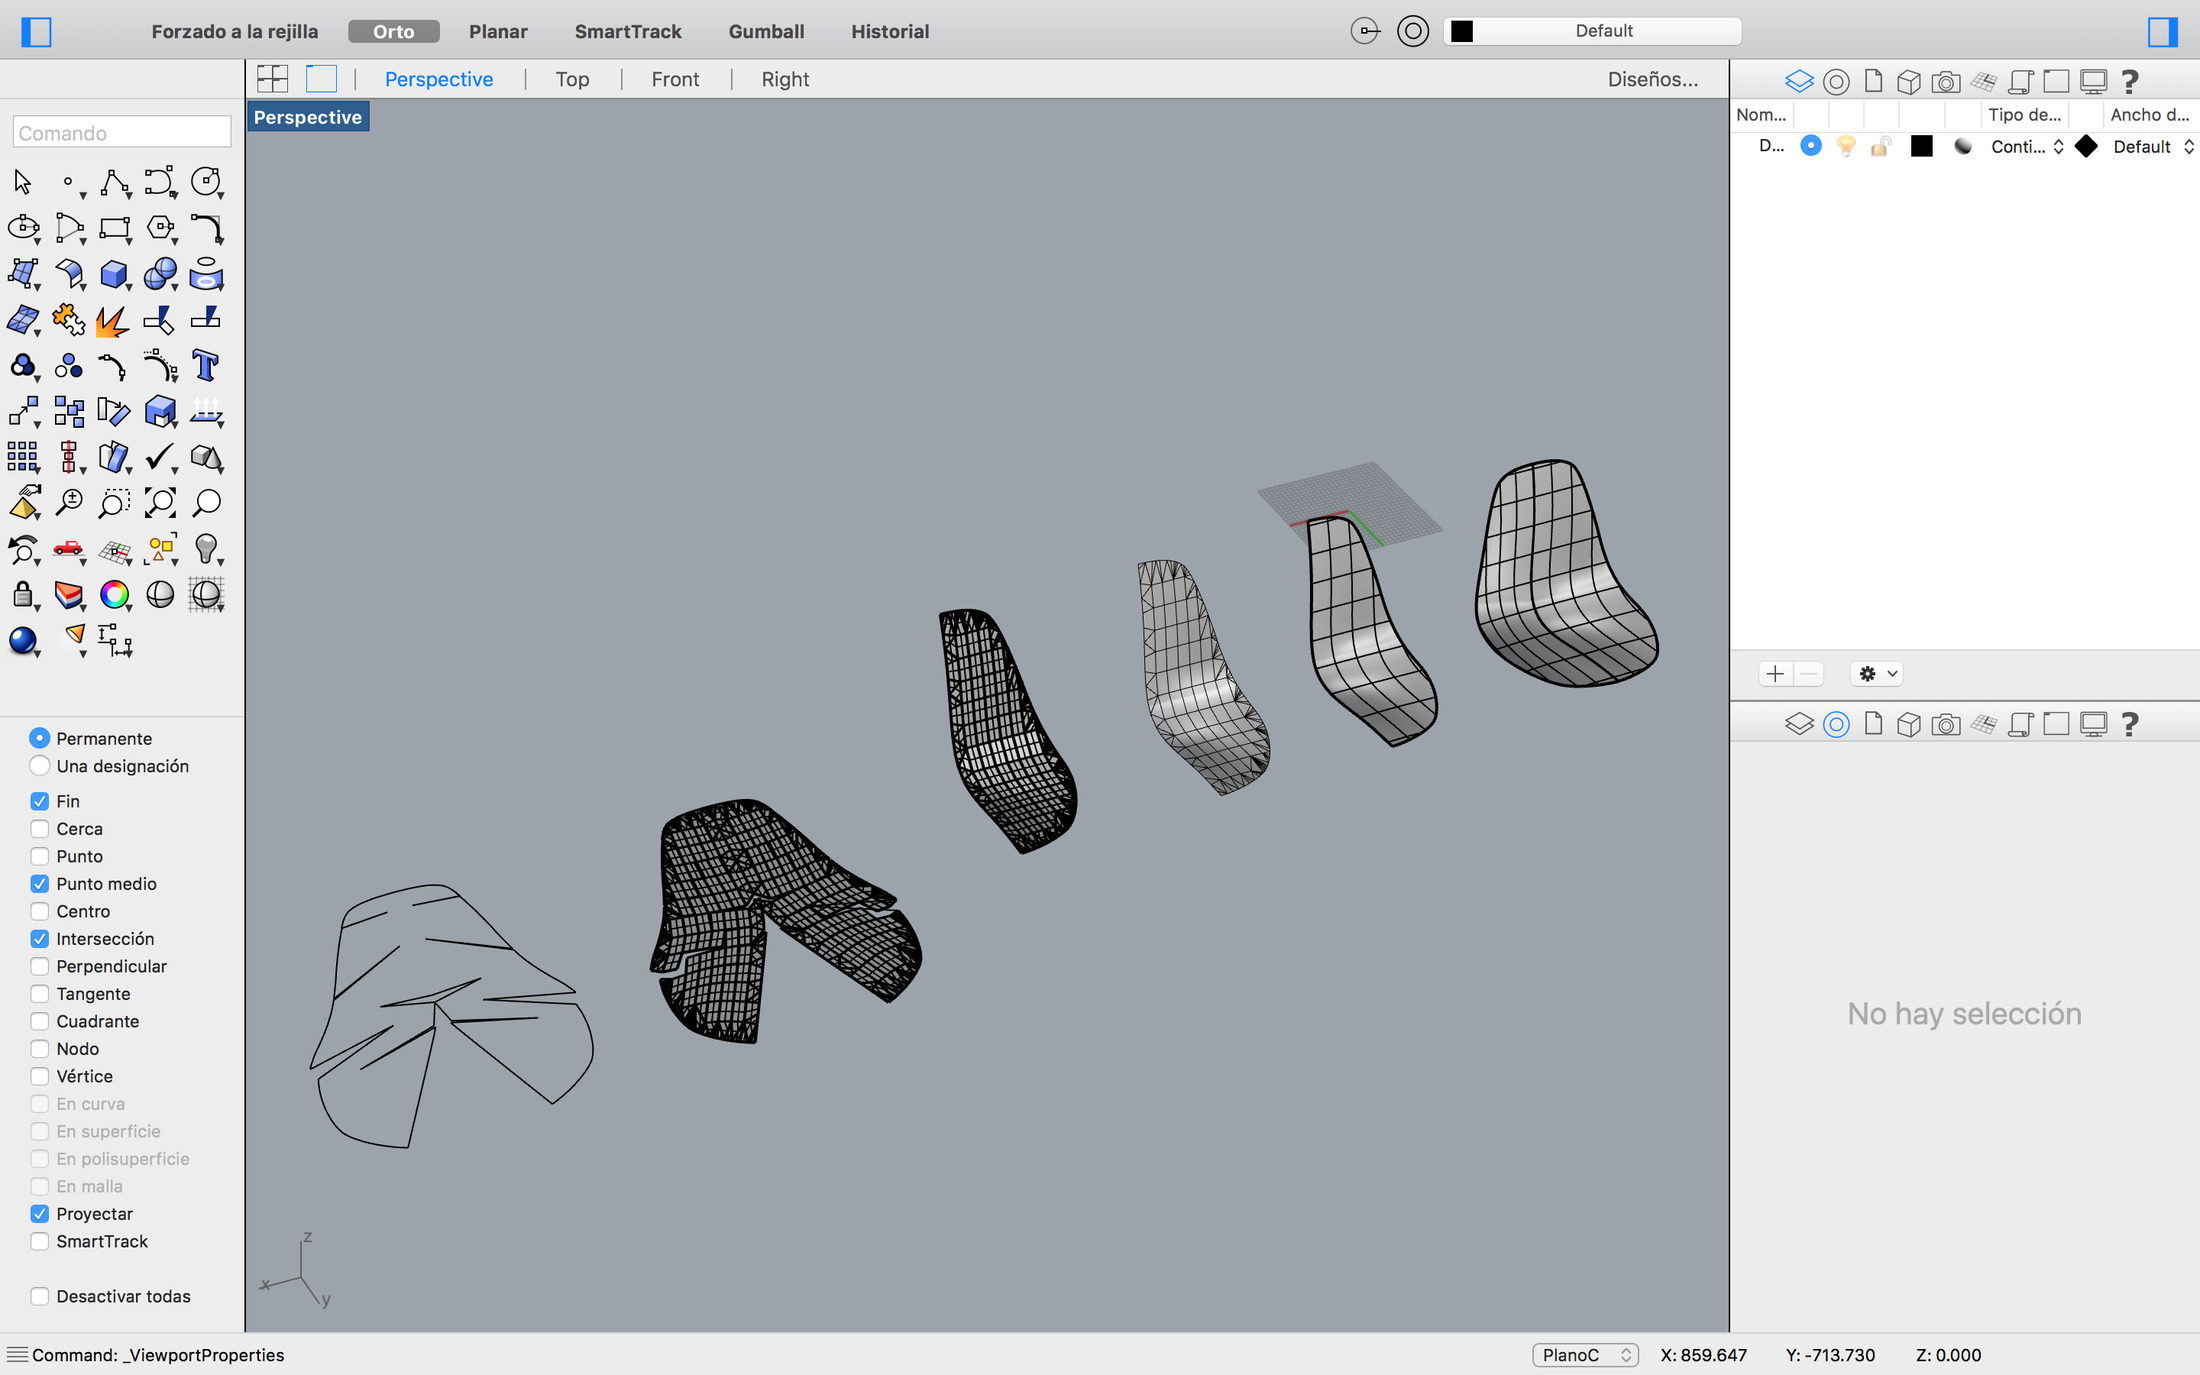
To achive a smooth surface without wrinckles the chair surface was unrolled into a flat surface so I can cut the burlap with the laser cutter. Rhino cant unroll a double curvature surface with a single command so the process is a bit more tedious, first you need to covert the nurbs surface into a mesh, then each individual flat face into nurbs surfaces, combine them in a polysurface and finally do a unroll surface command. There is a slight distortion happening as you are transforming a double curvature surface into a faceted one so you may need to try few different mesh resolution settings.
This flat surface was laser cut and placed on top of the mold to make sure that the seams where in the right place. As the burlap is able to strech a little bit, the final shape was simplified with only a central seam at the end.
Working space was set in a outdoor covered area and the process was repeated a couple of times in "dry test" mode to make sure that all the elements were ready and I understood how to do each part of the process.
For calculating the volume of resin needed, I measured the surface of the flat piece and the thickness of the coupon, this gave me the total volume of the surface –0.2 liters– I consider that burlap will take 25% of that volume which gave me a total resin volume of 0.15 liters.
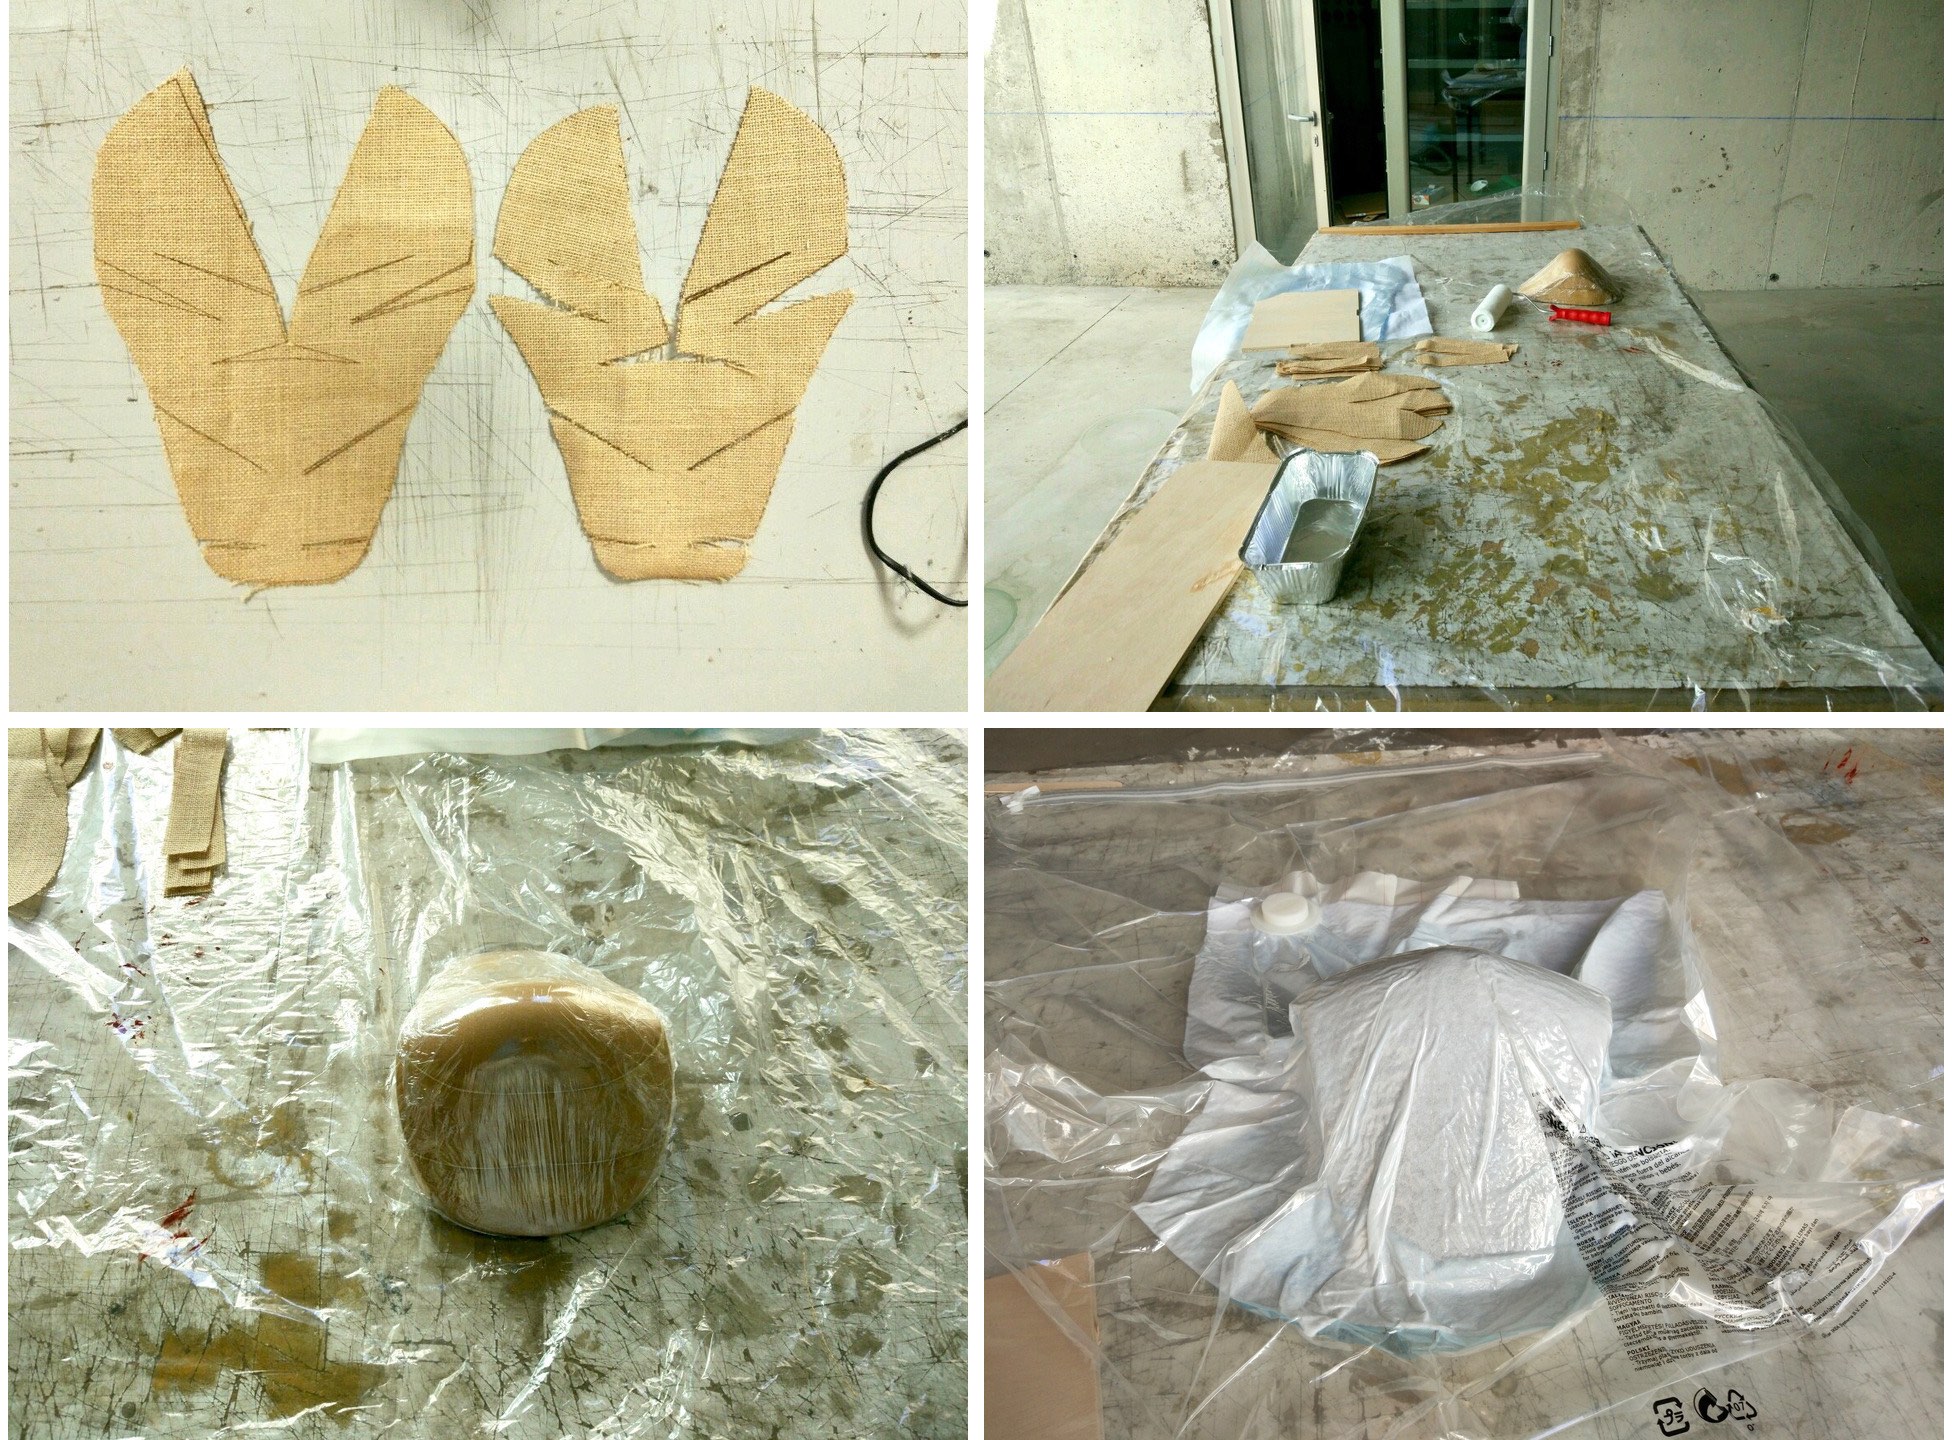
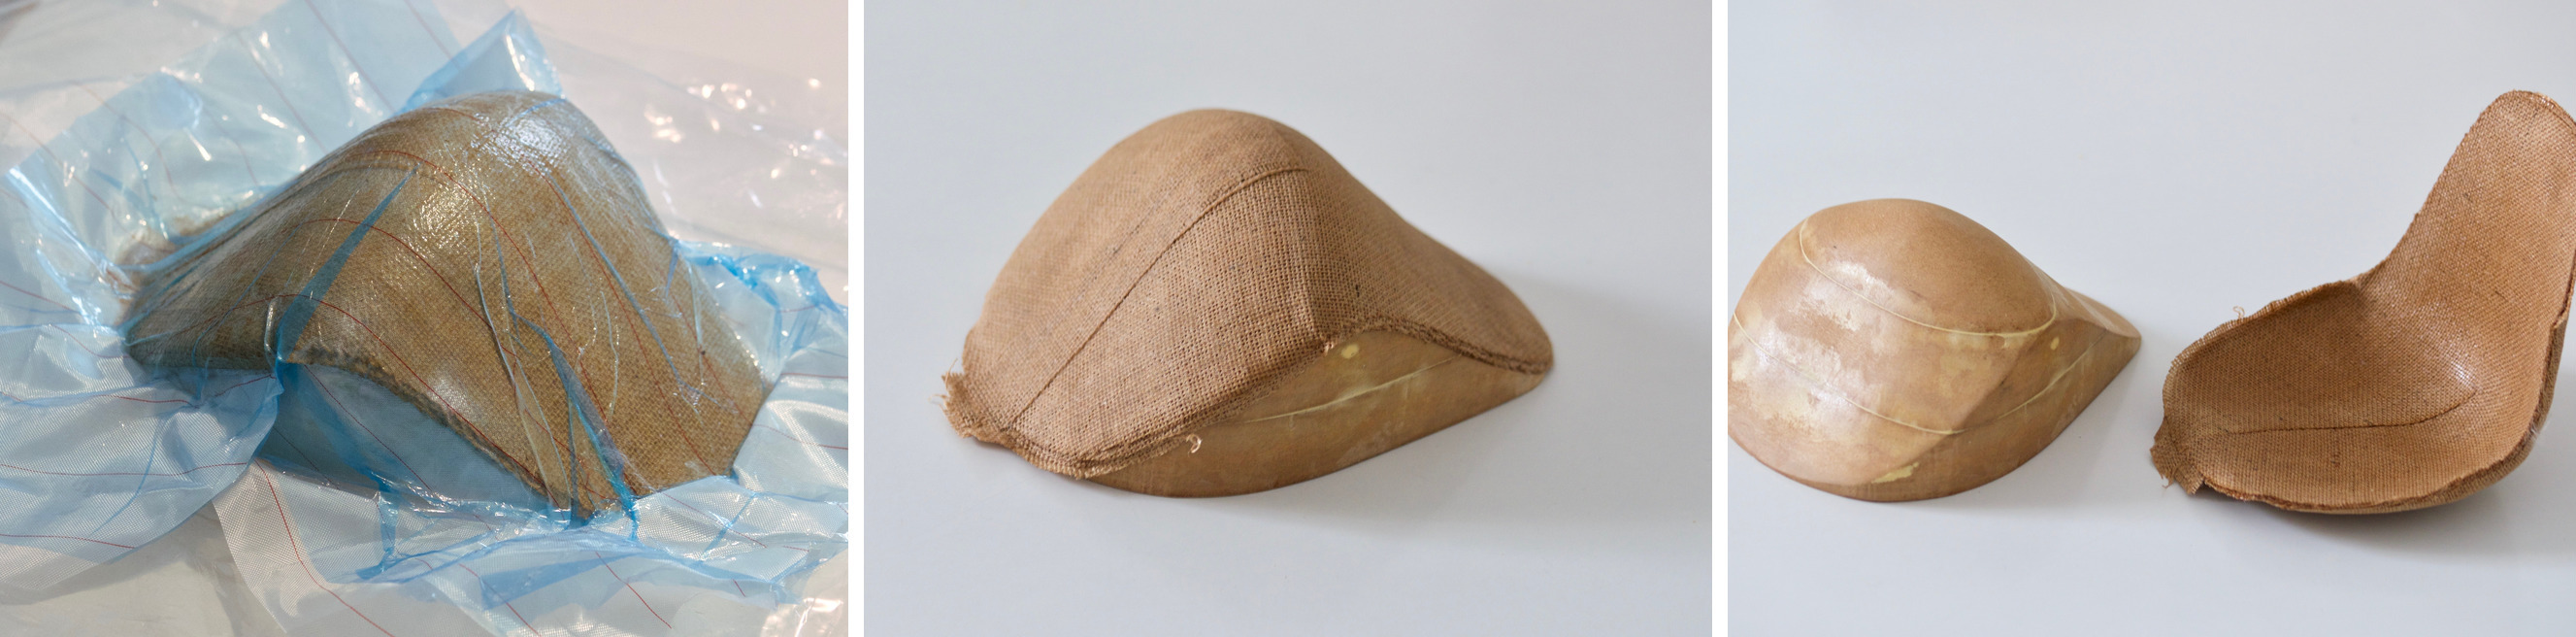
The vacumn bagging process is thorughly explained here. First, the mold was covered in film wrap to prevent the piece from sticking to it. Second, the resin is applied to the burlap pieces and carefully placed over the mold, small stripes are placed on top of the seam to reinforce that area. Third, a release fabric is placed on top followed by a layer of perforated film and finally the breather fabric layer. Finally, all the elements are placed carefully inside the vacumn bag and air is removed with a domestic vacumn cleaner.
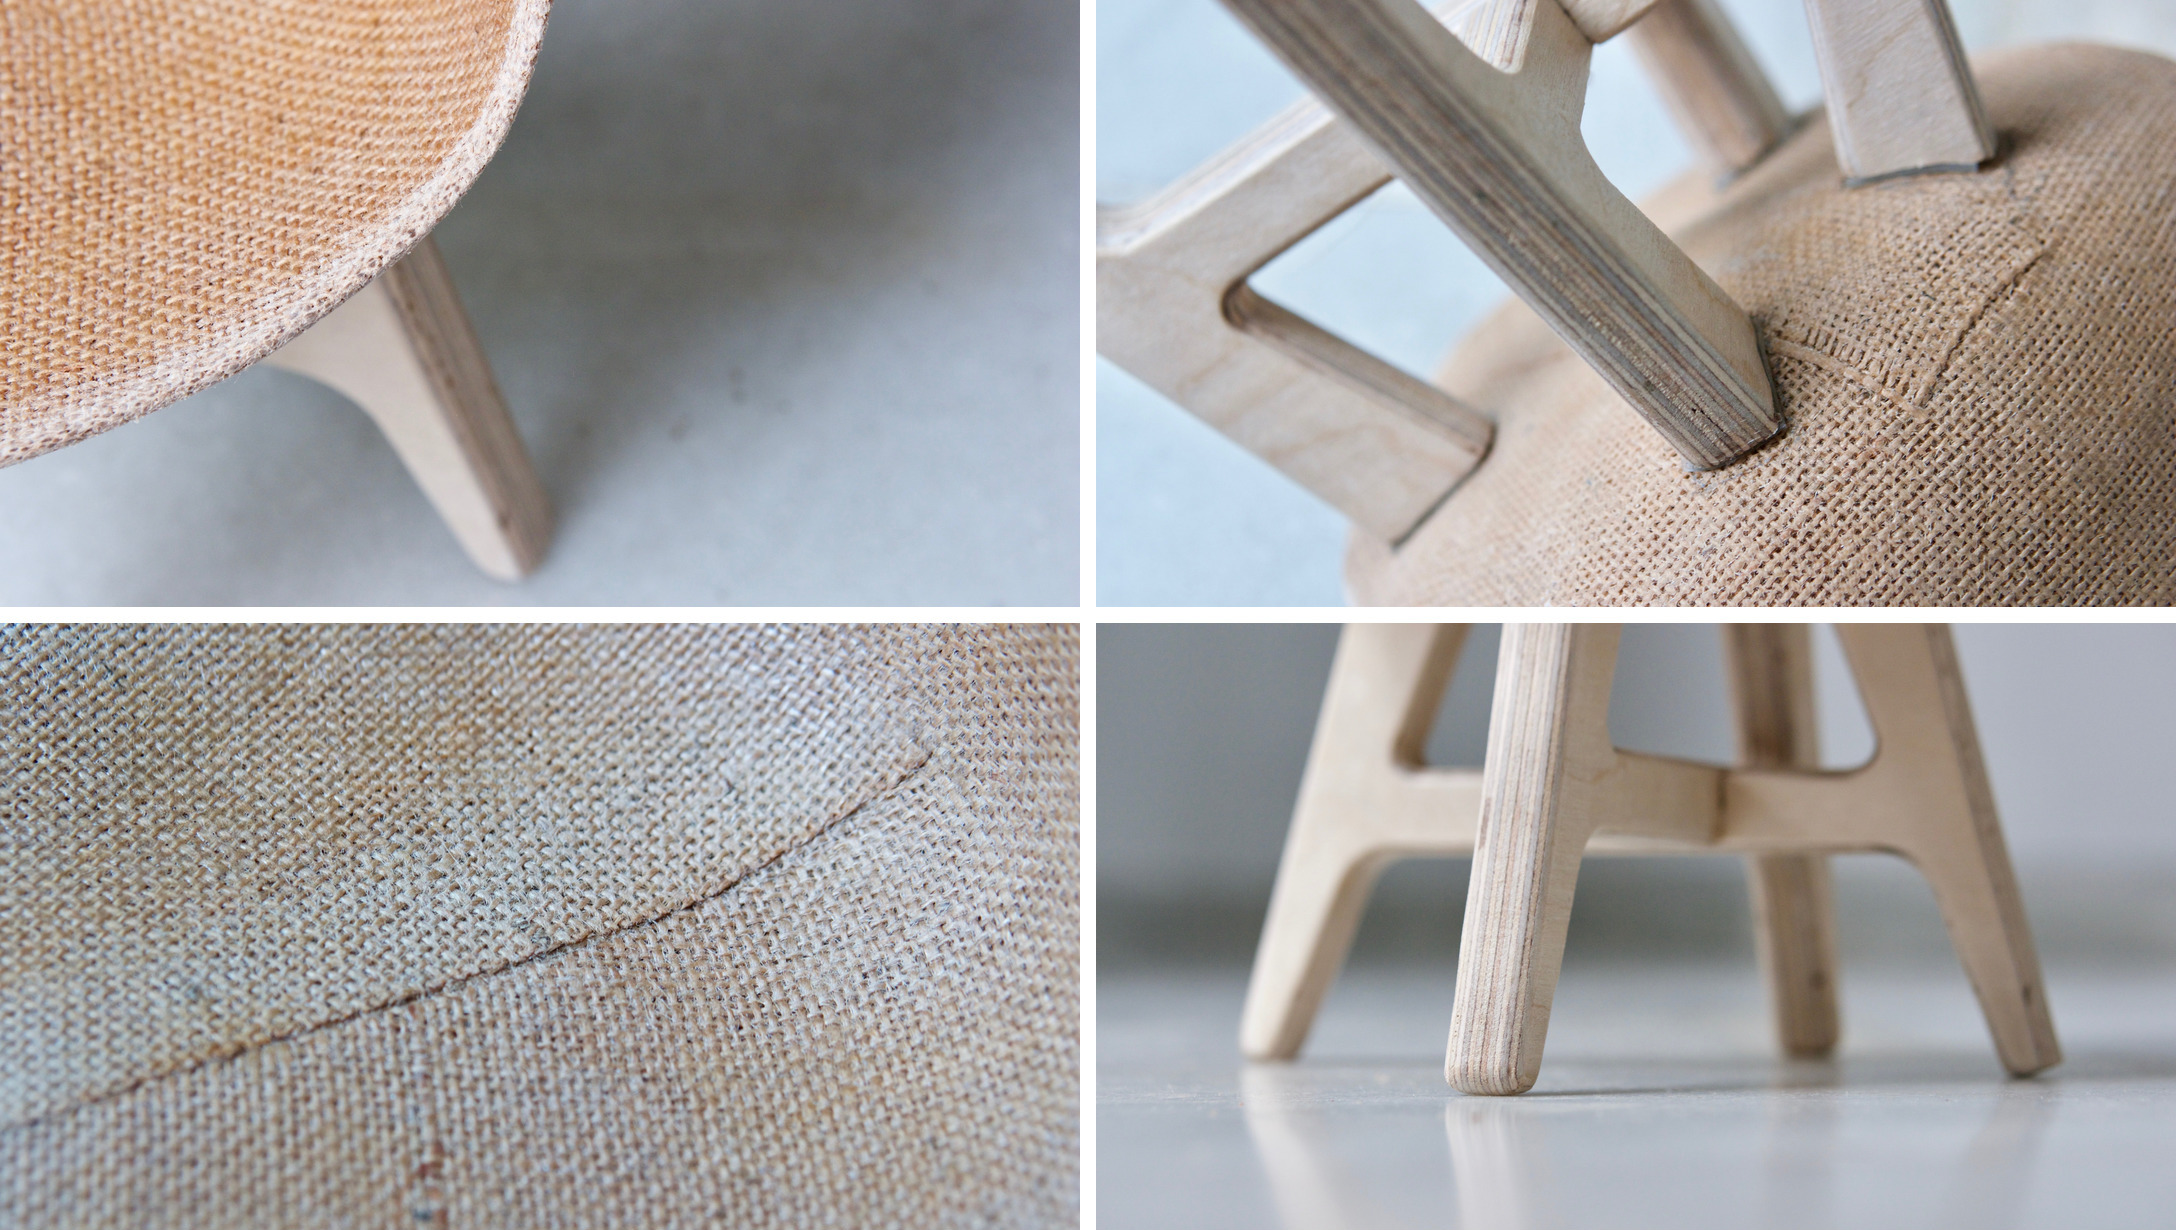
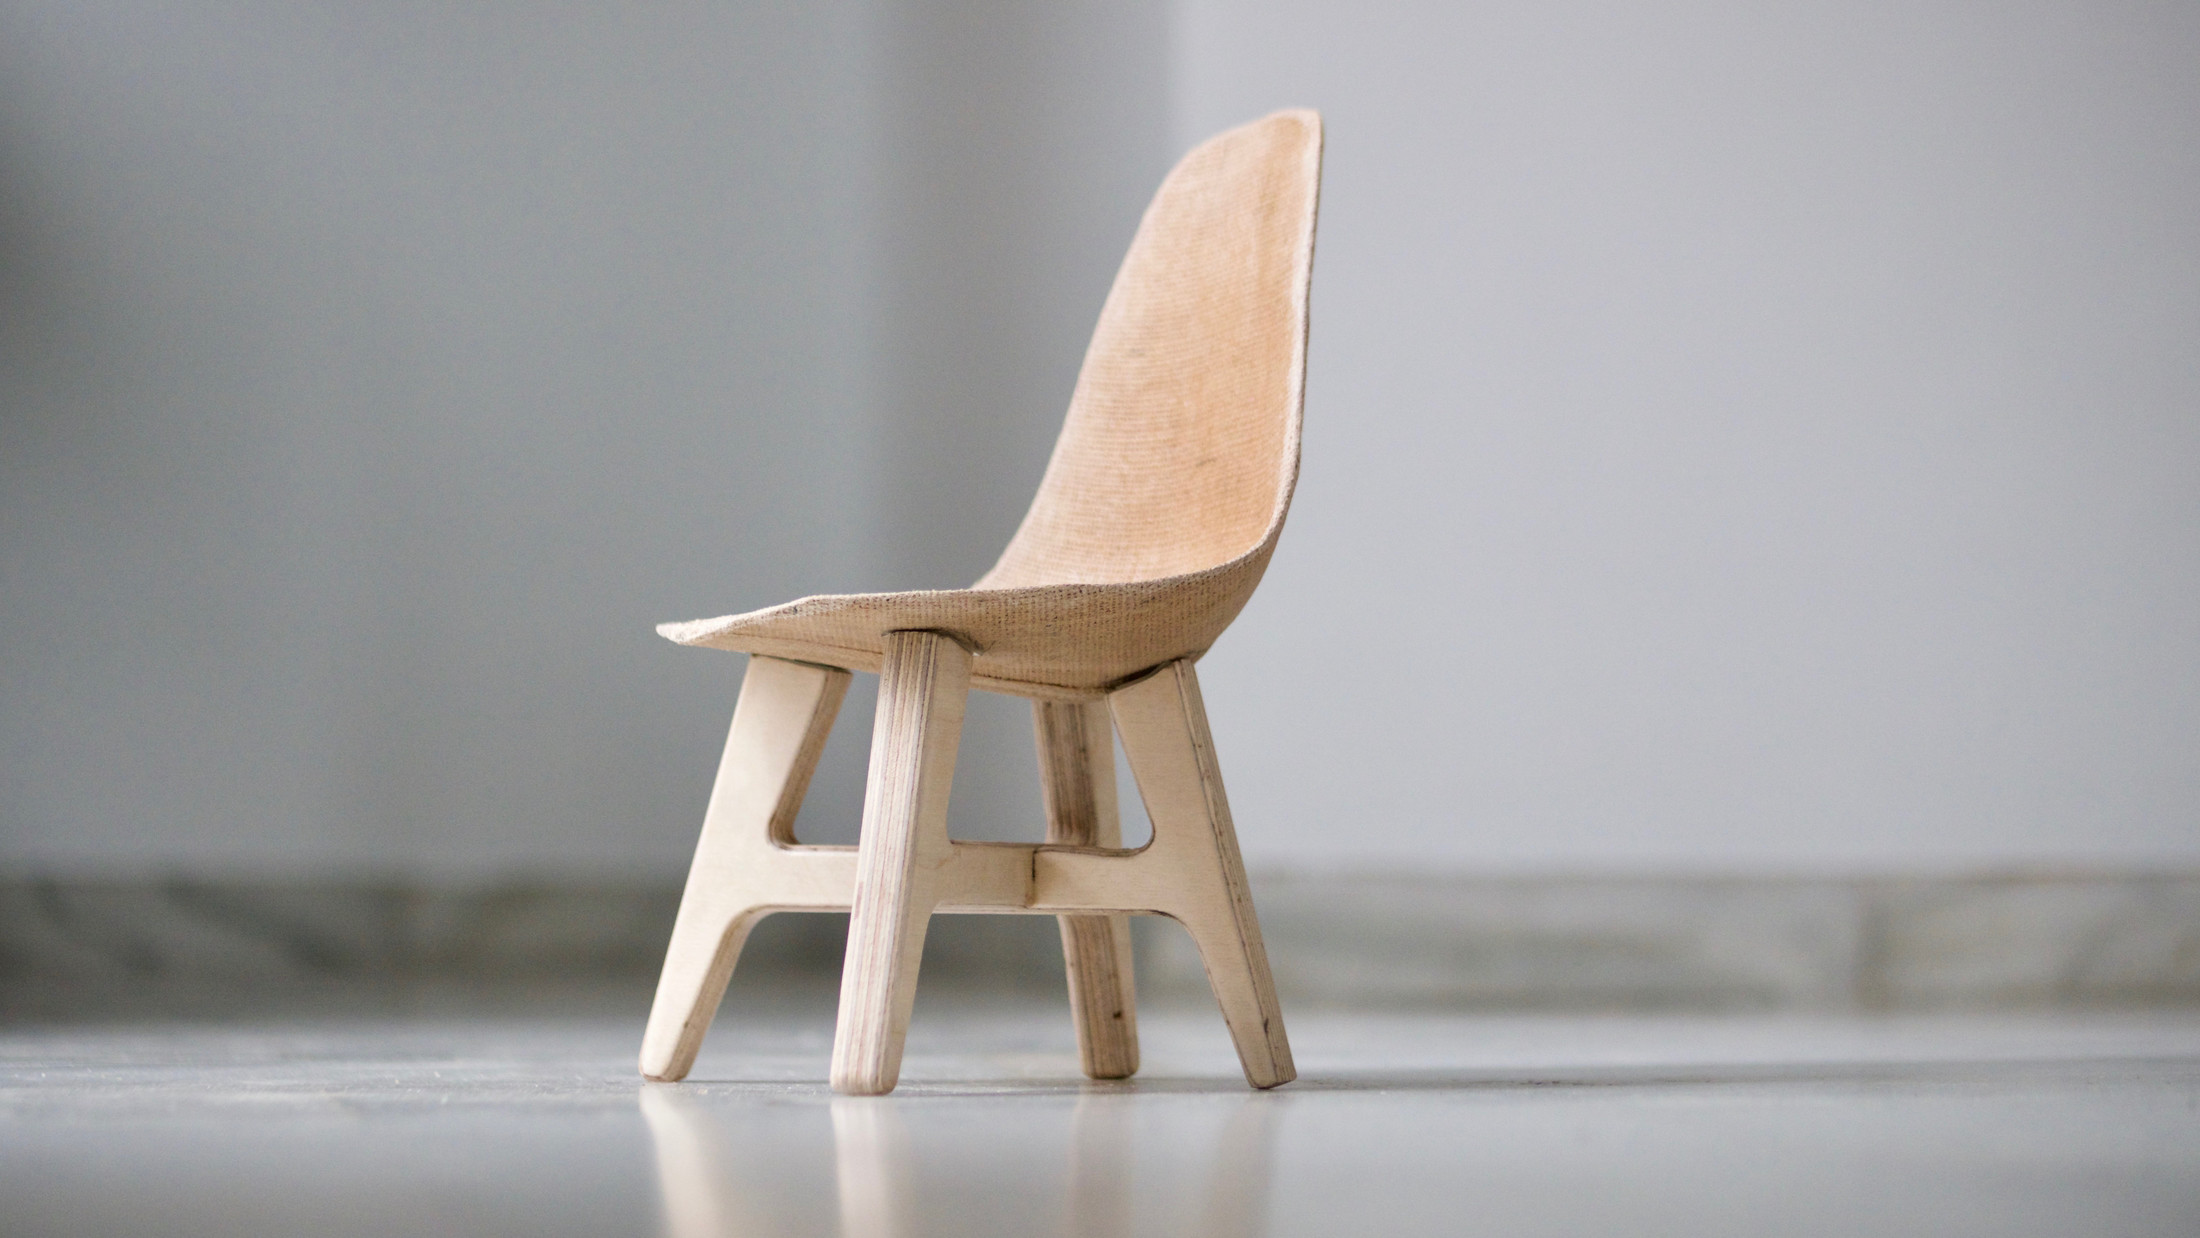
The following day the bag was opened and the chair shell was demolded. I was very satisfied with the result with a smooth surface witouth wrinckles. I cleaned the edge with a electric rotary saw and a orbital sander.
Last touches, chair legs and final assembly
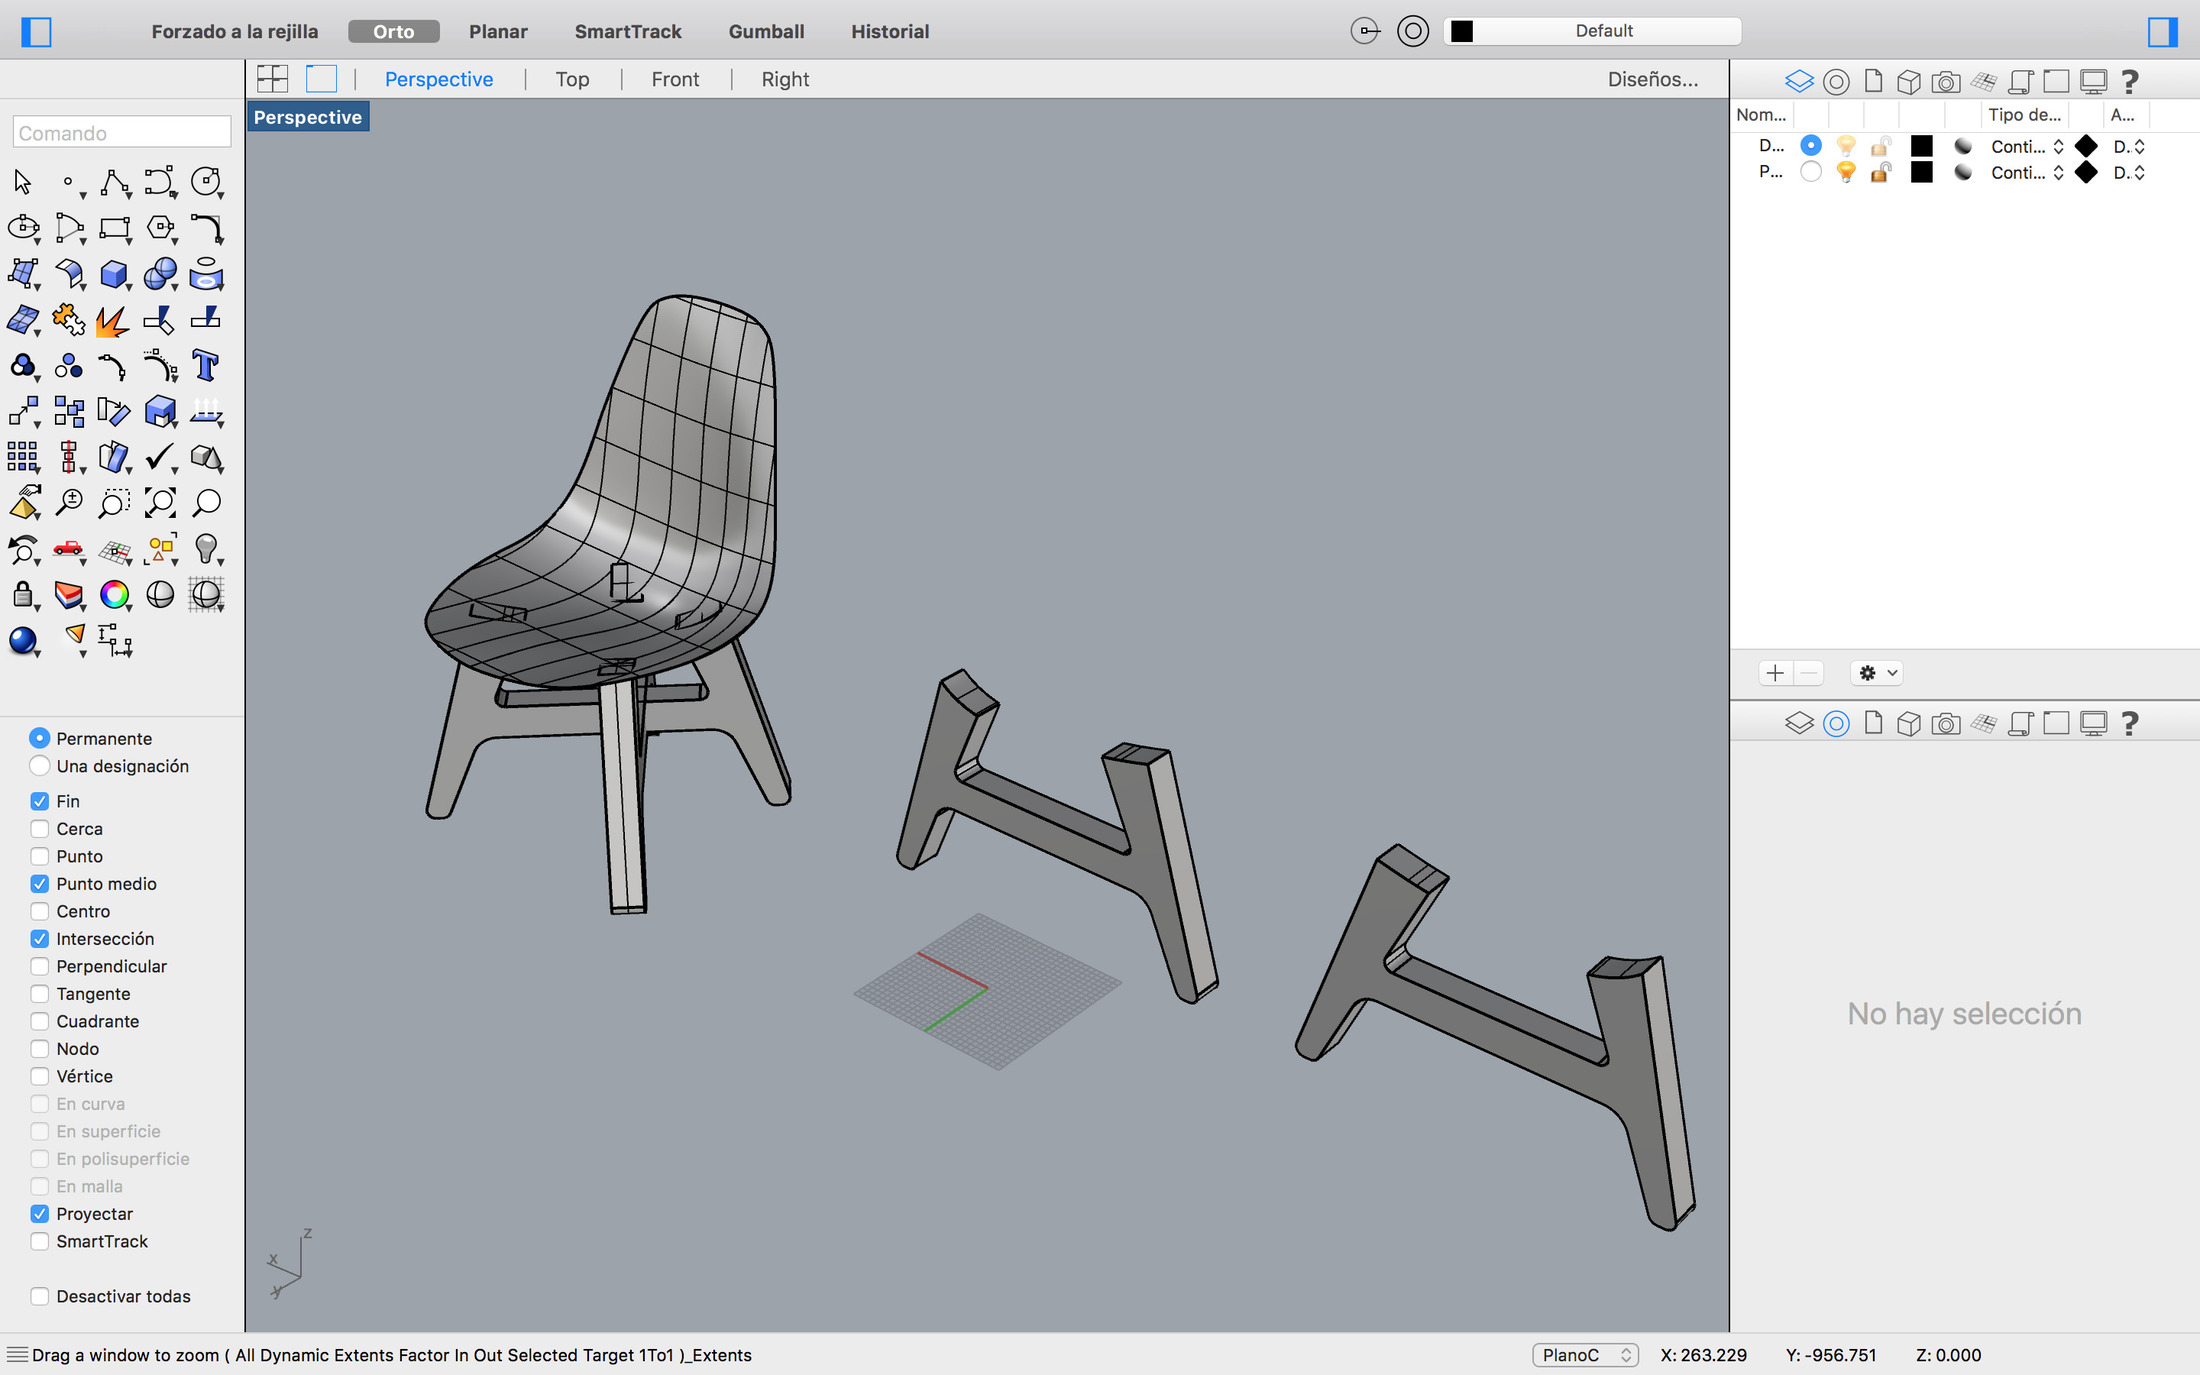
The original legs are made with a welded metal structure so I decided to go for a sturdier and easier to fabricate design made out of birch ply. I used the same settings and process used in the machining week, only difference is that I used Rhino this time to make sure that the legs section have the right curvature to recieve the shell.
I still need to give a second layer of resin to smooth the surface and specially the edges but I am quite happy with the results so far. Some close ups photos down here and the hero shot further below: