Meanwhile gone through the printer documentation.
And, installed cura - 3D printer slicing application. The installation process was interleaved with so many scaring warnings. Finally it is over!
But on loading it failed with segmentation fault.
Meanwhile a test design is given for printing as part of the group project.
Subsequently cura was downloaded from https://ultimaker.com/en/products/cura-software as an AppImage - dowload, chmod, execute in any linux distro - format.
Changed execute permission and is running!
Subsequently issued sudo pacman -R cura to remove the already installed cura.
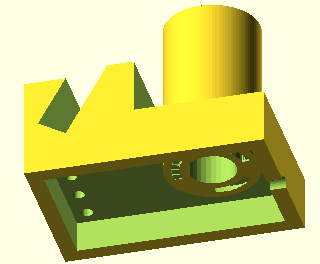
Then using openscad a 3d image is created. The code is here:
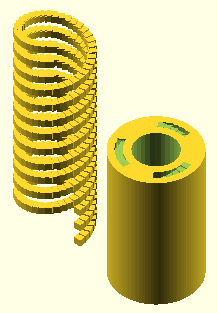
It could be used as a tablet stand with pen holder. There are 3 spirals running across the height of the cylinder.
This spiral cannot be constructed subtractively - at the best without some advanced techniques.
Some improvements could be made to the desgin - like adding a base to the cylinder instead of being hollow,
As per the suggestion of the instructor I printed a small version of the model. On printing, the base material is still sticked to the edges.
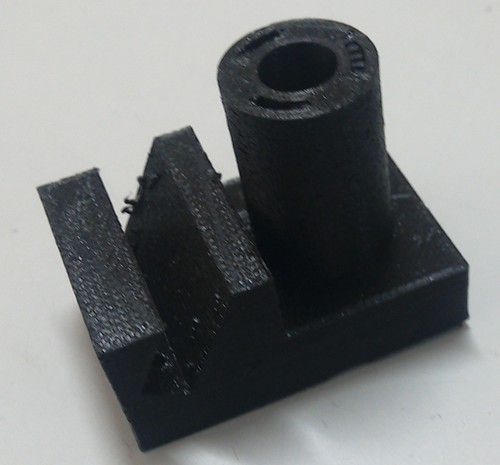
Some improvements could be made to the desgin - like adding a base to the cylinder instead of being hollow, make double sure that the angle of the slit is such that, when extended its bottom line will not touch the top of the cyliner.
