Week-7 :- Computer-controlled machining
This week assigment is to make something with wood which is normally not possible with
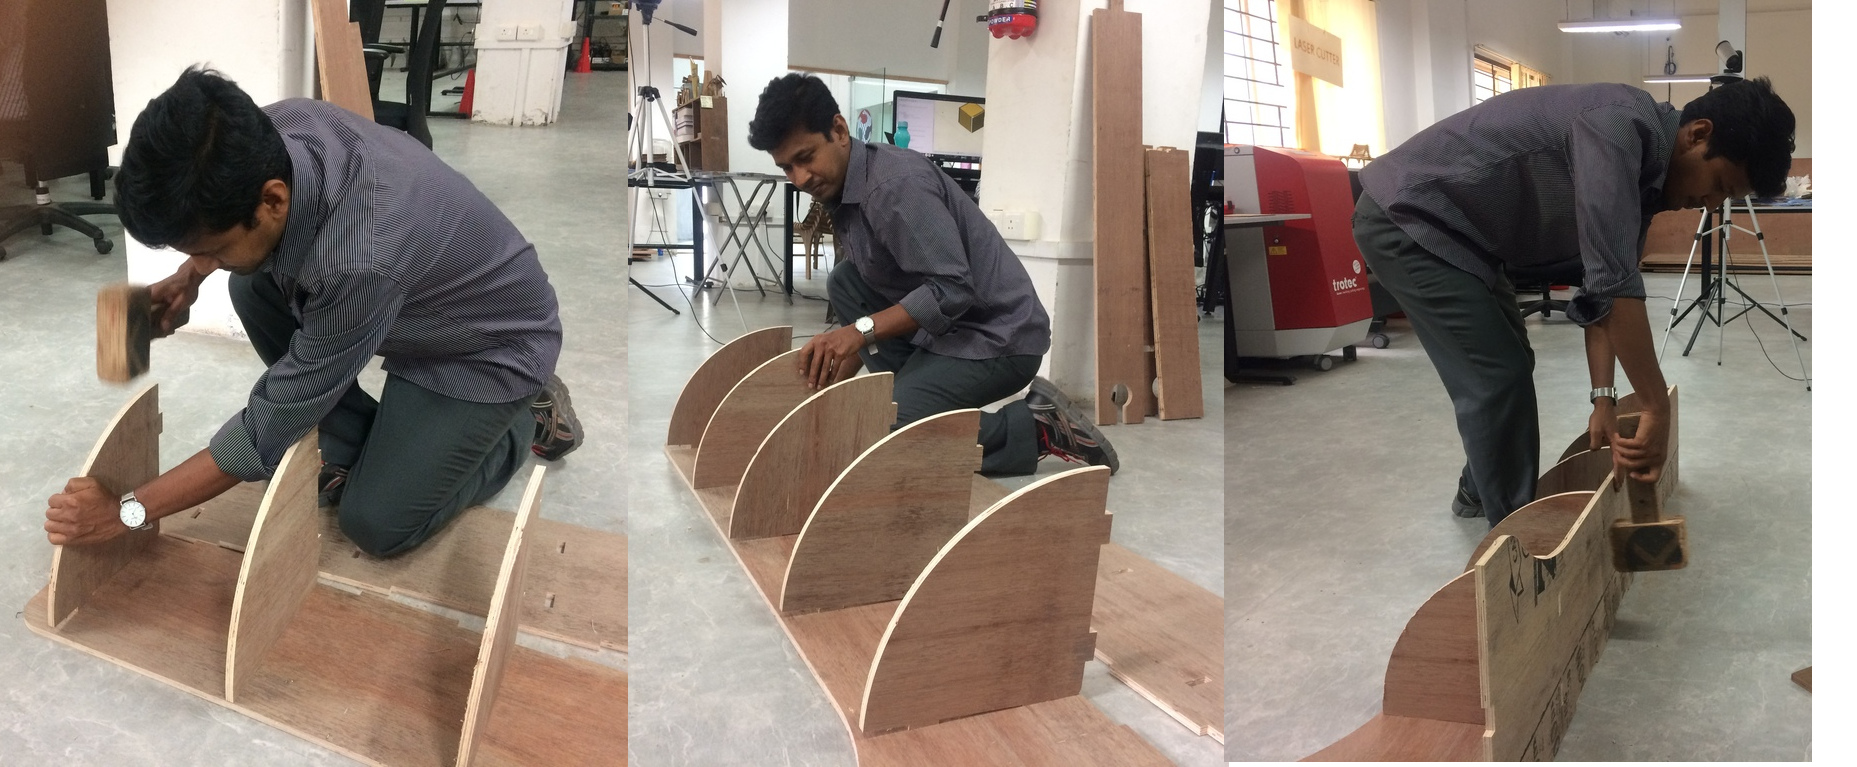
ordinary machines. I have designed a corner shelf and the same to be machined using ShopBot CNC 3 axis milling machine.
The designing has been done in autocad. The height of the stand is nearly 160 cm and the stand have five racks.
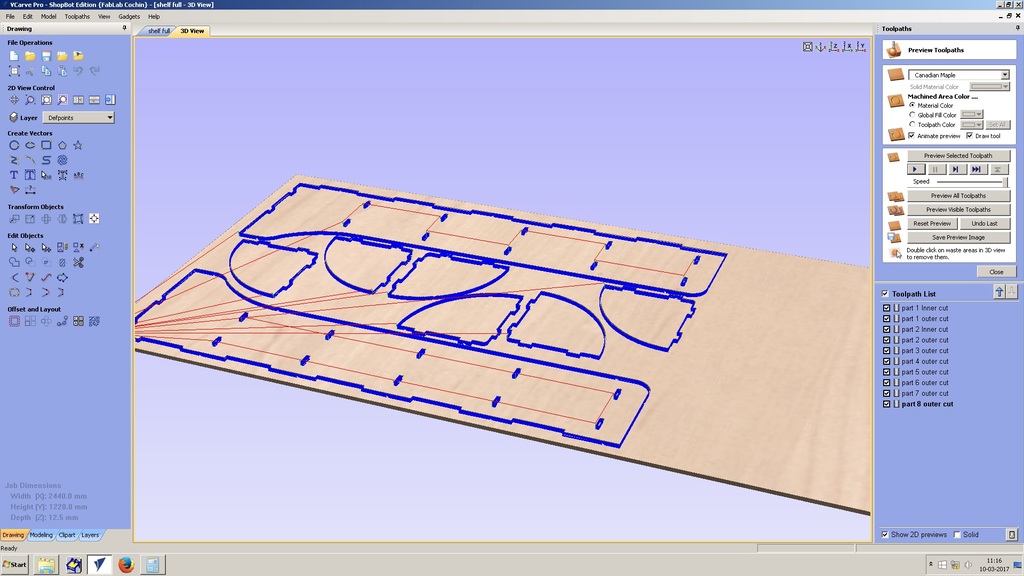
Shopbot file (gcode) can be created using Vcarv software. VCarve Pro and VCarve Desktop provide a powerful but intuitive software solution for cutting parts on a CNC Router.
The software can import 2D designs from other programs but also provides a full set of drawing and editing tools.
The design file for corner stand can be downloaded here.
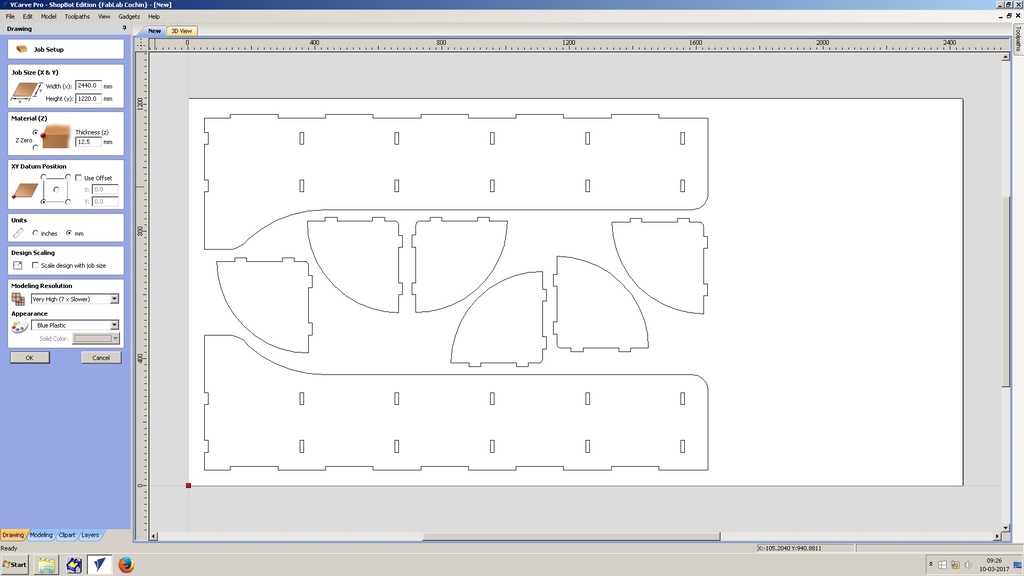
Step1:- Setting bed size
The normal bed size for shopbot prsalpha 96-48 is 96"x48" width. we have designed in mm units and follow the same.
Set the bed size to 2440x1220 mm. Set the plywood thickness to 12mm Select a XY datum position Select Units (in mm), click ok.
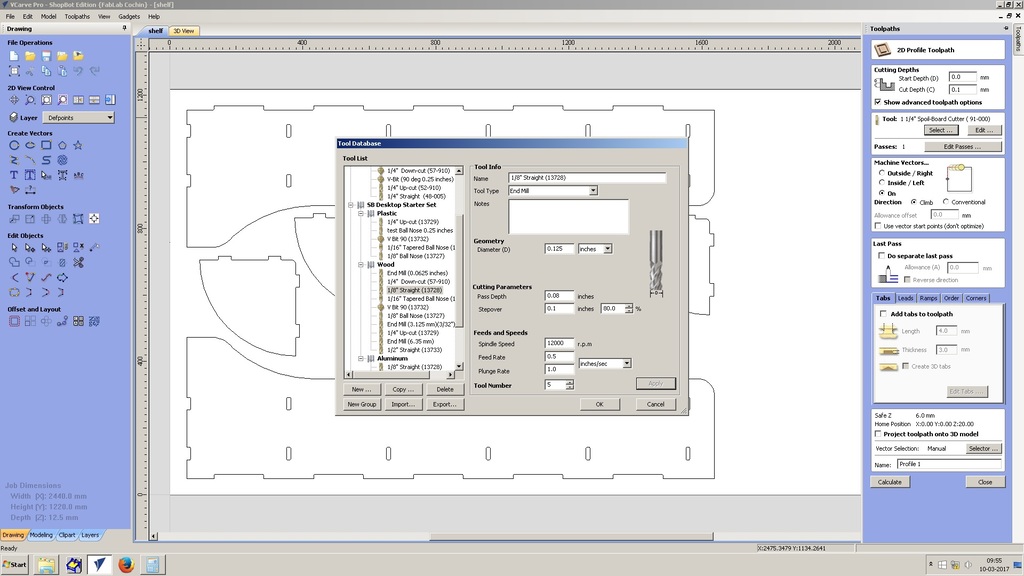
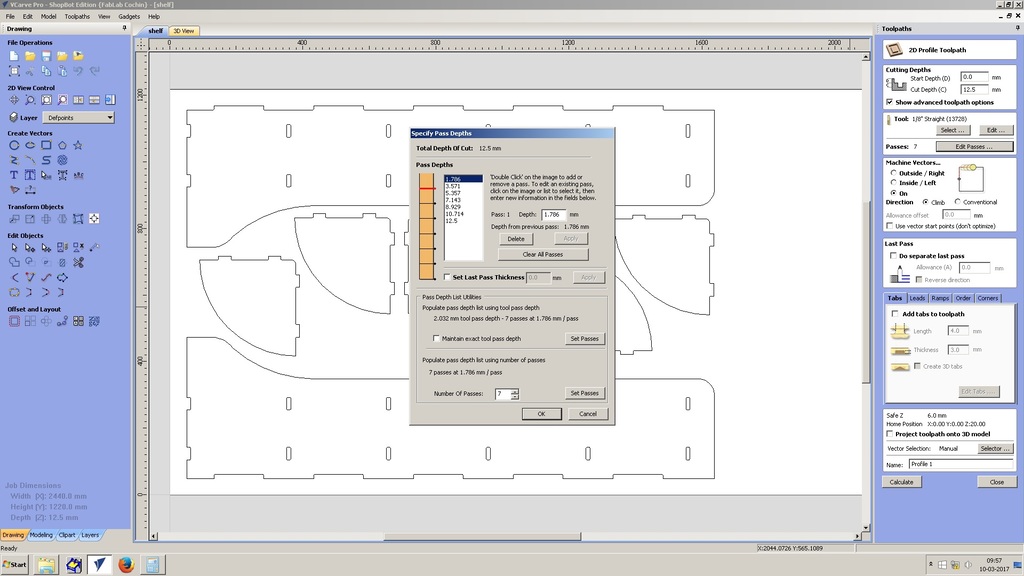
Step2:- Tool path settings
Open the sketch and align to the required bed position. Sketch should be a closed figure, or else
you can be manually join each line by slecting join by line option.
The cut depth can be controlled by giving the thickess at location Start depth and cut depth place holder.
Select the tool, I have opted 1/8" tool. Check the diameter, feed rate and depth of cut. generally,
chip load: ~ 0.001-0.010" = feed rate (inches per minute) / (RPM x number of flutes)
cut depth: ~ tool diameter
step-over: ~ tool diameter/2
The number of passes can be set here, pass depends upon the tool feed and speed and material type. For the current tool (1/8 inch, for wood cutting), each pass is set to 3 mm depth.
Select the machining side by clicking inside cut/outside cut according to the requirement. All pockets to be removed are given an inside cut and the figure outline is given an outside cut.
Tabs:- Tabs are given to prevent the material (plywood) from being torn apart while printing.
Click calculate.
Setting tool
The selected tool need to be fixed into the tool head. Select the collect for 1/8" tool diameter, tight the collect head then (give an average torque only)
. Make sure you have provided enough grip for the shank to take the cutting load. After setting the tool, move the tool to zero point and set X any Y to zero.
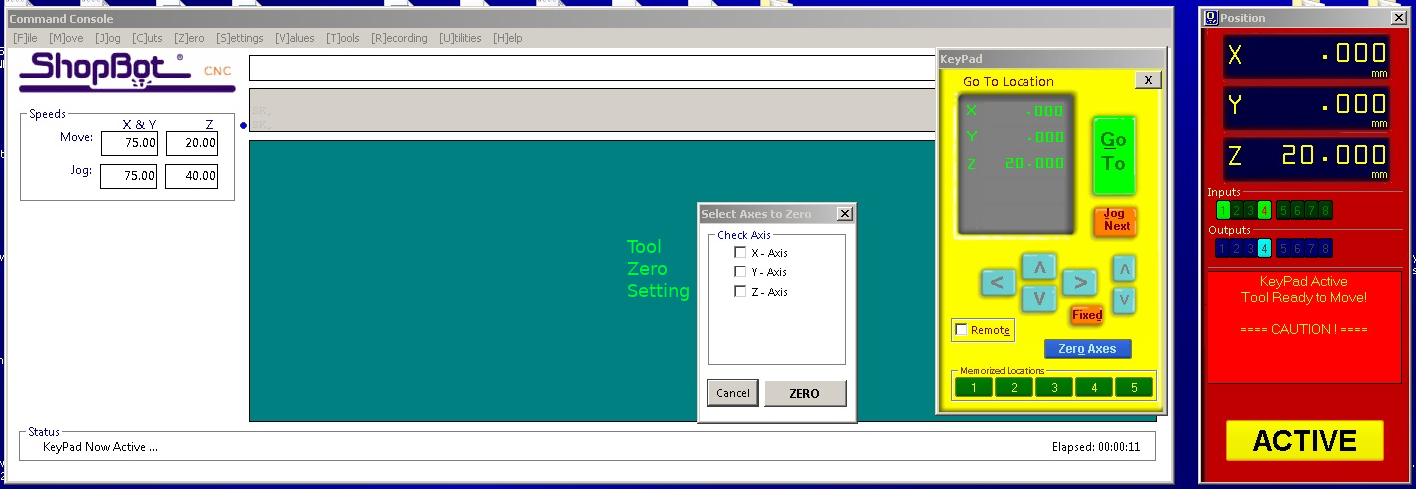
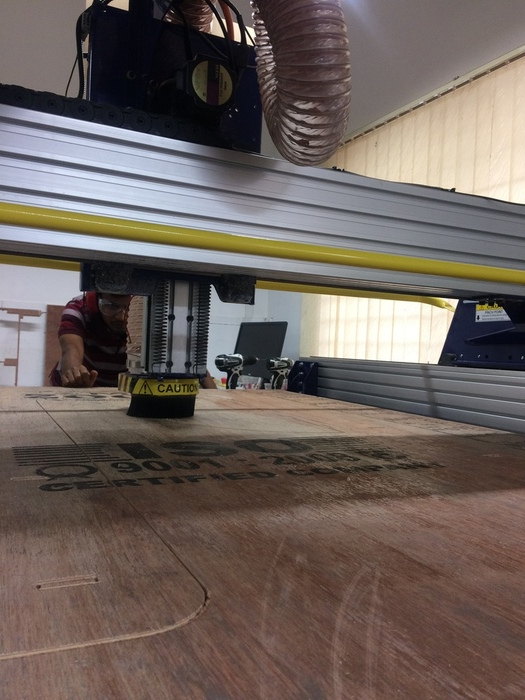
setting z height
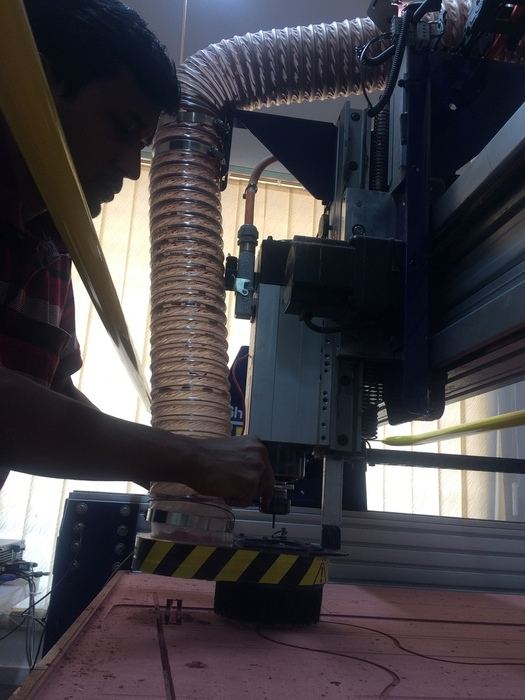
The z height is set to zero using alligator clip and zero plate.
The alligator clip is connected with the tool as shown below.
The zero plate is set below the tool and click the zero setting program. Once after the tool makes contact with the zeroplate twice, remove the clip from tool and put it back along with the zero plate.