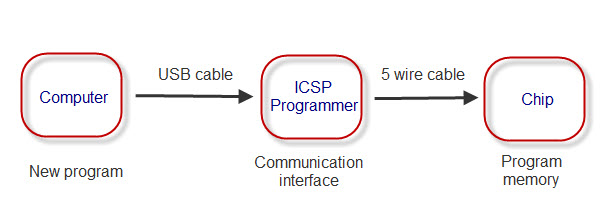
This week, I am going to make FAb IAP programmer. This ISP includes a few extra features such as a target power led and switch, a reset button and a led on the SCK line to indicate communication in progress. In-system programming (ISP), also called In-Circuit Serial Programming (ICSP). This device helps us to program a device while installed in a complete system, rather than requiring the chip to be programmed prior to installing it into the system.
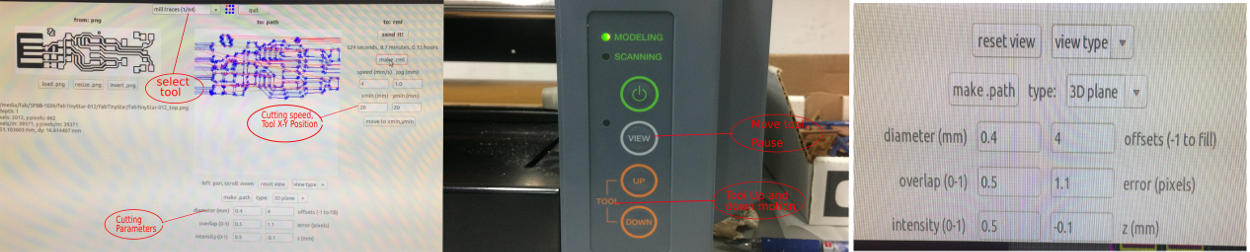
The PCB for ISP programmer can be machined using Modela MDX-20 3D Milling Machine. The Modela is an easy to use desktop milling machine, making it ideal for the rapid prototyping of product designs. In the FabLab, this is used for the milling of custom circuit boards, jewellery making and the production of moulds. The Modela can be used on wood, mdf, modeling wax, plaster and copper clad boards.
There are neumerous PCB designing softwares like Allegro, Altium, Board station, CADstar, CR-5000, Eagle, Expeditions, Freeware, OrCAD, NI Ultiboard, Pads, PCAD, Protel, Proteus. Since autodesk acquires eagle software, we are slowely switching to KiCAD software. The input required for modella miling machine is png file. A few software can directly export schematics to png format. The PCB for FabISP is shown below and the same can be downloaded here.

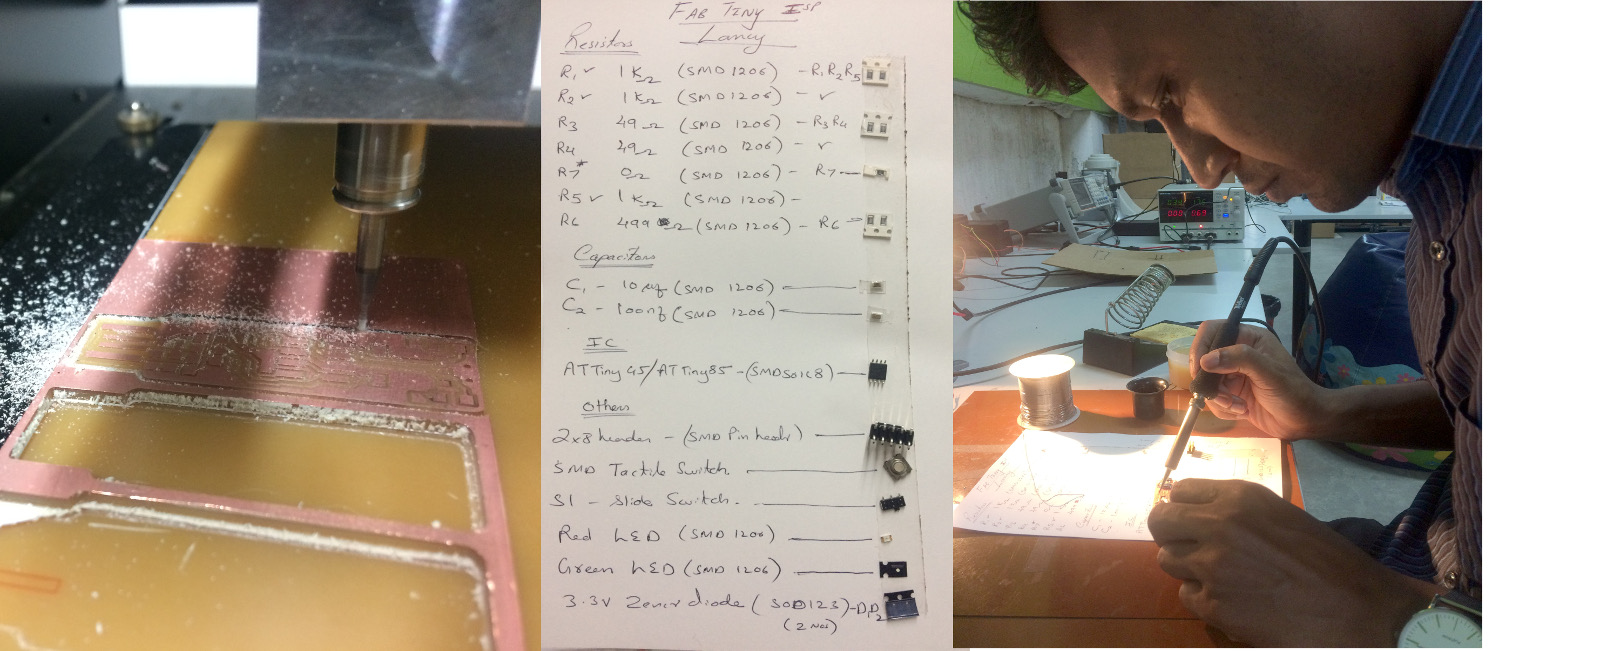
Once after milling process, PCB surface is wiped. If required Isopropyl alcohol can be used. The components for ISP is listed down. The standard soldering temperature is 700F, however
650F is found to be adequate for the eutectic mixture.
We can programm a chip using different tools. The ATtiny45 chip need to be flashed inorder to work as ISP. The simplest method I opted is to programm the chip using arduino. We do have a arduino uno board. I have used Atmega328 chip and it have got superior properties over Atmega8 here in this project. The FabISP can be connected to arduino uno board using FRC cable (6 wires), and its corresponding pins are shown below.
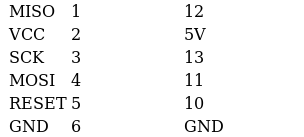
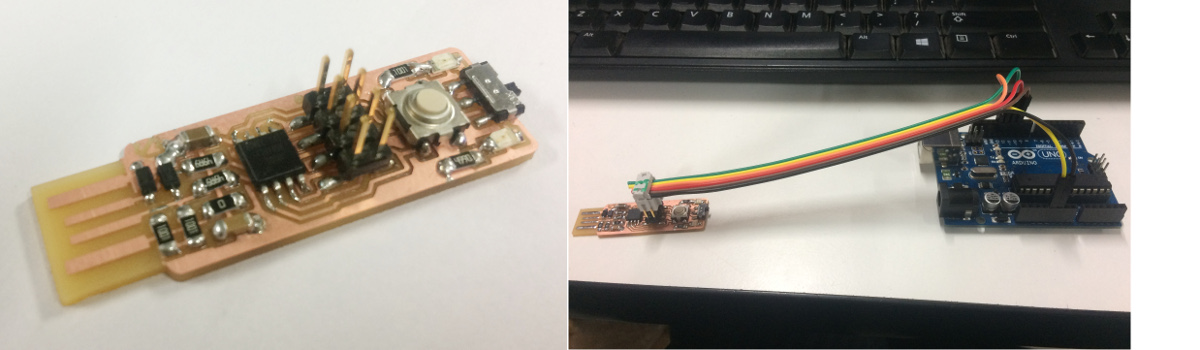
Arduino Uno board contain an ISP and ATMEGA chip. AtMEGA chip offers input output terminals. An FRC cable is connected between ATtiny45 and arduino pins. Arduino Uno board is connected to computer and run the Arduino IDE program.
Now the program is uploaded to ATMEGA chip in arduino uno board. The blinking LED's indicate the program is being flashed. If the program return an error "permission denied", then open a terminal window and enter the command as follows. This command will give permission for the same device. This command should be executed each time the device is plugged in or else you should add udev rules in linux which will get executed automatically each time when the system boots. You can close arduino IDE program if required. If you disconnect your board accidently, make sure its the same device (ttyACM0) when you reconnect or else give the command according to the device name.
sudo chmod a+rw /dev/ttyACM0
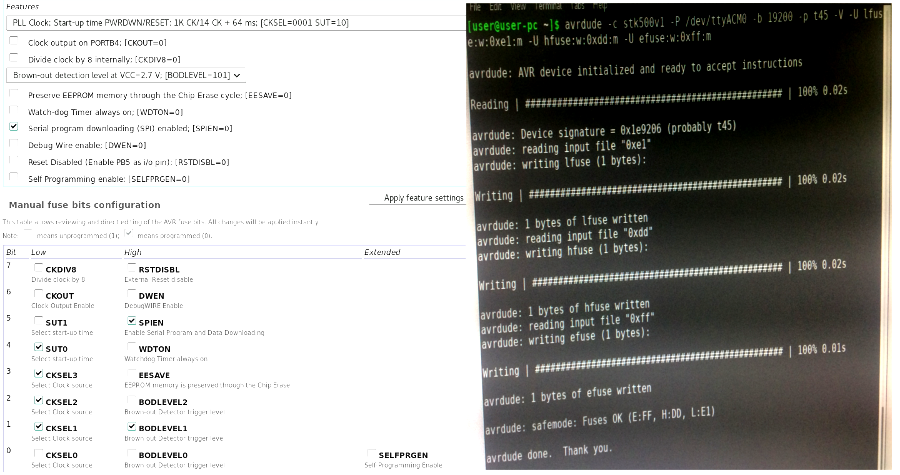
The next task is burning fuses in ATtiny45 chip. The fuses determine how the chip will act, whether it has a bootloader, what speed and voltage it likes to run at, etc. The fuses given in the below comand is hexadecimal representation. (lfuse:w:0xe1:m hfuse:w:0xdd:m efuse:w:0xff:m). This hexadecimal representation is elobrated in the left picture below and the command for burning fuses is shown below.
avrdude -c stk500v1 -P /dev/ttyACM0 -b 19200 -p t45 -V -U lfuse:w:0xe1:m -U hfuse:w:0xdd:m -U efuse:w:0xff:m
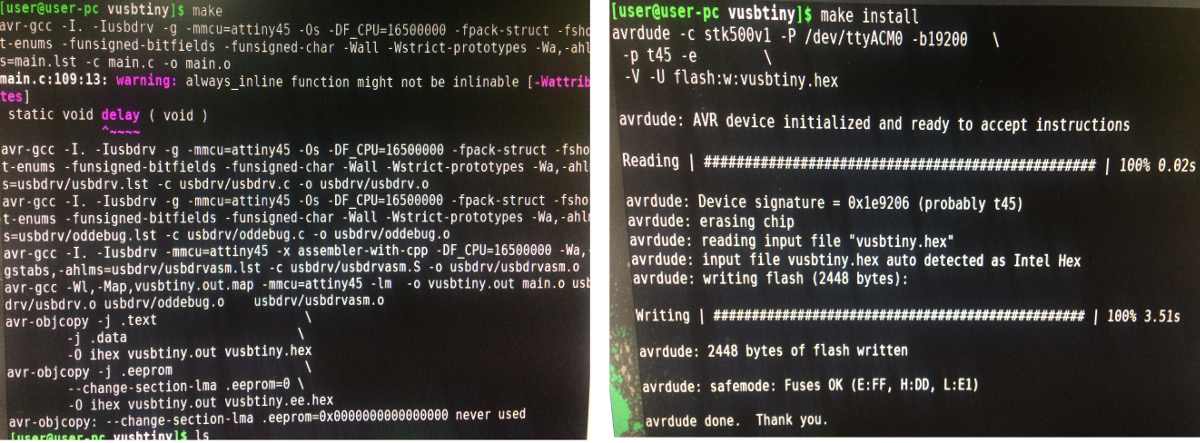
The program for ISP needed to be compiled and installed. 'Make' and 'make install' commands are used for this purpose. A makefile is a file containing a set of directives used with the make build automation tool. Each compilation produces an object file corresponding to the source file, this source file is installed using "make install" command. The commands 'make' and 'make install' is shown below. This command to be run from the same folder where files are copied. The files for compiling can be downloaded here.
    make clean
    make distclean
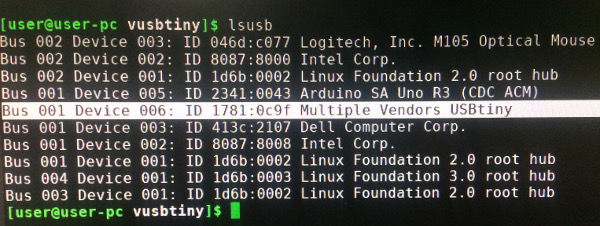
Once after loading, the ATiny44 can be disconnected from arduino uno. Now plug it on USB. Open terminal window and enter 'lsusb' and look for the device ID 1781:0c9f - USBtiny. If USBtiny is detected, then ATtiny45 is working as ISP.
lsusb
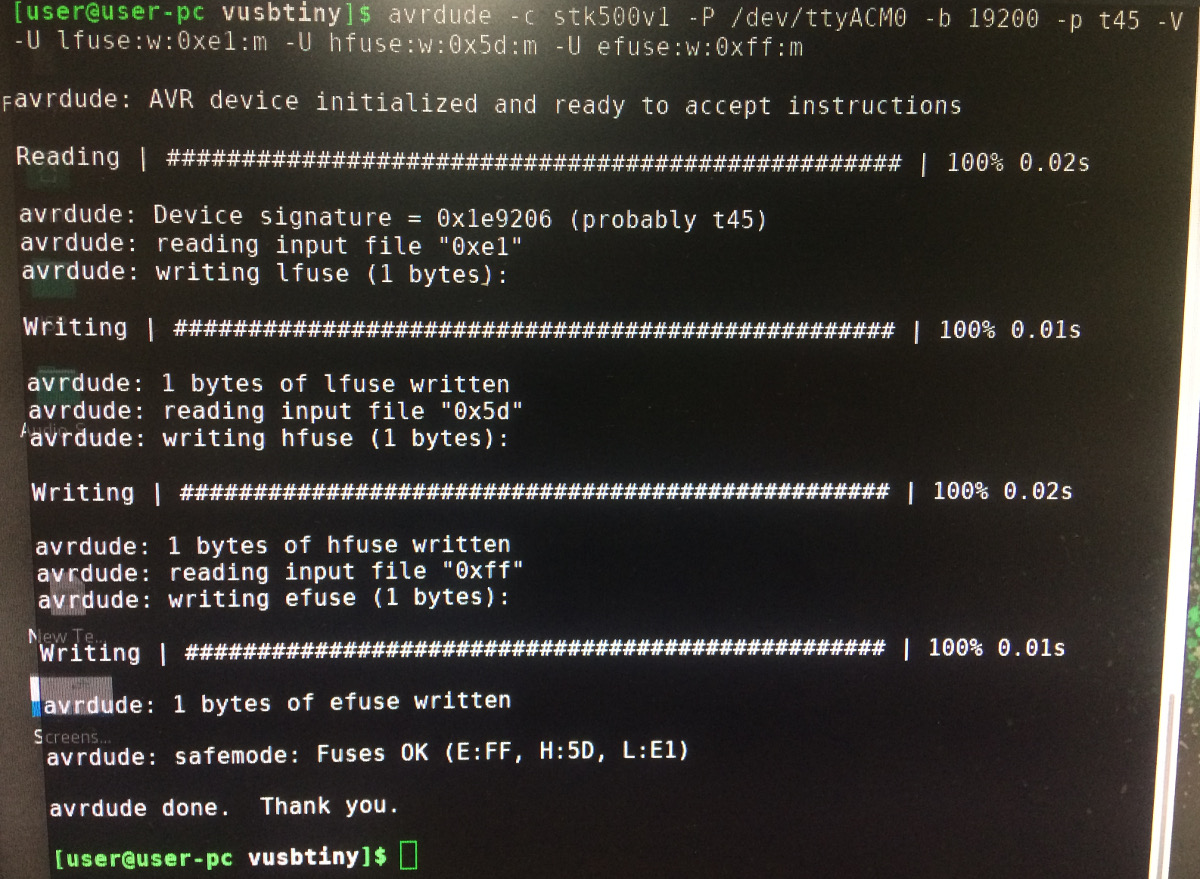
The next step is Blowing the reset-disable fuse. Make sure everything is working properly before taking this final step. Enter the below command on a terminal window.
avrdude -c tk500v1 -P /dev/ttyACM0 -b 19200 -p t45 -V -U lfuse:w:0xe1:m -U hfuse:w:0x5d:m -U efuse:w:0xff:m