This week assigment was molding and casting. My first plan was to create a small bench vise since its not available at lab. This require multiple layer mold (technically cope and drag) and special bolt and nut (grade 10) which is not available with us too. Finally, I planned to make a small cannon, wihich can be realised with a simple mould without much effort.
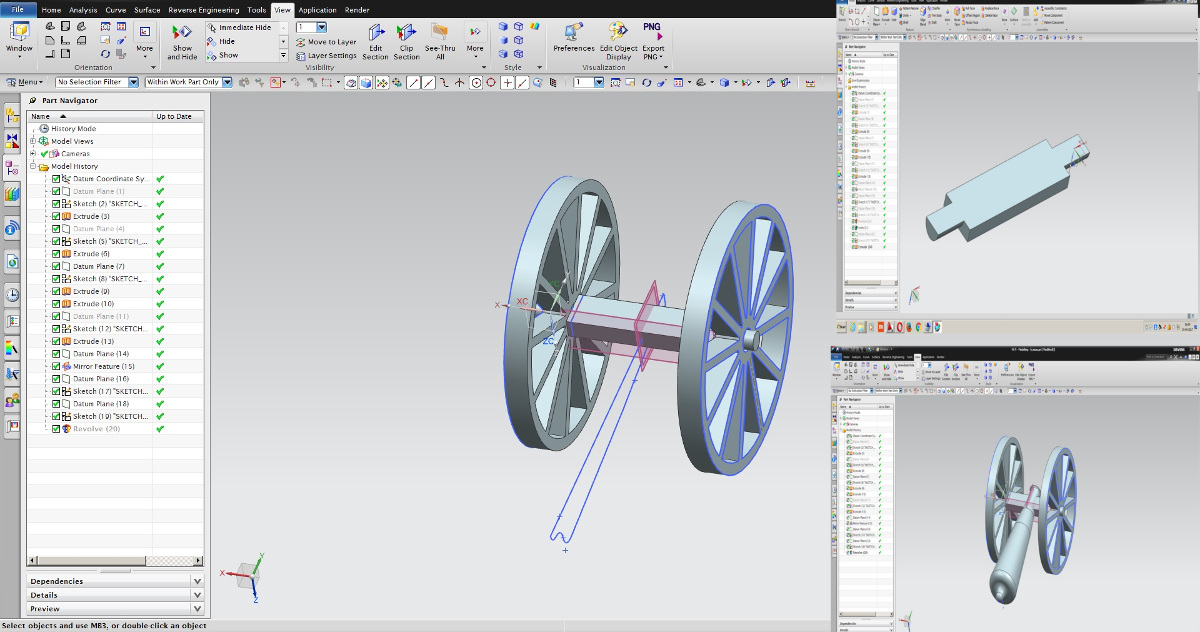
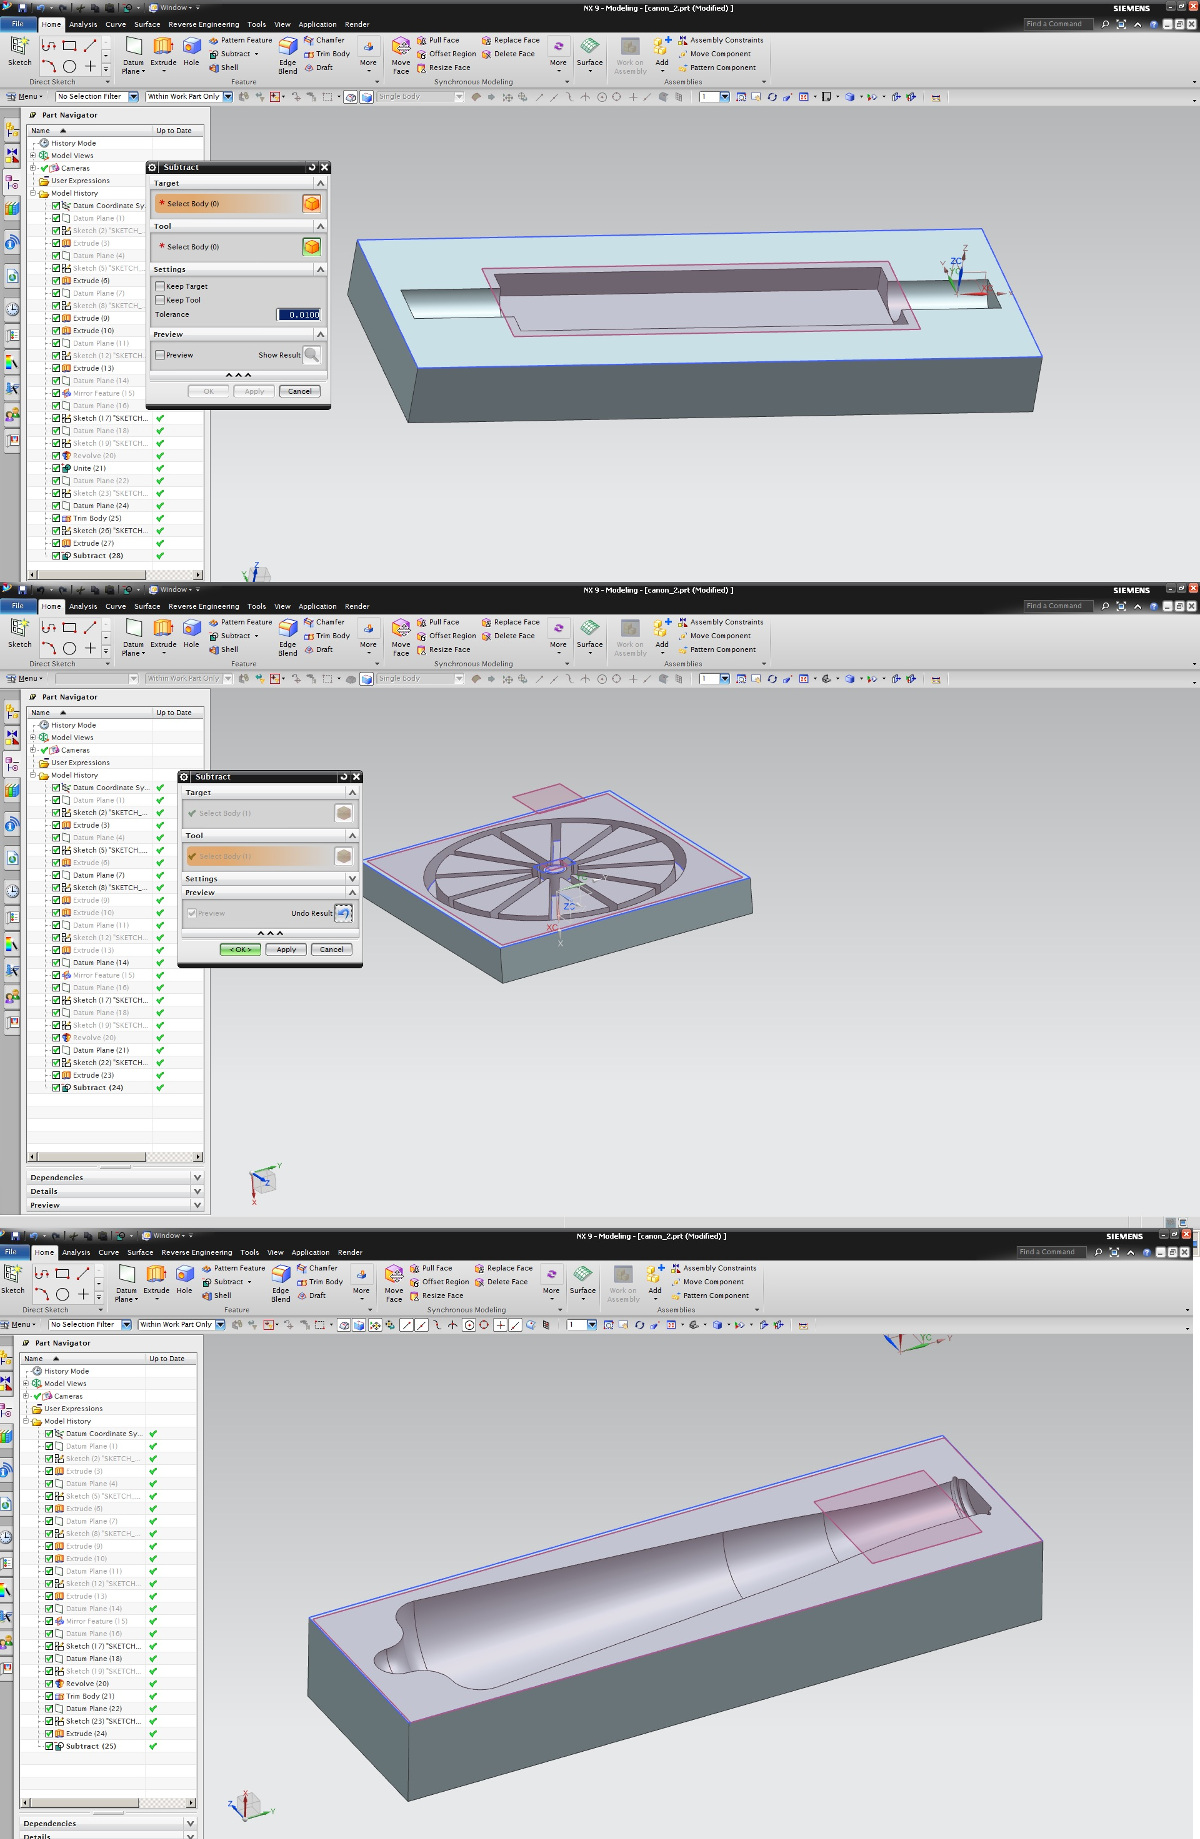
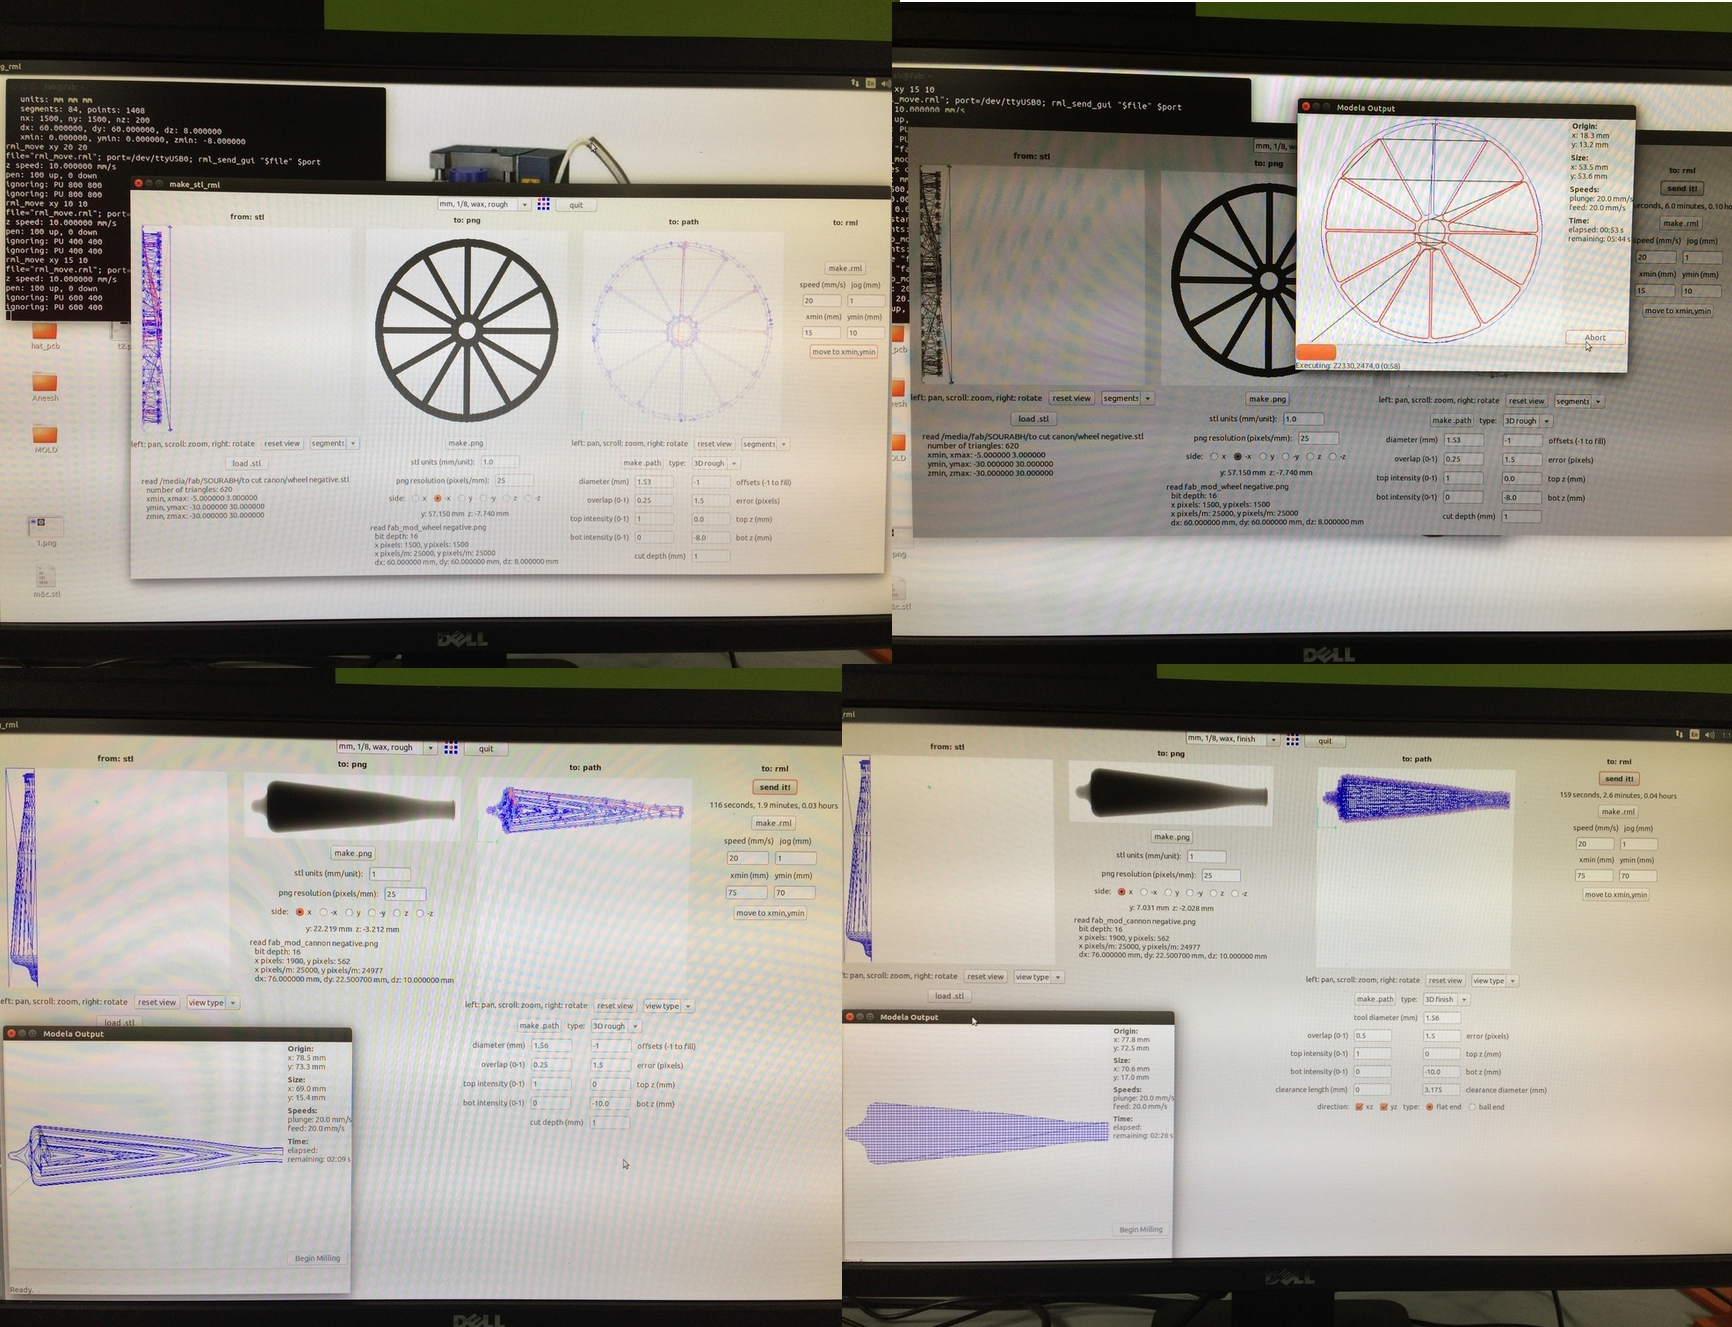
I started designing the canon part in NX software. After 3D modeling, different boolean operation were implemented to achieve the negative parts (3 parts). The corresponding figures are given below. The design files and its 3D model stl files can be downloaded here.
I have used scrap material for making the pattern. This is wax material, hence the tool load will be very less for the miling machine and can be finished in shorter time.
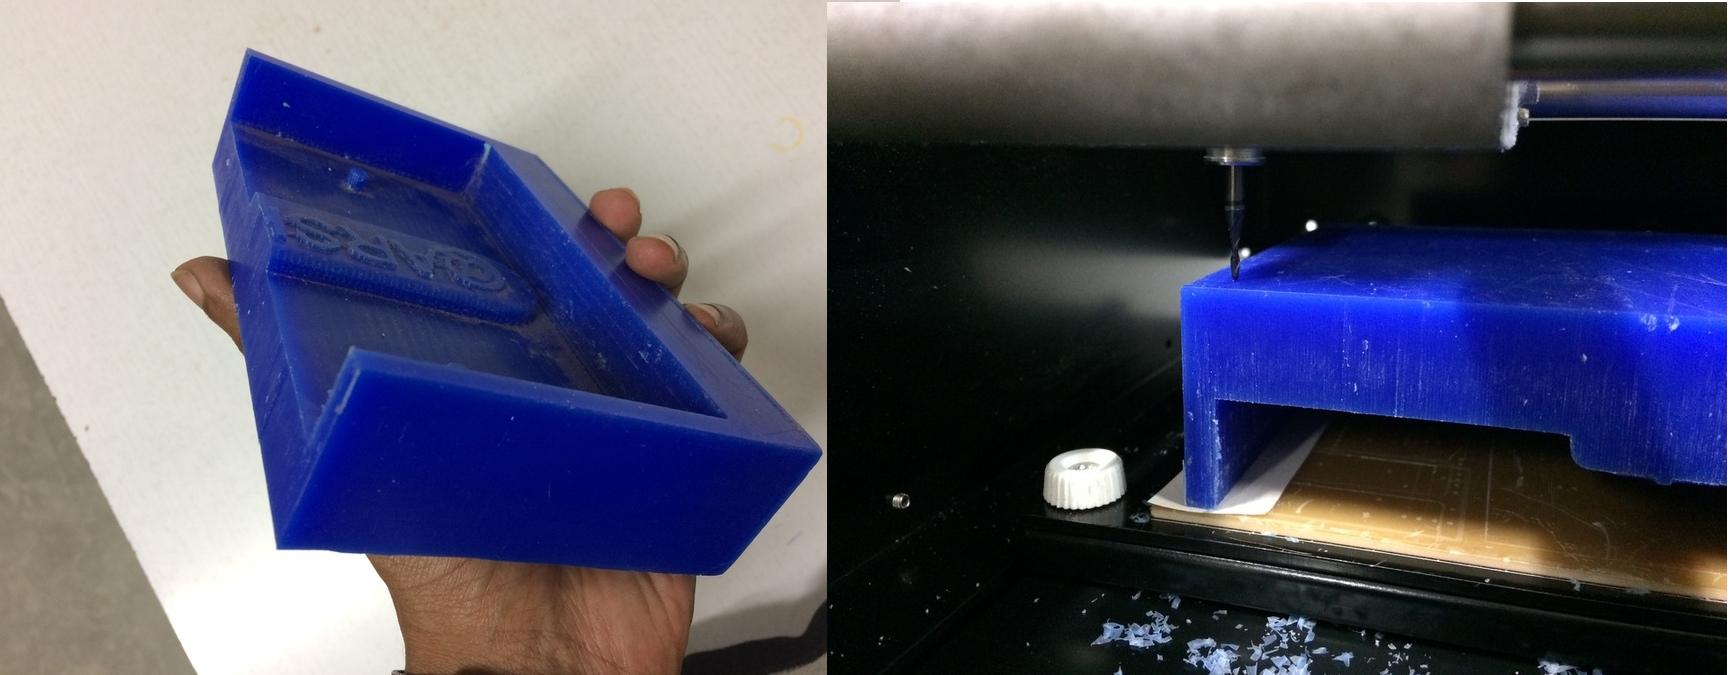
Open the fabmodule in terminal window and open the stl file. You can select the view type by changing the side by clicking x,y or z. Select the appropriate top view and select the milling bit size. Make sure, you milling bit have enough flute length to take away the material. I have selected 1/16" milling bit. Select rough cutting and enter 1.53 at the diameter location. You may select -1 for the fill. Select the starting x and y points for the wax pattern. Start milling process. The corresponding figures of the wheel and barrel is shown below. Once after completing the rough cutting, you may select the finish cutting operation. The tool path generated for the finish cutting will be different as compared to rough cutting. You may see several horizontal and vertical tool path for the finish cutting.
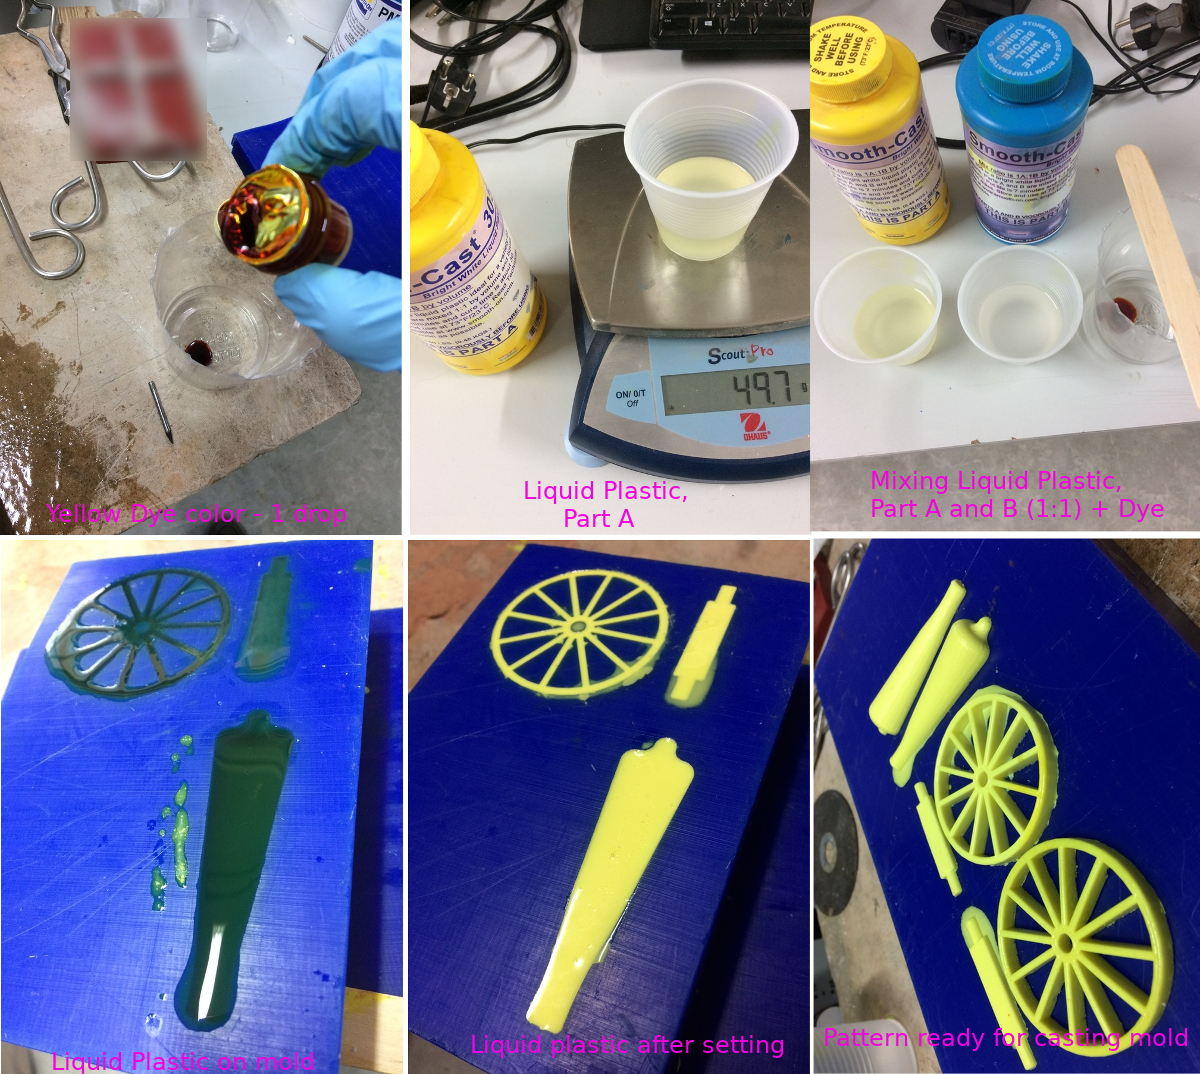
A pattern is the replica of true model. The pattern and true model are almost equal dimension. I have selected Yellow color dye for the pattern. A single drop is enough for the current pattern. Liquid pastic is used to creating the mold. I have used Liquid plastic (smooth cast 303, part A and part B). This is white in color and have a pot life of 7 minutes. The cure time is about 30 minutes depending upon mass. Part A and Part B is mixed in 1:1 ratio along with the dye. Around 50g each is mixed. My first pattern doesn't solidify properly, Later i understood that the solutions should be throughly mixed, or else the plastic wont solidify properly, therby loosing its mechanical properties. My second patterns came out with perfect shape. While removing the patern, I realised that, some draft allowance along with runner is necessary for perfection and remove the pattern ease. Finally some how I managed to remove the pattern from mold. This pattern is used to create the mould for casting purpose.
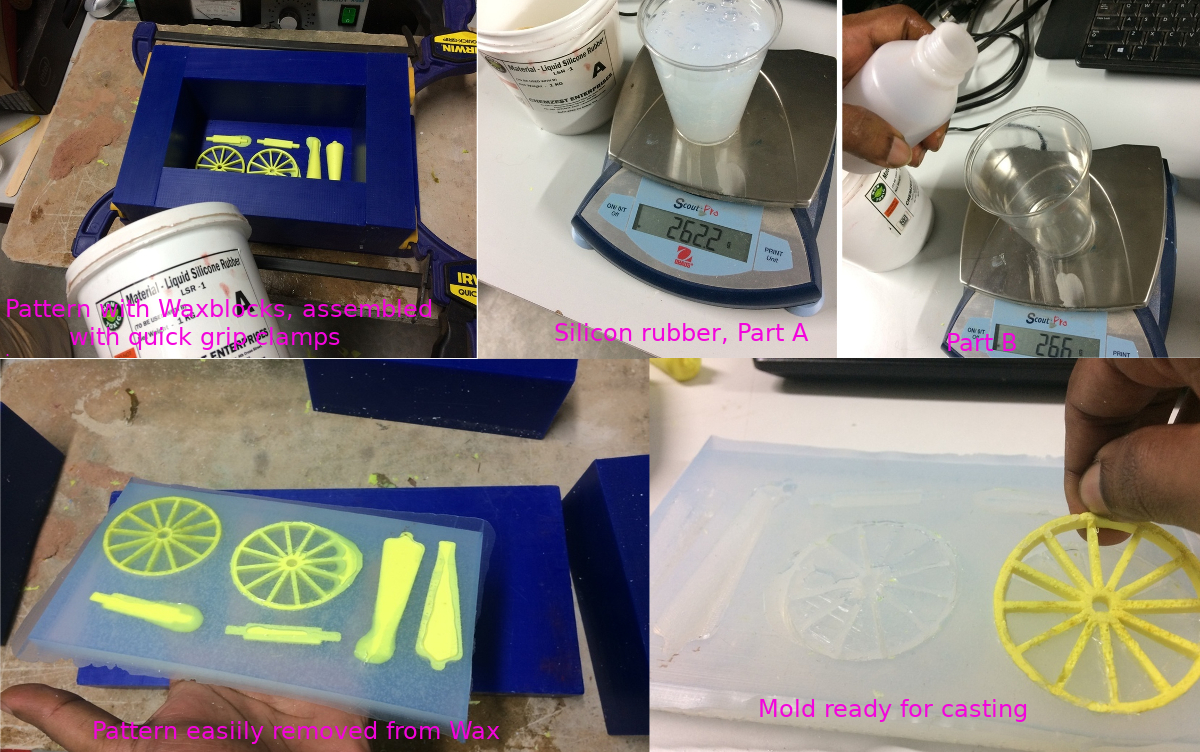
We have placed the pattern on a flat surface (wax block). Usually the wax pattern is carved to hold the mould while pouring. Here in our case, the viscosity of the silicon rubber is high. So, I decided to skip the carving operation (saved one wax block and machining hours :-) and used the same wax blocks along with quick grip clamps together to replicate a rectangular cup shape for holding the silicon rubber solution. I have used around 260g of silicon rubber Part-A solution and 26g Part-B solution (ratio 10:1). This mold will serve for casting purpose only, hence I skipped adding the dye. The sloutions has to be mixed throughly, because of the high viscosity, agitation is so hard. The below video depicts a simple solution for the same. The solution is poured and kept for 24 hrs. After 24 hrs, I have removed the quick grip and the mold is easily removed. Each patterns is removed by hand. This can be assembled together since its almost same as final part.
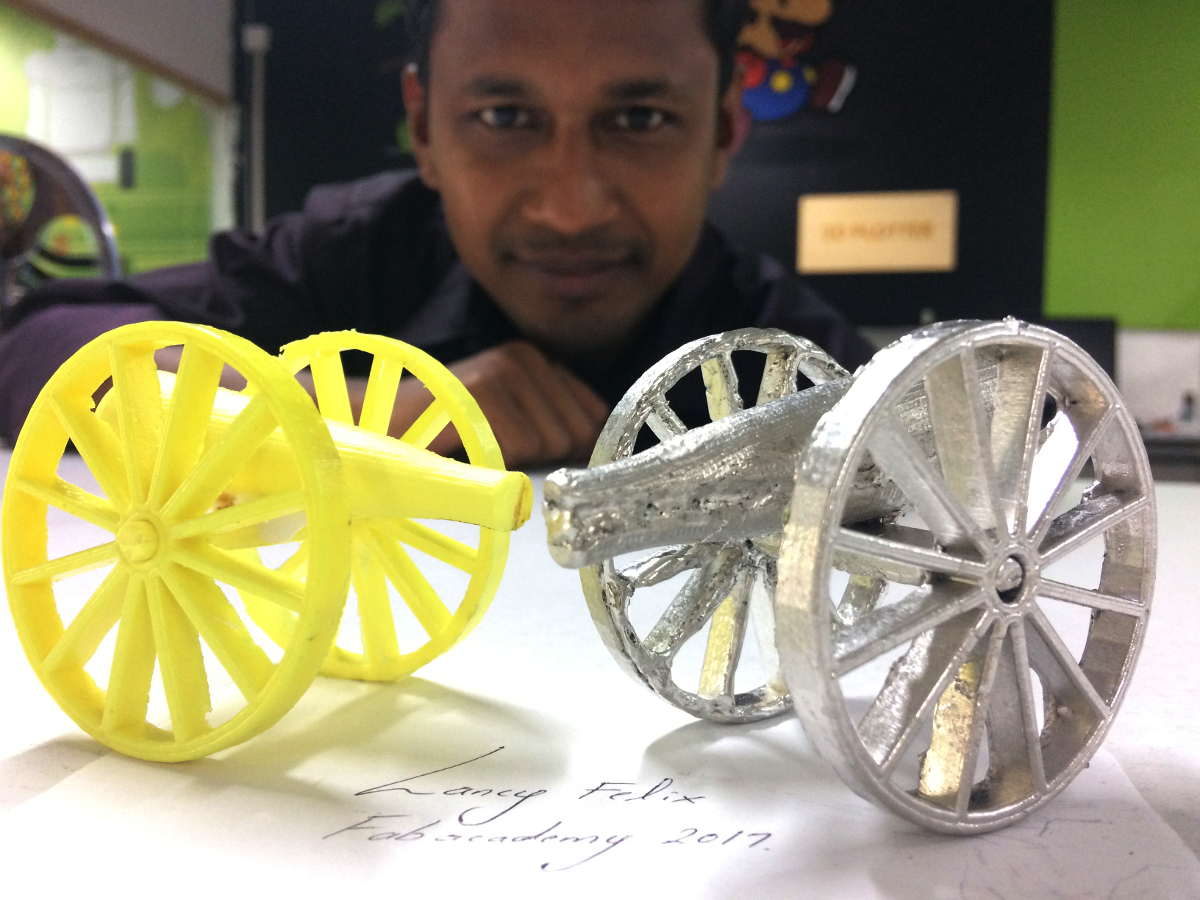
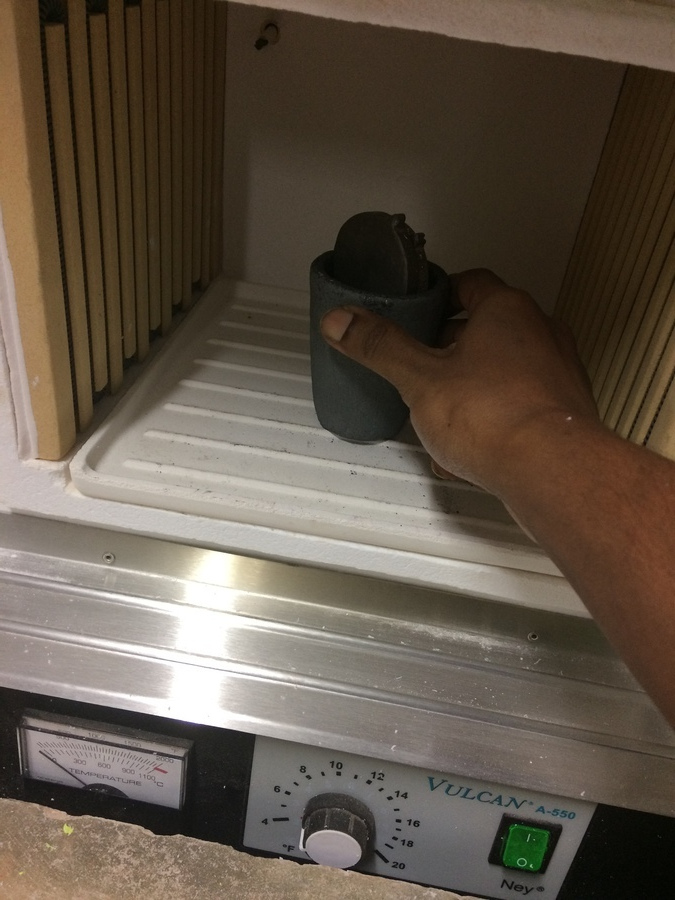
A low melting alloy (Bismuth) is used for cast. Bismuth is a soft, silvery metal with a bright, shiny surface. Its melting point is 271°C and its boiling point is 1,560°C, which make it an ideal for lab applications. Collected a few scrap pieces of bismuth alloys and kept it in furnace and raised its temperature above its melting point. After melting with the help to tools, I have carefully taken out and poured it in the mold. I forget to take photos for the same while pouring.
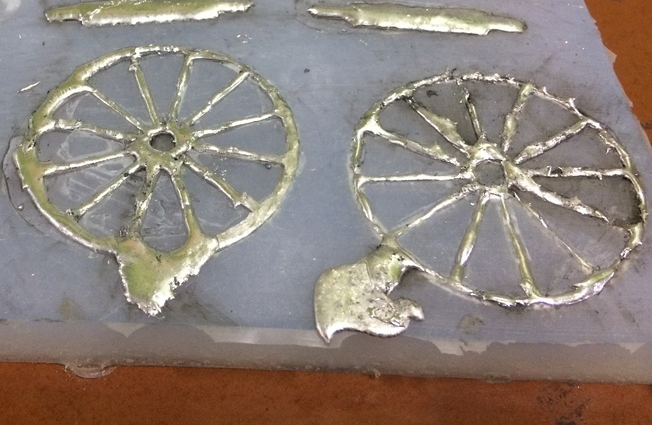
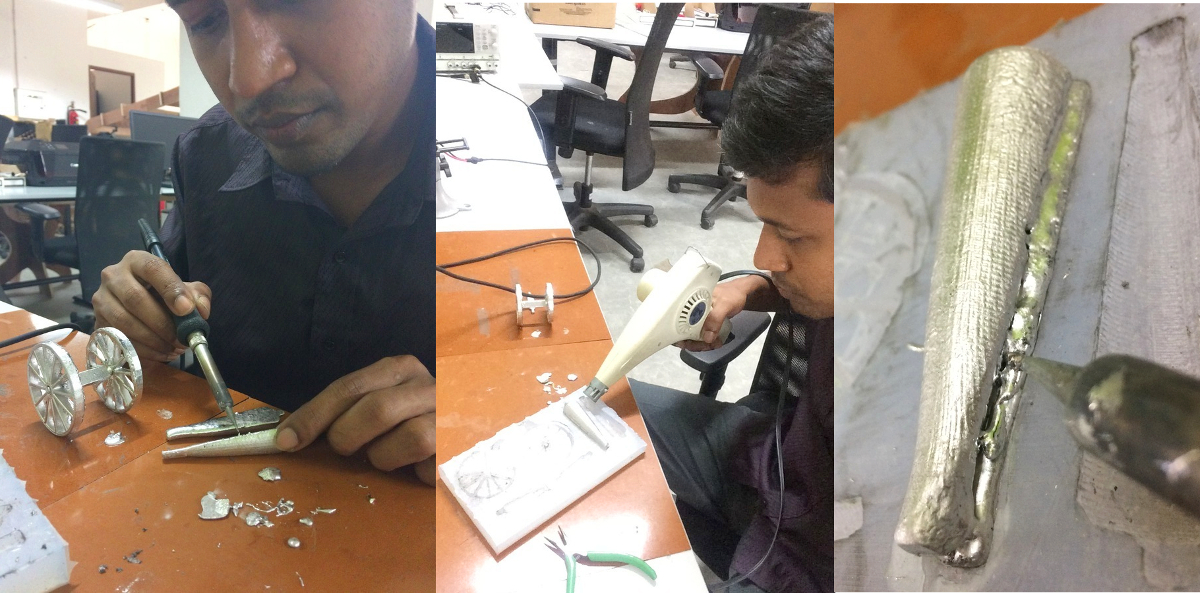
The cast part shape was very difficult to attain. There were poor metal flow, slag inclusions etc. This is because of the lack of draft allowance. I realised the importance of runner and riser while moulding. I planned to shape the cast using soldering iron, I set the temperature to high and resoldered the bismuth metal to attain a good shape.The two parts were soldered together (using butt welding technique). Before soldering, the parts have been preheated using hot air gun. My previous experience in arc-welding really helped me to join the two parts with ease. Finally, the rough edges have been shaped using hot soldering tip and the surface finish by hot air gun.