
- This week's lecture : Lecture
- Fab Tutorial Link : Tutorials
- Fab Tool's List : Tools List
Assignments:
- make something big
What I did this week?
- Designed 3D image in Onshape
- Learned to use Shopbot machine
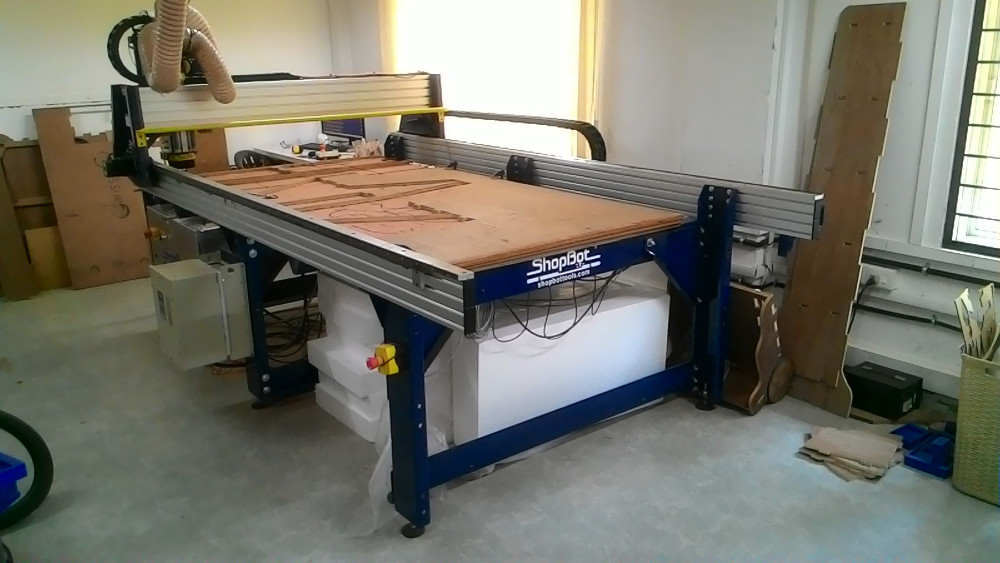
Our assignment for this week is to make something BIG using CNC machine. We have a large machine by ShopBot (with 8x4 bed size) and a small one, Modella MDX. Modella is used for PCB cutting and Shopbot is used for cutting plywood. This week, Pro.Neil had taught about various bits, cuts etc. We first tested a small piece using upcut bit, but finishing was not so good. So I decided to use downcut bit of size 1/4 inch.
What to build?
I was confused about what to build this week. 3D designing is still not that easy for me. So I do not want to make anything much complicated. I started searching internet for design inspirations. I found many interesting designs, But I was not confident :).
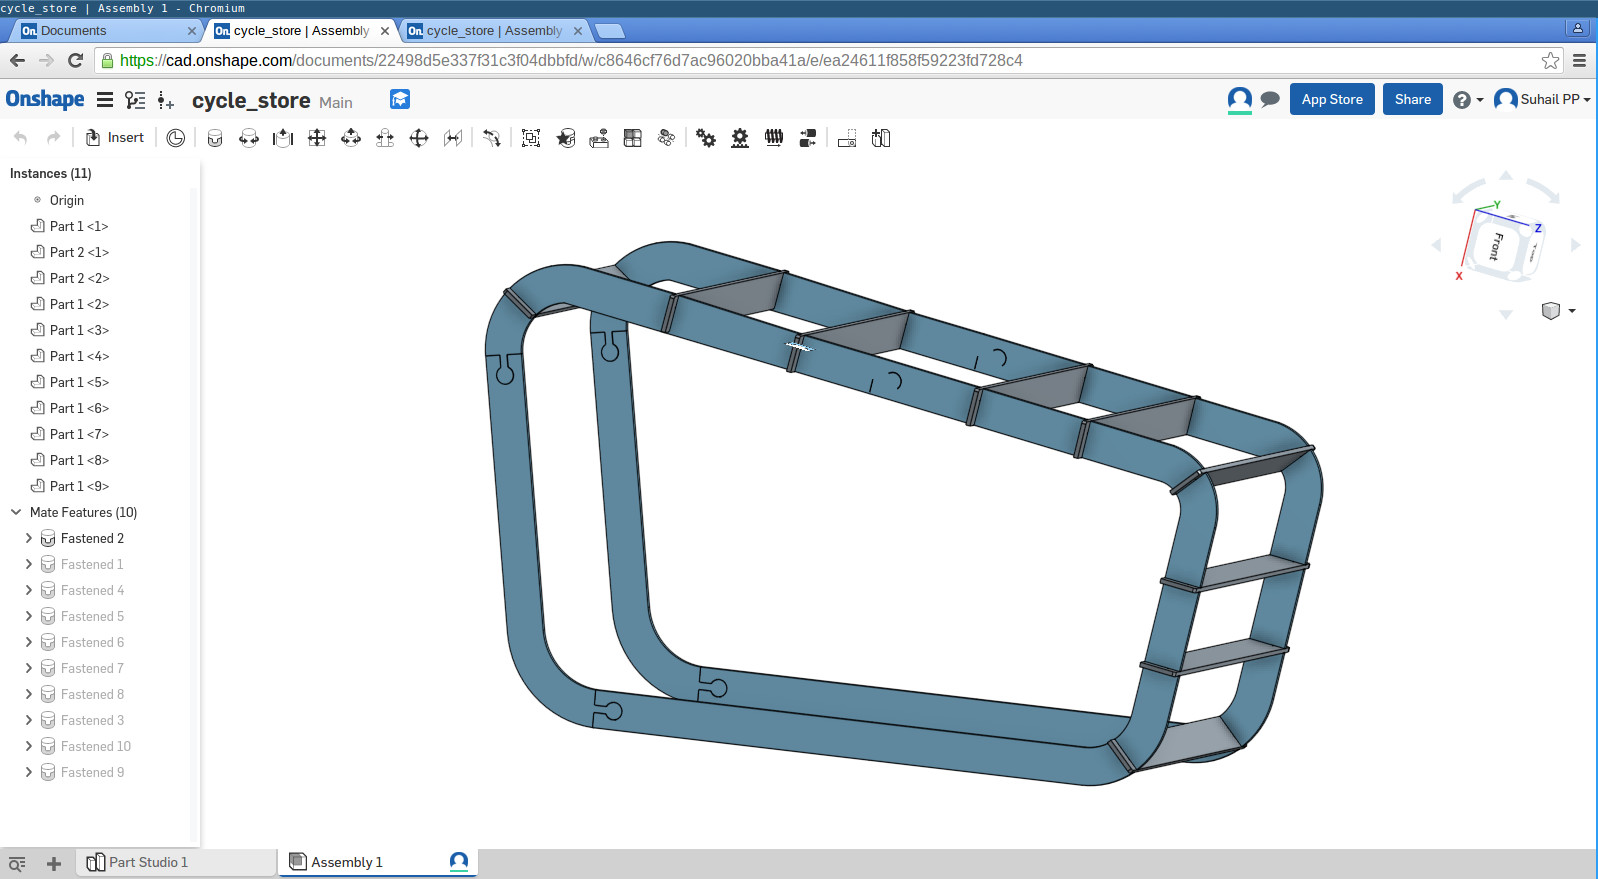
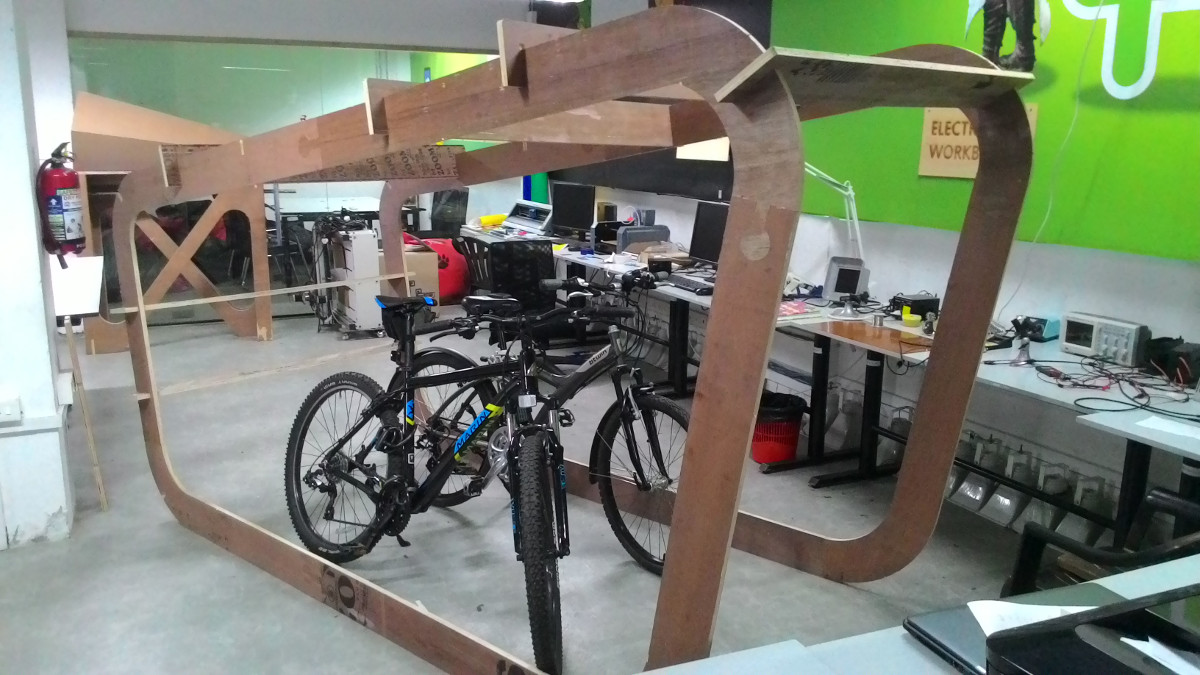
Atlast I decided to build a shed(skeleton only) for our bicycles. Me and my instructor use cycle here. I started sketching a rough design on paper.
Designing
I had used OpensCad for previous designs. I thought my current design would be difficult to do using openscad. So I decided to try Onshape. Our internet connection is not much reliable. So online tools like onshape are not suitable for us. But I decided to use it anyway, since I dont want to use other costly softwares.
I went through some tutorials provided by onshape. And I started designing.
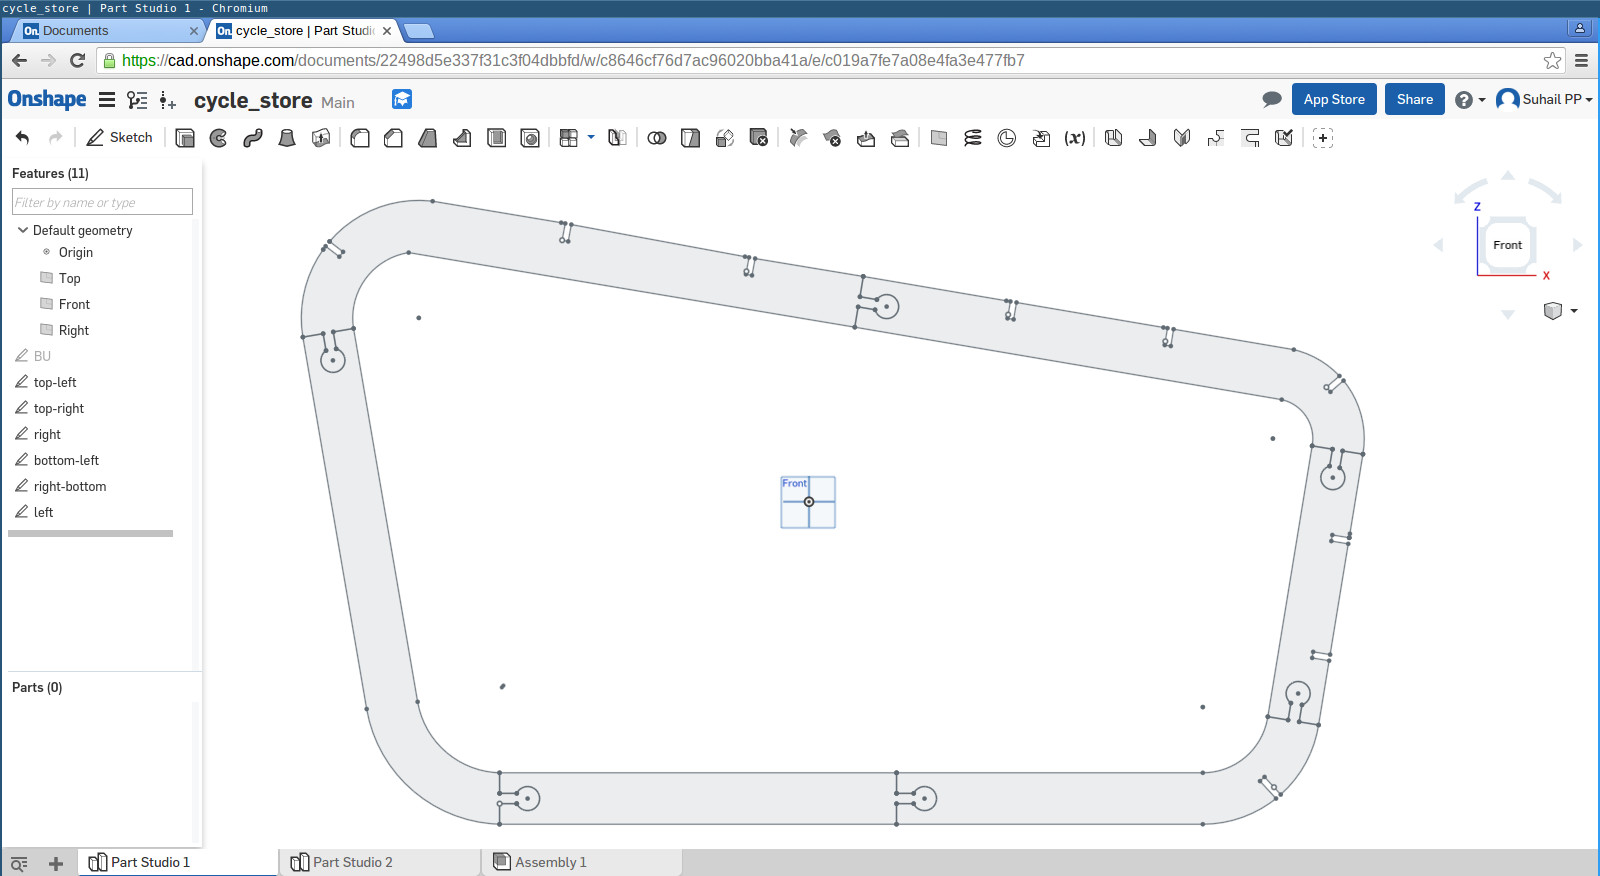
Initially I created a rough design. Here is a screenshot.

I am going to buid something larger than the size of plywood available here. So I cut it into four pieces. So there were 6 sketches in total.
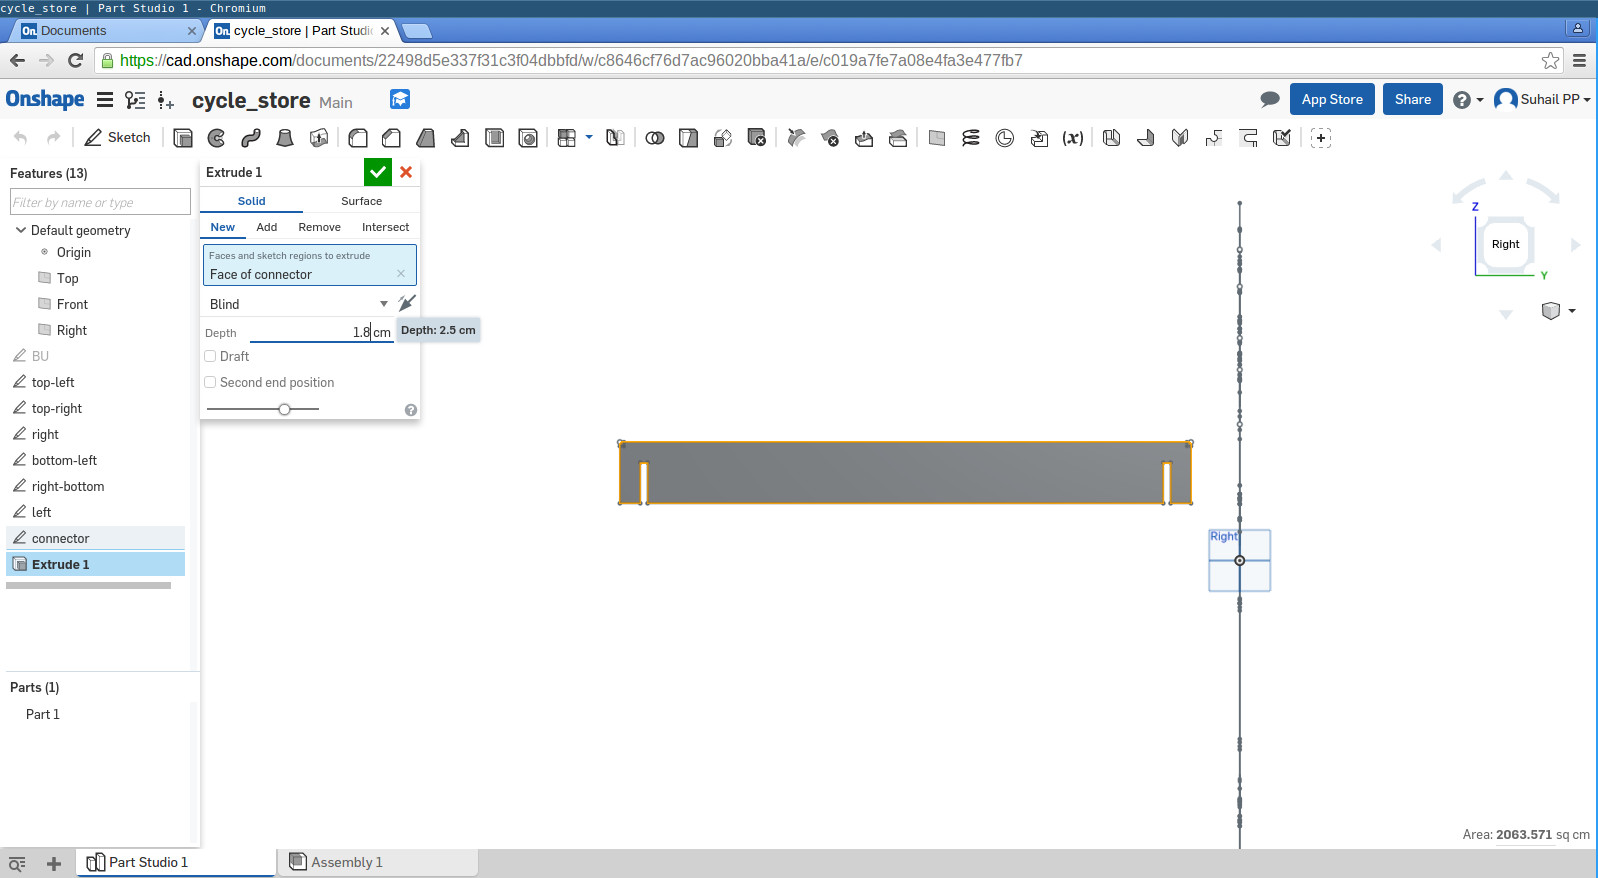
I created another sketch for item connecting left and right sides. Then I used extrusion tool to make the thickness same as that of the plywood(18mm). And I imported everything to assembly to check everything fits fine.
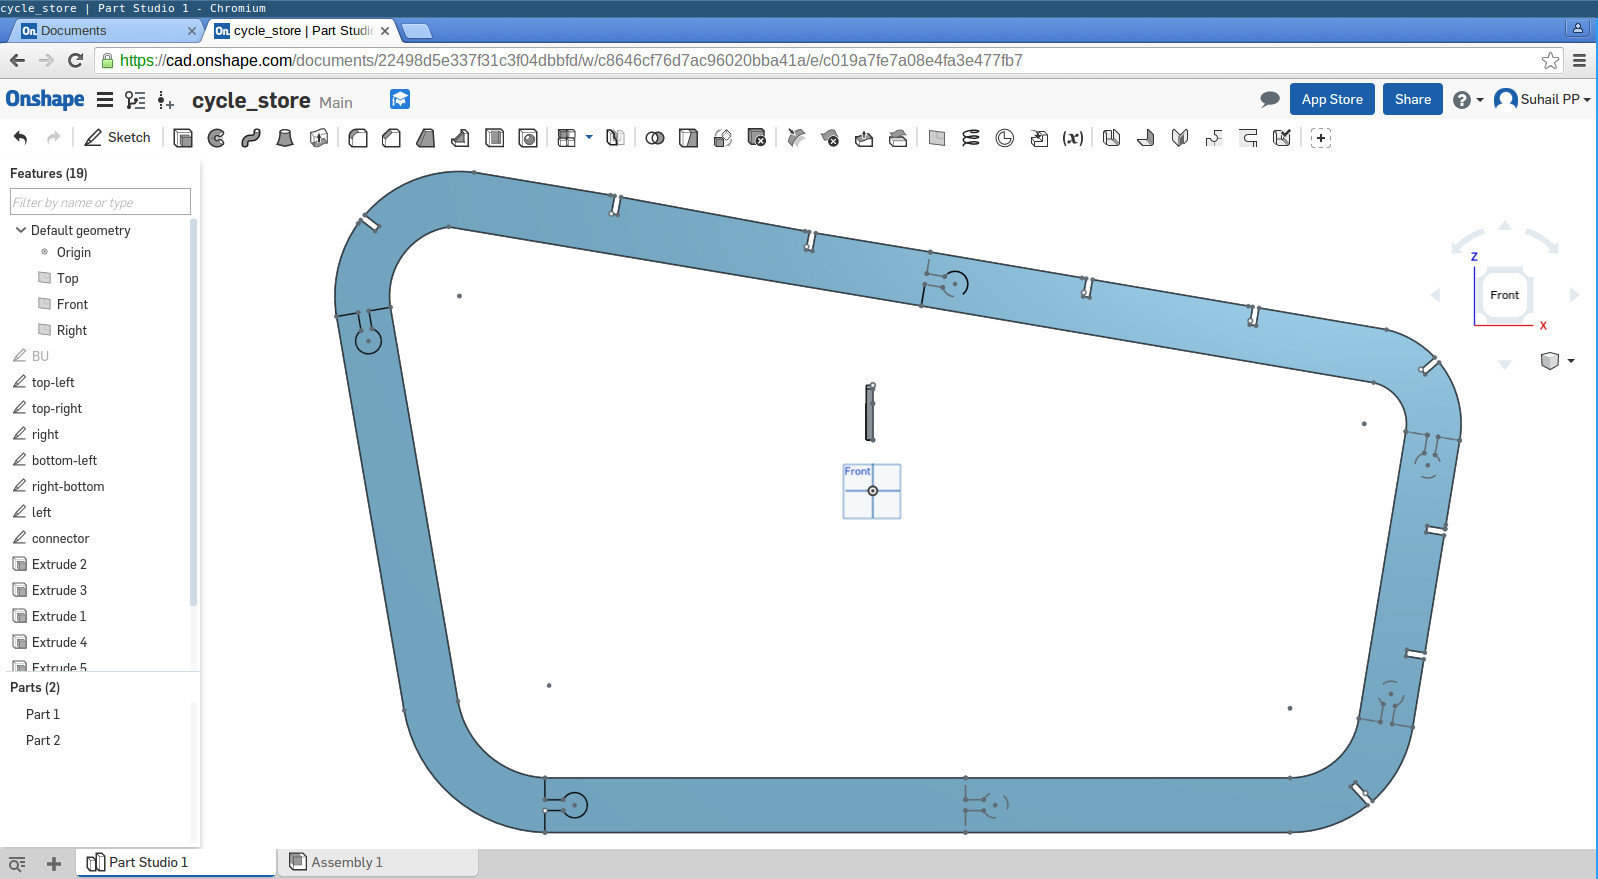
Here is the final assembly. I am planning to cover sides and top with transparent Tarpaulin sheets. My aim is to protect cycle from bad weather conditions. Design files are available at the bottom of the page.
3D file embedded using sketchfab is below.
Operating Shopbot
Guidelines to follow
- Wear eye protecting glasses and noise cancellation headset when the machine is operating
- Exhaust should be ON before start operation
- Never leave the machine unattended
- Quickly press emergency stop button in case something go wrong.
Operating ShopBot includes mainly two sections.
1. Generate required files using Vcarve Software
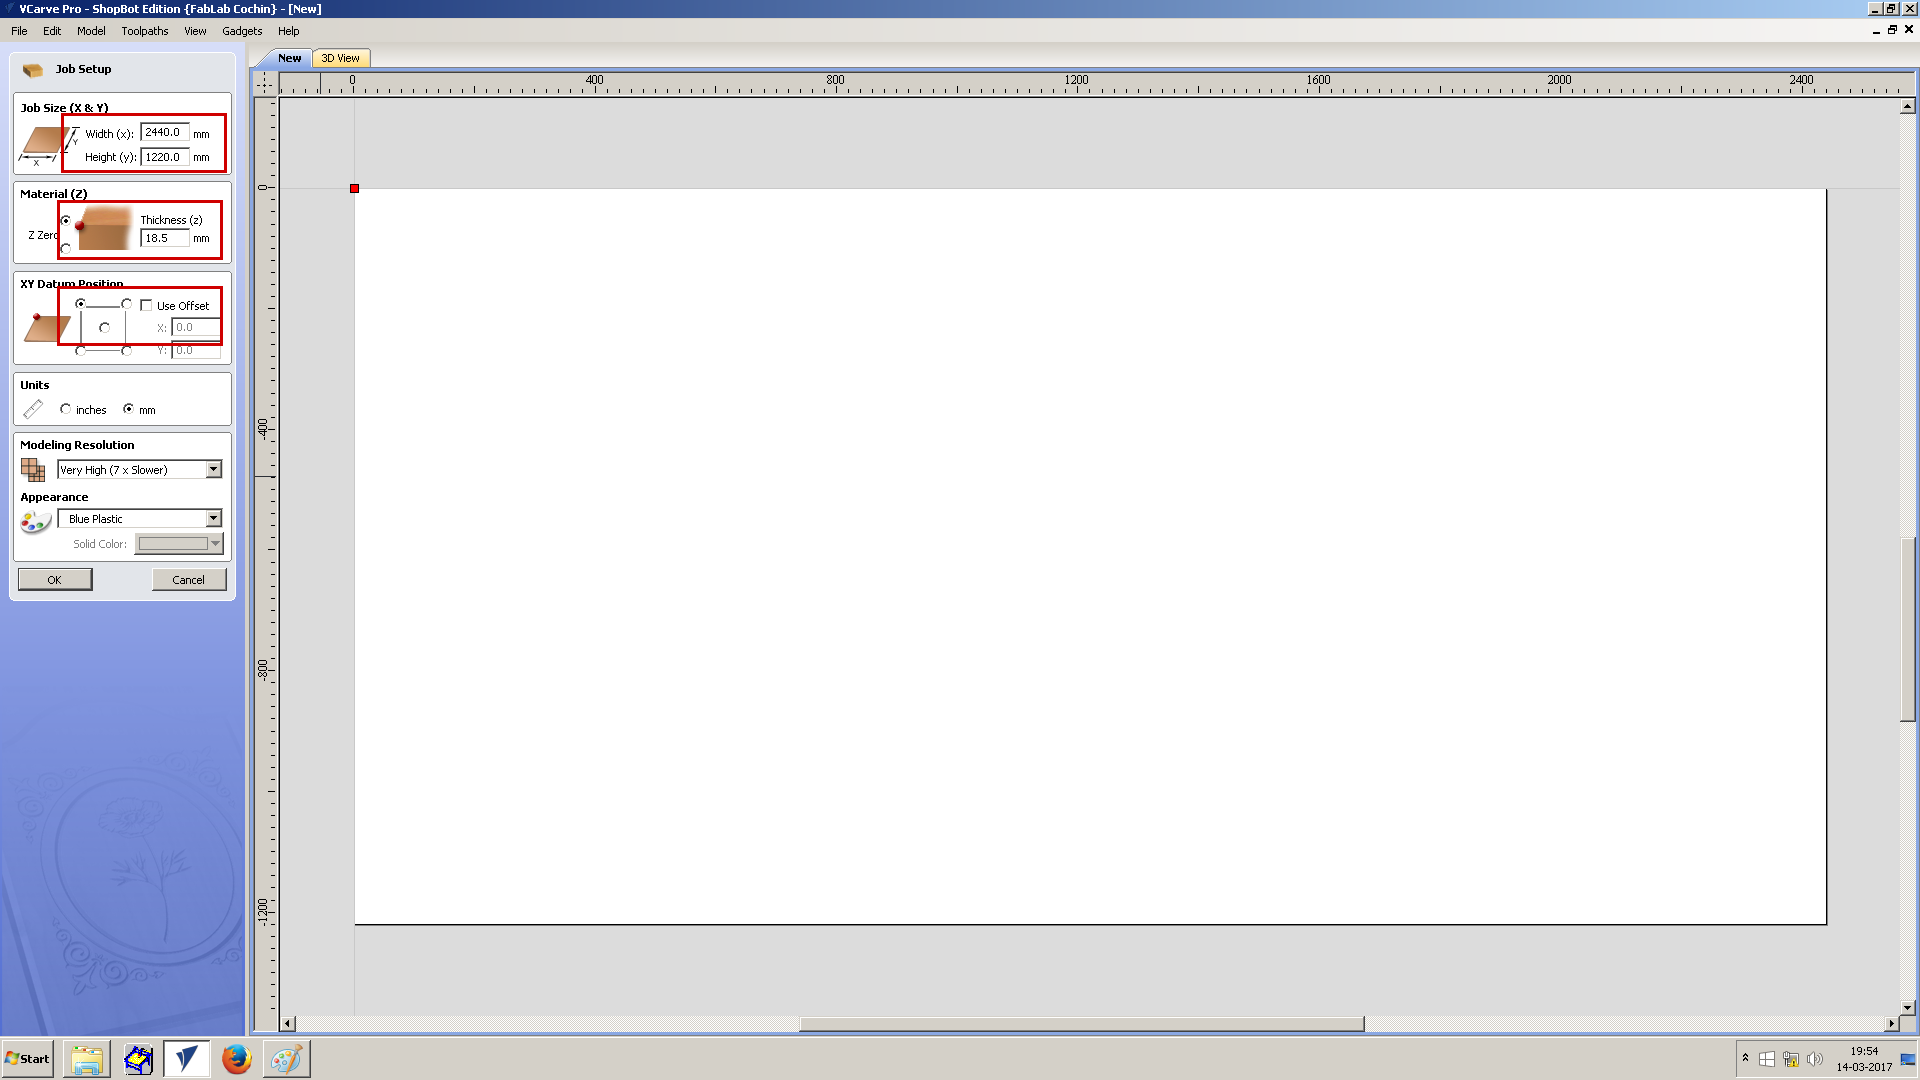
Vcarve software is used for arranging each elements to be cut and to generate files which are to be fed into ShopBot's application. Each parts to be cut are arranged such that plywood wastage is minimum. Following steps were used to generate required .sbp file.
Open the software and create a new file. Select required plywood size, material thickness and origin position. I used the following settings.
- 2440x1220mm size
- 18.5mm thickness
- Top left corner as origin point
On the left panel there are many tools available. I used mainly the following tools.
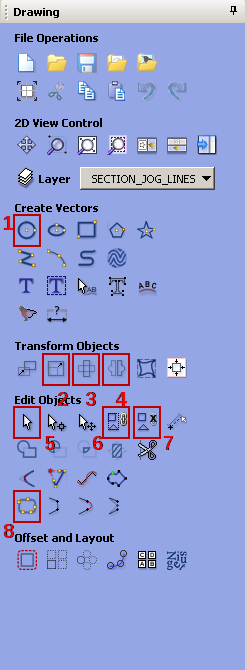
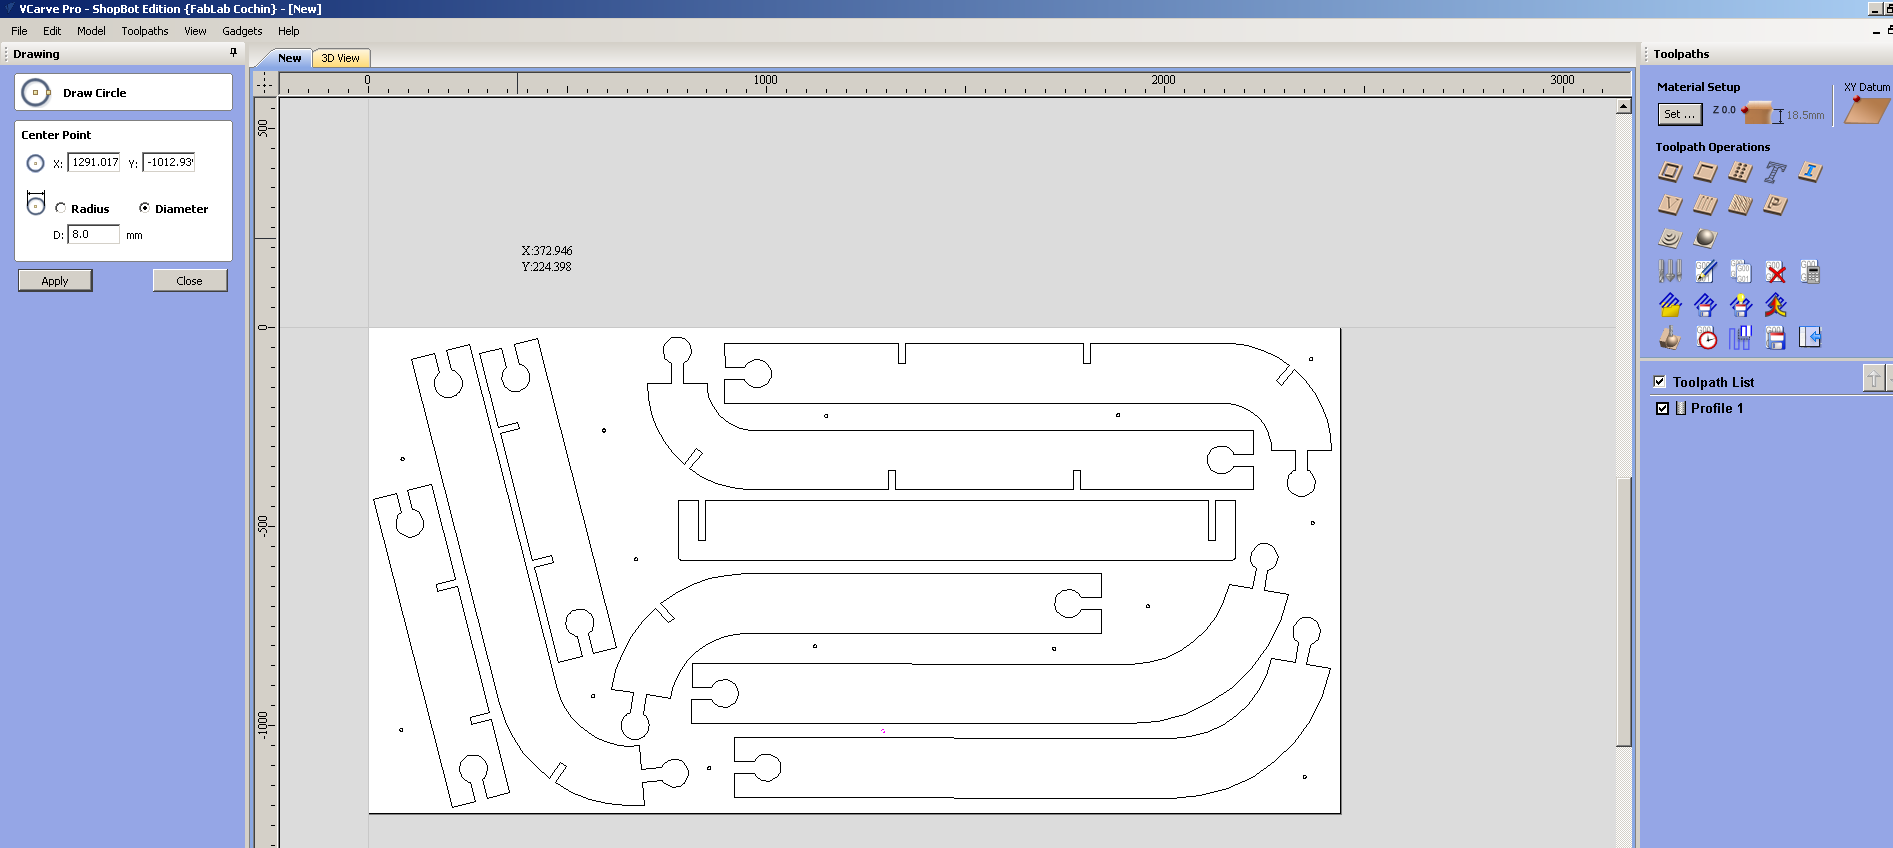
- Drawing circle. I used it for marking drilling holes for using screws.
- For changing size of object
- To rotate object at particular angle
- Take mirror image of the selected object
- To select an object
- To group each objects as a single element
- To ungroup a grouped object
- To join each vectors in an element
Import each part designs into Vcarve(File -> Import -> Import vector file). I selected one dxf from my design. I had some issue with the size of imported item. Size was only one tenth of original size. So I had to change size to 1000%(default was 100%).
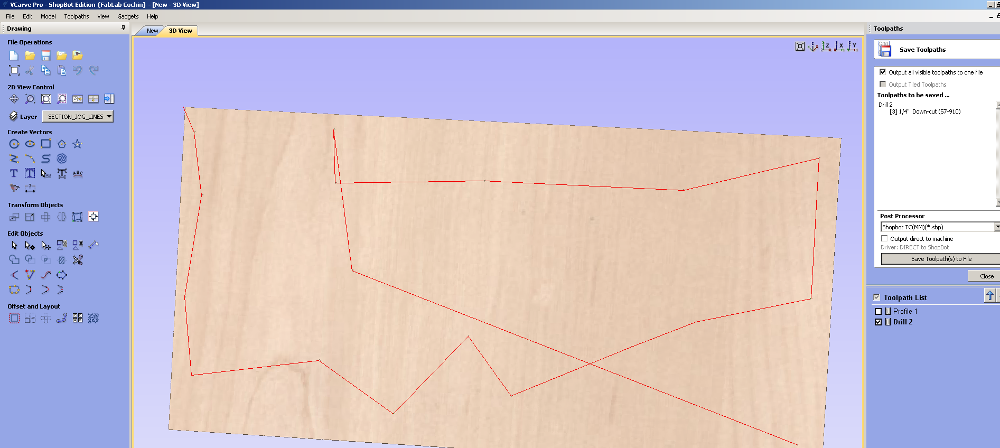
Files were imported and arranged as below.
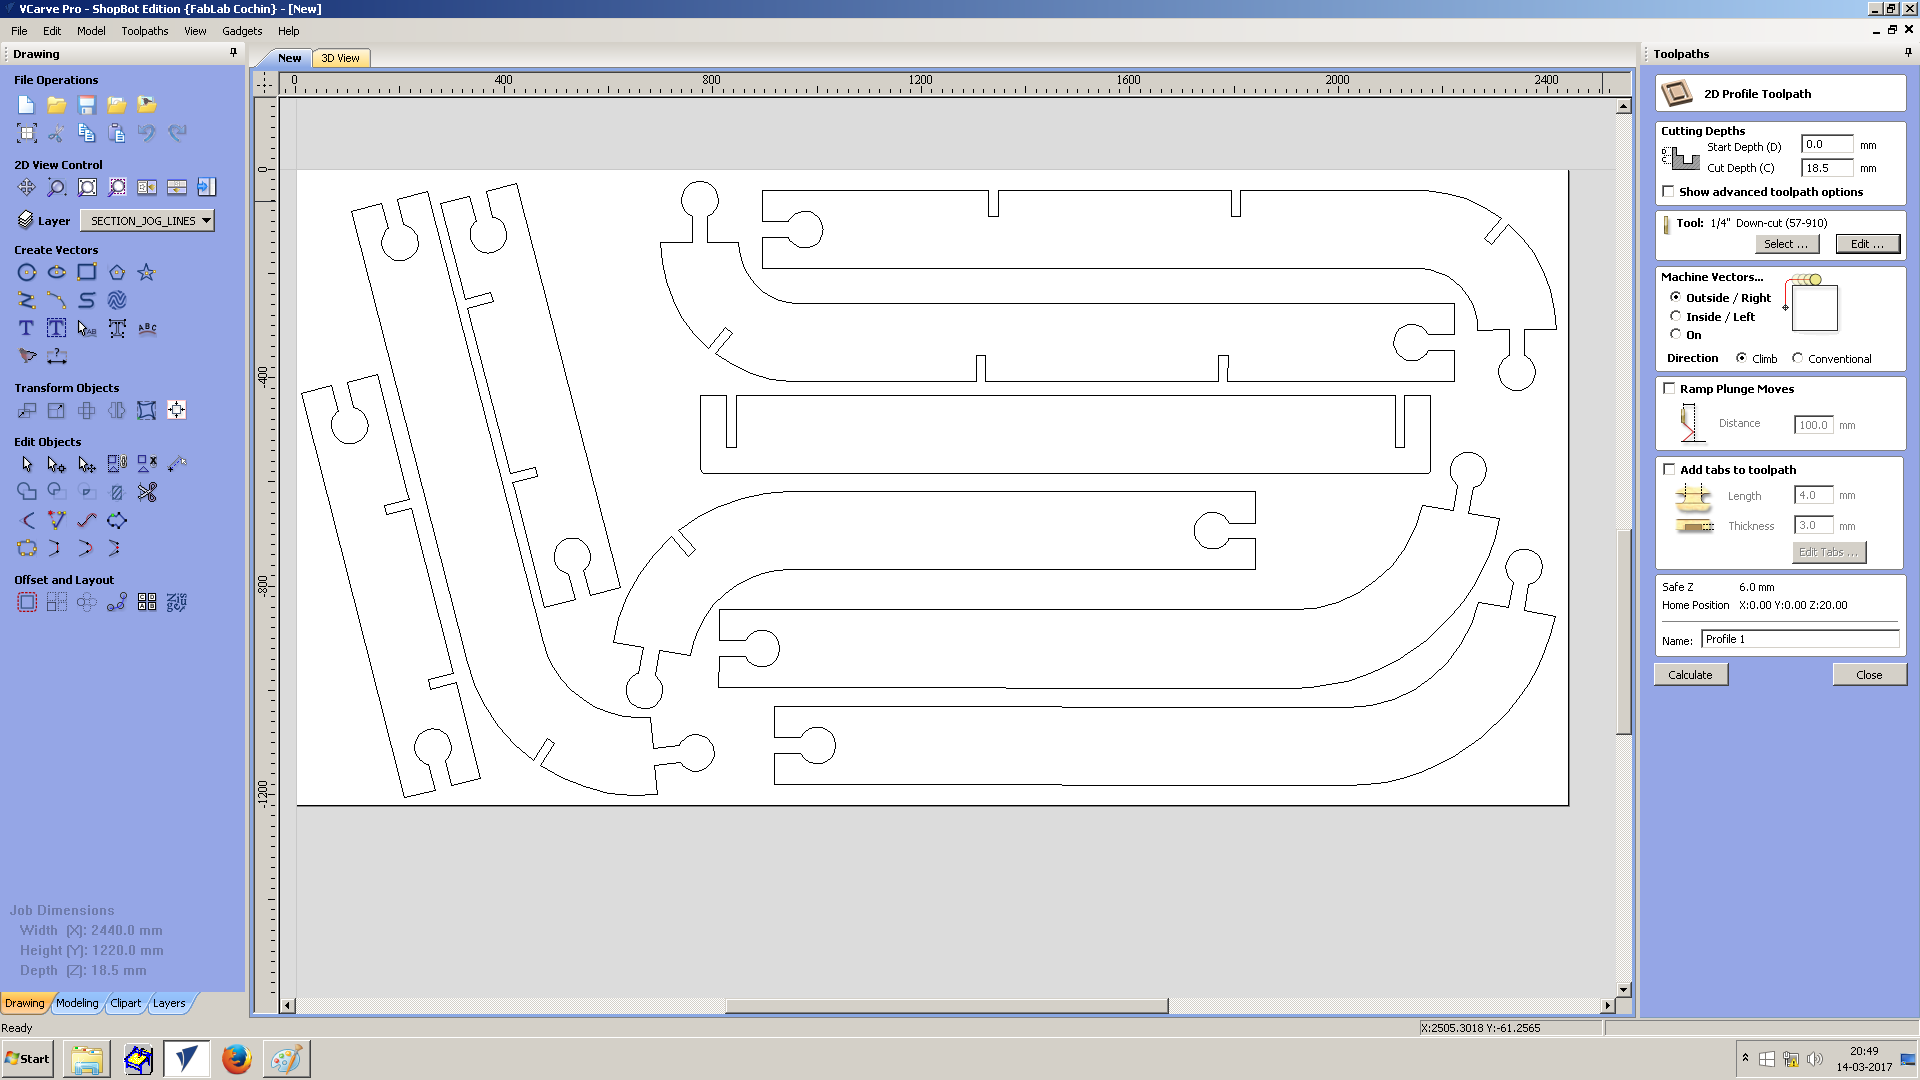
On the right side there is toolpath settings menu. First button under Toolpath Operations Tab is Profile Toolpath, which is used to set the profile settings for cutting the plywood. Third tab under the same section is Drilling Toolpath, which used for setting drilling holes. I used the following settings in Profile Toolpath.
Cut Depth - 18.5mm
- Tool
1/4" Down-cut
Spindle Speed - 16000 rpm
Feed Rate - 0.5 inches/sec
Plunge Rate - 1 inches/sec
Pass Depth - 0.125 inches
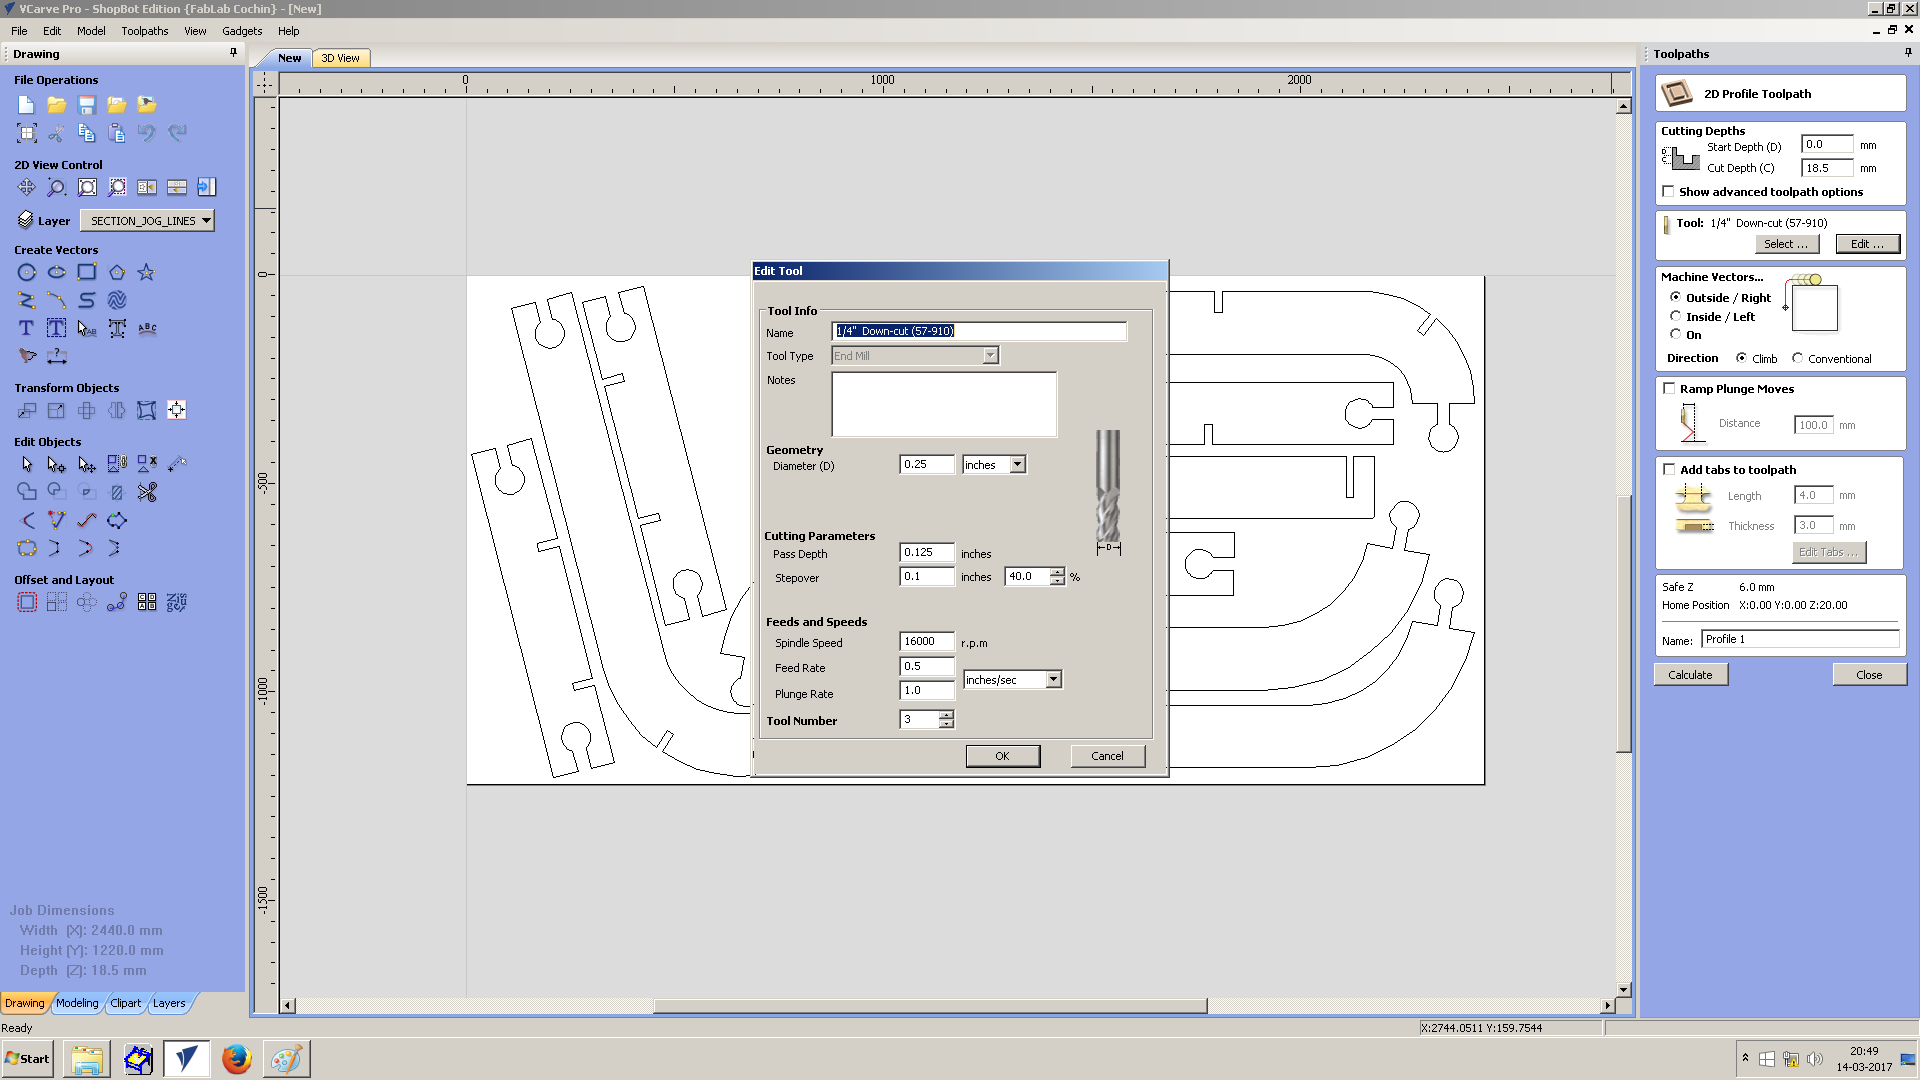
Cut type - Outside
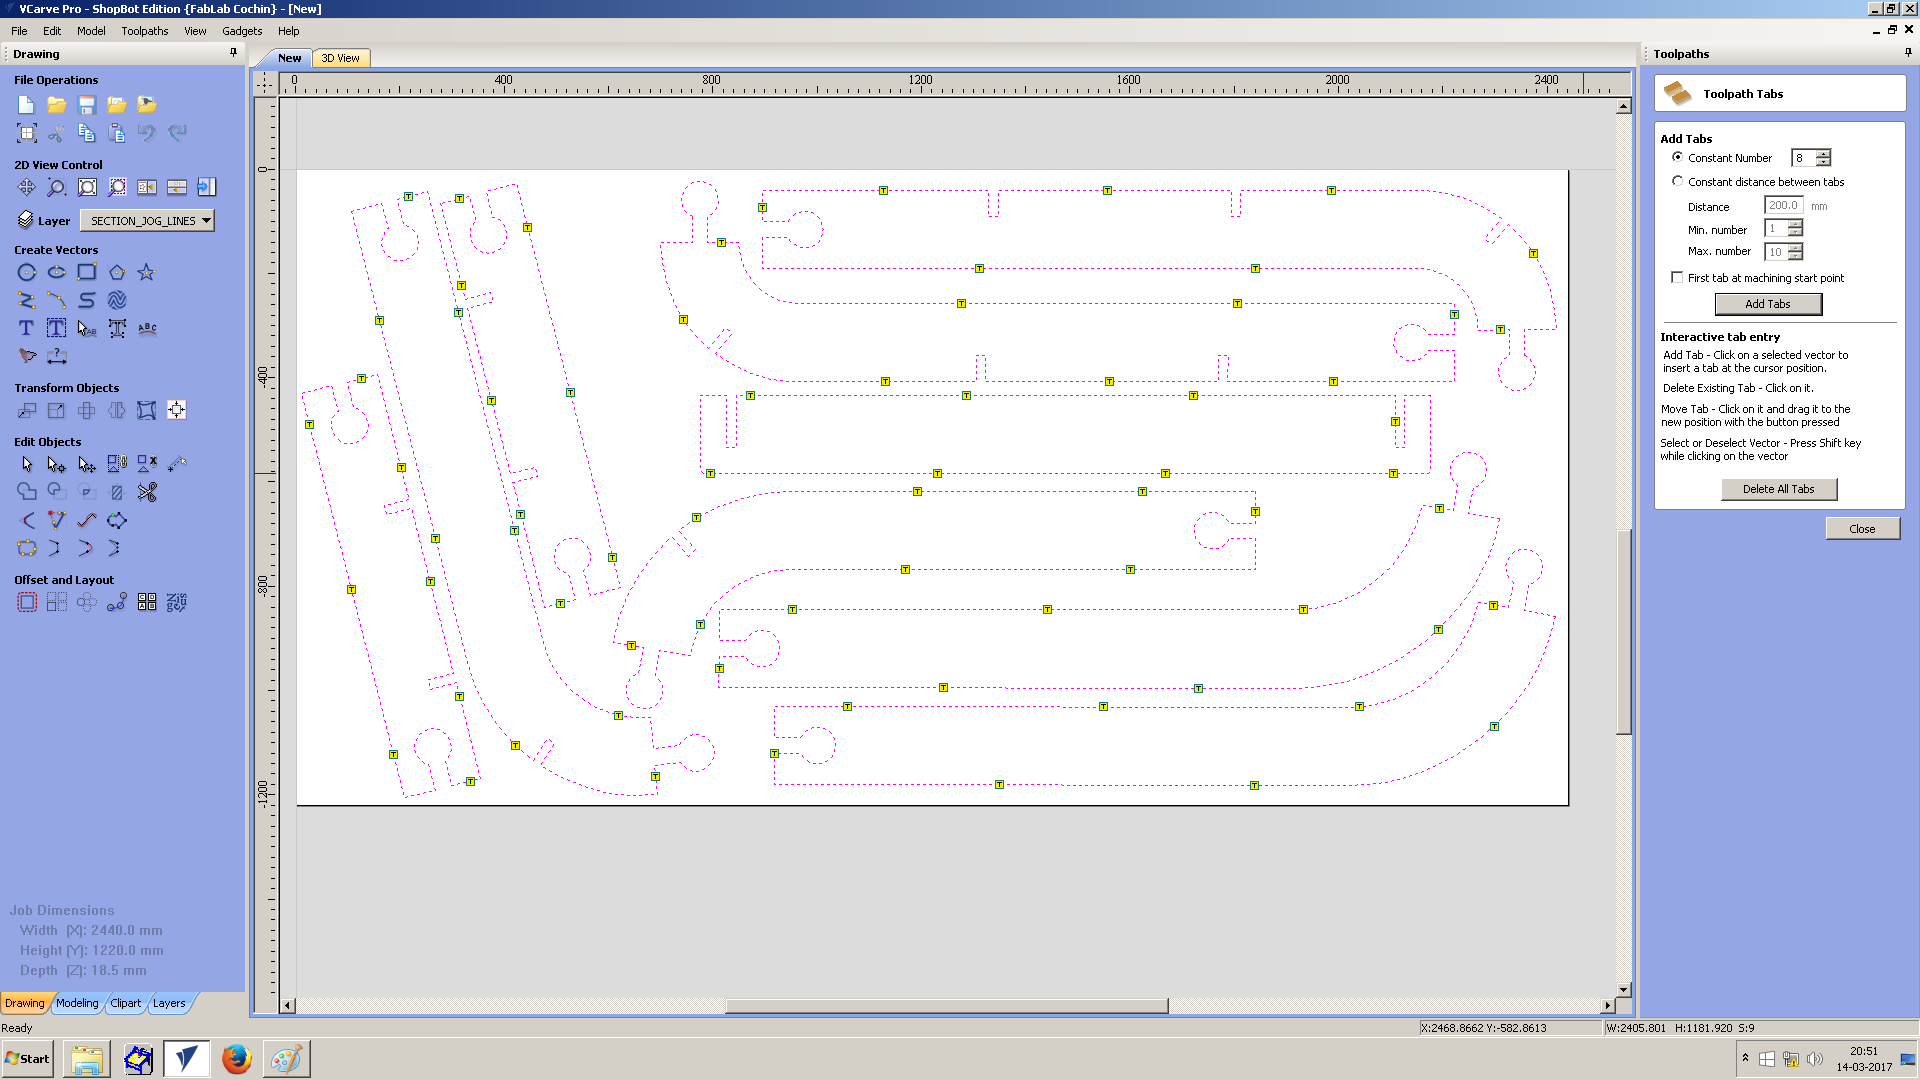
Tabs - 8 tabs of thickness 3mm
After setting everything in toolpath menu, click on calculate button to generate the toolpath. Select 3D view tab to get 3D view.


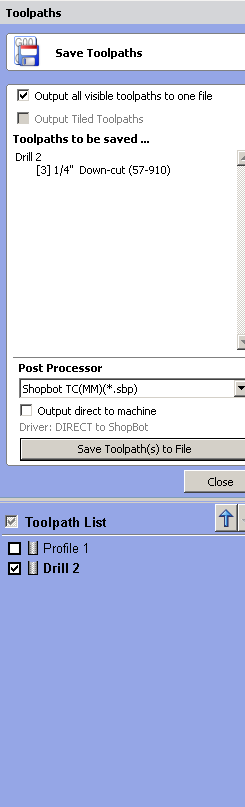
This profile is then saved as .sbp file. For saving, select save button from Toolpath menu available on the right side. Make sure current profile checkbox under Toolpath is selected.
Now I have created the profile file for shopbot. But, to fix the plywood strongly we have to use screws. For this, screw positions were selected and used circle tool to mark it on board. Circle of diameter 8mm were used.
Following settings were used for drilling path file.
- Cut Depth - 1mm
- Tool - 1/4" Down cut
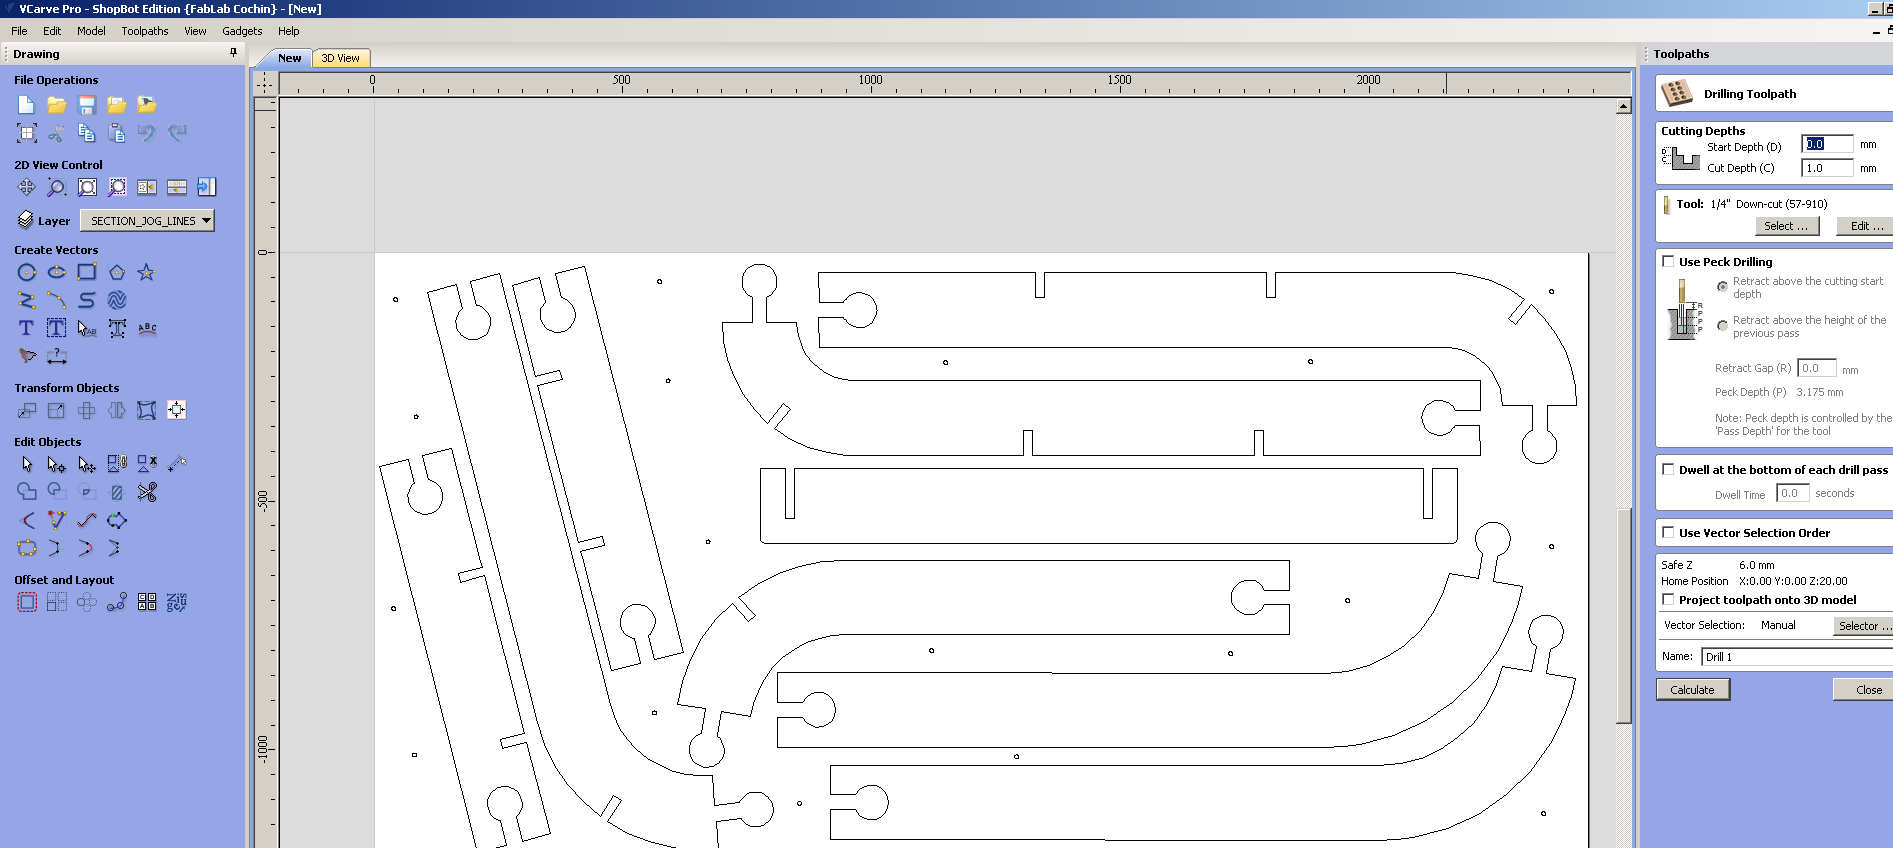
Now use calculate button to generate toolpath. And save the drill settings as .sbp file.
Now both profile and drill files are ready. Its time to feed them into shopbot.
2. Begin Cutting
Open Shopbot's application. It looks like screenshot shown below.
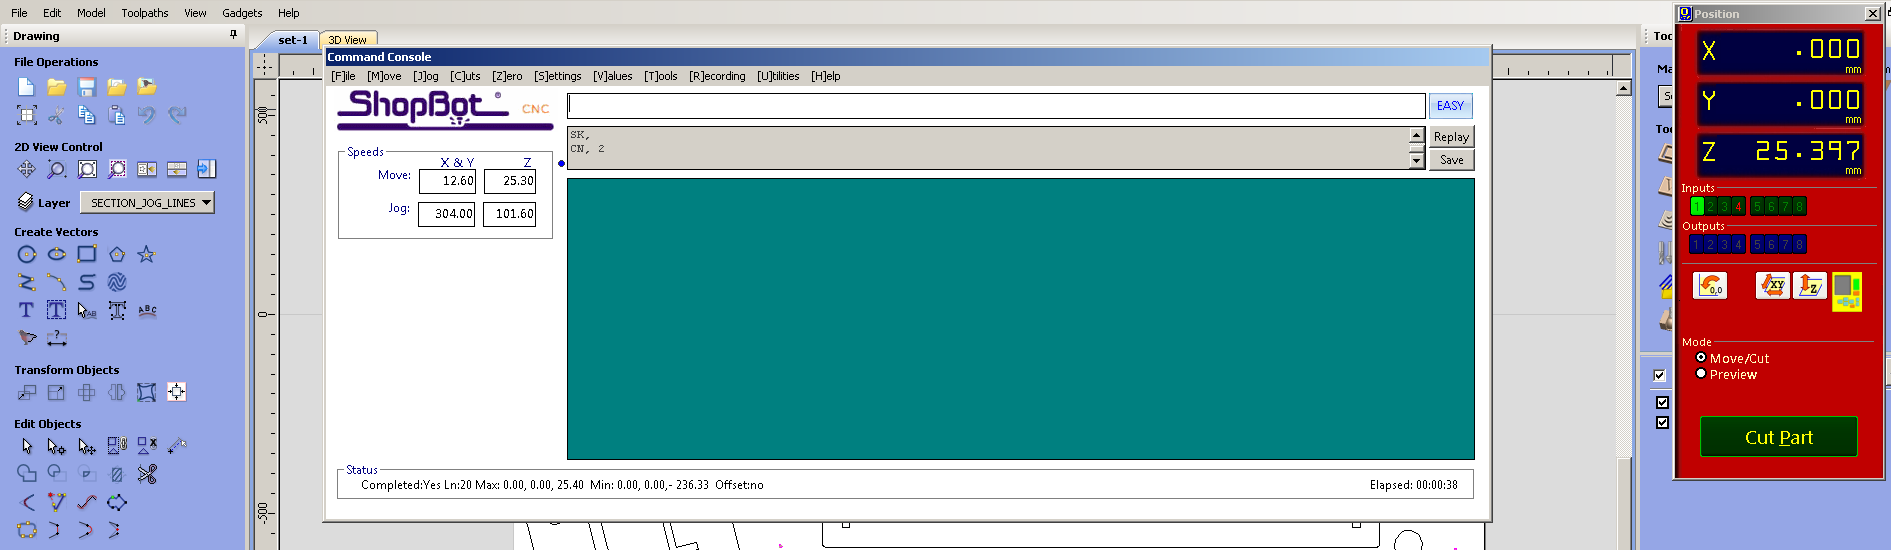
The button with a yellow background is used to open keyboard which is used to move the machine to required position.
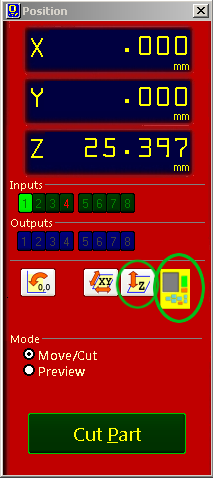
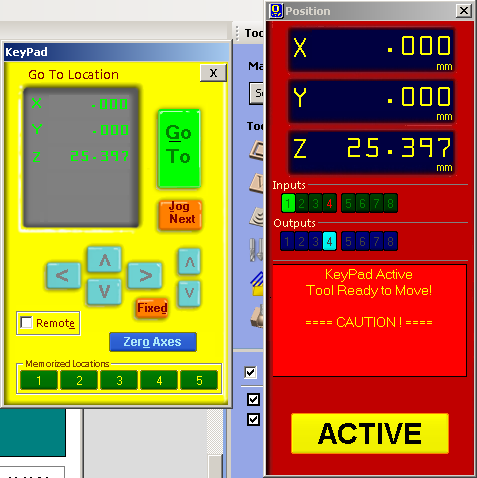
Use this keyboard to set a origin point. After moving the head to required origin point click on the orange background colored button named Fixed and select X and Y. Then click on button named zero.

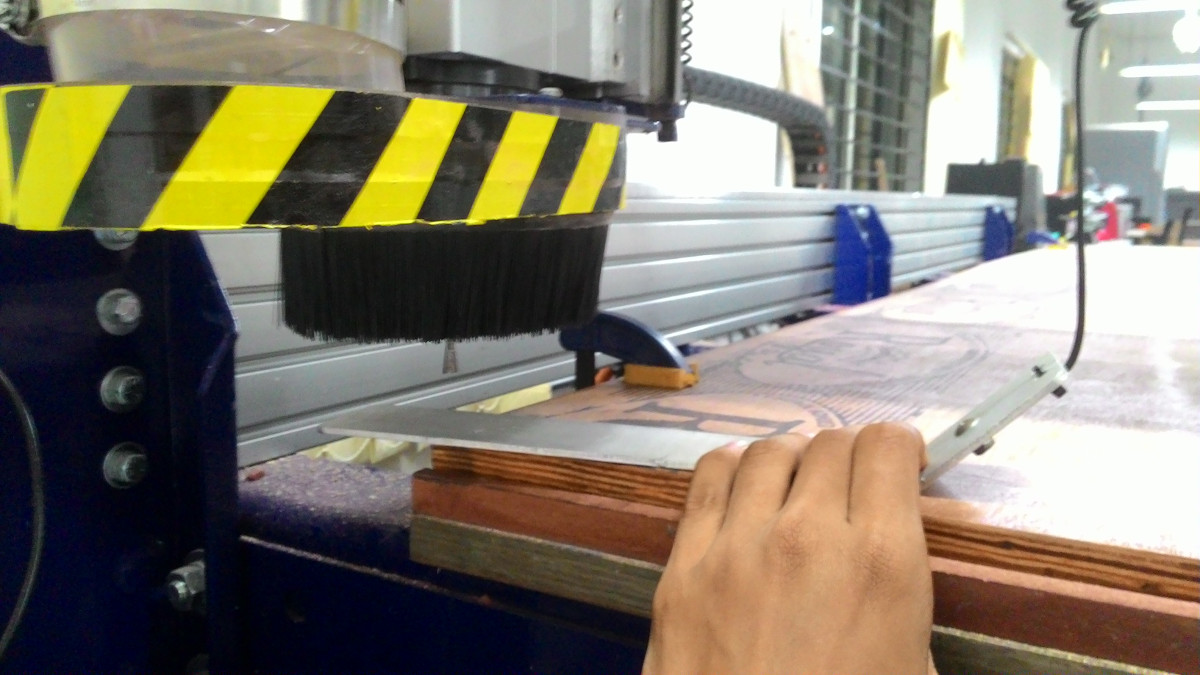
Now set the z axis. Place the plate below the drill bit as shown in the image and click on the button left to the keyboard icon.
Turn on the machine. Click on the Cut Part button button and choose drill toolpath file first. Press the spindle start button when the pop up window ask to do so. And click OK.
Then the machine will start drilling. Put screws on these holes. And select profile toolpath file for cutting the plywood.
GIF
Output
Here is the final output
What next?
This week's assignment is finished, but to use this structure there are some more things to do. Important thing is the structure lacks proper balance. I have to find some way to fix this. Another work to do is covering the structure with sheets. And also I am planning to polish or paint it later.
Final Thoughts
- make sure drill bit wont touch screws or clamp.
- size scaling
- putting tabs
- move head to all position to make sure it reach everyehere and do not touch the clamp