Week05: 3D Scanning and Printing
Assignment
- group project: test the design rules for your printer(s)
- design and 3D print an object (small, few cm) that could not be made subtractively
- 3D scan an object (and optionally print it) (extra credit: make your own scanner)
Design Rules for Printers
da Vinci Mini
I have 3D printer at home, which is XYZprinting da Vinci Mini .

The print size is 15cm x 15cm x 15cm. PLA filament provided from XYZprinting is only possible to use in this printer.
I printed 3D Printer Tolerance Test.
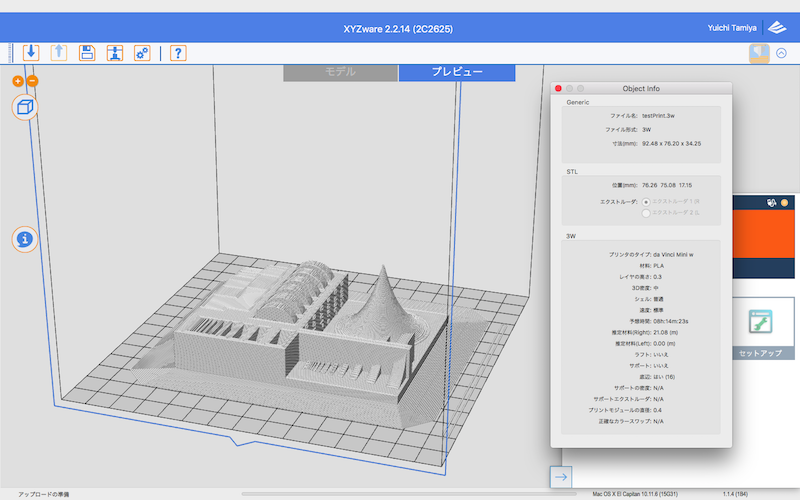
Parameters
Resolution: 0.3 mm
Infill: middle(30%)
Speed: normal
Brim*:16mm
(* First try was failed. Printed object was warped, even I used double-sided tape. So brim is added for second try.)
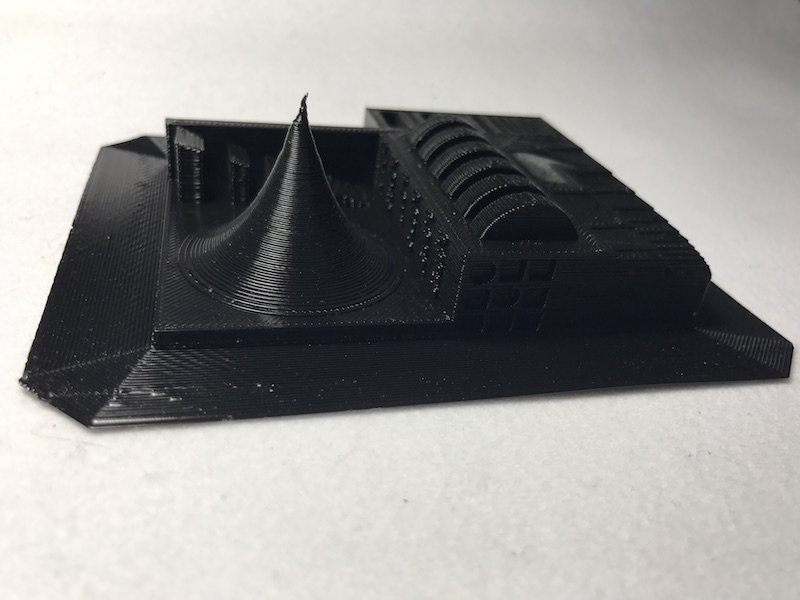
Result
This parameters are I normally use. The Corn starts to be formed finely, but the peak could not be shaped. The 0.0025" to 0.015" gaps could not be made in this printer.
I also test using "overhang_test.stl" in Make: 2015 3D Printer Shoot Out Test Models.
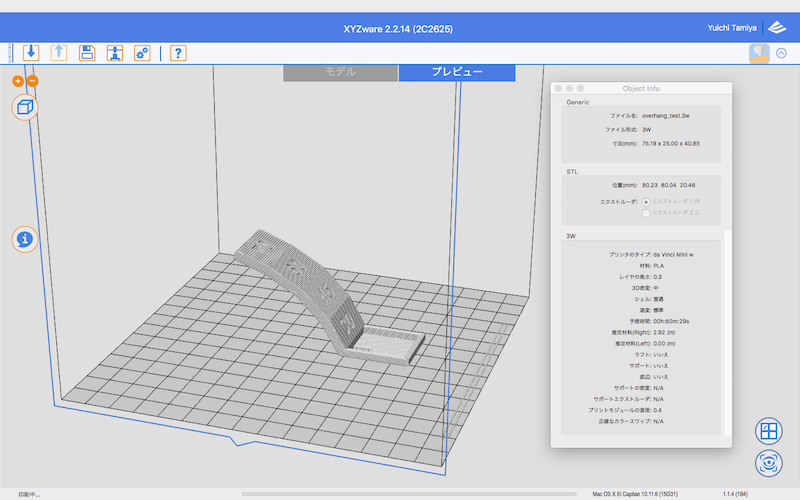
Parameters
Material: PLA
Resolution: 0.3 mm
Infill: middle(30%)
Speed: normal
Result
On up side, 30 degrees is normal surface, but 45 to 70 degrees is getting rough.
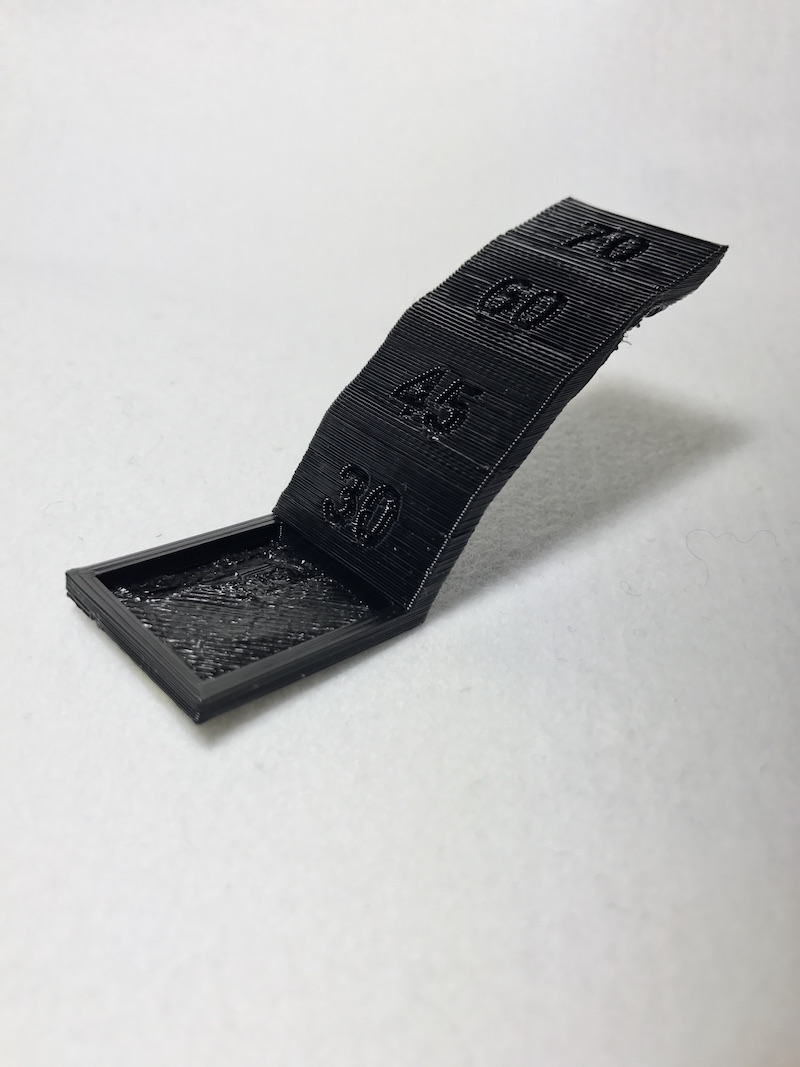
Back side surface is gradually unshaped. In this Parameter, 30 degrees is the maximum overhang to print finely.
Parameters
Material: PLA
Resolution: 0.2 mm
Infill: max(90%)
Speed: normal
Result
There is not much difference more than I expected.

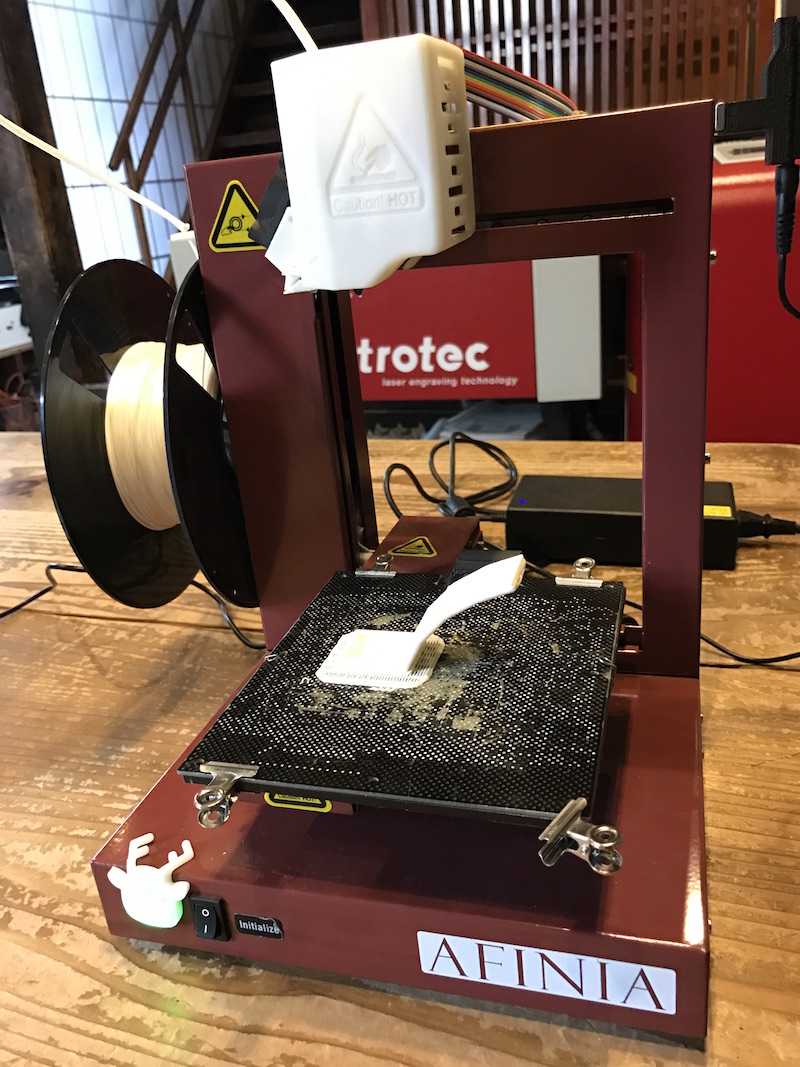
There are different 3D printers in FabLab Kamakura, so I printed the same overhang_test.
Makerbot Replicator 2X


Parameters
Material: PLA
Resolution: 0.3 mm
Infill: 30%
Result

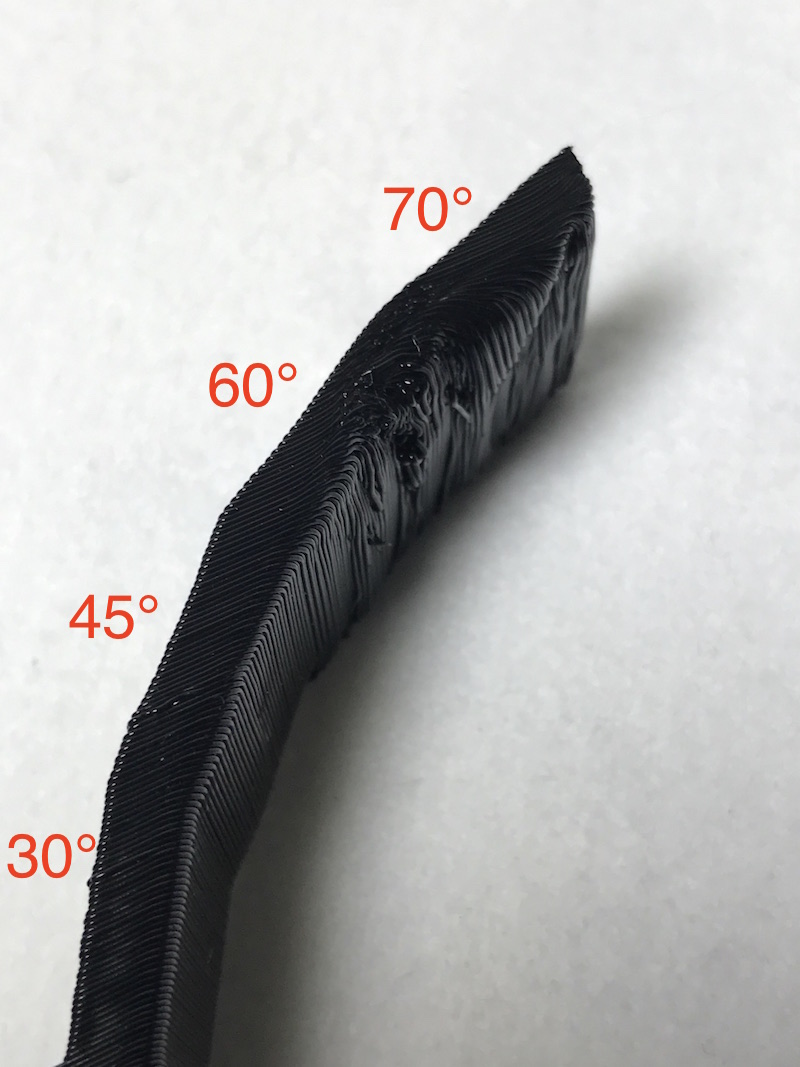
Afinia H480
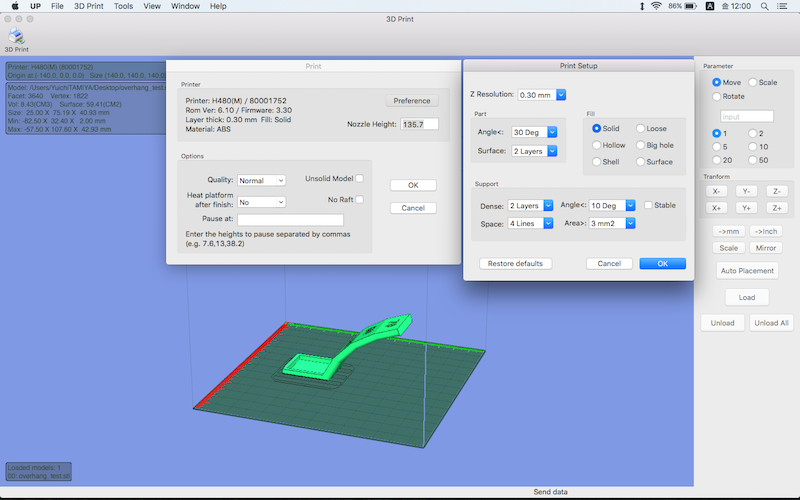
Parameters
Material: ABS
Resolution: 0.3 mm
Infill: solid
Result
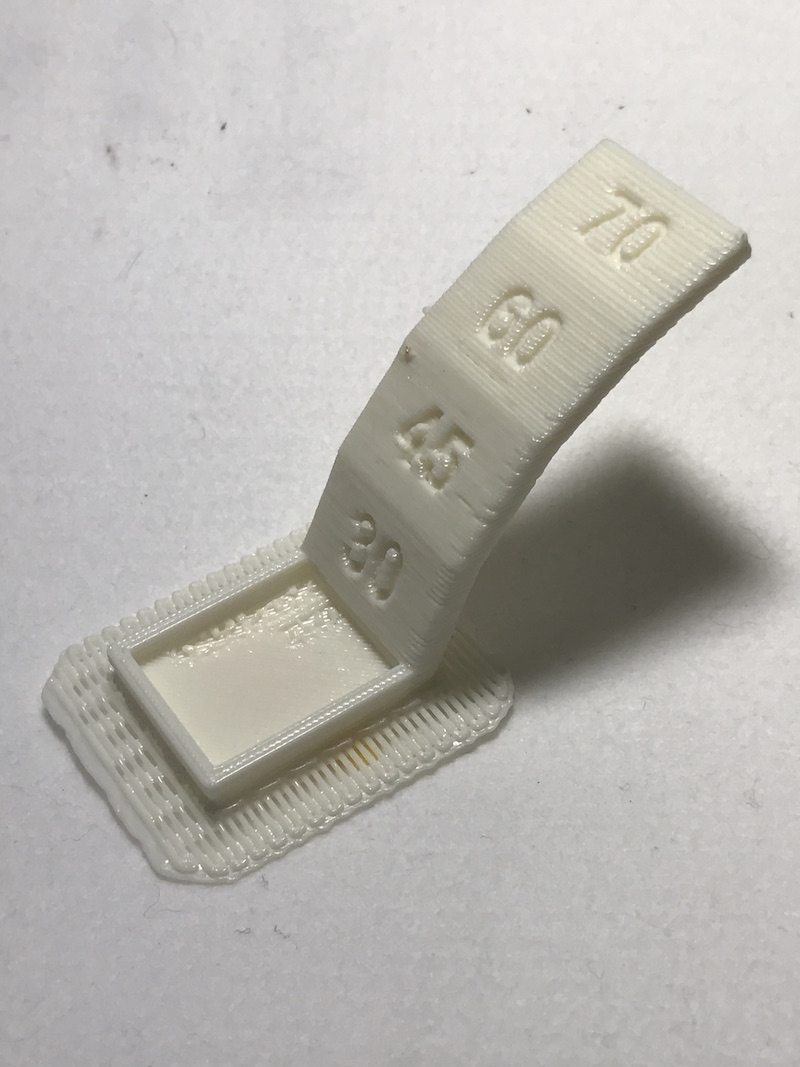
Up side of this two test print is fine at 30 and 40 deg, little rough at 60 and 70 deg.
Back side surface is unacceptable output from 45 to 70 deg. Right test part's infill is solid, but it could not even make shape.
Design and 3D Print an Object that could not be made Subtractively
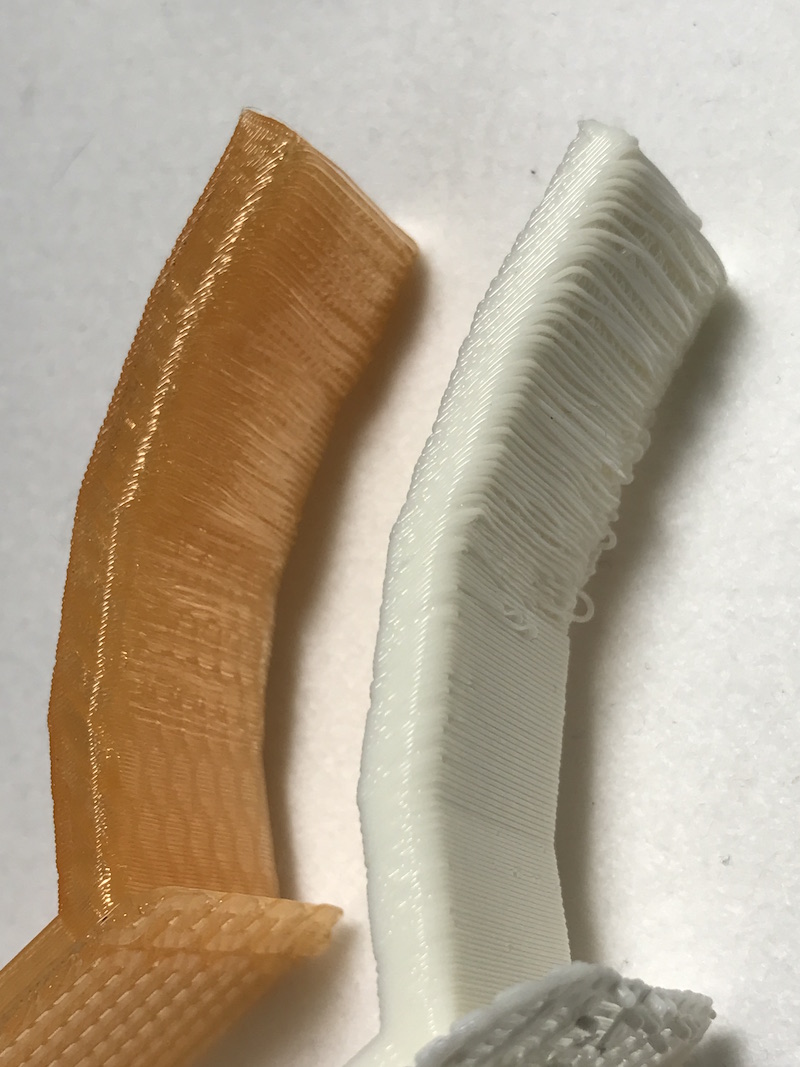
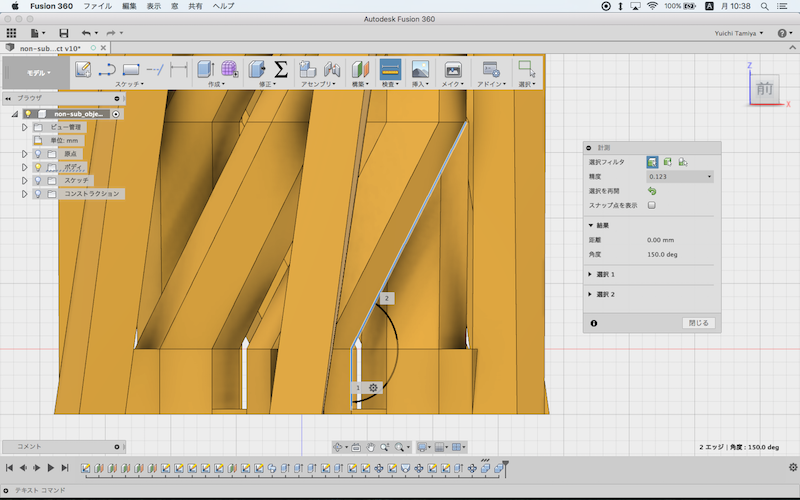
All 3D printers that I can use gave me fine output of 30 degrees overhang. So I designed a model below, that is made combination of 30 degrees overhang parts.
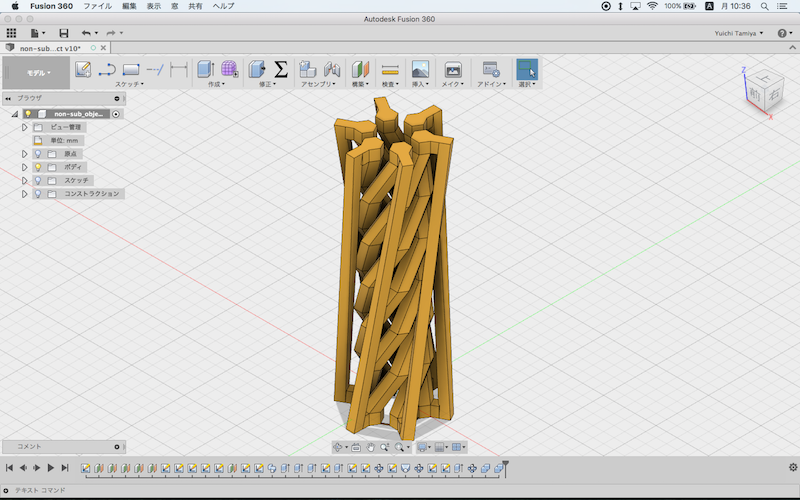
Angle: 180 - 150 = 30 [deg](overhang)
download .stl
download .f3d
Printed in da Vinchi Mini.

Parameters
Material: PLA
Resolution: 0.2 mm
Infill: 30%
Speed: Super fast
Result
This overhang object could be printed. But top part was not fine, because thin and tall parts swung each time when filament was extruded.

3D Scan Objects
I tried to use Autodesk ReMake by manually turn table way. So I need to make small photo booth to take hundreds of photos. I did not have iPhone holder to set on camera stand. So, I designed and print out.
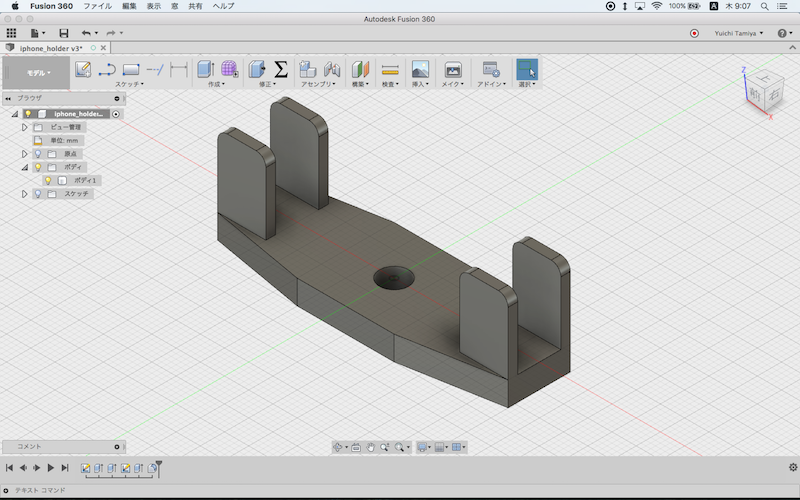
download .stl
download .f3d
Then I use it like this.

I took photos of small objects, then I upload to ReMake server to make 3D scanned model, they could not make 3D data I expected. It might be luck of light, so I stop using ReMake.
Then, I used iOS App 123D Catch. I took white polar bear 's photos and upload, then they gave me brown holed polar bear.
I read this web site and got some information about 3D scan. Trino is one of the recommendations about this site.
Then I tried to used Trnio and download iOS App Trino.Trino will take photos automatically and show us which angle photo was taken from. Trino can send scanned data to Sketchfab directly.
Download .obj File from Sketchfab and open it in Meshmixer to clean up background. Then export to stl file.

download .mix
download .stl
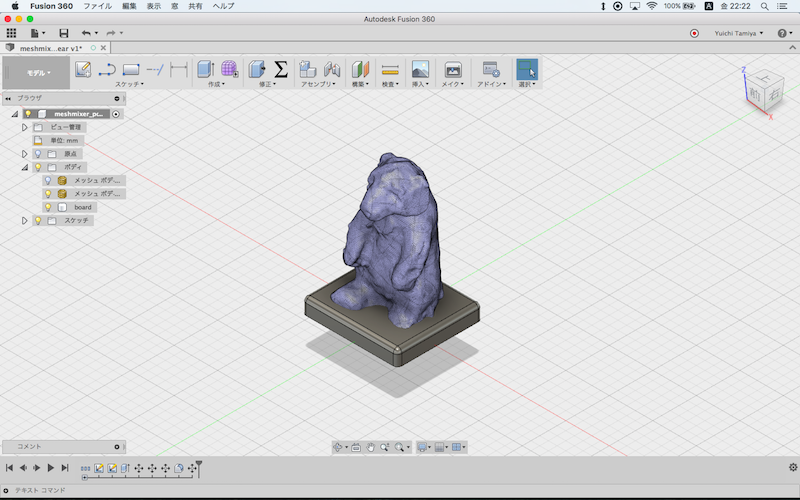
Upload and open this .stl File in fusion 360.

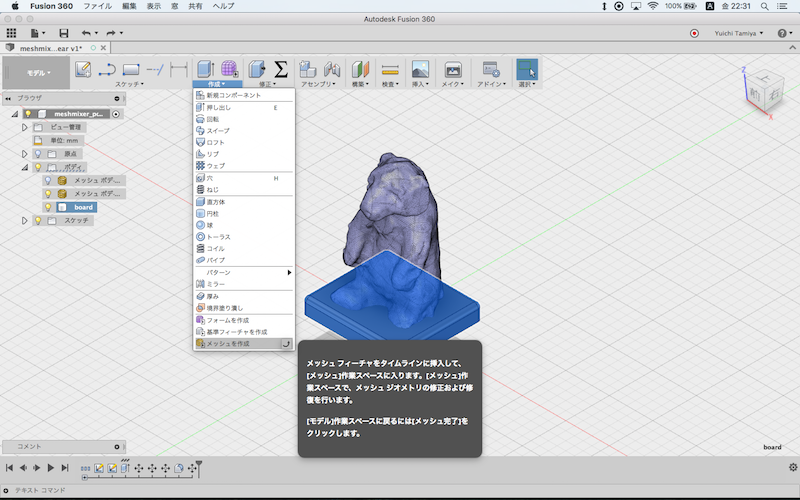
Use Make closed mesh command to close mesh and make mesh body.

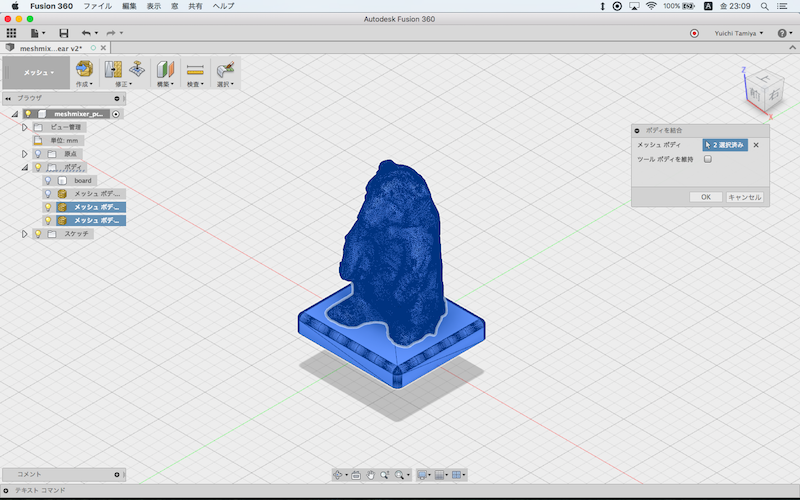
Make new body as a board under the bear.
Use make mesh command to change body to mesh body.
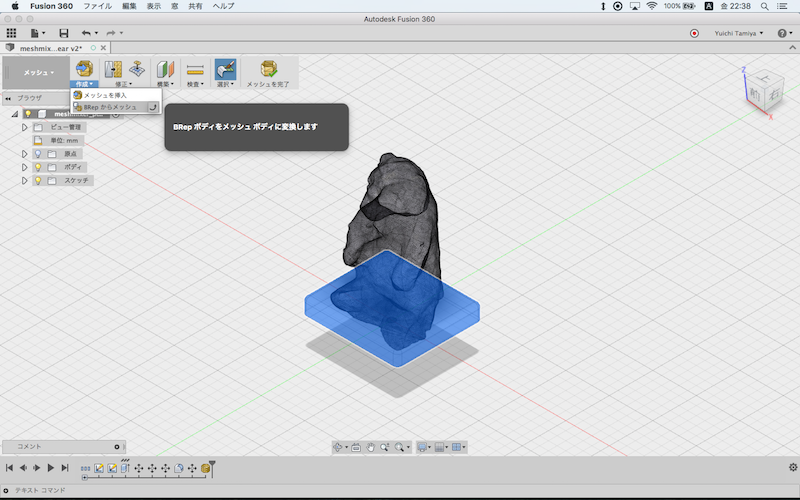
Change BRep body to mesh body.
Back to model mode and change to stop capturing design history.
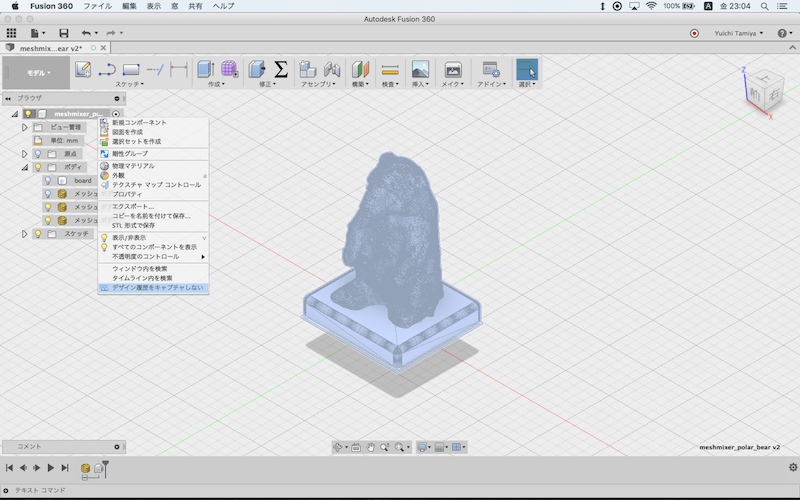
Then back to mesh mode and combine two mesh bodies.
Export to stl file.

download .stl
download .f3d
Printed by da Vinci Mini. I now got black bear.
