Week #7 Computer-Controlled Machining
Assigments
Software Used
- GIMP2.0
- VCarve Pro - ShopBot Edition
Machine Used
- ShopBot
Exercise Repo
You can find all files used in this class in the Fab Academy repository in the button below or a backup in this Google Drive folder.
Past experience
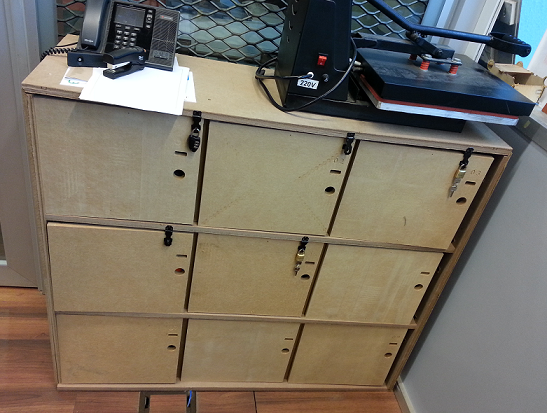
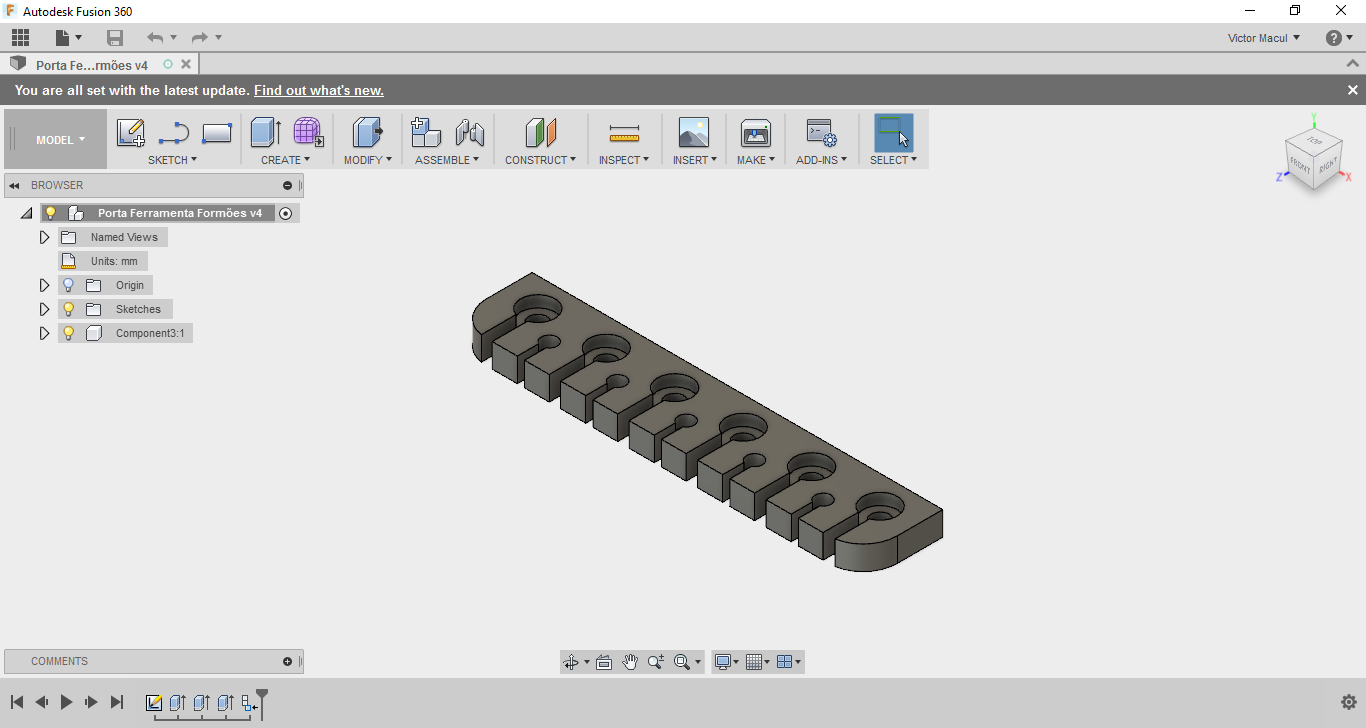
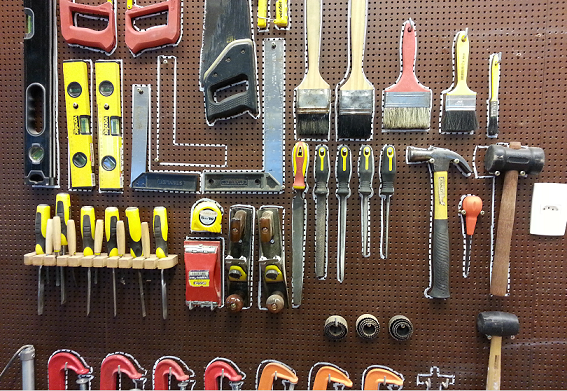
I learned how to use ShopBot on the begining of this year, when Fab Lab team were organizing Insper Fab Lab before classes start. We made a Fin Loker from OpenDesk. And I also modeled (on Fusion 360) and made a holder for some woodworking tools.
Log
2017 03 09 Cutting a Giraffe Lamp
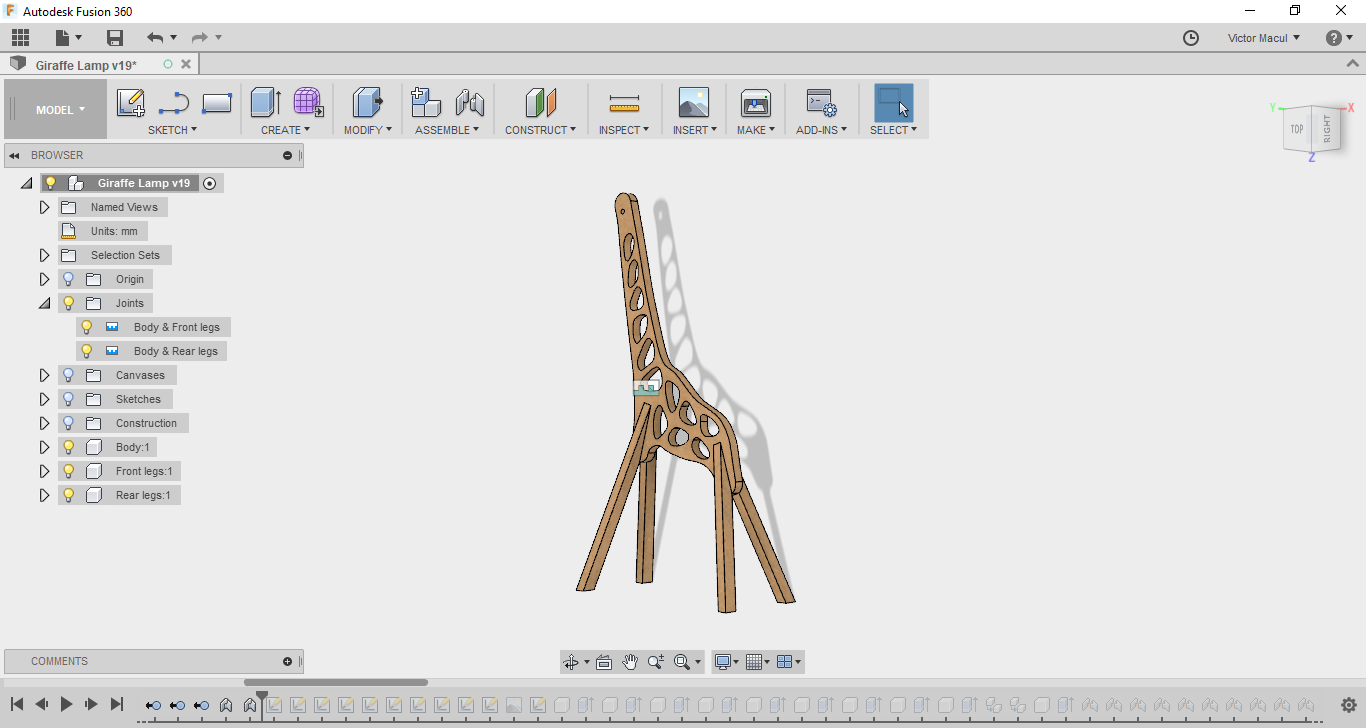
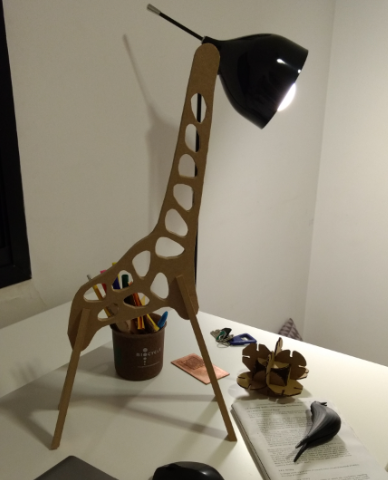
For this week assigment I prototyped one of the products I'm using to teach CNC Machining to my students: a Girrafe Lamp. I modeled this producton Fusion 360, and this process is presented in detail on Exercise 02 page. I decided to use MDF beacuse of its price (much cheaper than solid wood) and its appearance (nice looking for a giraffe lamp). Besides that, it was the material we had available in our lab for Fab Academy and its also a material that we usualy have available for our students at Insper.
The milling process is a subtrative process that uses a rotary cutting tool to remove material from the surface of a workpiece. Using a CNC milling machine, like ShopBot, its possible to make a 3D object from a digital 3D model.
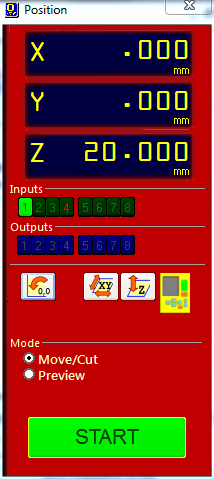
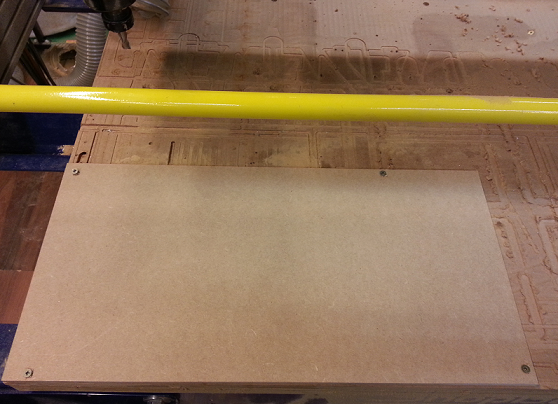
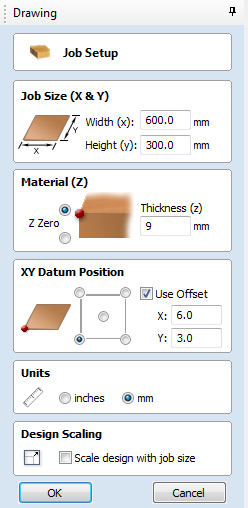
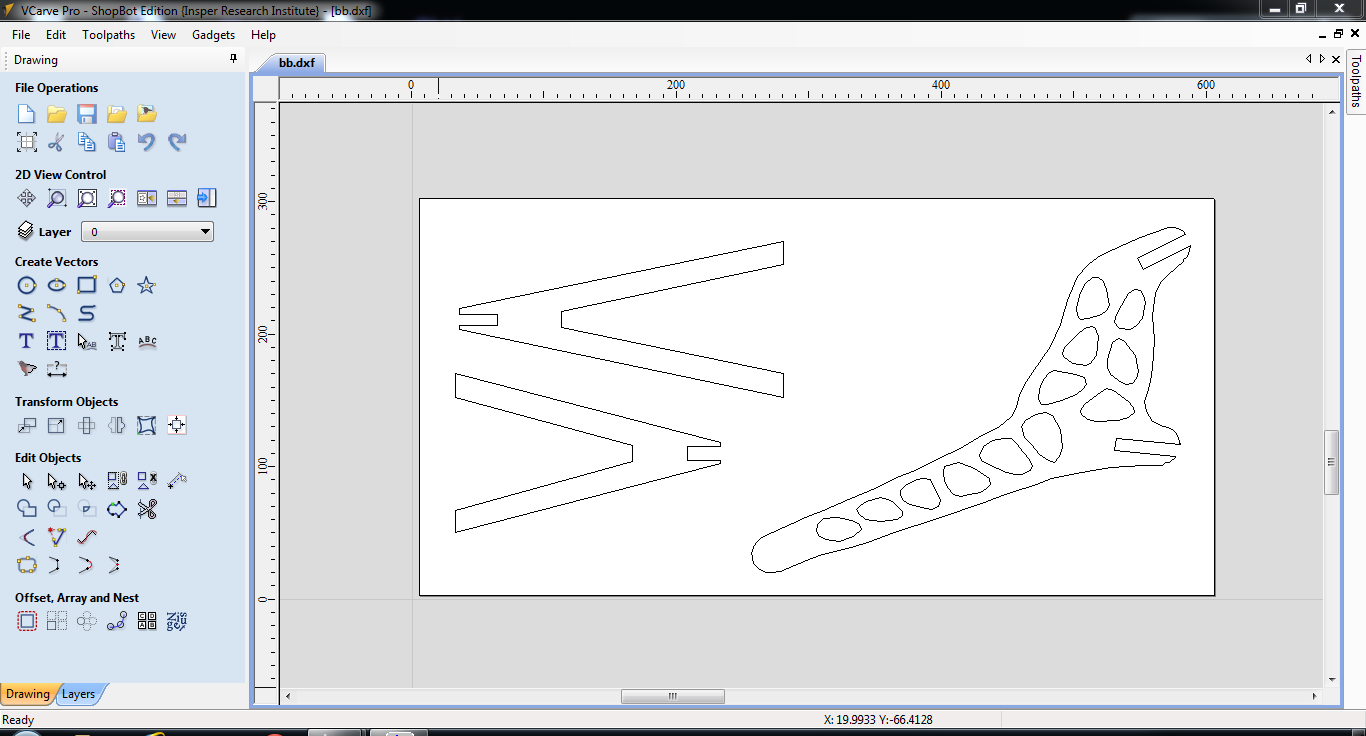
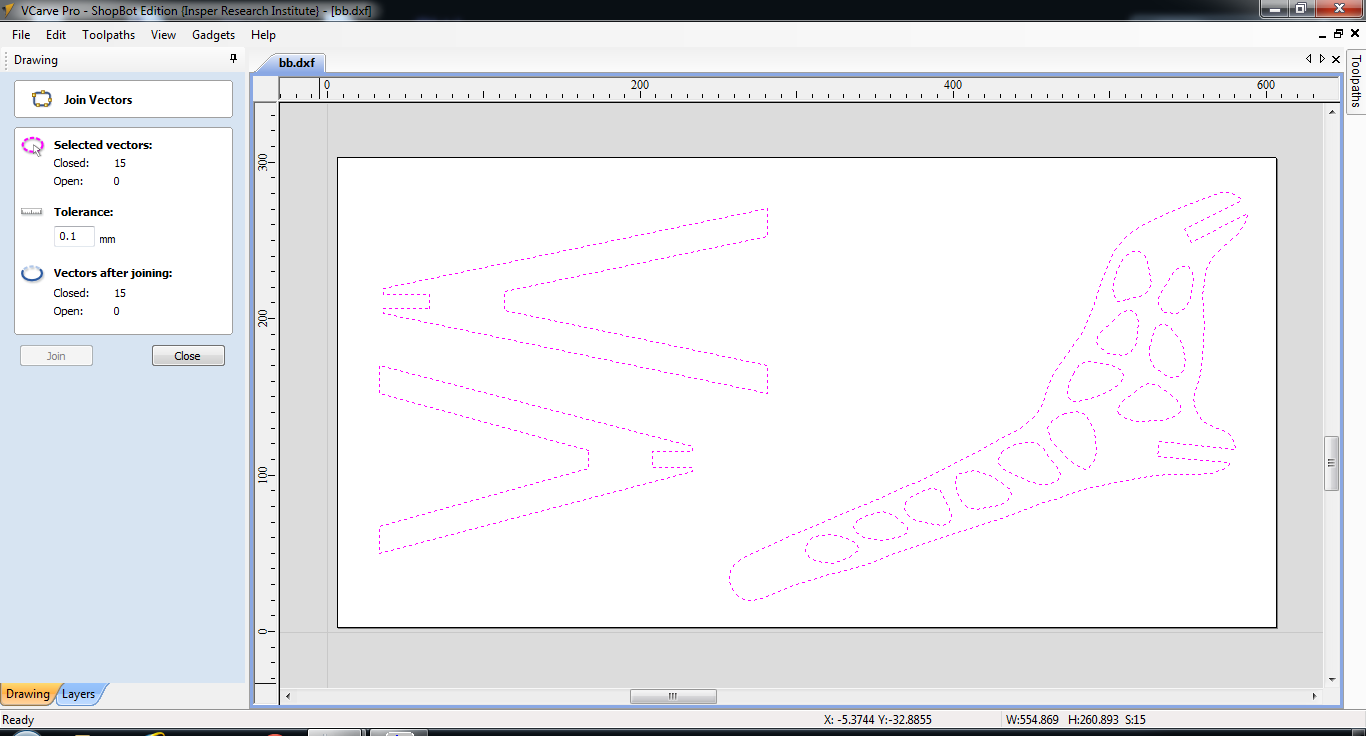
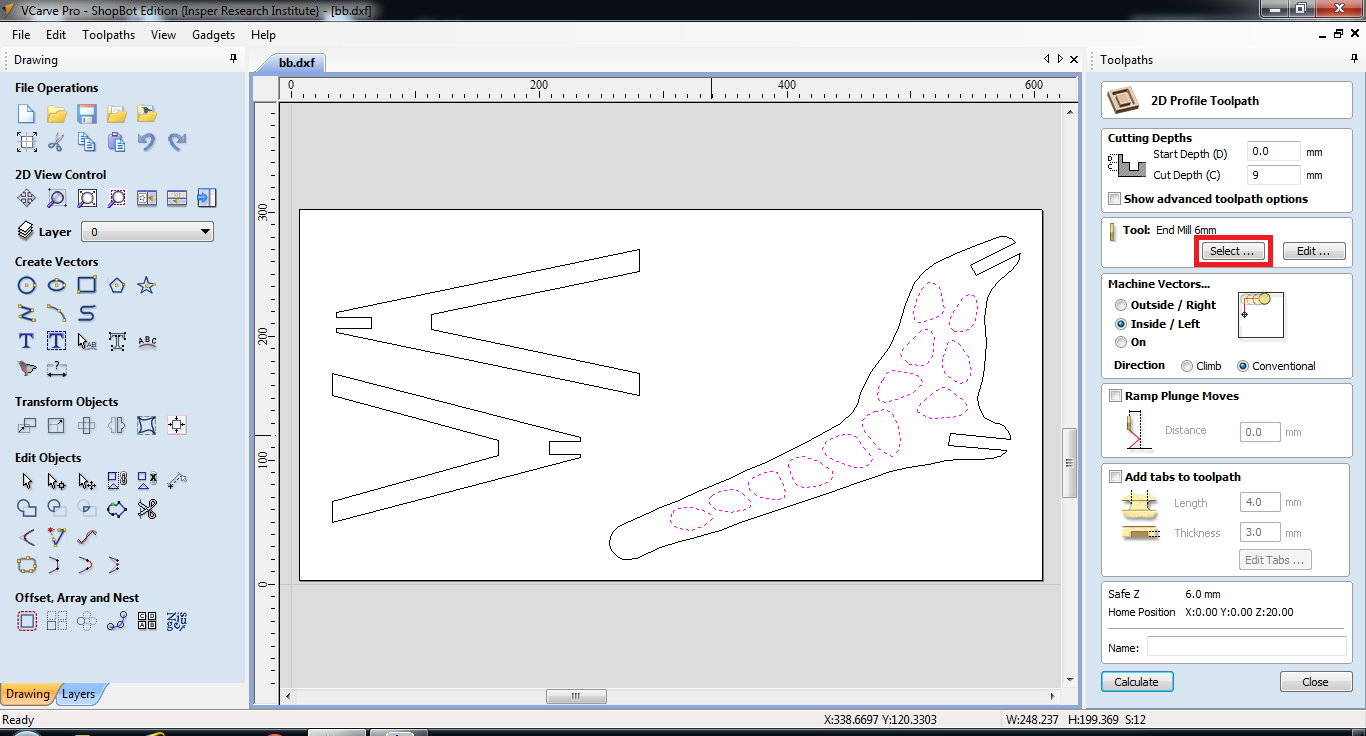
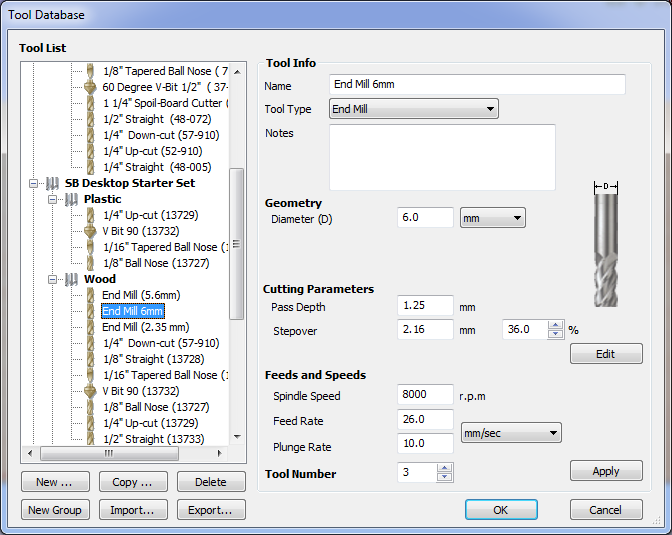
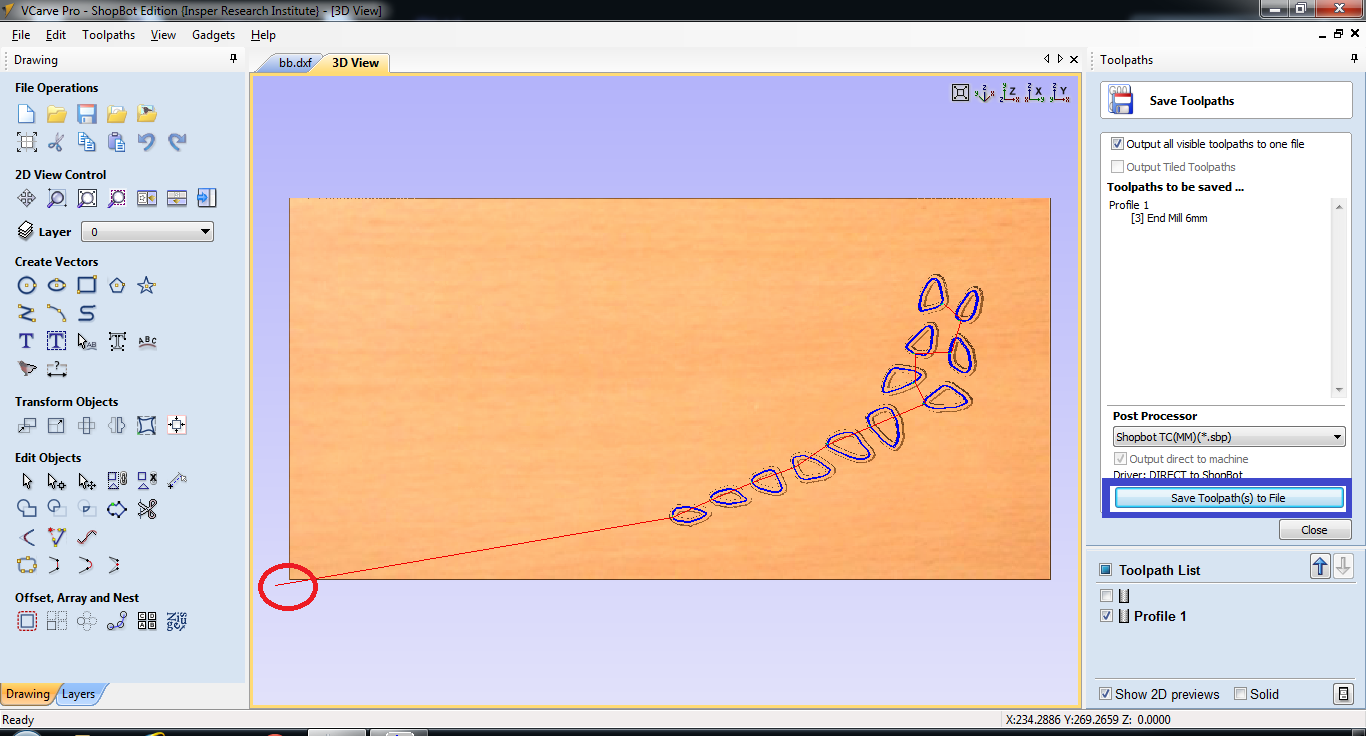
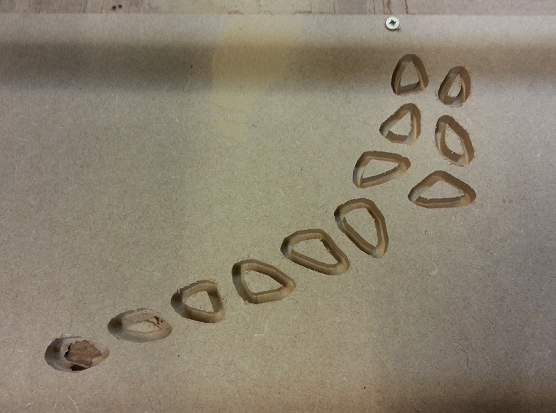
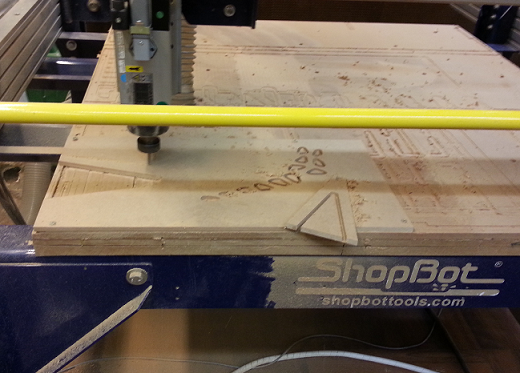
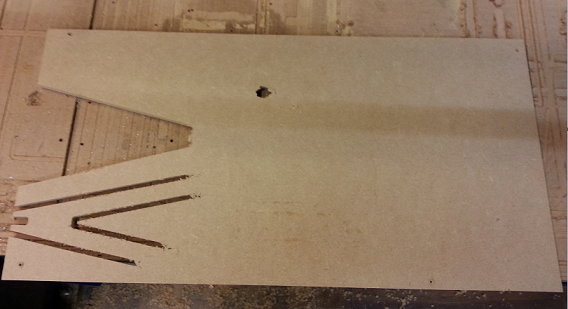
With the 3D model done, I exported the dxf files from sketches. The first time we tried to cut, we had an issue to open 'giraffe lamp body.dxf' file on VCarve. My collegues suspected that the problem was related with the way I drew the sketch, using spline feature. After a quick search on google, my collegue found out that his intuition was right, and he also found a plugin to fix this issue, called DXF Spline to Polyline . After fixing this issue was time to cut! The first thing to do was to fix the MDF sheet on the machine's table, using screws and a screwdriver. After this I opened the dxf file on VCarve and position it to the working area. Next step was to check if the there was open vectors in my file (a feature of VCarve). Then I seted the parameters to cut, including tool parameters. Before start the cut, I setted the Z origing, using the sensor connected on the machine. First I did a inside cut to do giraffe spots. It's important to do before cut the external profile, mainly if the external cut was done without tabs. Second operation, was the outside cut to make the gireaffe profile. As I didn't use tabs, one of my components leave its position (I notice at the same time and remove it formthe working area). Durring the outside operation, I also noticed that I had'd set XY origin at the right place. Actully, I didnt't set it, because it usually is already setted. If had paid more atention in the toolpath preview, I would notice this issue before start cutting. To make a better finishing I used a file, and then assembled the giraffe. The images below ilustrate this process.
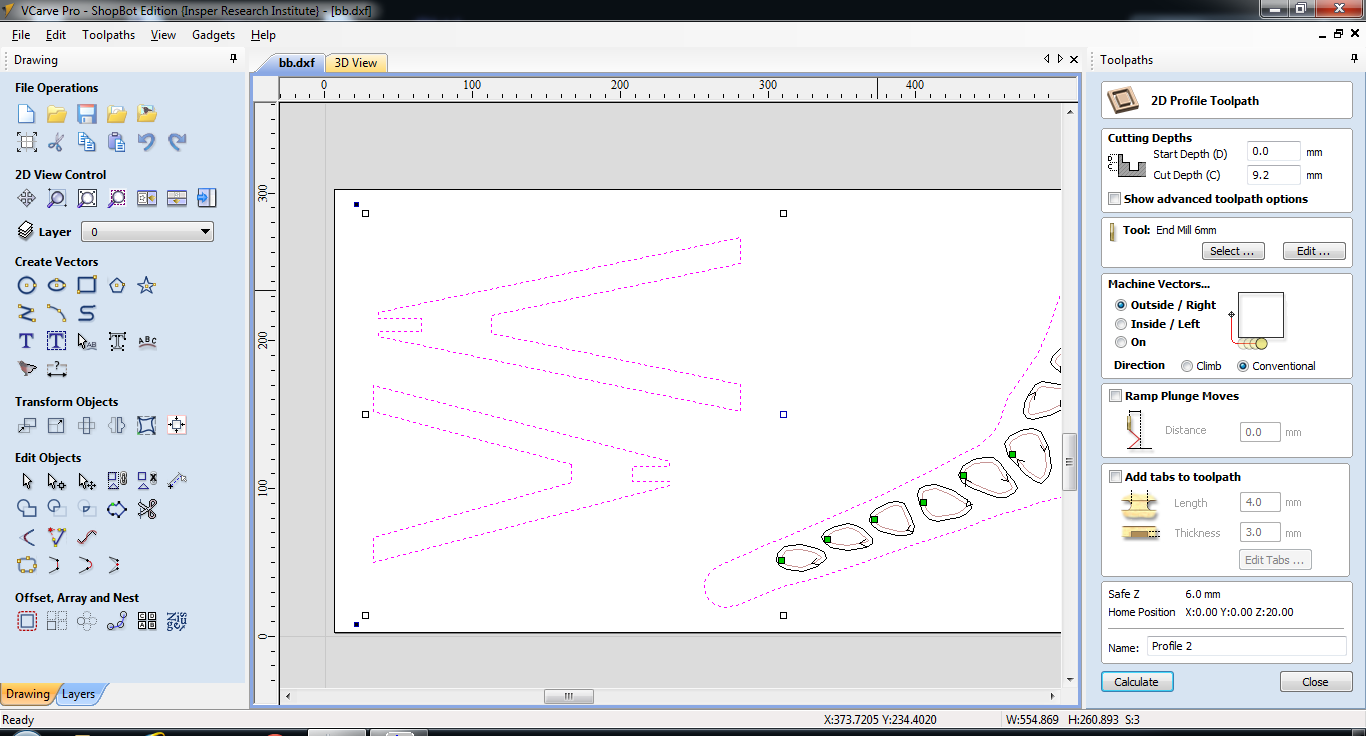
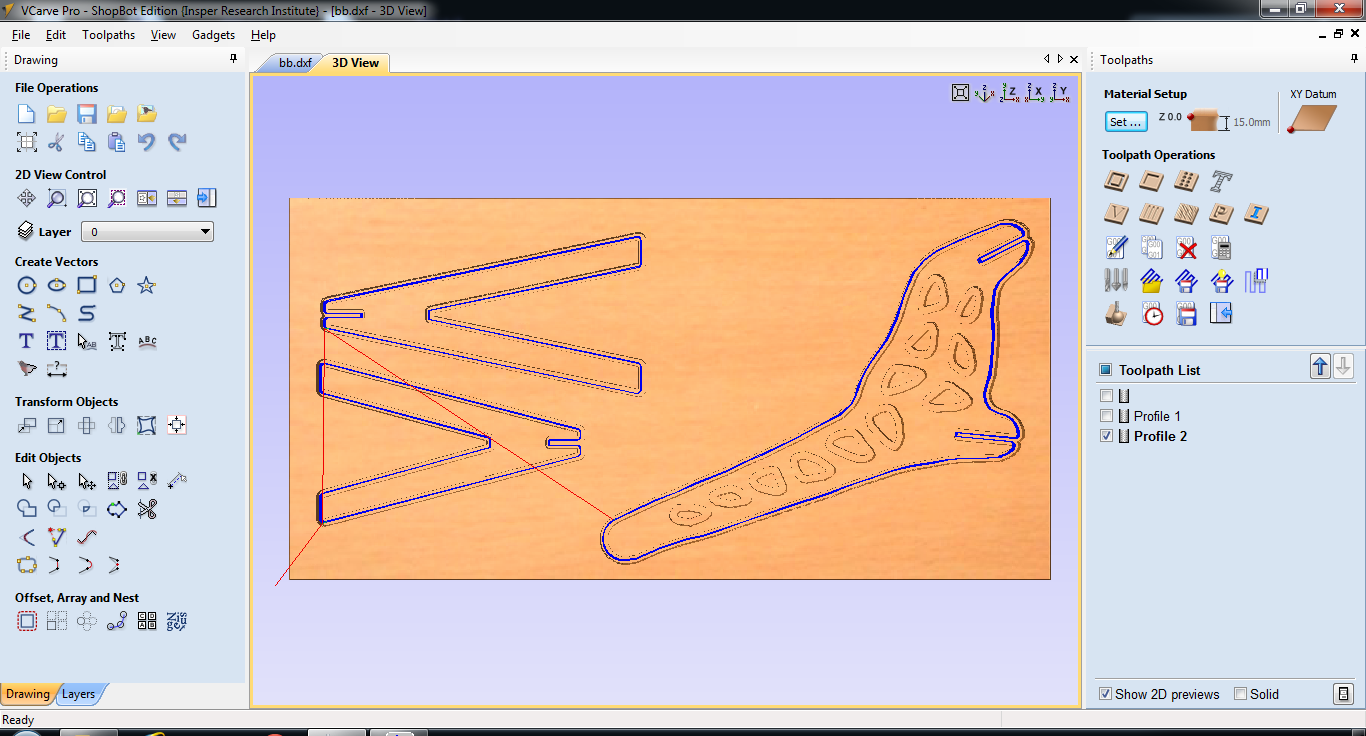
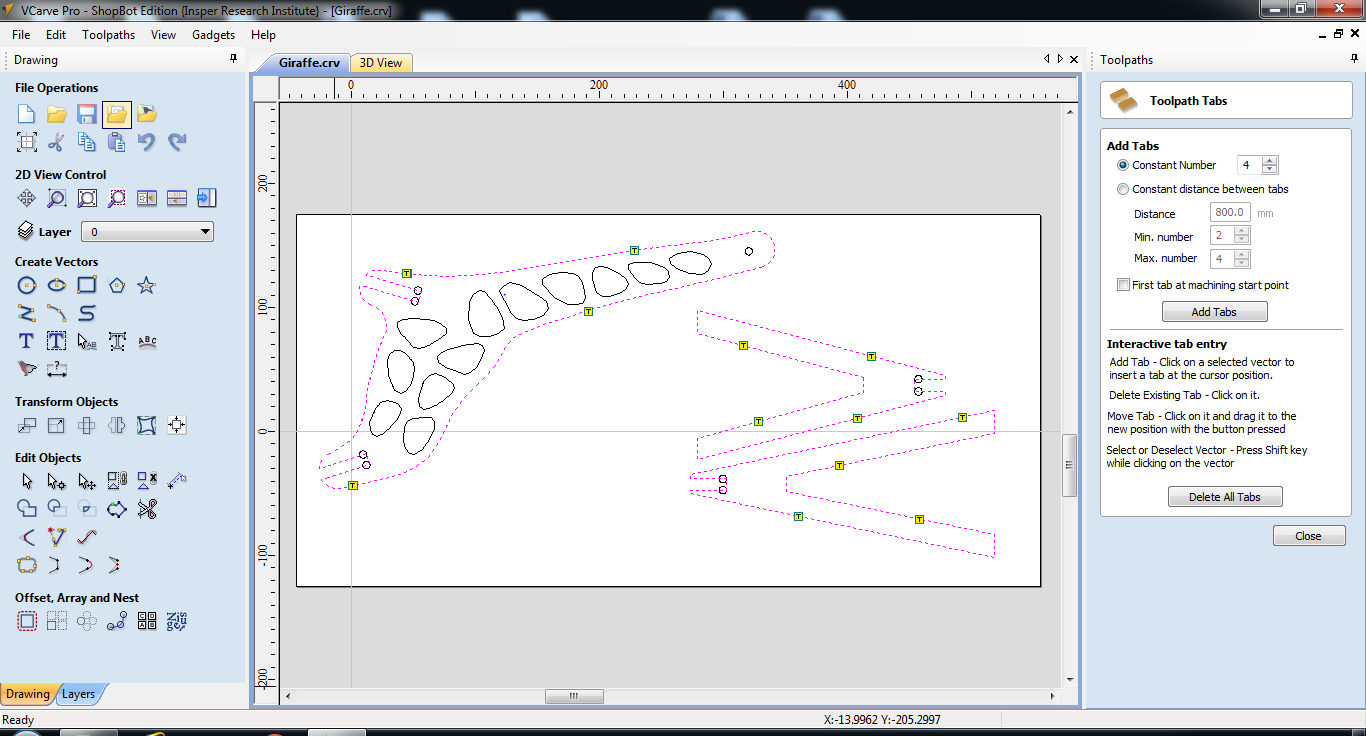
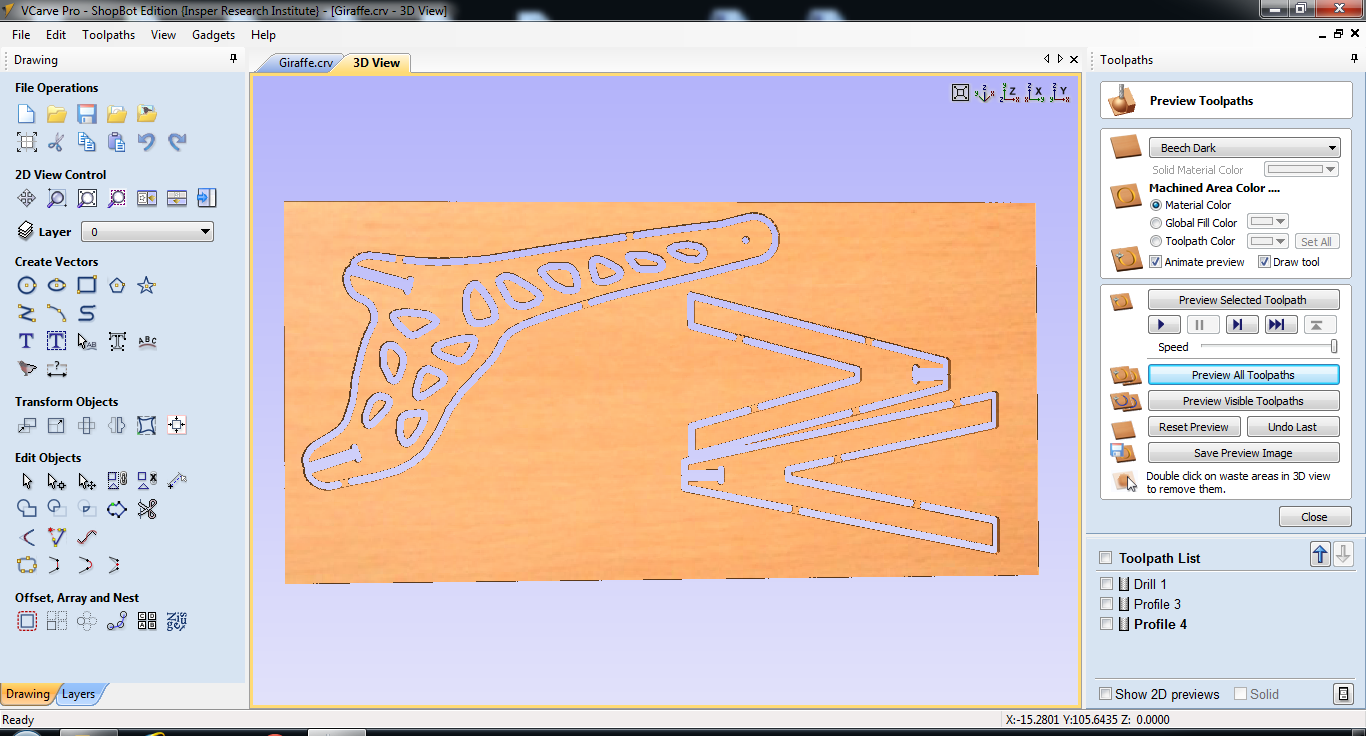
2017 07 18 Improvements: Dog bones and tabs
In order to improve the press-fit joint between giraffe legs and body, I did a dog bone profile in the joints. I also added tabs to the milling process to prevent the part leave position. The pictures bellow show how it woulbe be through the simulation made in V-Carve Pro. The files are already updated according to this milling strategy, and can be found in the zip folder under the name "Giraffe improvements".