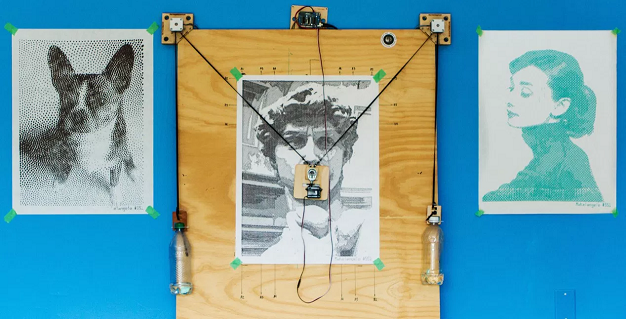
- MECHANICAL DESIGN (week 1 of 2)
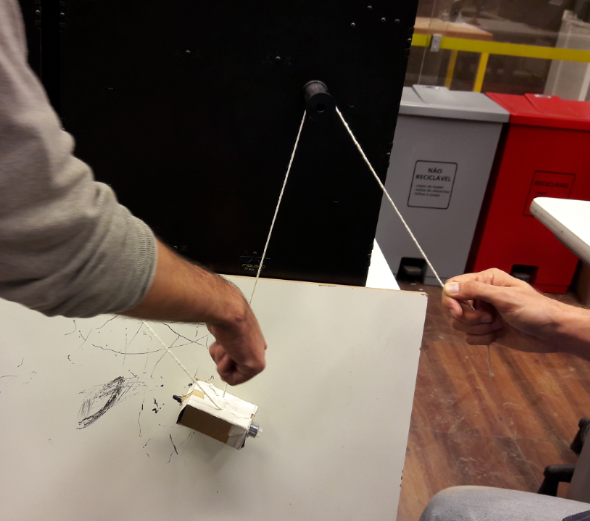
- Make a machine, including the end effector, build the passive parts and operate it manually.
Class material: Mechanical Design
Insper FabLab's operational manual here.
Zmorph 2.0SX - extra information here and also there is this first print tutorial online. The slicer Zmorph recomends is called Voxelizer; for tutorials and download click this link.
3D print filament diameter 3.00 mm - that was proper to the toolhead I used. The access the ABS material available at Insper, click here; and for the PLA click here.
My specific task was to develop the mechanical system. I followed these steps:
1) Try to develop the mechanical part from scratch. I had help from Victor and it was fun, but failed. We learn the idea of weight balance and this was crucial to calibrate the final working system.
2) Learn from Lourenço's development (he works within the technical team at Insper and has build a polar drawbot on his own some time ago).
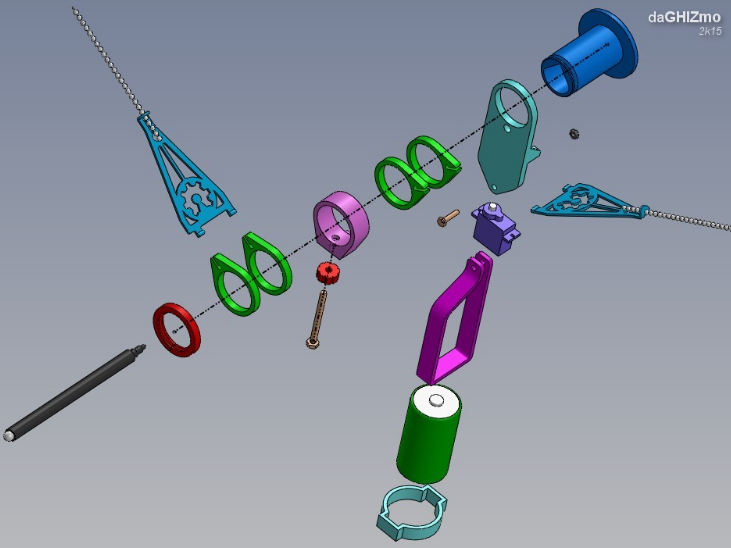
3) Analyse and understand polar drawbot development kit (click here). 3D printing is never that easy and the parts often need adjustment. In this sense, I printed extra units, replacements, in case anything broke during assembling process.
4) I made almost all the 3D prints on the project (some wore made by Alex Garcia).
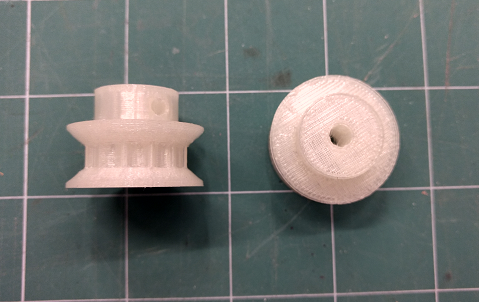
As soon as I finished checking the STL set of files to printi, we chose one subset for the first effort of building our drawbot parts. The gears were chosen. It follows the setup for this print, the same used for exercise 05 and to access the gcode click here.
Alex and Victor also did 3D prints for this assignment. The image with the partes displayed in exercise 11 shows different material colours. They worked on different printers as well. For extra comments on this topic, please address Victor's full group assignment documentation.
Hair spray was the glue used for this 3d print.
- Temperature - nozzle: 240°C - bed: 100°C.
- layer height: 0,1 mm
- printing speed: 30mm/s
- material: ABS 3.00 mm.

![]()
small.bmp)
small.bmp)
small.bmp)
small.bmp)
small.bmp)
-----------

This work is licensed under a Creative Commons Attribution-ShareAlike 4.0 International License.