
- Test the design rules for your printer(s) (group project).
- Design and 3D print an object (small, few cm) that could not be made subtractively.
- 3D scan an object (and optionally print it).
Class material: 3D Scanning and Printing
Insper FabLab's operational manual here.
Zmorph 2.0SX - extra information here and also there is this first print tutorial online. The slicer Zmorph recomends is called Voxelizer; for tutorials and download click this link.
Mousta Builder - extra information here as Mousta team is a member of Instructables.com. The slicer Mousta suggests is RepetierHost; click this link for download.
Sense 3D Scanner - extra information here. There is a video link in our lab manual that I share here. Other downloads are found in this link; a guide and the software for Windows OS.
3D print filament diameter 3.00 mm - that was proper to the toolhead I used. The access the ABS material available at Insper, click here; and for the PLA click here.
Fusion360 design files Tester object and tube 3d printed.
It's been almost two years since I started to work with 3D printing. It seems to me - more and more - a deception exersice. It is a way to learn how to deal with frustration, develop patience and achieve really nice results after that (maybe).
For this exercise, I had my first try with 3D scanning. It was the same feeling... Sense 3D is the hand scanner we have at the lab. One has to 'grow' the image from real to digital; no rush, no shaking and a lot of: 'lost tracking'.
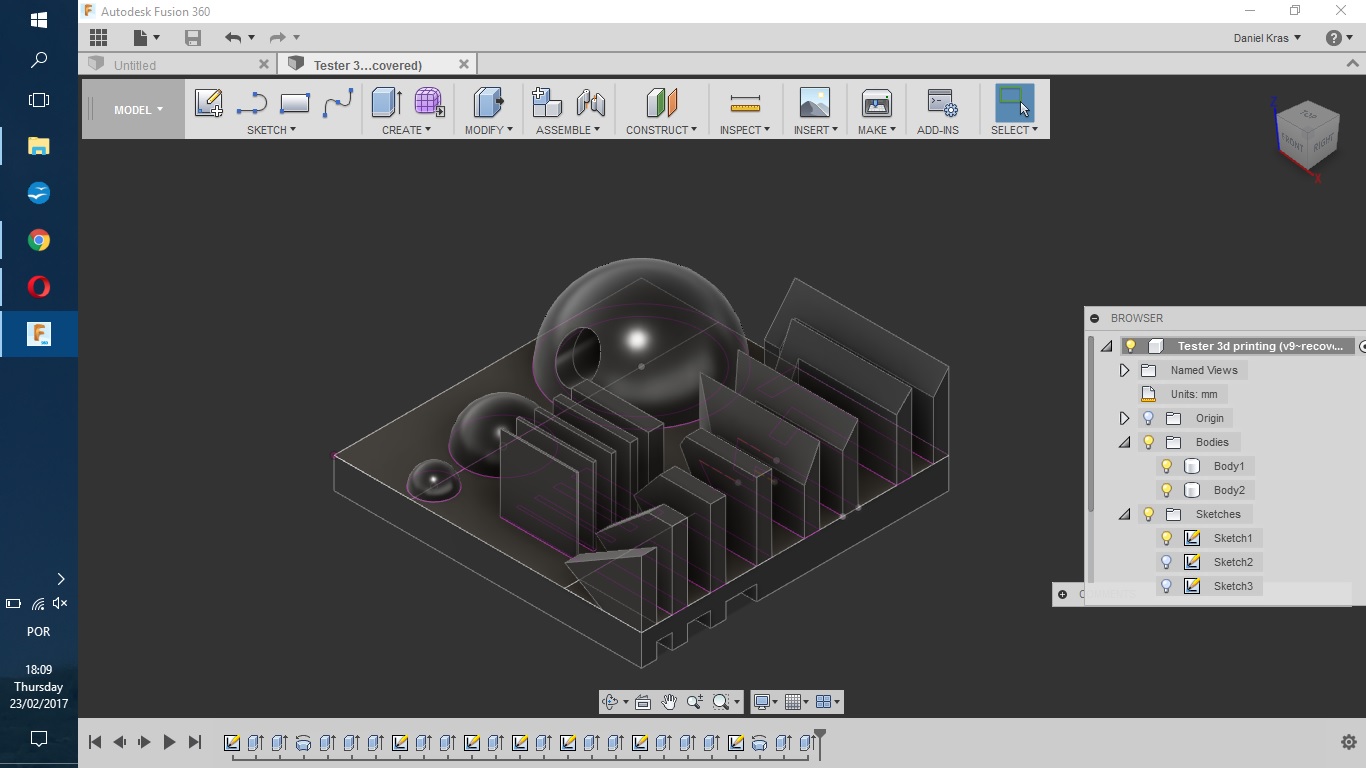
The tester file was designed with Fusion360. It has a shape that tests printing with no support, a range of horizontal angles, a range of wall thickness and a range of negative solid 3D print.
-STL tester file.
-Gcode tester file.
Hair spray was the glue used for this 3d print.
- Temperature - nozzle: 240°C - bed: 100°C.
- layer height: 0,1 mm
- printing speed: 30mm/s
- material: ABS 3.00 mm.
It follows some images to document this assignment. It is a way to tell a bit about the work with Fusion360 and Voxelizer softwares.


Meshmixer is another software that helps me with .stl models. It is good to move, change a bit, scale, cut, slice and rotate the models. I like to test any Fusion 360 model with Meshmixer.
Extra info about Meshmixer: download and tutorials.
Meshmixer preview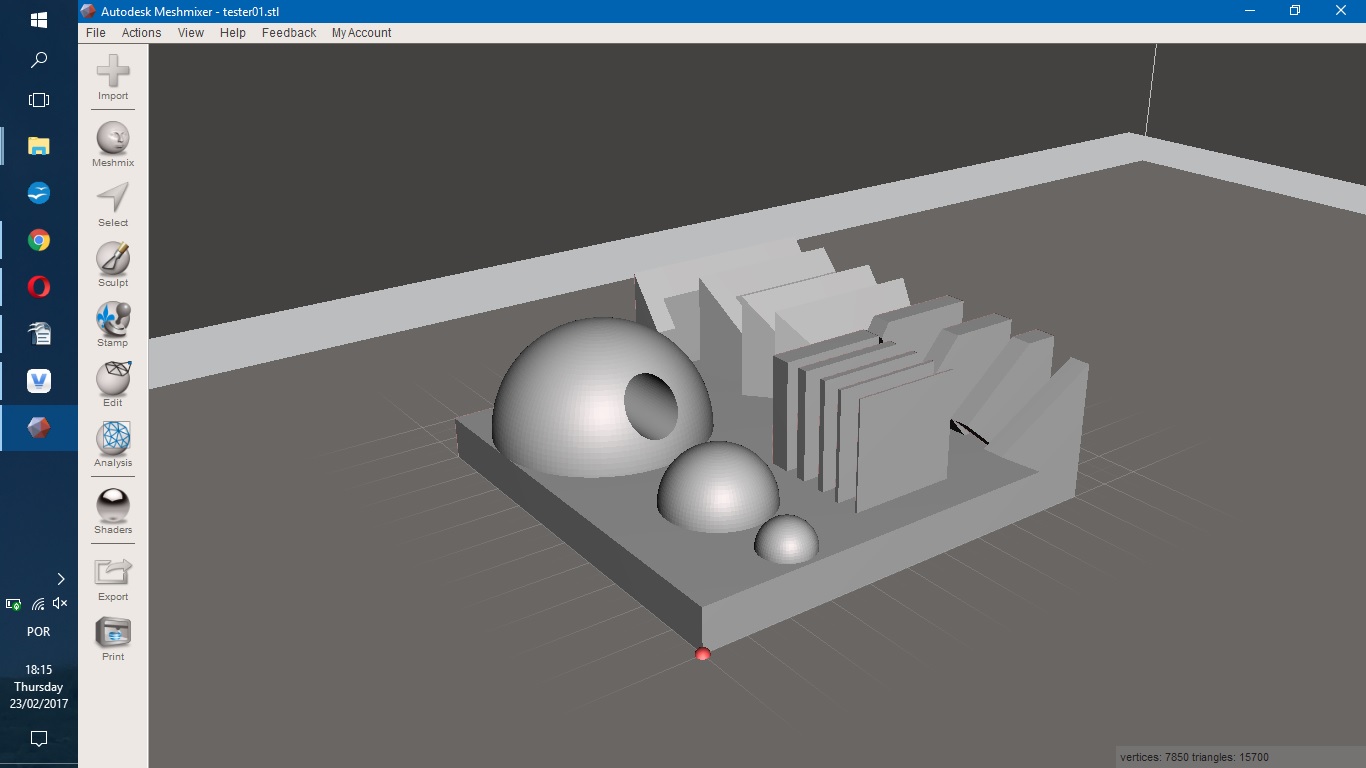
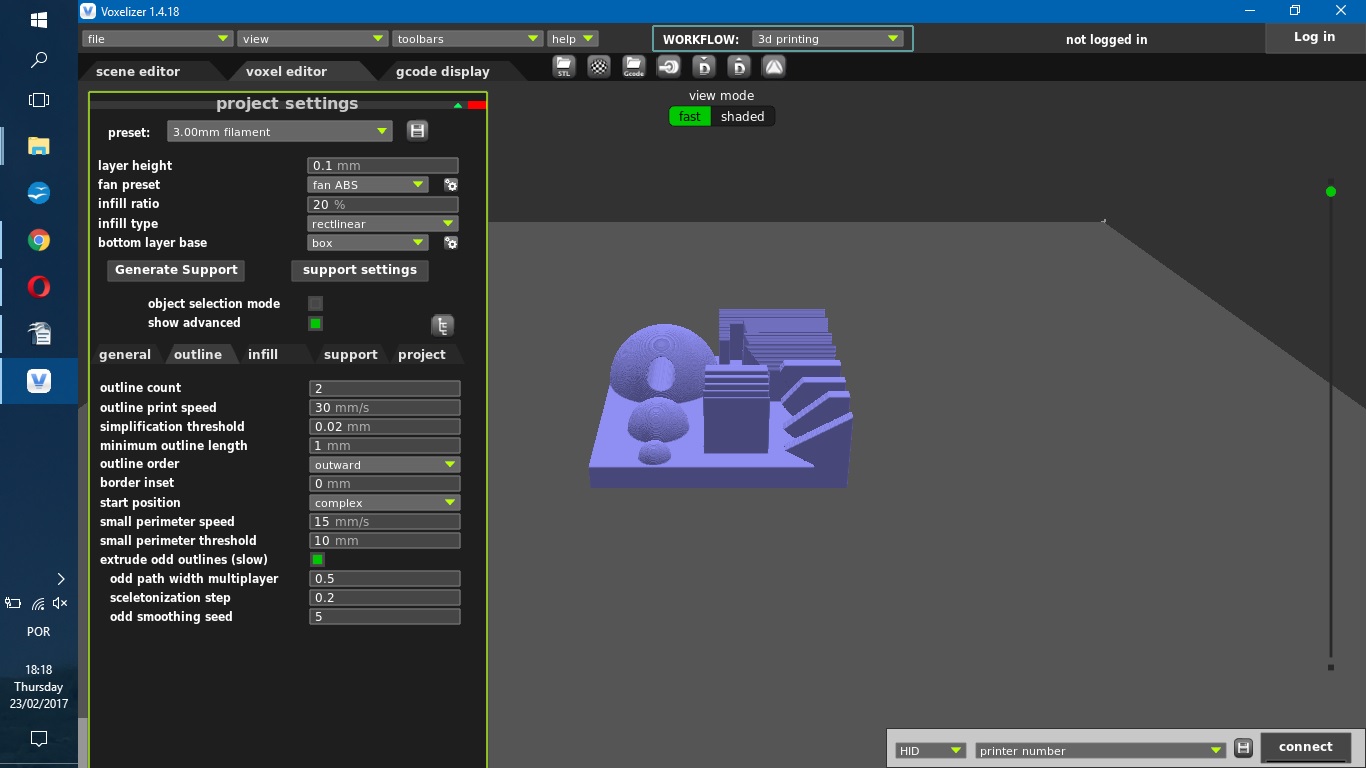
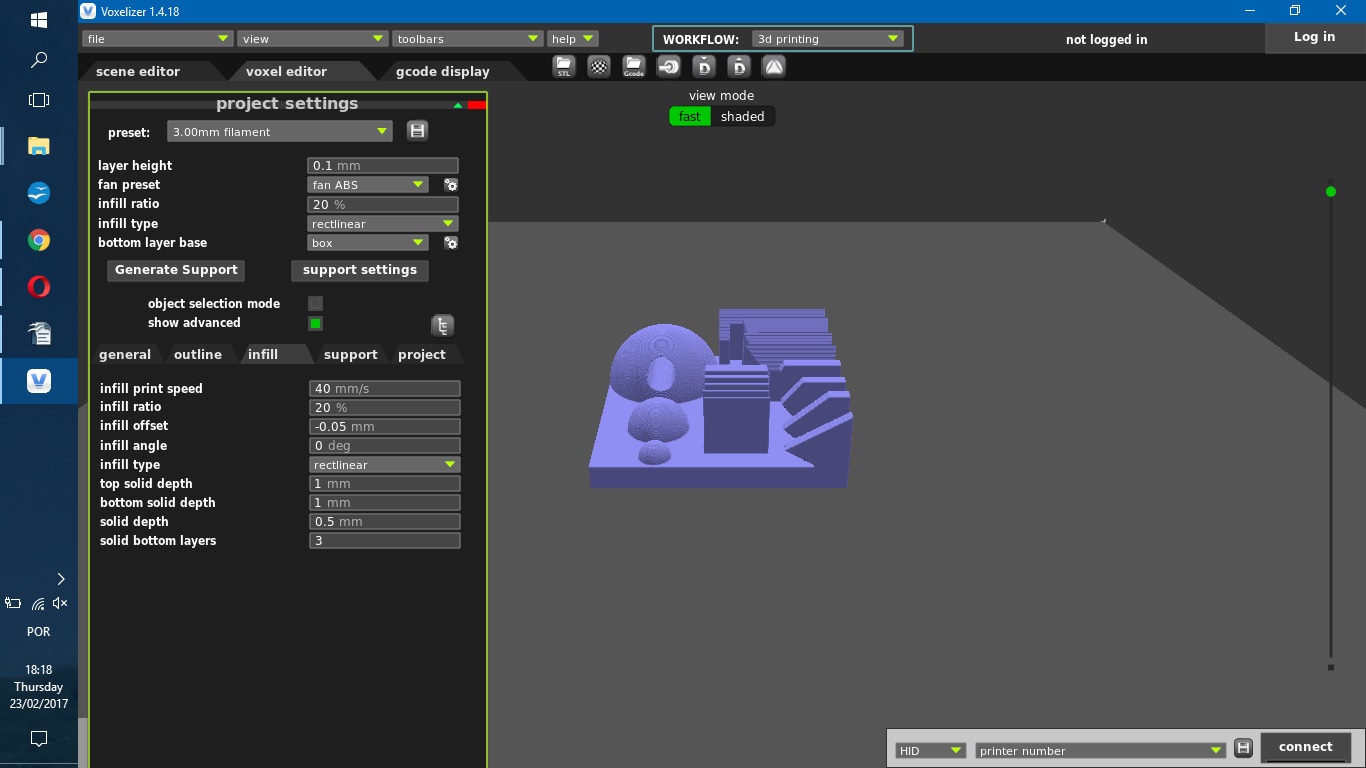
It follows the process of importing .stl file from its folder to Voxelizer working environment. Voxel is a word for "pixel 3D". Voxelizer works with pixel 3D. When I hit 'Voxelize' in the software it turns the whole solid into a finit set of many voxels.
I may choose the size of a voxel in a range of 0.5 mm³ - 0.01 mm³. After this process, I follow with 3D printing standart configurations:
- Outline;
- Infill;
- Support - no need for that in this case;
- Raft and other project presets.
The filament I used was ABS - 3.00 mm - yellow.


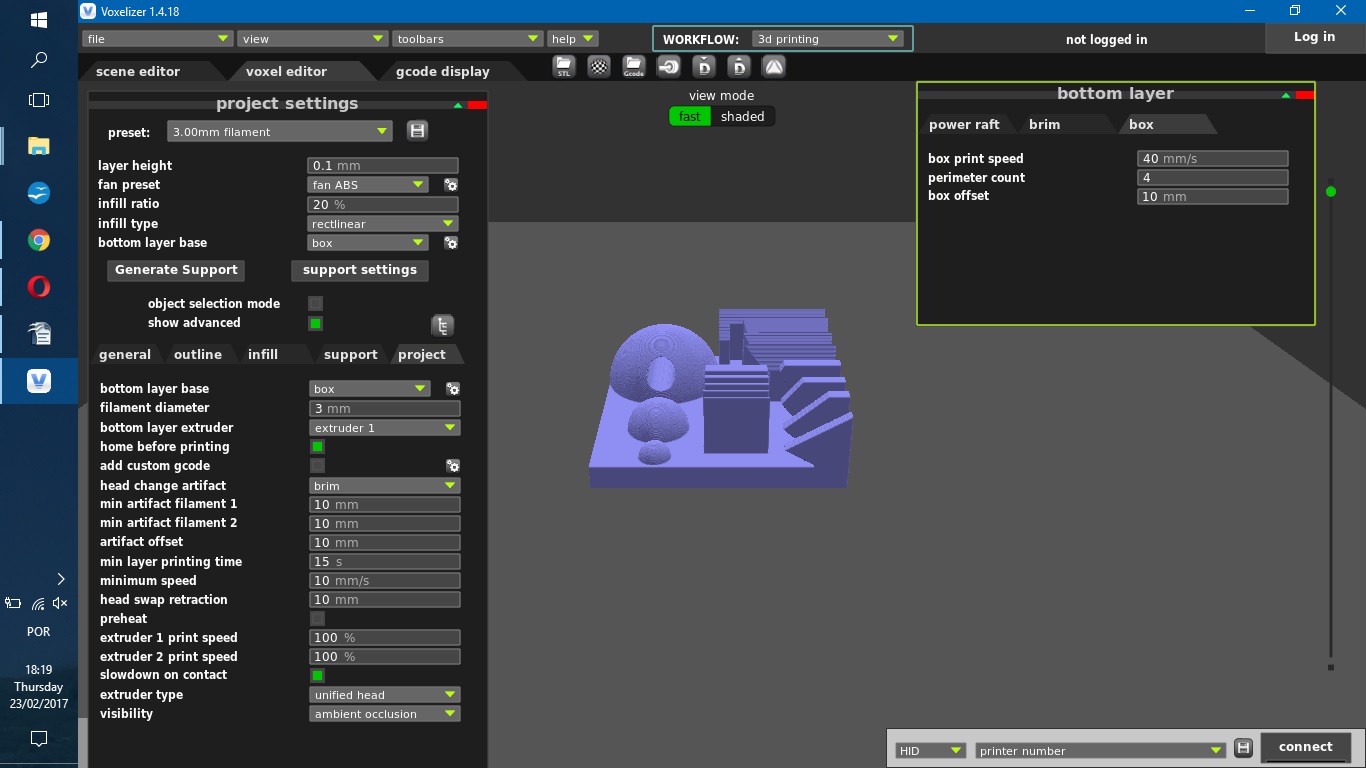
It is possible to check that the smallest parts are not visible in the gcode image. It means those parts are not going to be printed.

The first 3d print attempt wasn't succesful. Error: warp - was noticed. The 3d print was restarted.
.bmp)
.bmp)
.bmp)
.bmp)
.bmp)
.jpg)
.jpg)
.jpg)
.jpg)
.jpg)
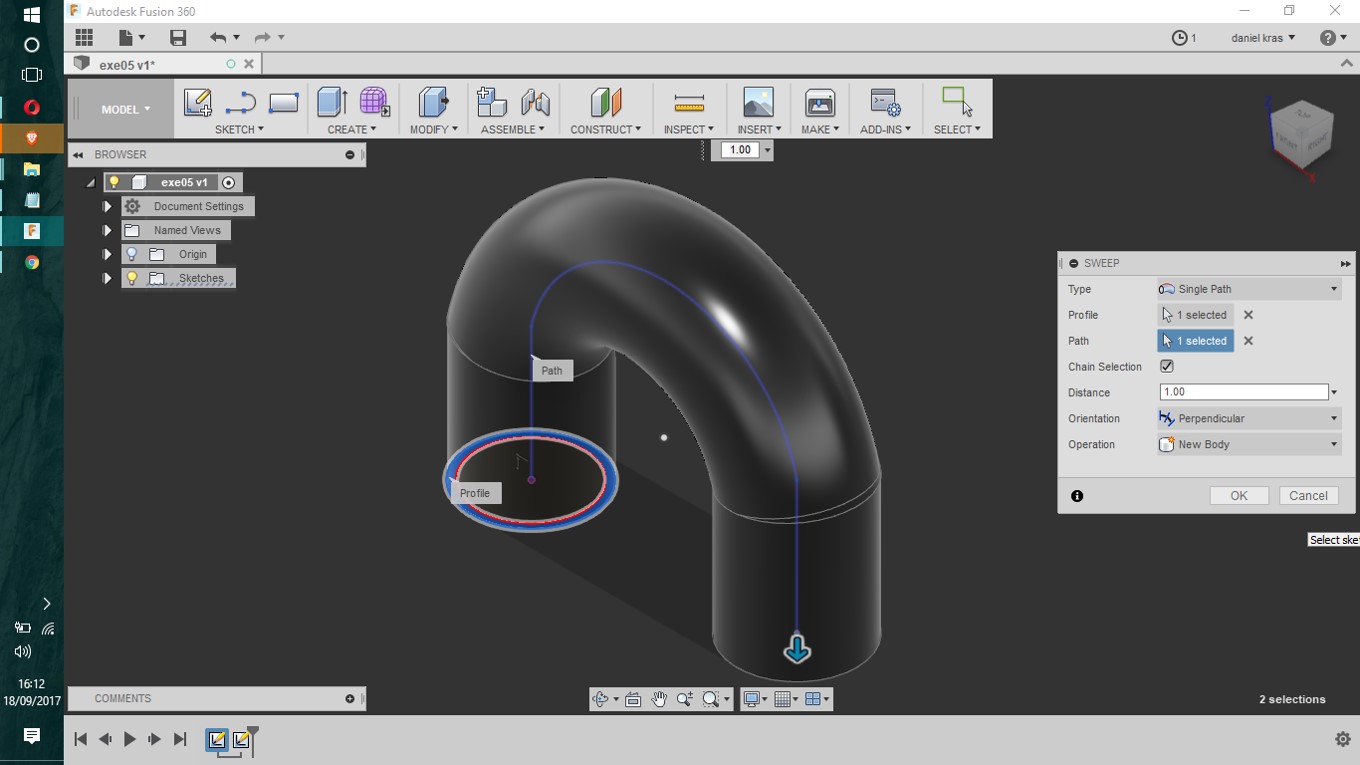
The model I create do complete this assignment is inspired in Pelicano's model idea. It is a tube.
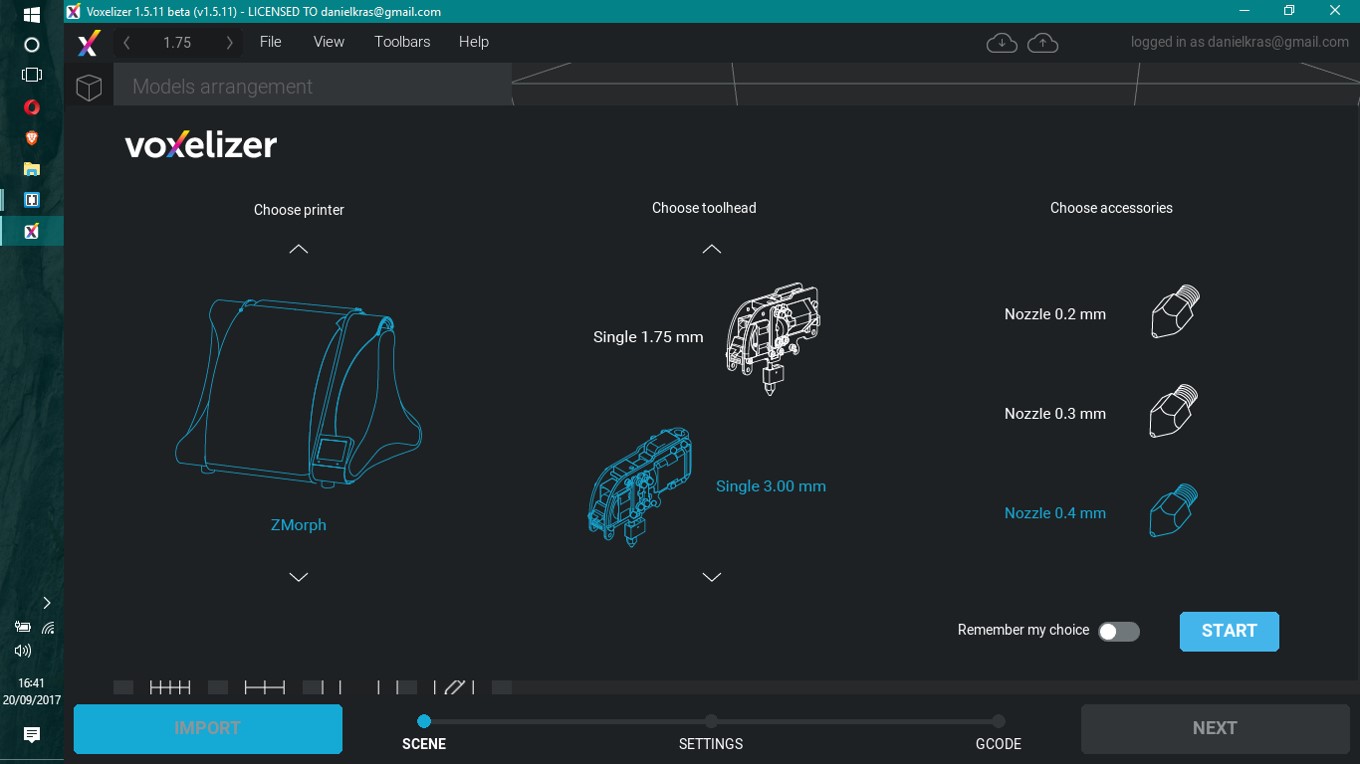
I printed it with Zmorph 2.0 SX; filament was ABS Ultimaker 3.00 mm. The slicer software was Voxelizer (it is a new version comparing to documentation showed above). I chose a bit raft area to get better grip with the table and had hair spray as adhesive.
- Machine: Zmorph 2.0 SX;
- Filament: ABS 3.00 mm;
- Filament temperature: 240°C;
- Table temperature: 100°C;
- Speed: 30.0 mm/s;
- Layer high: 0.23 mm.
The model itself was designed in Fusion360. An STL file is available here. It follow some images of Fusion360 design and later screenshots of Voxelizer setup.
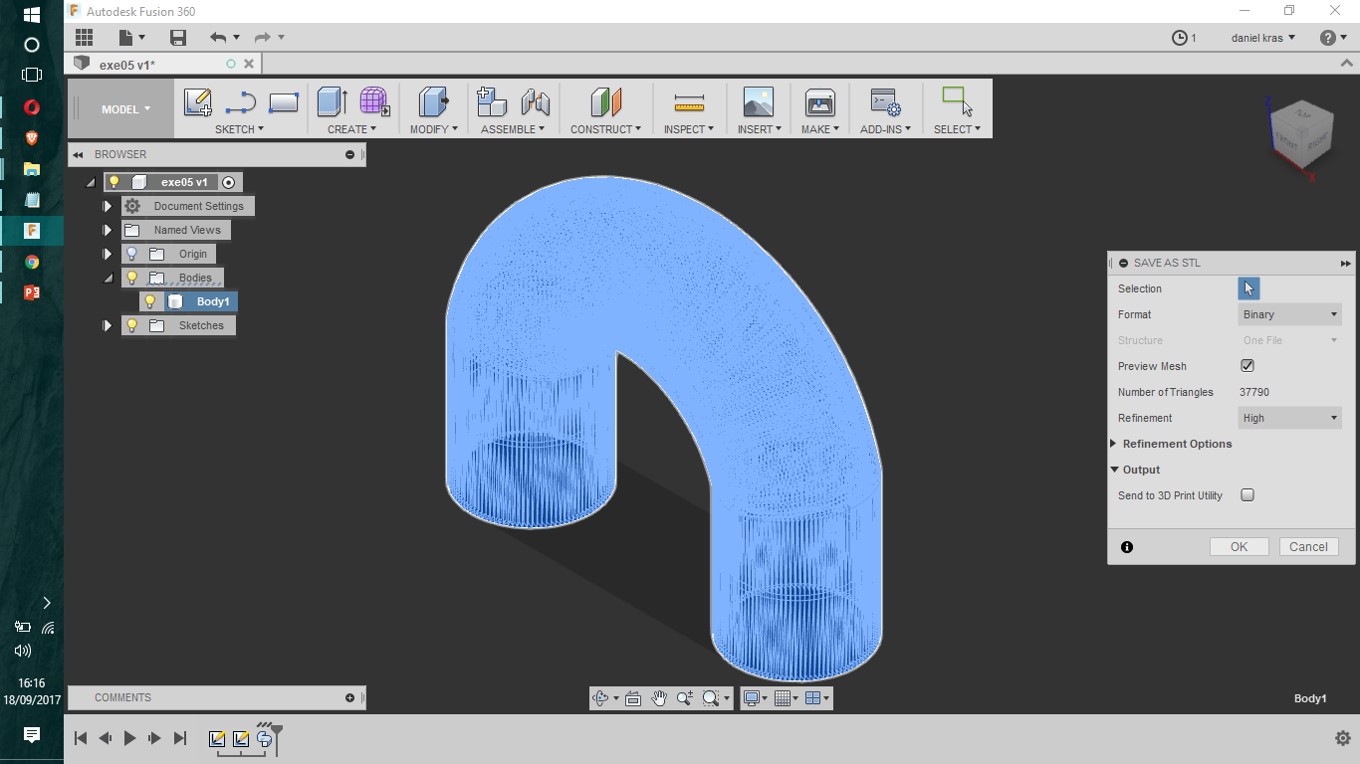
Some extra information and documentatio of above setup follows with images. It will be easy to recognize Voxelizer's update from the printscreens.
.jpg)
.jpg)
.jpg)
.jpg)

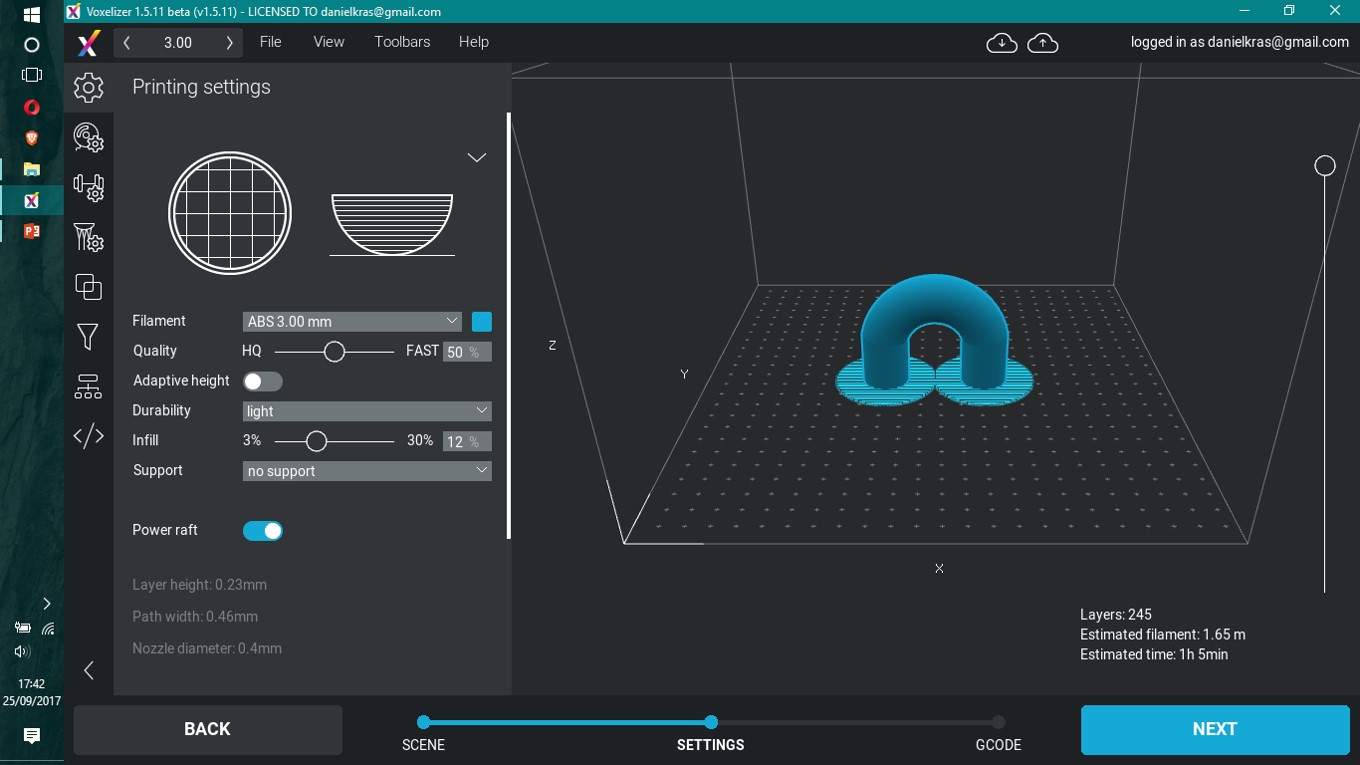
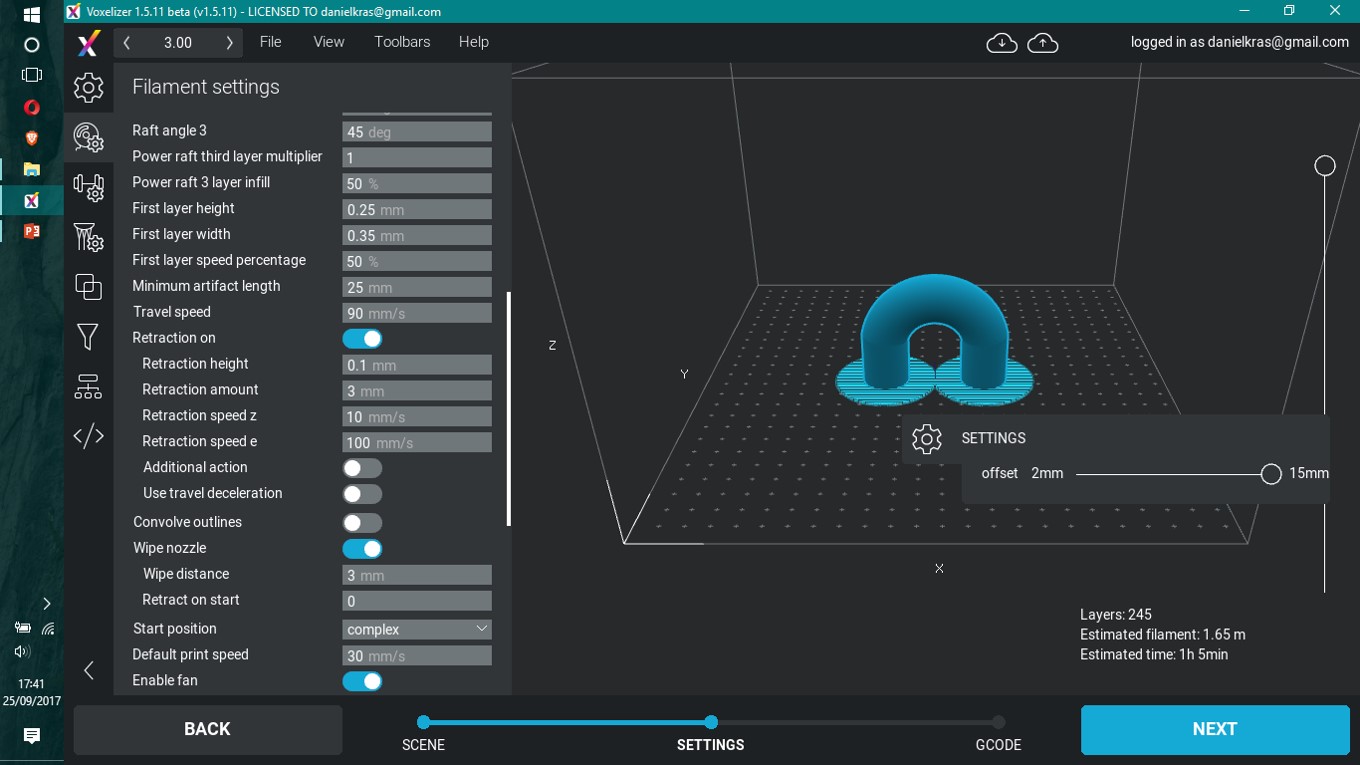

The Voxelizer, as other slicer softwares, gives an idea of how long the 3D print will take and how much material will be needed. It is just an idea, because it often happens to go wrong and restart is very common (meaning more time and material needed).
There is an option of printing from computer straight to 3D Printer thrugh USB cable. I don't recomend that, 'cause you need to leave the computer attached to the printer till the end of it (or quit in the middle).
This is a nice way to have fun. It is a skill to be develop still, by now I may only have poor results when 3D scanning.
The first day scanning was an exercise of building digital objects from a Sense 3D. Pelicano was trying at first with a chair and later we tried to scann ourselves. It wasn't that successful. Finally, I did scan a table object. It seems like the object emerged from a fire.
.bmp)
.bmp)
.bmp)
With this exercise I tried to find out what could be done alone with the 3D scanner we have at the lab. I saved the object in many different formats, as the Sense 3D software offered. The files are available here.
it was much easier to 3D scann a small object that I could leave over the table and move the hand scanner around it. If the table's surface has texture and doesn't shine, it will be better to generate a scann image. if the object doesn't shine, it will also help for a better scann process.

.bmp)
.bmp)
.bmp)
.bmp)
-----------

This work is licensed under a Creative Commons Attribution-ShareAlike 4.0 International License.