#12. Molding and Casting
Molding
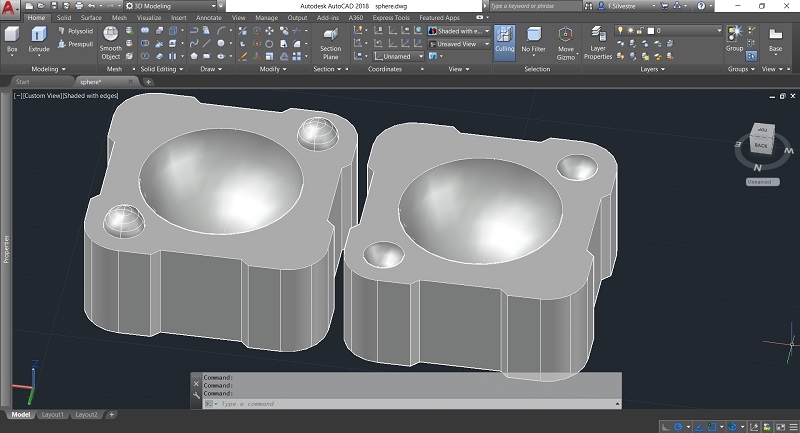
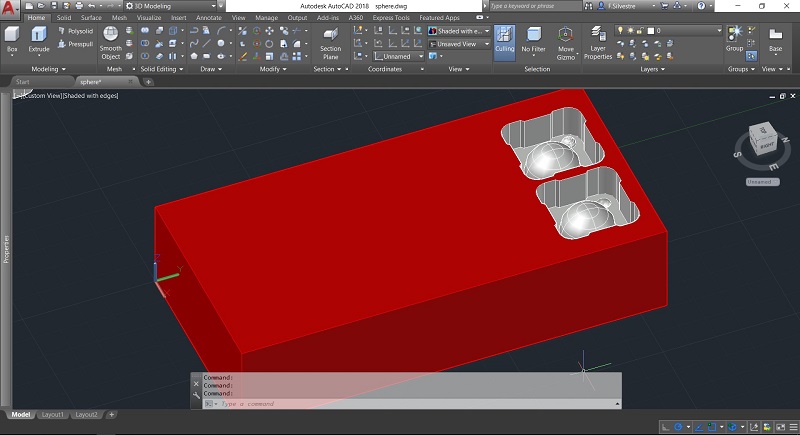
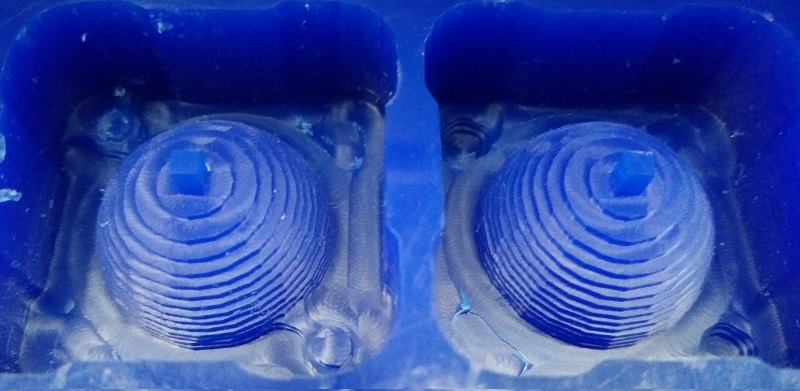
Started this week with somenthing i never tryed before, carving a block of wax, molding and casting. To do this i first begun by designing a simple piece, in this case it would be a sphere, since i've never worked with this i thought i'd better make something simple to start with. Design a the model, then what i wanted its mold to be like and then removed it from the block of wax (in the design). After a while i came up with the 3D model you can see below.
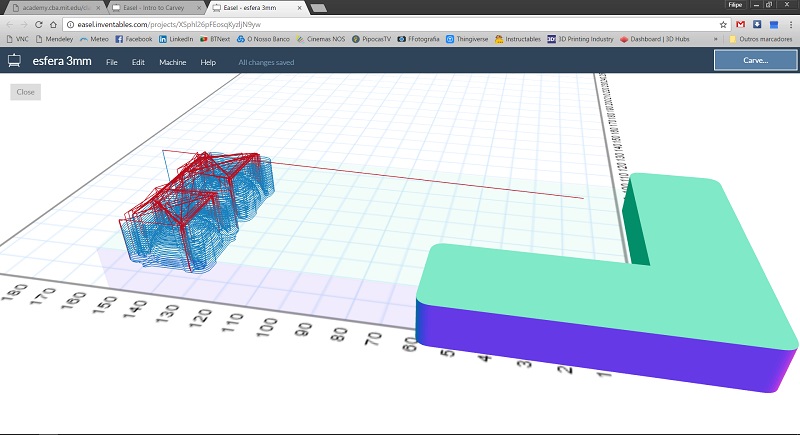
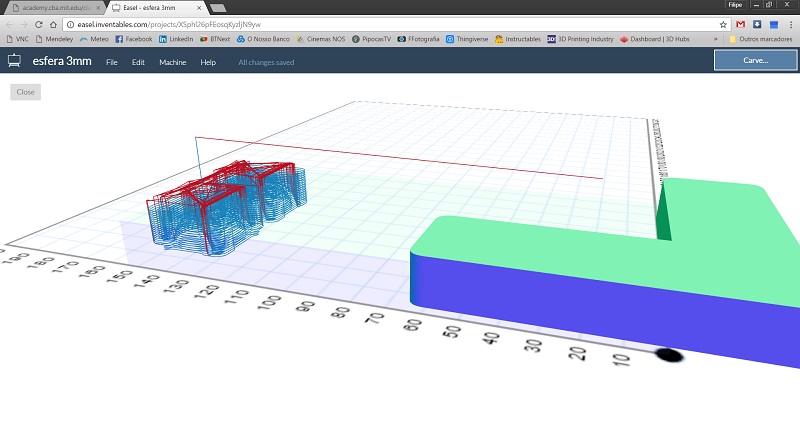
With the negative block i went into meshcam to export a gcode with the parameters i thought were best. The paths that were generated can be seen in the image below. In this software first i got to make sure you're origin is in the correct place so that when you see the gcode on the easel you won't have any errors. Then if the dimensions are correct, you have to choose the area where you want to work, then to finish you have to select the tools (add them if needed) and set the parameters to carve. With this done is just a matter of saving the gcode files and open them on easel to see if everything is good.

The machine i was going to use was the Carvey and when we import the Gcode from MeshCAM into Easel, the app previews the paths its going to make. In the images below you can see the rough cuts then the fine, wish both together took about 1 hour to complete, maybe should had made it slower or do some more paths to refine the finishing. Also below there's a small video of the machining, still early in the process since there's not a lot of shards lying around.
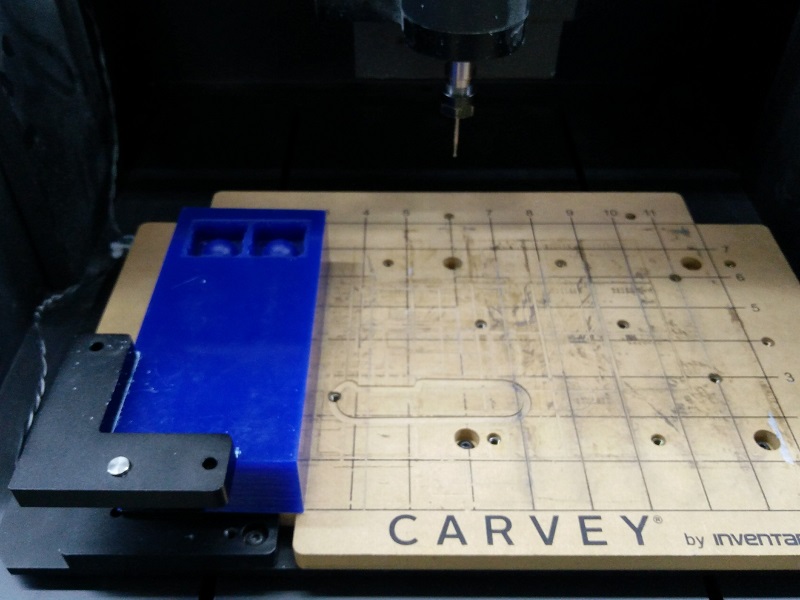
Now this is the outcome, first from the rough and then from the fine. For the fine i only did the X and Y paths but maybe should have done the waterline as well, i'll be using this process for my final project so i'll have some more pratice to do.
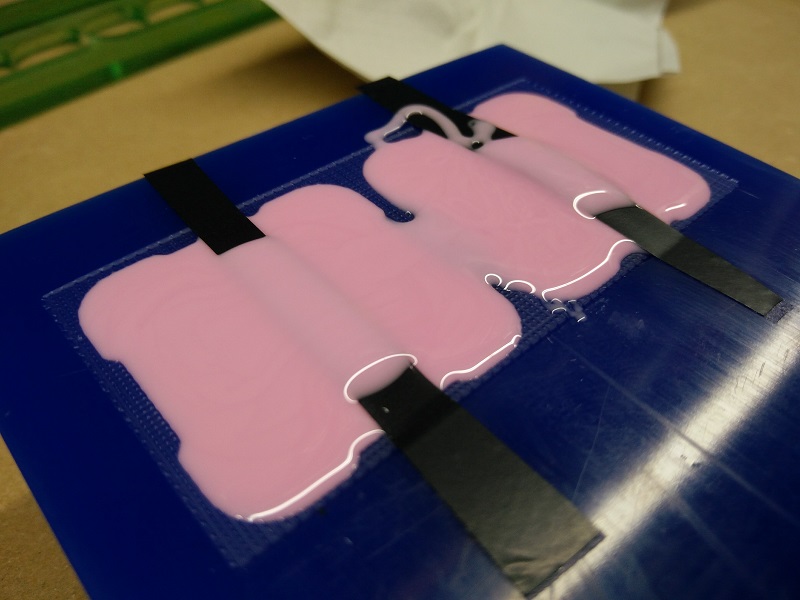
Also there was a problem with how to fill the cavity of the mold, i basically forgot to make the channels for hte entry of resin and a respirator, so before i fill the master with the silicone i simply added a small cilinder and taped it.
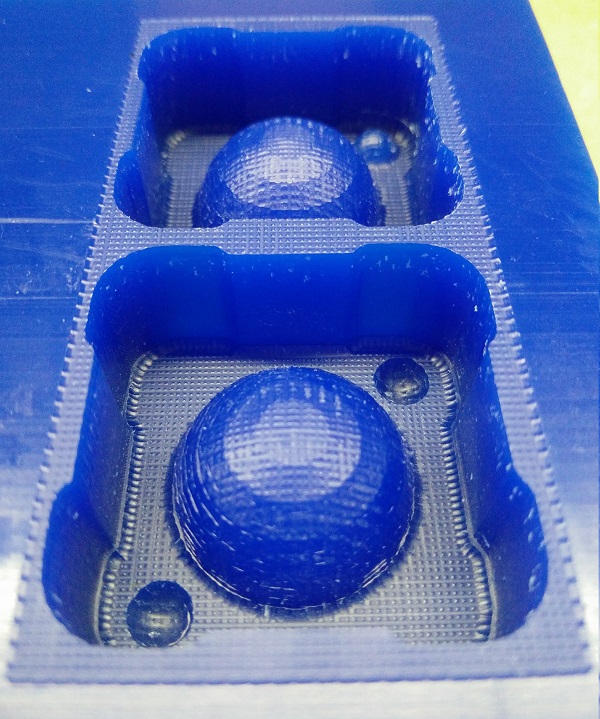
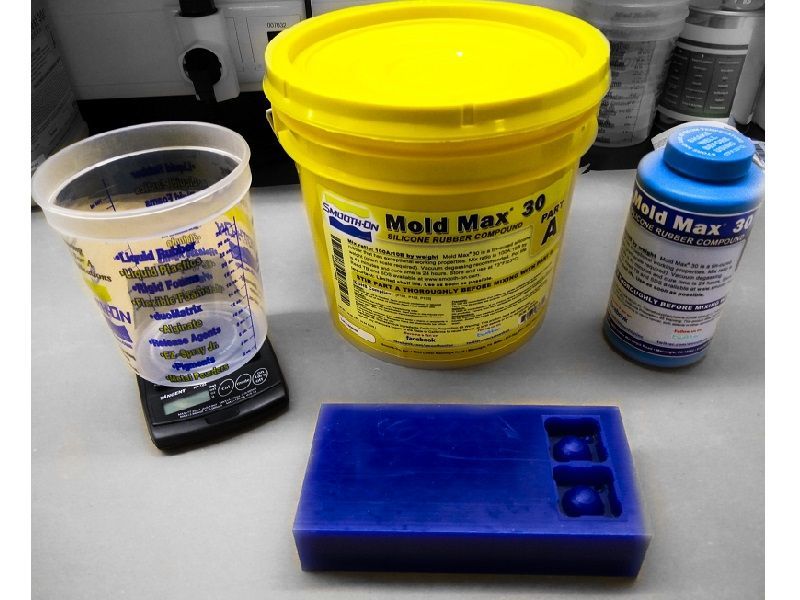
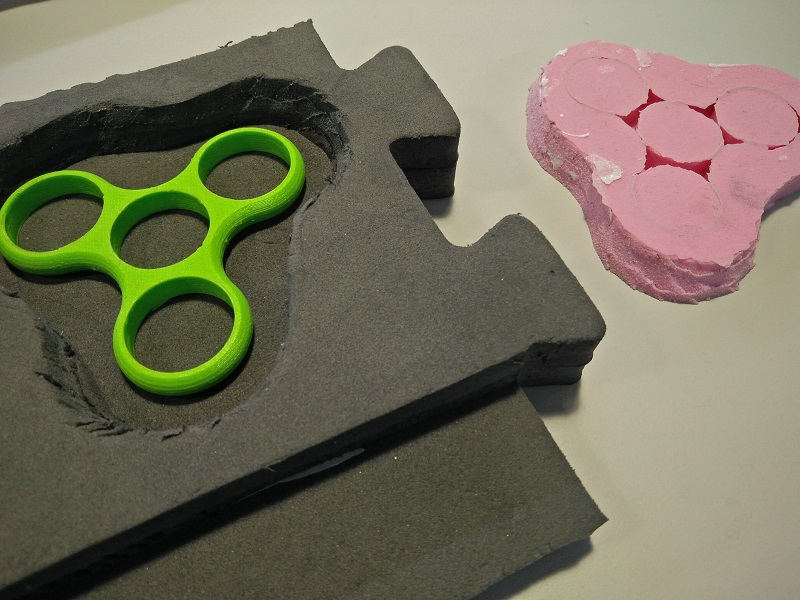
We used Mold Max 30 from Smooth-On wish is a tin-cured silicone rubber compound, its a 10A to 1B mix (to weight) wish was a bit of a nightmare to get right, since the part was really small i had some trouble getting it right but ended up with some leftover wish i put into a 3D printed spinner with some improvised walls.
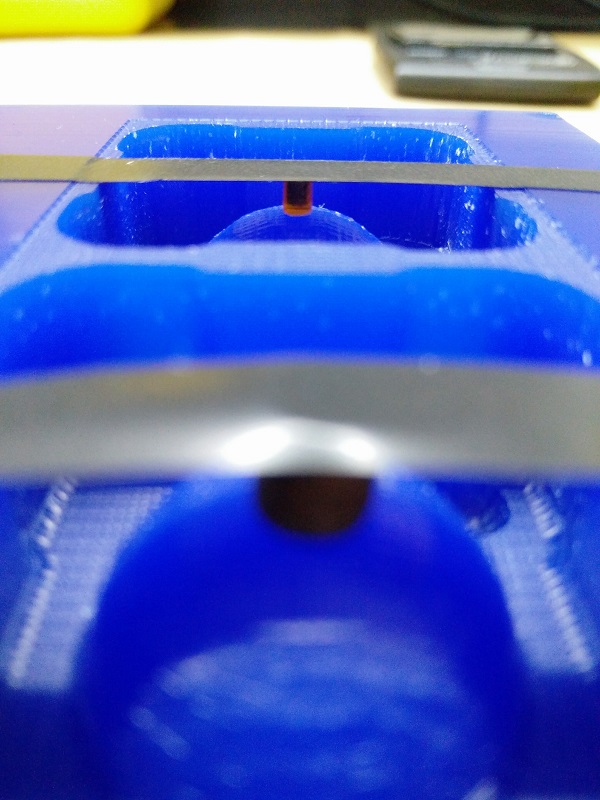
After all was well mixed (2 minutes more after what it seemed to be weel mixed) i puted the cup into the Vacuum degassing chamber and had to make the following video.
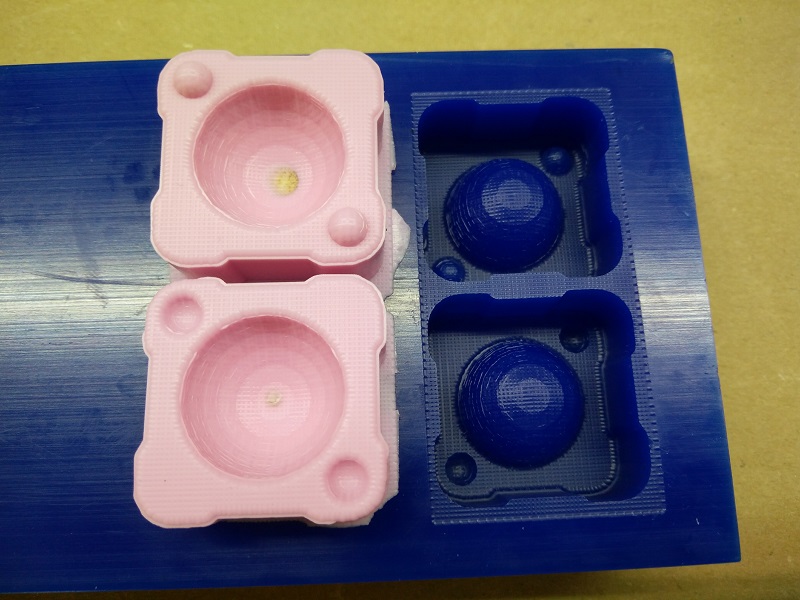
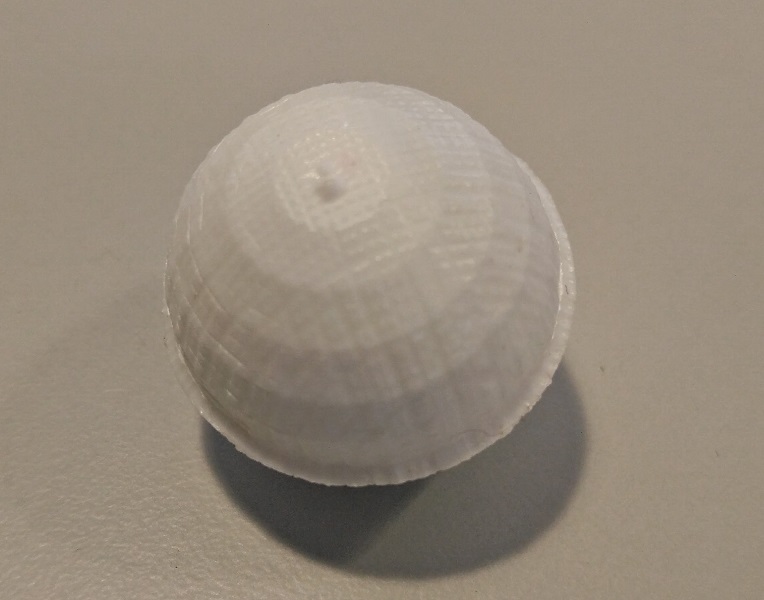
Althought i still had some bubbles coming up it was there for almost 3 minutes so i tought i was looking good already so just decided to poor into the master and that was it. It make up as you can see below, not perfect but still very good i think, maybe didn't had to put in so much but it didn't ooze out or anything. After curing overnight (just in case i waited 24 hours) and the silicone just came out perfectly. Now into the resin!
On the second attempt i decided to leave the bottom hole open and went for it, happily and regardless the mess it did, the result was much more interesting:
But since i had some leftover silicone i decided to make something quick and easy, so i grabbed a piece of floor matt and cut it to size and created a small recipient to put a fidget i'd printed before and amazingly it worked, this is how it looked:
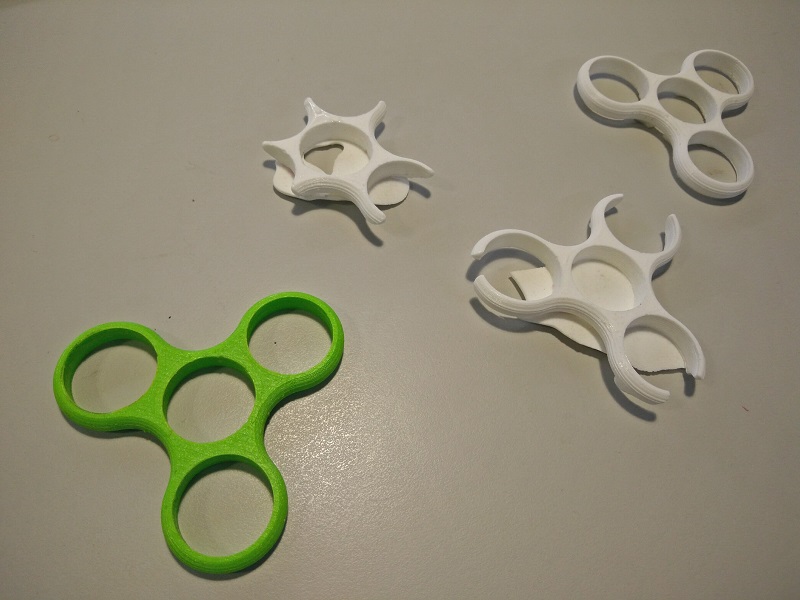
And so i ended up trying to produce a fidget with the resin, it got better each try and the last one it worked, wasn't able to fit the bearings inside but still it looked really similar to the original piece.
Files to download: