Assignment 8
embedded programming
Have you:
- Design and build a wired &/or wireless network connecting at least two processors
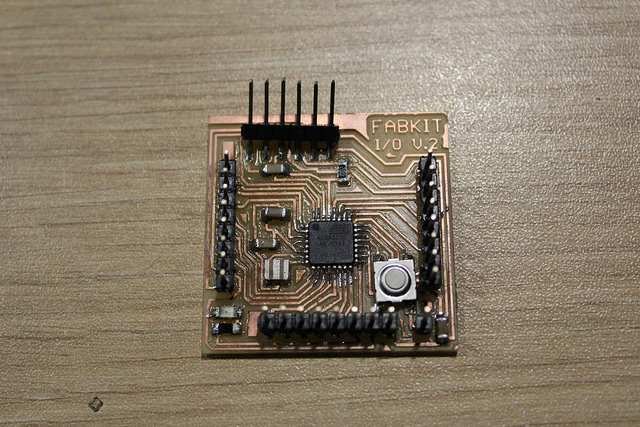
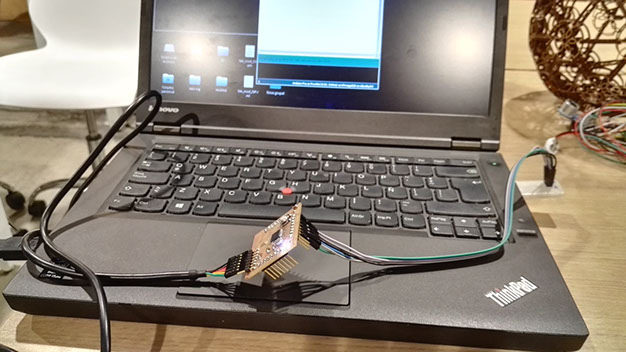
For this homework, we are asked to make a microcontroller, in this case we chose a Fabduino.
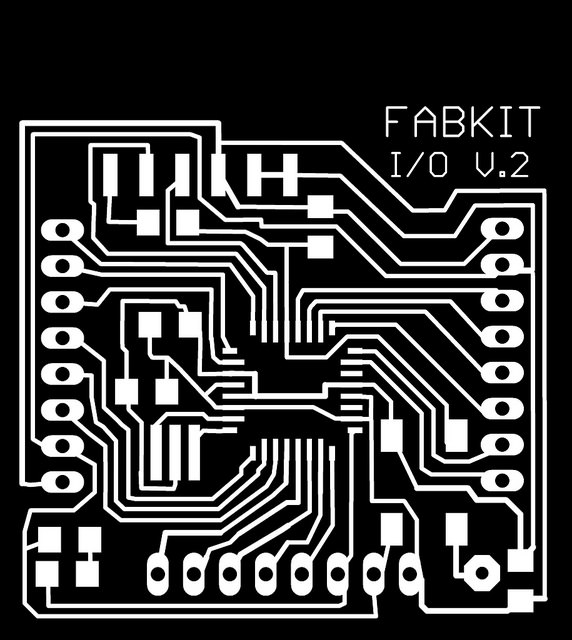
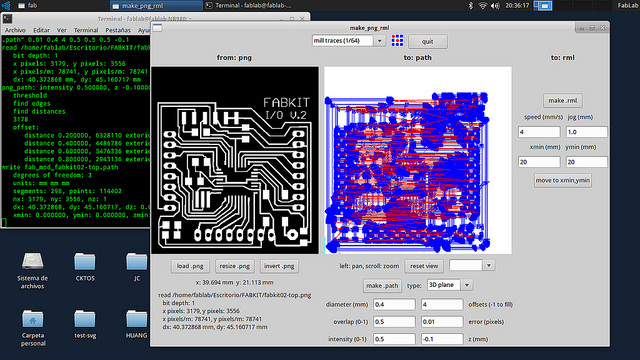
The Fabkit can download free of internet in PNG format, ready to mill.


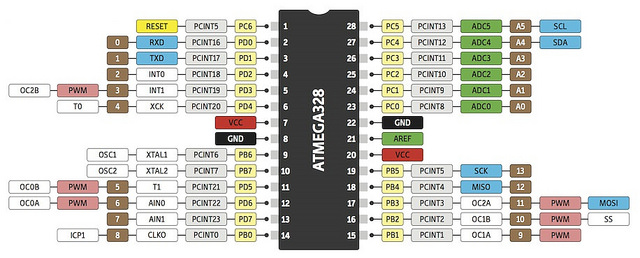
Before milling, the first thing we have to do is to check the Data Sheet of the AT MEGA 328, as it will allow us to know what each PIN is and that it can be connected
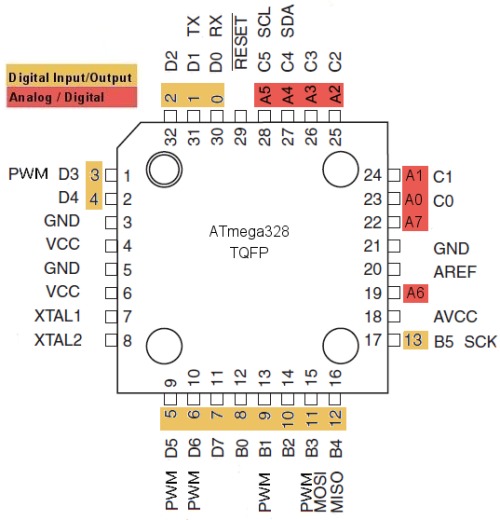
In this case, the FABDUINO is a board compatible with AtMega 328 microcontroller, for this reason you can write the same code that Arduino.
For milling, as the files are already in PNG format we place the plate in the milling machine (in the same way as in Week 6 and Week 4) and load the files to be milled.
The difference is that in this case we will make an interior cut to pass the pins stopped and have more space.
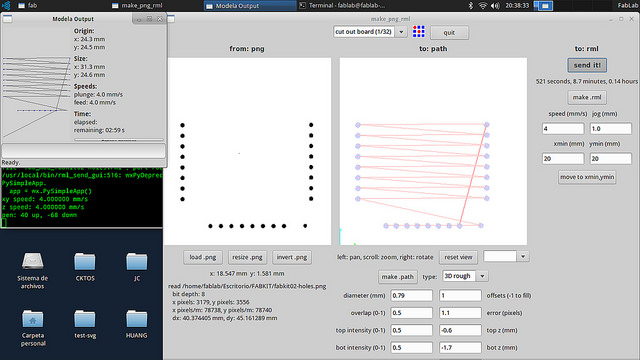
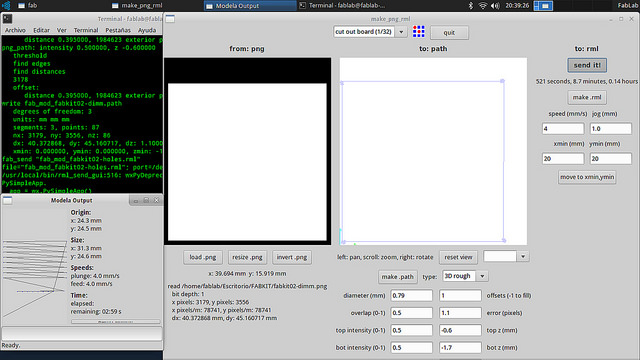
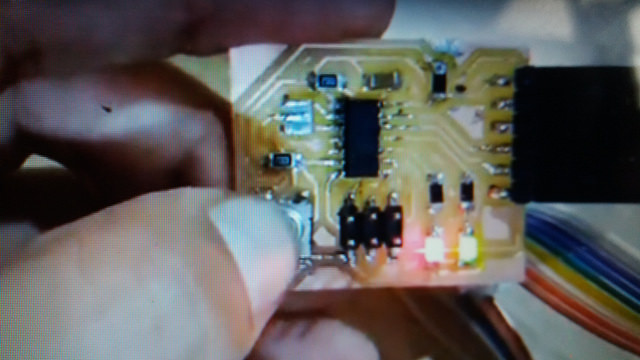
Once the plate is milled, we weld it and proceed to programming.
PROGRAMMING : In this case we will program in two languages: Arduino and Code C
ARDUINO IDE
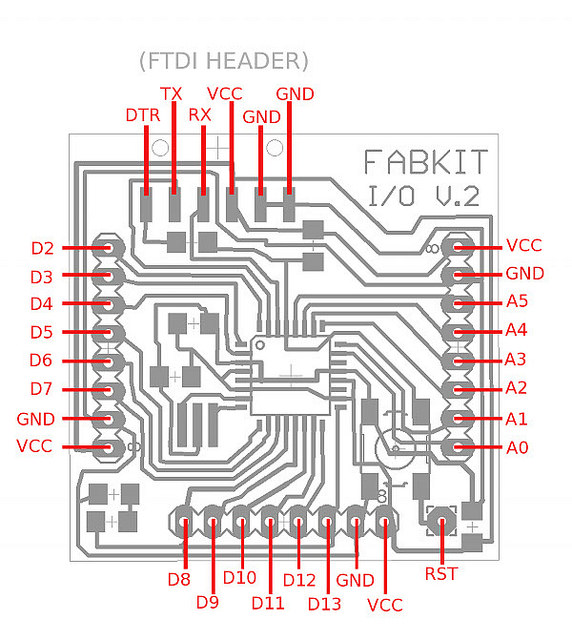
For burn the Bootloader we need a FTDI cable and a AVRISP, acoording to the diagram of Fab Kit. Other form is using a USB tiny.
The AVSRP should be plugged into the pins below and the FTDI cable directly to the PC.
Important, in the FTDI cable, the color Black is GND.
Next, download the Arduino IDE in this link.
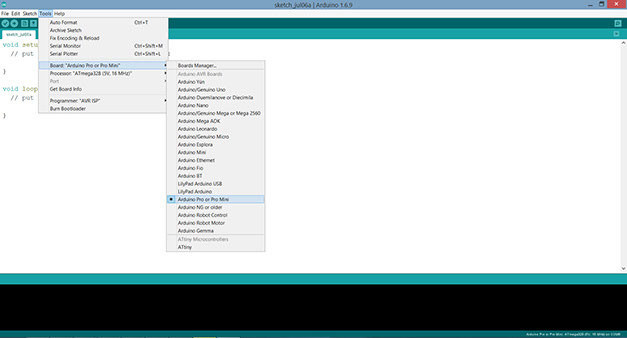
Follow this steps to burn bootloader for the Fabkit:
1. Open Arduino IDE
2. In Tools/ Board select Arduino Pro or Mini
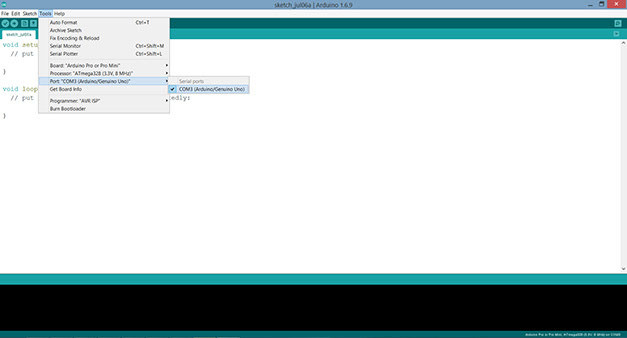
3. Select in Processor At Mega 328 and 3.3V and 16 Mhz
4. Select Port COM 1
5. You can programmer with many options, but in this case select AVRISPmskll
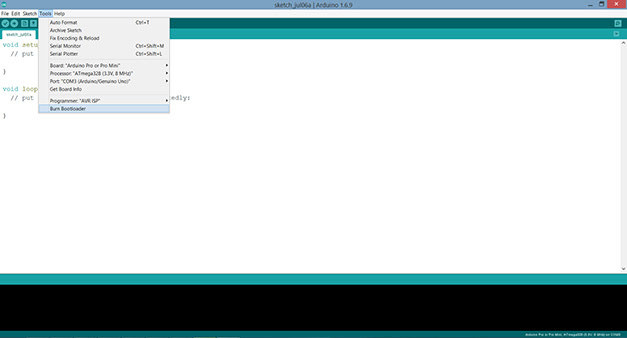
6. Select BURN BOOTLOADER
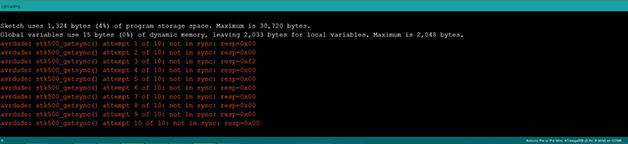
In case of error, check the continuity of the components of the board.
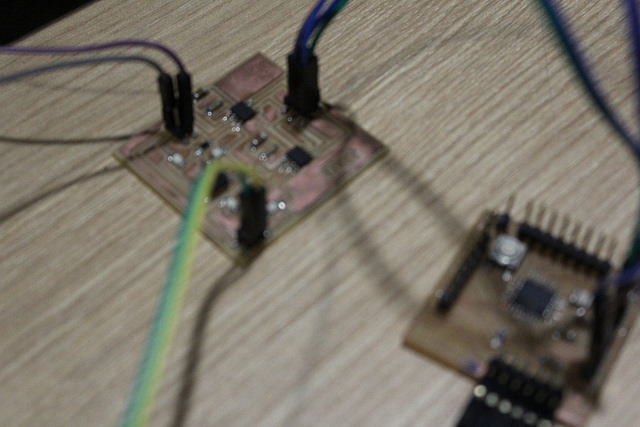
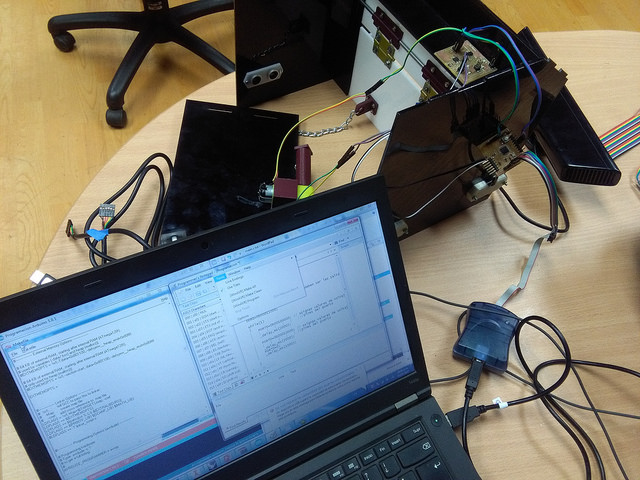
Then, we identify the pines that we have to connect according to the schematic of the FabKit and connect it to the H bridge we did in week 10 and to the power source.
We use one of the examples of the Arduino IDE and on that we change the pins according to the pins of the Fabduino.
We are getting the engine to rotate in one direction for 2 seconds and then turn in the other direction for 2 seconds.
In Arduino it is programmed in a binary way, that is to say, if the pin is written as HIGH it will work if it is written as LOW it will do nothing.
As already identified the digital pins 4 and 3 like pins that go to the motor, first it is necessary to identify the pins like outputs (Void Setup); Then Void Loop is written that pin 4 is HIGH and pin 3 is LOW, this means that it will rotate in the direction of pin 4. The delay is put down which means the time it will take, like this one In thousands of seconds we put 2000 (2 seconds). We do the same but we inverted the pins and at the end both pins are written in LOW for 1 second, which will be the time that the motor does not move.
The programming on the Arduino is infinite, so when you finish performing the programmed actions you will repeat it again and again.
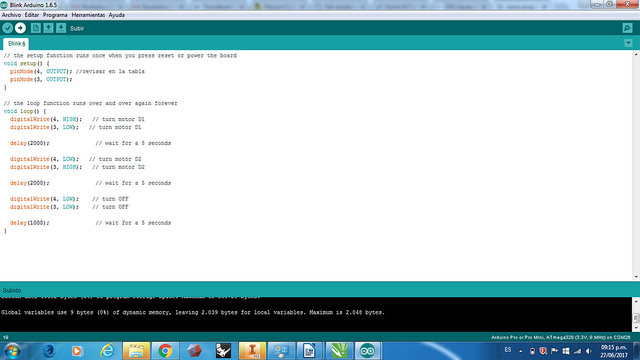
Once you have written the code to be programmed click on Compile (to verify the code) and then you can upload to Fabduino.
CODE C
In order to program the same in this language, I will try to explain the equivalence of the current programming in code c.
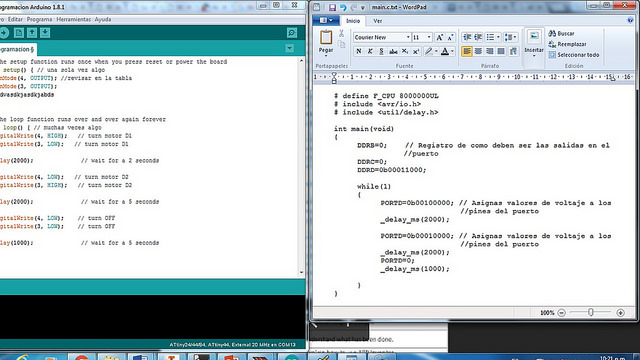
We must take into account that the language c is also binary and must be started indicating the frequency of the CPU, in this case is 8 Mhz since the microcontroller has a resonator of 8 mhz.
Following this should be added the libraries (.h), the library of the microprocessor and the library of delays, without this, the codes would only be numbers.
The main difference is that the arduino reproduces the same code infinitely many times, the code c only does it once by default and to do it several times it is necessary to add a command (while 1) that means that when some pin this on will repeat the code .
To understand it better we must see the following graph of the ports of the mega (segun data sheet) where it tells me that the Fabduino has 3 ports and each port has different pins.
In this case we have connected the pins to port D, exactly in PIN 3 and 4. The equivalence to code c is to indicate 1 in the pins that are being used and 0 in those that are not used from right to left counting from 0. (0b00011000).
Then write the command to do it repeatedly and add how the engine worked, how long. It is the same only that the codification is by port and in binary code 1.0.
Once you have the code, we must download the program WinAVR to program in C our microcontroller, we can download it from the link.

Then, in the Notepad, we copy the code in C and we recorded it in a folder with the name main .C.
We open the Makerfile program where we have to choose the type of MCU, the programmer, the port and the format. Once written we recorded it in the same folder as the code.
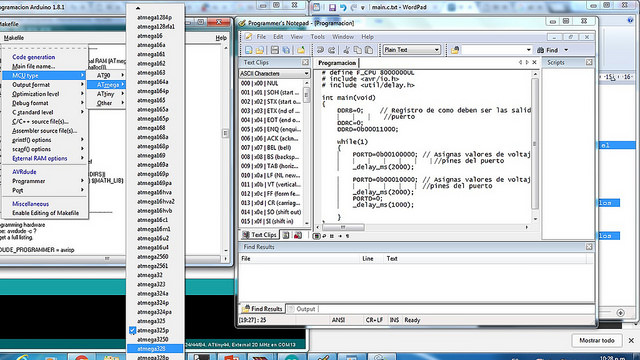
We connect the AVR to the computer and the microcontroller and select Make all (it's similar to the Arduino compile command) and then the Program command (it's like uploading to the Arduino).
Finally, we have programmed the same in two languages and we can conclude that the Arduino is easier for people who do not know how to program or have a very basic level.
PROGRAMMING TO HELLOW WORLD BOARD : Additionally for the assignment, I wanted to program the board I made in week 6 but I designed it with only one Led and the programming options were very few.
To do this, design another circuit with two LEDs and program it so that both lights work when the button is pressed.
For this, we first define the output and input pins with the PINMode function, the button is connected to the PIN 7 and the LEDs to the PINs 2 and 3.
Then, I upload the programming to the microcontroller following the steps of week 6, compile it and upload it.
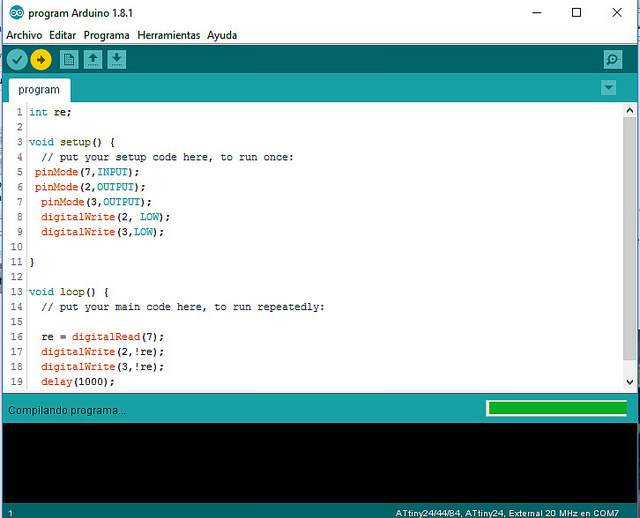
Finally, both lights turn on when the button is pressed