Assignments 7
Computer-controlled machining
Well, for this assignment I decided to make a dog house, since I have a Golden Retriever pet of 5 years and it seemed a good idea for my dog to have his own house.
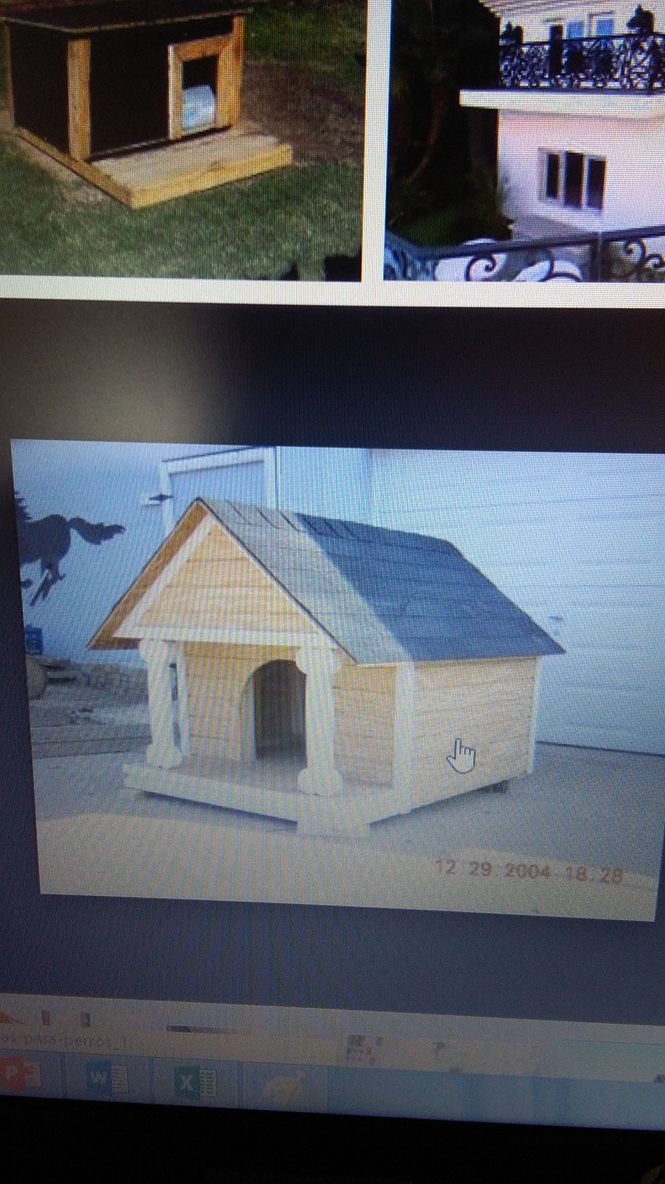
First I look for some models of home on the internet to make a skect of my project to manufacture.
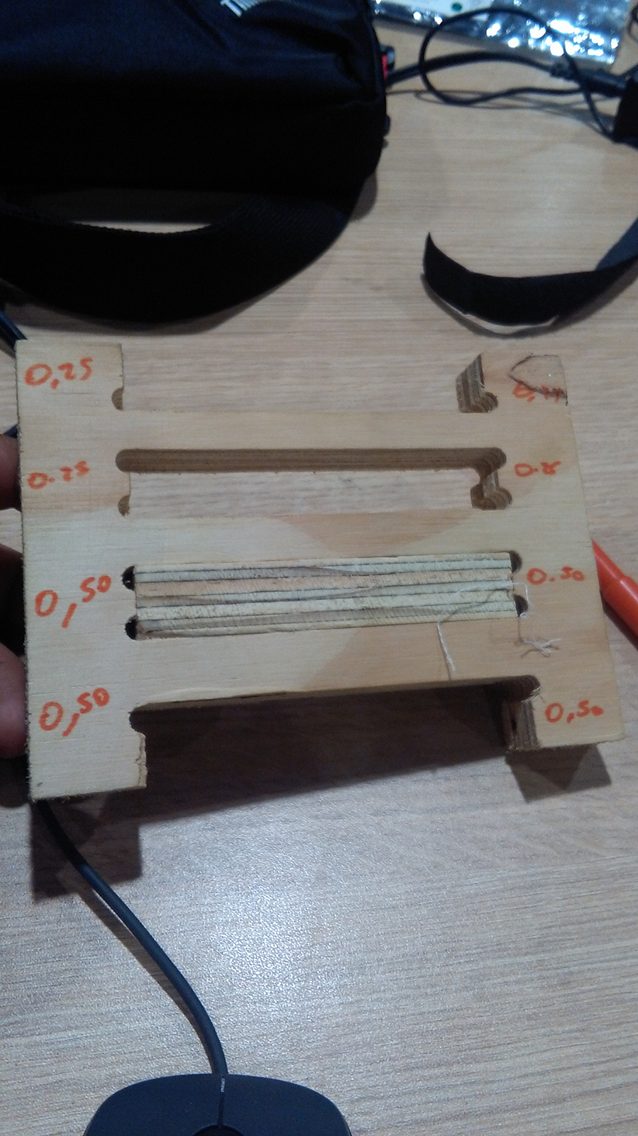
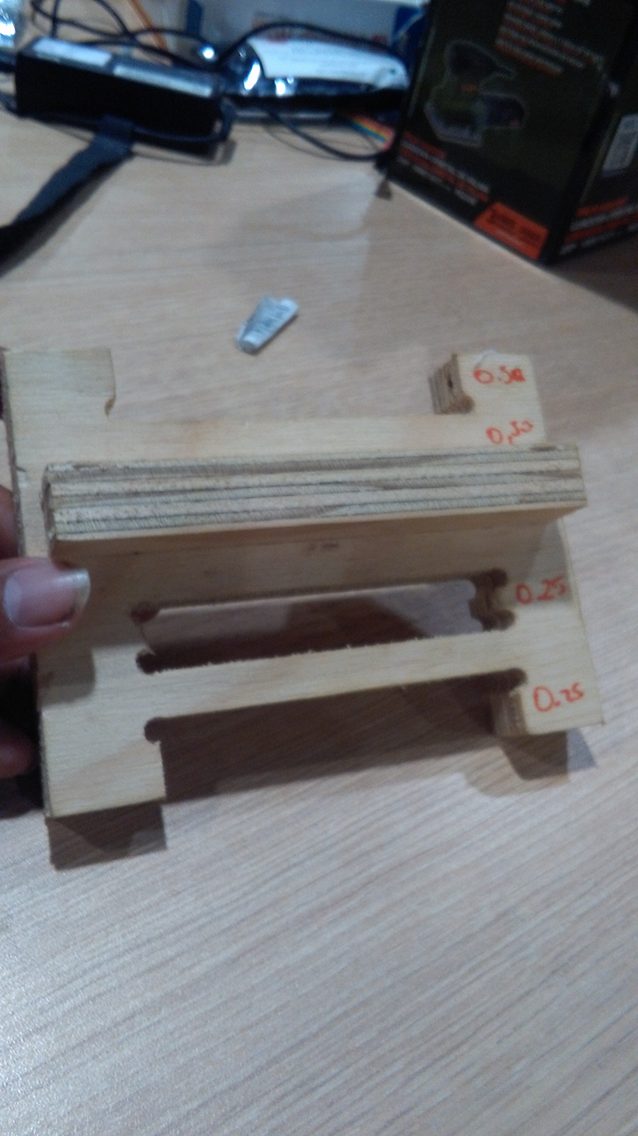
Then, I did a tolerance test to be able to design the house, remember we will use pressfit, not bolts.
As you see the proper tolerance for the type of material we use, TRIPLAY 18mm, is 0.5mm in width.
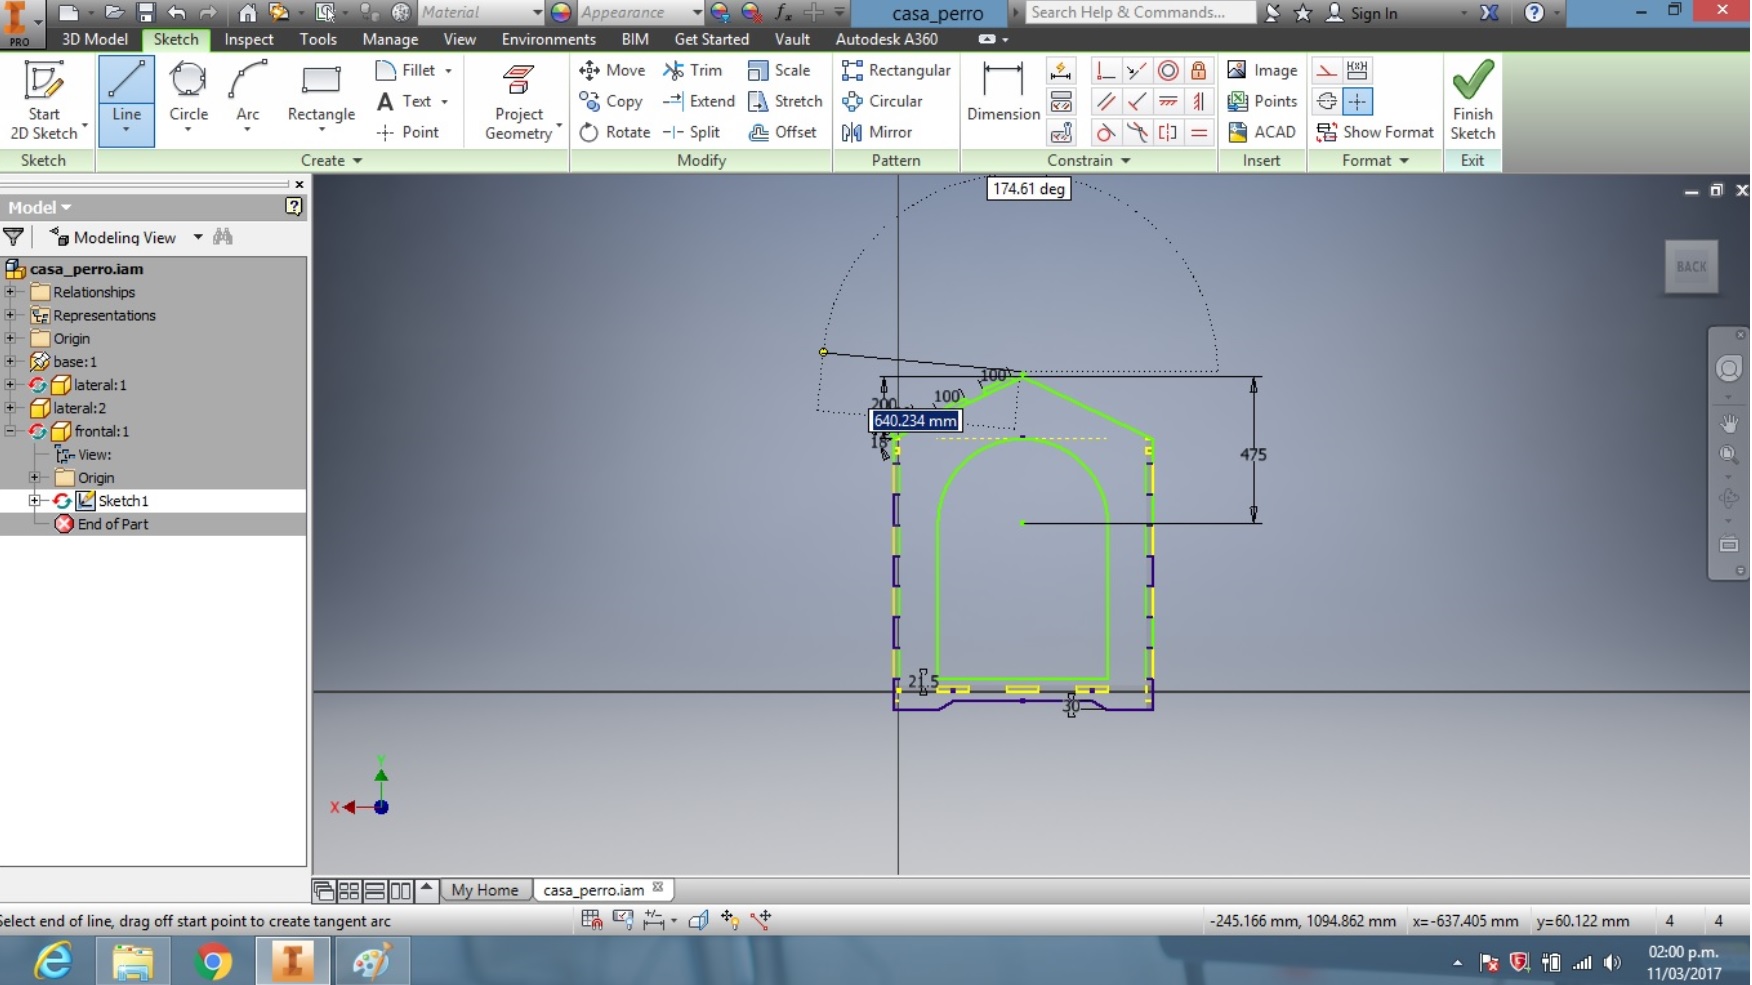
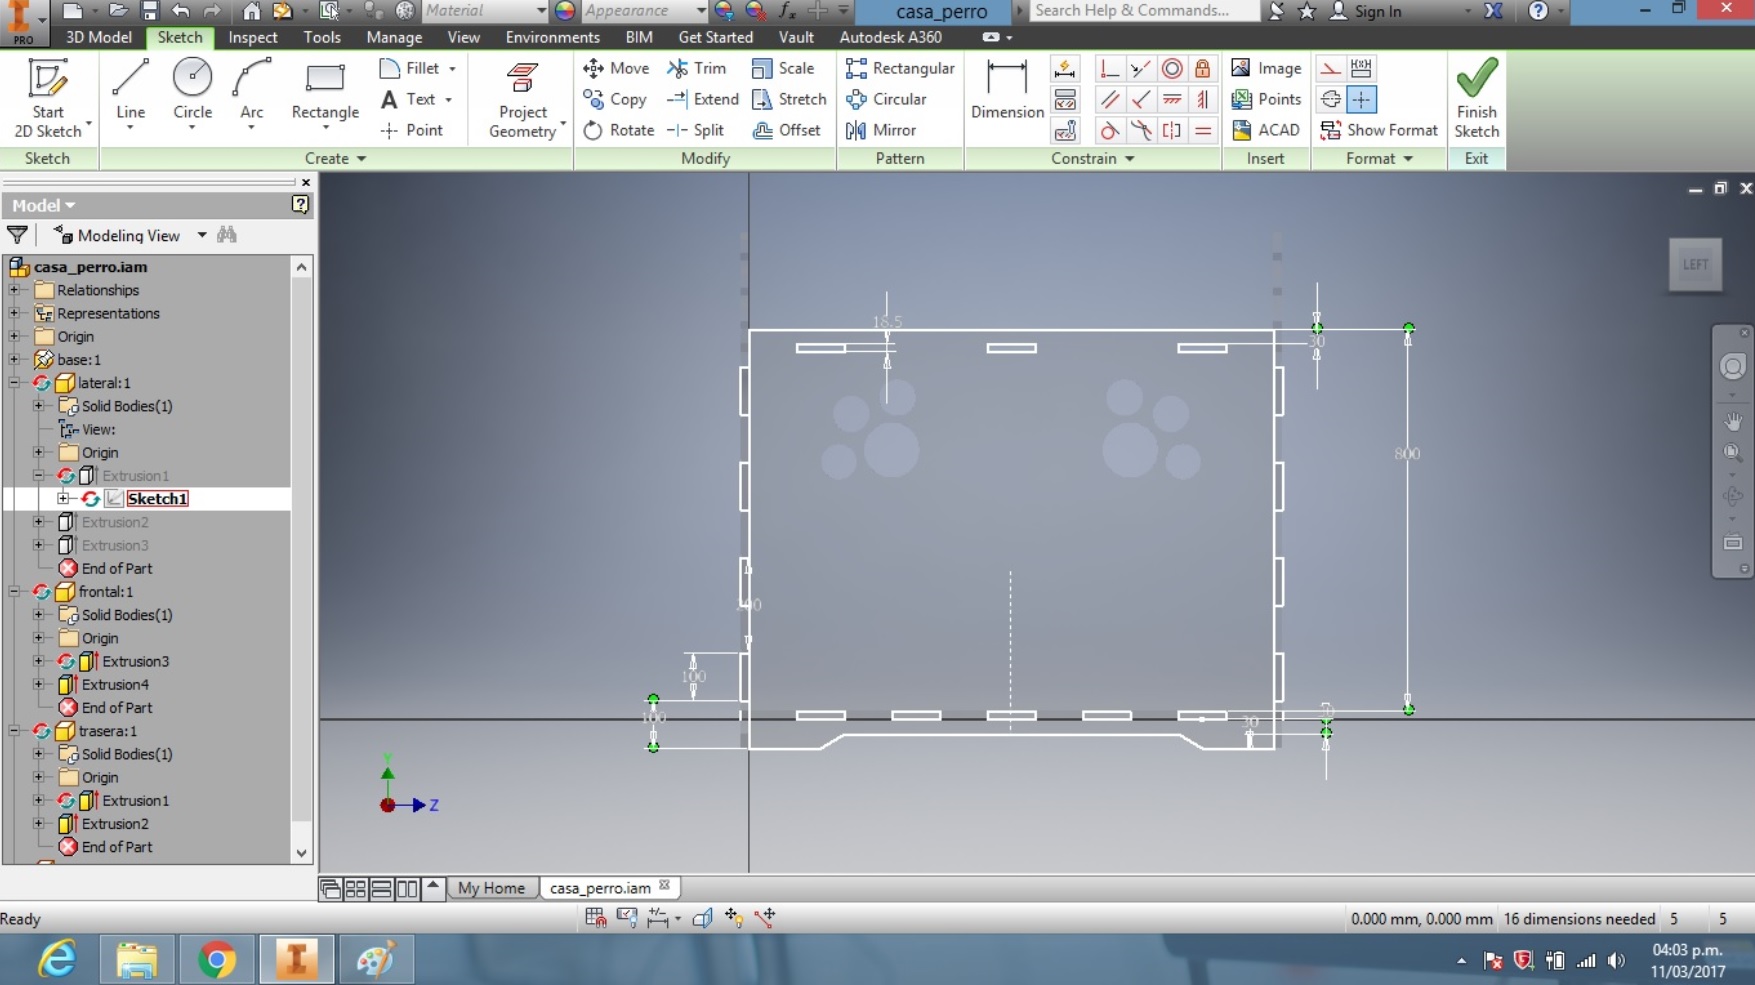
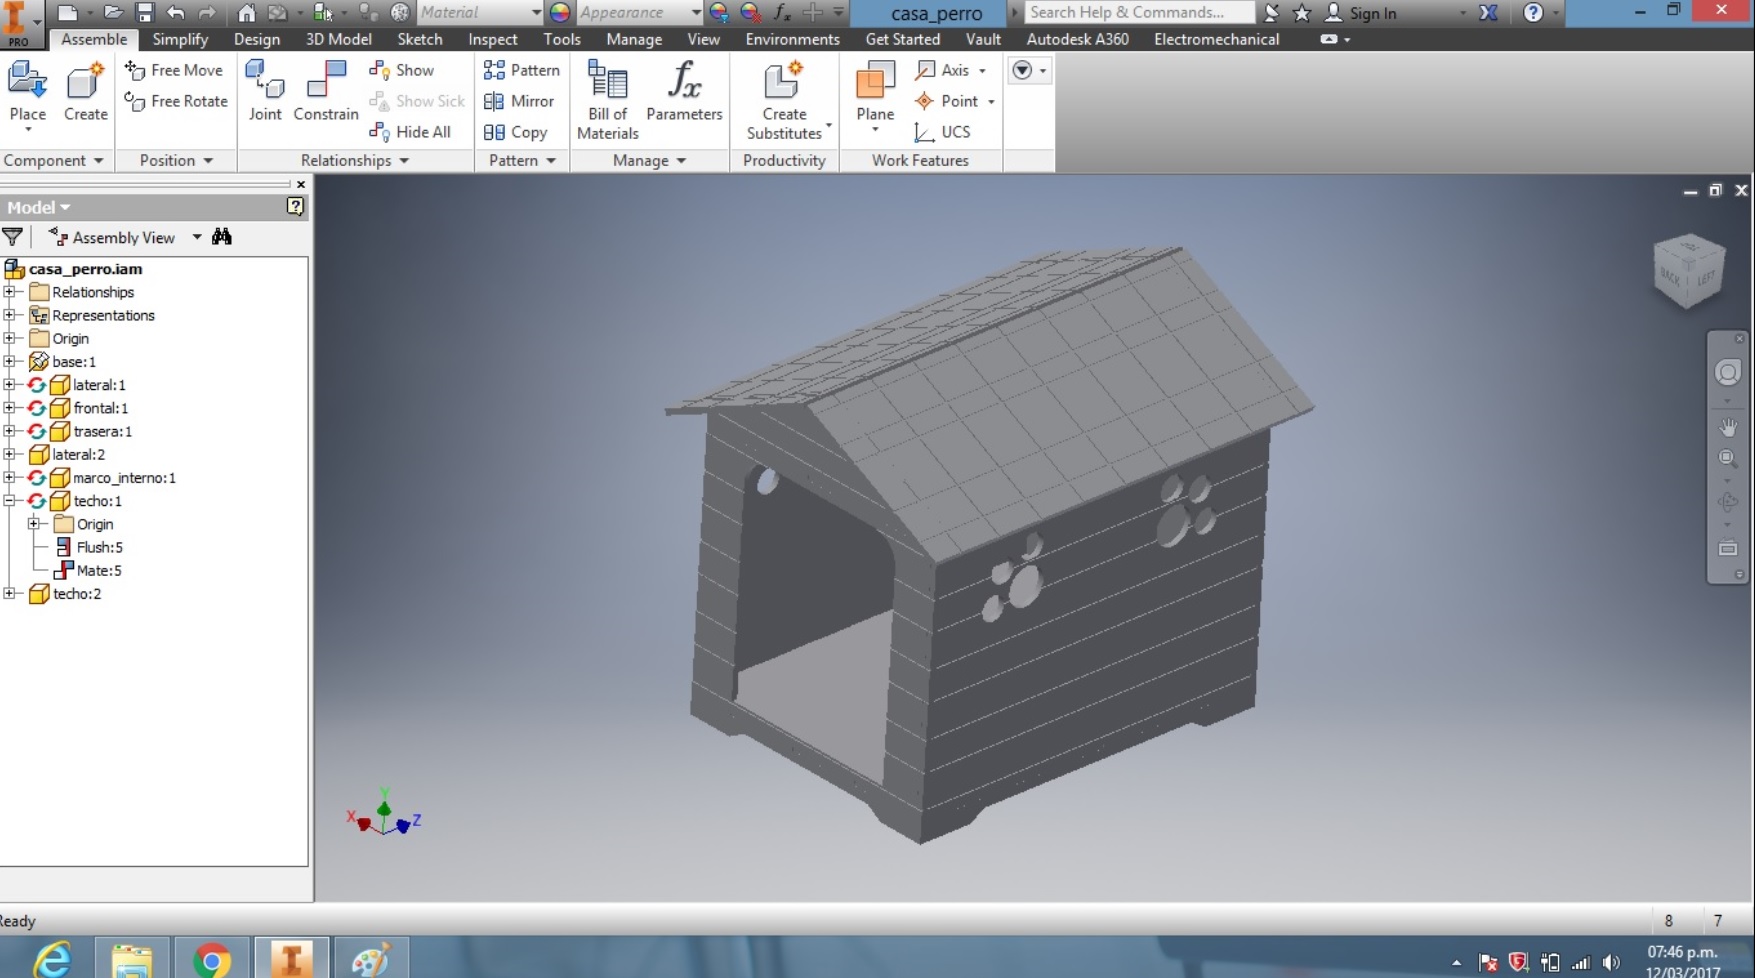
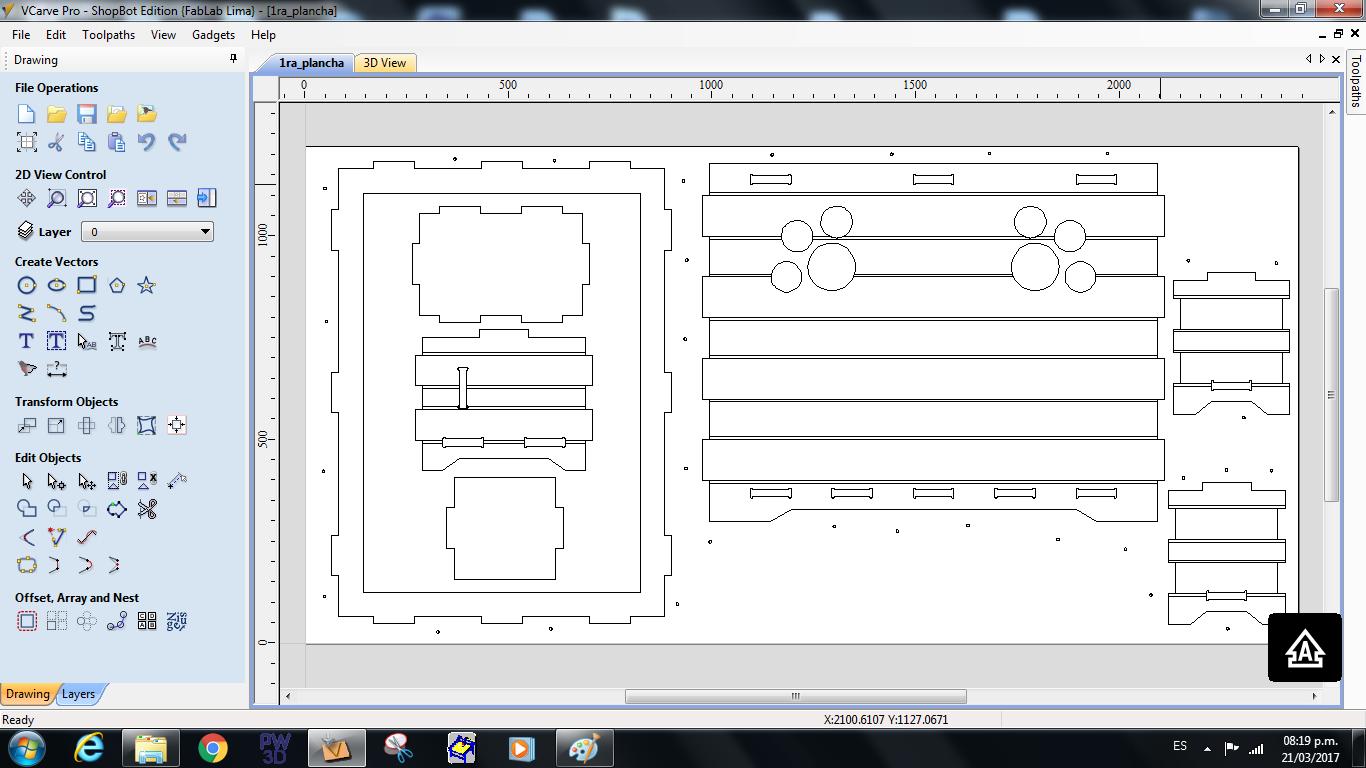
Then, I use Autodesk Inventor to design the dog house, I use measures for the house based on the size of my dog, it's a big dog.
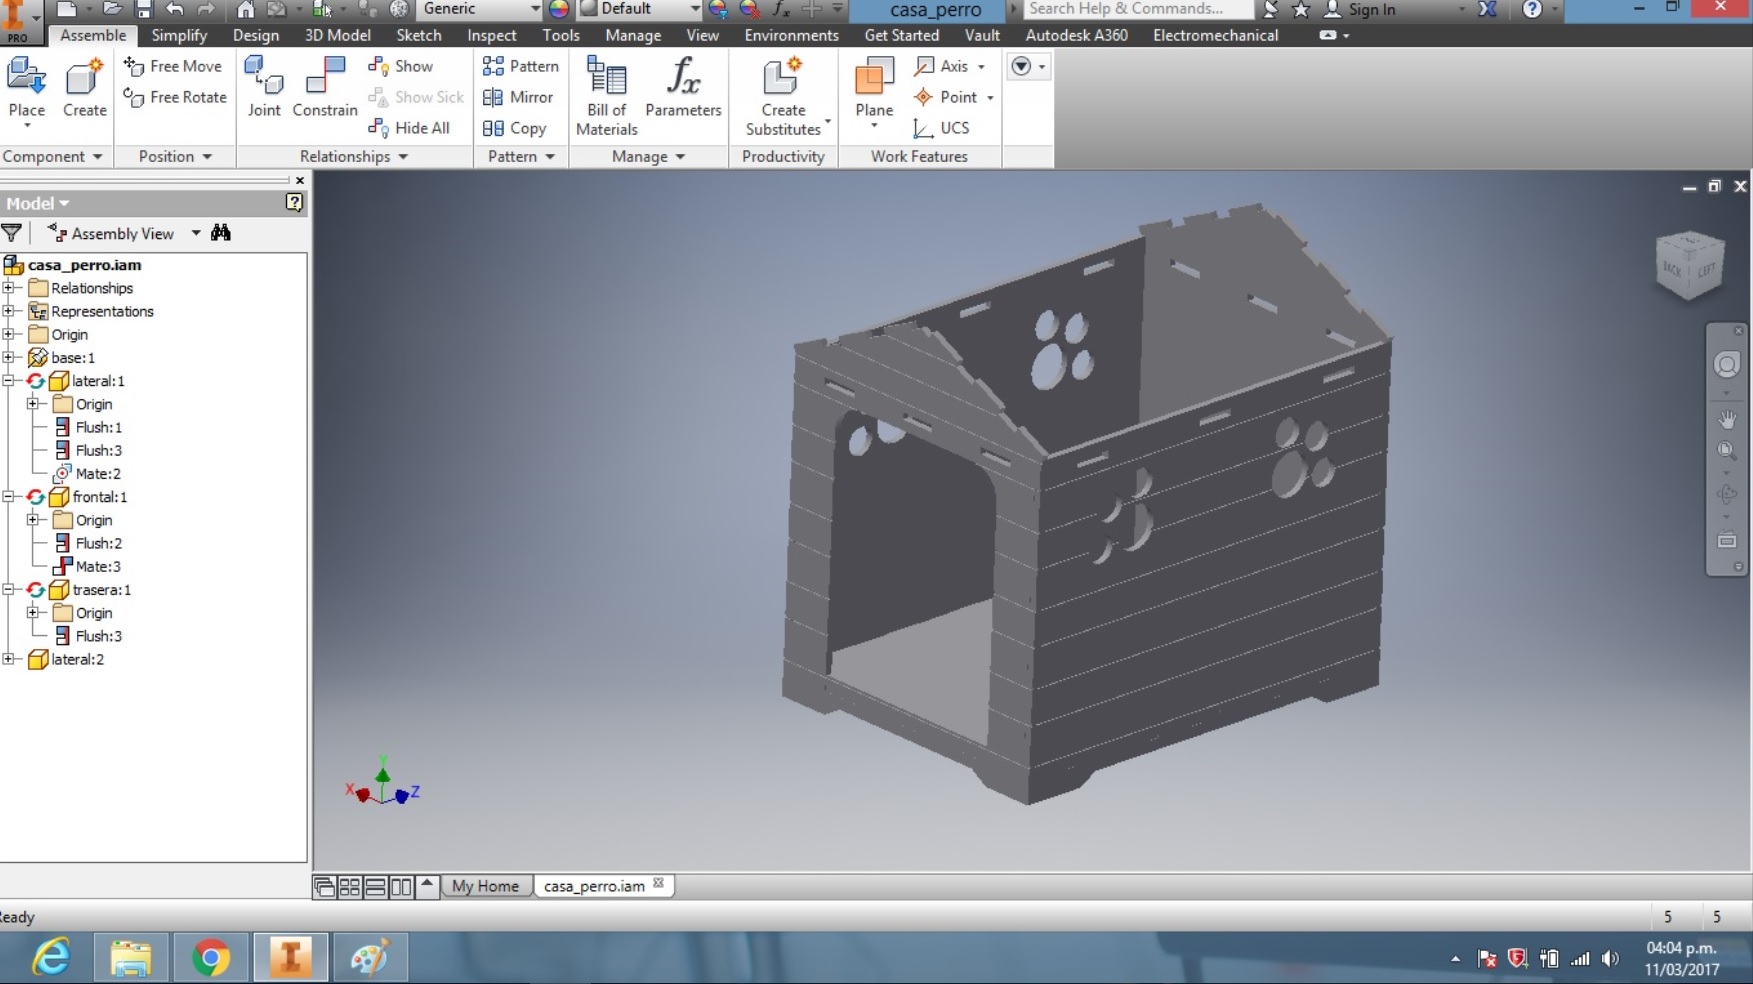
As you can see, with the option ASSEMBLY, we can see how the house looks according to the advanced.
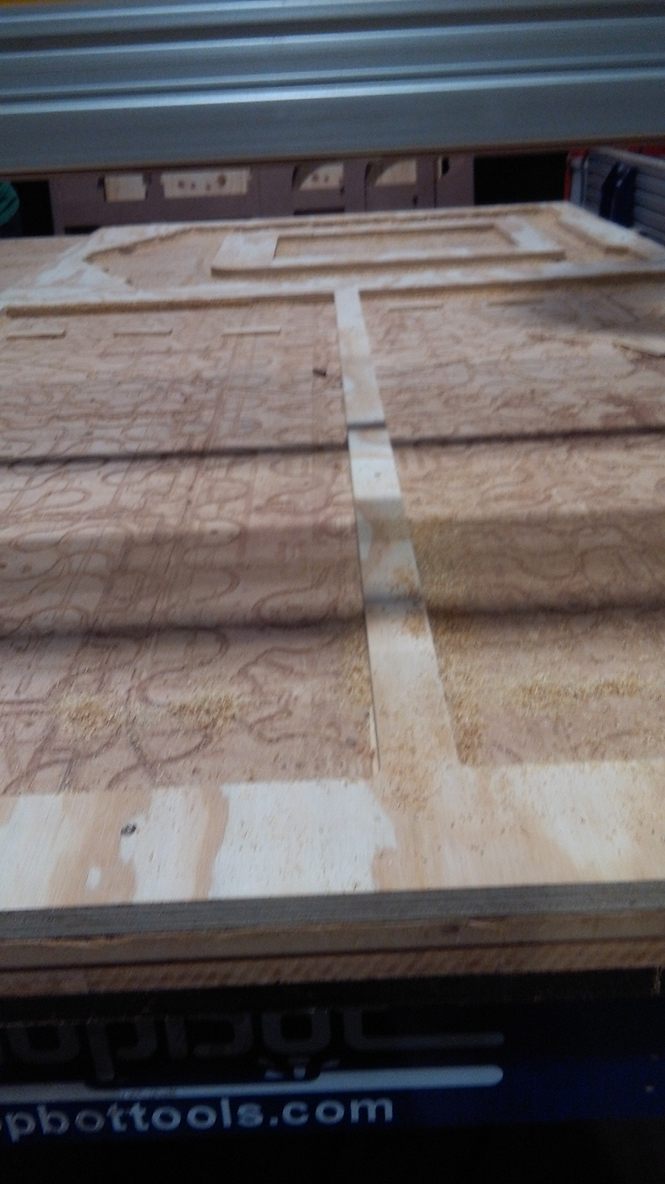
I designed a channel 7 mm thick and 4 mm deep to give it an appearance of shingles or wooden boards.
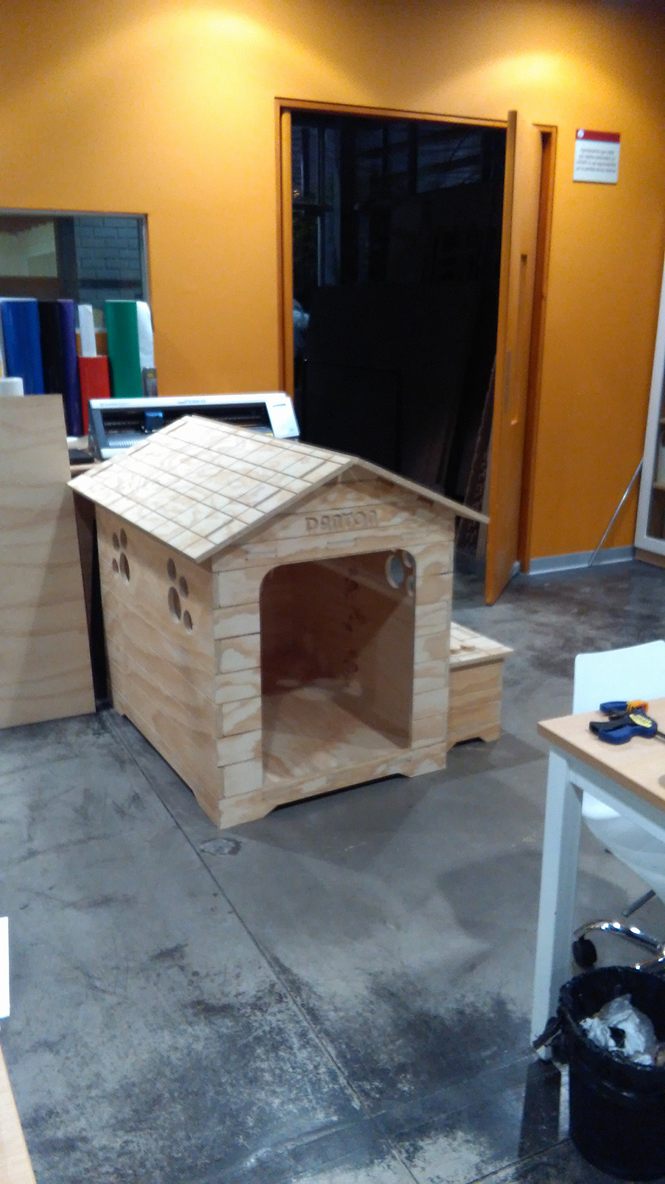
And that looks like the final design of my dog's house.
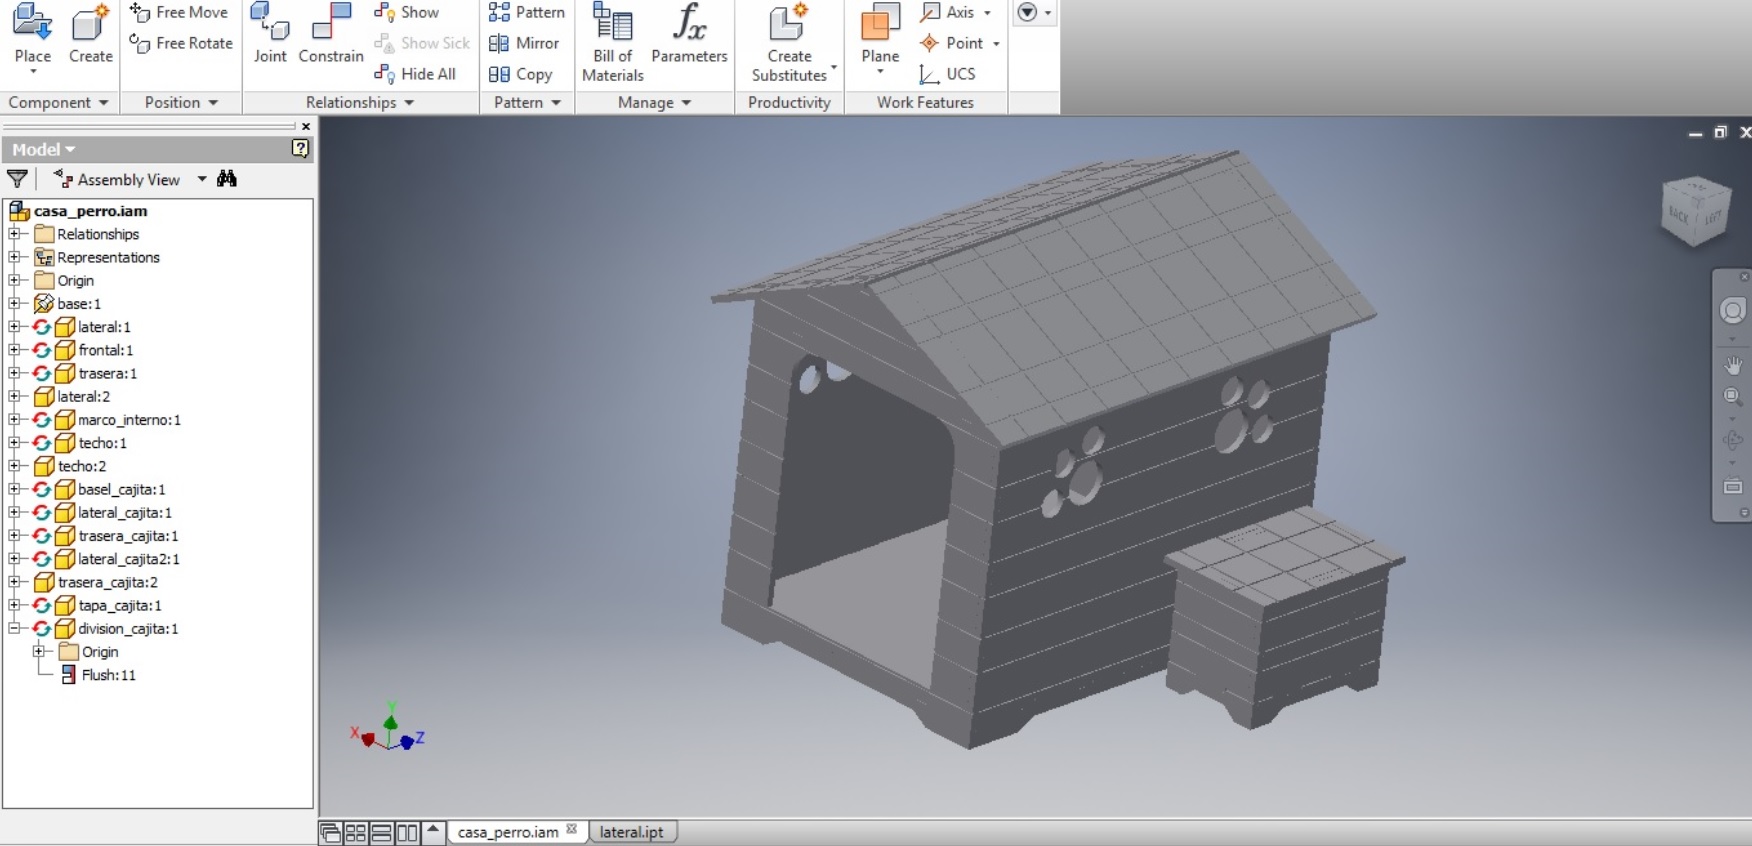
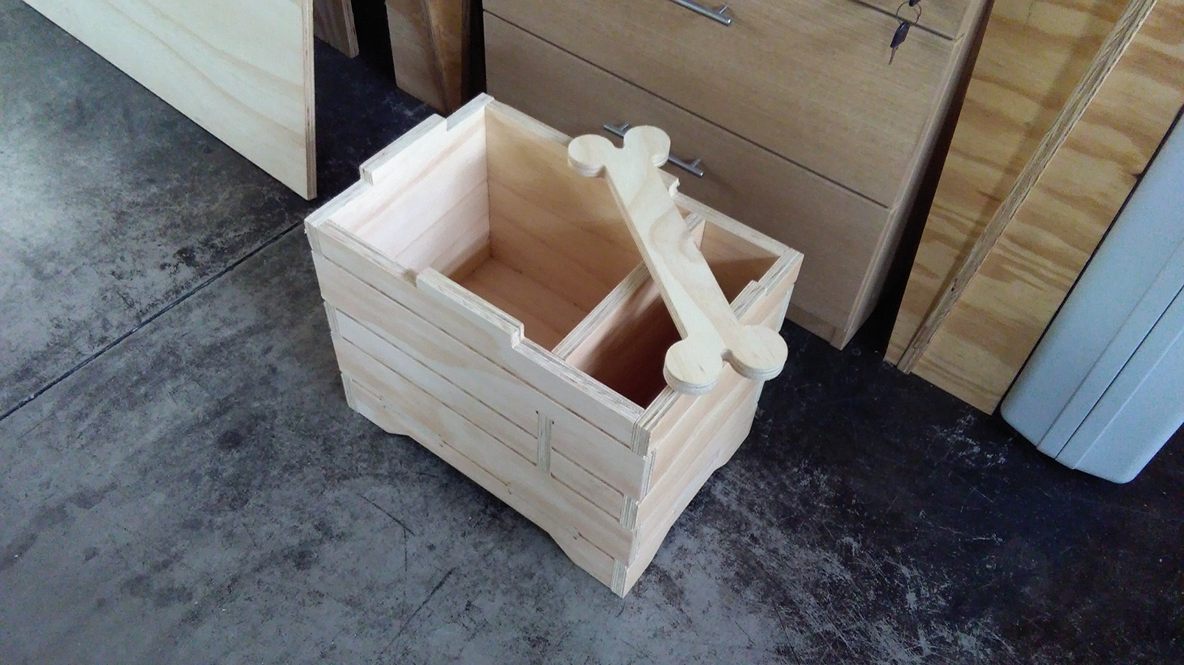
Also design a box apart from the house so I can keep my pet clothes.
CLICK HERE FOR DOWNLOAD THE FILES

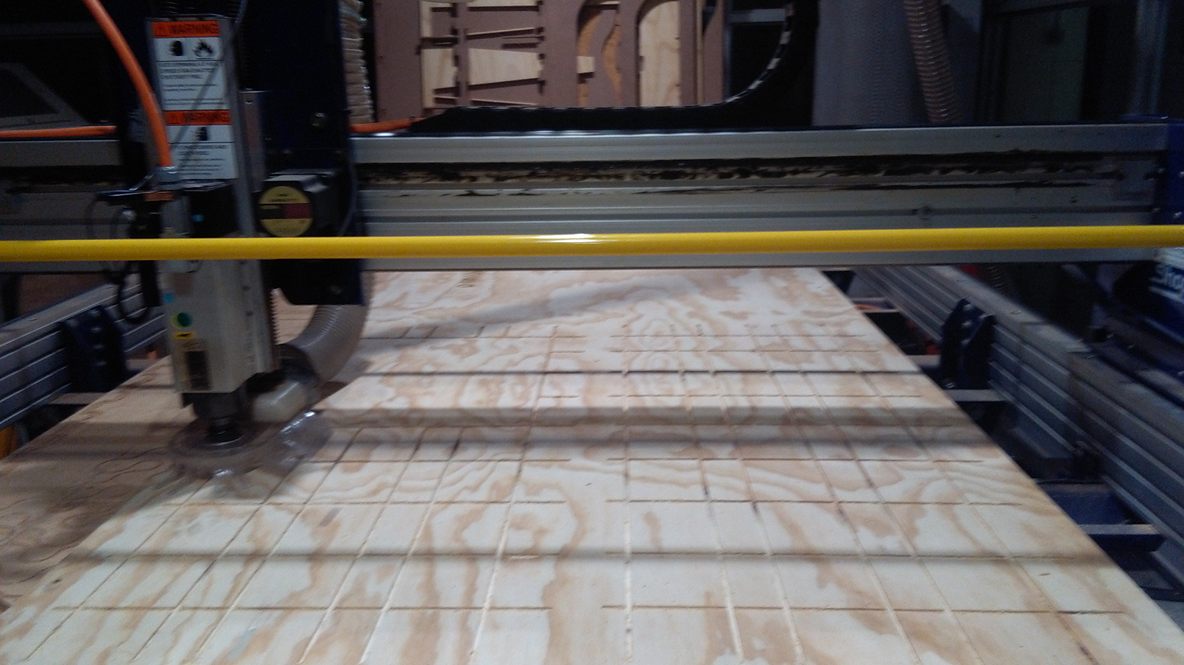
In FabLab ESAN, it has a SHOPBOT, a CNC milling machine with milling capacity of 2.44 m x 1.52 m.
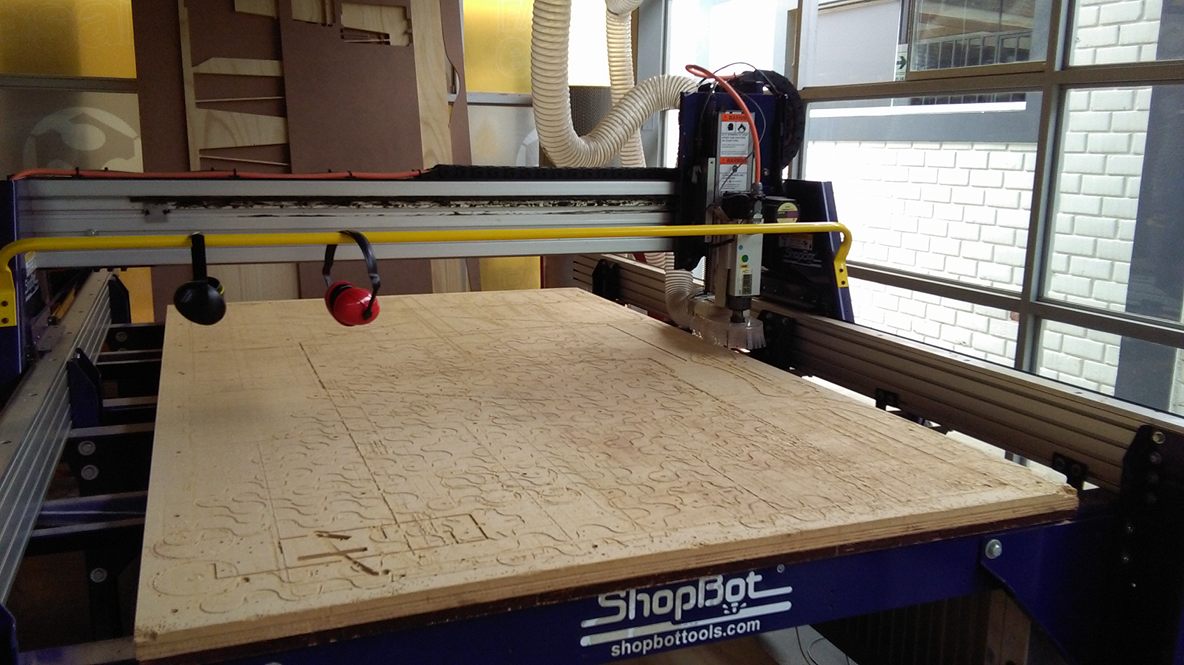
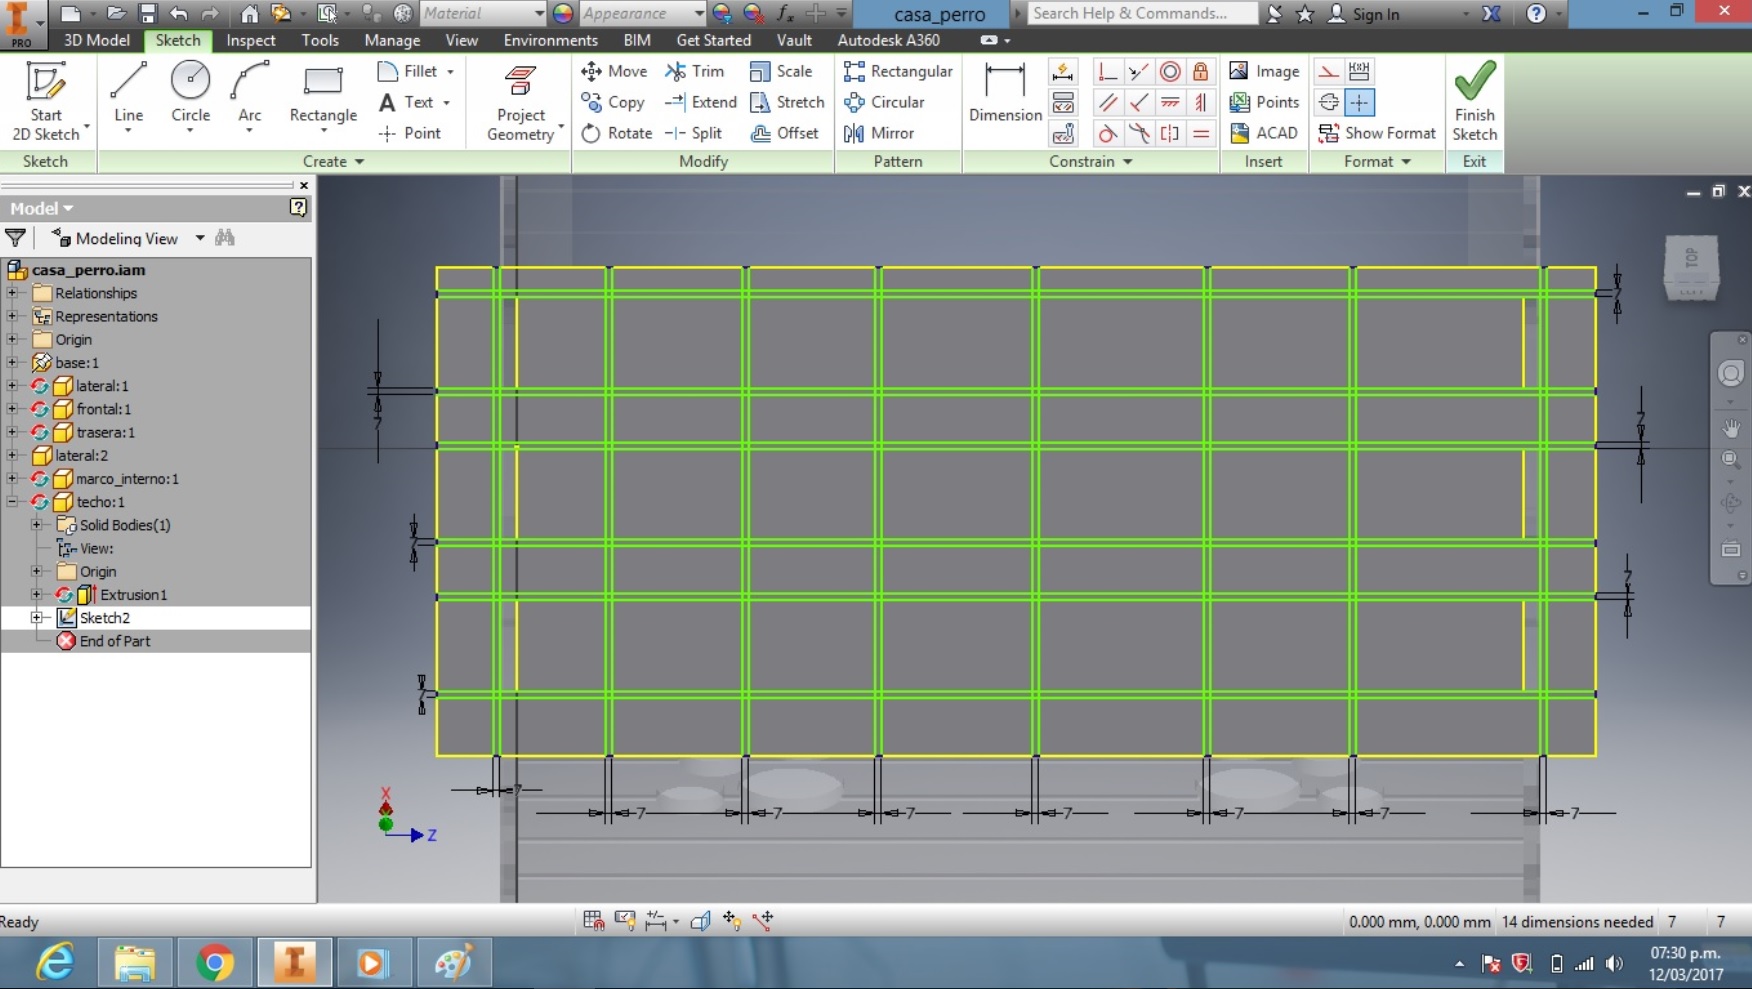
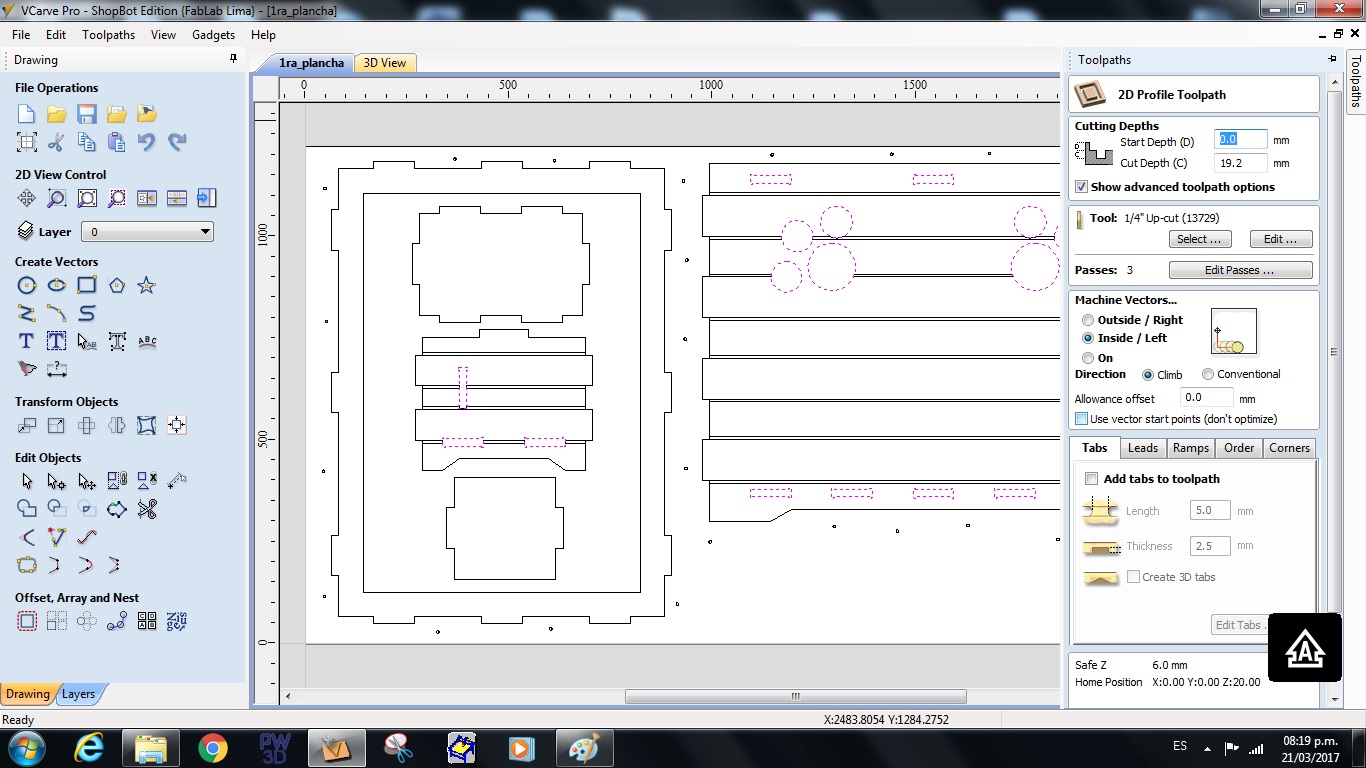
Then I use the program VCARVE PRO, which allows you to load your designs by exporting the face in DXF or DWG format, and configure the milling characteristics.
For the operation I use a 1/4 inch.

As you can see, I set the characteristics of milling, cutting depth (1mm more than thickness), number of passes, type of milling cutter, internal cut, external cut, etc.
In the first configuration I use the PROFILE option (internal) to perform internal milling of the design.
In the second configuration I use the POCKET option that allows you to make a recess of the material or "cajeado" according to the depth that is designated in the design, in this case apply 6 mm of depth to simulate the blocks of wood.
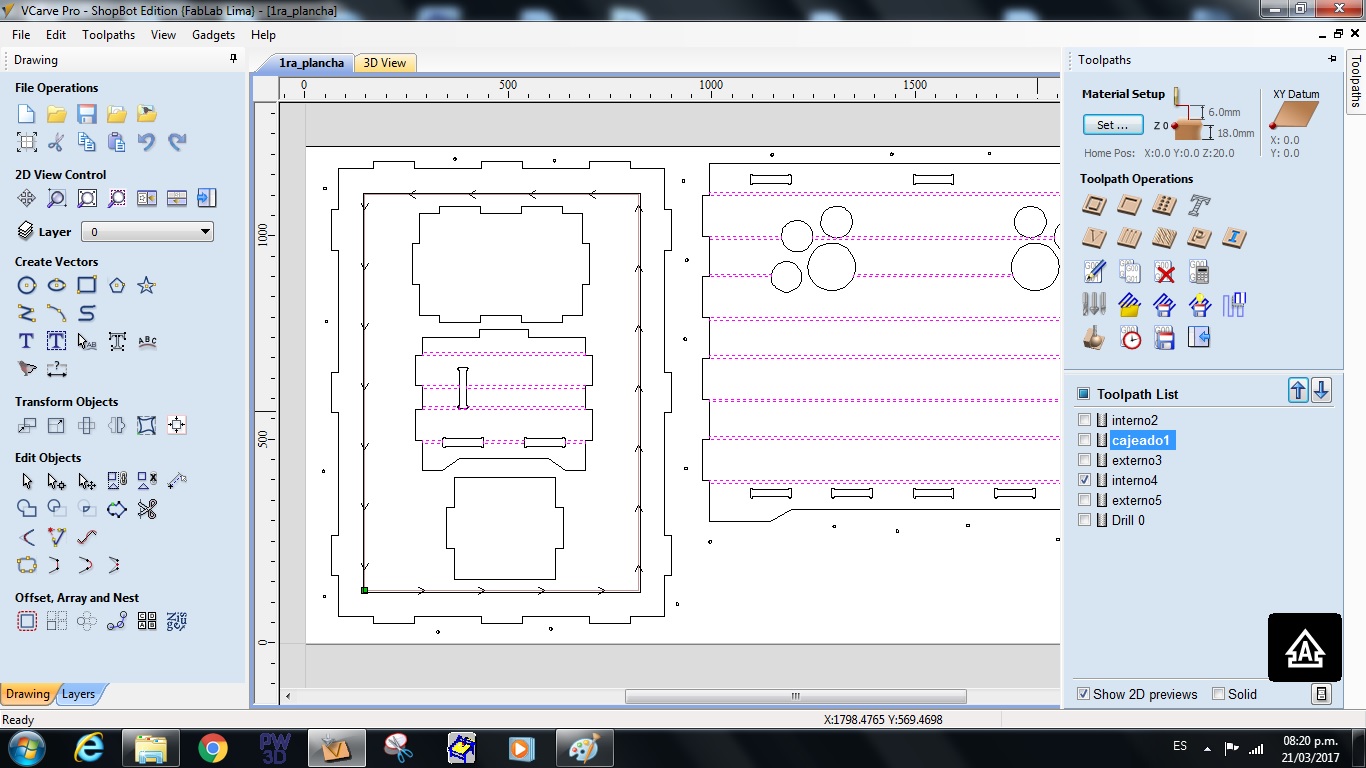
Then open the shopbot program, reset the machine, and load the paths.
PARAMETERS MILLING
For the machining process, the following milling parameters must be set:
-
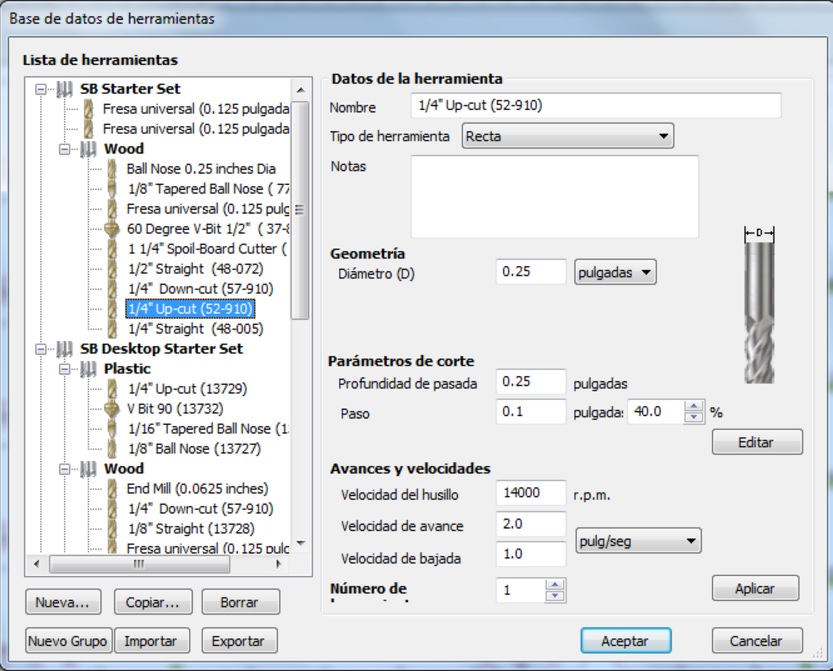
SPINDLE SPEED:
14000 RPM
-
TOOL:
mill 1/4 inch Up cut, this tool will be used as it will work with Triplay 18mm and a higher resistance of the material is required.
- # PASSES:
3 passes, each time the mill makes one pass, it will reduce 6 mm of material, which is within the limits of the tool
-FEED :
-The feed used is 2 inch / sec
-The speed of descent (height) the spindle each time you make a pass is 1 inch / sec.
These values are by default in the program Vcarve where we configure the paths of the design, which are configured automatically choose the tool or mill to use in a certain material, in this case WOOD.
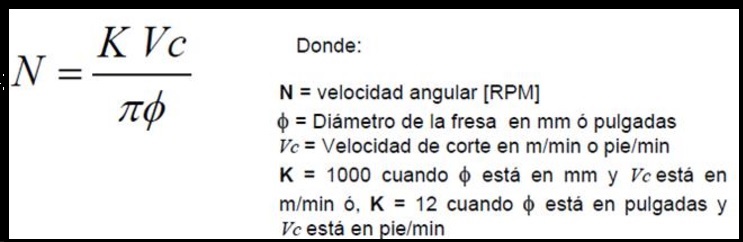
These values can be checked theoretically if we apply the formulas.
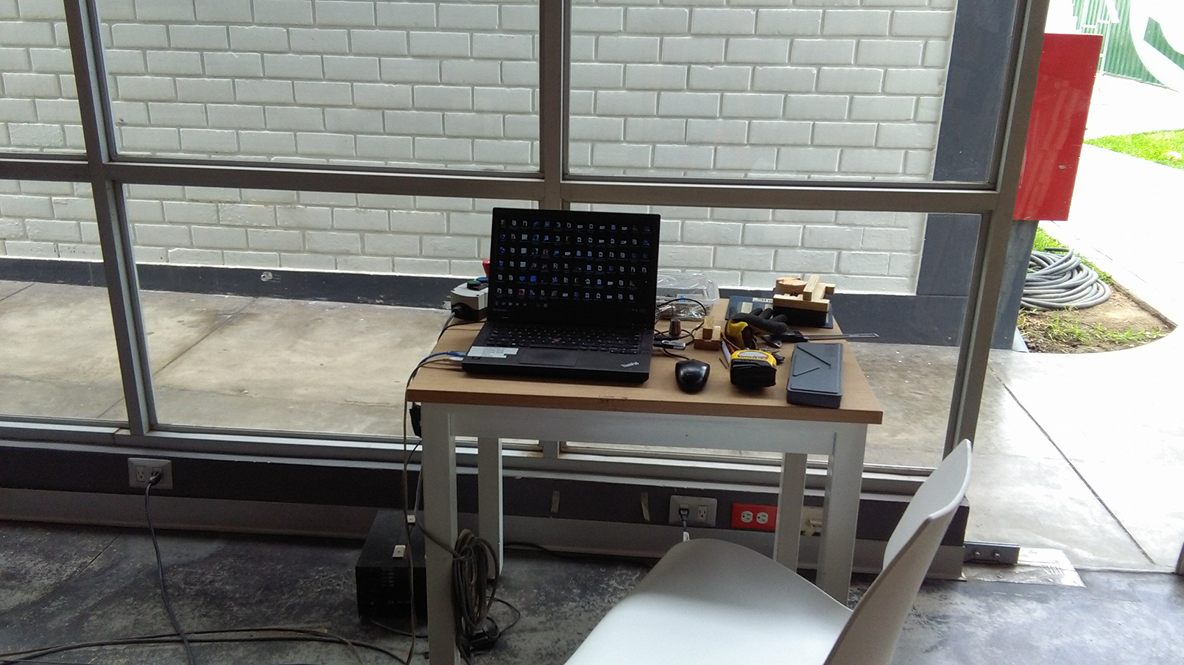
Then, I opened the software of the machine (Shopbot).
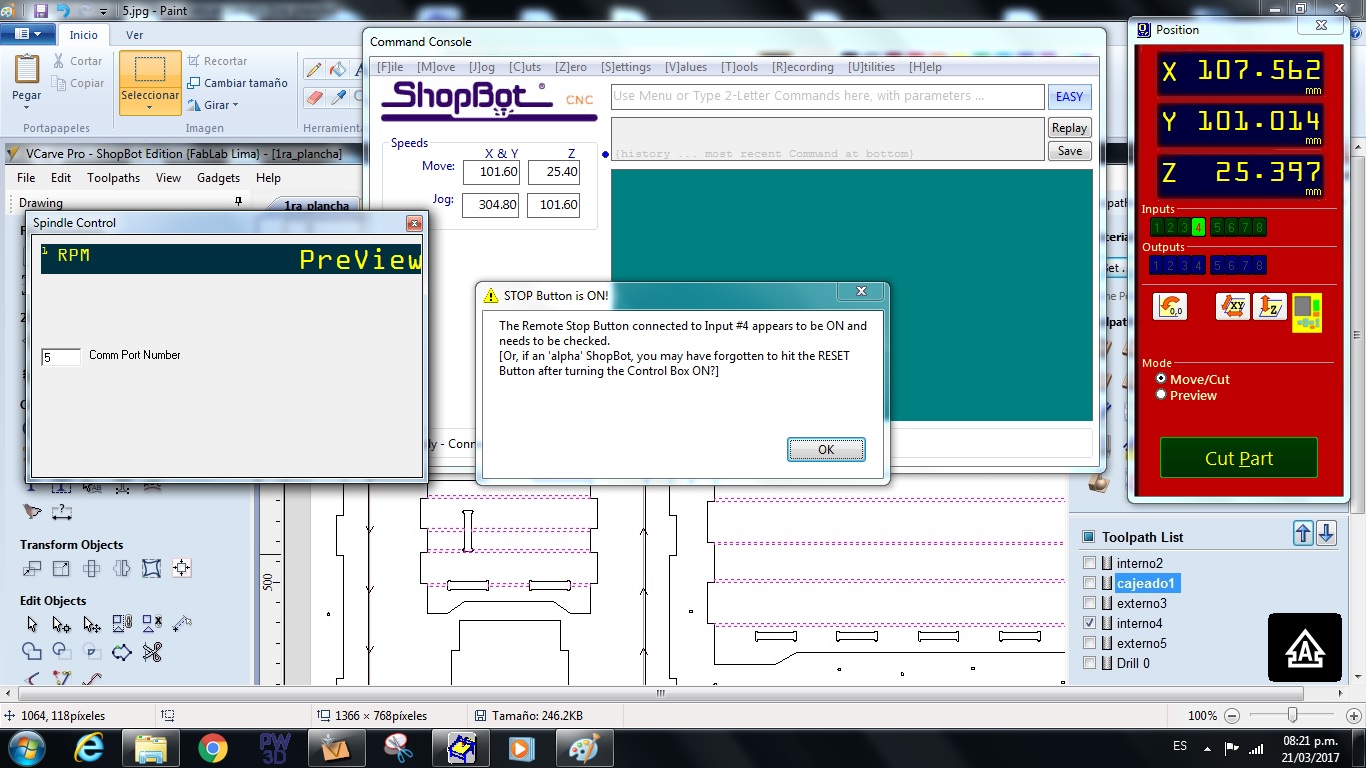
Before starting the milling process, it is necessary to calibrate the machine, for this we first perform the zero "Z".
Which is where the spindle regulates the height and detects the cut start point.
Then, the zero "XY" is done, which is where the machine places the spindle in the corner of the bed.
As a lesson learned, it is important to note that the file is loaded first, then the spindle is turned on, then the extractor is turned on and finally the command is executed.
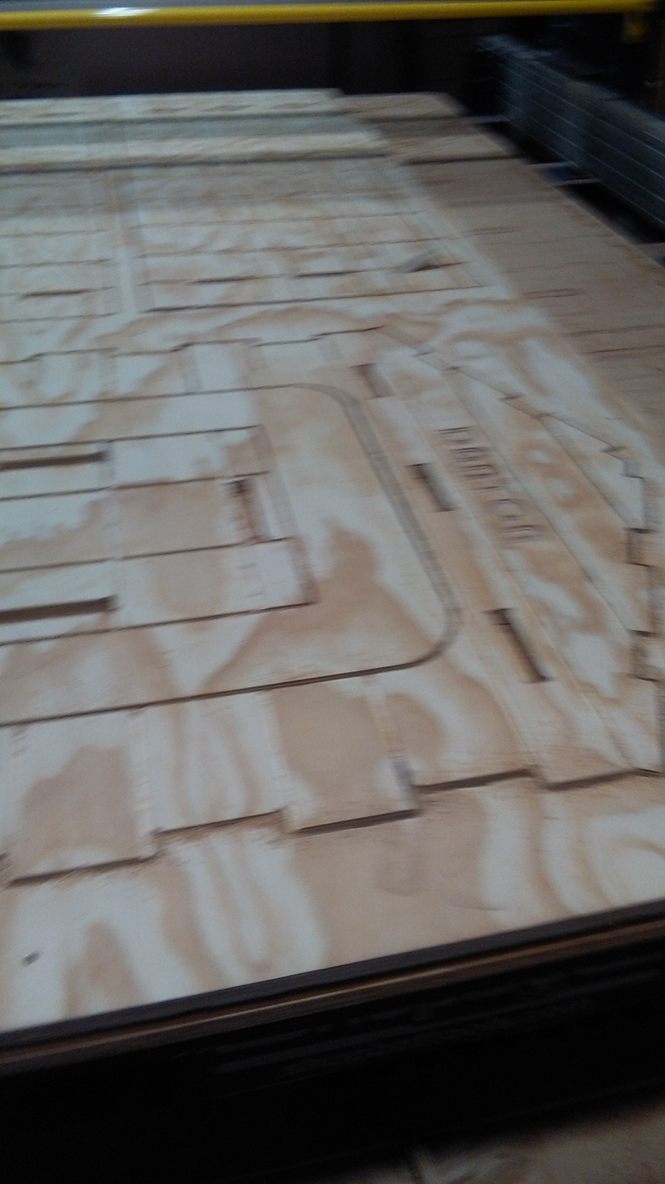
Then remove the milled parts.
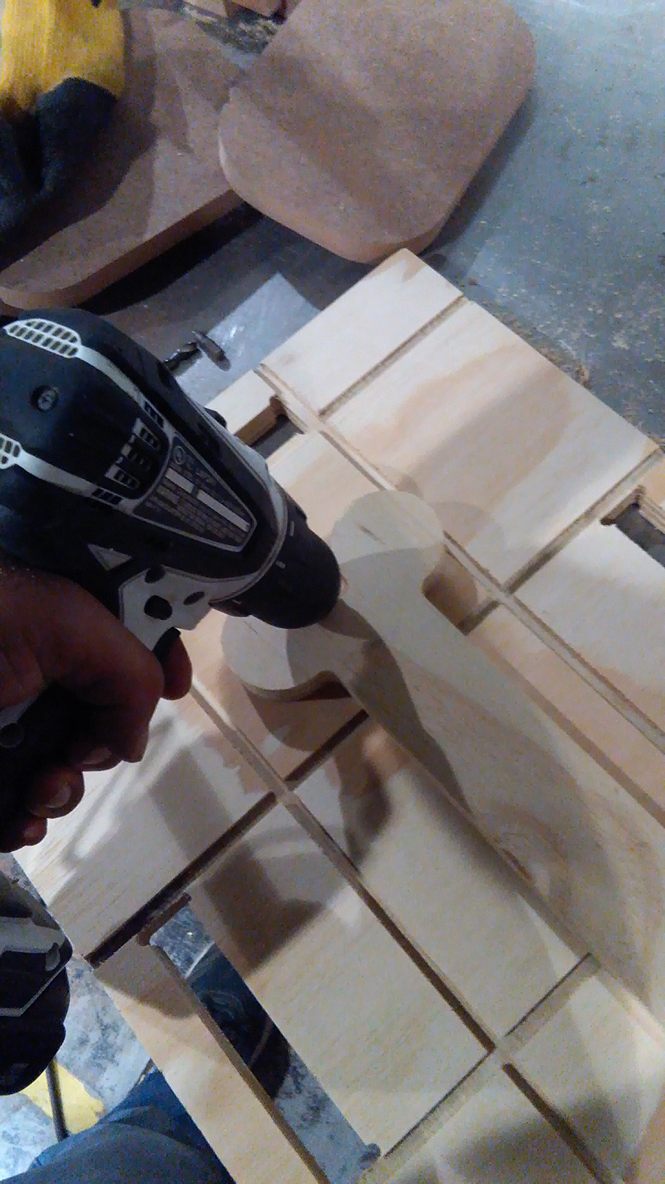
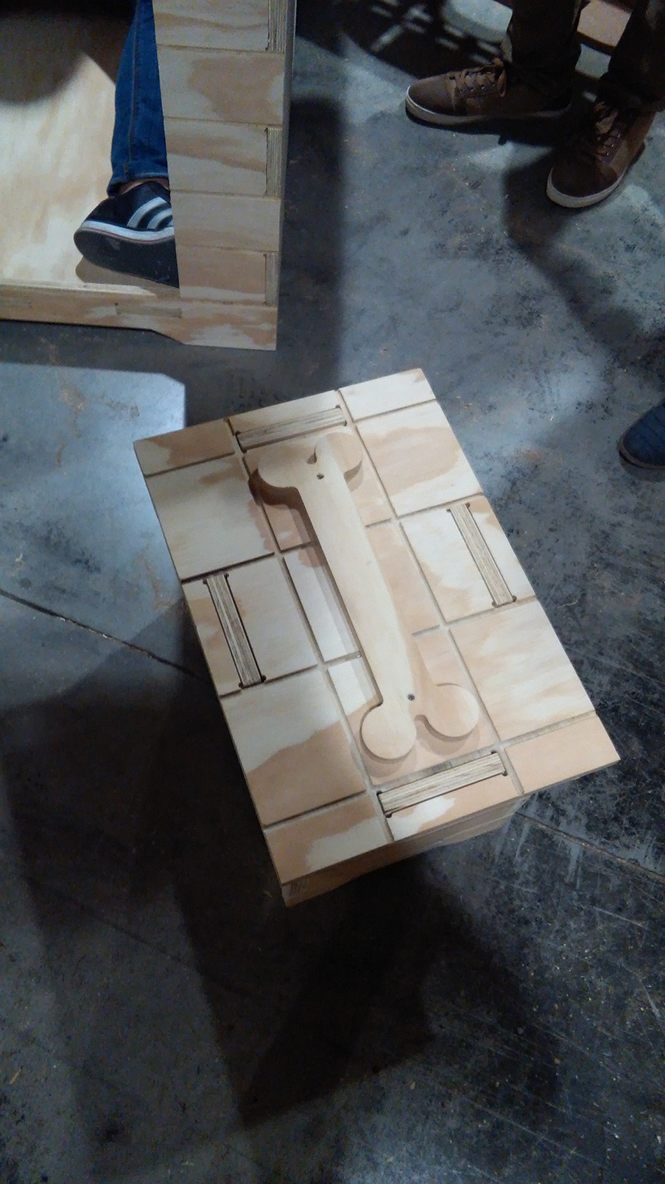
I use a V mill to engrave my pet's name inside the TRIPLAY, this milling gives it a three-dimensional finish.
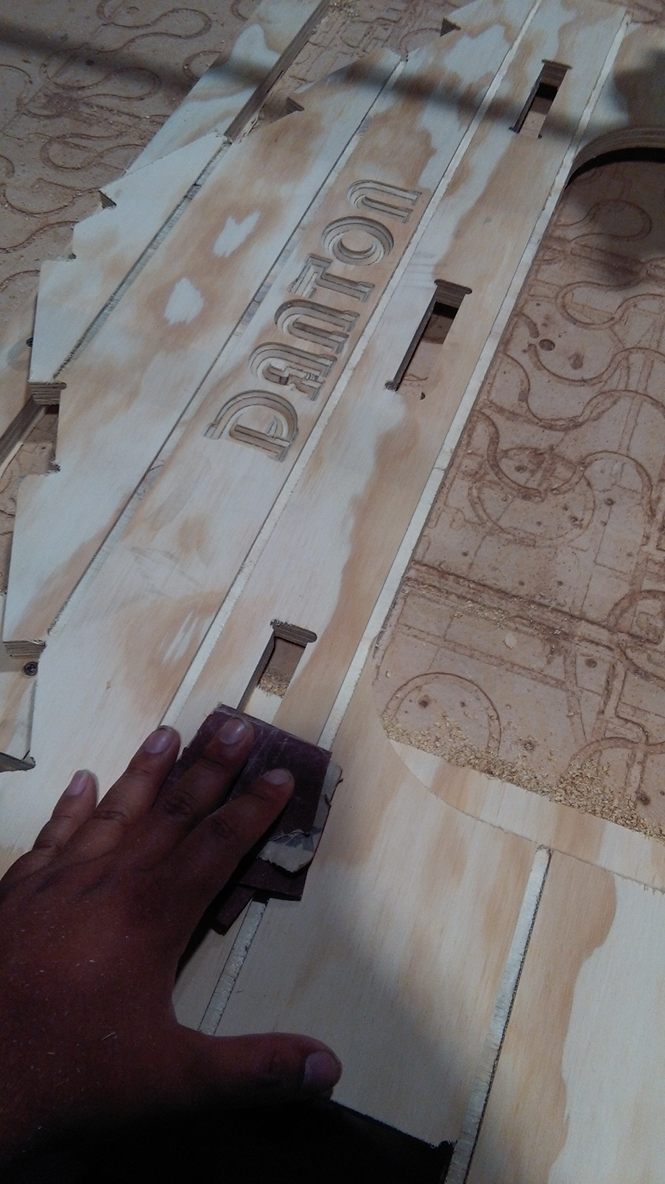
Then sand all the milled parts, to have a good surface finish and improve the assembly.
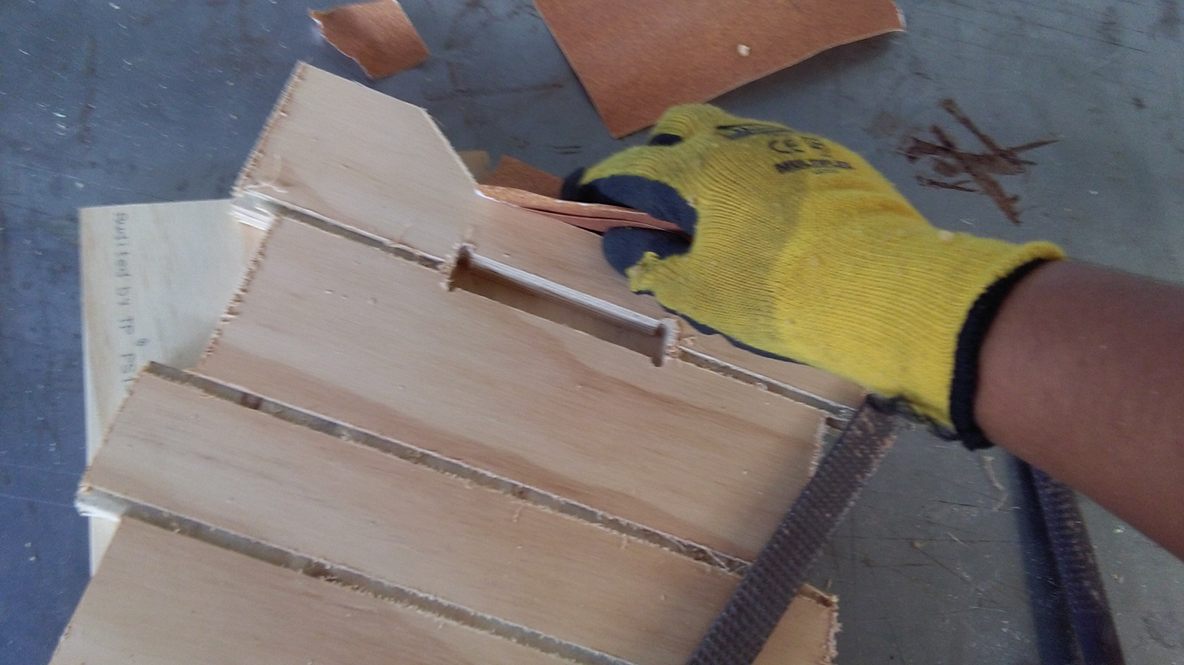
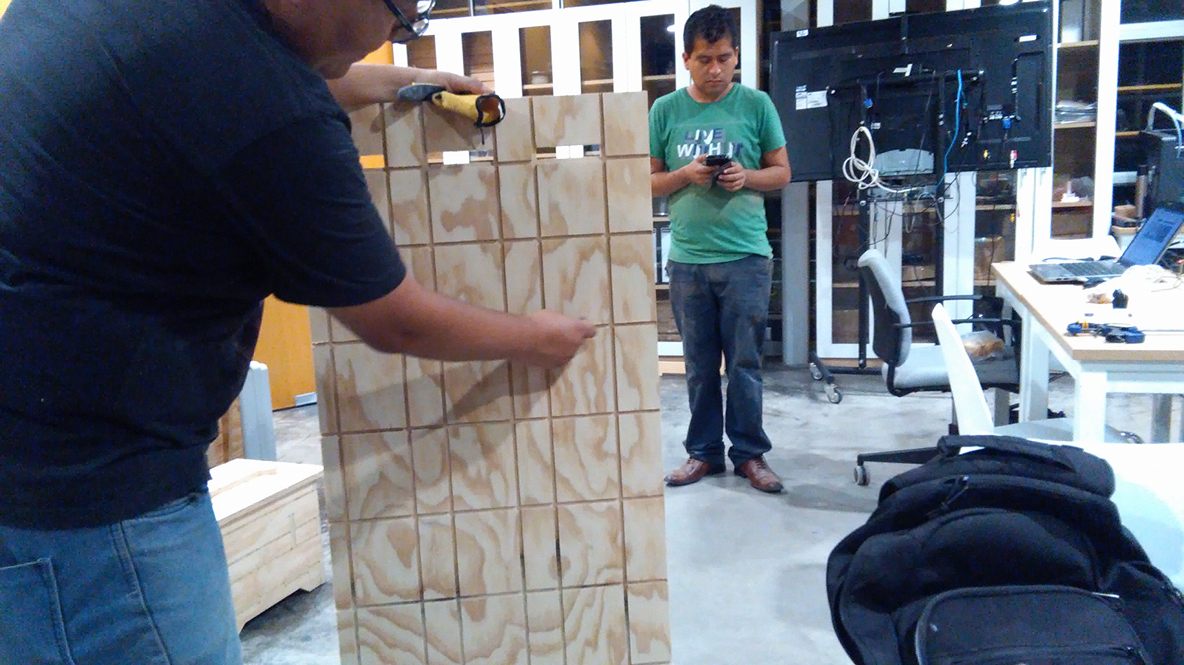
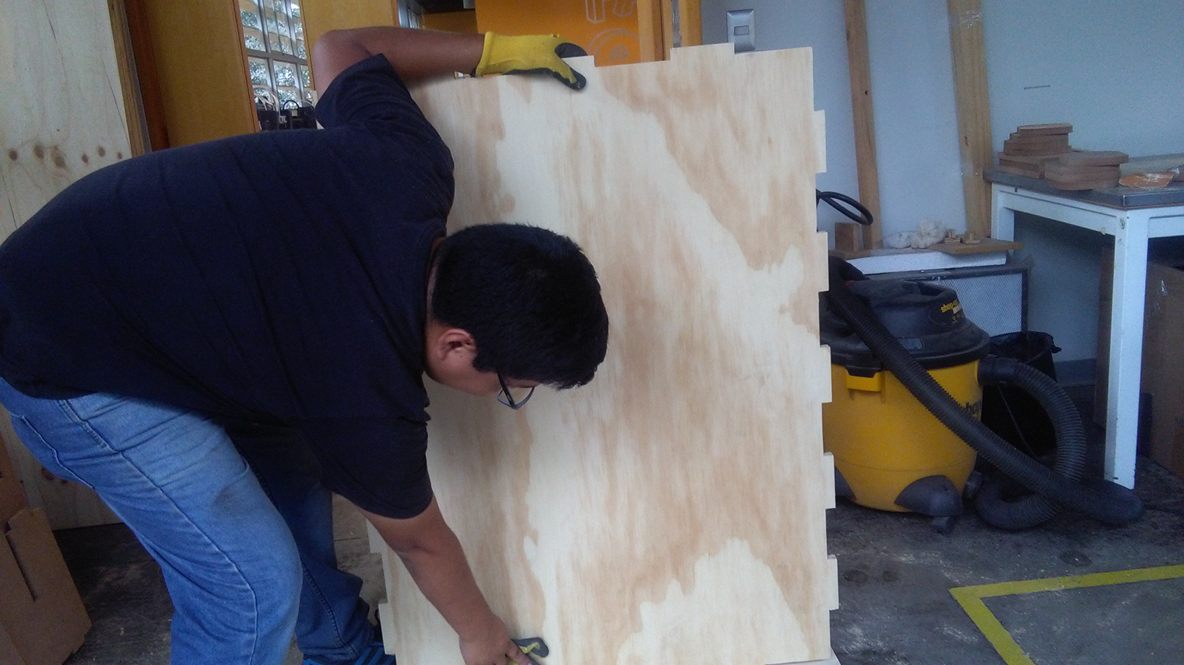
Also use a rubber hammer to assemble the PRESSFIT.
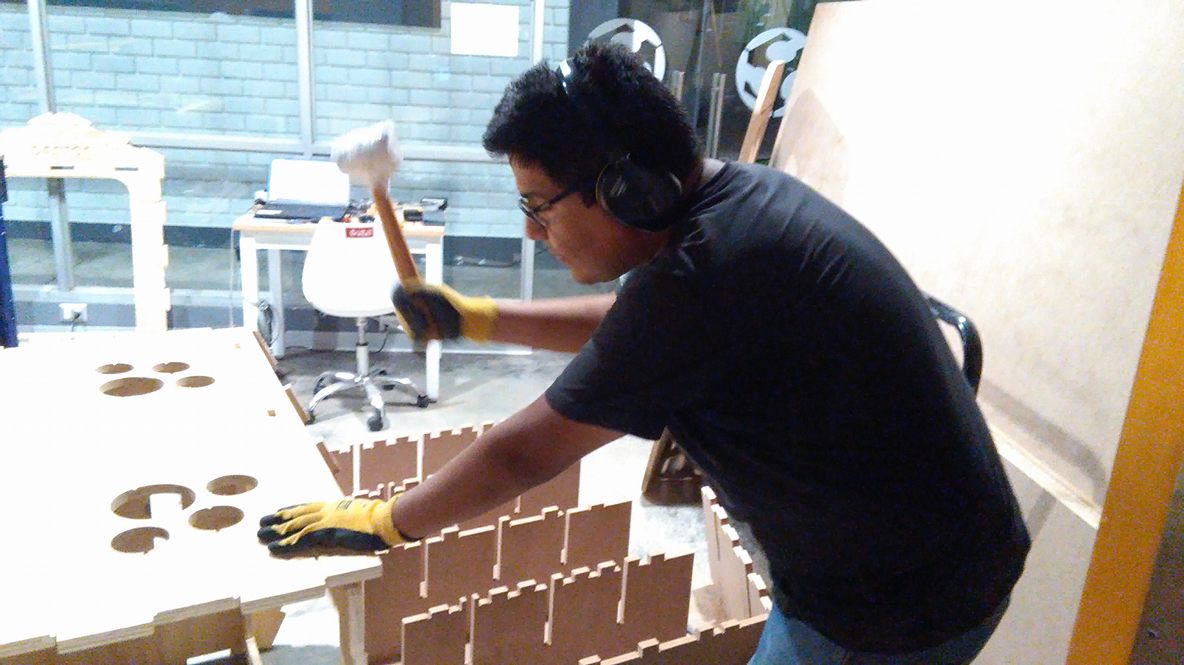
Once already armed almost totally, with the help of the instructor, we verified that the house can support a great weight.
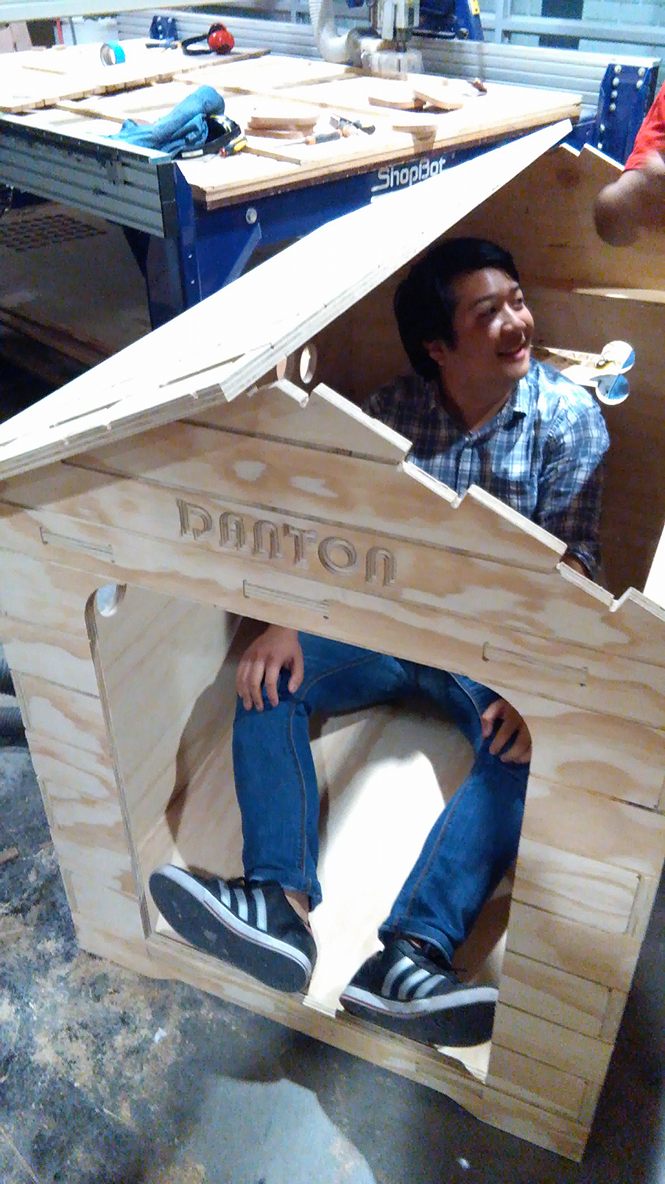
And finally, this my house dog.