<
>
WEEK ·2·

ASSIGNMENT
1. Model (raster, vector, 2D, 3D, render, animate, simulate,...) a possible final project and post it to your class page.
1. TINKERCAD (3D)

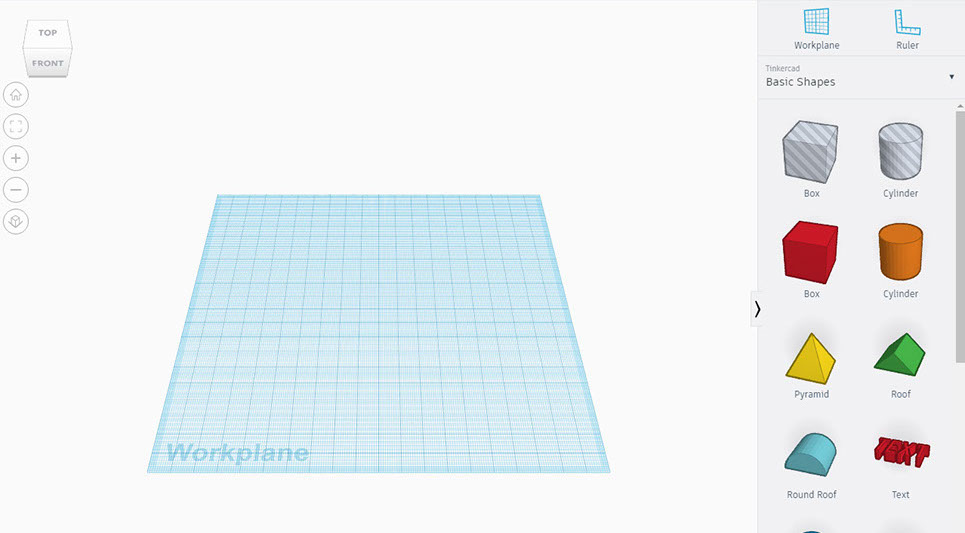
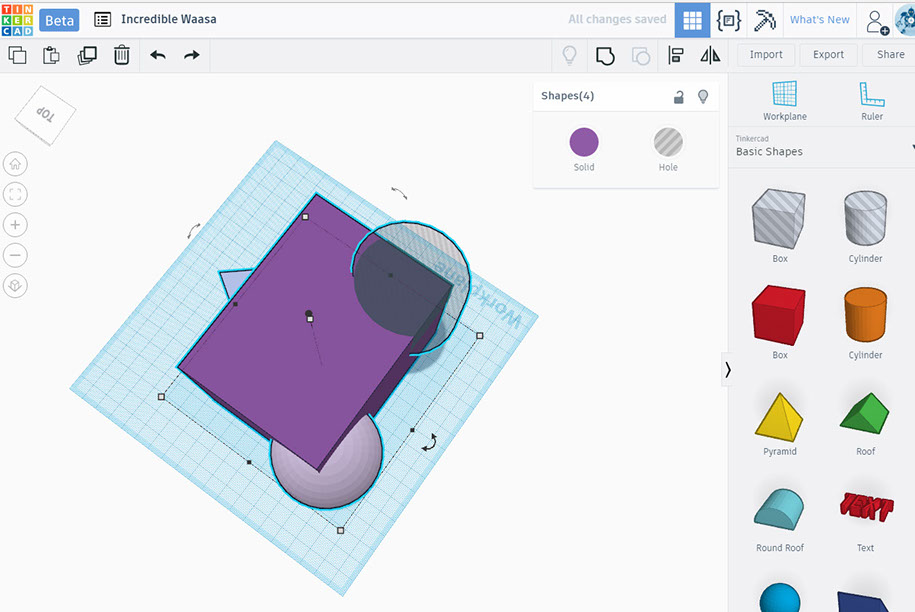
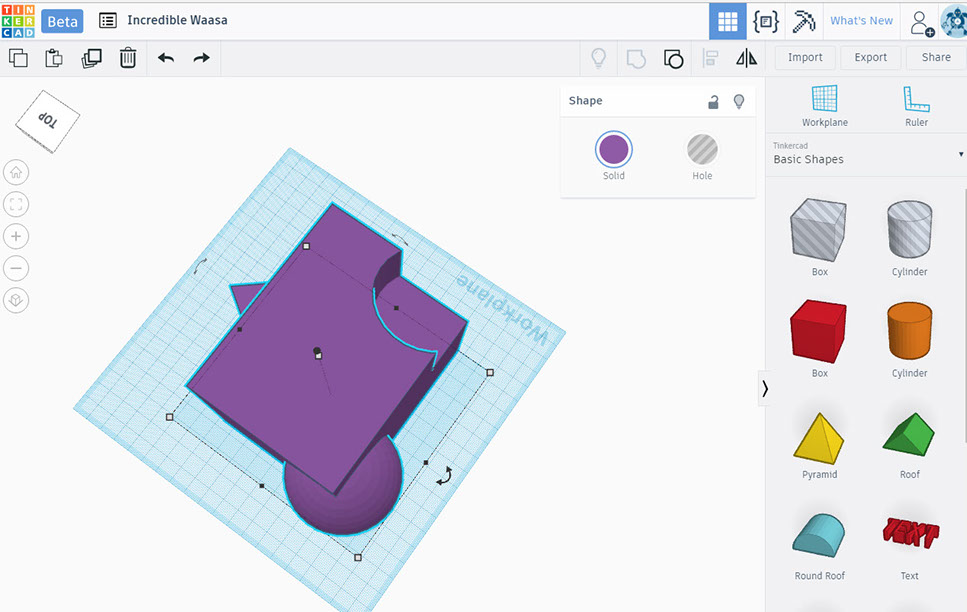
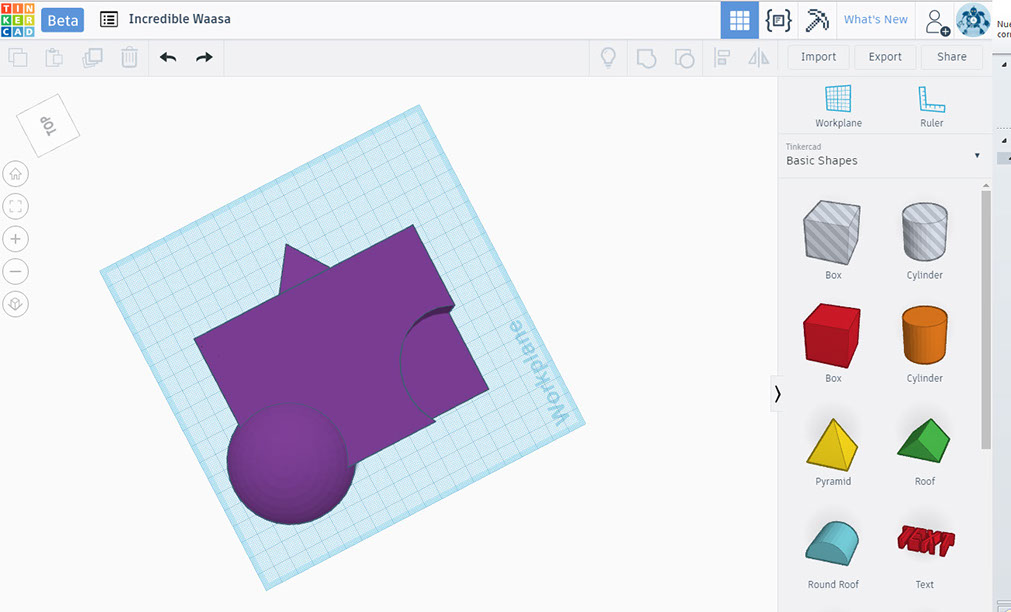
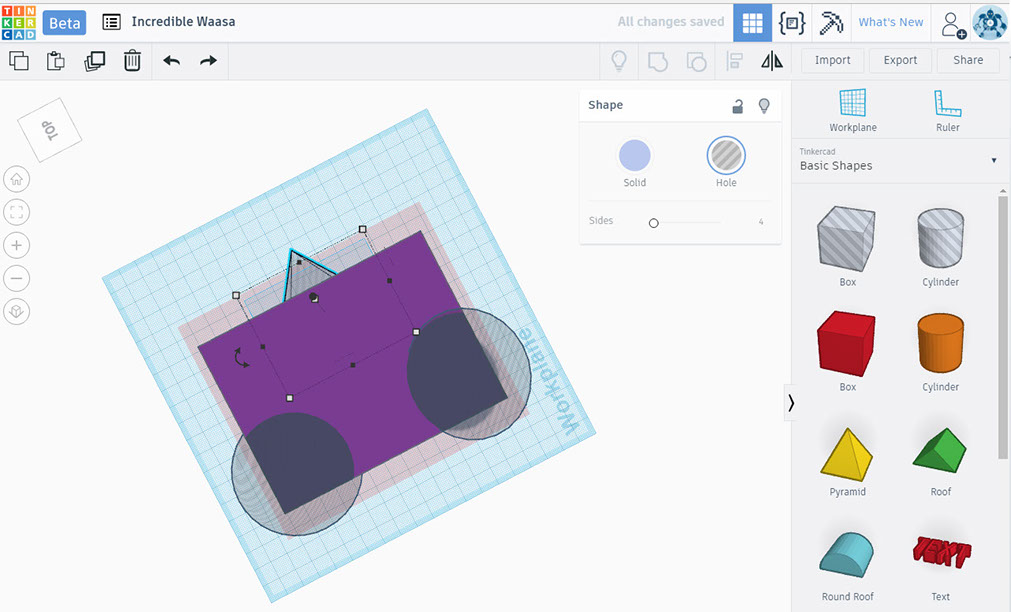
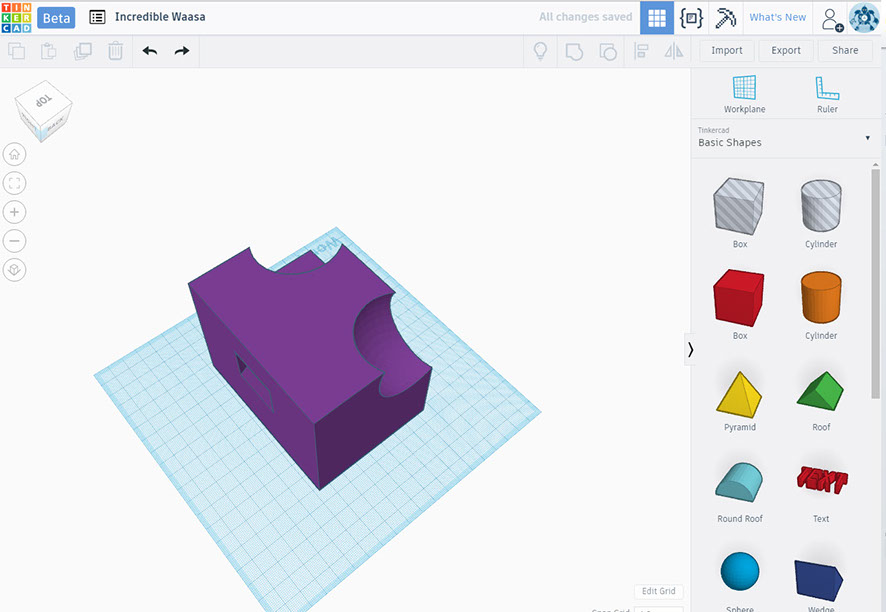
Tinkercad is a program very easy to use. To begin with you do not need to download it, you work from the web platform. It works on Windows or Mac.
It is a program that can serve a lot for those who just start in the 3d world because you can practice with forming presets and basic commands.
Select the volumes from the right bar and drag them to the workplane. There some arrows will appear that allow you to modify the measurements intuitively but also a menu will be display where you can go varying the measurements and seeing how it changes.
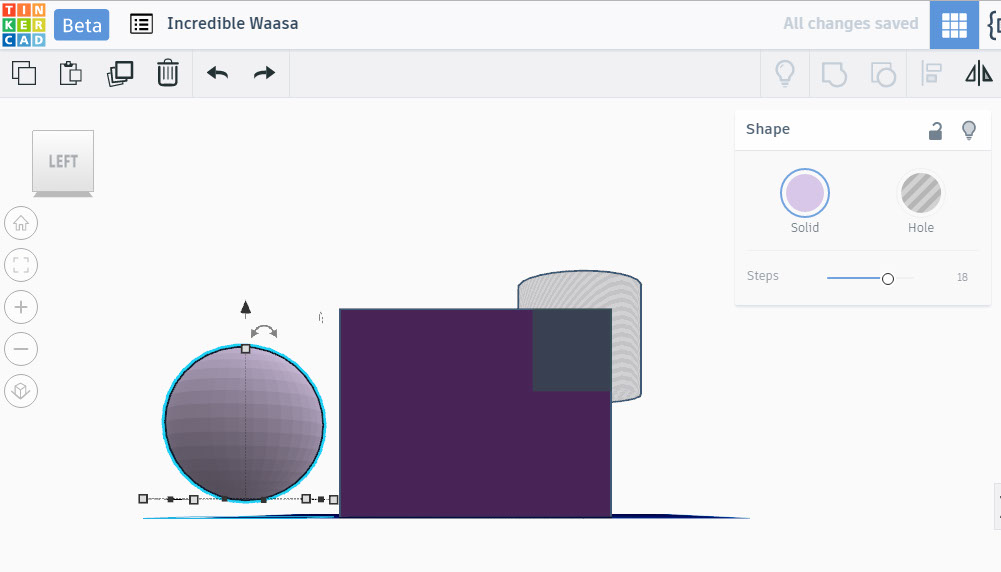
Allows you to change view between elevation or floor.
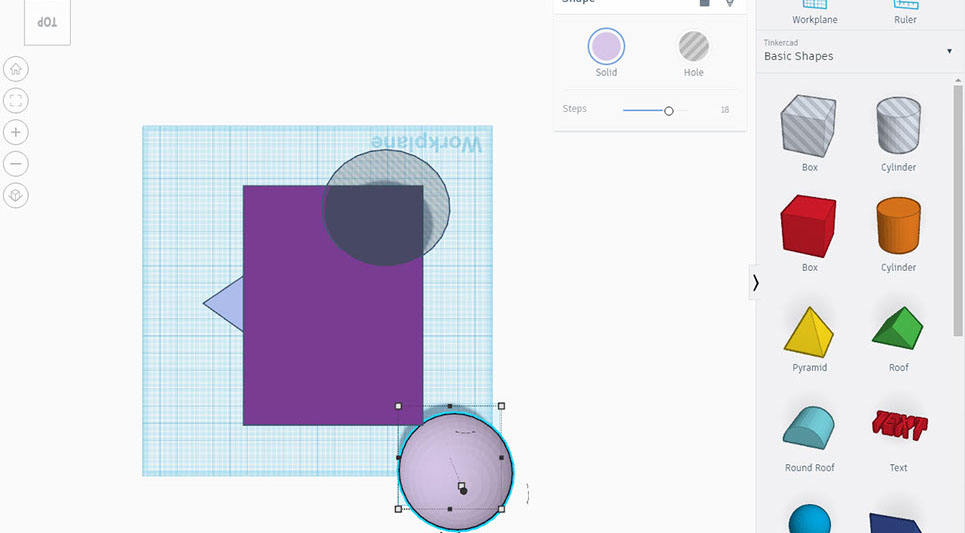
Tinkercad has a choice of solid or transparency basically what this does is add or subtract mass. If you intercept two solids and one of them is with the transparency option on, the intersection will be subtracted.
The isometry view allows you to view the entire composition and you can readjust the position of any of the volumes.
The volumes left in solid are added as mass in the composition.
You can switch to transparency by selecting volumes
What you leave in transparency will be subtracted from the composition.
3 - 9
<
>
2. AUTOCAD (2D)
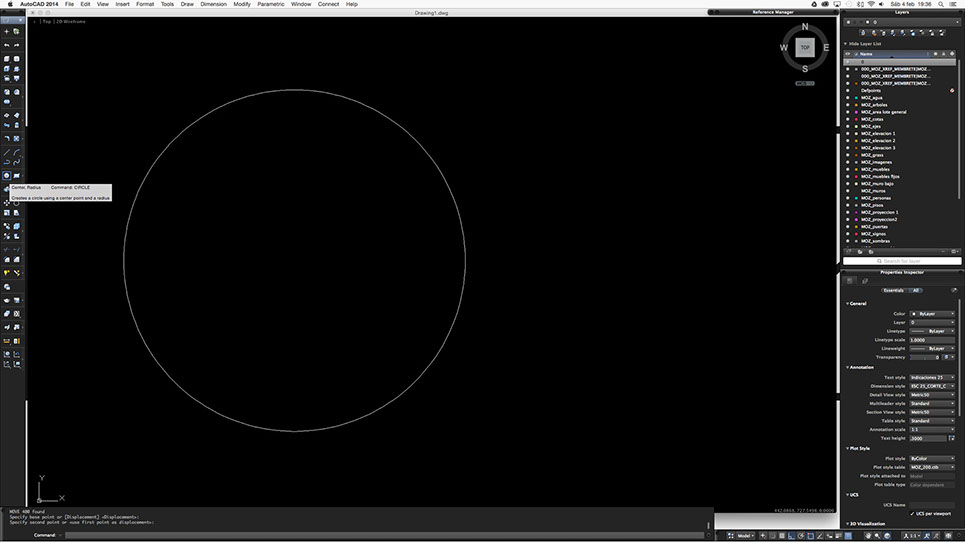
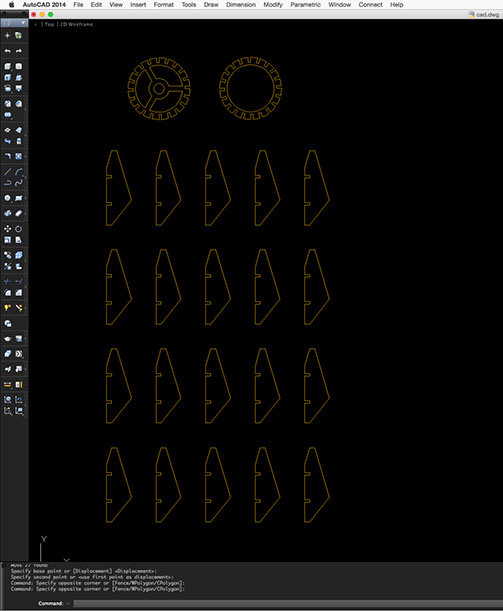
I am thinking that the design of my lamp should be modular. This way itcould take up less space and anyone could set it up by following a simple manual. If you're new with AutoCad this tutorial will help you http://bit.ly/1TjauIs
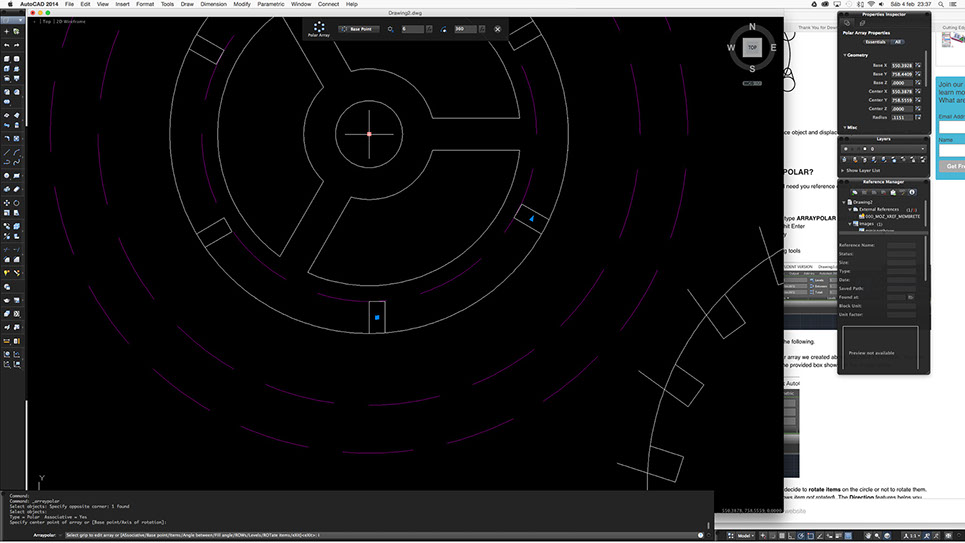
I have used AutoCad before but I wanted to explore a new option in the program. This is how I decided to learn the Array - Polar option. I followed this tutorial http://bit.ly/2kFMtiW
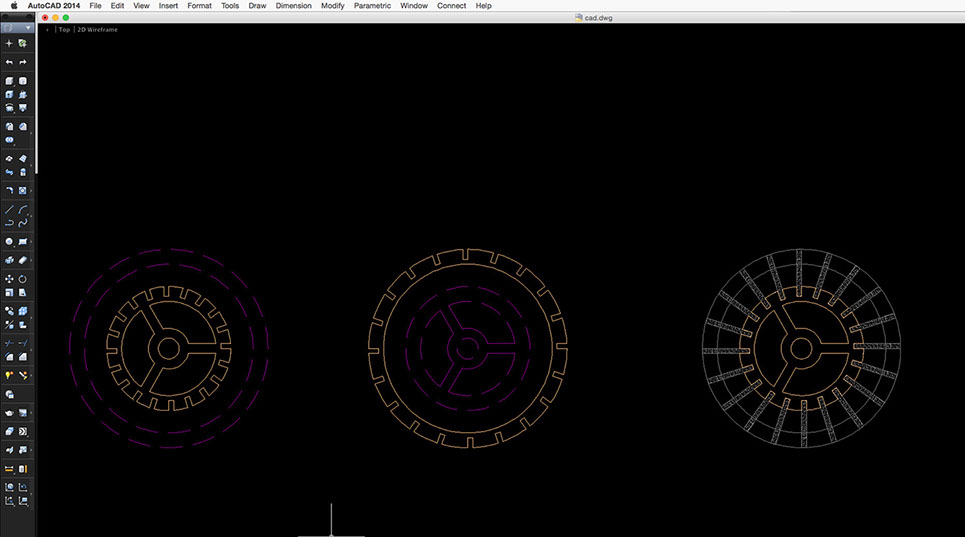
First draw in plan the rings that would function as part of the structure.
As in any program, keeping order while working is essential so you do not make mistakes (or at least not so many) I believe that in AutoCad working on the right layers is paramount. Once the drawing of the structural rings were finished, I place each of the elements in layers.
The array command asks you to choose the item you are going to repeat then asks you for the starting point and angle of rotation. It is important to put I + Enter to be able to indicate the amount of final elements to obtain otherwise you will have to do the procedure piece by piece. In my case I wanted to copy 20 elements.
1 - 4
<
>
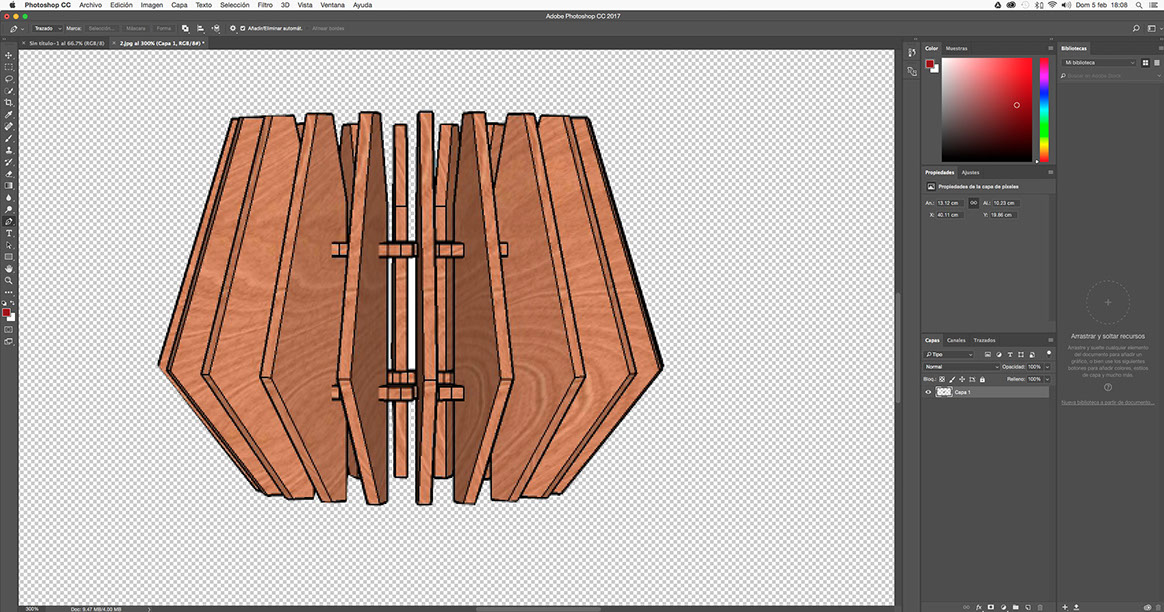
3. SKETCHUP (3D)


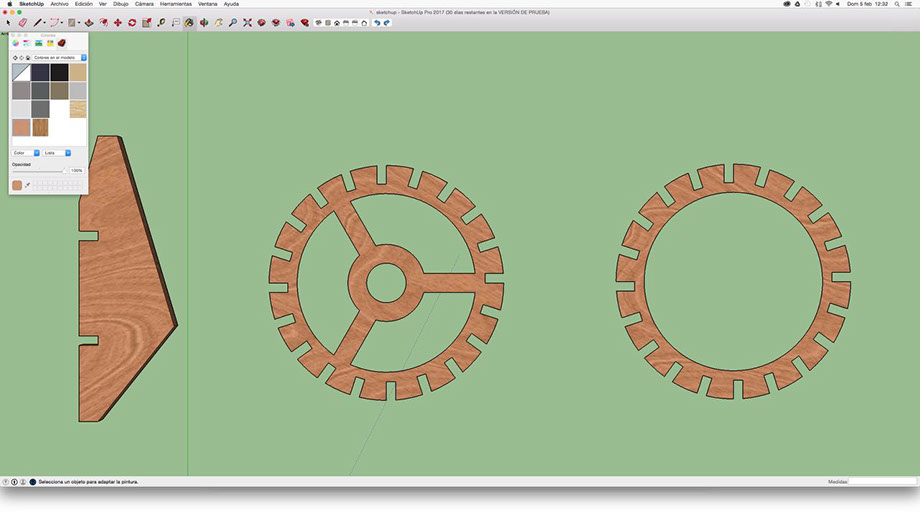
I downloaded the educational version of Sketchup and followed this tutorial http://bit.ly/2bL159M
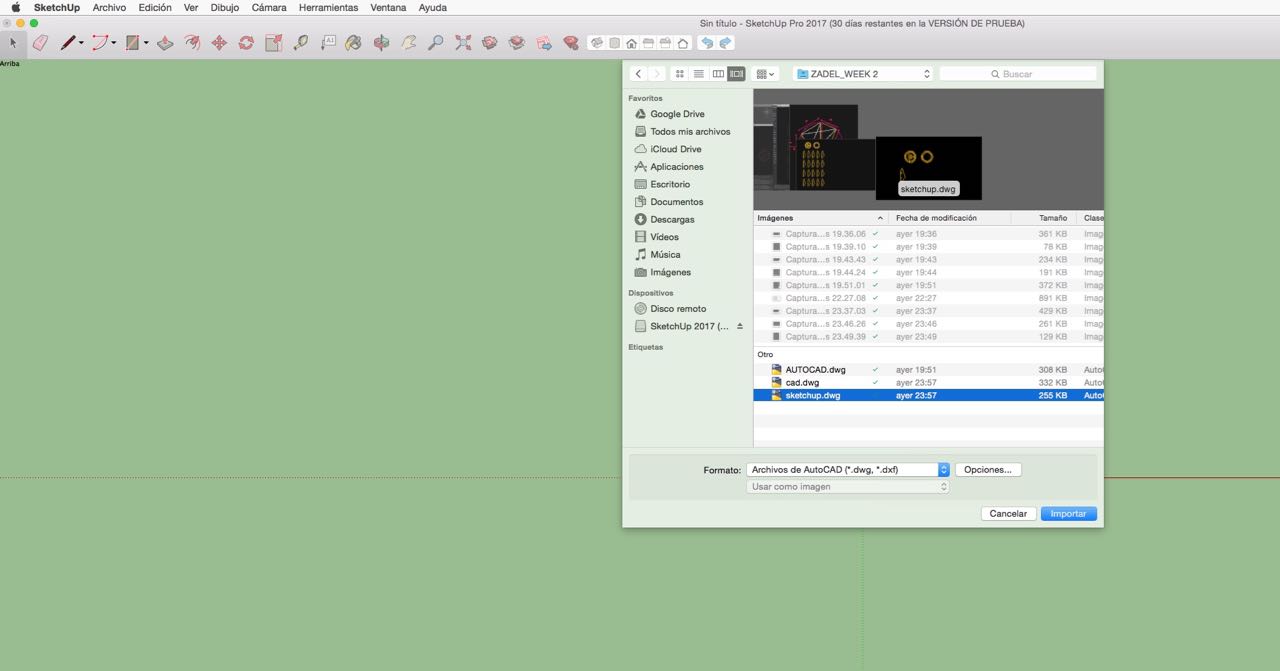
Sketchup allows you to import an AutoCad file. Make sure the file has only what you want to work on Sketchup because otherwise you will have to erase many elements and take more time.
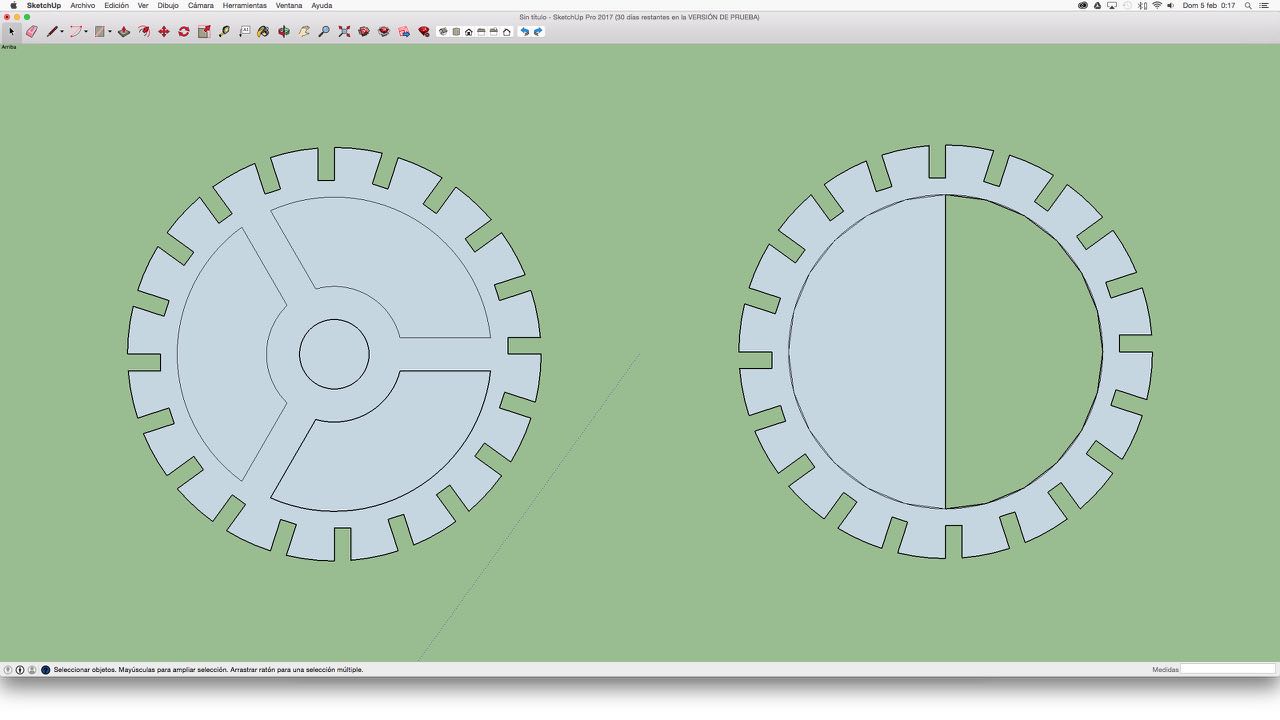
When the autocad file goes to Sketchup it does not always go "closed" well. That is why it is necessary to select the pencil tool and review some lines until a blue color drawing (as shown) appears.
When you already have the drawings with their respective shaded areas you can start to "raise" the 3d. There is a tool called push-pull and depending on what you need, you choose one of those options, you place the measurement and you're done.
To work in an orderly way in Sketchup it is necessary to create groups for each 3d element.
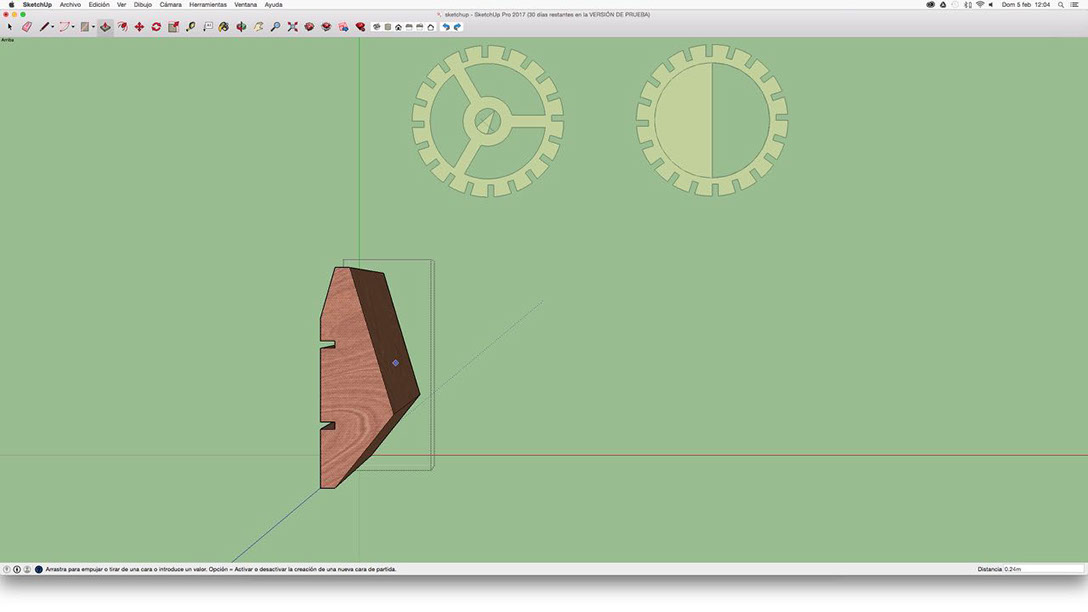
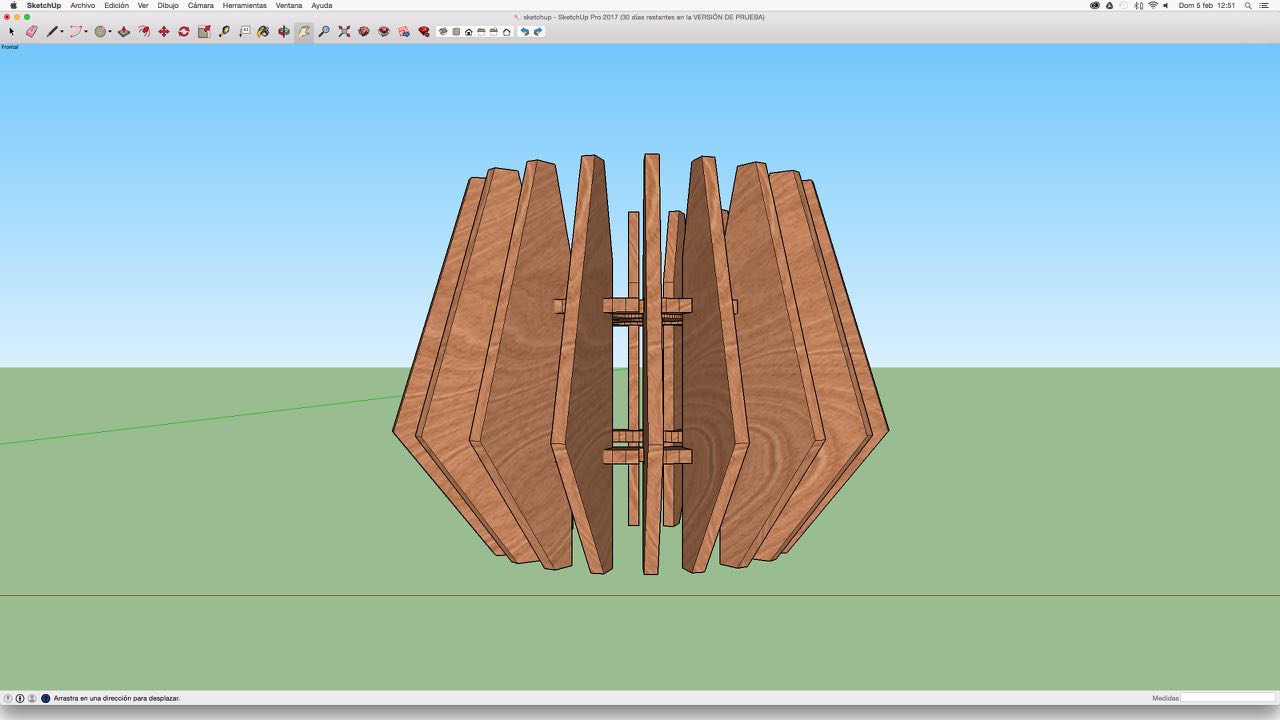
Here I show my 3 elements in 3d and in group
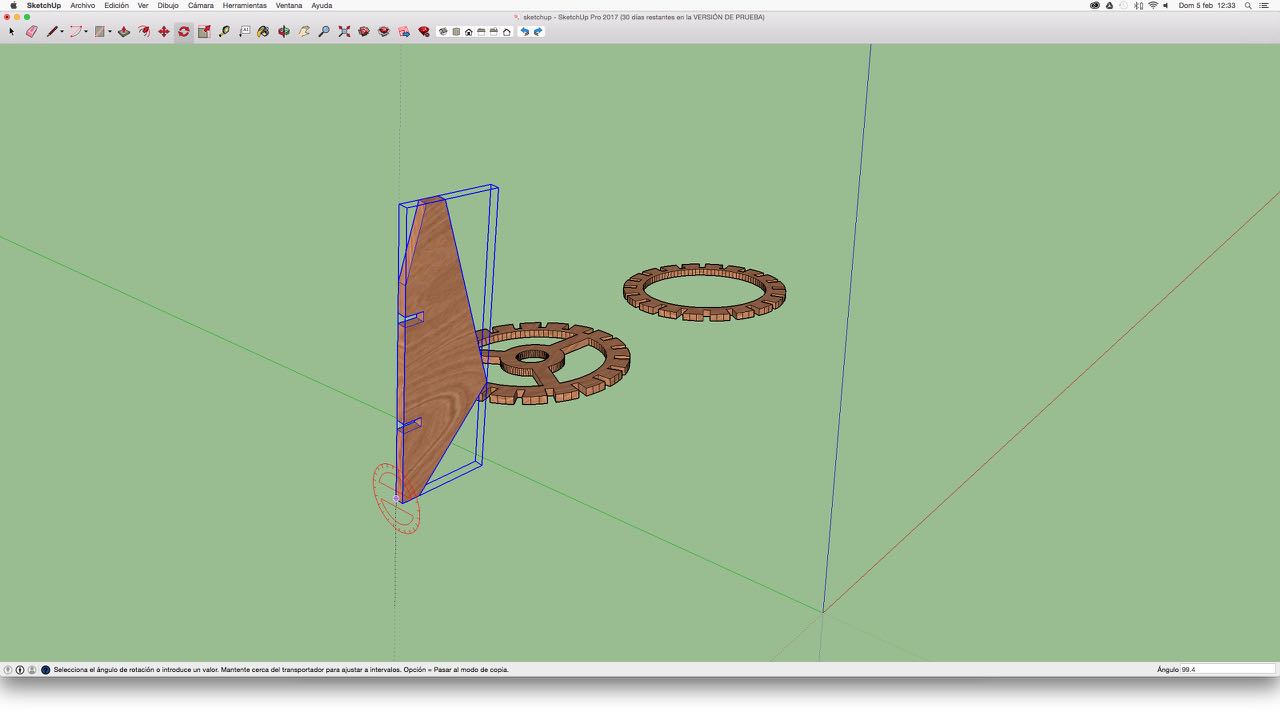
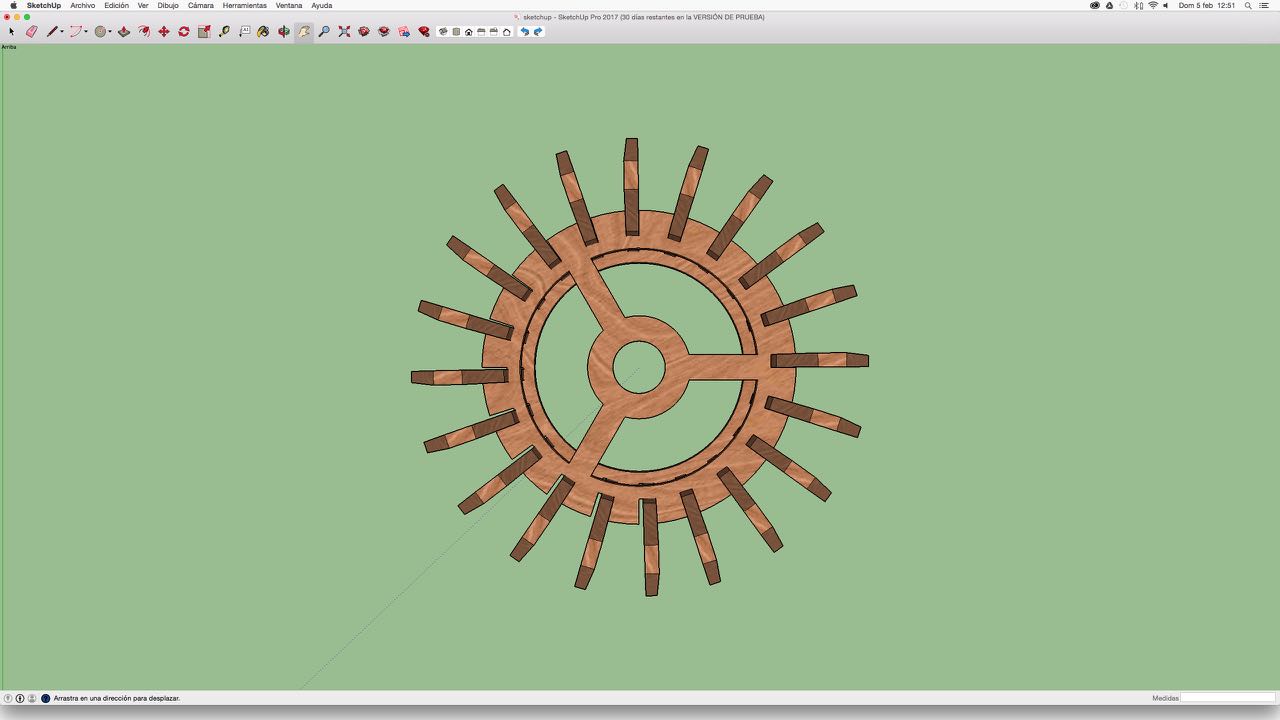
Now it is time to start the composition of my lamp and for this I will have to go rotating each of the vertical pieces until they fit the discs.
Like this. I need to copy this item 19 times but doing it one by one would take too long and I could be wrong on the angle. Just as in AutoCad in sketchup you can also work with a type of array-polar
For this, type "Q" to select the object to copy and then the center and the reference angle point. It is important to click on alt to give the copy order. Finally click on * to indicate the number of pieces resulting. If you do not do all this you would only be rotating the original element. I followed this tutorial http://bit.ly/2kaJLiv
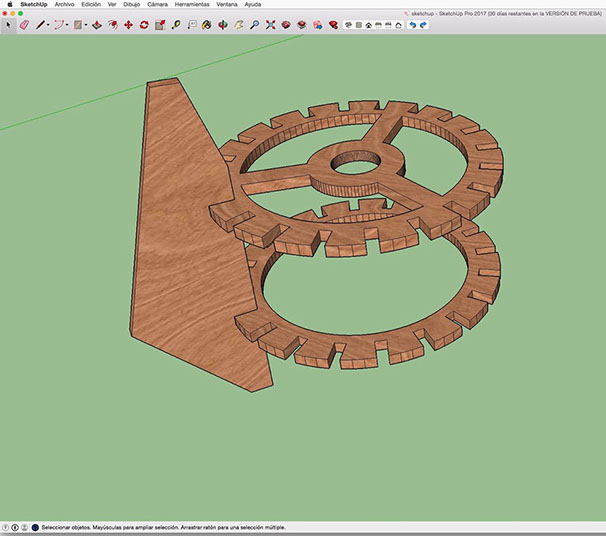
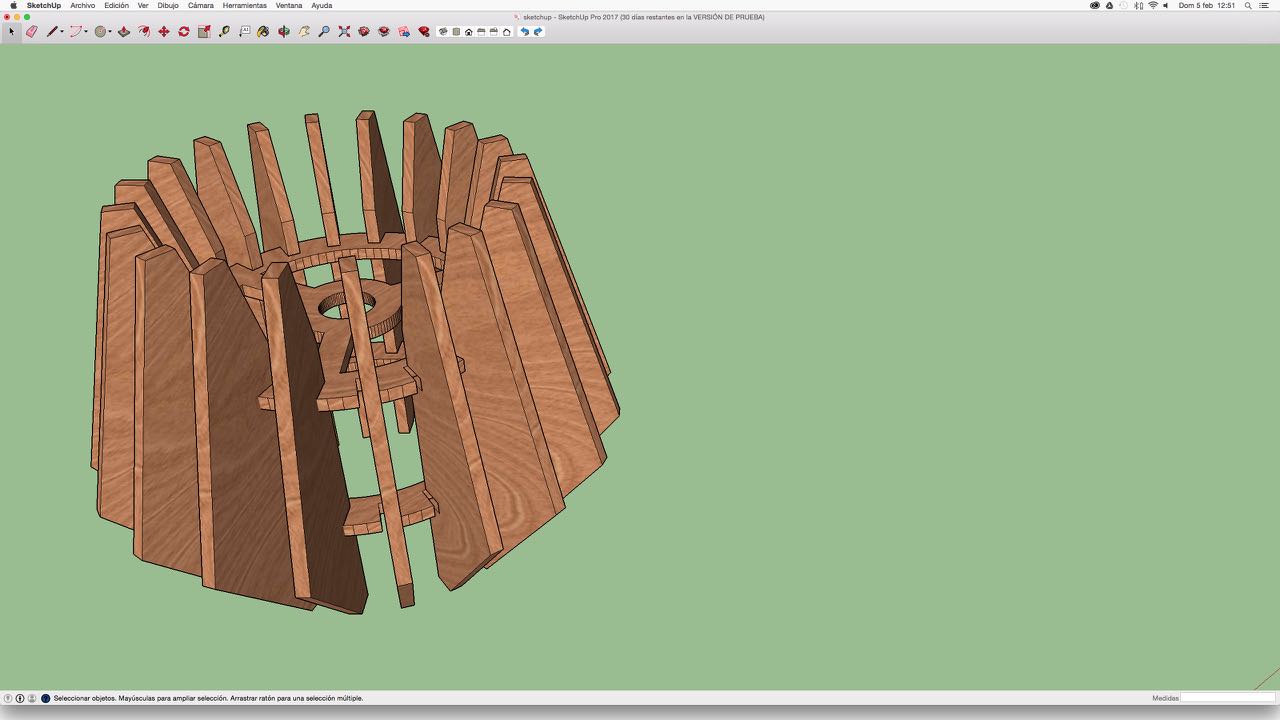
Finally the element is completed.
This is another view.
3 - 11
<
>
4. PHOTOSHOP (RASTER)
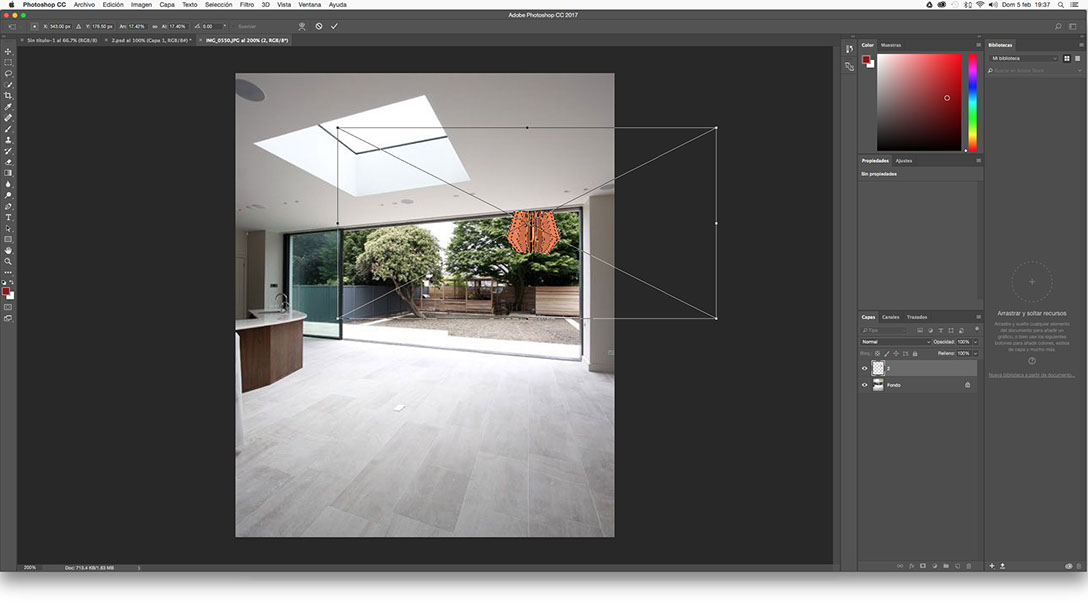


I downloaded the adobe photoshop trial version and watched first this tutoral http://bit.ly/1GnSzLi
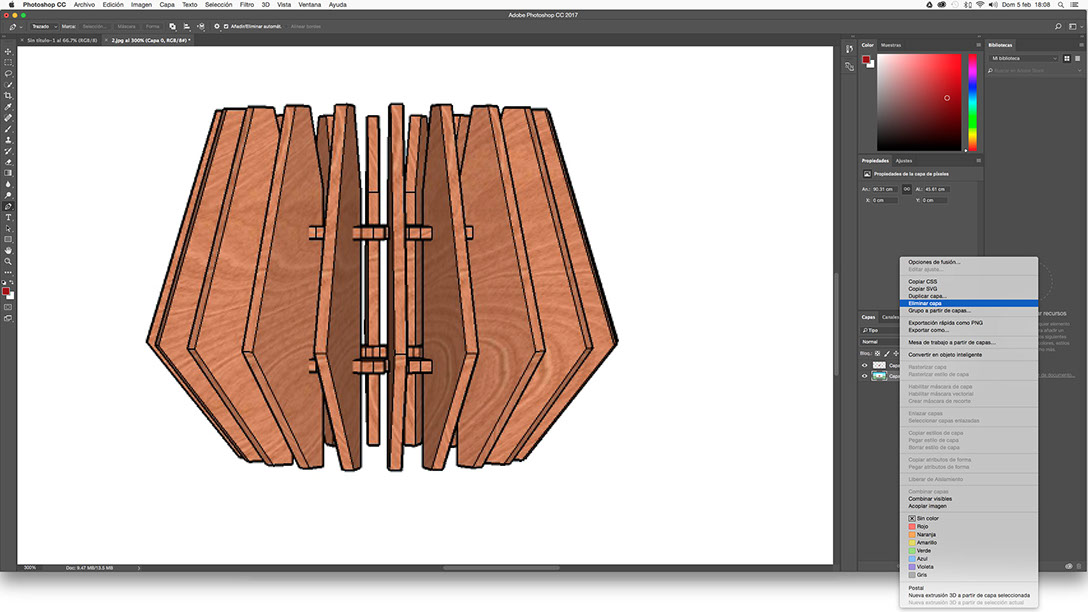
As the tutorial shows, the way to select the object I want to trim is with the pen option. Once I finished selecting the right click "select - ok" object. Then control + j to copy the layer and erase the layer from the background.
This is how the bottomless image remains. This allows you to make photo montages on any background.
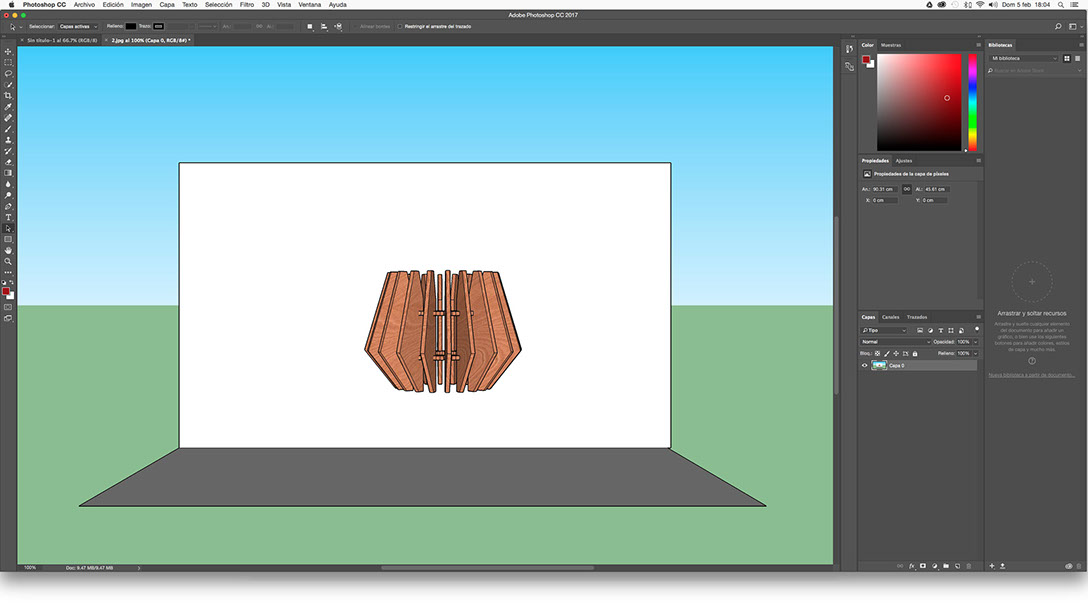
In a new sheet of photoshop I placed the image that I wanted to use as background. The image is referential only used to test the program.
I put in the photoshop page the file with my image (without background .png)
I correct the location of the object and that’s it. In this test the object is not rendered as there is no vray for mac.
2 - 6
<
>
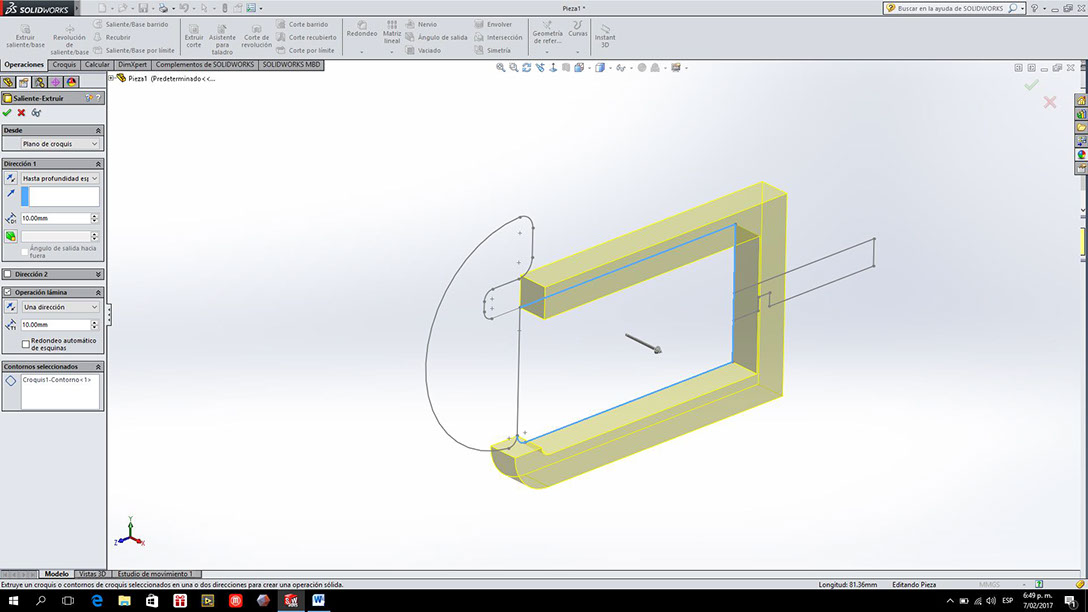
5. SOLIDWORKS (3D)
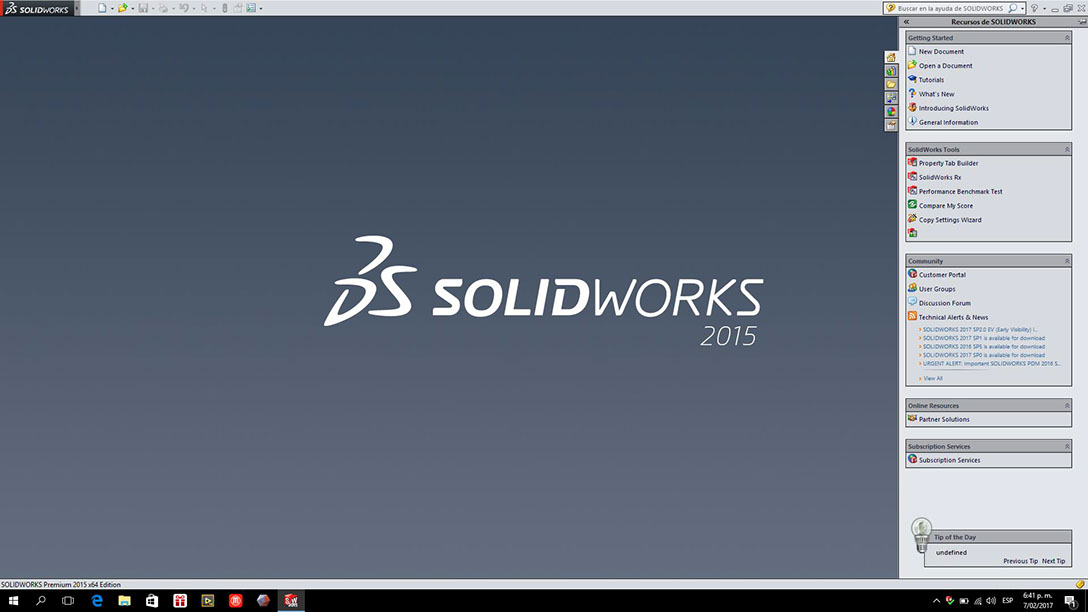
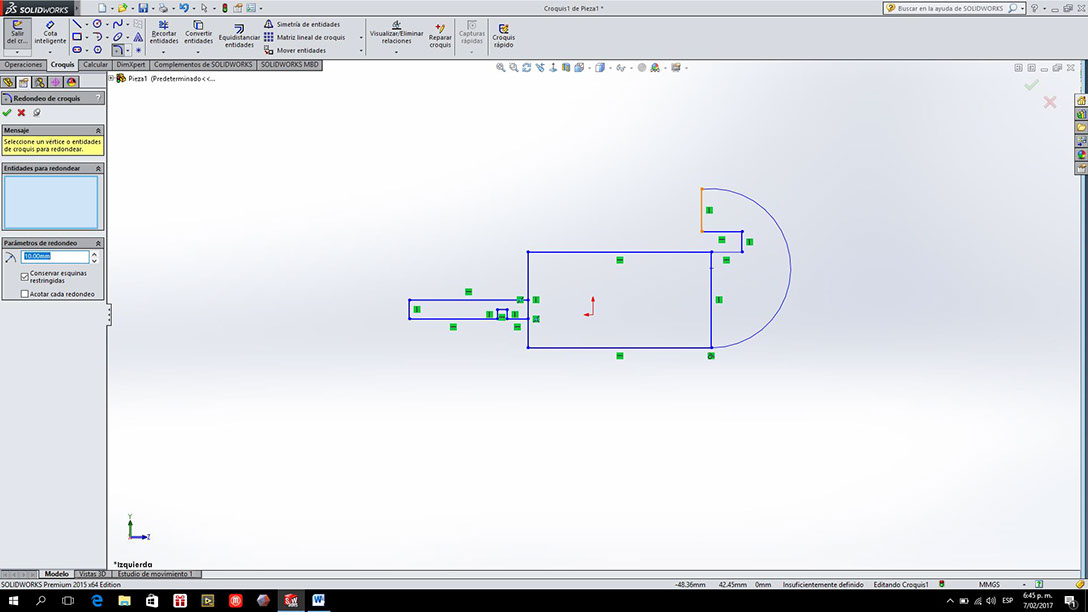

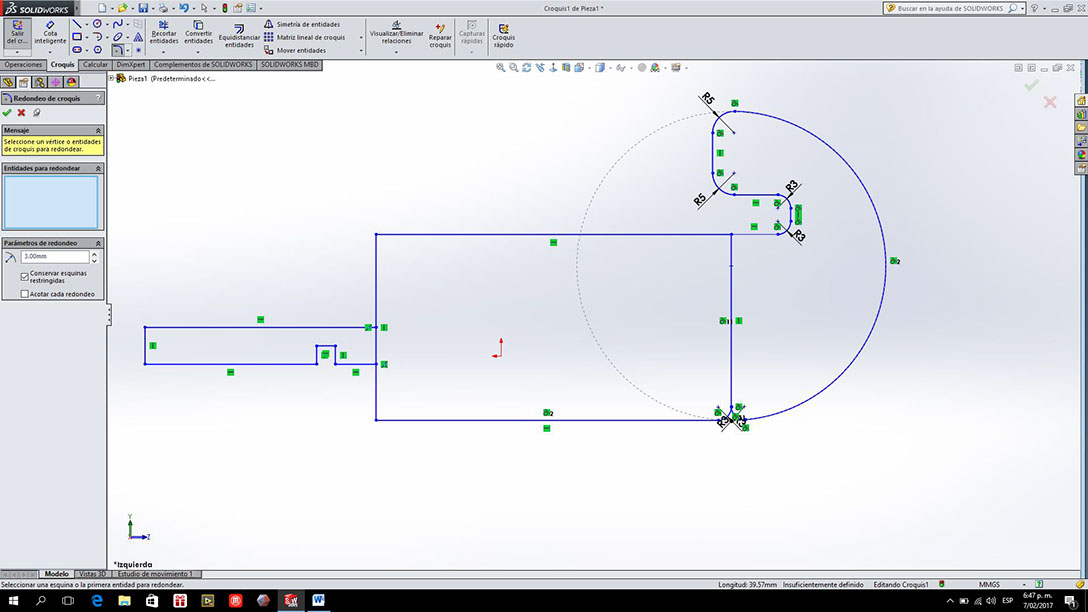

Solidworks is a program quite easy to follow but it only works in Windows.
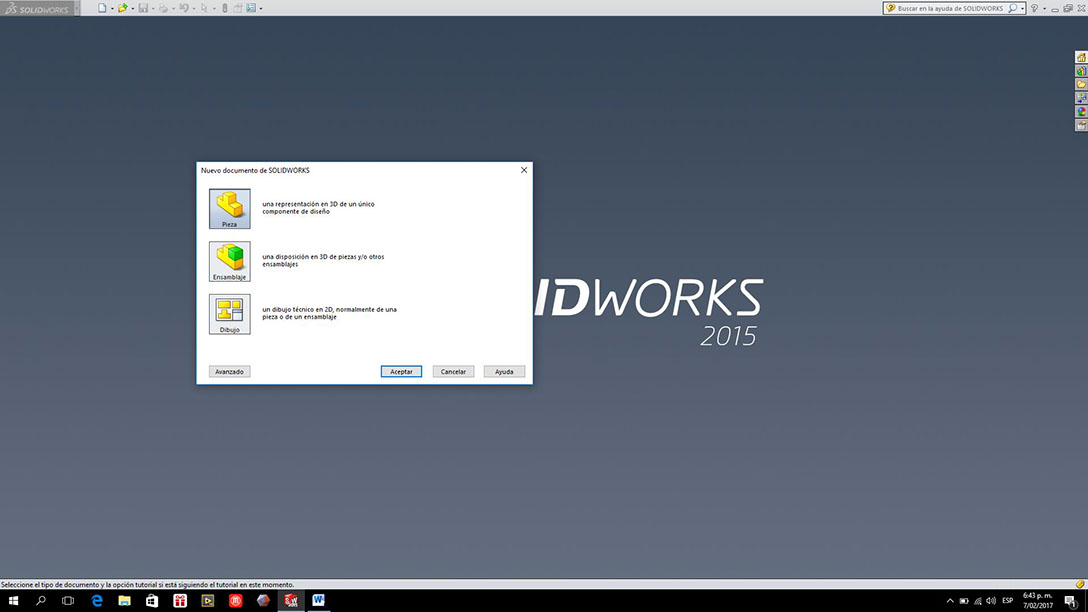
The program has three work options, I followed the first to start modeling a solid.
Although the program has commands similar to AutoCad for being the first time I used it, it took me a little more time to adapt to the work environment.
To begin the sketch you have to select option in 2D.
I use different plans and drawings to basically test the program.
When you go out of the sketch and pass to operations you can start working in 3 dimensions.
You can also change materials and have a preview of how it will look.
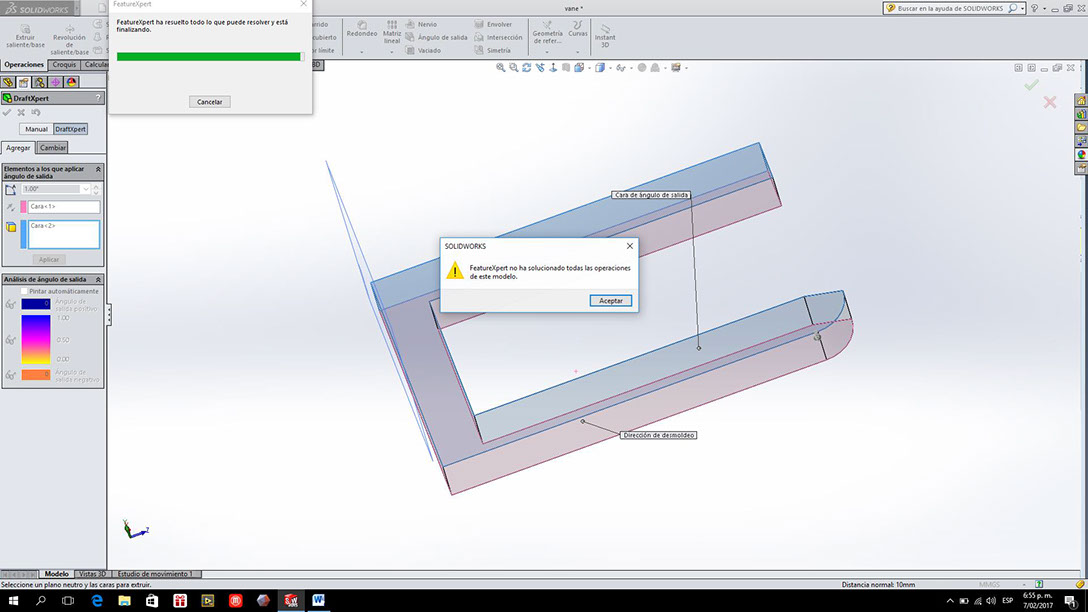
At the end I had some problems with certain indications but the program is quite simple to understand and worth exploring.
8 - 8
<
>
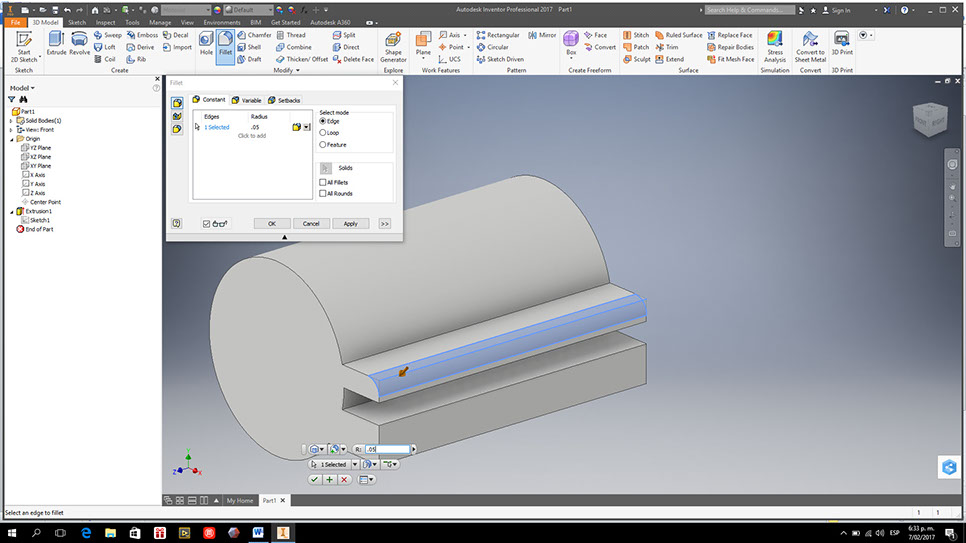
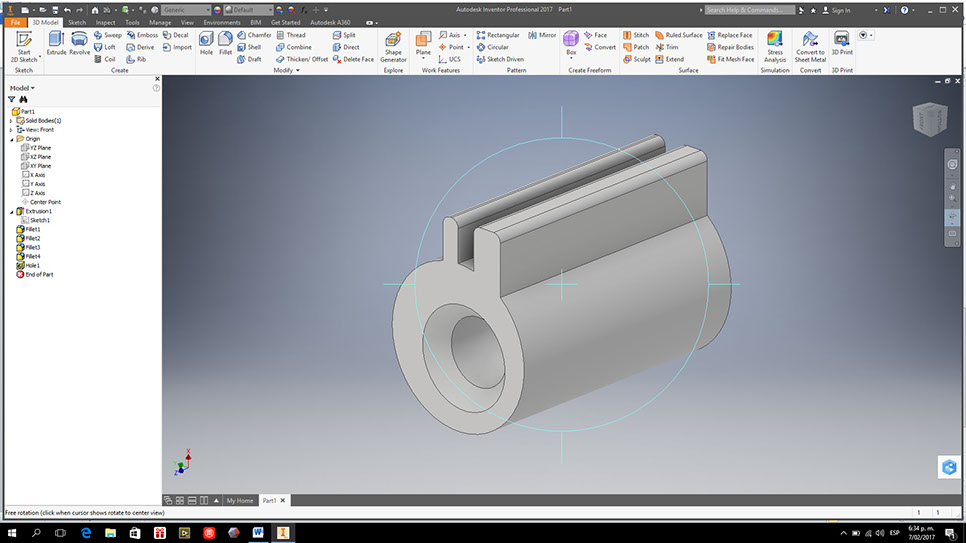
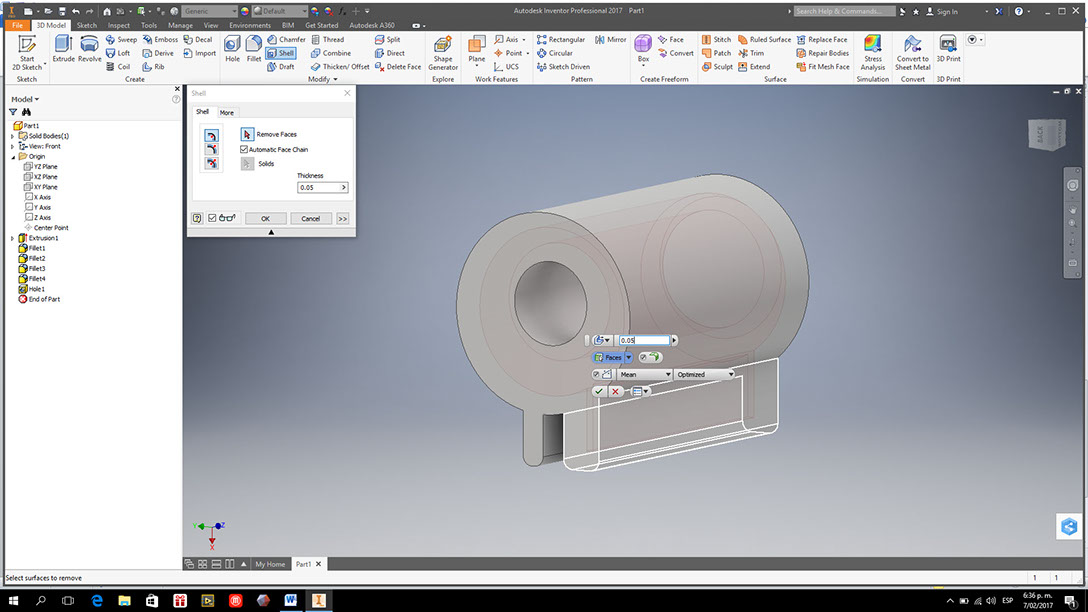
6. INVENTOR (3D)
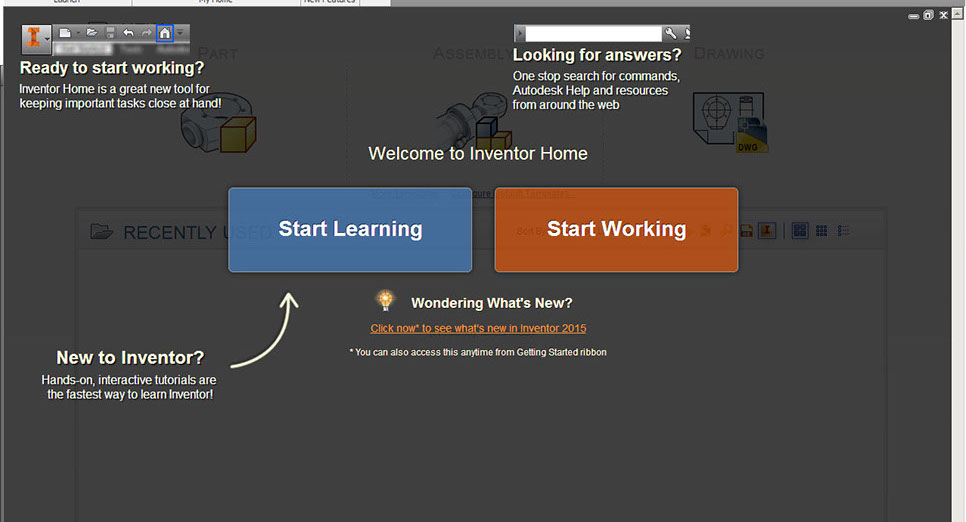
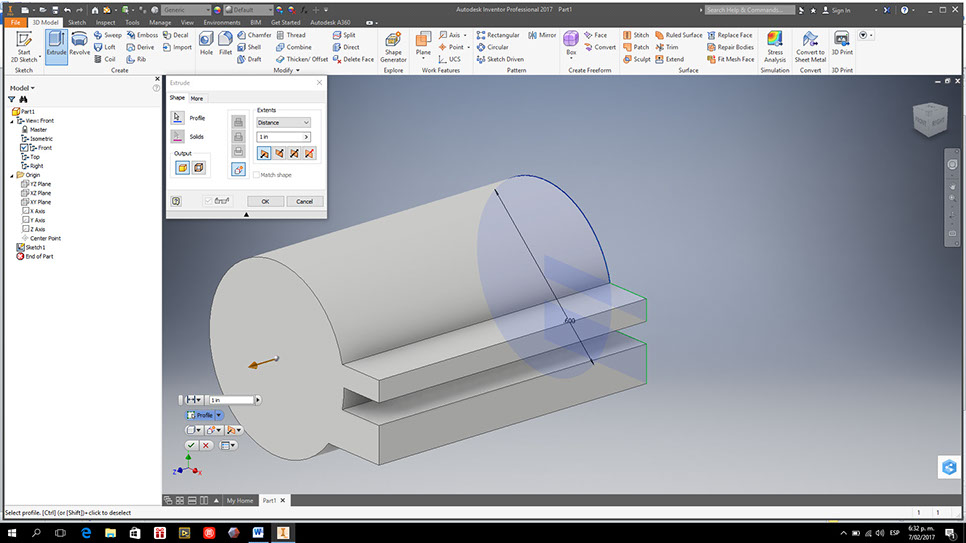
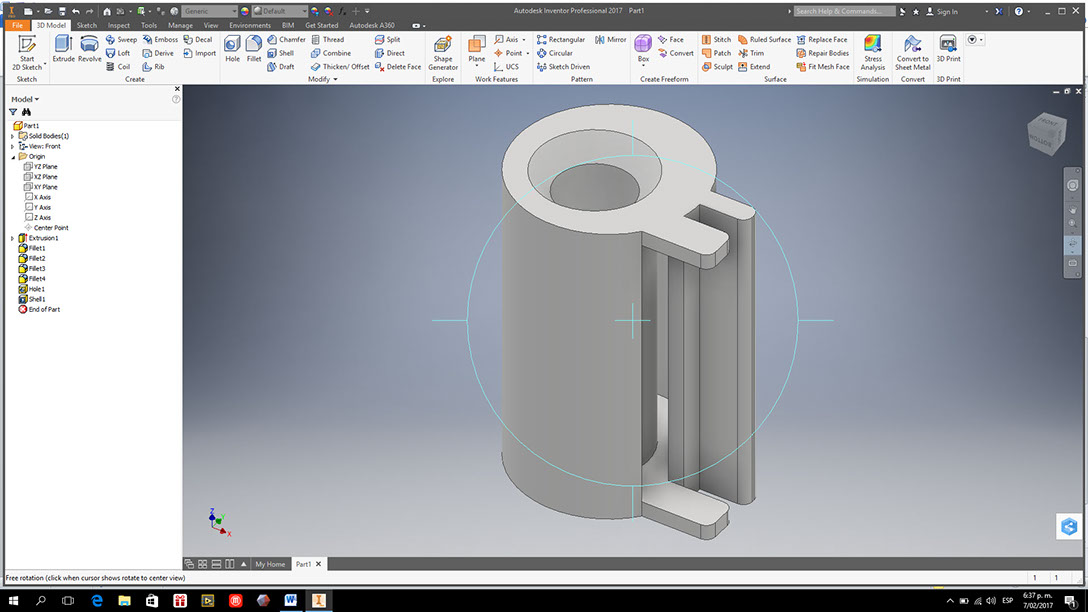
This is the first time I try Autodesk Inventor. When I opened the program I had two options. One of them was start learning and inside there were several tutorials.
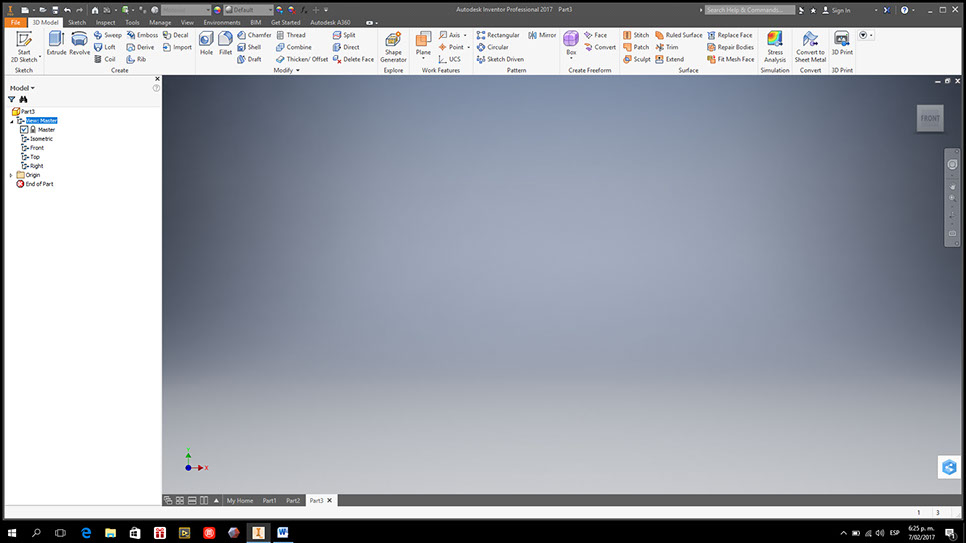
When you place a new worksheet you can not start doing anything until you select the face or view where you are going to work. Inventor in my opinion is a very complete and orderly program.
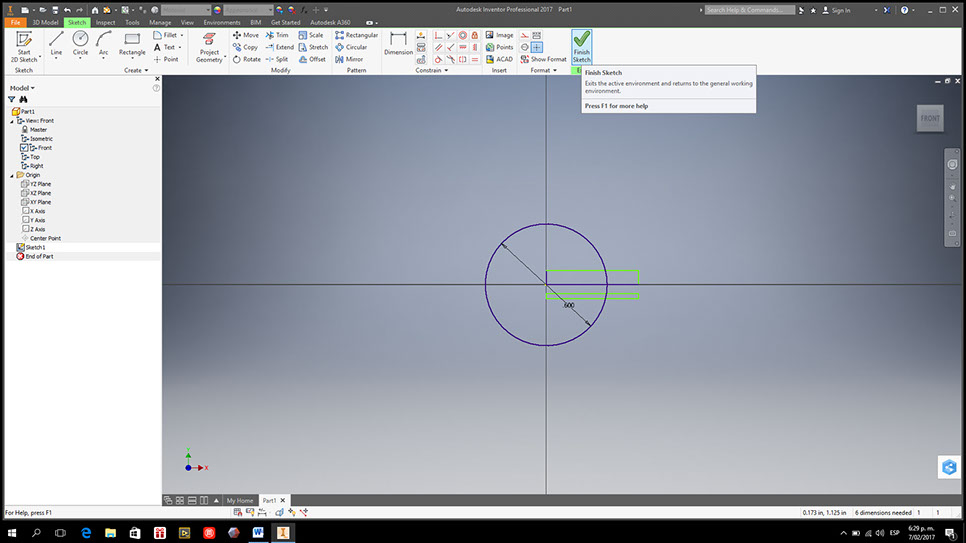
Once chosen the view to work, we chose the 2D sketch option to have the drawing commands. It is similar to AutoCad in terms of commands but more advanced.
You can change your view to complete the drawing of the object.
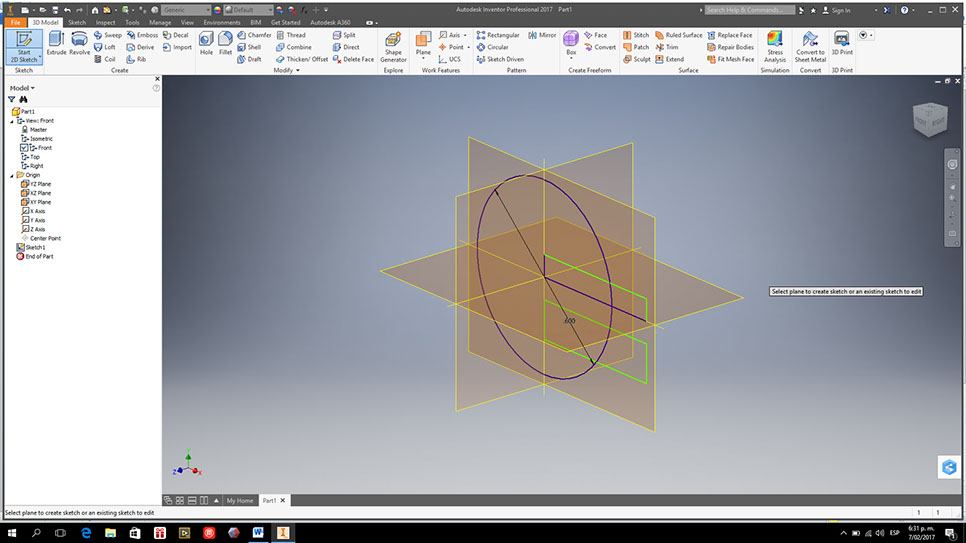
Once the 2D drawing is ready, choose the 3d option and the extrude, rivolve, etc.
All the steps made in the model are recorded in a menu on the left, so you can return to your steps if you need to update something.
Mauris sit amet tortor.10
All the steps made in the model are recorded in a menu on the left, so you can return to your steps if you need to update something.
Inventor allows you to model in 3D and then get the planes of that object and even select the cut points.
5 - 9
<
>
7. ANSYS (SIMULATION)

The university where I teach classes has a license for ansys.
I was able to contact the professor in charge to, at least, see the program and to know what kind of simulations you can do.
I wrote to Neil asking him if having access to Ansys would help me later with my final project but for these first tests he recommends working with Fusion 360 or Solidworks.
1 - 2
<
>
DOWNLOAD FILES


