Press-Fit Construction Kit, WHAT ?
Yes, that's exactly how you feel when you read the assignment guidlines, and to make a long story short, a construction kit is just a punch of building blocks that you can combine to build different shapes, exactly like LEGO. But what is Press-Fit? Press-Fit techinques depend entriely on the material-to-material friction to connect different parts, no glues nor fastners. This documentation explains how I made my own kit.
Step 1: Idea
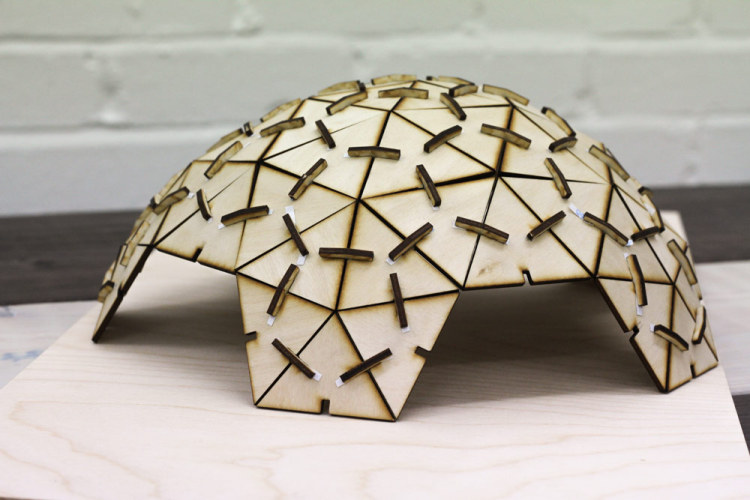
At the beginning, I was really trying to design a perfect kit that can build anything, just like LEGO. I'm a programmer and I used to design algorithms to solve some problems-when I say it this way it seems easy but it is not- and I had to write a proof that my algorithm will work exactly in the same way with any set of inputs. I tried to do the same here, so I have started drafting. All of the objects around us consists of different planes, and it's connected together in different angles. So if we can build some plans and different connectors with different angles, we can actually build anything. However, it's not that easy to build a connector for all different angles, so I have made only the most common ones. Maybe you'll not be able to build everything using my kit, but I'm sure that you can build many different objects.
Step 2: Getting Started
First thing that you have to do is to find the right materials for your machine. Our Laser Cutter at Fab Lab Egypt can work with acrylic, wood, faom, paper, cardboard, and more, and most of the machines can also. I have chose 3mm Plywood sheets, because it's cheap and easy-to-cut. After that, I have spent some time searching for ideas and different joints. I have found some amazing projects that helped me like this one
And you can find many different joints on MAKE joinery notebook.
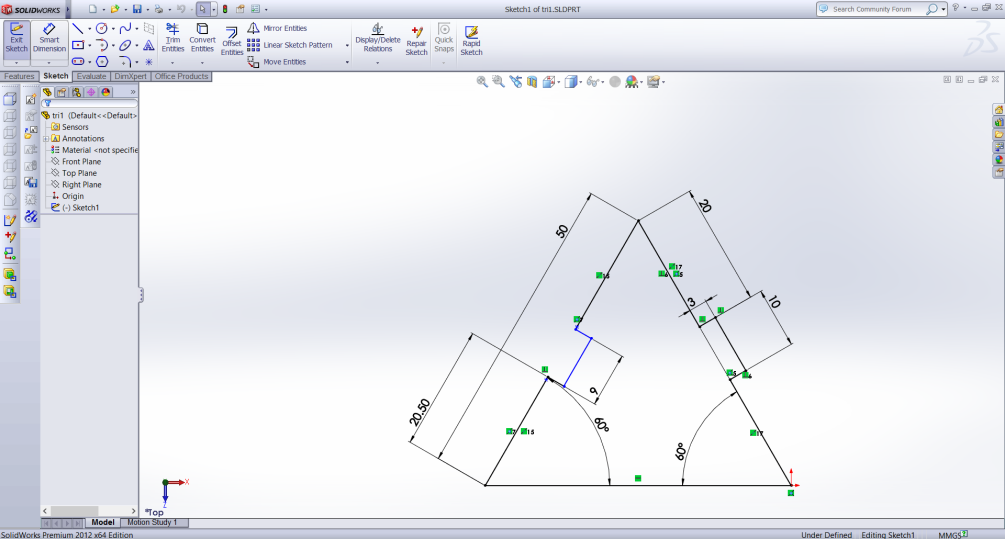
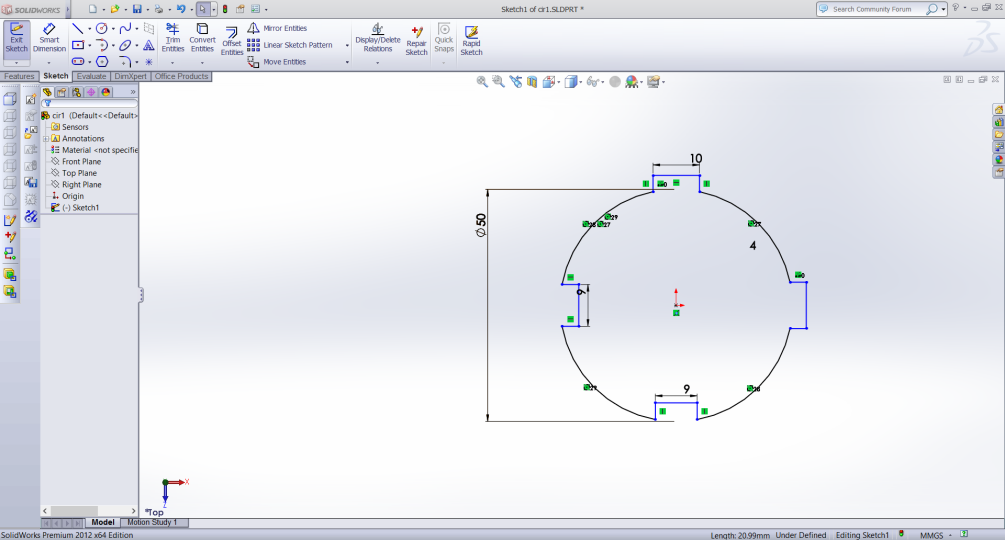
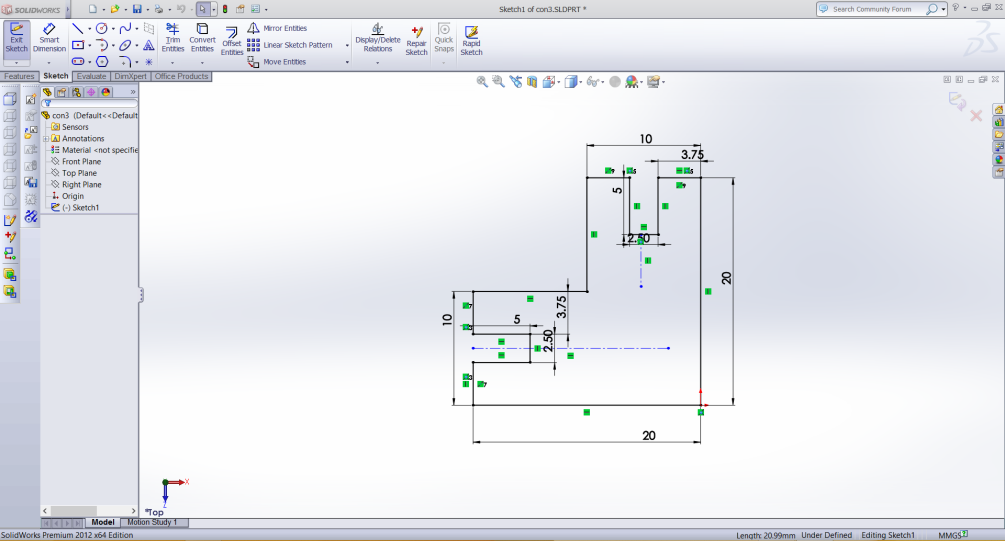
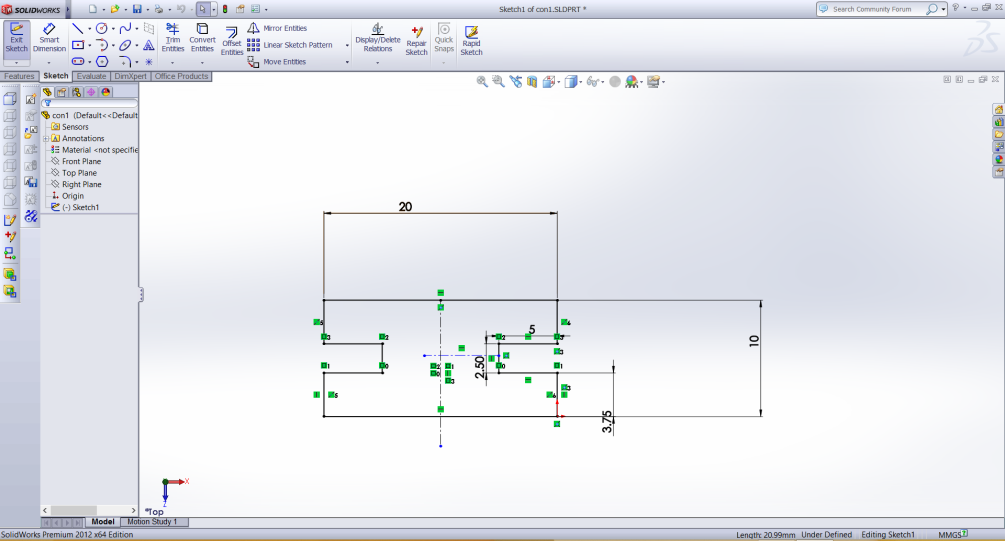
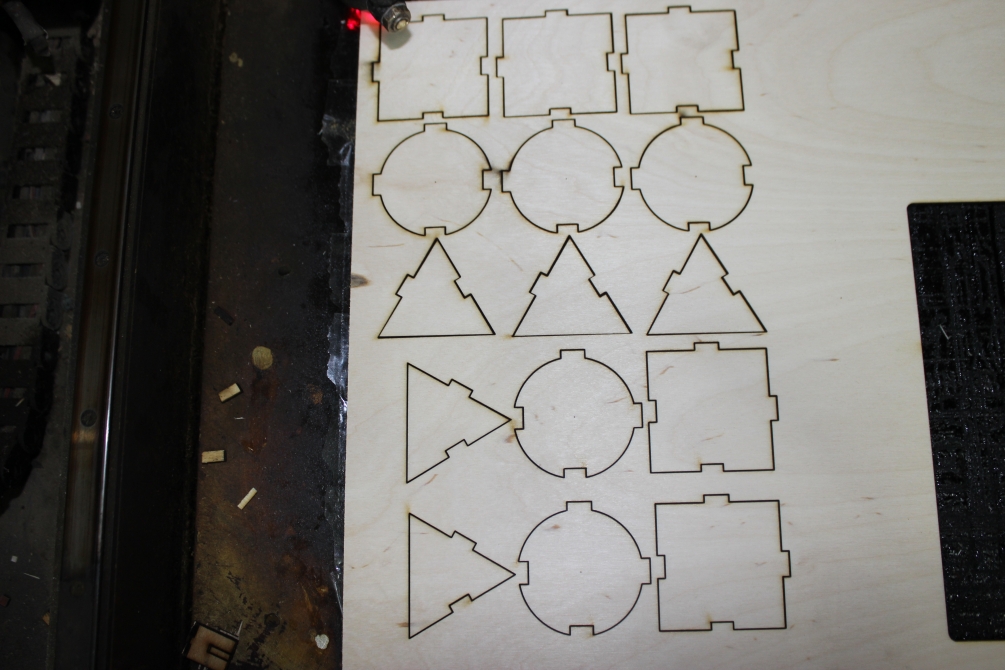
Step 3: The Design
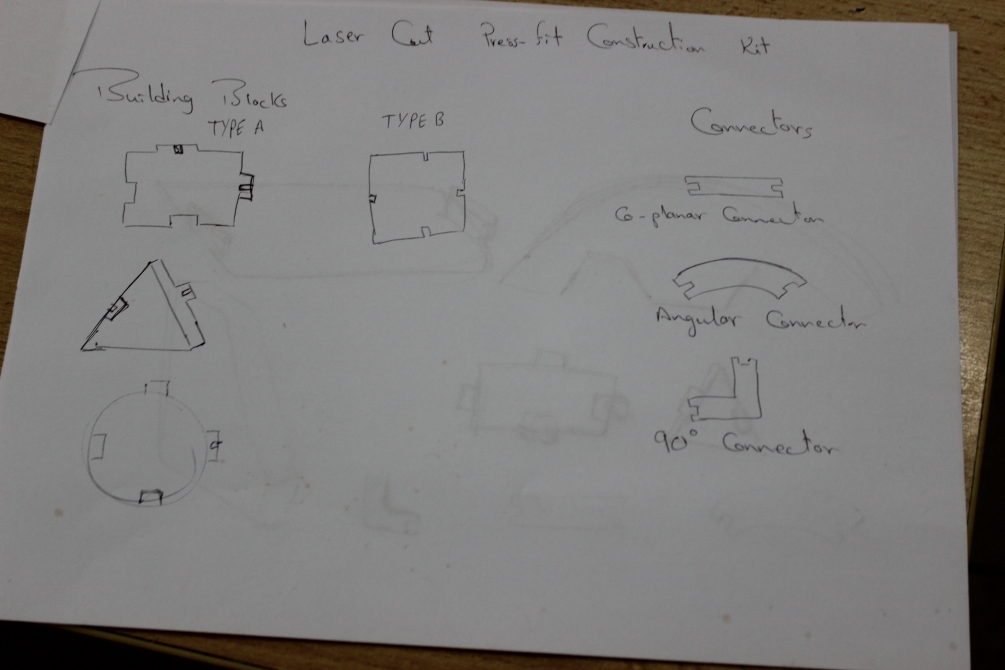
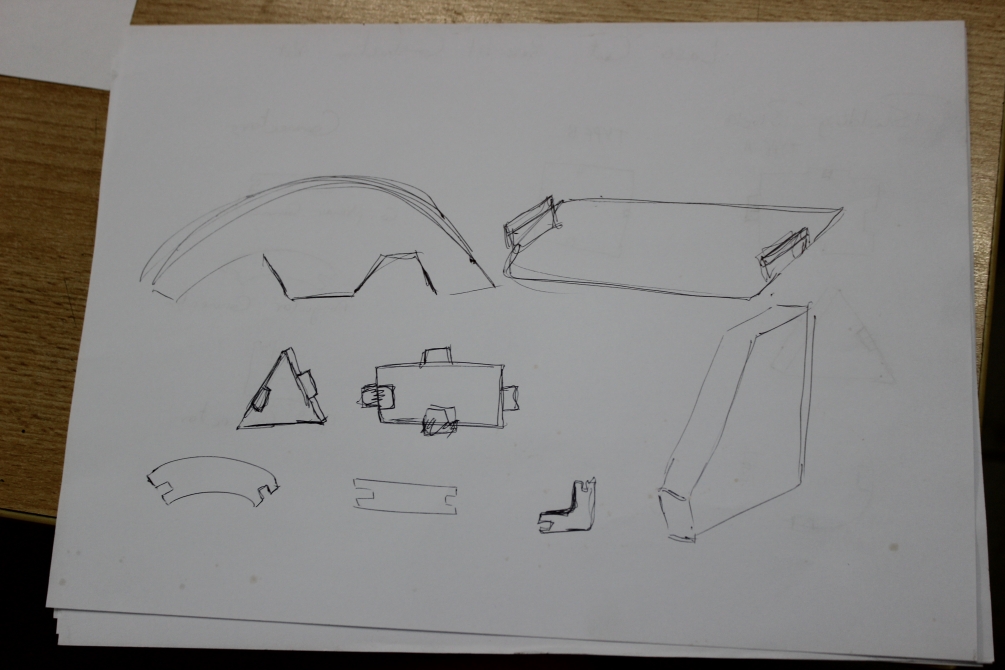
I used SolidWorks to design the parts, I have design 3 building blocks and 4 different connectors. All the building blocks are 5cm in width and height, and the coonectors are 2cm in width.

Step 4: Machine Setup
Before starting with the actual cutting, your have to configure your machine. Fist of all, if are using a laser cutter that doesn't have "Auto Focus" option, like me, then you have to adjust the focus. The laser cutter uses a lens to concentrate the laser beam at a certain point, and every lens has its own focal lens, thus you have to check that the distance between the end of the laser head and the surface of the material is exactly the 'focus'. If you're lucky enough -and trust me you're not- you'll be able to find the right power and speed to cut through your materials, if you are not, like me, you'll have to test on a small piece of the material to find the right power and speed for cutting, for me I have used 65% power and 9mm/s speed.

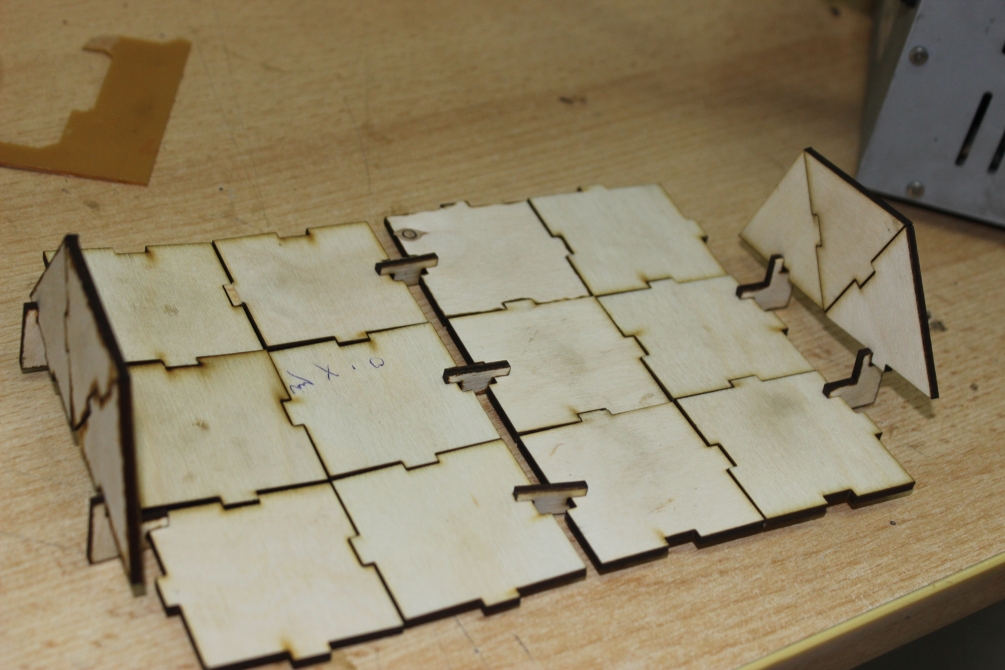
Step 5: Cut your pieces
Now you are ready to cut your kit, I have used 2 (300x500)mm Plywood sheets, and I have made 73 pieces.

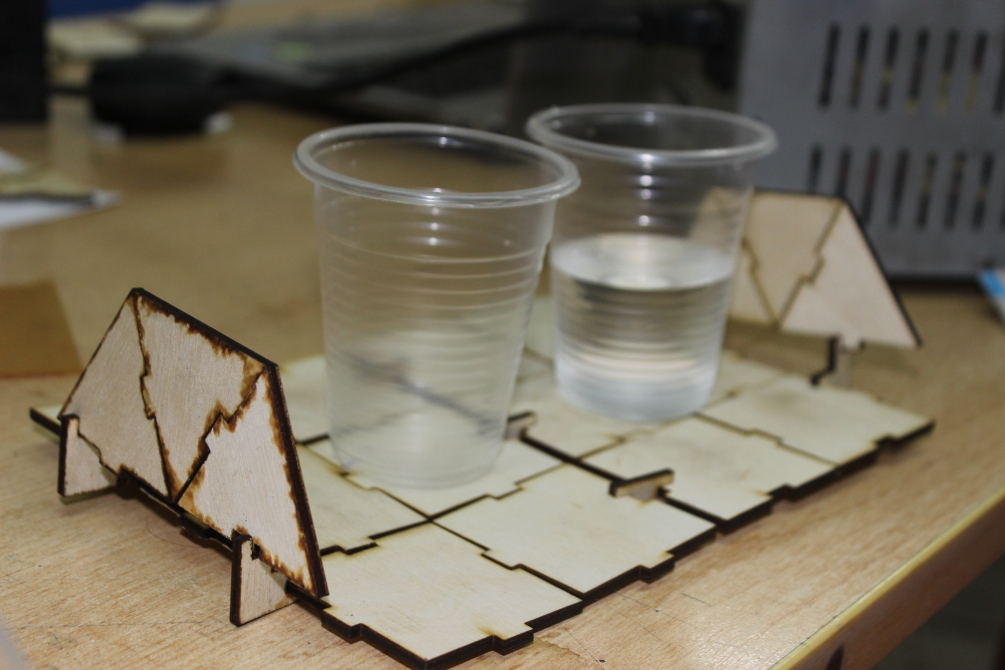
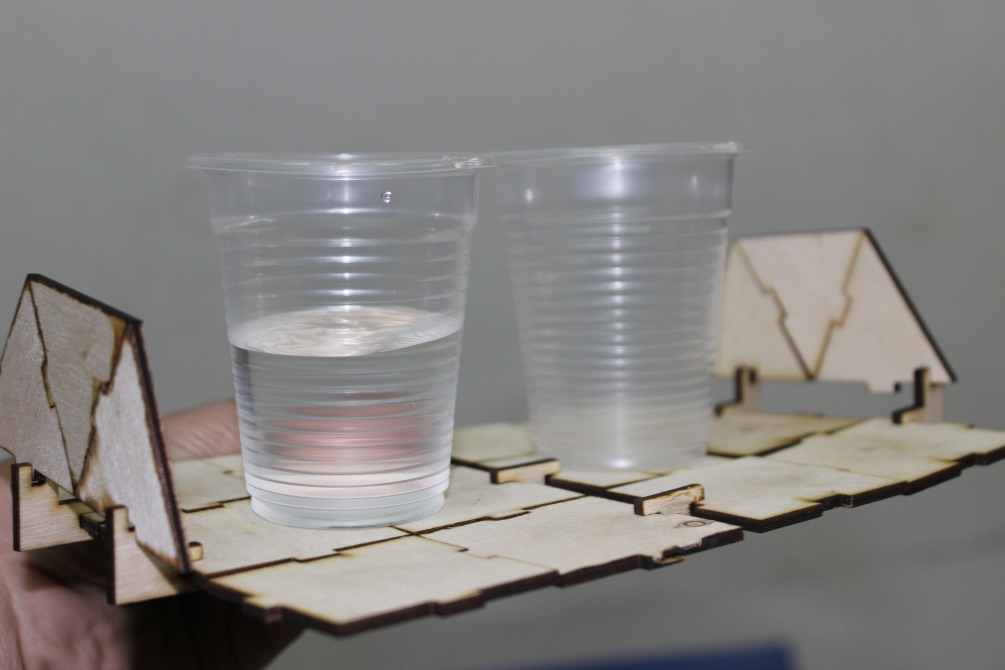
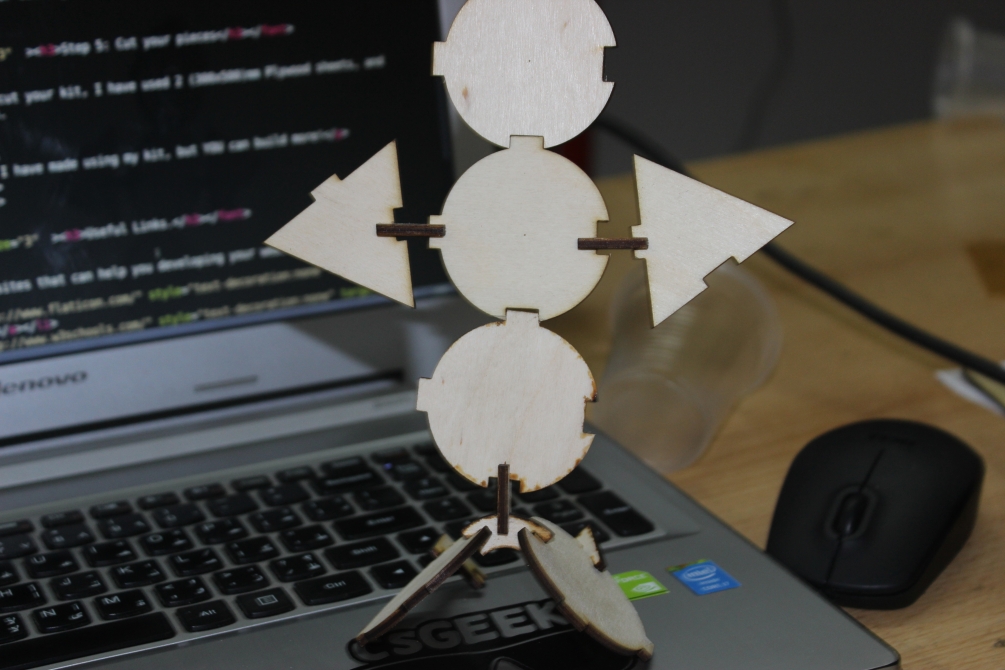
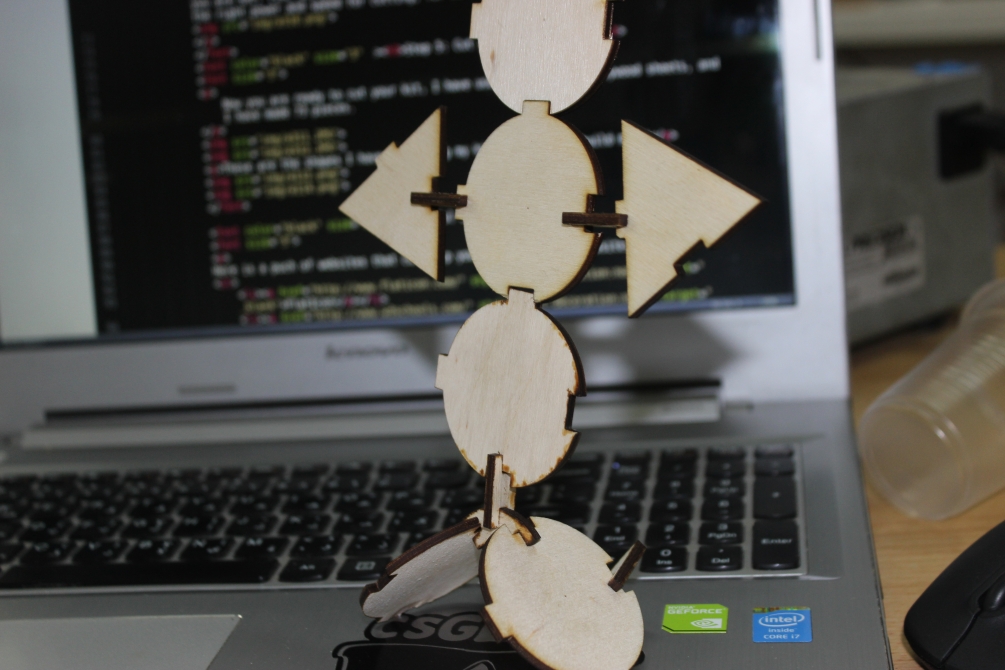
These are the shapes I have made using my kit, but YOU can build more, and feel free to share what you make.