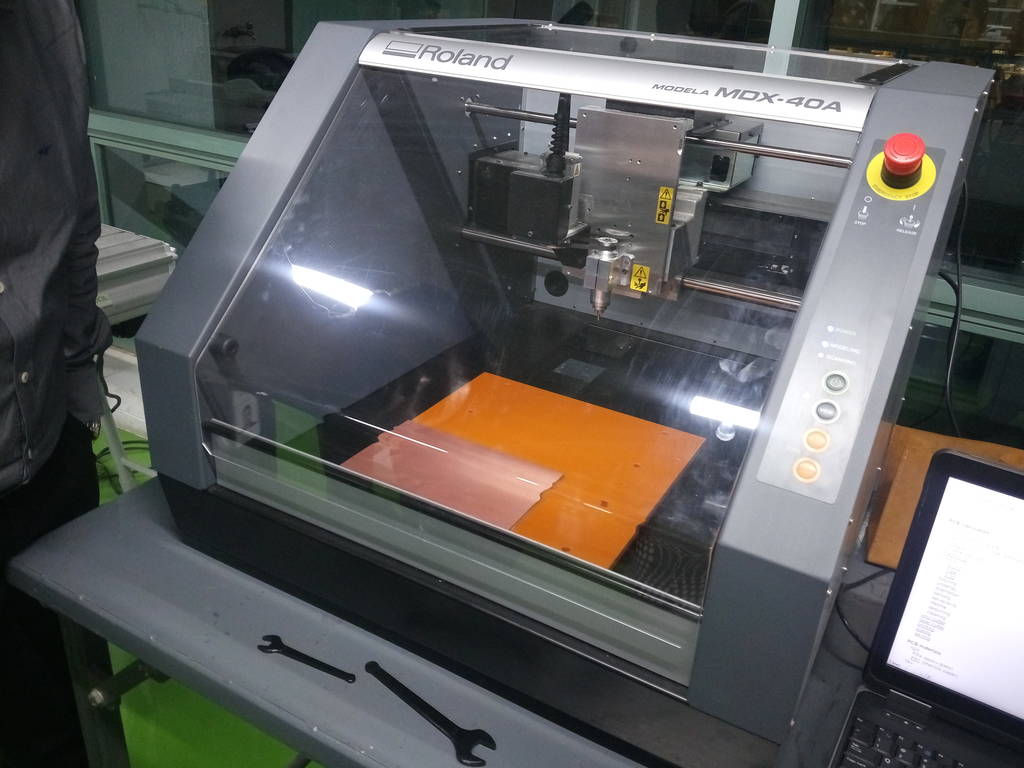
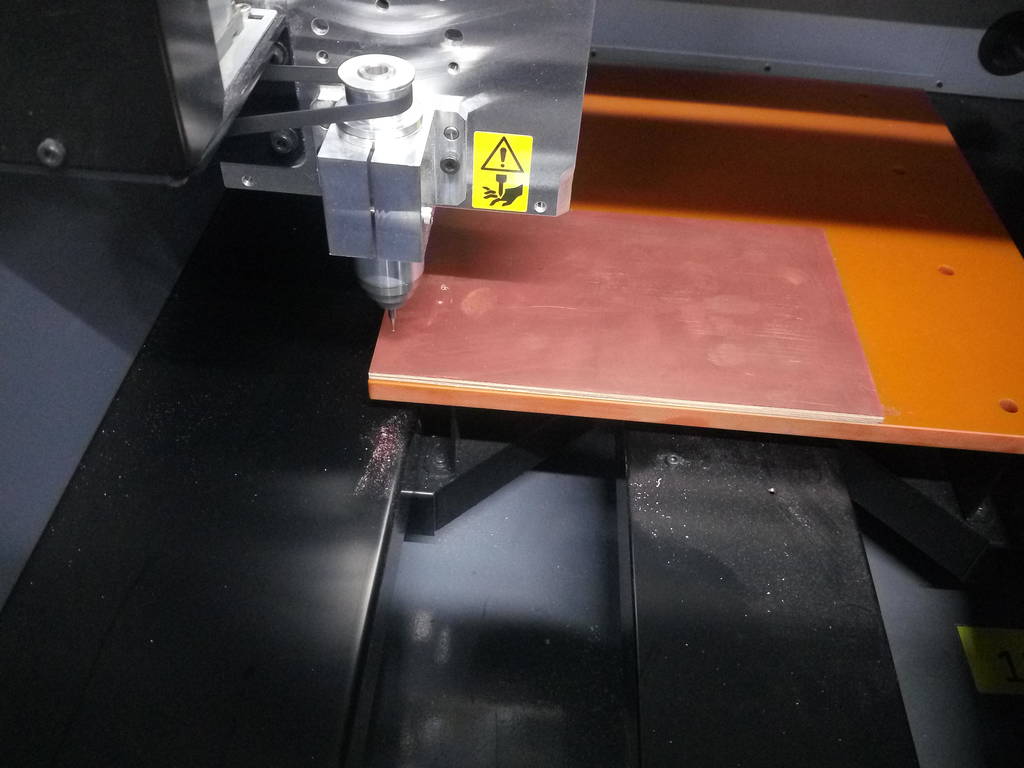
Roland milling machine Model A MDX-40A
Roland milling machine is 3 axis PCB milling machine I used for milling of my PCB

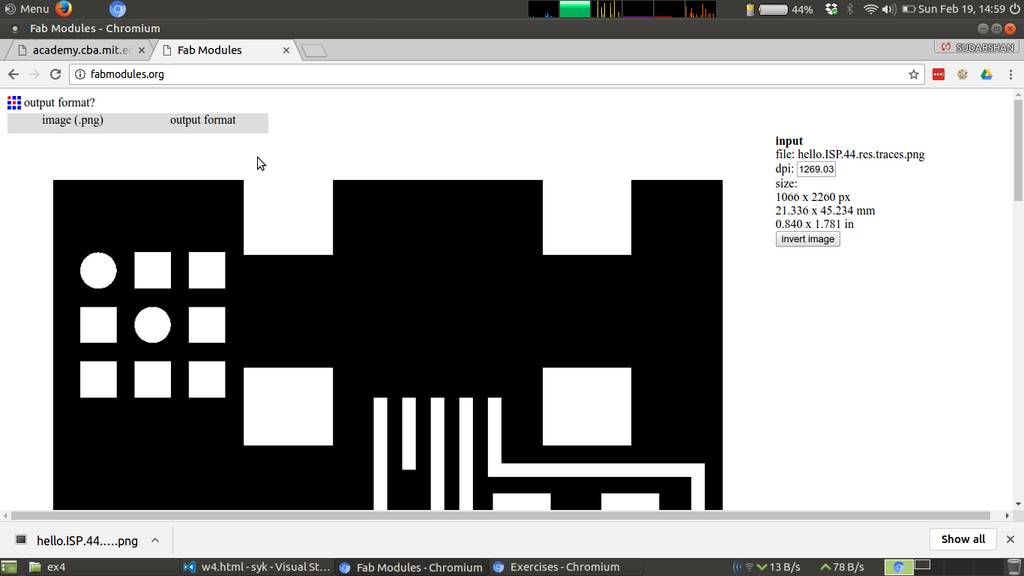
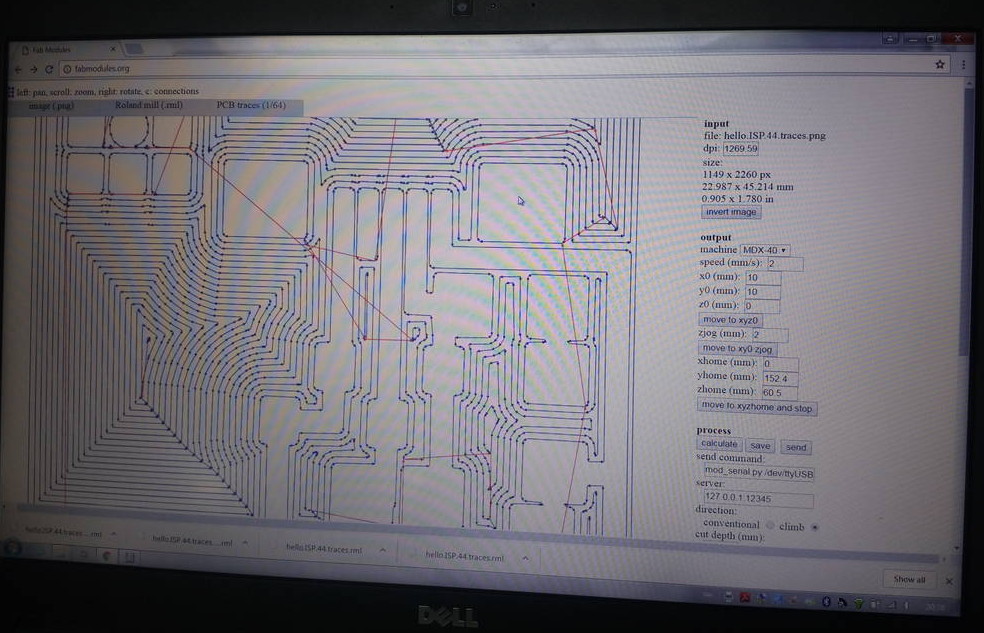
Using fabmodules to generate program for PCB milling
Selected png image of PCB and fab module has detected size of board based on image size. Image size detected as 21.336 x 45.234 mm
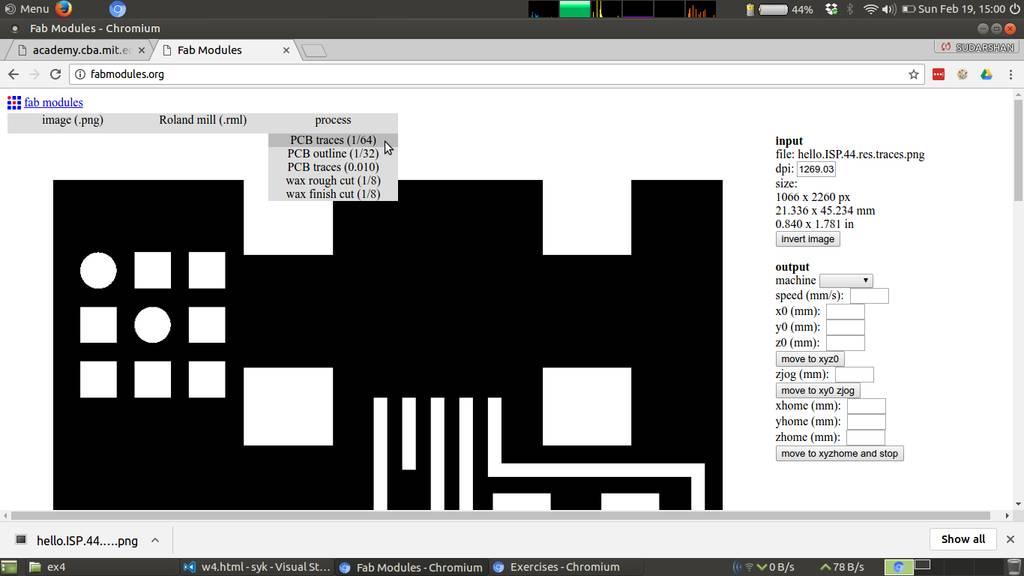
Selecting output type as .rml
Based on machine I selected .rml as output file
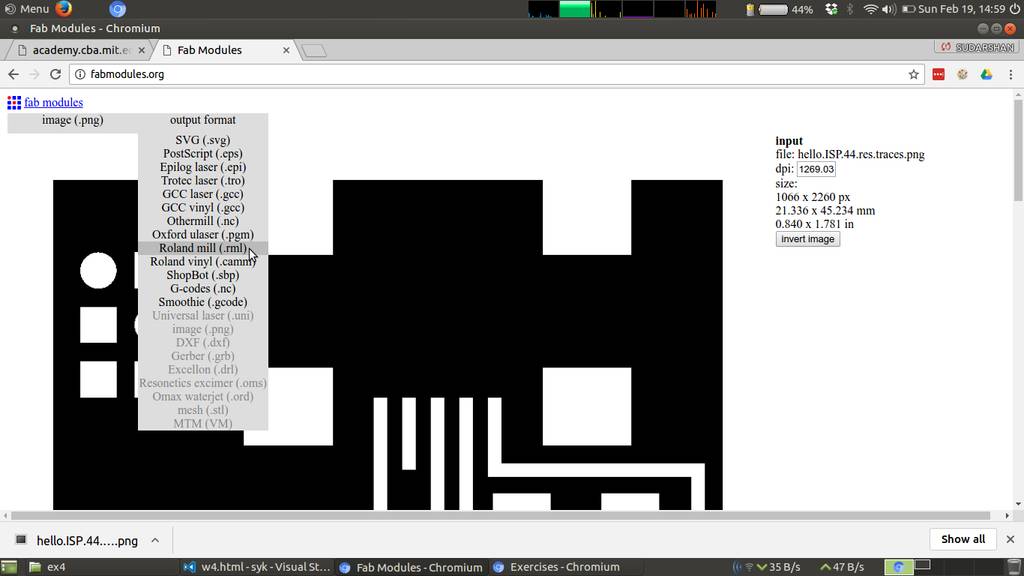
Selecting machine as MDX-40
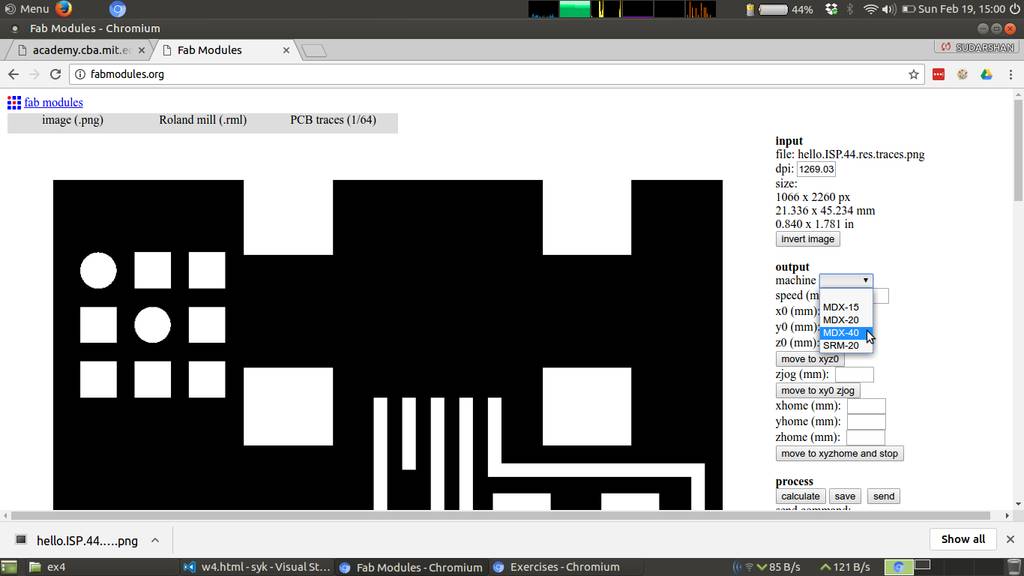
Selecting PCB traces as 1/64
Settings that worked in fab modules
| Machine : | MDX-40 |
| Speed : | 2 mm/second |
| X0, Y0, Z0 : | 10, 10, 0 |
| zjog : | 2 mm/second
I have kept this same as cutting speed. This is to avoid jerks while axis movements
|
| RPM : | 4500 Revolutions per minute |
| Other settings are kept default | |
Tool path generated by fabmodules
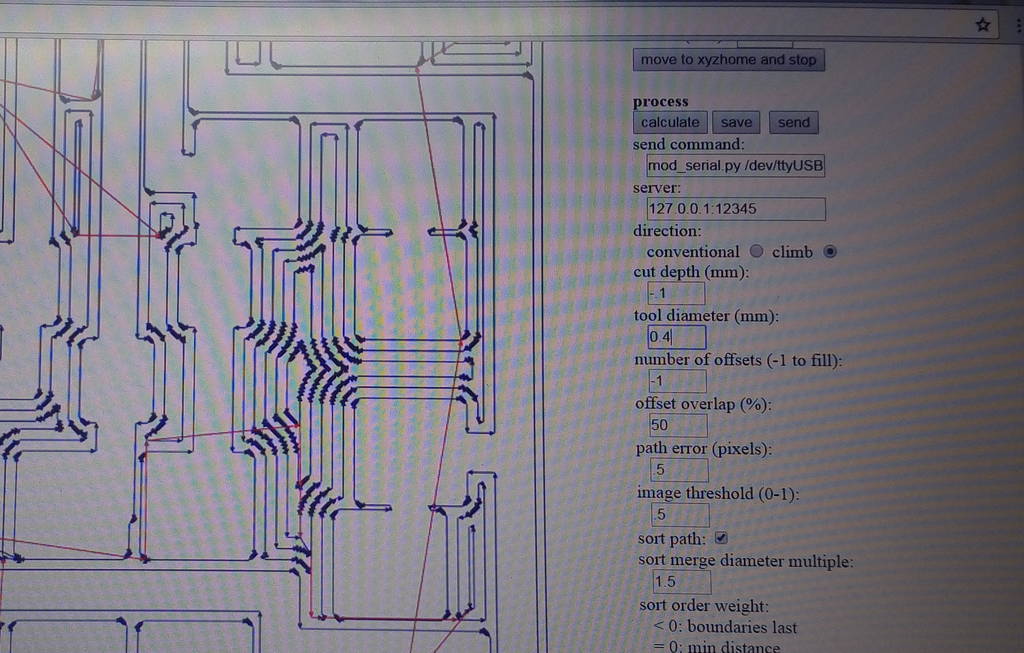
Tool path generated by fabmodules
Taking tool offset on milling machine
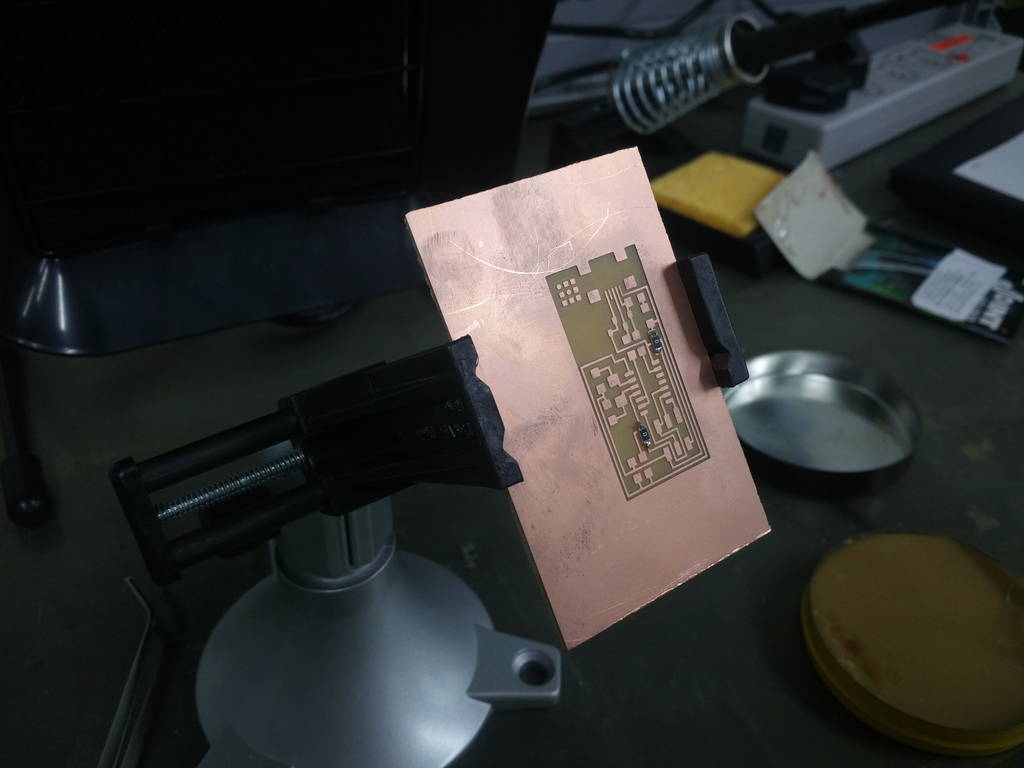
PCB milling progress
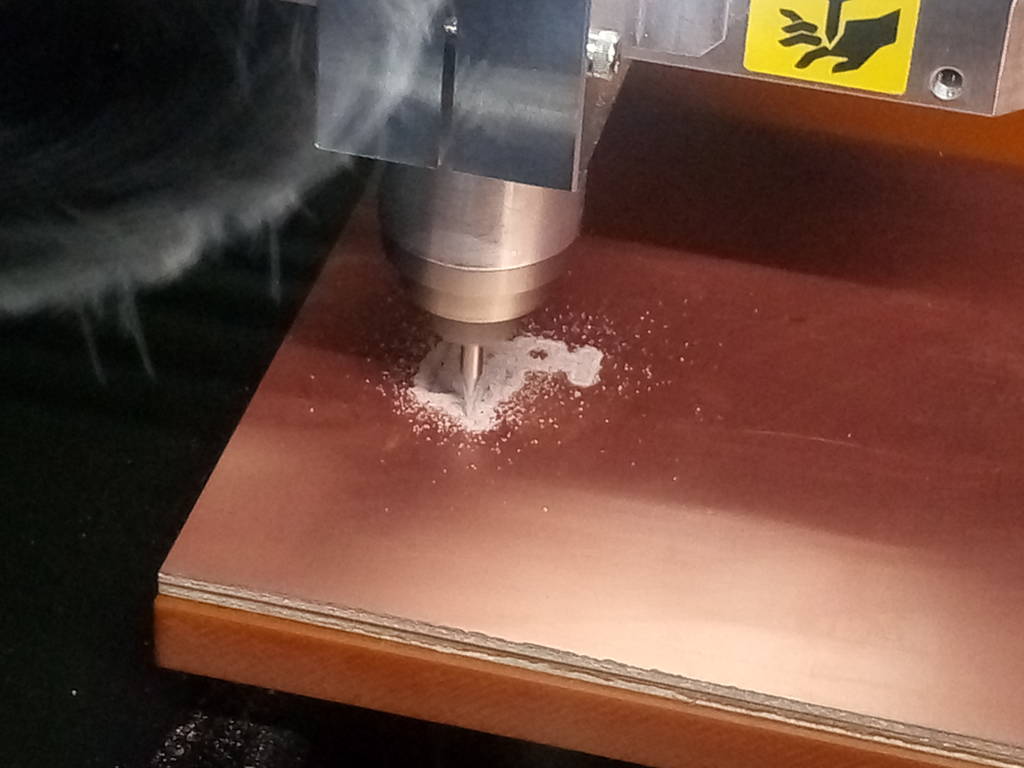
Learnings while PCB Milling
- Initially kept cutting speed at 4 mm/second but milling cutter broke with that speed. Hence I reduced speed to 2 mm/second and thereafter it worked
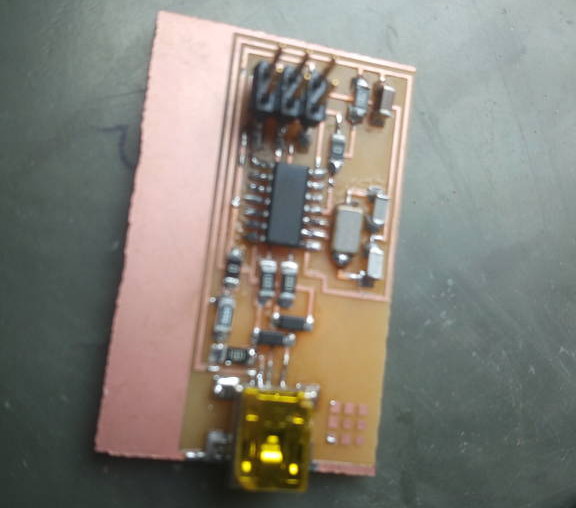
Doing trial soldering
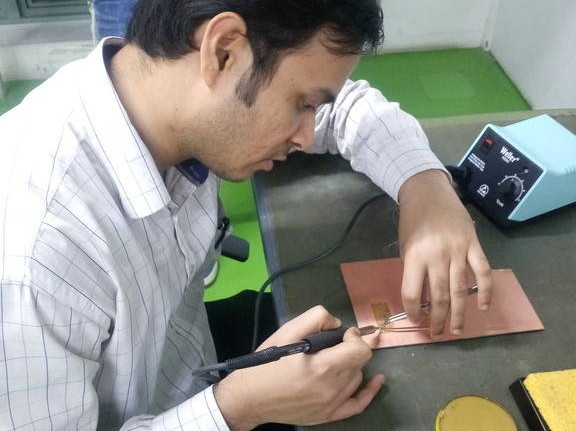
Trial solders
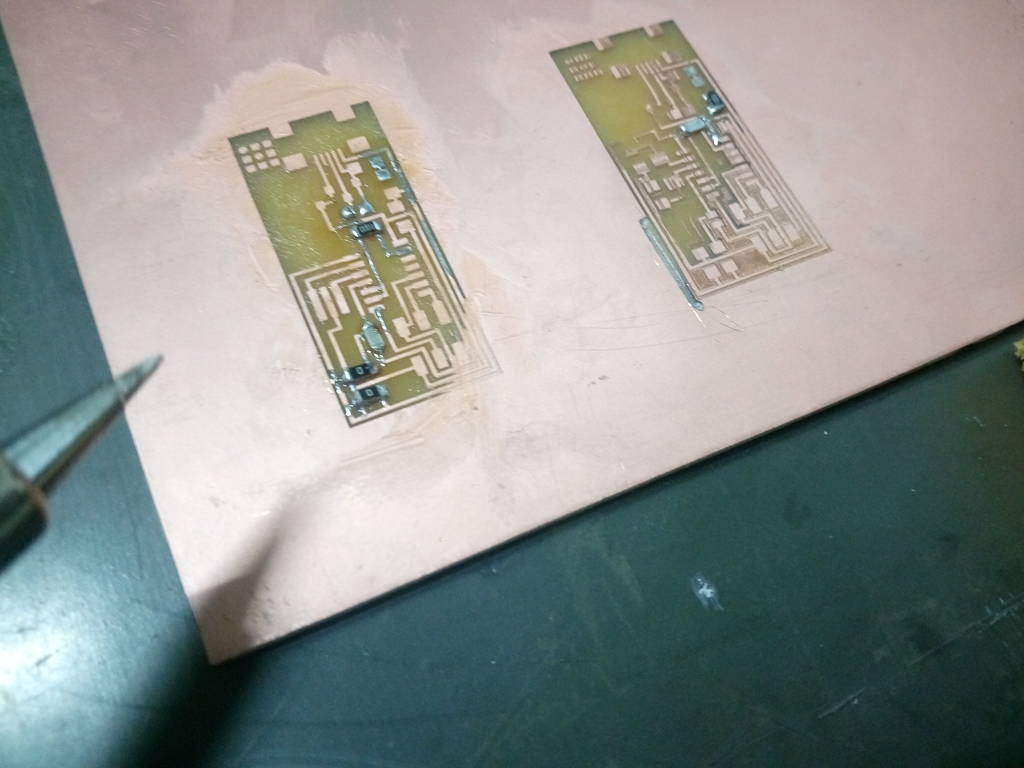
PCB Soldering Start
PCB Soldering Finished
Learnings while PCB Soldering
- Flux makes important role here while doing PCB soldering. I have applied flux over all surfaces where I want my solder to stick. Flux makes solder to stick properly
- Twice while doing soldering I did put extra solder over controller leads causing pins short. I have tried to remove solder using hot soldering Iron but its made possible when I used extra flux at iron. Hence if you want to remove solder then put extra flux over soldering iron
- Controller and USB was toughest part of soldering. I have ground soldering iron with sharp point. Then took sufficient solder and applied flux over pins. Then with capillary action solder applied successfully
Flux plays key role. Use it appropriately
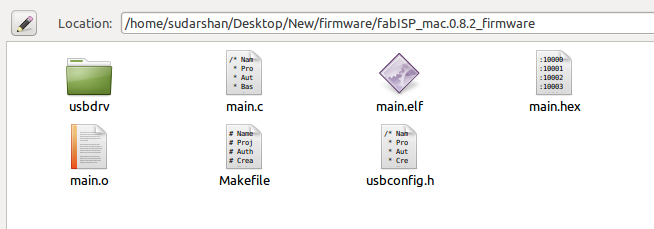
Programming of Fab ISP
sudarshan@sudarshan-Lenovo-ideapad-100-15IBD:~/Desktop/New/firmware/fabISP_mac.0.8.2_firmware$ make help
This Makefile has no default rule. Use one of the following:
make hex ....... to build main.hex
make program ... to flash fuses and firmware
make fuse ...... to flash the fuses
make flash ..... to flash the firmware (use this on metaboard)
make clean ..... to delete objects and hex file
sudarshan@sudarshan-Lenovo-ideapad-100-15IBD:~/Desktop/New/firmware/fabISP_mac.0.8.2_firmware$
sudarshan@sudarshan-Lenovo-ideapad-100-15IBD:~/Desktop/New/firmware/fabISP_mac.0.8.2_firmware$ make hex
avr-gcc -Wall -Os -DF_CPU=20000000	 -Iusbdrv -I. -DDEBUG_LEVEL=0 -mmcu=attiny44 -o main.elf usbdrv/usbdrv.o usbdrv/usbdrvasm.o usbdrv/oddebug.o main.o
make: avr-gcc: Command not found
Makefile:153: recipe for target 'main.elf' failed
make: *** [main.elf] Error 127
sudarshan@sudarshan-Lenovo-ideapad-100-15IBD:~/Desktop/New/firmware/fabISP_mac.0.8.2_firmware$
sudarshan@sudarshan-Lenovo-ideapad-100-15IBD:~/Desktop/New/firmware/fabISP_mac.0.8.2_firmware$ sudo apt-get install flex byacc bison gcc libusb-dev avrdude
[sudo] password for sudarshan:
Reading package lists... Done
Building dependency tree
Reading state information... Done
gcc is already the newest version (4:5.3.1-1ubuntu1).
The following additional packages will be installed:
  libbison-dev libfl-dev libftdi1 m4
Suggested packages:
  avrdude-doc bison-doc
The following NEW packages will be installed:
  avrdude bison byacc flex libbison-dev libfl-dev libftdi1 libusb-dev m4
0 upgraded, 9 newly installed, 0 to remove and 87 not upgraded.
Need to get 1,487 kB of archives.
After this operation, 4,545 kB of additional disk space will be used.
Do you want to continue? [Y/n]
Get:1 http://in.archive.ubuntu.com/ubuntu xenial/main amd64 m4 amd64 1.4.17-5 [195 kB]
Get:2 http://in.archive.ubuntu.com/ubuntu xenial/main amd64 libfl-dev amd64 2.6.0-11 [12.5 kB]
Get:3 http://in.archive.ubuntu.com/ubuntu xenial/main amd64 flex amd64 2.6.0-11 [290 kB]
Get:4 http://in.archive.ubuntu.com/ubuntu xenial/main amd64 libbison-dev amd64 2:3.0.4.dfsg-1 [338 kB]
Get:5 http://in.archive.ubuntu.com/ubuntu xenial/main amd64 bison amd64 2:3.0.4.dfsg-1 [259 kB]
Get:6 http://in.archive.ubuntu.com/ubuntu xenial/universe amd64 libftdi1 amd64 0.20-4build1 [15.2 kB]
Get:7 http://in.archive.ubuntu.com/ubuntu xenial/main amd64 libusb-dev amd64 2:0.1.12-28 [29.9 kB]
Get:8 http://in.archive.ubuntu.com/ubuntu xenial/universe amd64 avrdude amd64 6.2-5 [291 kB]
Get:9 http://in.archive.ubuntu.com/ubuntu xenial/universe amd64 byacc amd64 20140715-1 [56.9 kB]
Fetched 1,487 kB in 6min 46s (3,656 B/s)
Selecting previously unselected package m4.
(Reading database ... 270021 files and directories currently installed.)
Preparing to unpack .../archives/m4_1.4.17-5_amd64.deb ...
Unpacking m4 (1.4.17-5) ...
Selecting previously unselected package libfl-dev:amd64.
Preparing to unpack .../libfl-dev_2.6.0-11_amd64.deb ...
Unpacking libfl-dev:amd64 (2.6.0-11) ...
Selecting previously unselected package flex.
Preparing to unpack .../flex_2.6.0-11_amd64.deb ...
Unpacking flex (2.6.0-11) ...
Selecting previously unselected package libbison-dev:amd64.
Preparing to unpack .../libbison-dev_2%3a3.0.4.dfsg-1_amd64.deb ...
Unpacking libbison-dev:amd64 (2:3.0.4.dfsg-1) ...
Selecting previously unselected package bison.
Preparing to unpack .../bison_2%3a3.0.4.dfsg-1_amd64.deb ...
Unpacking bison (2:3.0.4.dfsg-1) ...
Selecting previously unselected package libftdi1:amd64.
Preparing to unpack .../libftdi1_0.20-4build1_amd64.deb ...
Unpacking libftdi1:amd64 (0.20-4build1) ...
Selecting previously unselected package libusb-dev.
Preparing to unpack .../libusb-dev_2%3a0.1.12-28_amd64.deb ...
Unpacking libusb-dev (2:0.1.12-28) ...
Selecting previously unselected package avrdude.
Preparing to unpack .../avrdude_6.2-5_amd64.deb ...
Unpacking avrdude (6.2-5) ...
Selecting previously unselected package byacc.
Preparing to unpack .../byacc_20140715-1_amd64.deb ...
Unpacking byacc (20140715-1) ...
Processing triggers for install-info (6.1.0.dfsg.1-5) ...
Processing triggers for man-db (2.7.5-1) ...
Processing triggers for libc-bin (2.23-0ubuntu9) ...
Setting up m4 (1.4.17-5) ...
Setting up libfl-dev:amd64 (2.6.0-11) ...
Setting up flex (2.6.0-11) ...
Setting up libbison-dev:amd64 (2:3.0.4.dfsg-1) ...
Setting up bison (2:3.0.4.dfsg-1) ...
update-alternatives: using /usr/bin/bison.yacc to provide /usr/bin/yacc (yacc) in auto mode
Setting up libftdi1:amd64 (0.20-4build1) ...
Setting up libusb-dev (2:0.1.12-28) ...
Setting up avrdude (6.2-5) ...
Setting up byacc (20140715-1) ...
Processing triggers for libc-bin (2.23-0ubuntu9) ...
sudarshan@sudarshan-Lenovo-ideapad-100-15IBD:~/Desktop/New/firmware/fabISP_mac.0.8.2_firmware$
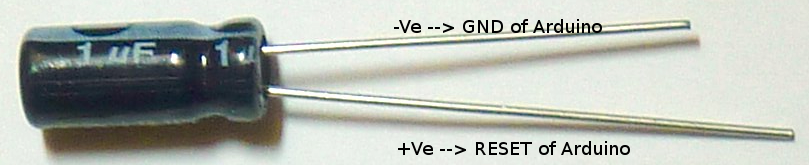
To burn program using arduino change line no 16 of make file
AVRDUDE = avrdude -cavrisp2stk500v1 -b19200 -Pusb/dev/tty.usbmodem1411 -p $(DEVICE) # edit this line for your programmer
Now you can use Arduino as a programmer
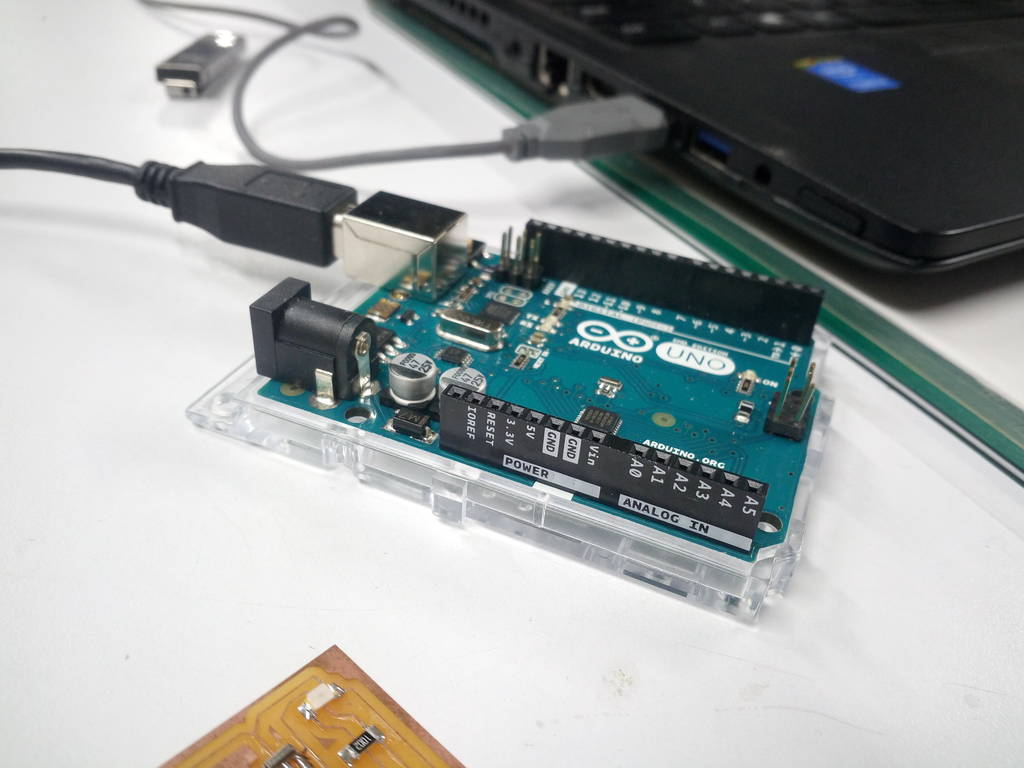
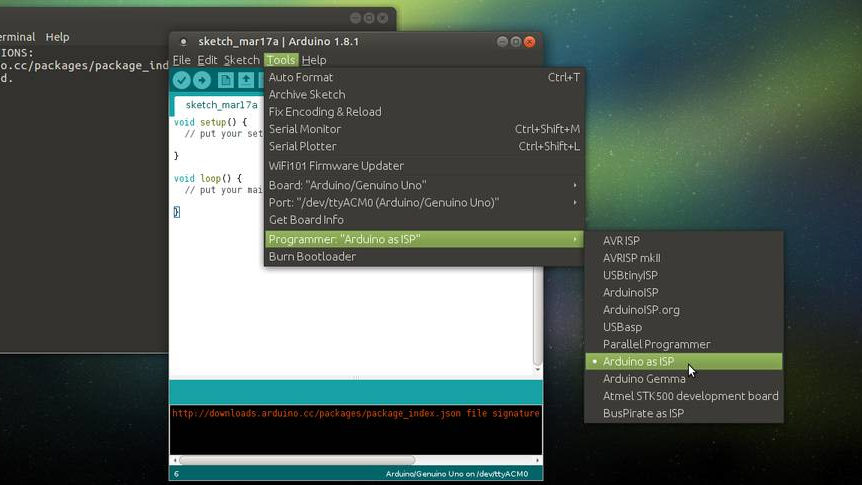
Making Arduino as ISP
Connect arduino to computer using USB Cable
Open Arduino IDE and select settings as mentioned
Select Tools -> Board -> Arduino/Gennuino Uno
Port -> /dev/ttyACM0 (Arduino/Genuino Uno)
Programmer -> Arduino as ISP
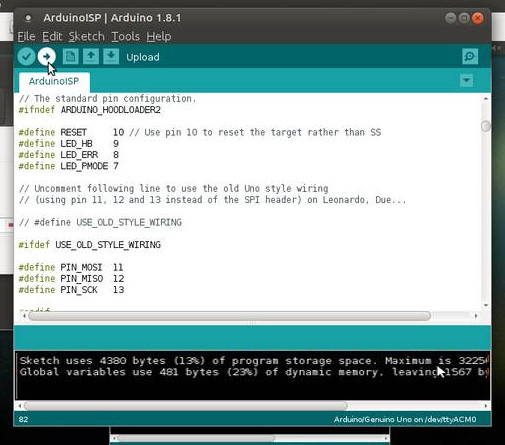
Select Arduino sketch and upload
Select File -> Examples -> ArduinoISP -> ArduinoISP
Click on Upload 
Note down pin numbers. Preferably put it in spreadsheet
| RESET | 10 | Yellow |
| PIN_MOSI | 11 | Black |
| PIN_MISO | 12 | Blue |
| PIN_SCK | 13 | Brown |
Unplug Arduino
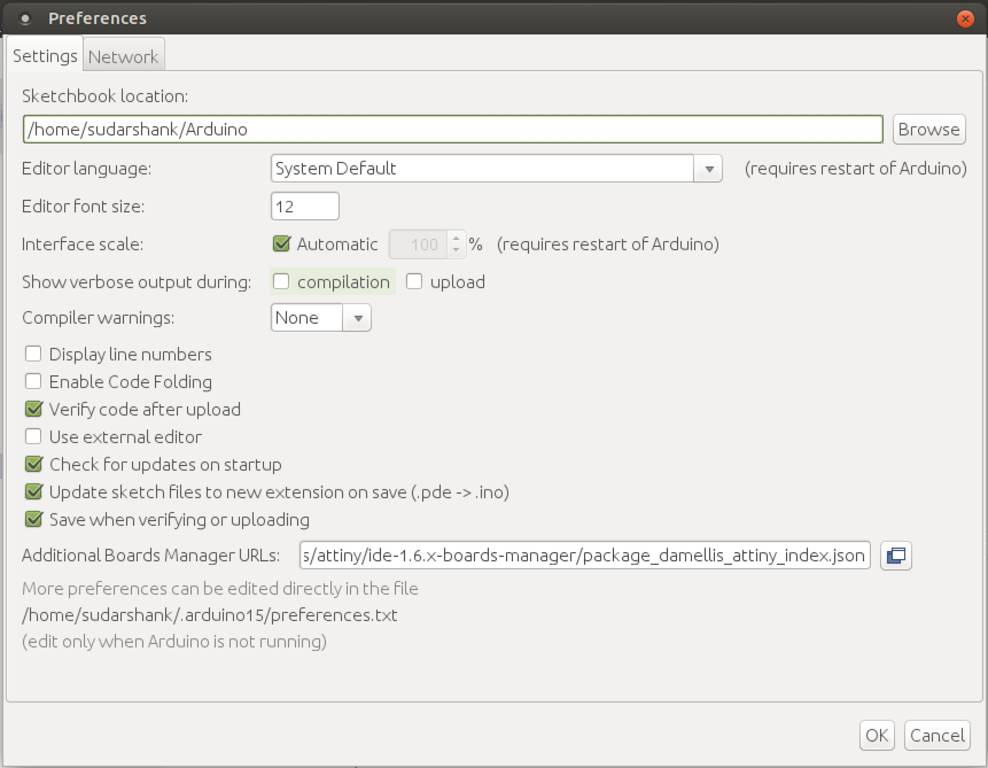
Download and install ATtiny board libraries
Set board manager Url
Open Arduino IDE and click on File -> Preferences
Set Additional Boards Manager Urls as
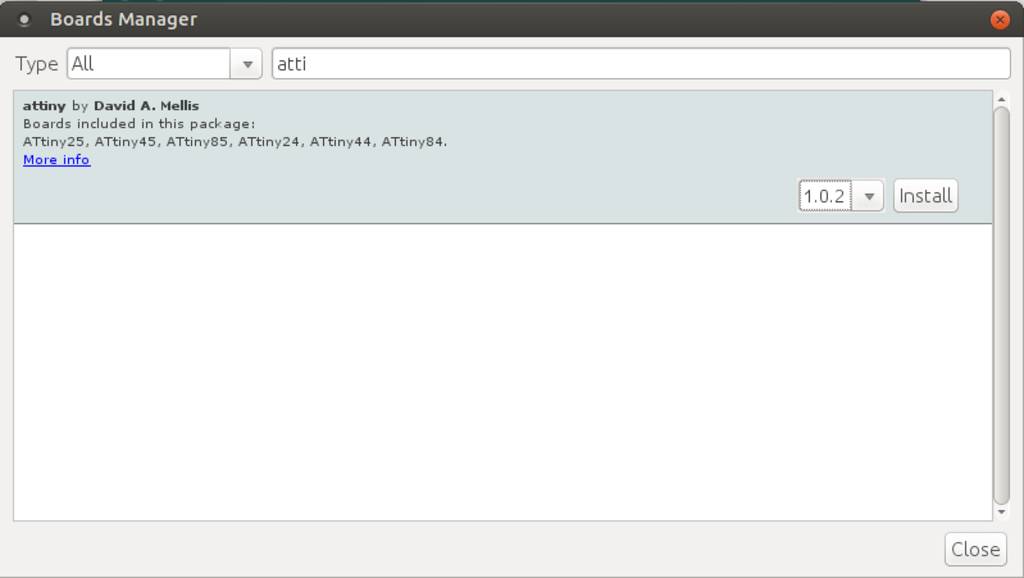
Download and install boards from Board Manager
From Arduino IDE open Tools -> Boards -> Board Manager
Search for ATtiny. It will show up ATtiny Library
Select version and click on install
It will download and install required libraries
Check under Tools -> Board -> ATtiny Microcontrollers
Connect FabISP to Arduino
Connection points
| Color | Arduino | FabISP |
|---|---|---|
| Blue | Pin 12 | MISO |
| Yellow | Pin 10 | RESET |
| Green | Ground (GND) | GND |
| Brown | Pin 13 | SCK |
| Red | VCC (5V) | VCC |
| Black | Pin 11 | MOSI |
Connect Fab ISP header with arduino
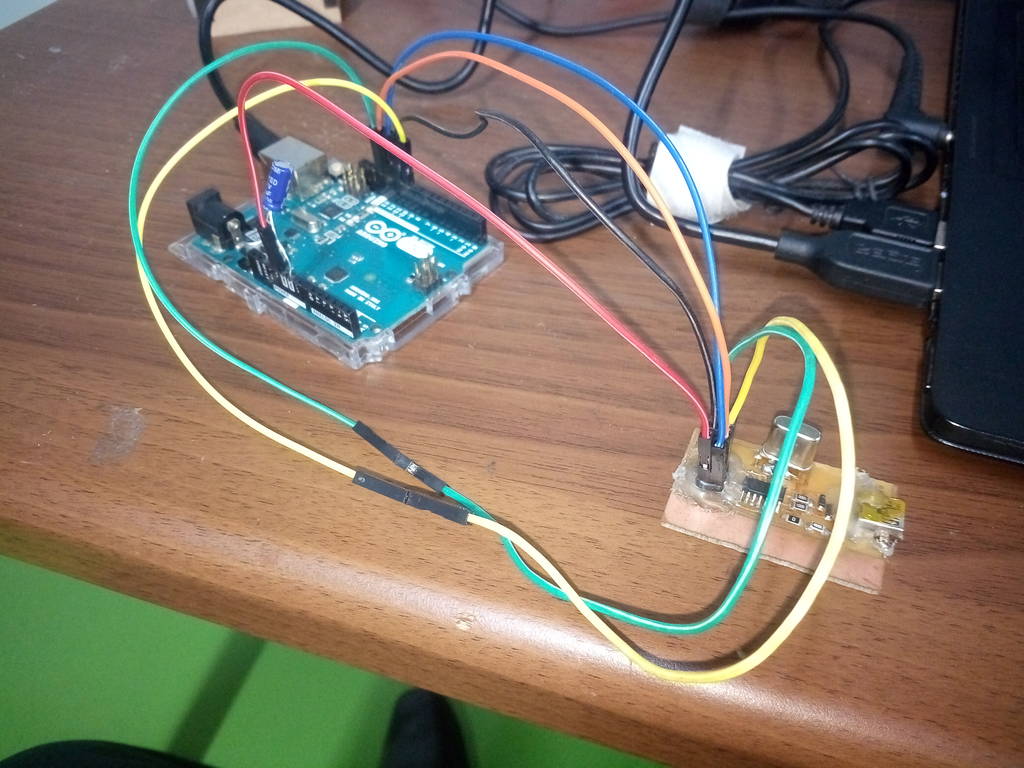
Burn firmware to FabISP
make hex ....... to build main.hex
make program ... to flash fuses and firmware
make fuse ...... to flash the fuses
make flash ..... to flash the firmware
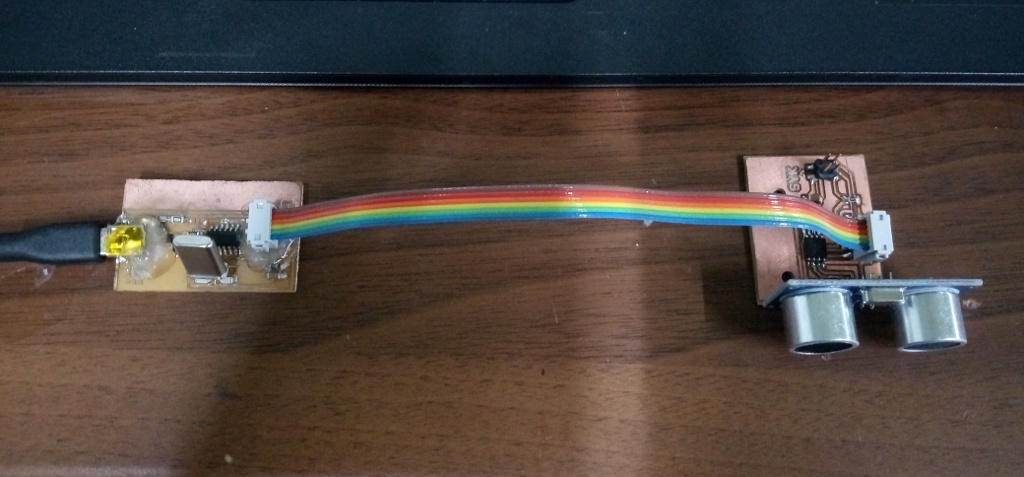
Used FabISP to program ultrasonic board