Emergent 3D Printed Skin
The objective of this assignment is to go through towo process of design, 3d scanning and 3d printing. To design and 3D print an object (small, few cm) that could not be made subtractively and 3D scan an object and optinally print it.
We need to identify the advantages and limitations of 3D printing and scanning technology and how to apply these methods in production.
Requirments:
// Described what you learned by testing the 3D printers.
// Shown how you designed and made your object and explained why it could not be made subtractively.
// Scanned an object.
// Outlined problems and how you fixed them.
// Included your design files and ‘hero shot’ photos of the scan and the final object.
Released: 22.02.2017
Week05: 3D scanning and printing
References:
// Cura | 3D printing software
// Slic3r | 3D printing software
Experience
3D printing or additive manufacturing is a process of making three dimensional solid objects from a digital file.
The creation of a 3D printed object is achieved using additive processes. In an additive process an object is created by laying down successive layers of material until the object is created. Each of these layers can be seen as a thinly sliced horizontal cross-section of the eventual object. 3D printing is the opposite of subtractive manufacturing which is cutting out / hollowing out a piece of metal or plastic with for instance a milling machine. 3D printing enables you to produce complex (functional) shapes using less material than traditional manufacturing methods.
It all starts with the creation of a 3D model in your computer. This digital design is for instance a CAD (Computer Aided Design) file. A 3D model is either created from the ground up with 3D modeling software or based on data generated with a 3D scanner. With a 3D scanner you’re able to create a digital copy of an object.
We kicked off the week with a group assignment to test the limitations of 3D printing. *TEST 01* and *TEST 02* From my point of view I can list two main key points in that manner:
// Mechanical Engineering issue: Plastics and metals are imperfect materials; there are trade-offs in balancing attributes of durability, practicality and aesthetics simultaneously - one has to give way to the other
// Manufacturing Processes Imperfection: Part design needs to account for manufacturing tolerances, material shrinkage, millimetre margins, minimum feature sizes, the need to support the part through the process via scaffolding and so on. This creates complications. Very few advanced designs can be rapidly sketched and disseminated without accounting for these physical factors, adjusting them for the general manufacturing method, and finally, for the specific model of the machine used to make the part.
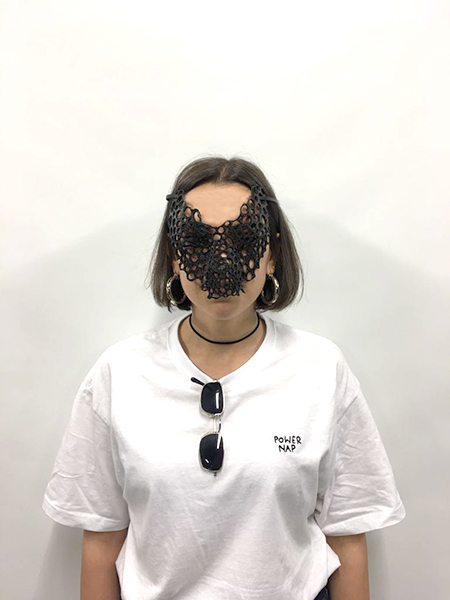
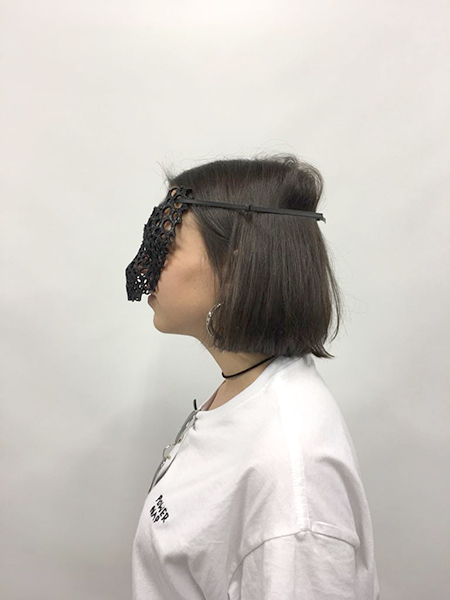
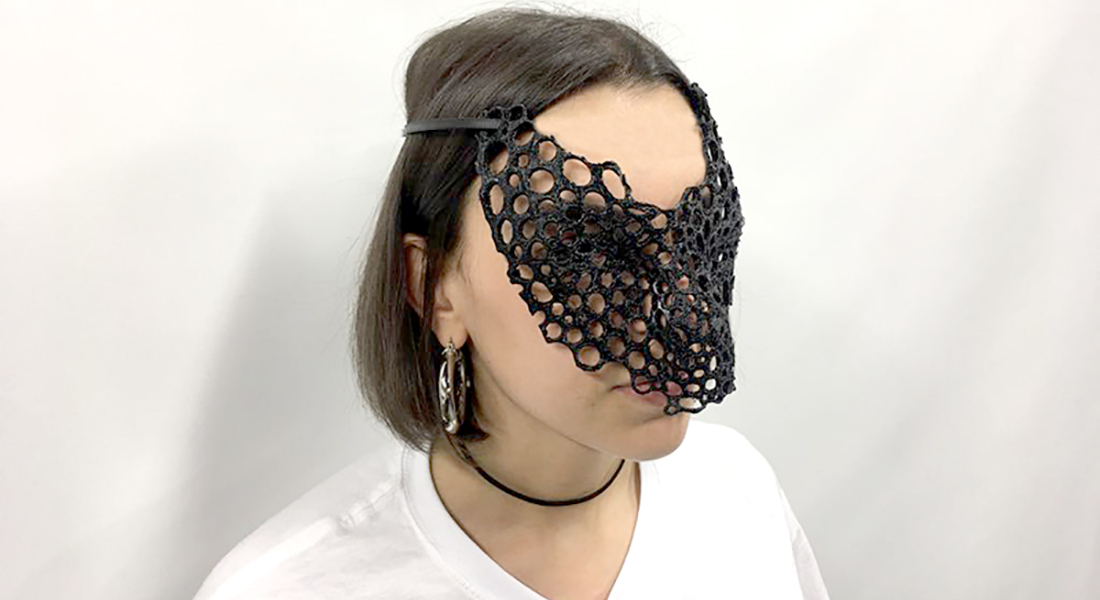
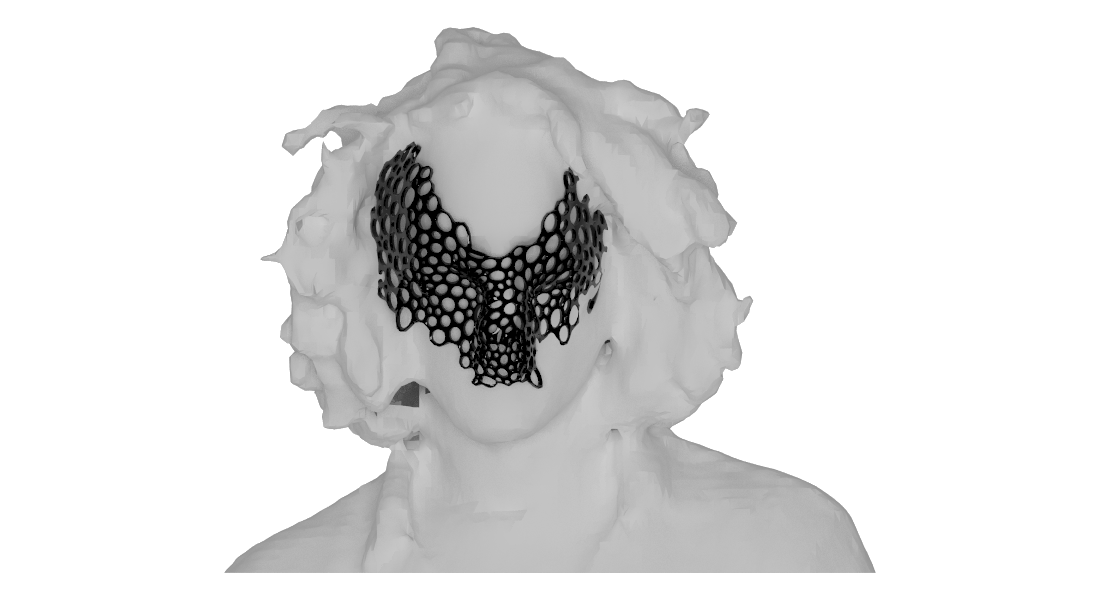
3D printing is one of my favourite topics in design production, and 3d scanning was a nice touch to add to the whole process. I scanned my friend's face Matteo and generated the mesh model using Agisoft . I decided to 3d print an emergent wearable skin of Matteo's face using the visual scripting rhino plug-in grasshopper .
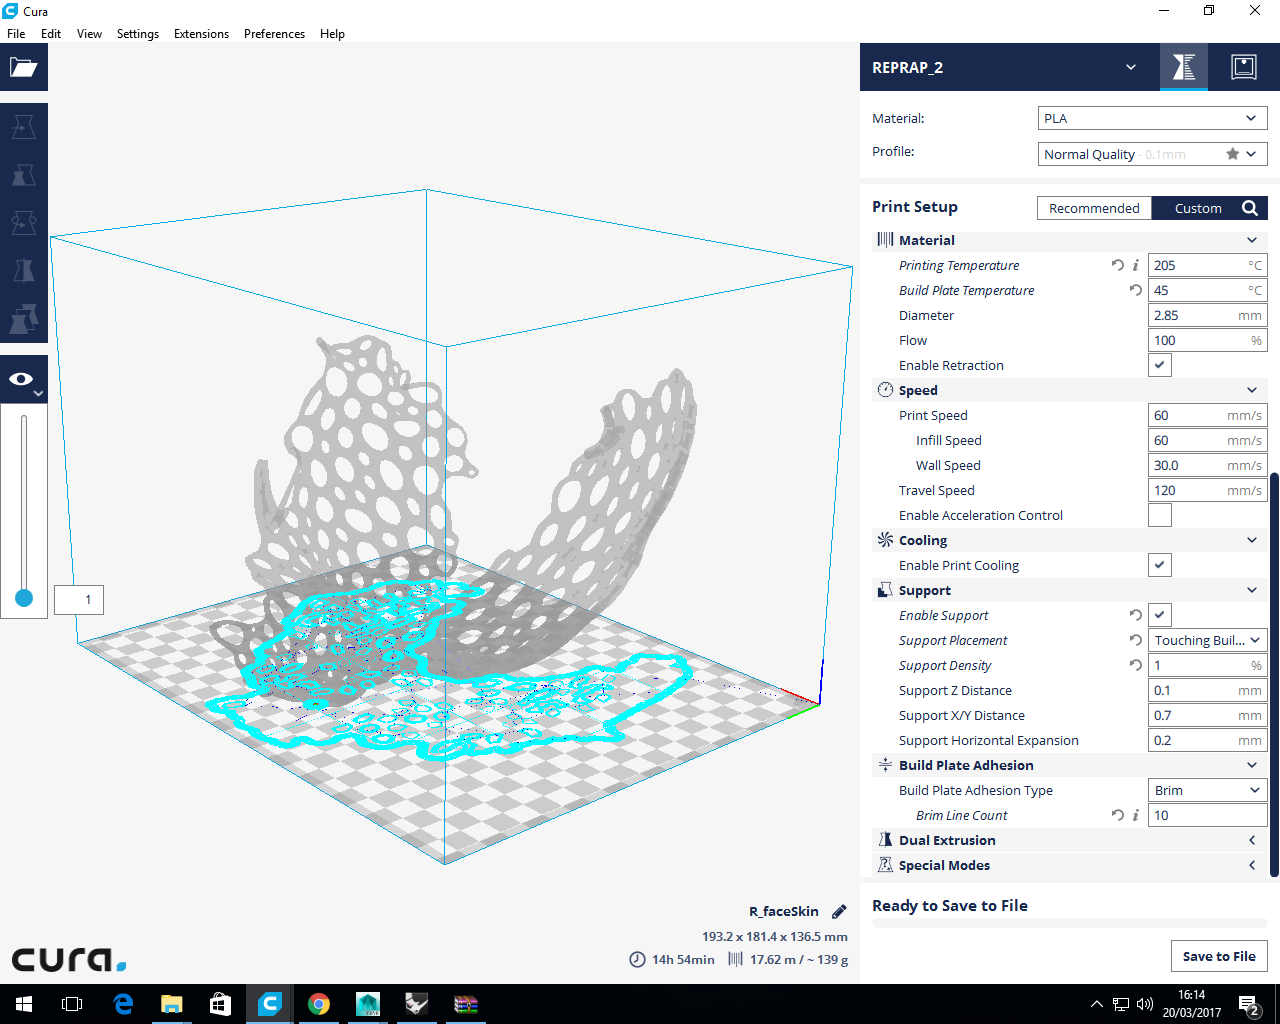
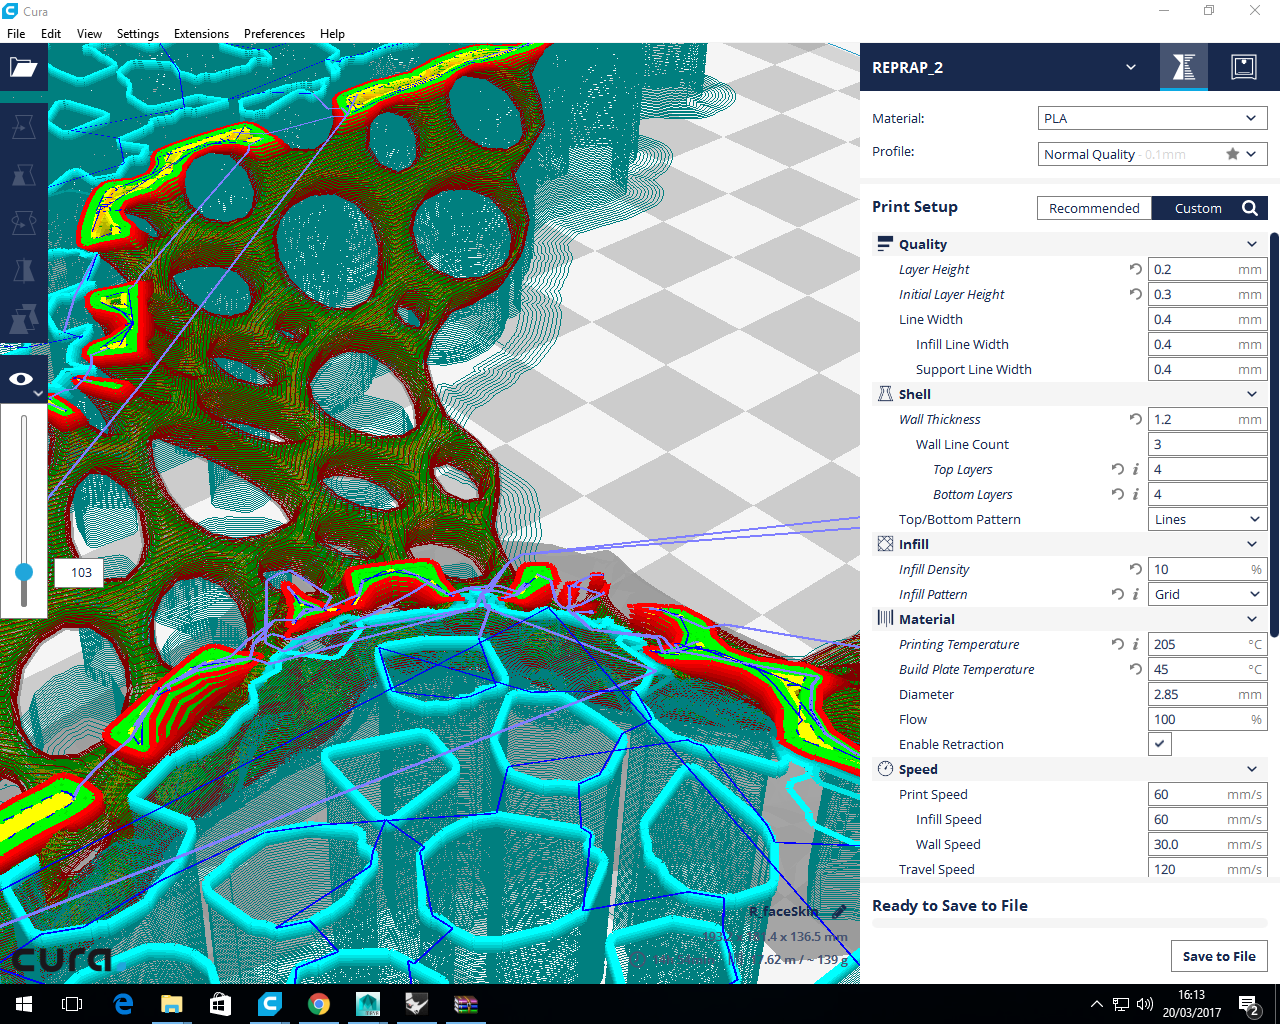
I had difficulties printing the mask in a normal plastic based printer because of the issue of supports where i ended up with an incomplete print of 15 hours! The plan is re-print the mask using a powder based printer or resin based printer.
3D scanning
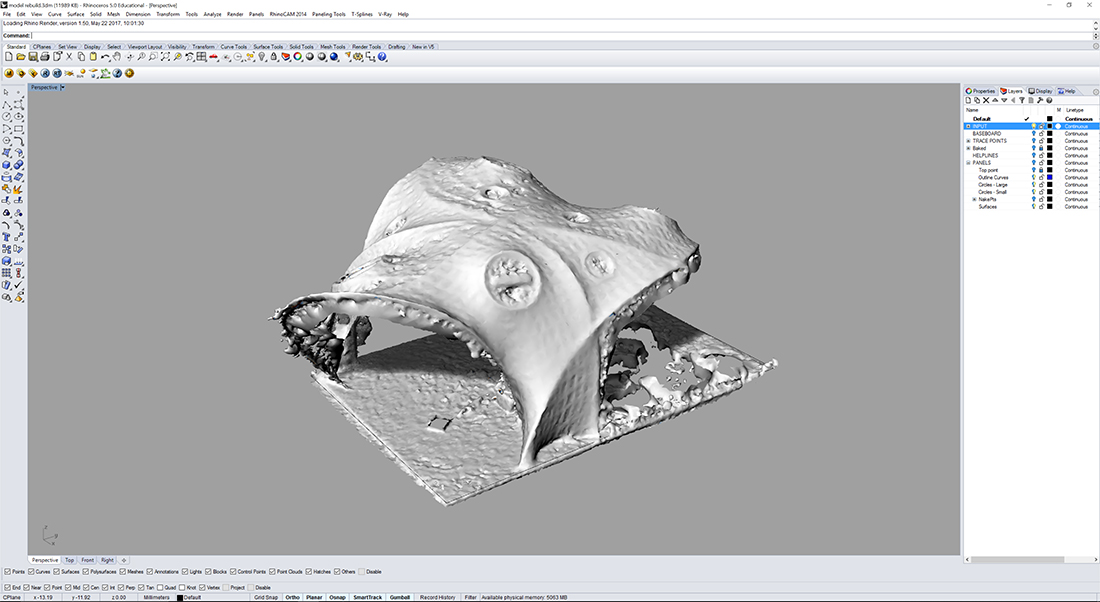
I have taken a lot of photos to have a high resolution of scan result. I have found this shell in IAAC and decided to scan it because it is white and i thought it would be interesting to give it a try. I drew the contours on it to so the camera can detect the points on the shell and would make the scanning process easier to generate the model.
I have used Agisoft I have put the link in the references, it is a very high end 3d scanning models generator and you can check THIS tutorial for more information
 generated model in Rhino
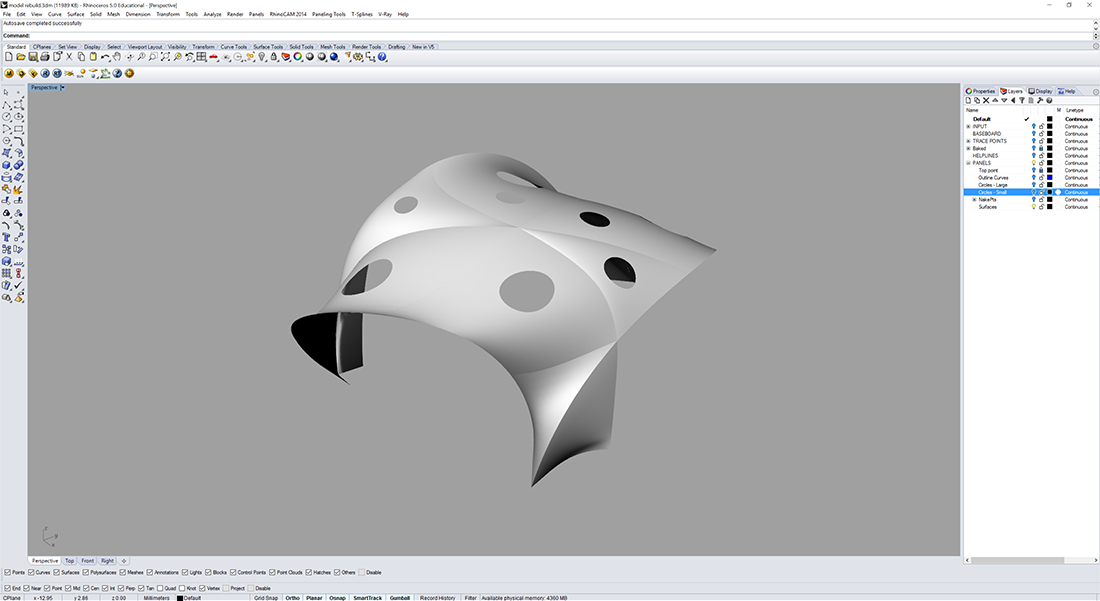 remodeling the mesh
 3D modeling
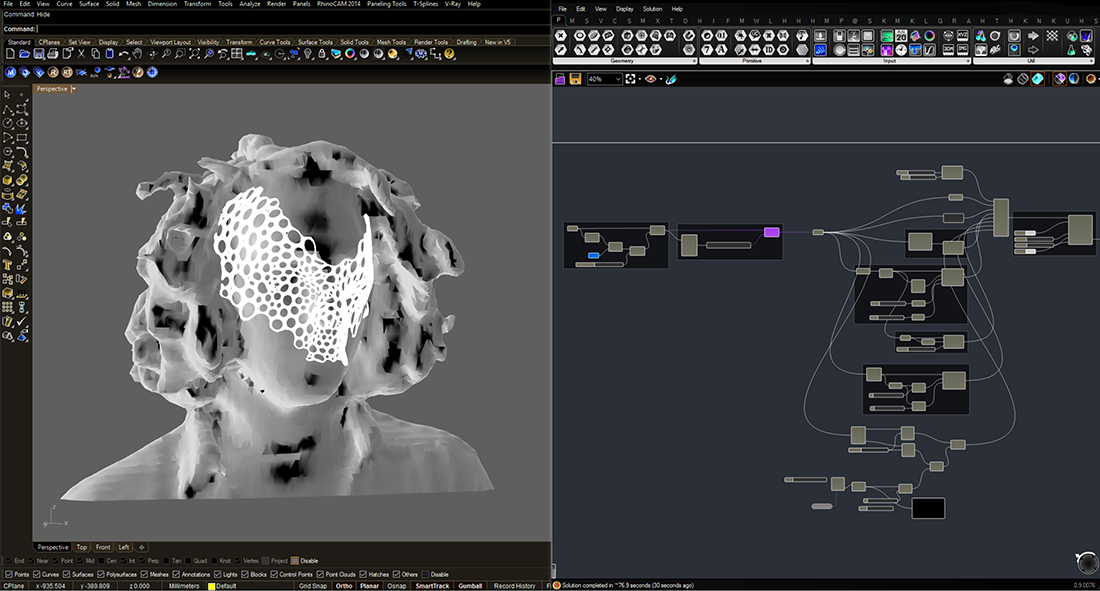
Same process of scanning i have scanned my friend Matteo from Fab Lab and tried to apply a wearable mask on his face. I have Used a physics engine plug in called Kangaroo to simulate the relaxation of the mask on the face and used Weaverbird to apply the pattern and somooth it.
This kind of modeling cannot be Subtractive manufacturing because it is a kind of process that not yet possible to print, but it can be done manually cutting the material but is most typically done with a CNC Machine utilizing multiple tools and cut around at least three (x, y, and z) axes.
 Front view
 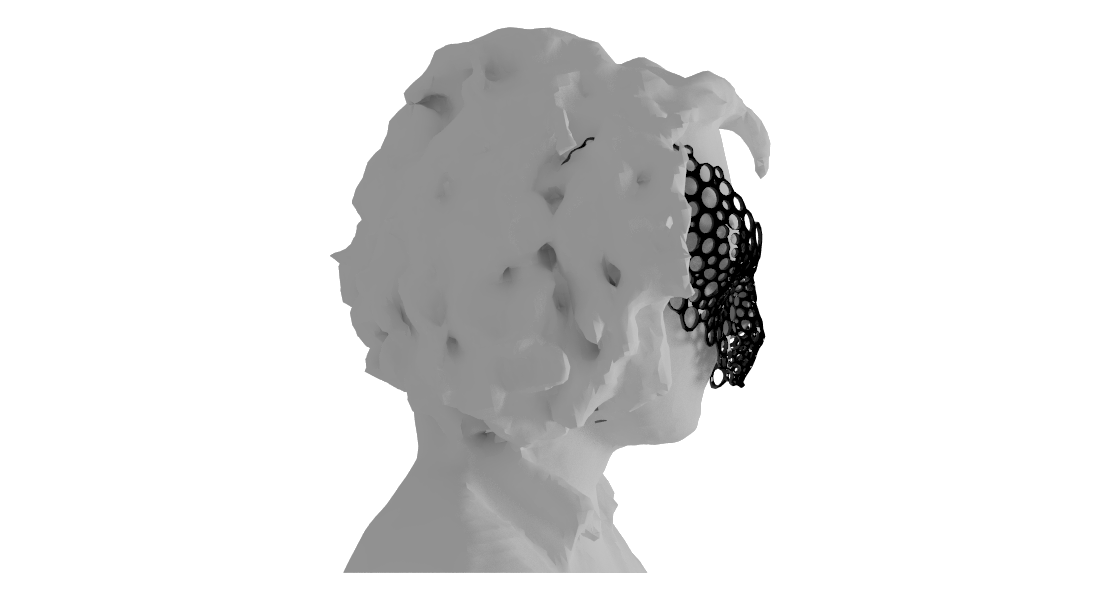 Side view
 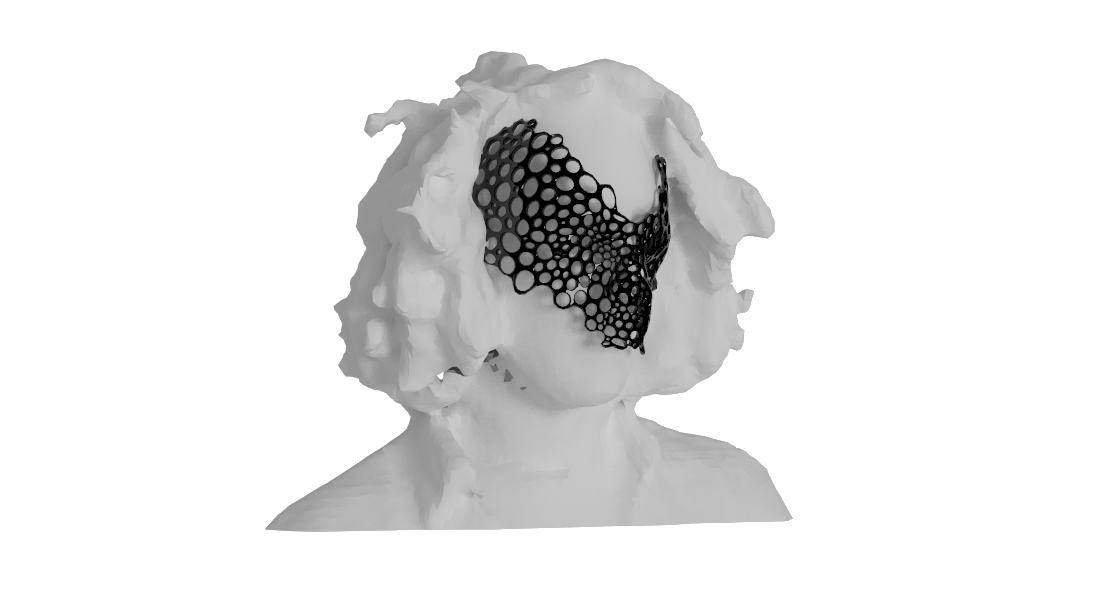 perspective
 3D printing
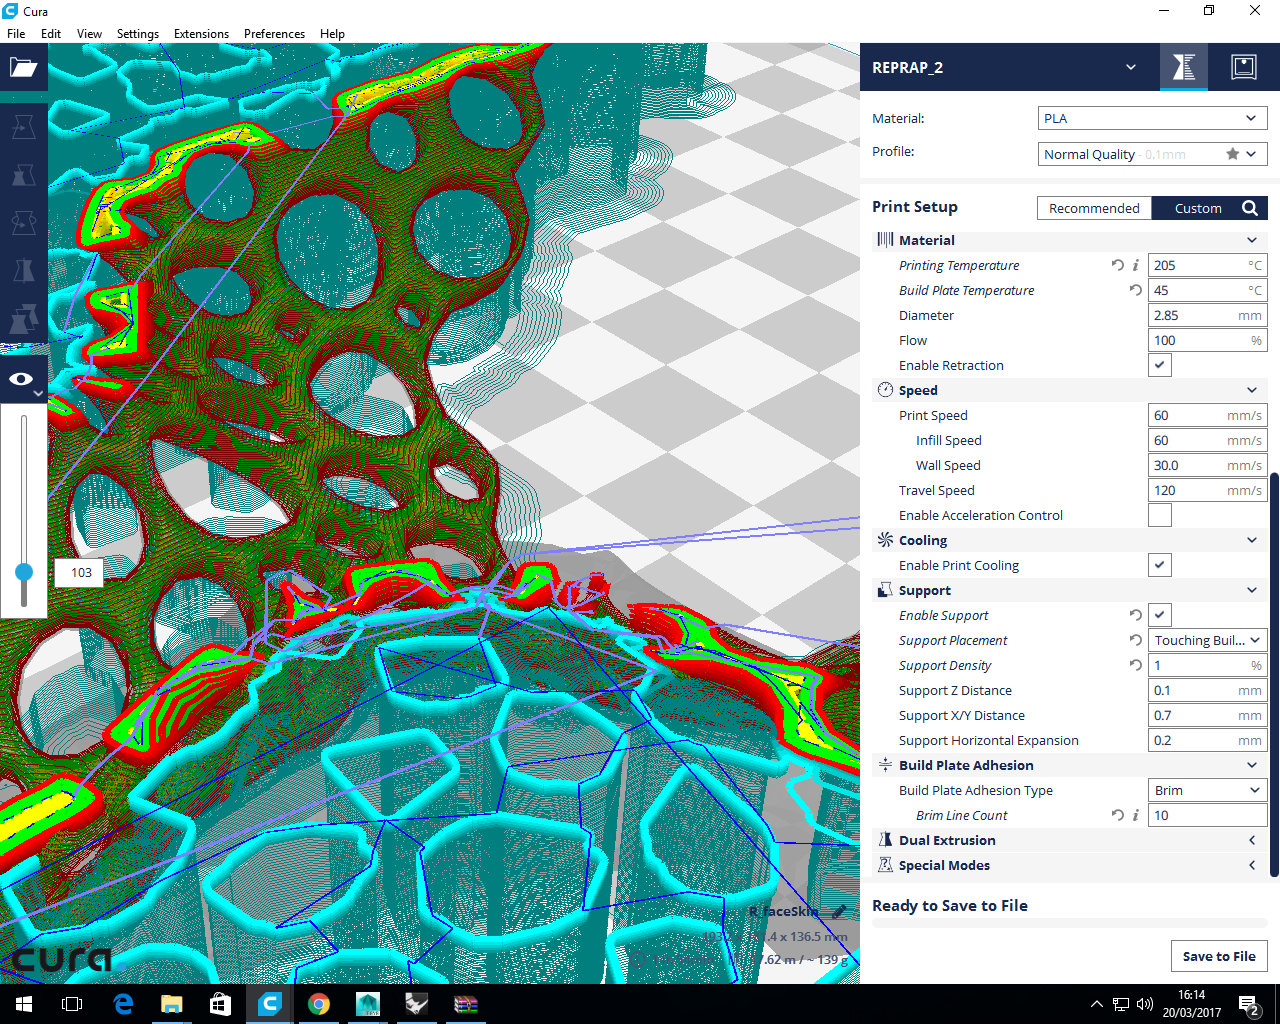
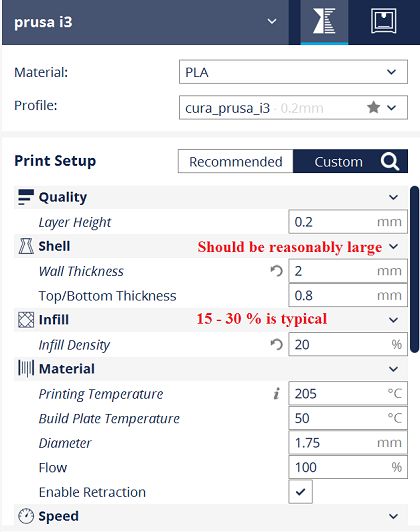
export the file as STL format to CURA . a small tip before exporting is to group the bodies from rhino so CURA can read them as one object.
I have used CURA to set up the STL file for printing. Cura is freely available software developed by Ultimakers and its also access to numerous print options which enchance the overall print quality .

Application