ISP-fabTomization
The objective of this assignment is to make an in-circuit programmer (ISP) by milling the PCB, then optionally trying other processes..
To describe the process of milling, stuffing, de-bugging and programming, and demonstrate the workflow of the process and identify areas for improvment if required.
The FabTinyStar is yet another version of an AVR ISP programmer/board that can be produced in a fab lab using a milled PCB and readily available components. The project is based on the efforts of many people. For more history of the FabTinyStar and the people who have contributed to it, Zaerc's FabTinyStar page and Brian's FabTinyStar page.
Requirments:
// Shown how you made and programmed the board.// Explained any problems and how you fixed them.
// Included a ‘hero shot’ of your board.
Released: 15.02.2017
Week04: electronics production
References:
// FabISP: Electronics Production
// Milling with Fab Modules and Roland Modela MDX-20
// FabISP: Programming WINDOWS users
Experience
The process consists of PCB fabrication, assembling the PCB, software installation, program the board and evantually testing the function and the programmer.
I would definitely read about What is ISP and what is PCB and what is AVR and i would research any word that crosses my eyes expecially if you dont have much knowledge in electronics.
#sideNote: One possible point of confusion in this document is that the device you're building will become an AVR programmer, but you also need a working AVR programmer in the process of building it. Your board refers to the new programmer that you are building. Programmer refers to the working programmer that you'll use to initialize yours. At the end of this document, your board becomes a programmer.
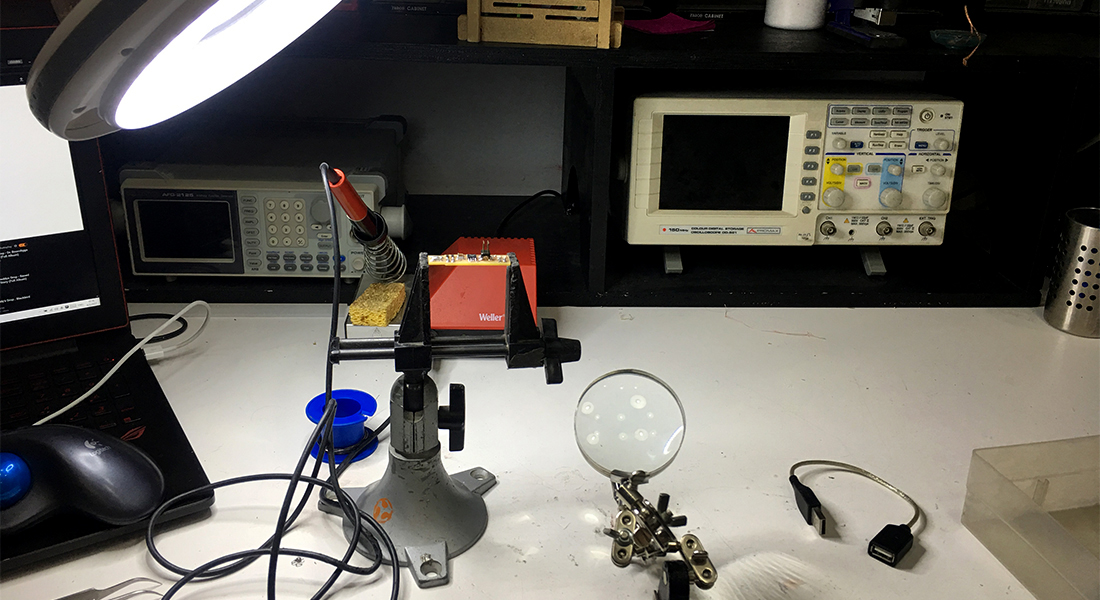 My station of the week!
 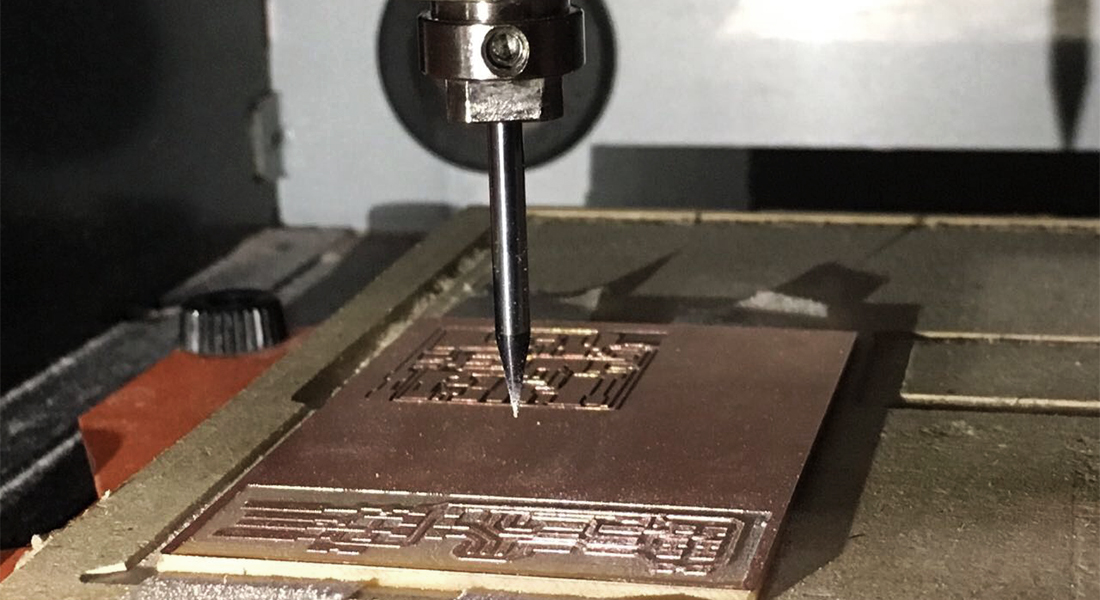 PCB Fabrication
 To set up the machine for milling
// set the z-axis right on top the surface.
// double tape the base before sending the file to ensure that it won't move.
// make sure the drilling bit is perfectly secured
// start milling at low speed and gradually speed up when you make sure everything is going well.
 This is how it is going to look like
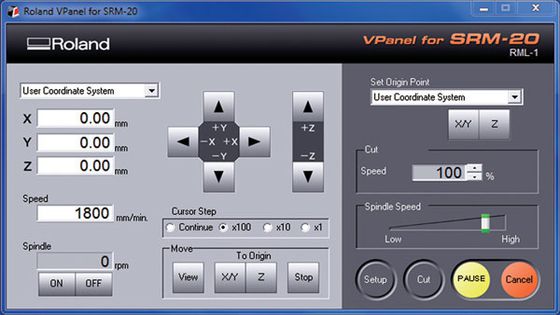
 A demo of how to set up the FabModules
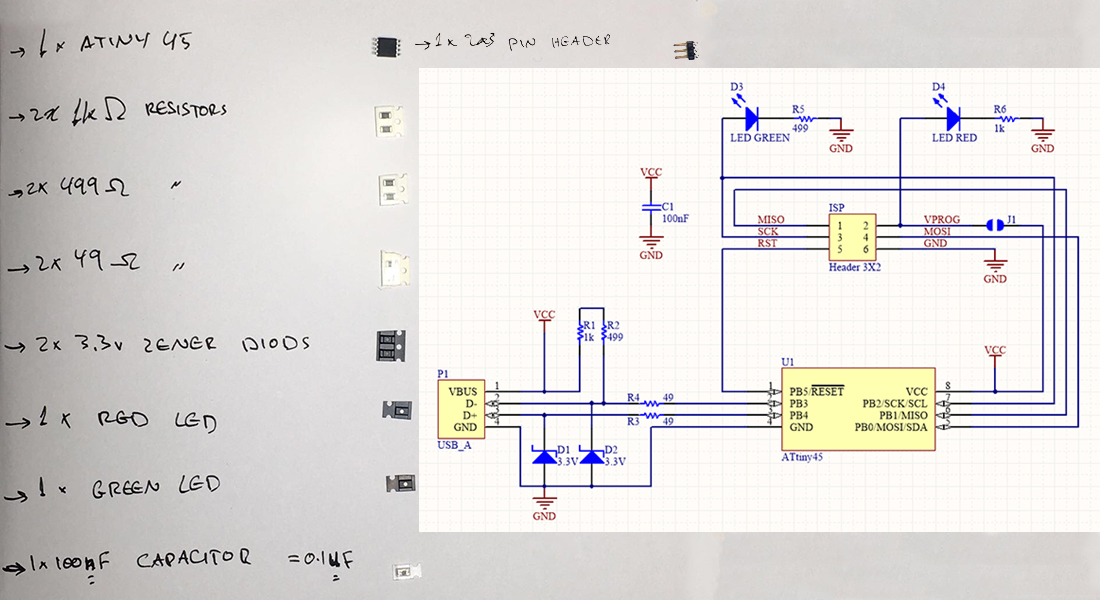
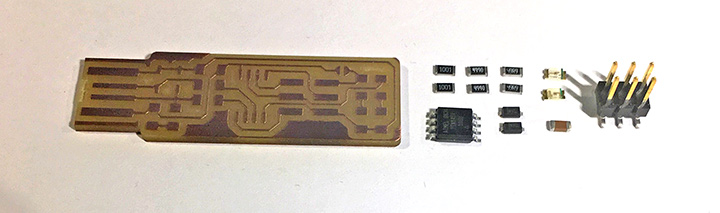 Pieces milled using FabModules App
 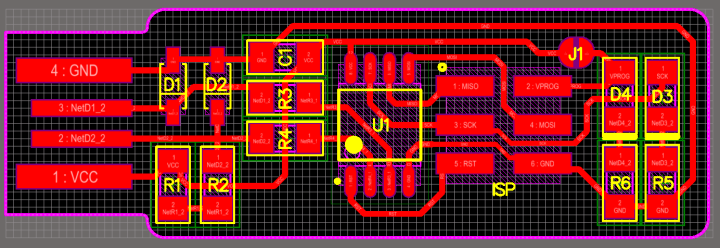 // 1x ATtiny45 or ATtiny85
// 2x 1kΩ resistors
// 2x 499Ω resistors
// 2x 49Ω resistors
// 2x 3.3v zener diodes
// 1x red LED
// 1x green LED
// 1x 100nF=0.1uF capacitor | check here
// 1x 2x3 pin header
 Adding more gears on the rails
 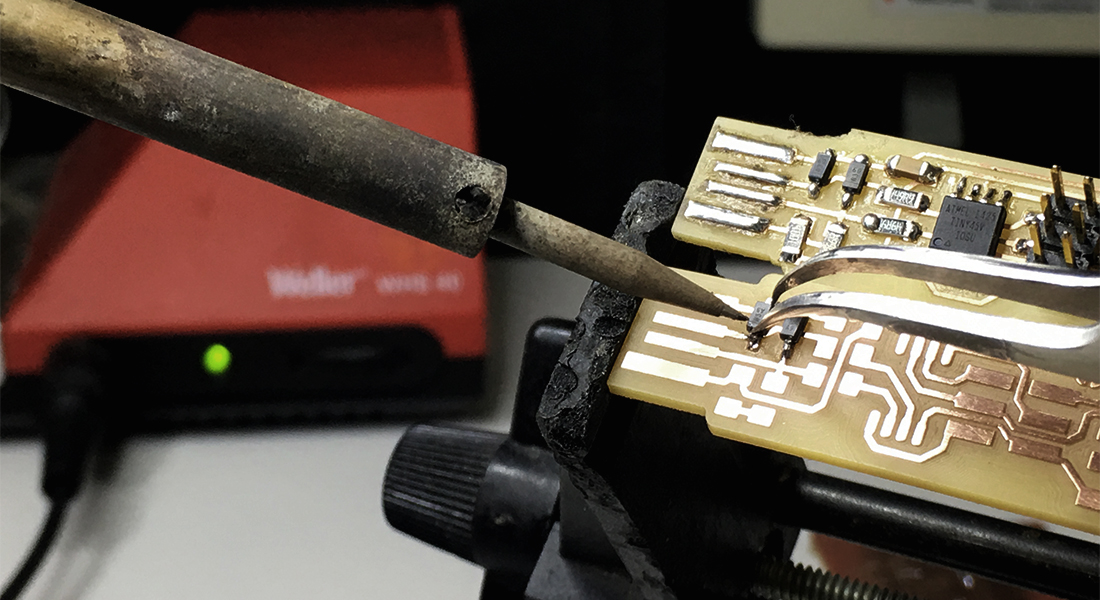 soldering the pieces
 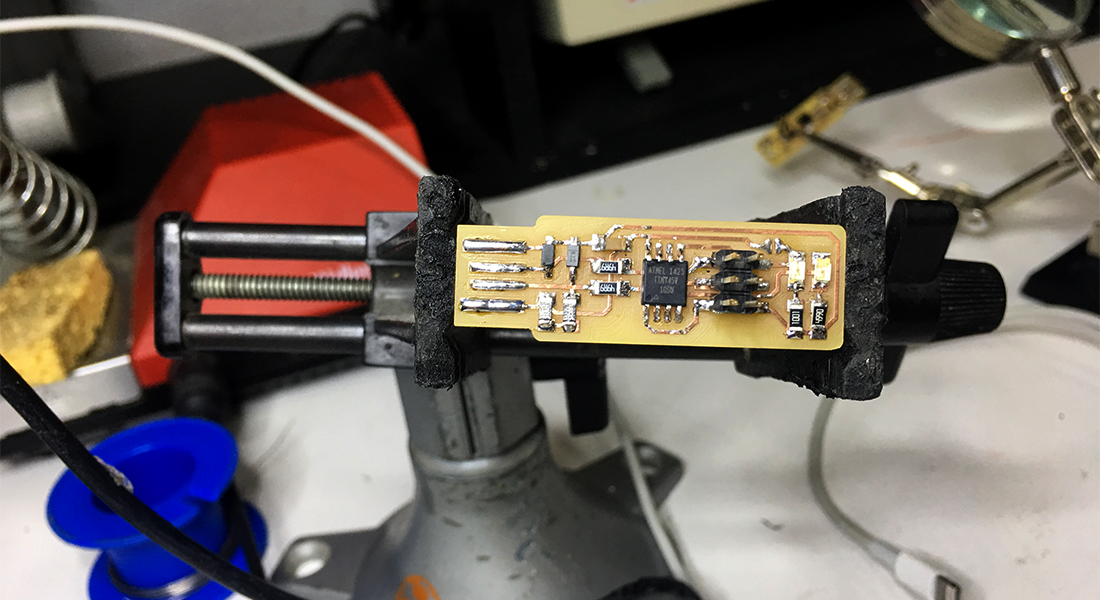 final result after double checked with the multimeter
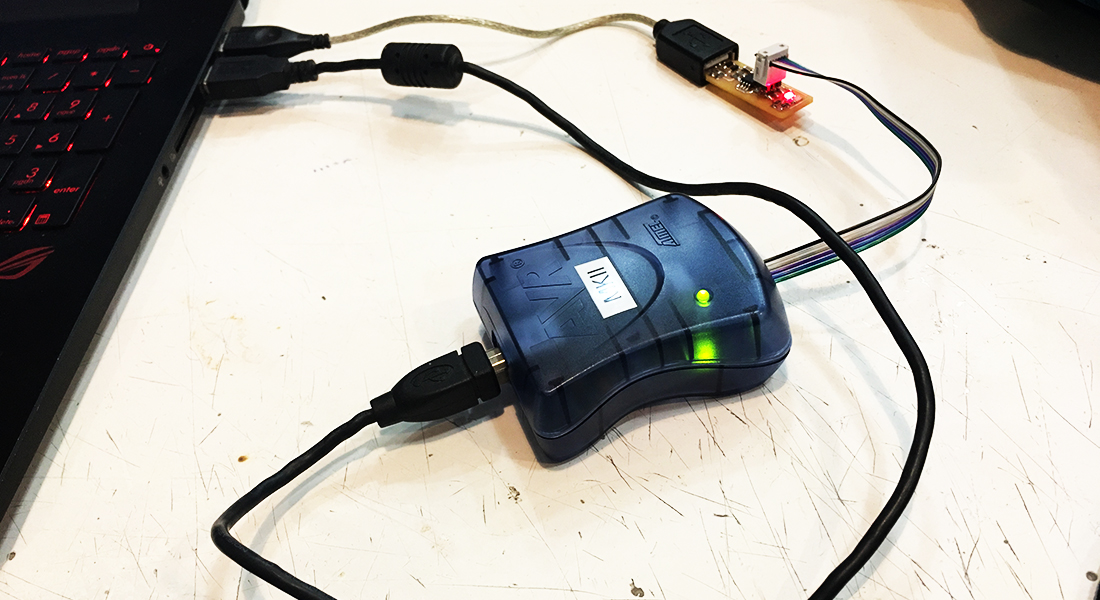
I have downloaded the files and installed the drivers and WINAVRdude but I had a lot of difficulties programming this FABISP on windows unlike Neil's FABISP, we could not figure it out, we tried to run the program on linux using one of the sudents laptop and it worked perfectly!
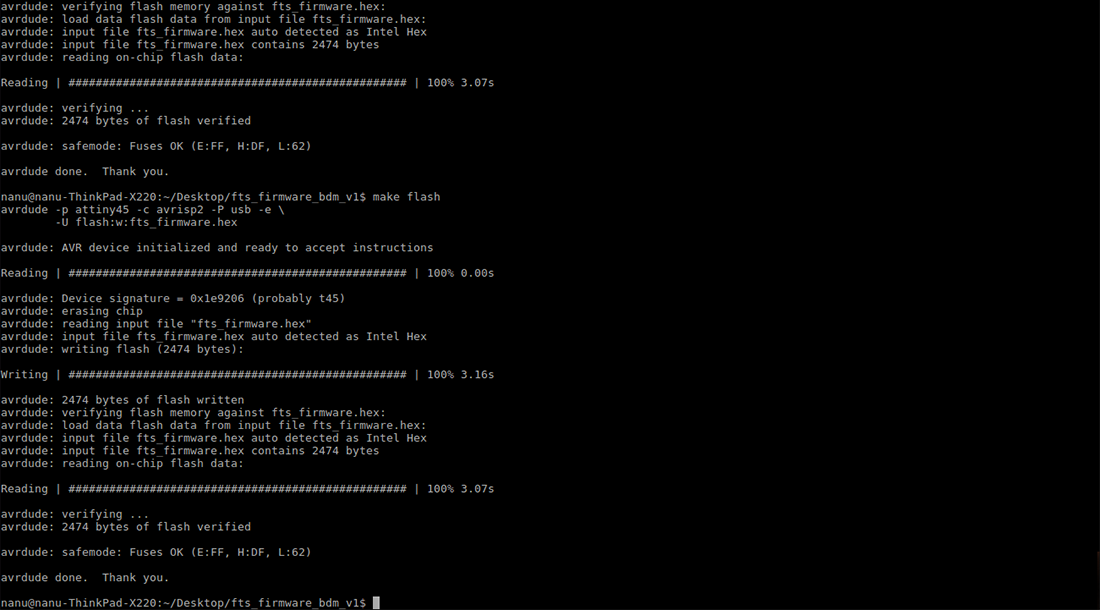 software installation using Linux, follow Brian
 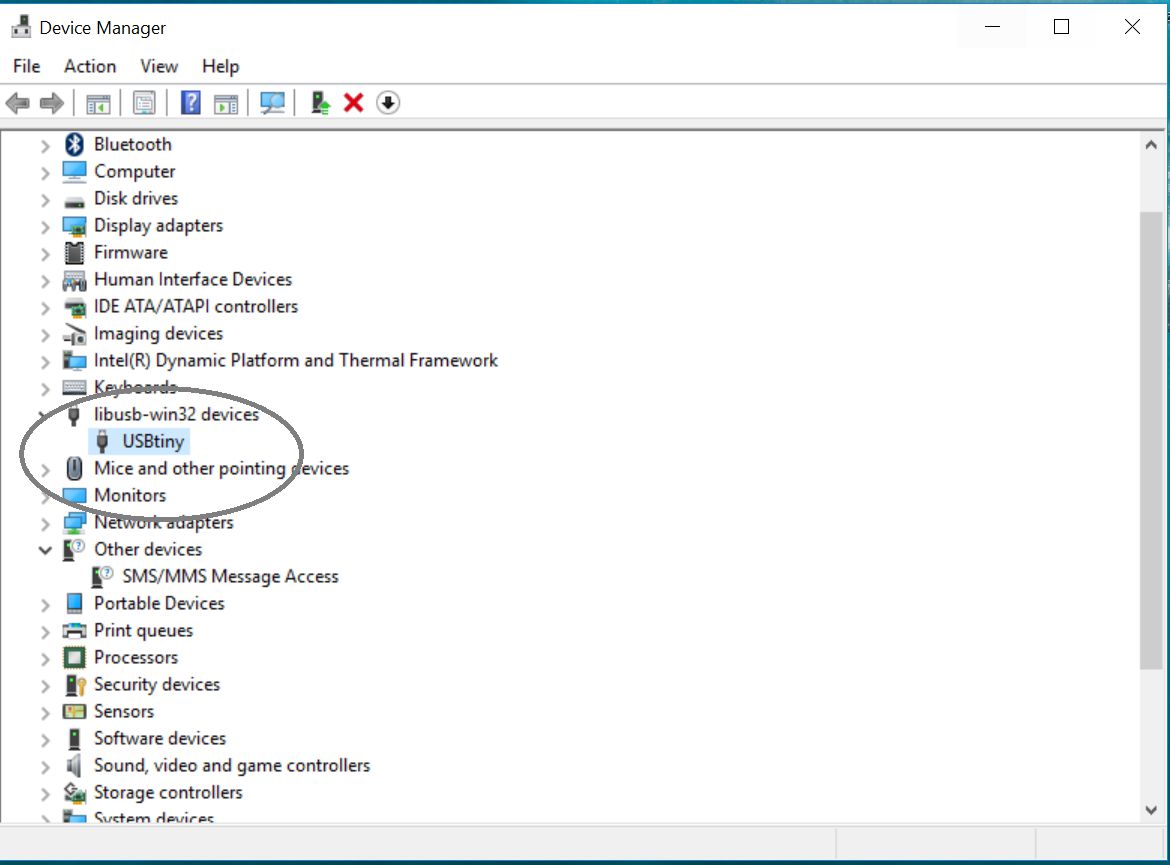 the pc has detected the FABISP!