Principles and Practices, Project Management
Final project draft
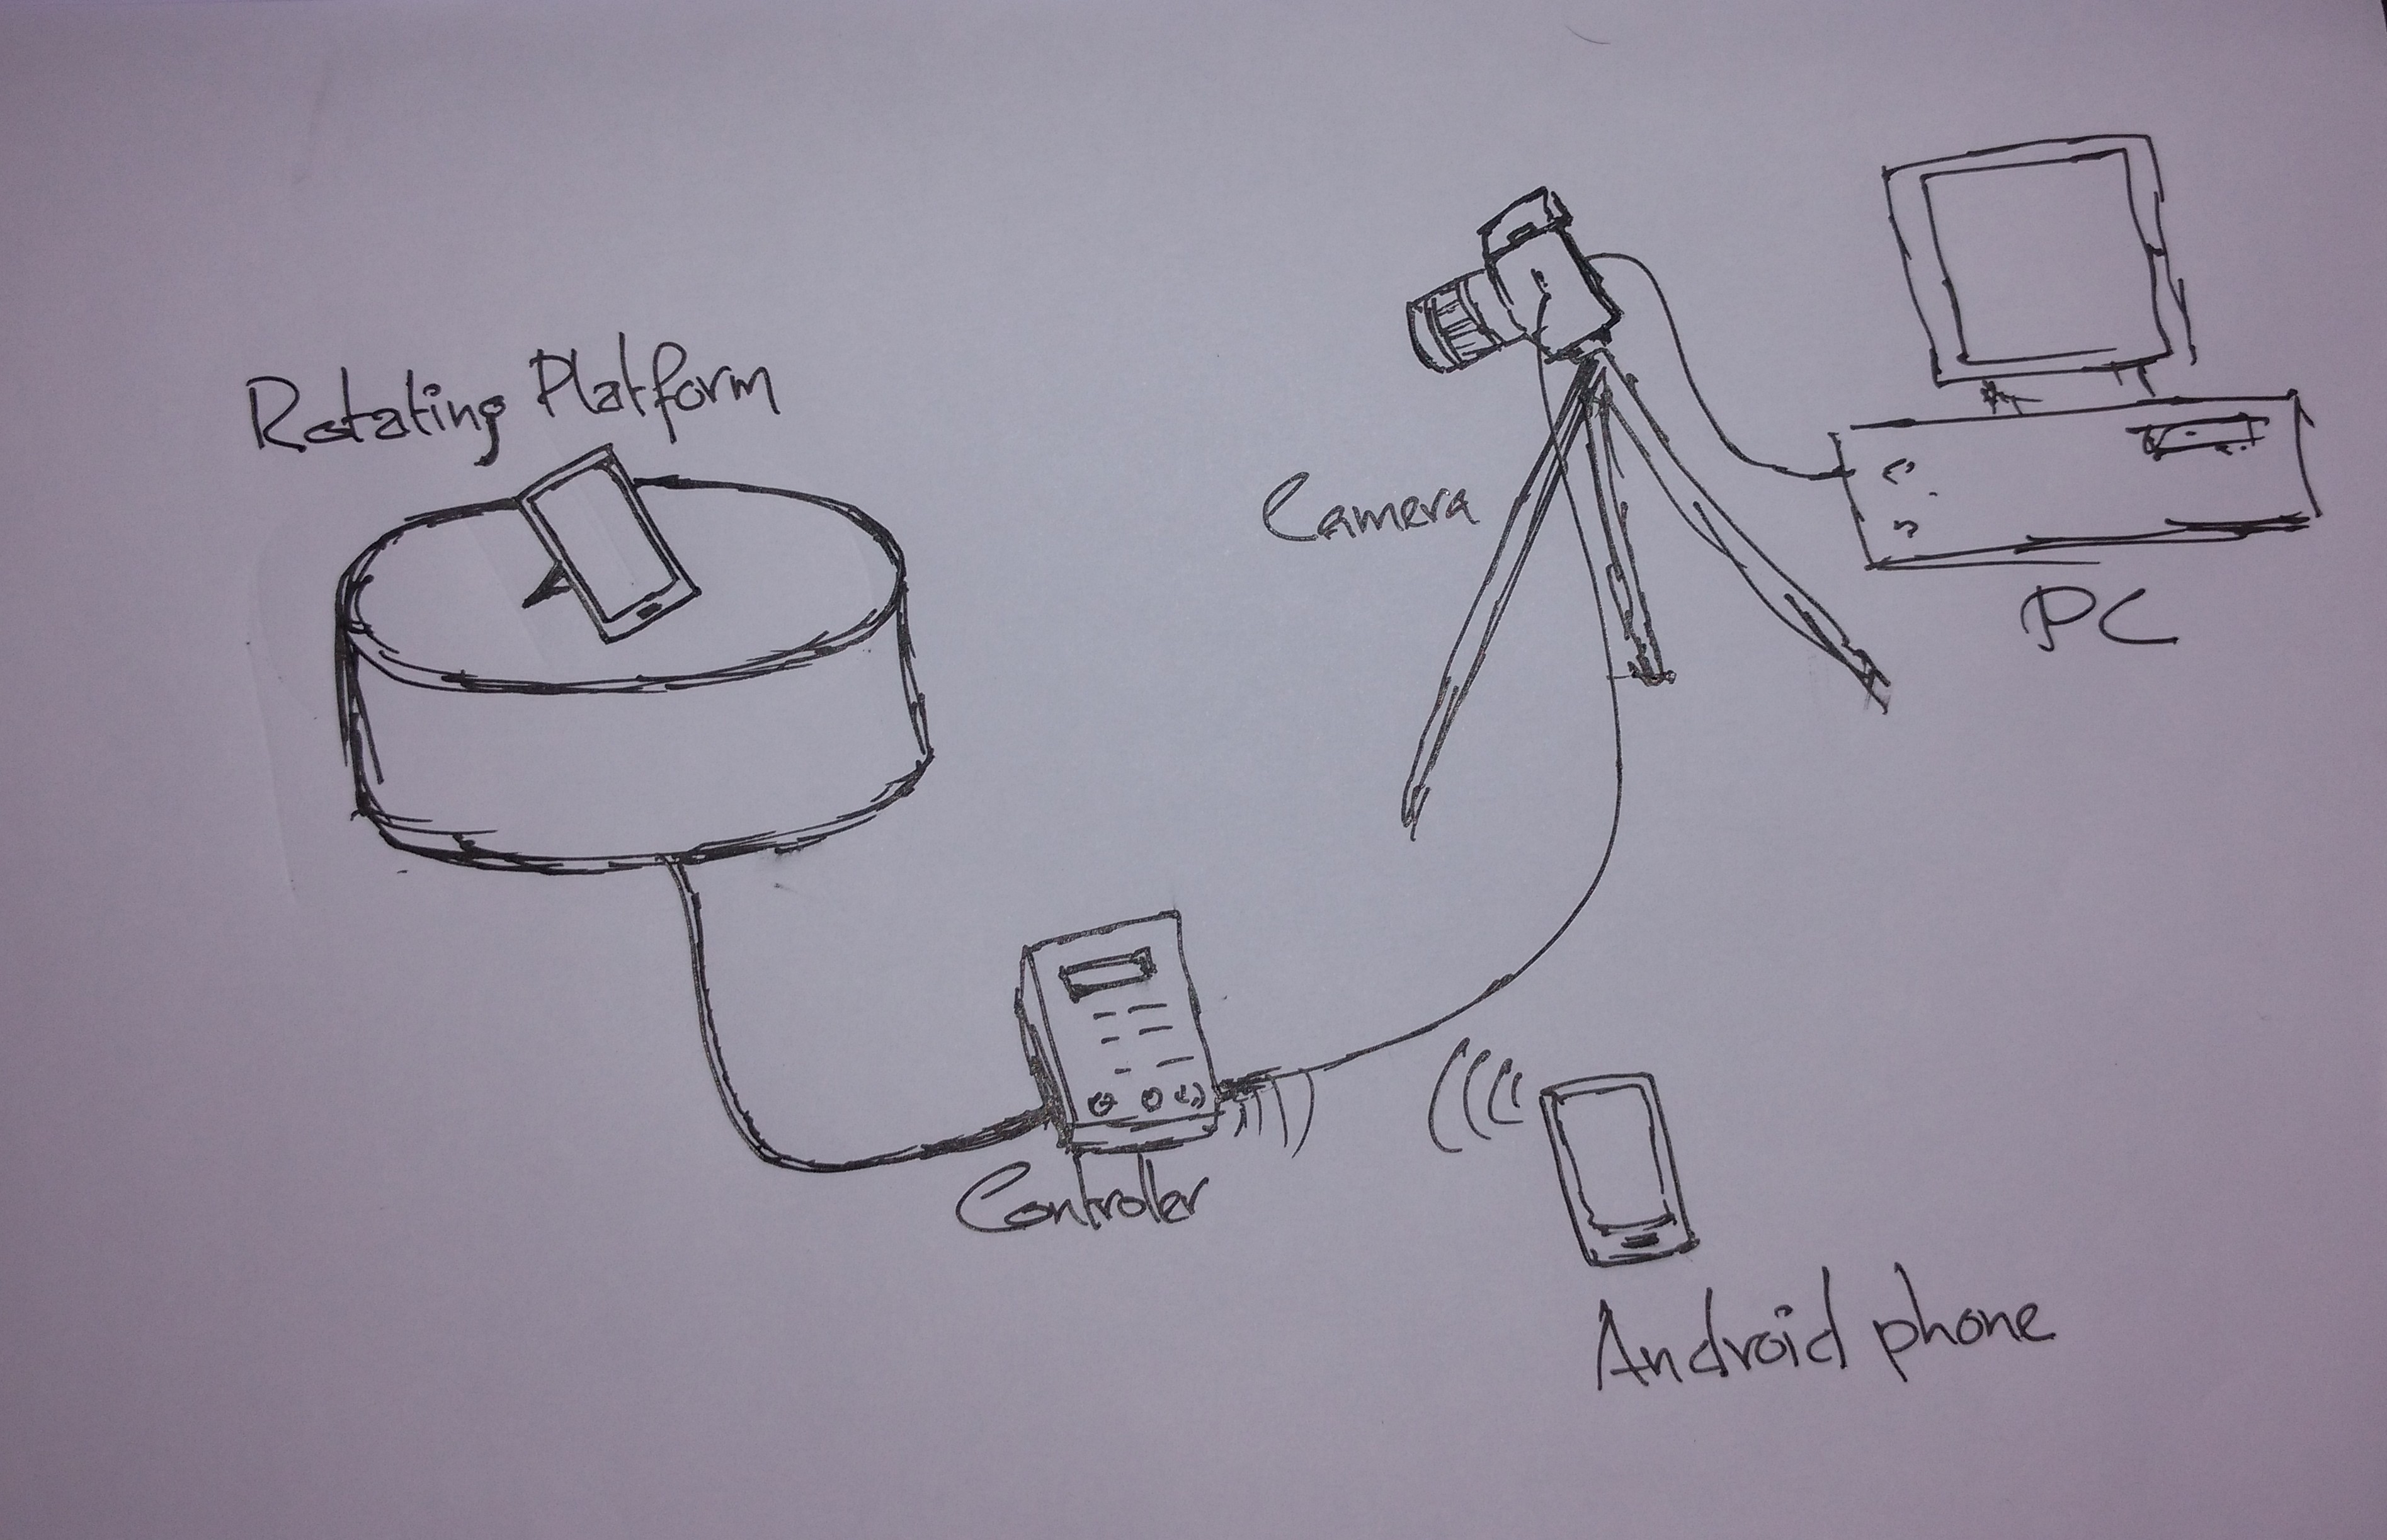
My project is to make a device which can be used for 360 degree product photography, which will helps the online traders to show a 360 degree visual of the products the sell. It is a turntable device,with stepper motor and a controller. We will place the product on the turntable platform. The platform will turn by a fixed angle and will wait for a while for capturing the image at that instant. This process will continue till the total angle becomes 360 degree. So by merging all the images captured, we can make a 360 degree visual of the product. For controlling the parameters like rpm and all, I am planning to add an android connectivity also other than the normal hardware switches.
The first step for the fab academy was to set up the 'git'. Since the git was already installed and configured in my laptop there was no need of installing it. We have already got the tutorial for working with the git repositories from Francisco, so it was easy to set up everything. here is the tutorial.
As in the tutorial , we used the ssh key Francicso shared for the first time. Then I used to generate my own key and add it to the gitlab account. I am explaining it below.Generating the ssh keys
    ssh-keygen -t rsa -b 4096 -C "my email id here"
    Generating public/private rsa key pair.

    Enter a file in which to save the key (/Users/yadusharon/.ssh/id_rsa): [Press enter]

    Enter passphrase (empty for no passphrase): [Type a passphrase]
    Enter same passphrase again: [Type passphrase again]
By typing the above commands in the Terminal we can generate the ssh key. (Actually the keys were already genereted in my laptop) . The keys will be generated and it will be in the .ssh folder with the names id_rsa (private) and id_rsa.pub (public). Next is we have to copy the content of public key in the gitlab acount. For that i used gedit because it is easy to copy from gedit.
gedit ~/.ssh/id_rsa.pub
Now the public key will get opened in the gedit. Copy the content and close the Gedit.
Now, go to http://git.fabacademy.org/ Sign in with the fabcloud id. Click on the profile settings which is in the left menu. Click on SSH Keys. Now we can add the keys by clicking the 'Add ssh key'. Paste the key we already copied and give a title. And click 'Add Key'
Now the ssh keys are added , and we can push contents to the repository. The steps to clone the repository and the setps to push are alredy there in the tutorial. So i am not repeating it.
Our repository is "fablabtrivandrum" and we have to push our contents to that repo. For our personal webpage we need to create a folder called "students" in the repository, inside that we need to creat another folder with our student id as the name (in my case it is 384). So in my case I have to push all the datas in to that "384" folder.
For pushing the contents the commands are
    cd Documents/git_works/fab/fablabtrivandrum/students/384
    #moving in to the directory where our datas lies
    git add --all
    git commit -m "message"
    git push
Now the archives are pushed to the repositories.
For writing code in html for my webpage , I am using Brackets. It is a modern opensource text editor for web designs. One thing I liked in brackets is, it has preview option in the web browser and the browser will get reloaded automatically when we save the changes in the text editor.