She really likes walking during rainy ugly days...
But she does not like to walk on dirty and dry grounds...
To be honest, Fab Snail does not like many things...like polluted air or muggy days...
She is not the only one who doesn't like all that, just like all the other snails...
The difference is that if Fab Snails is not happy, she can turns into a real stalker!
(Also on your mobile -.-)
So take care of Fab Snail, she is a good snail...
She is just different from the other snails!"
Weekly Assignment
The weekly assignments for this week were:
- Test and tune 3D printers
- Make and print a 3D model wich can not be made with subtracting techniques
- Make a 3D scan of an object and obtain a 3D representation
- (Group) Optional: build and test a 3D scanner
Software and Hardware
The software that i've used this week are:
- Cura: used for tuning printers parameters
- Flashprint: used for tuning printers parameters
- Rhinoceros: used for building my 3D model
- Agisoft Photoscan: software for photogrammetric reconstruction
- 123D catch: software for 3D scanning
- Skanect: it allows to use the Kinect as a 3d scanner
- Horus: used for laser scanning
- Meshmixer: used for adjusting the meshes of 3D scanned models
- Meshlab: used for adjusting the meshes of 3D scanned models
Concerning the hardware:
- Ultimaker2: 3D FDM Printer
- Luzbot TAZ: 3D FDM printer
- Flashforge Dreamer: 3D FDM printer
- DWS Xfab: 3D sthereolithographic Printer
- Ciclop scanner: 3D laser scanner
- Kinect: used as a 3D scanner
- Skanect: it allows to use the Kinect as a 3d scanner
3D printers calibration
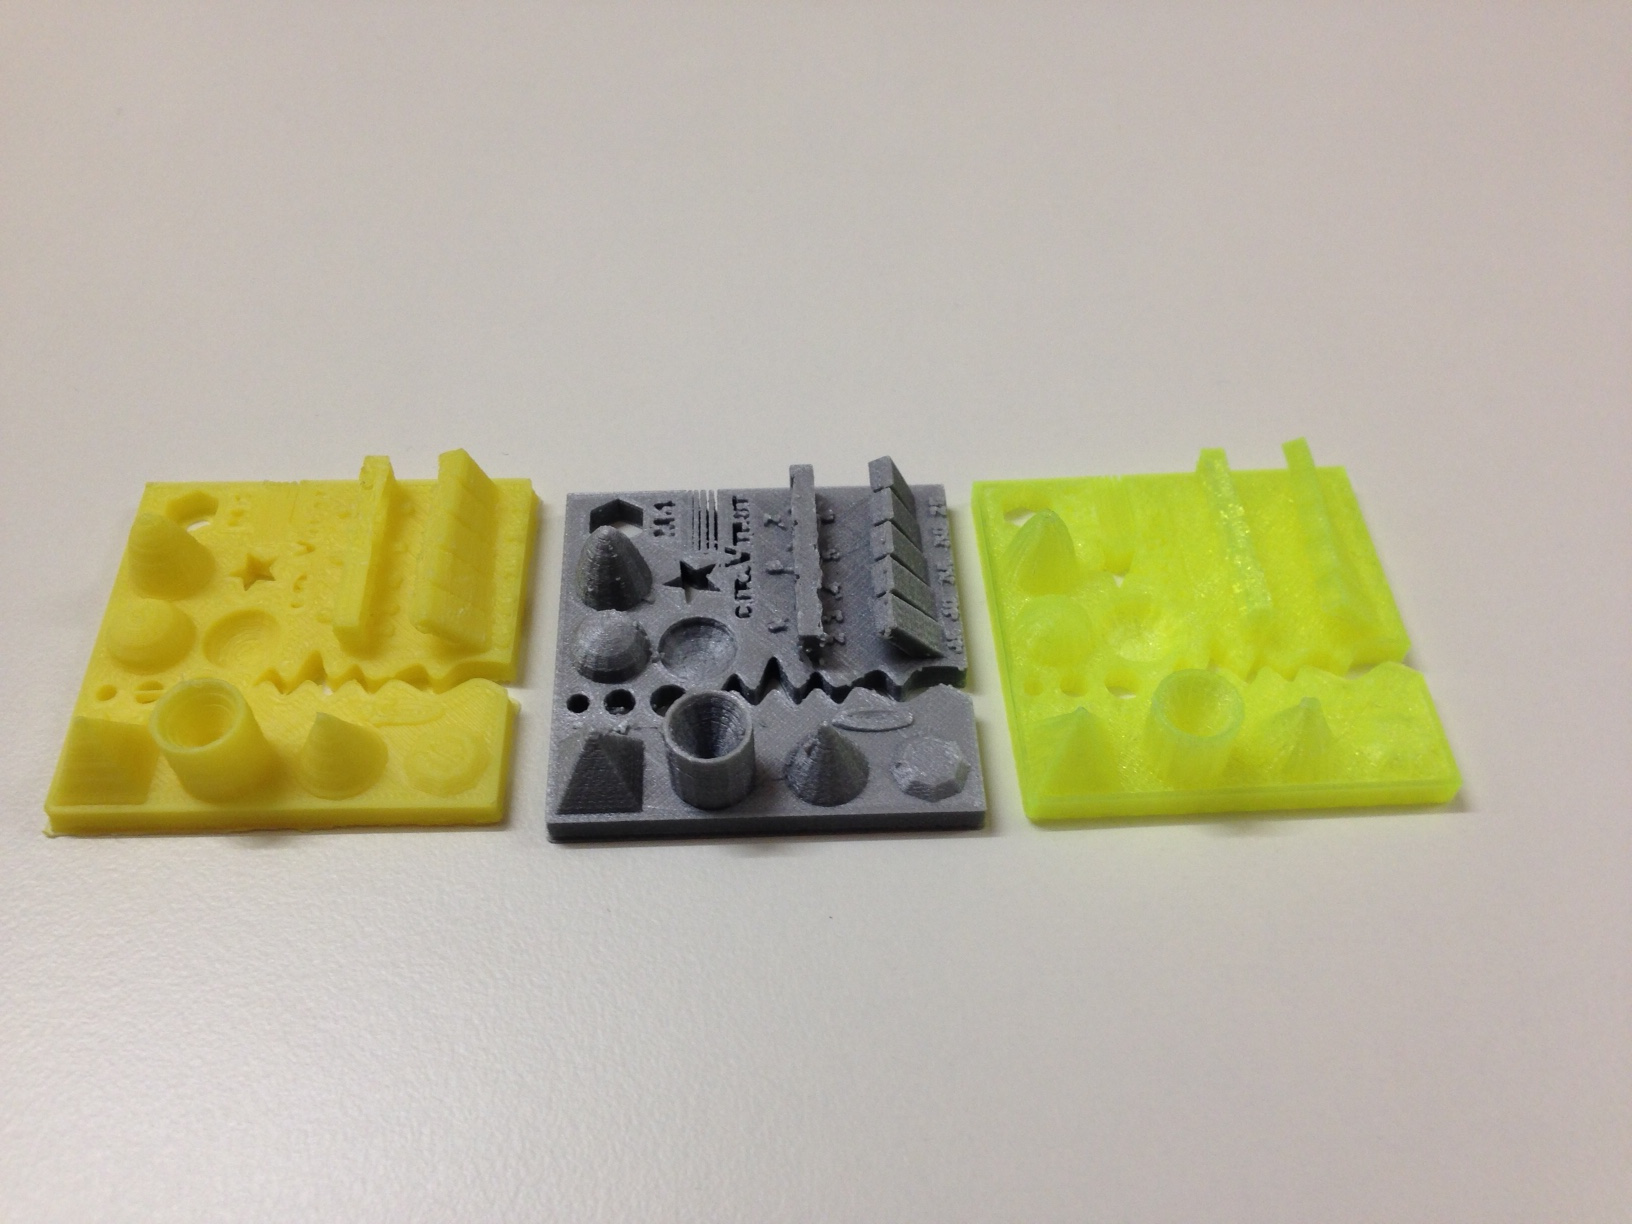
The first thing we did in the lab was to tune the printers and verify some printing parameters.
In particular we've evaluated the following variables:
- Size: the object is 4x50x50mm (baseplate)
- Hole size: 3 holes (3/4/5mm)
- Nut size: M4 Nut should fit perfectly
- Fine details: pyramide, cone, all numbers
- Rounded print: wave, half sphere
- Minimum distance between walls: 0.1/0.2/0.3/0.4/0.5mm
- overhang: 25°/30°/35°/40°/45°
- bridge print: 2/3/4/5/6/7/8/9mm
- surface: all the flat parts
We used this file for the test and here there is the result with the different printers of the Lab:
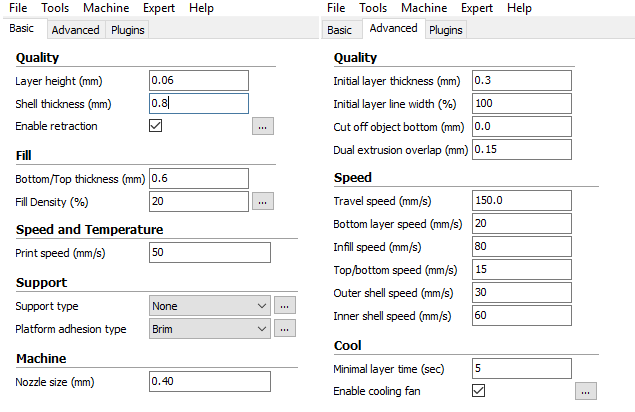
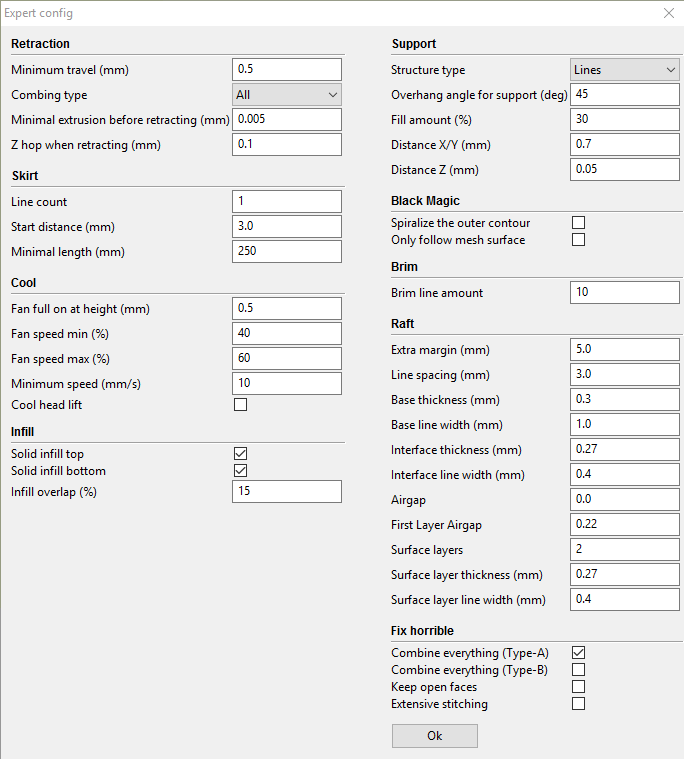
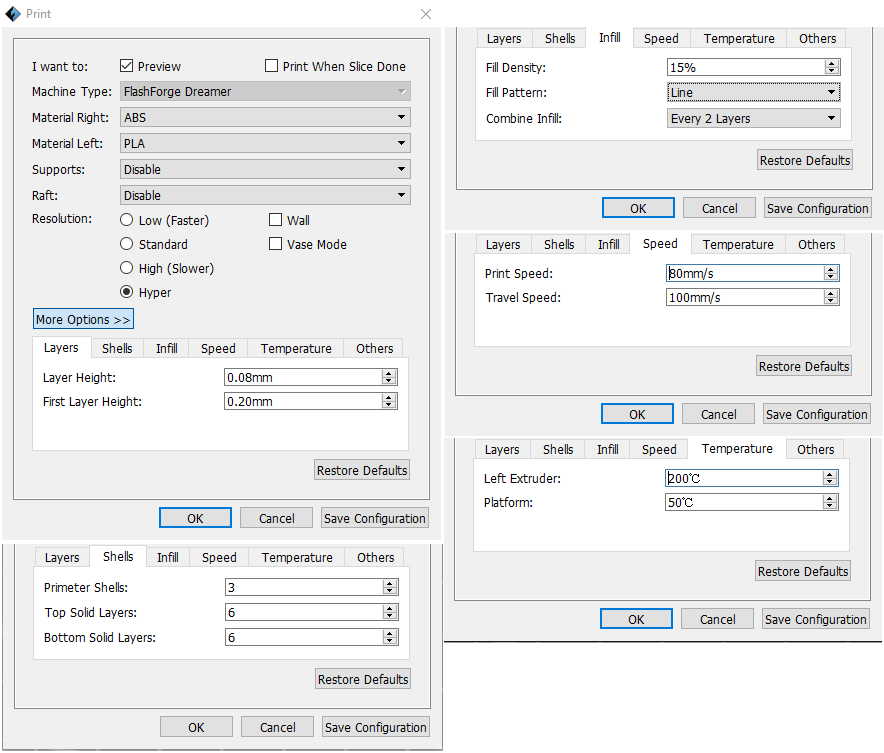
And we have used the following software settings for the printers:
Ultimaker 2: Cura settings
Lulzbot TAZ: Cura settings
Flashforge Dreamer: Flashprint settings
And the winner is...
Flashforge Dreamer (aka: the little oven :) )
3D Modeling - Rhinoceros
For the modeling i've tried Rhinoceros. I've made this decision because
i wanted to test another software for 3D modeling and i'vealready used Antimony and
Solid Works in the previous weeks.
It comes out that i really like Rhino and i think it is really powerful for modeling objects with
a "fluid" structure.
Compared to Solid Works, i found Rhino more "friendly" and easy to understand.
Each command
has an help with very useful and well detailed instructions. Moreover, i found very interesting
that is possible to have an auto-completion for the commands.
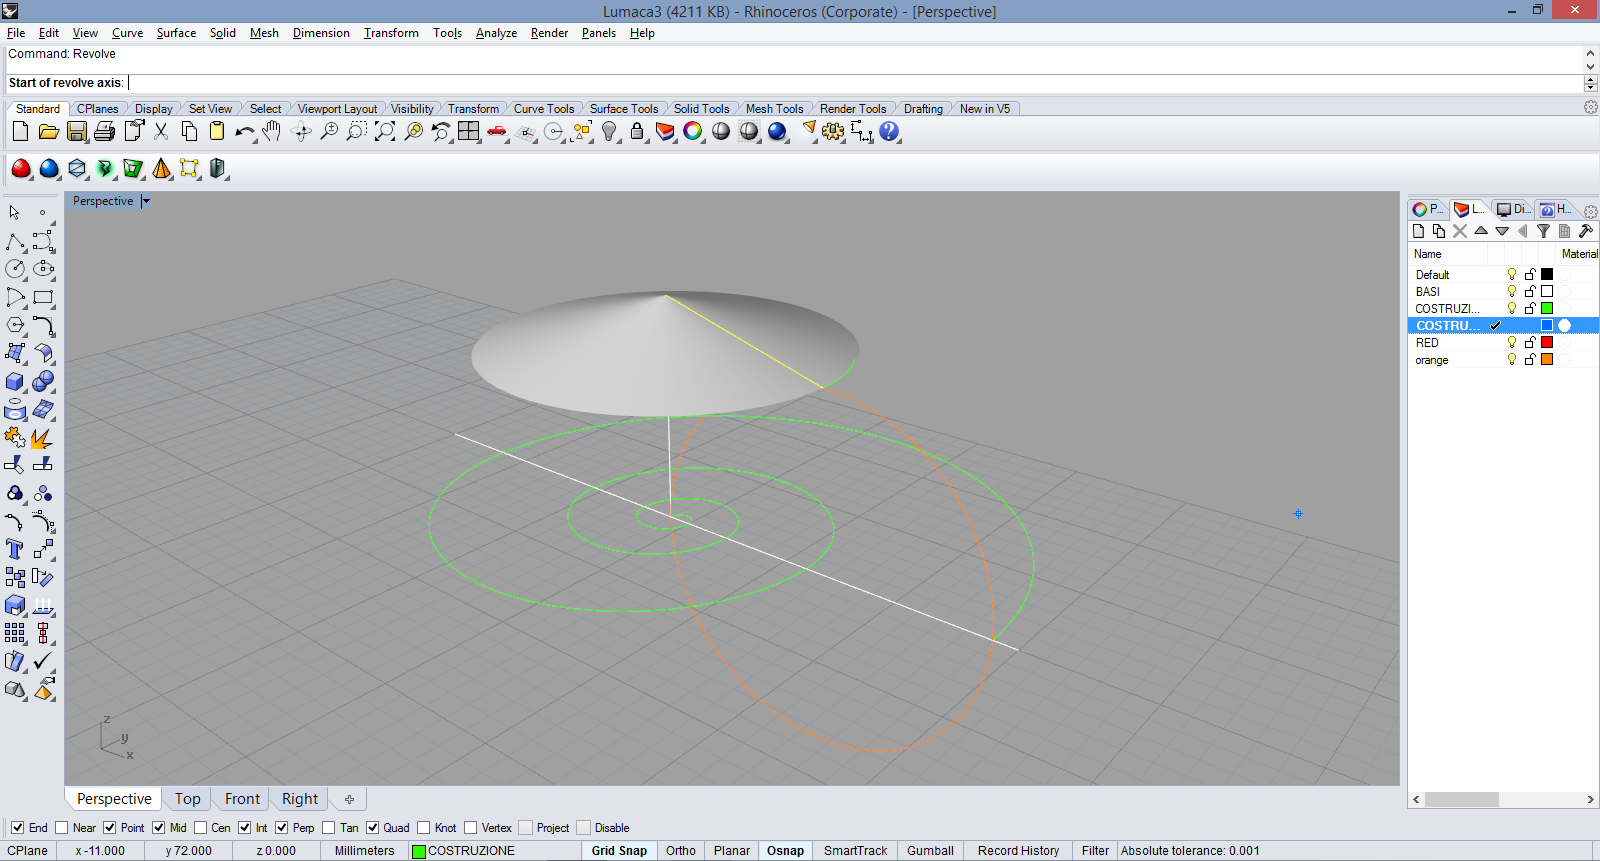
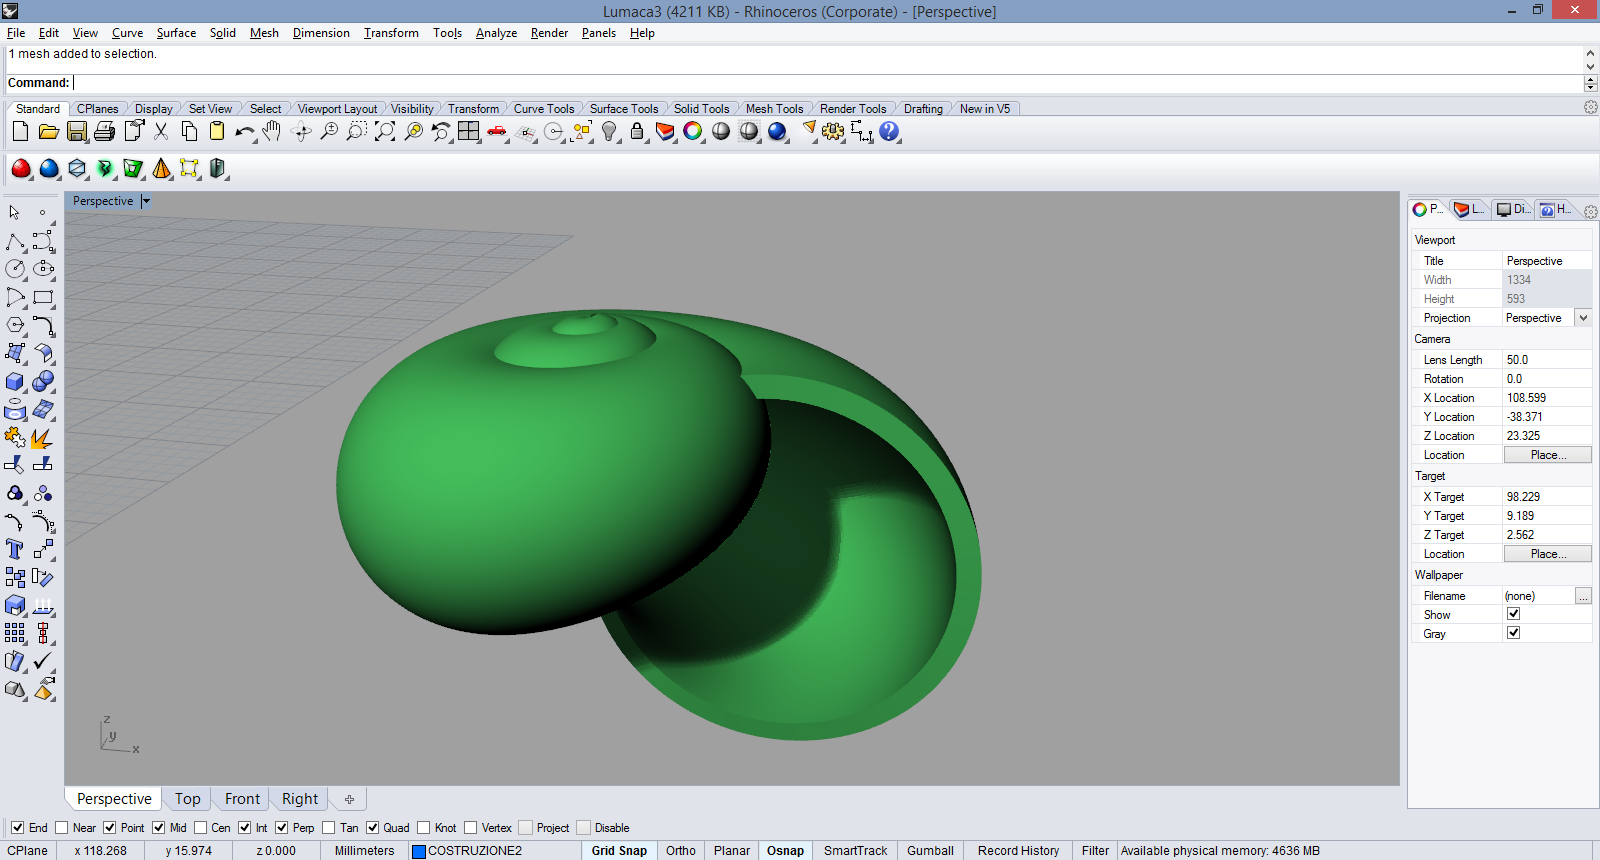
Having said that, i've used Rhino to model a part of my final project: The snail shell.
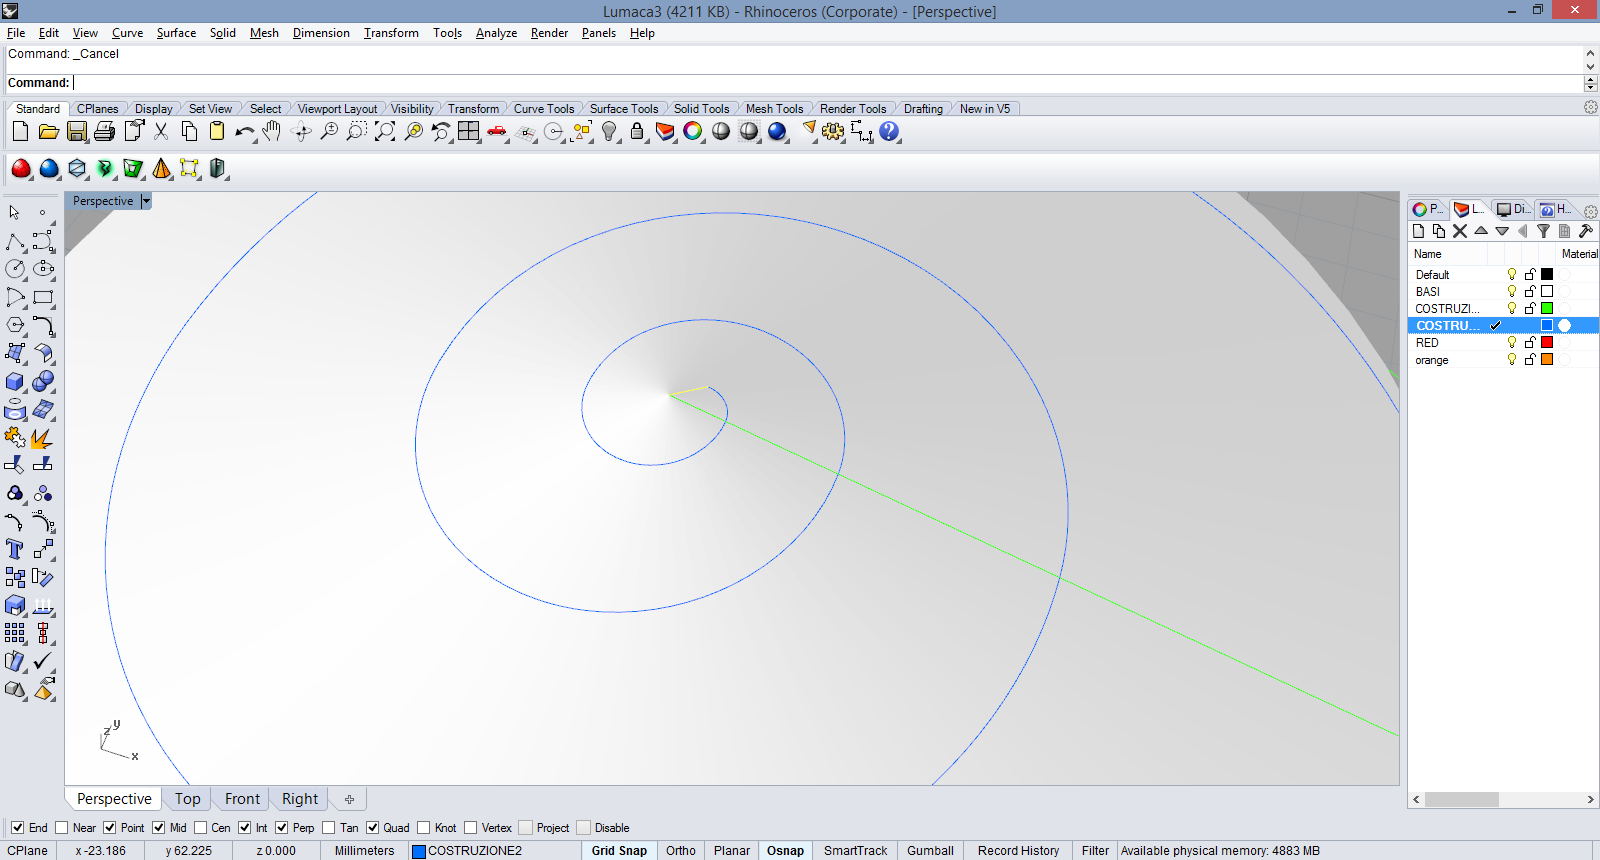
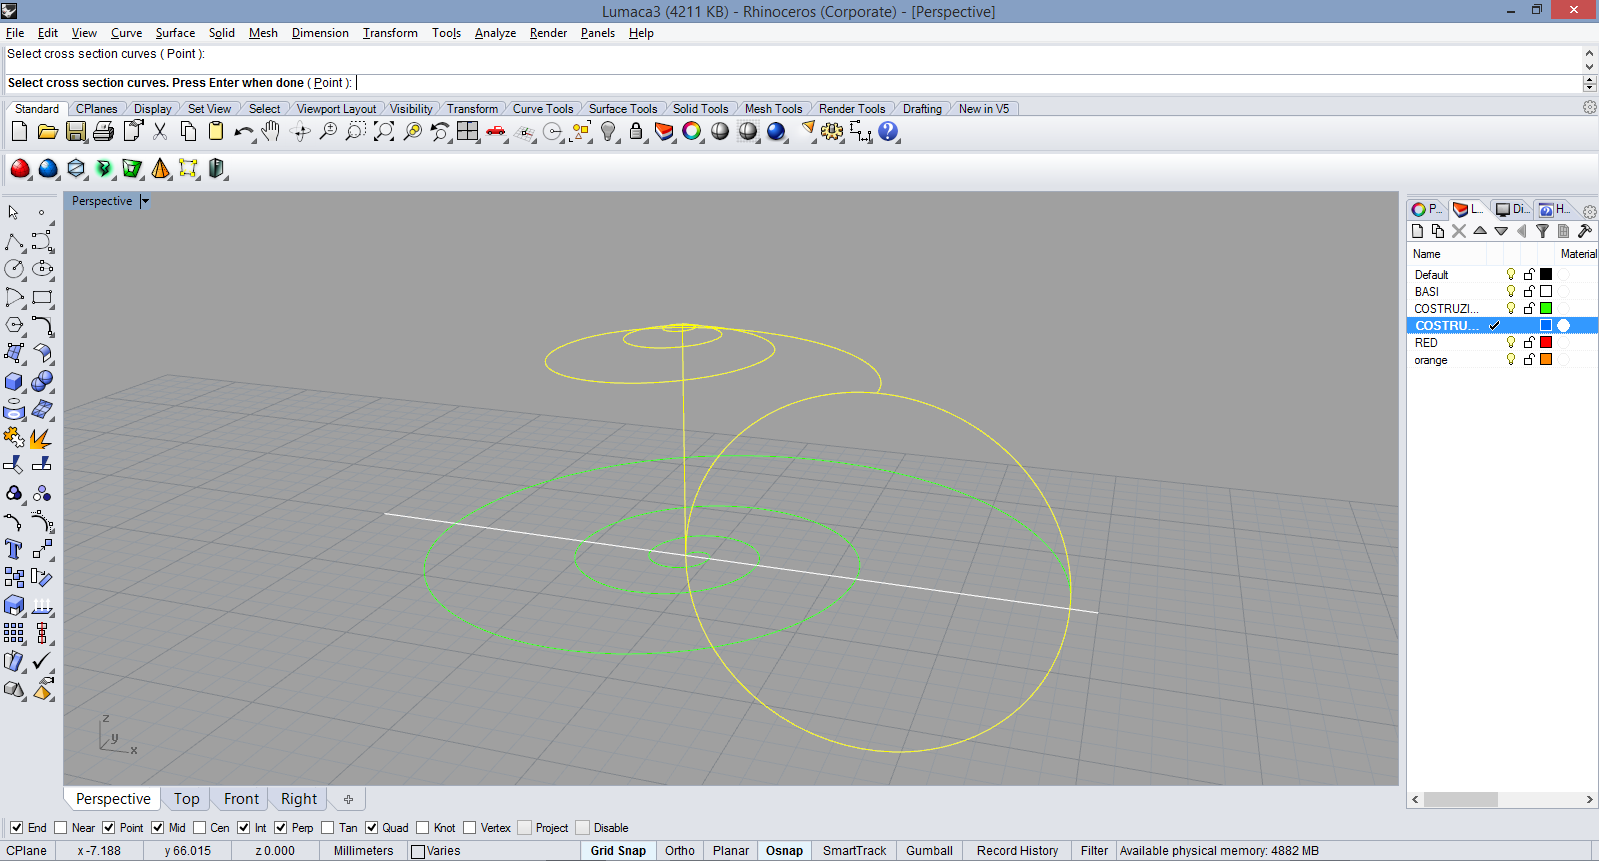
I've made some screenshot to describe the workflow that i've followed to design the shell:
1) Draw vertical circles (red circles diameters: 1,2,4,8 blue circles diameters: 1.5,3,6)
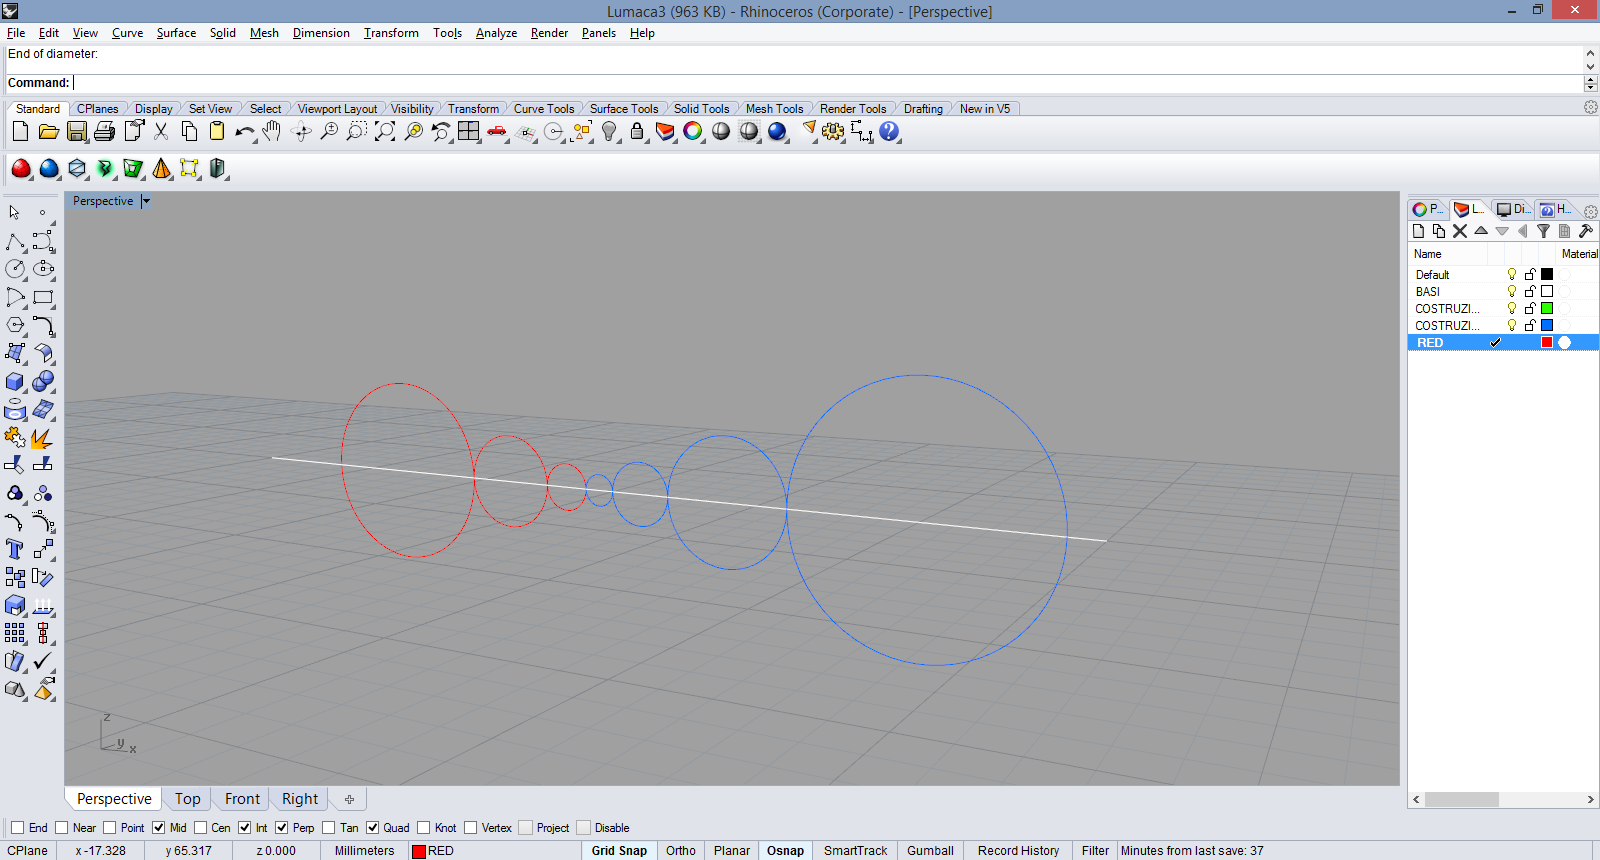
2) Draw horizontal circles using the verticals as references
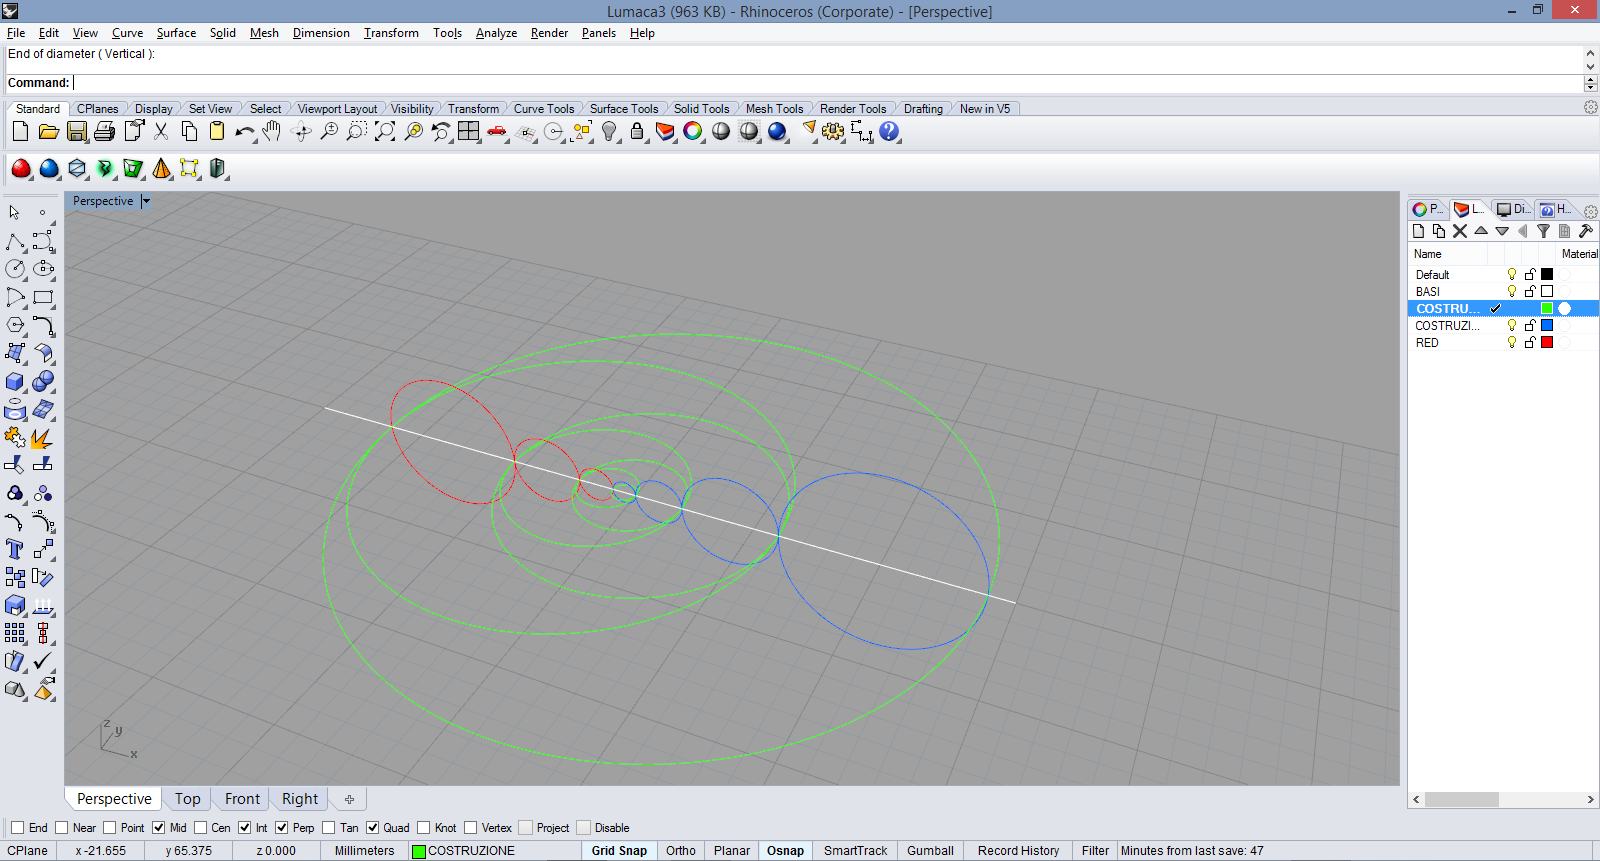
3) Trim out not needed parts of the circles to obtain a regular spiral structure

4) Draw a circle between the two extreme points of the spiral
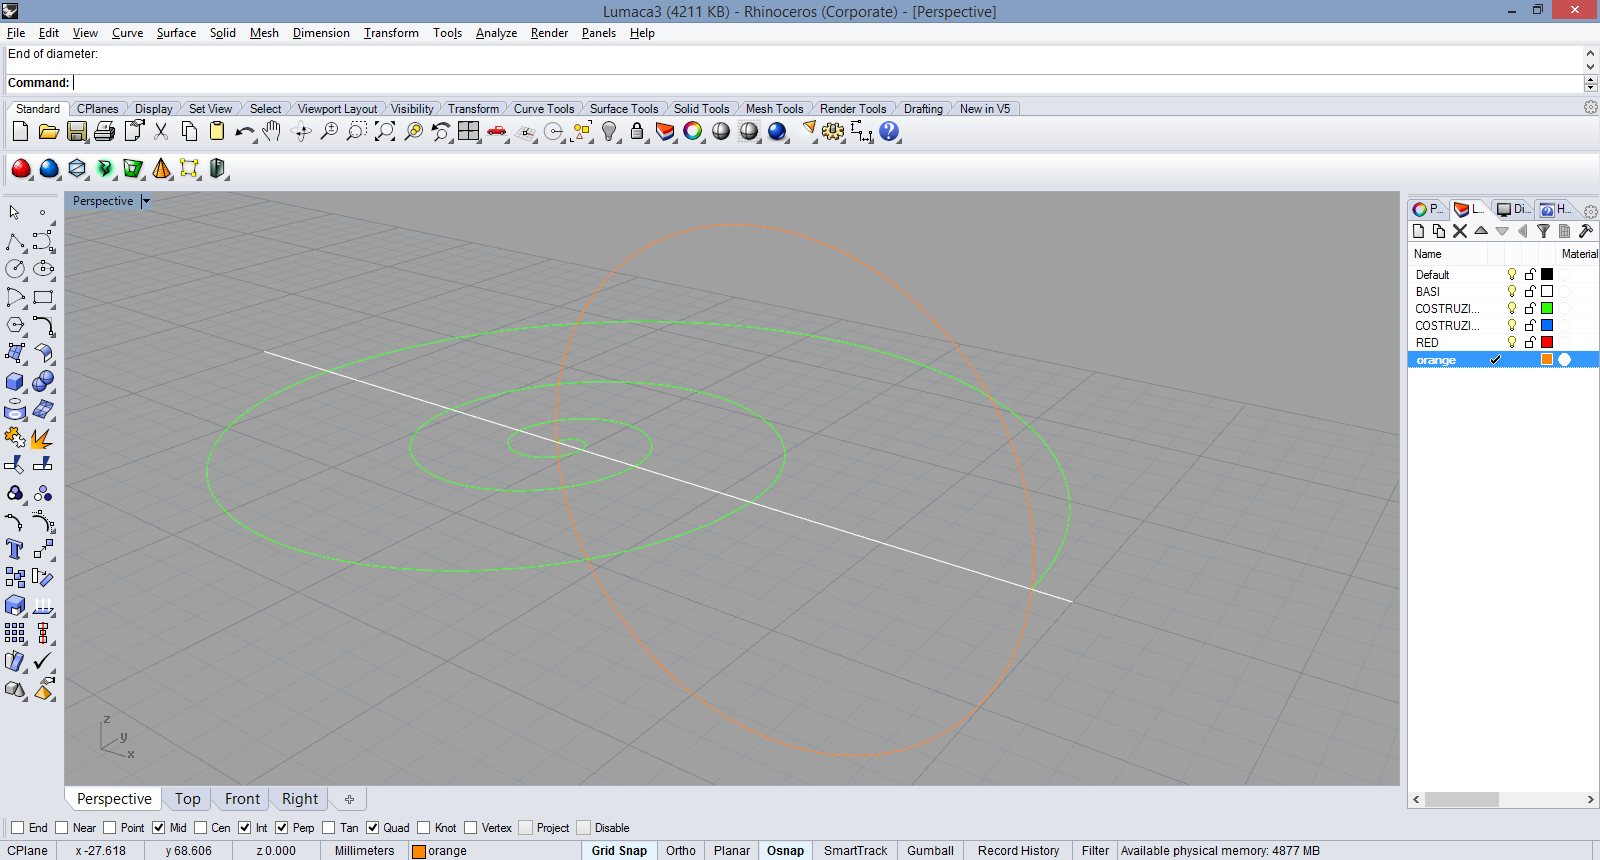
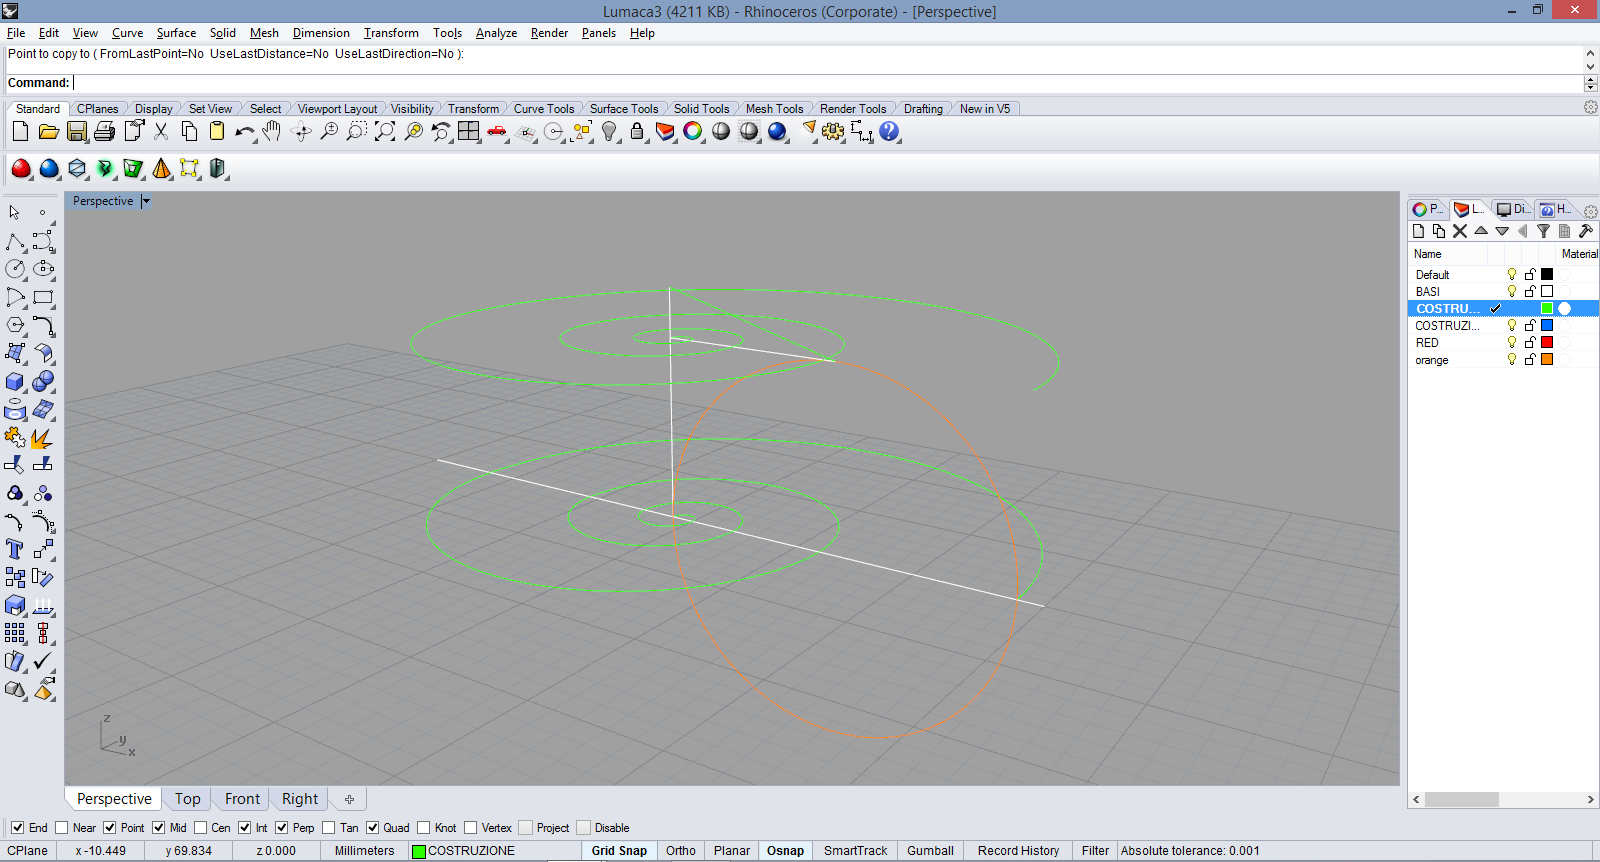
5) Copy and move the spiral from base to top (tangent to the plane which pass for the point at the top of the circle)
6) Join the top of the central axis with the top point of the circle and revolve this line to make a cone. This will determine
the "height" of your shell
7) Project the spiral on the cone and make sure to close the spiral with a line (join the yellow and the blue in the end)
8) Make a Sweep2 using the axis and the top spiral as rails and the big circle as cross section curve
9) This is the surface after the sweep
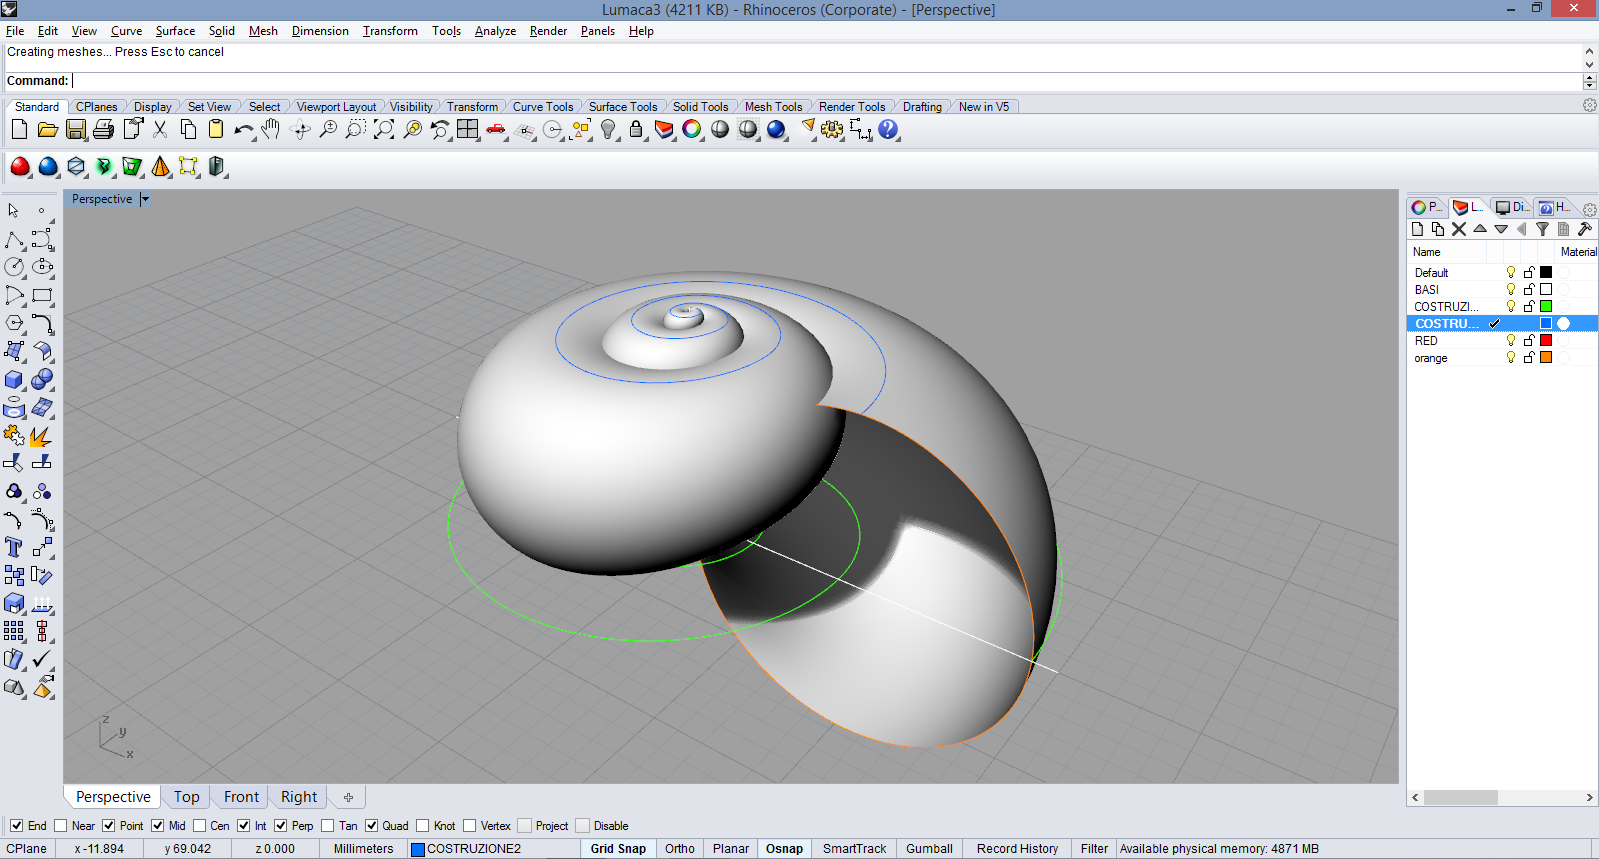
10) Convert into mesh using the Mash command and give a thickness using the Offset command. Then export as .stl
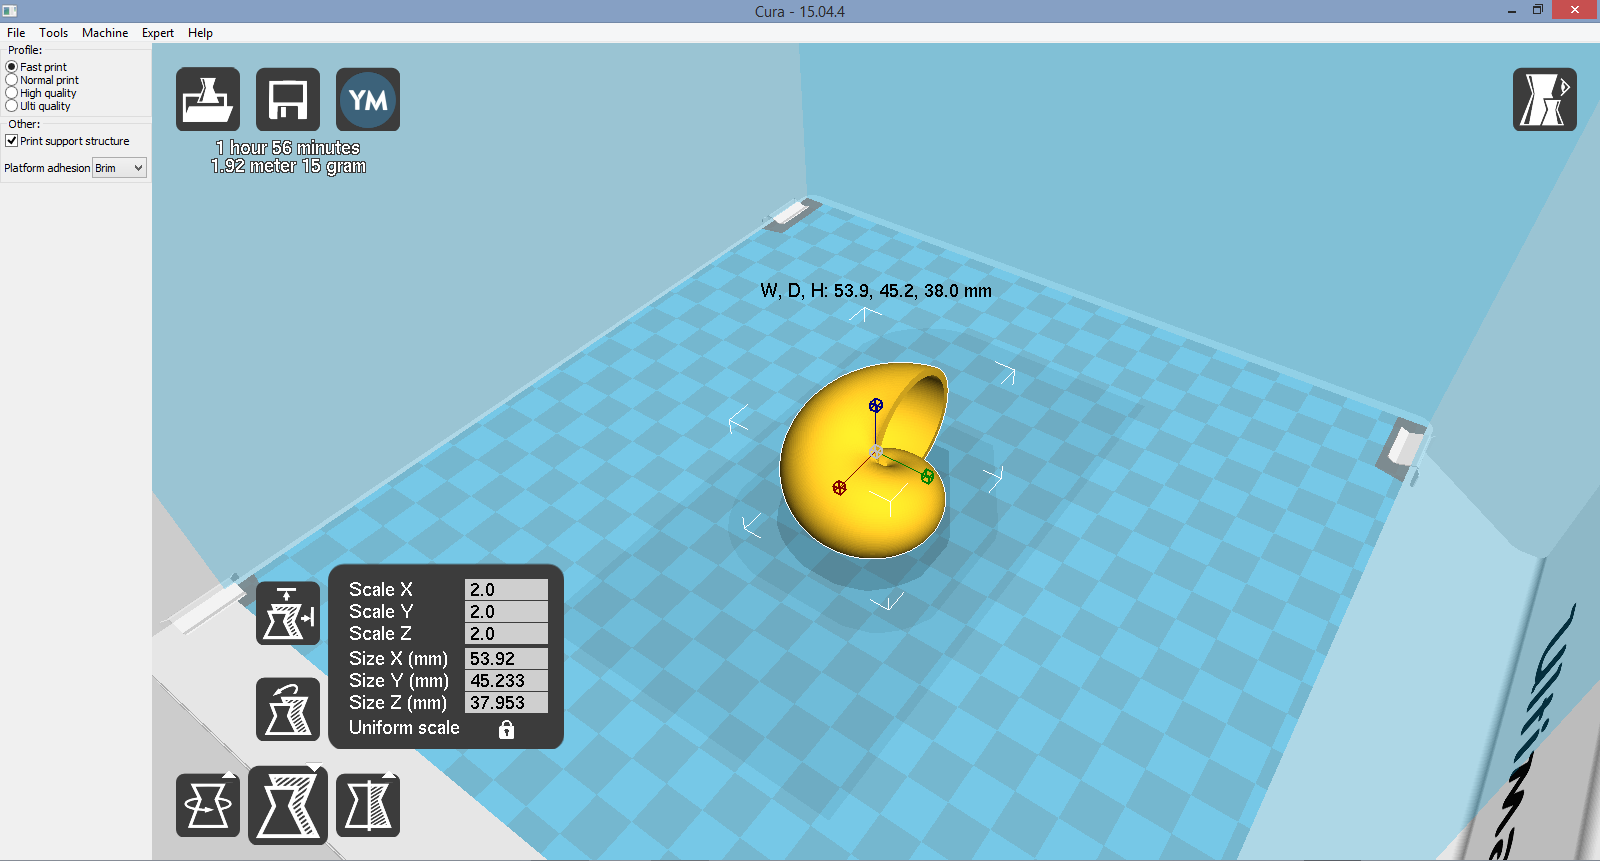
This is a preview of the .stl model (Download STL):
Shell2 by wakitowaki on Sketchfab
After this, i've used Cura to generate the gcode to print the model.
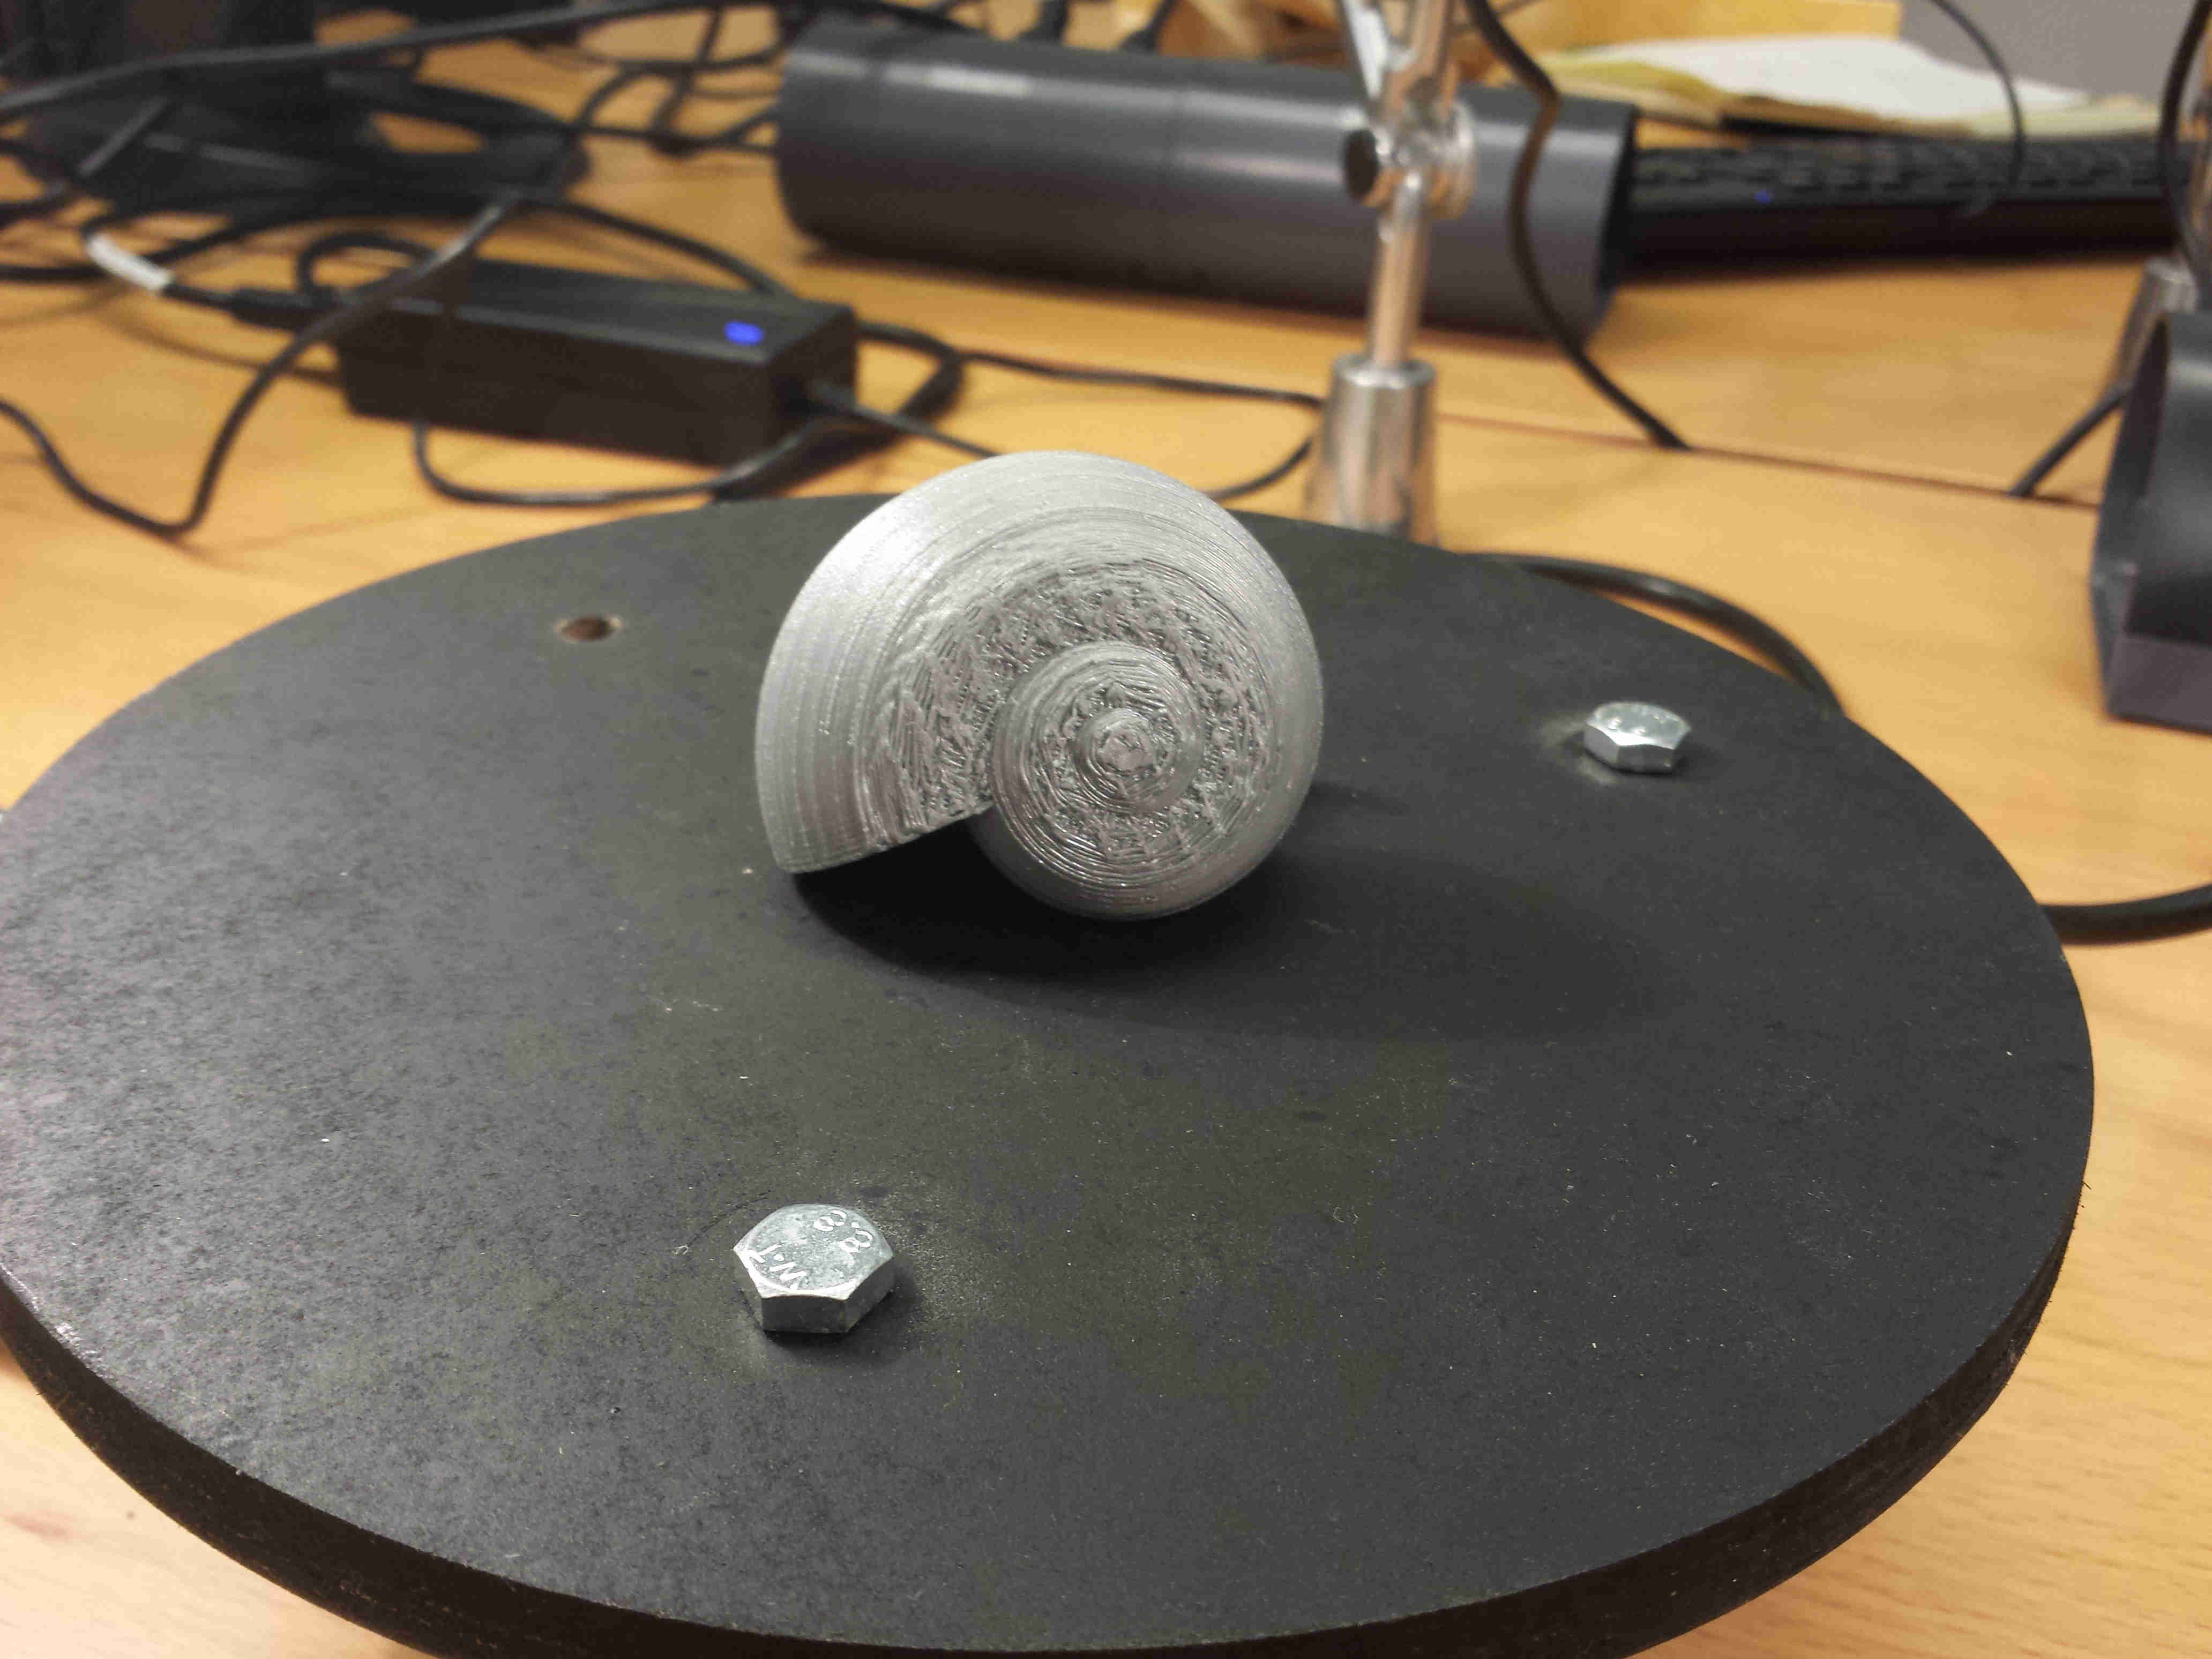
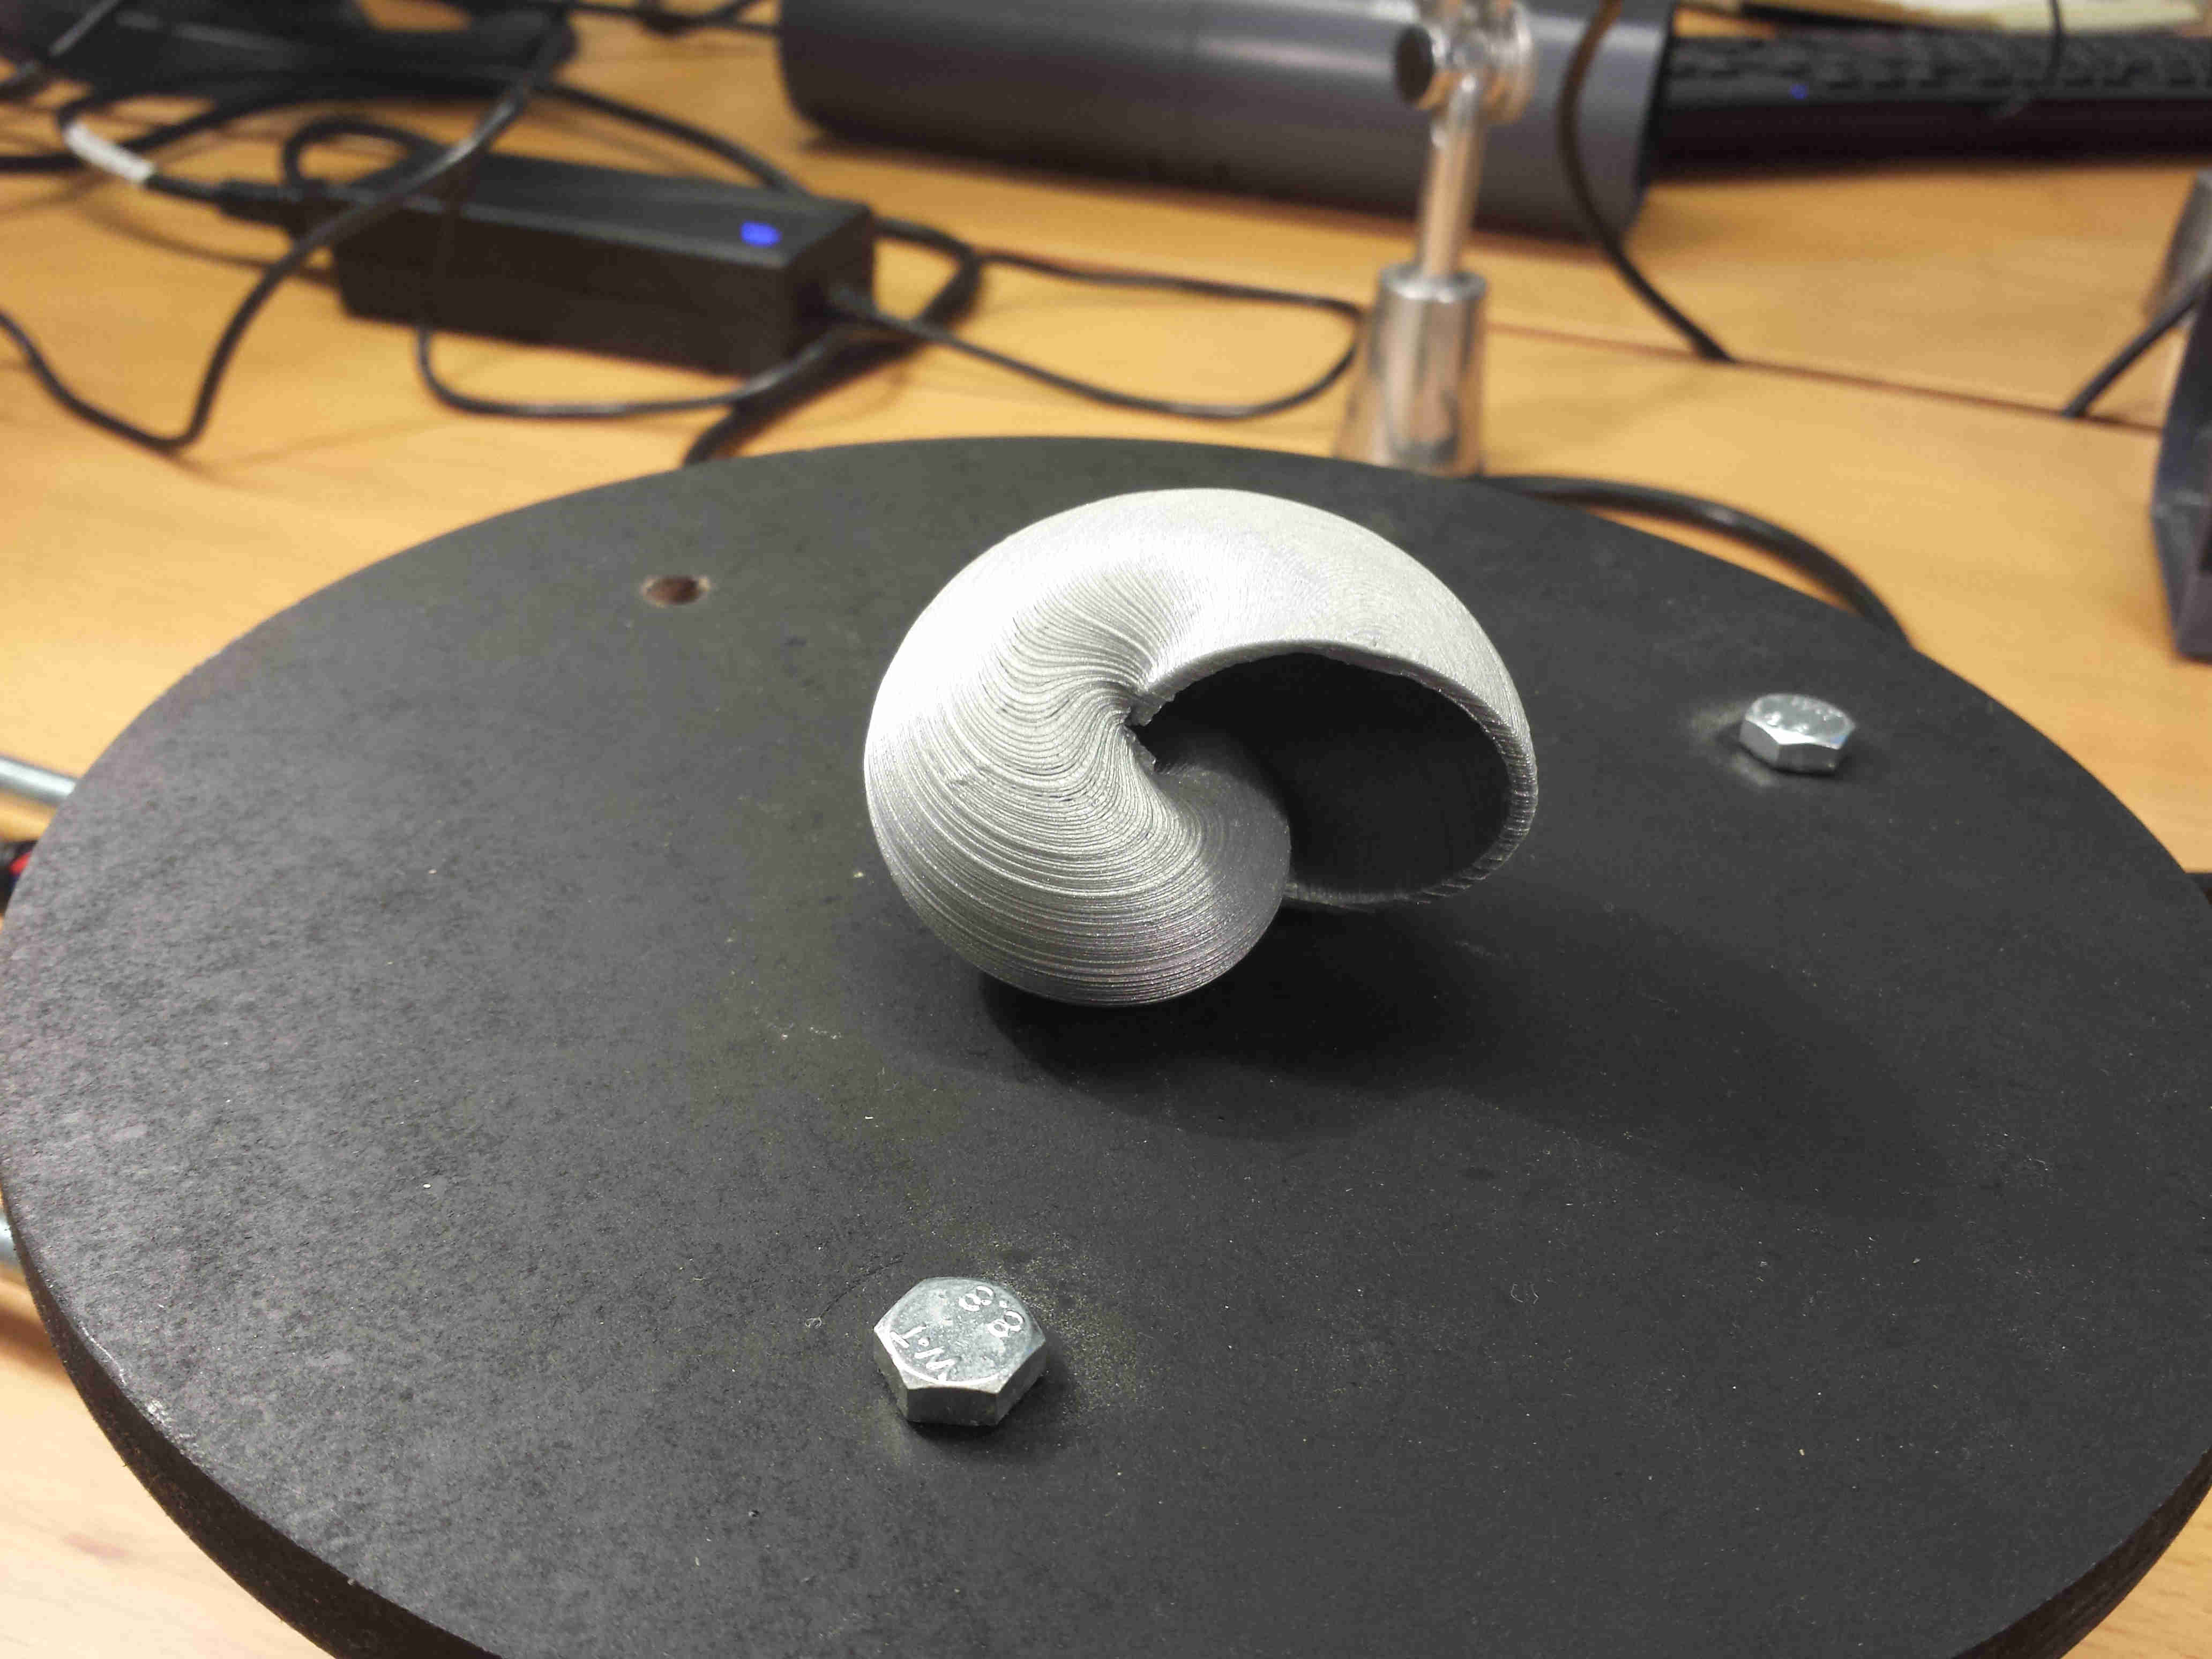
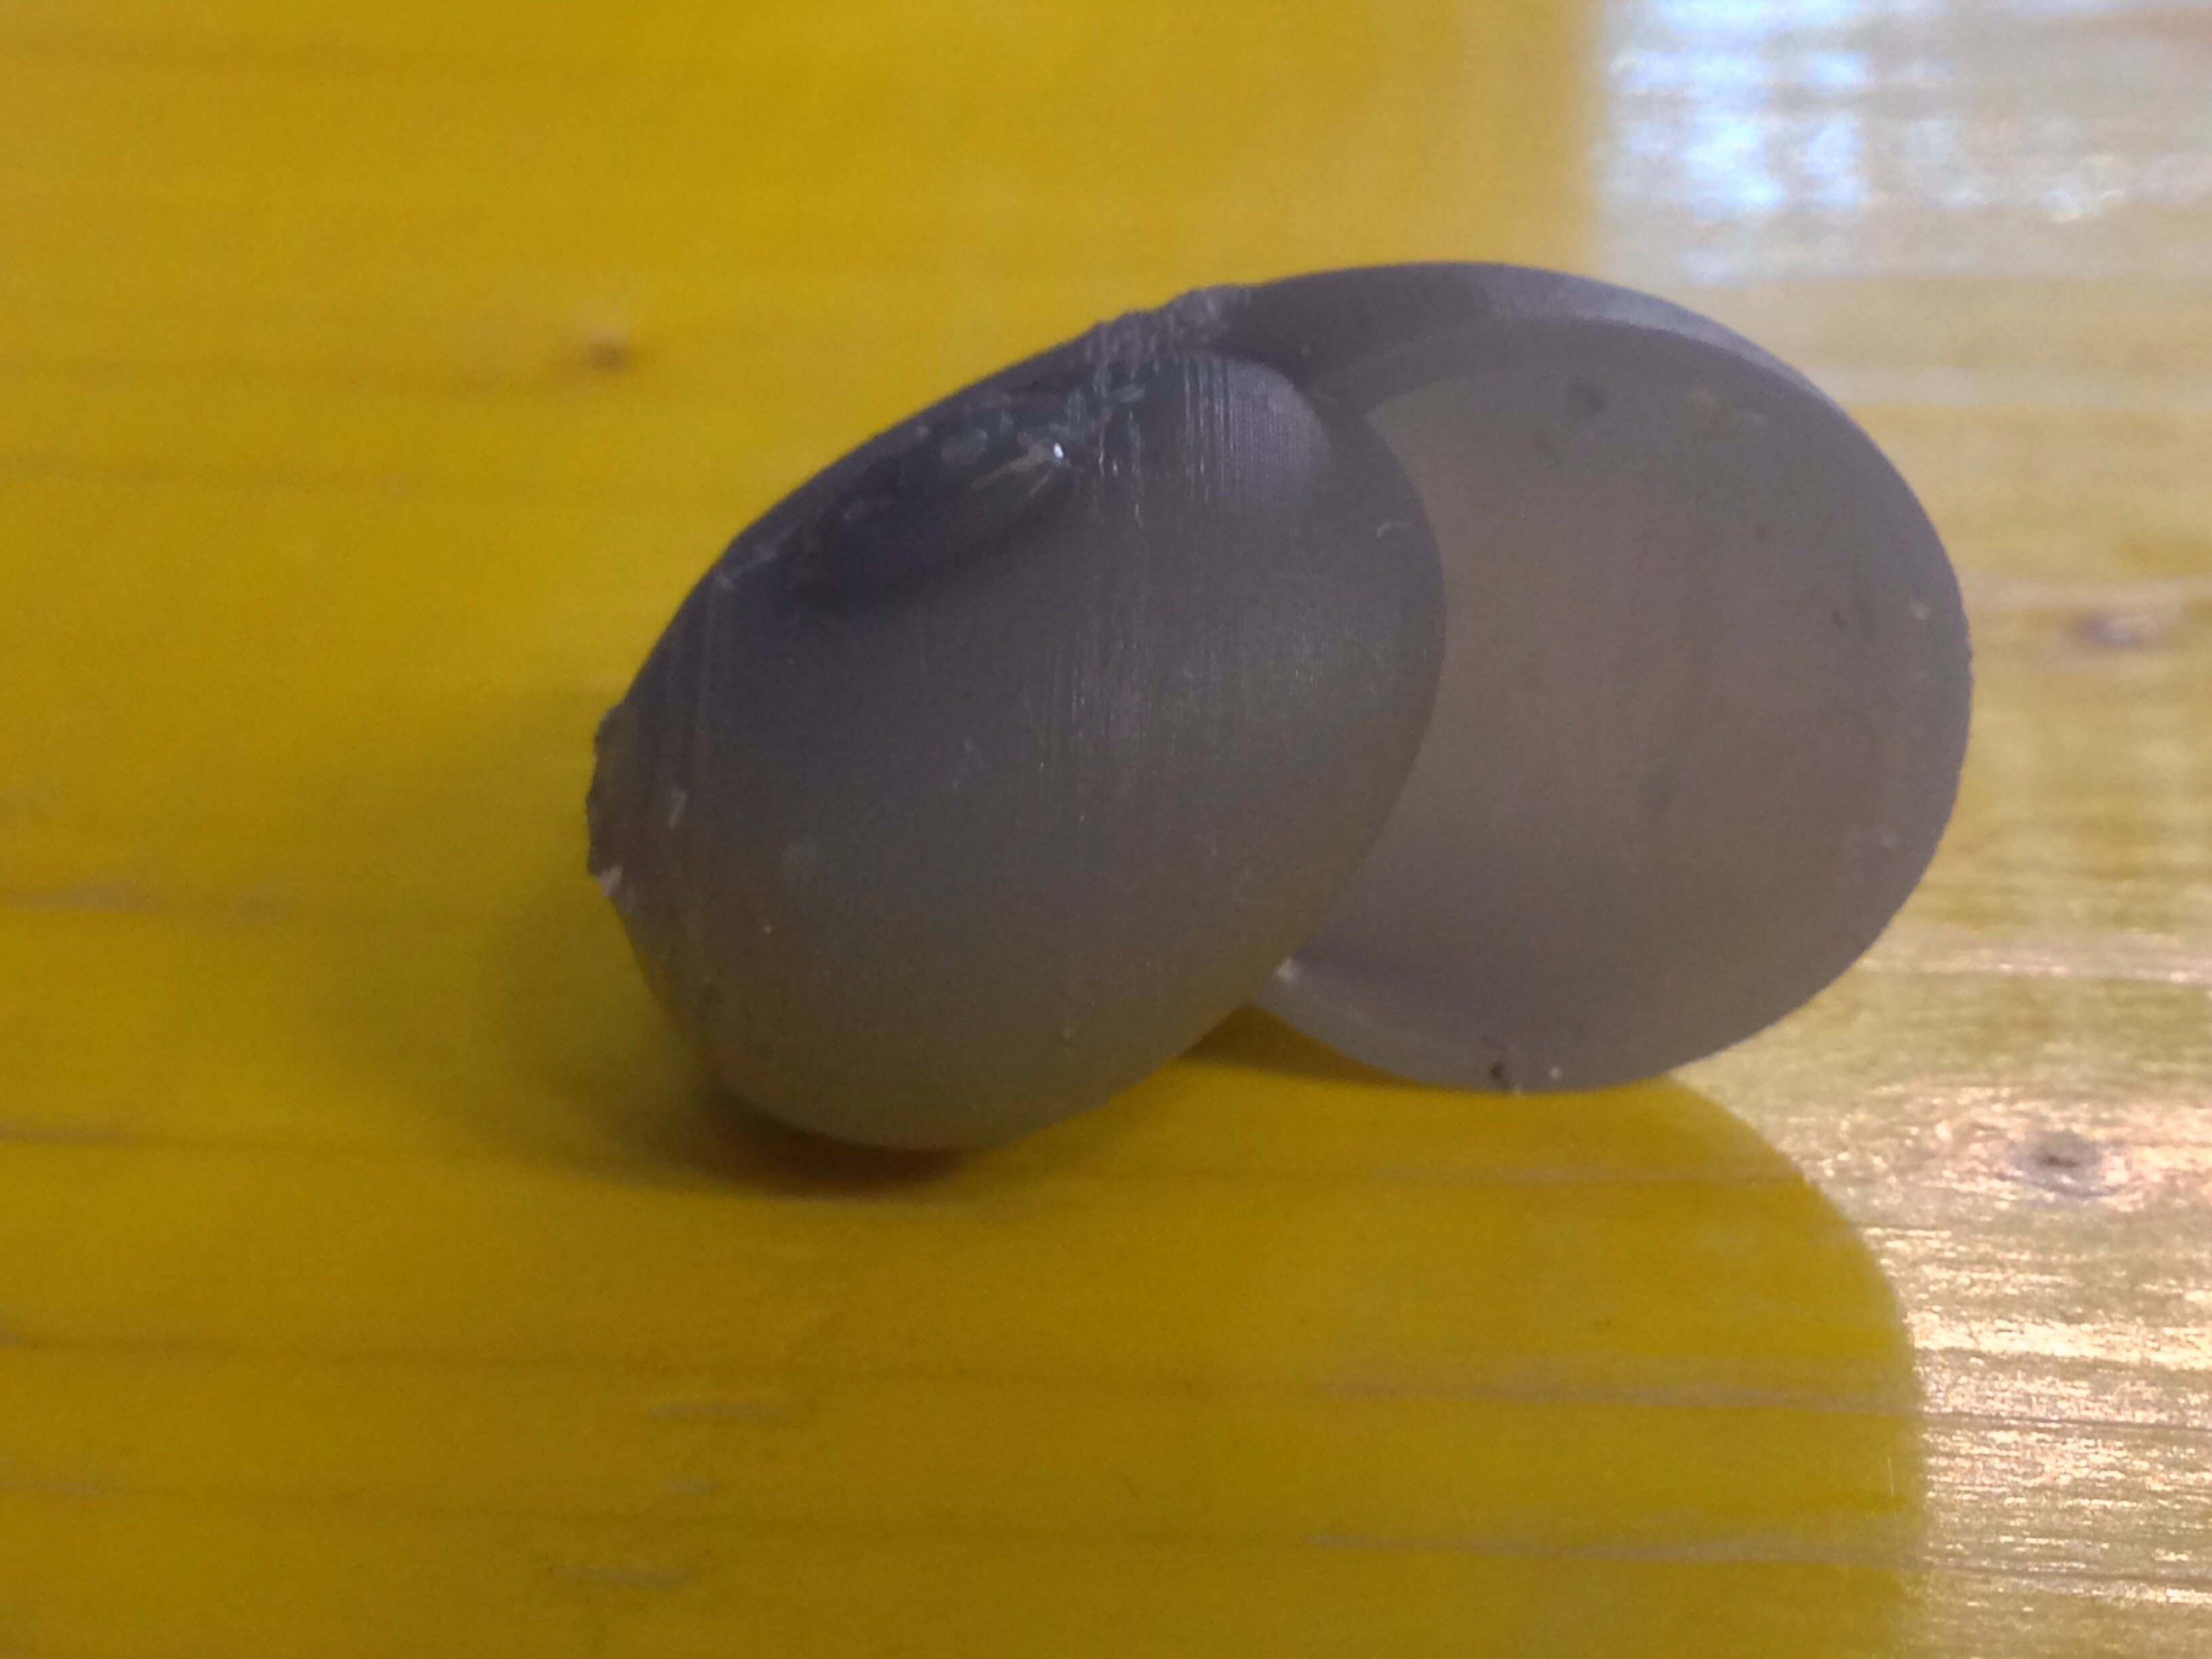
Finally, here is the final object printed with the Ultimaker 2:
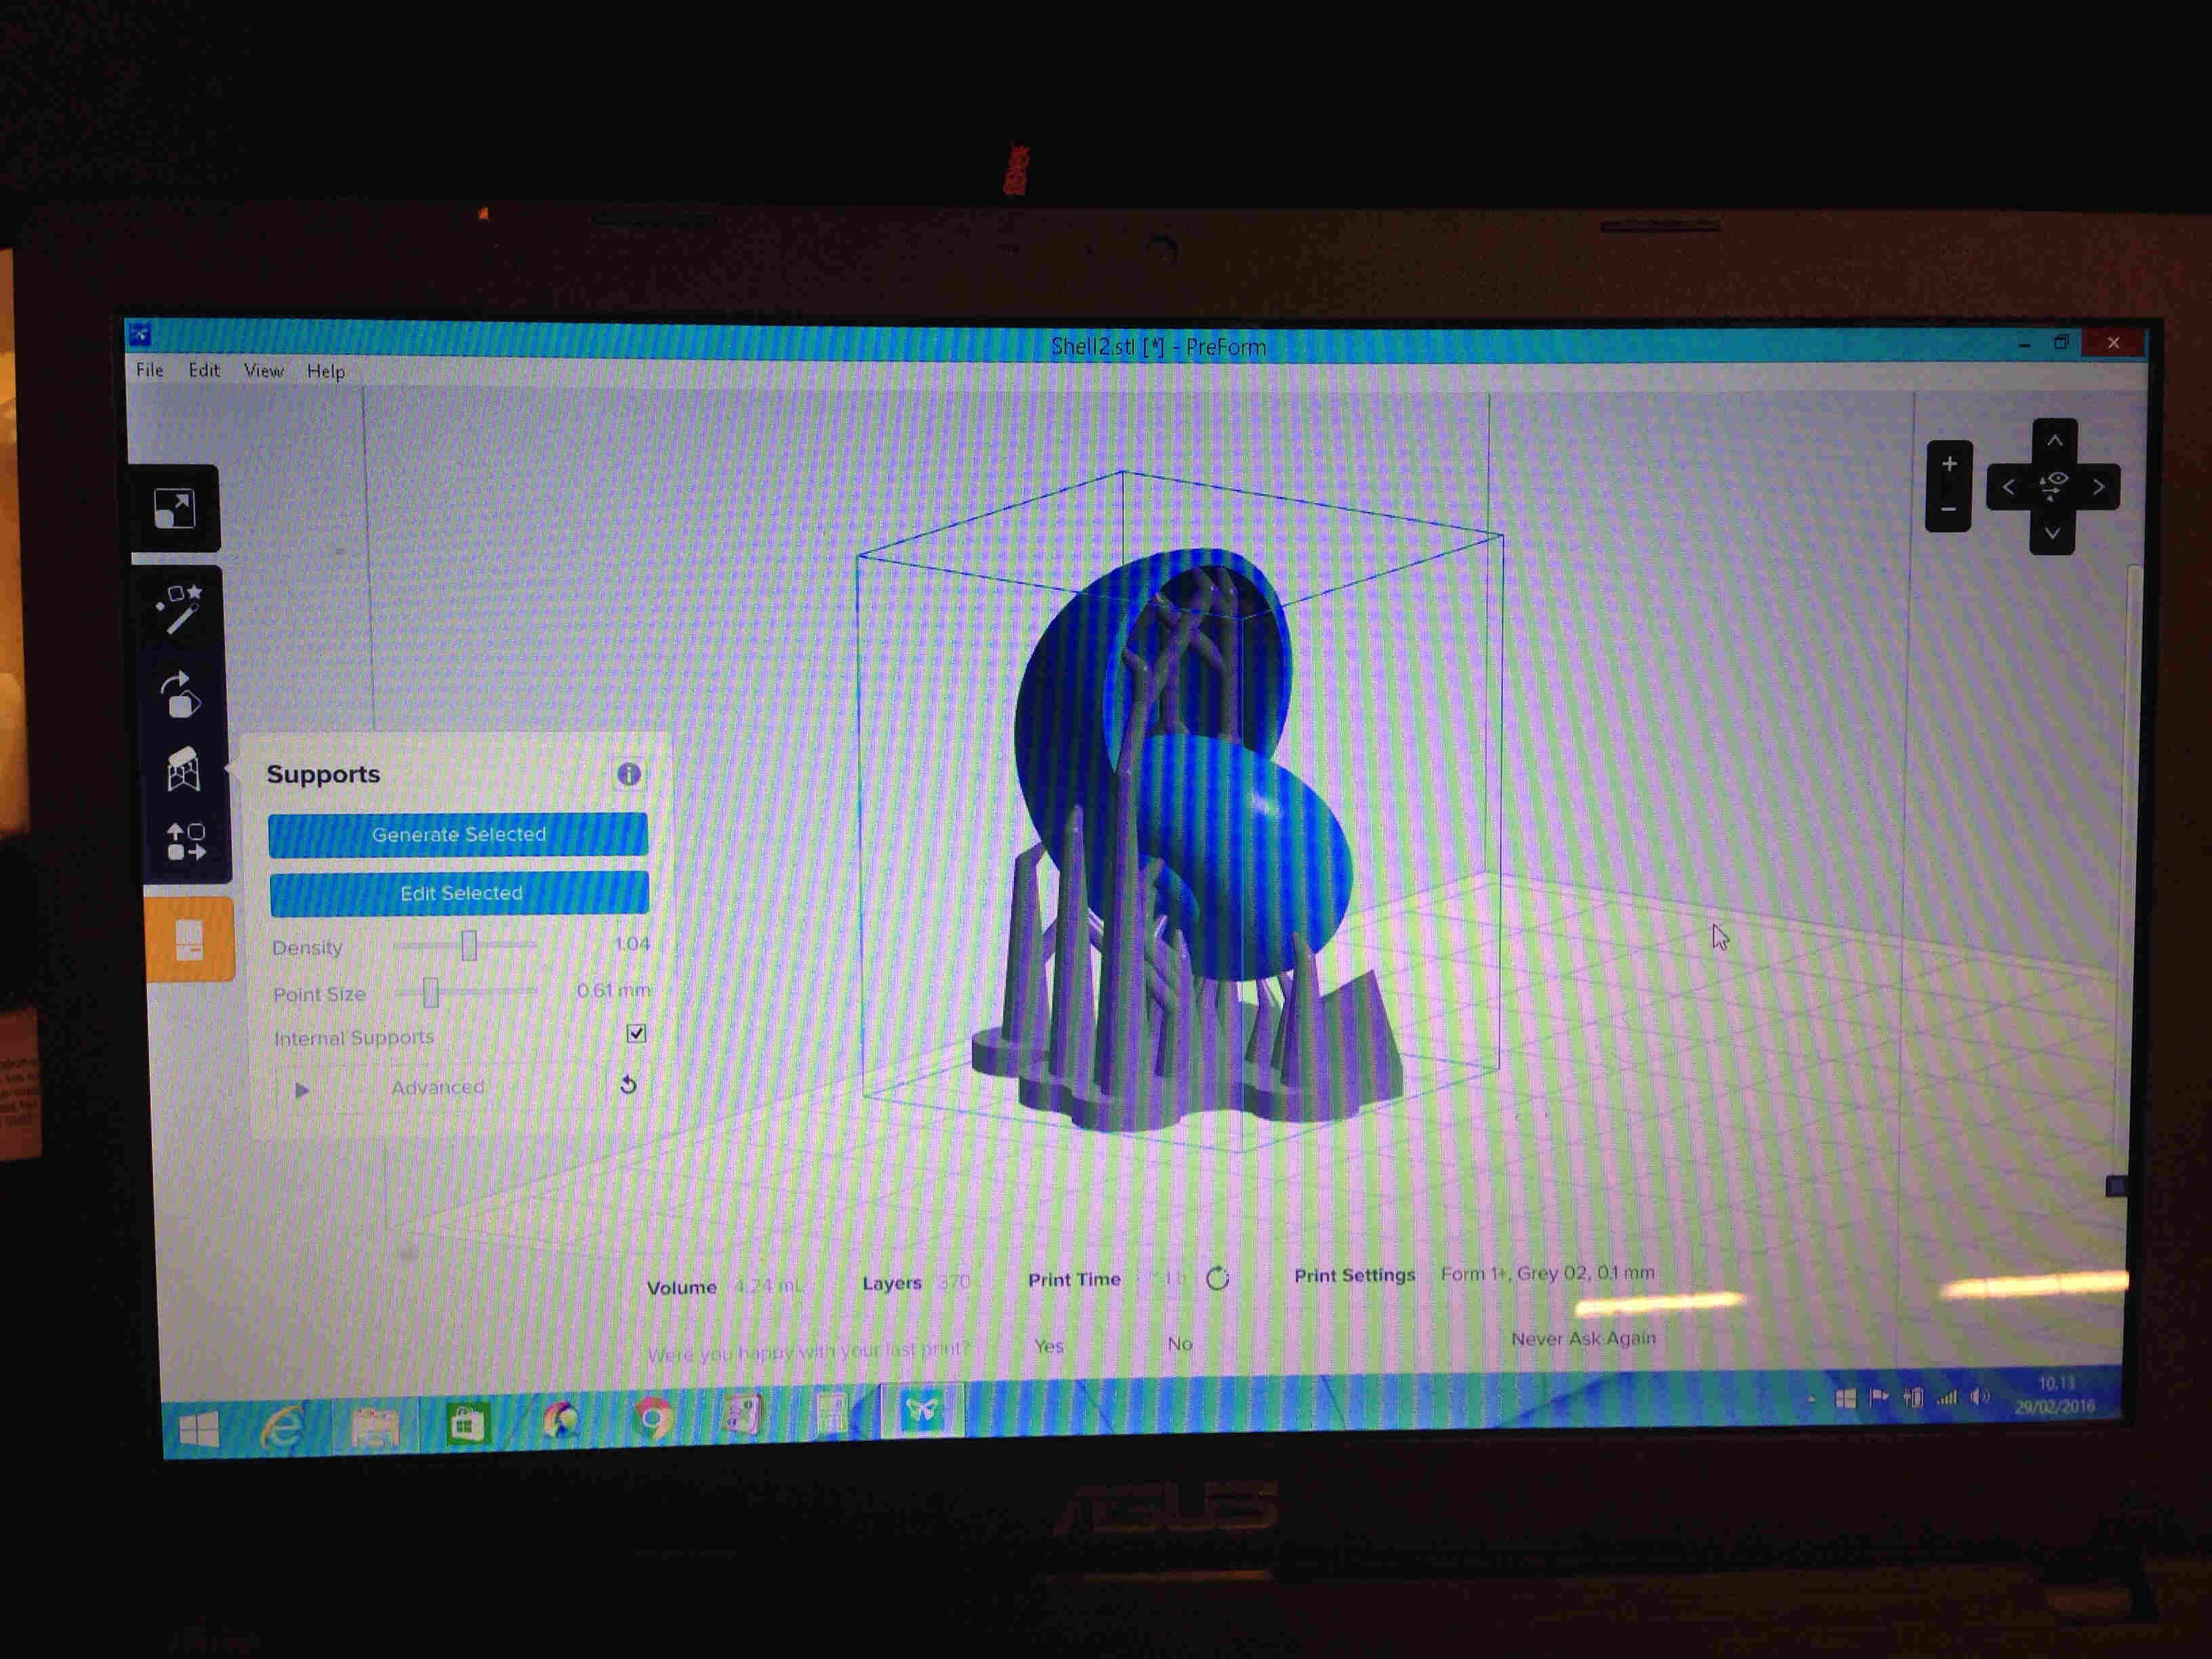
Moreover, our instructor has a FormLab inside his Fab Lab so i've asked to him if is possible to print the model also with that printer.
At first, i've used the PreForm software to add some supports to the model. Thanks to the live preview, it was really easy to adjust the density and the shape of the supports.
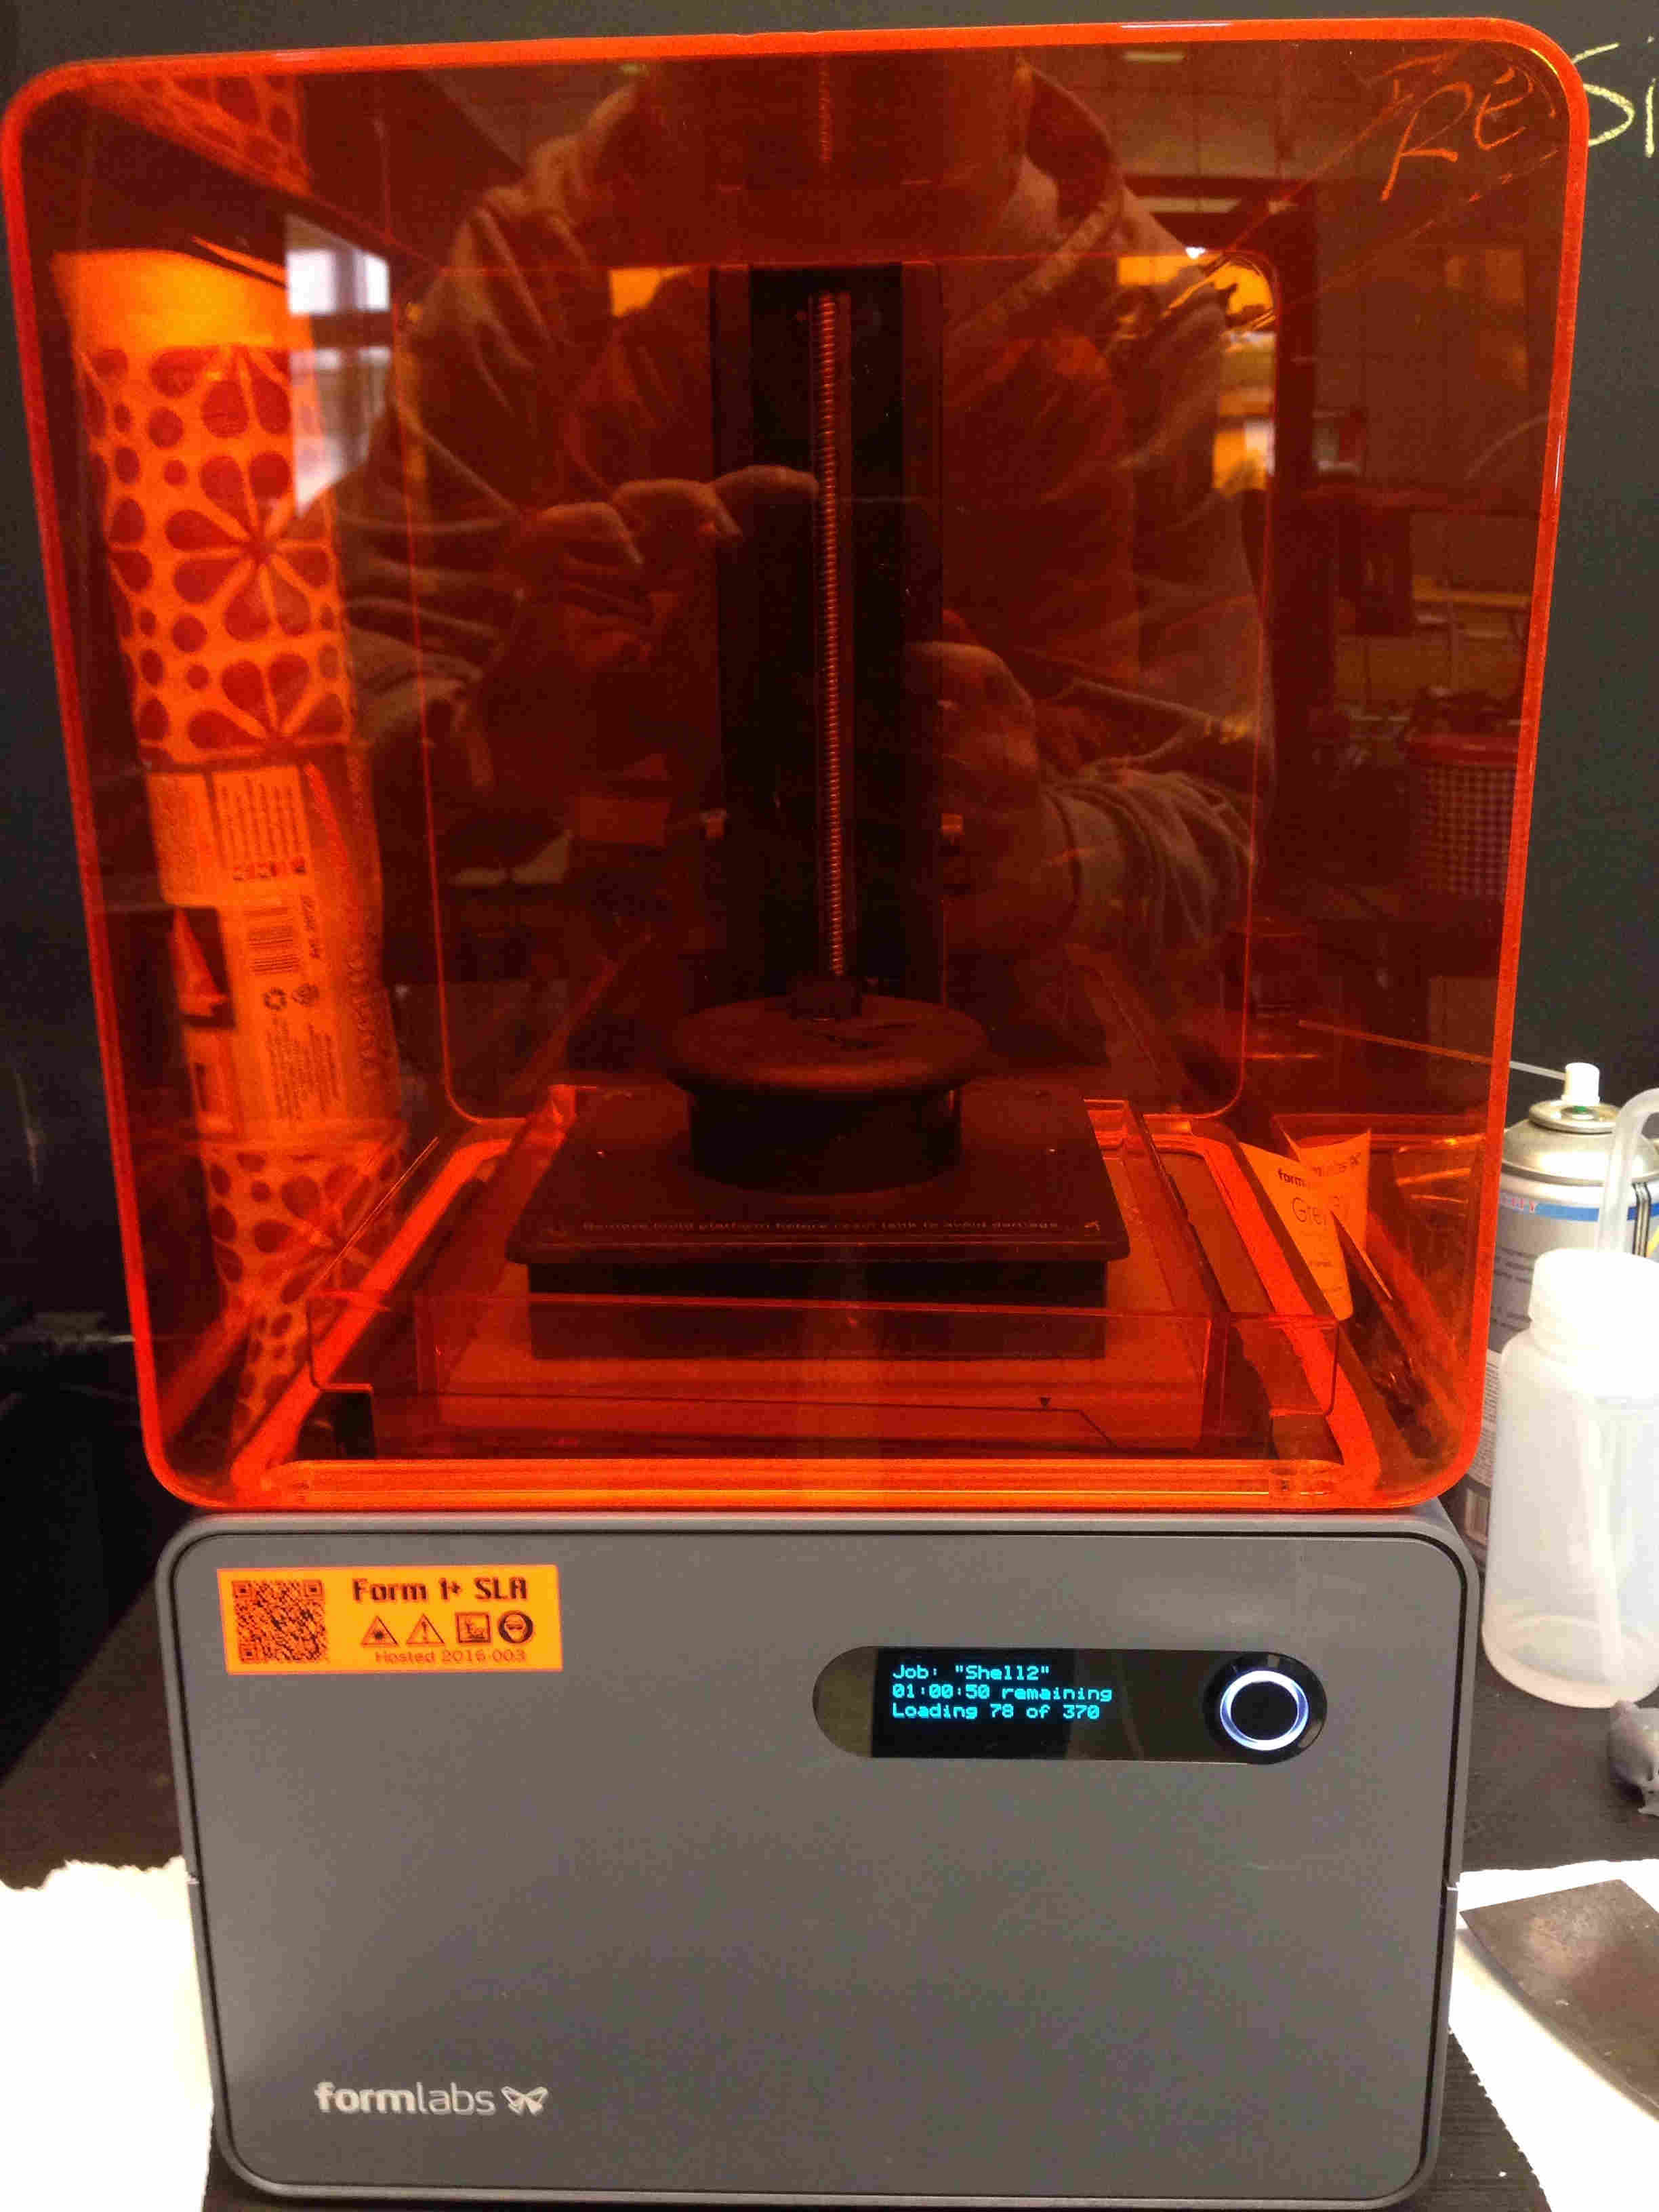
The printing required an hour:
After the printing phase finished, i've removed the object from the metal plate of the machine and i've putted it in a solution of isopropylic alchool to clean the resin in excess.
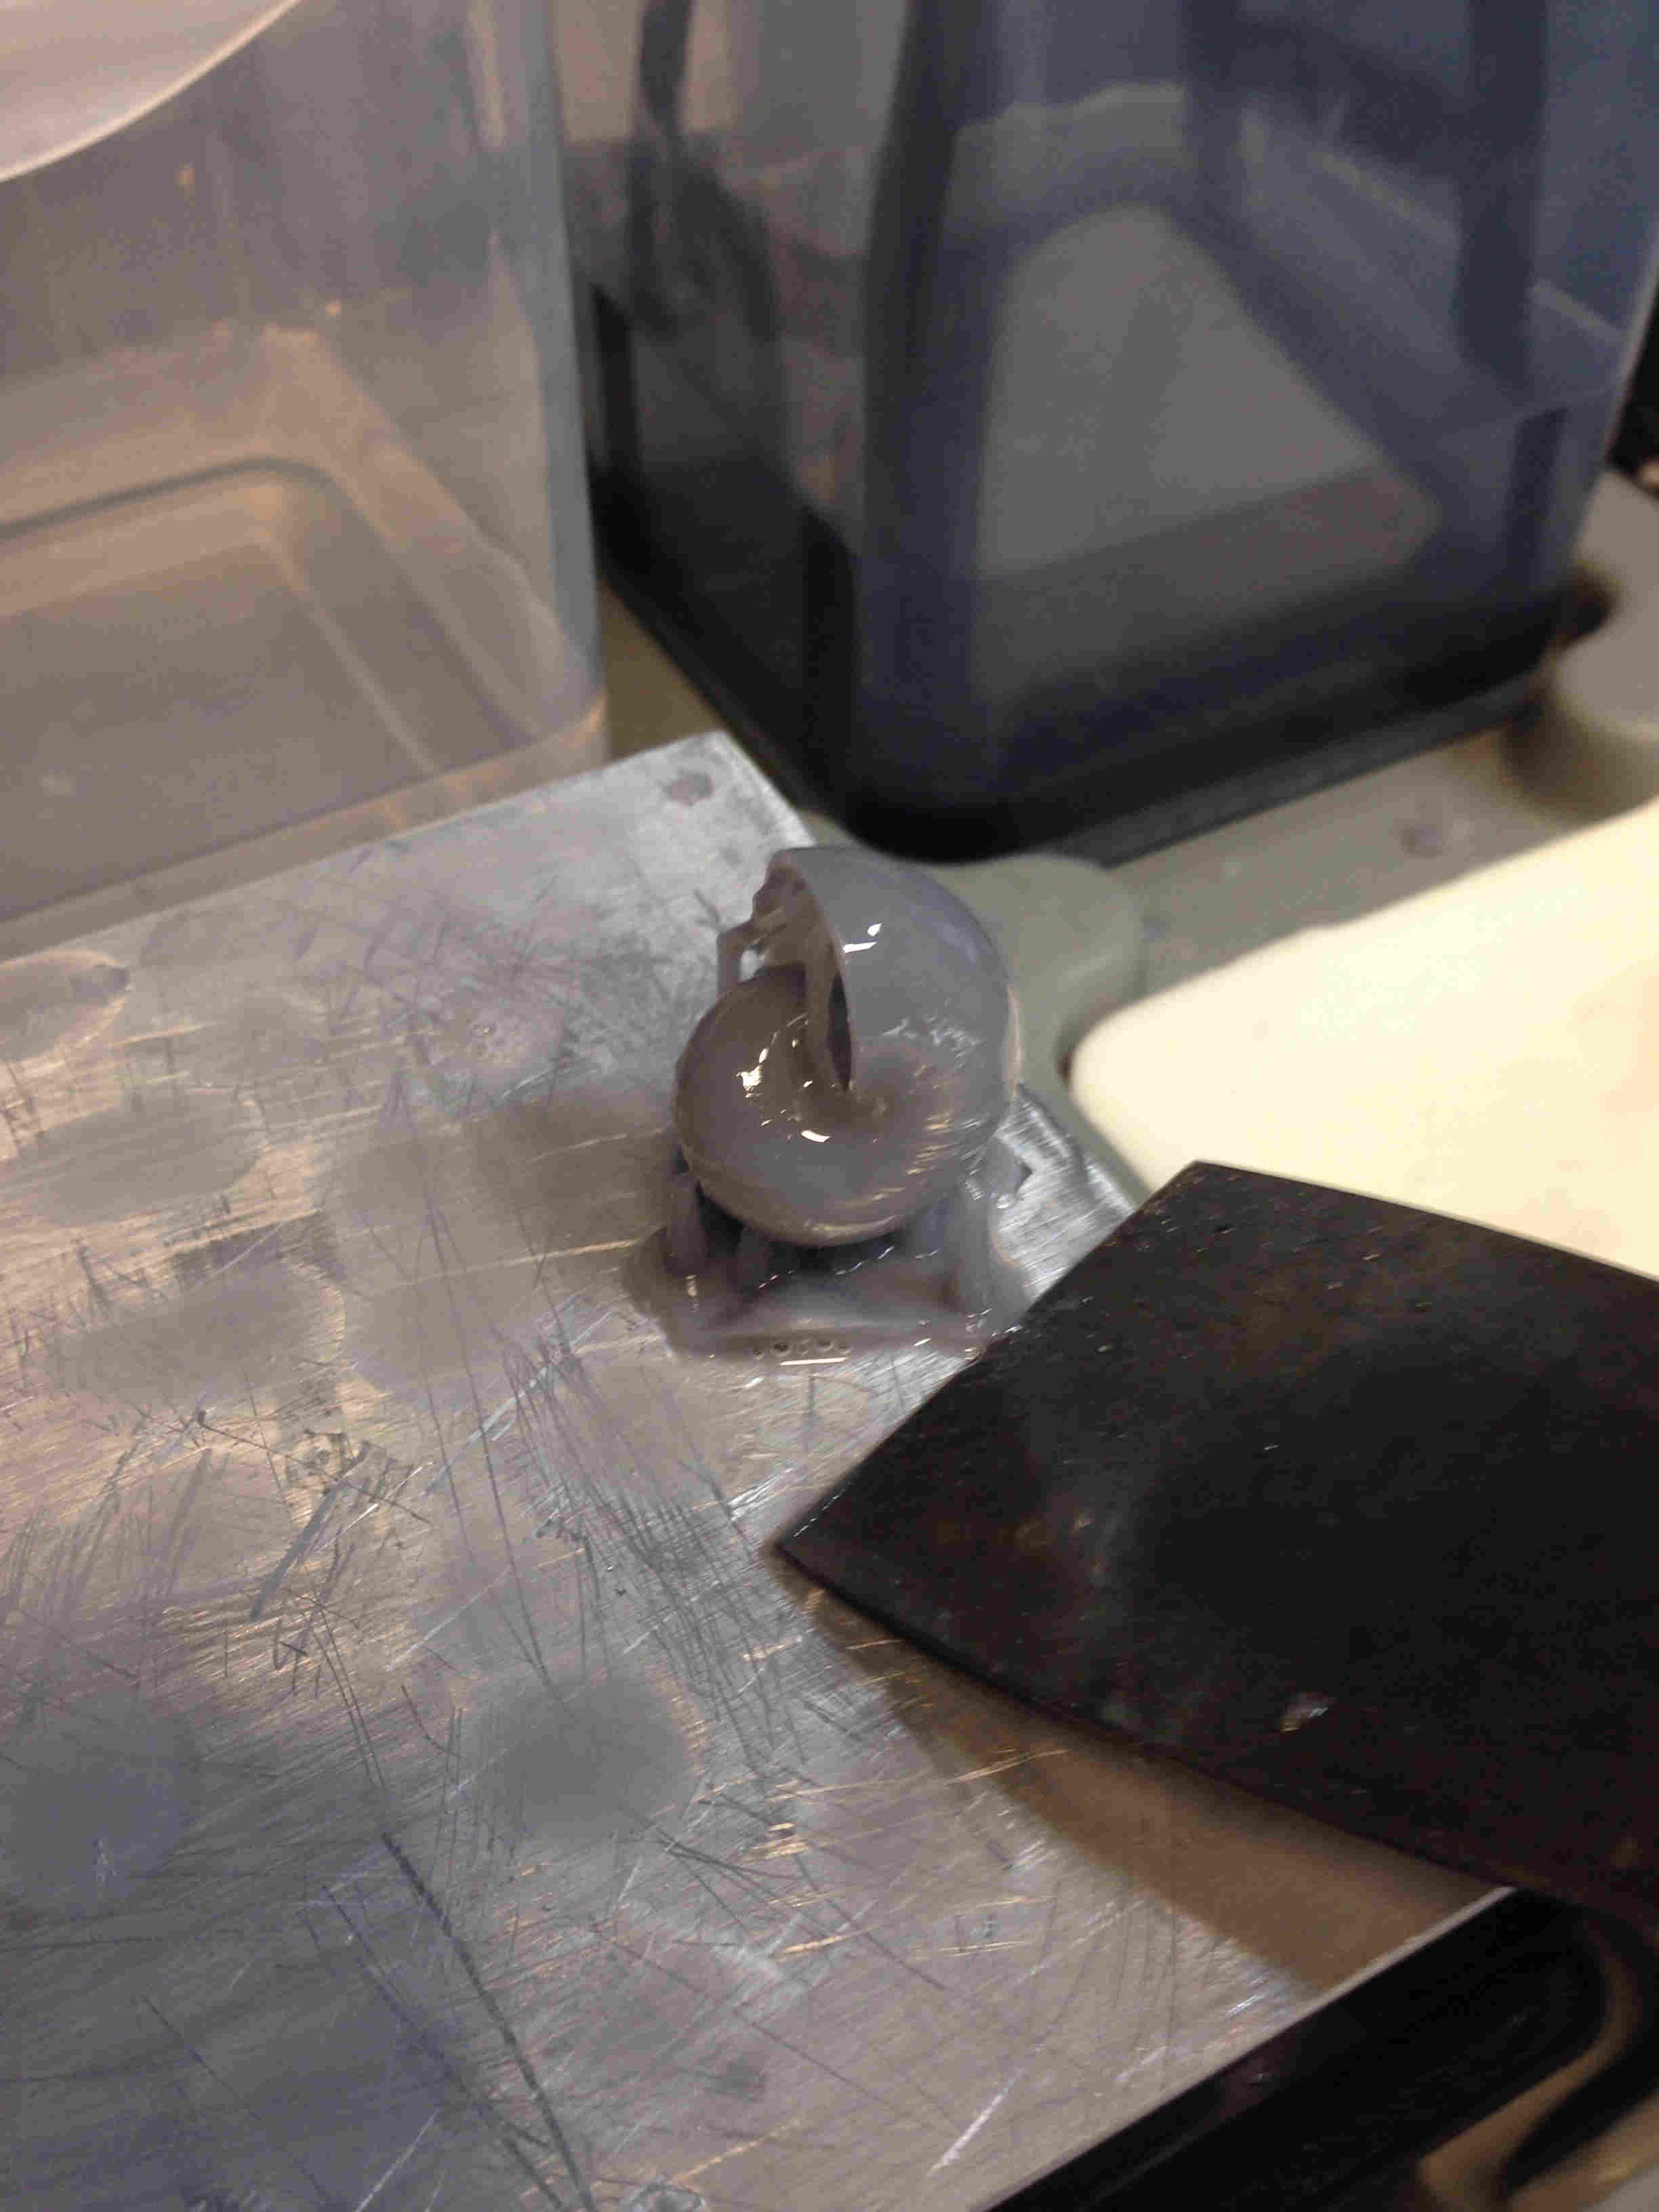
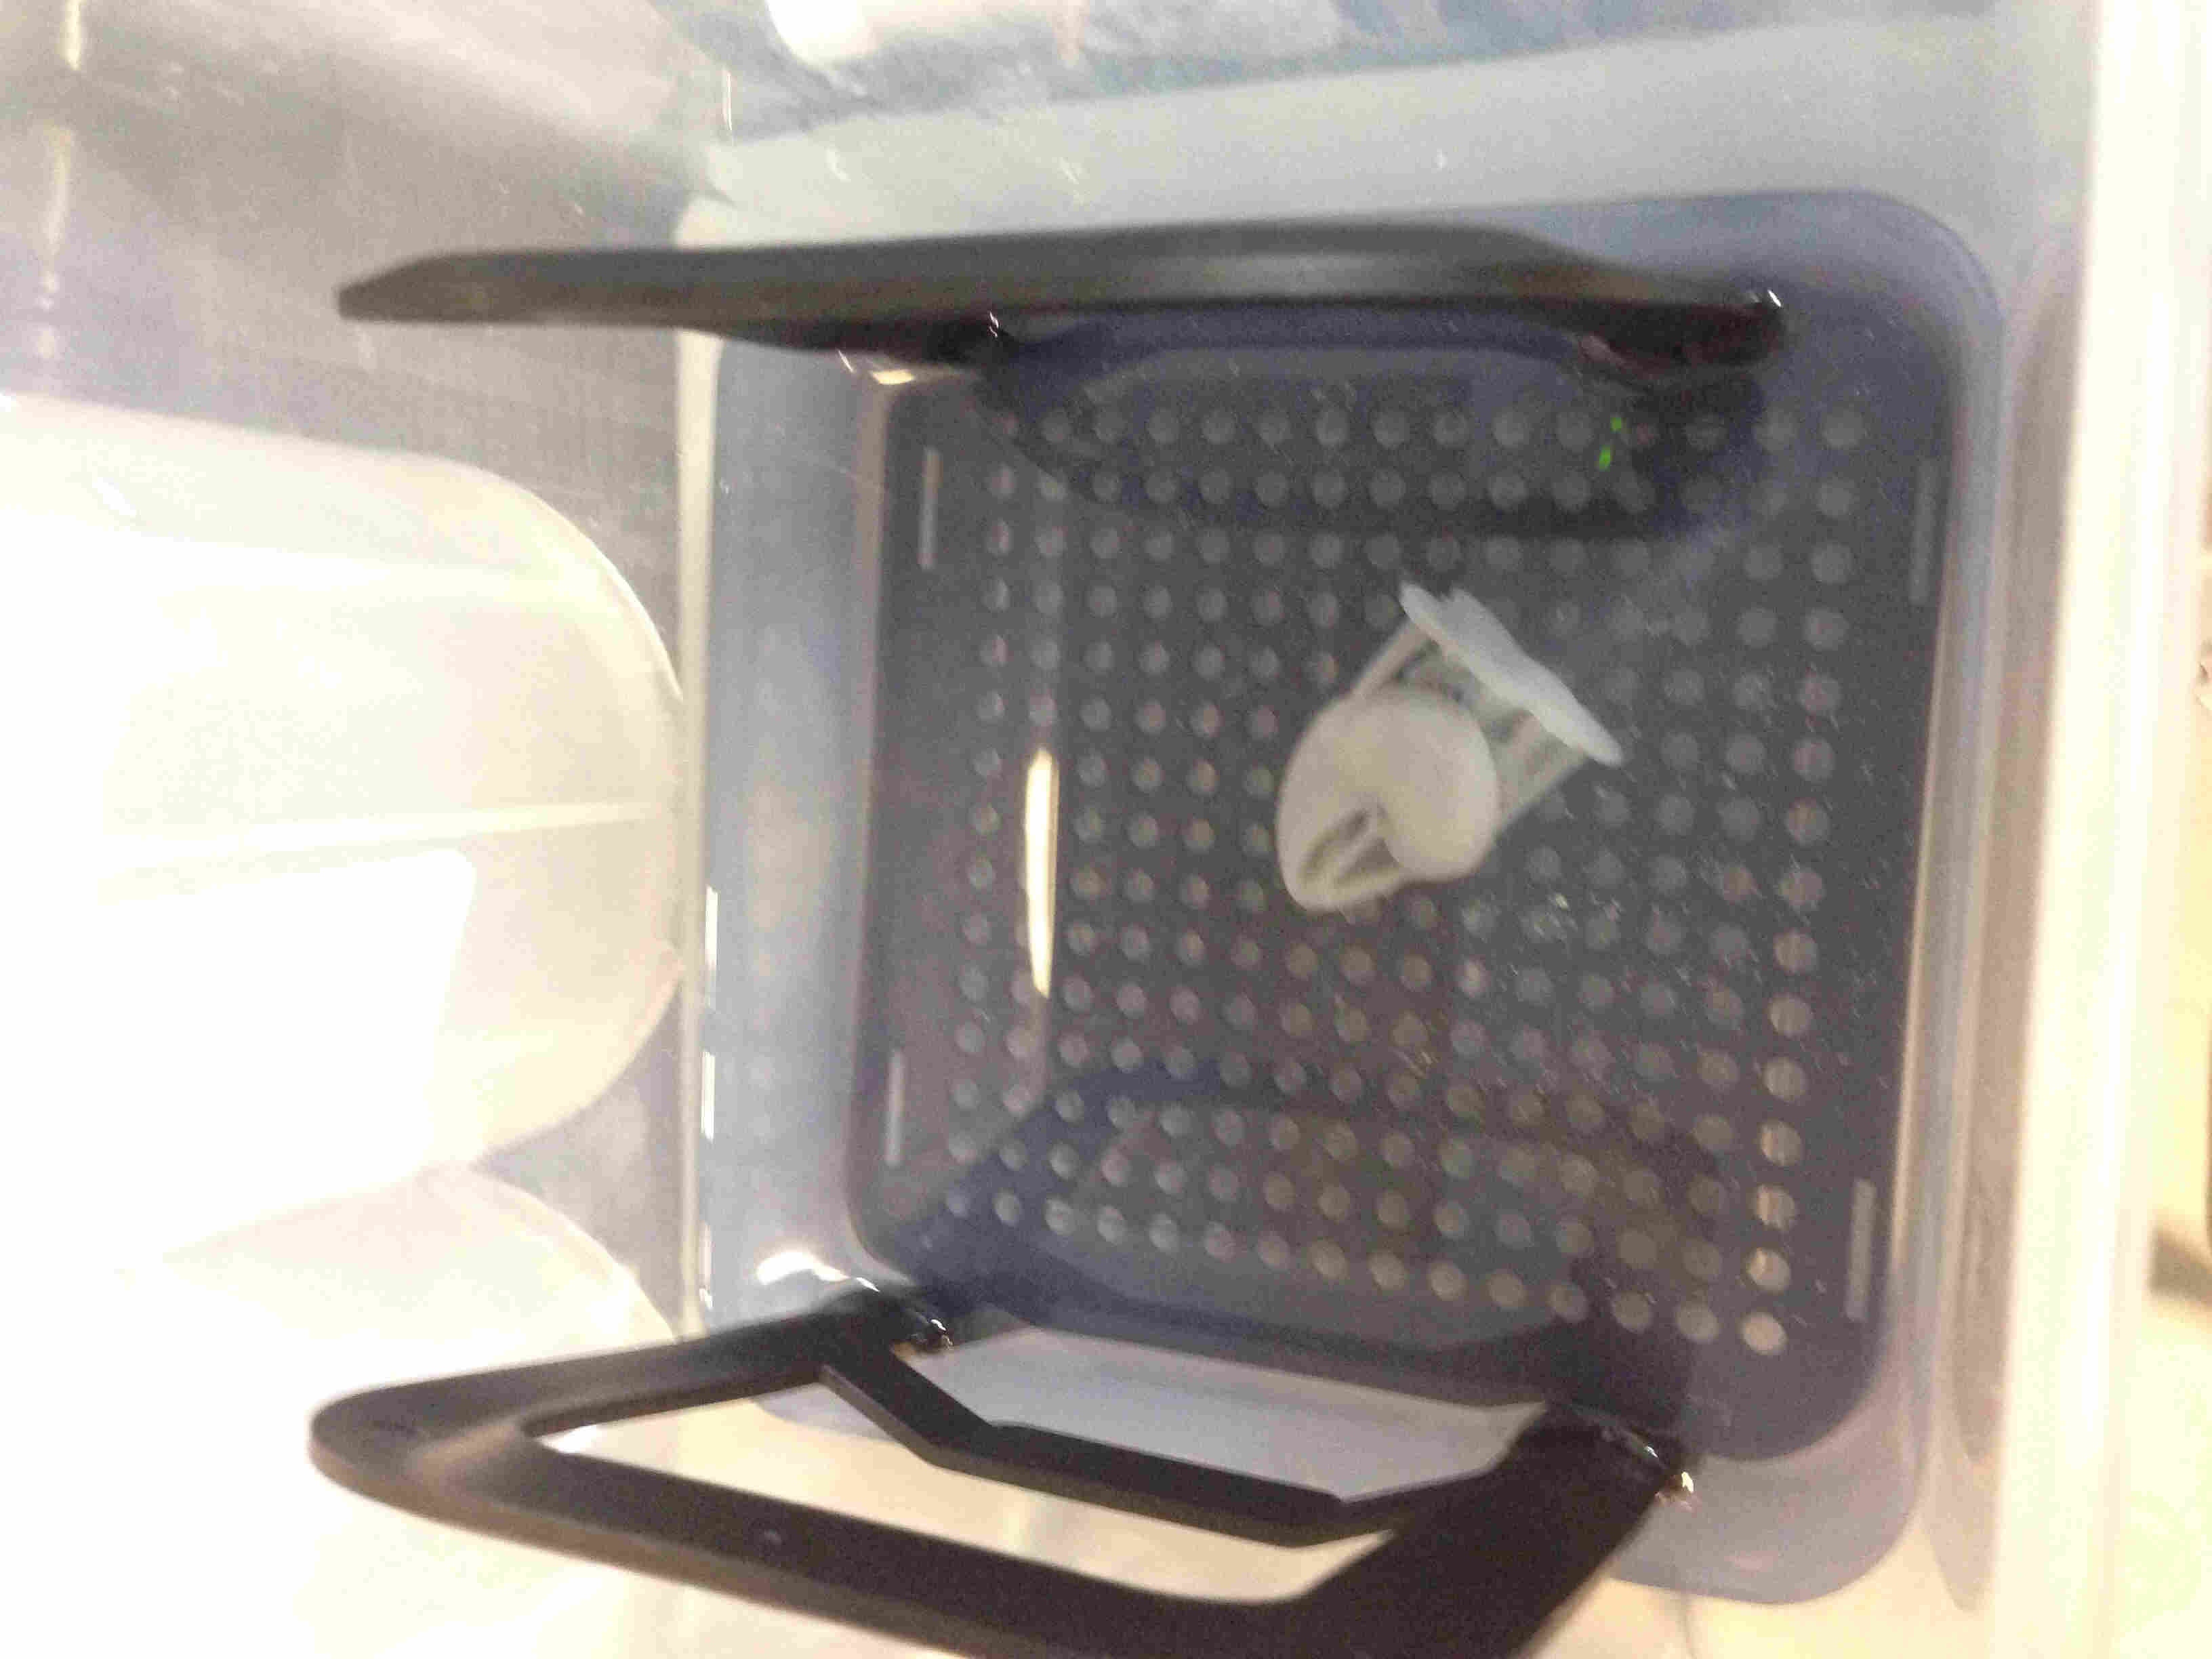
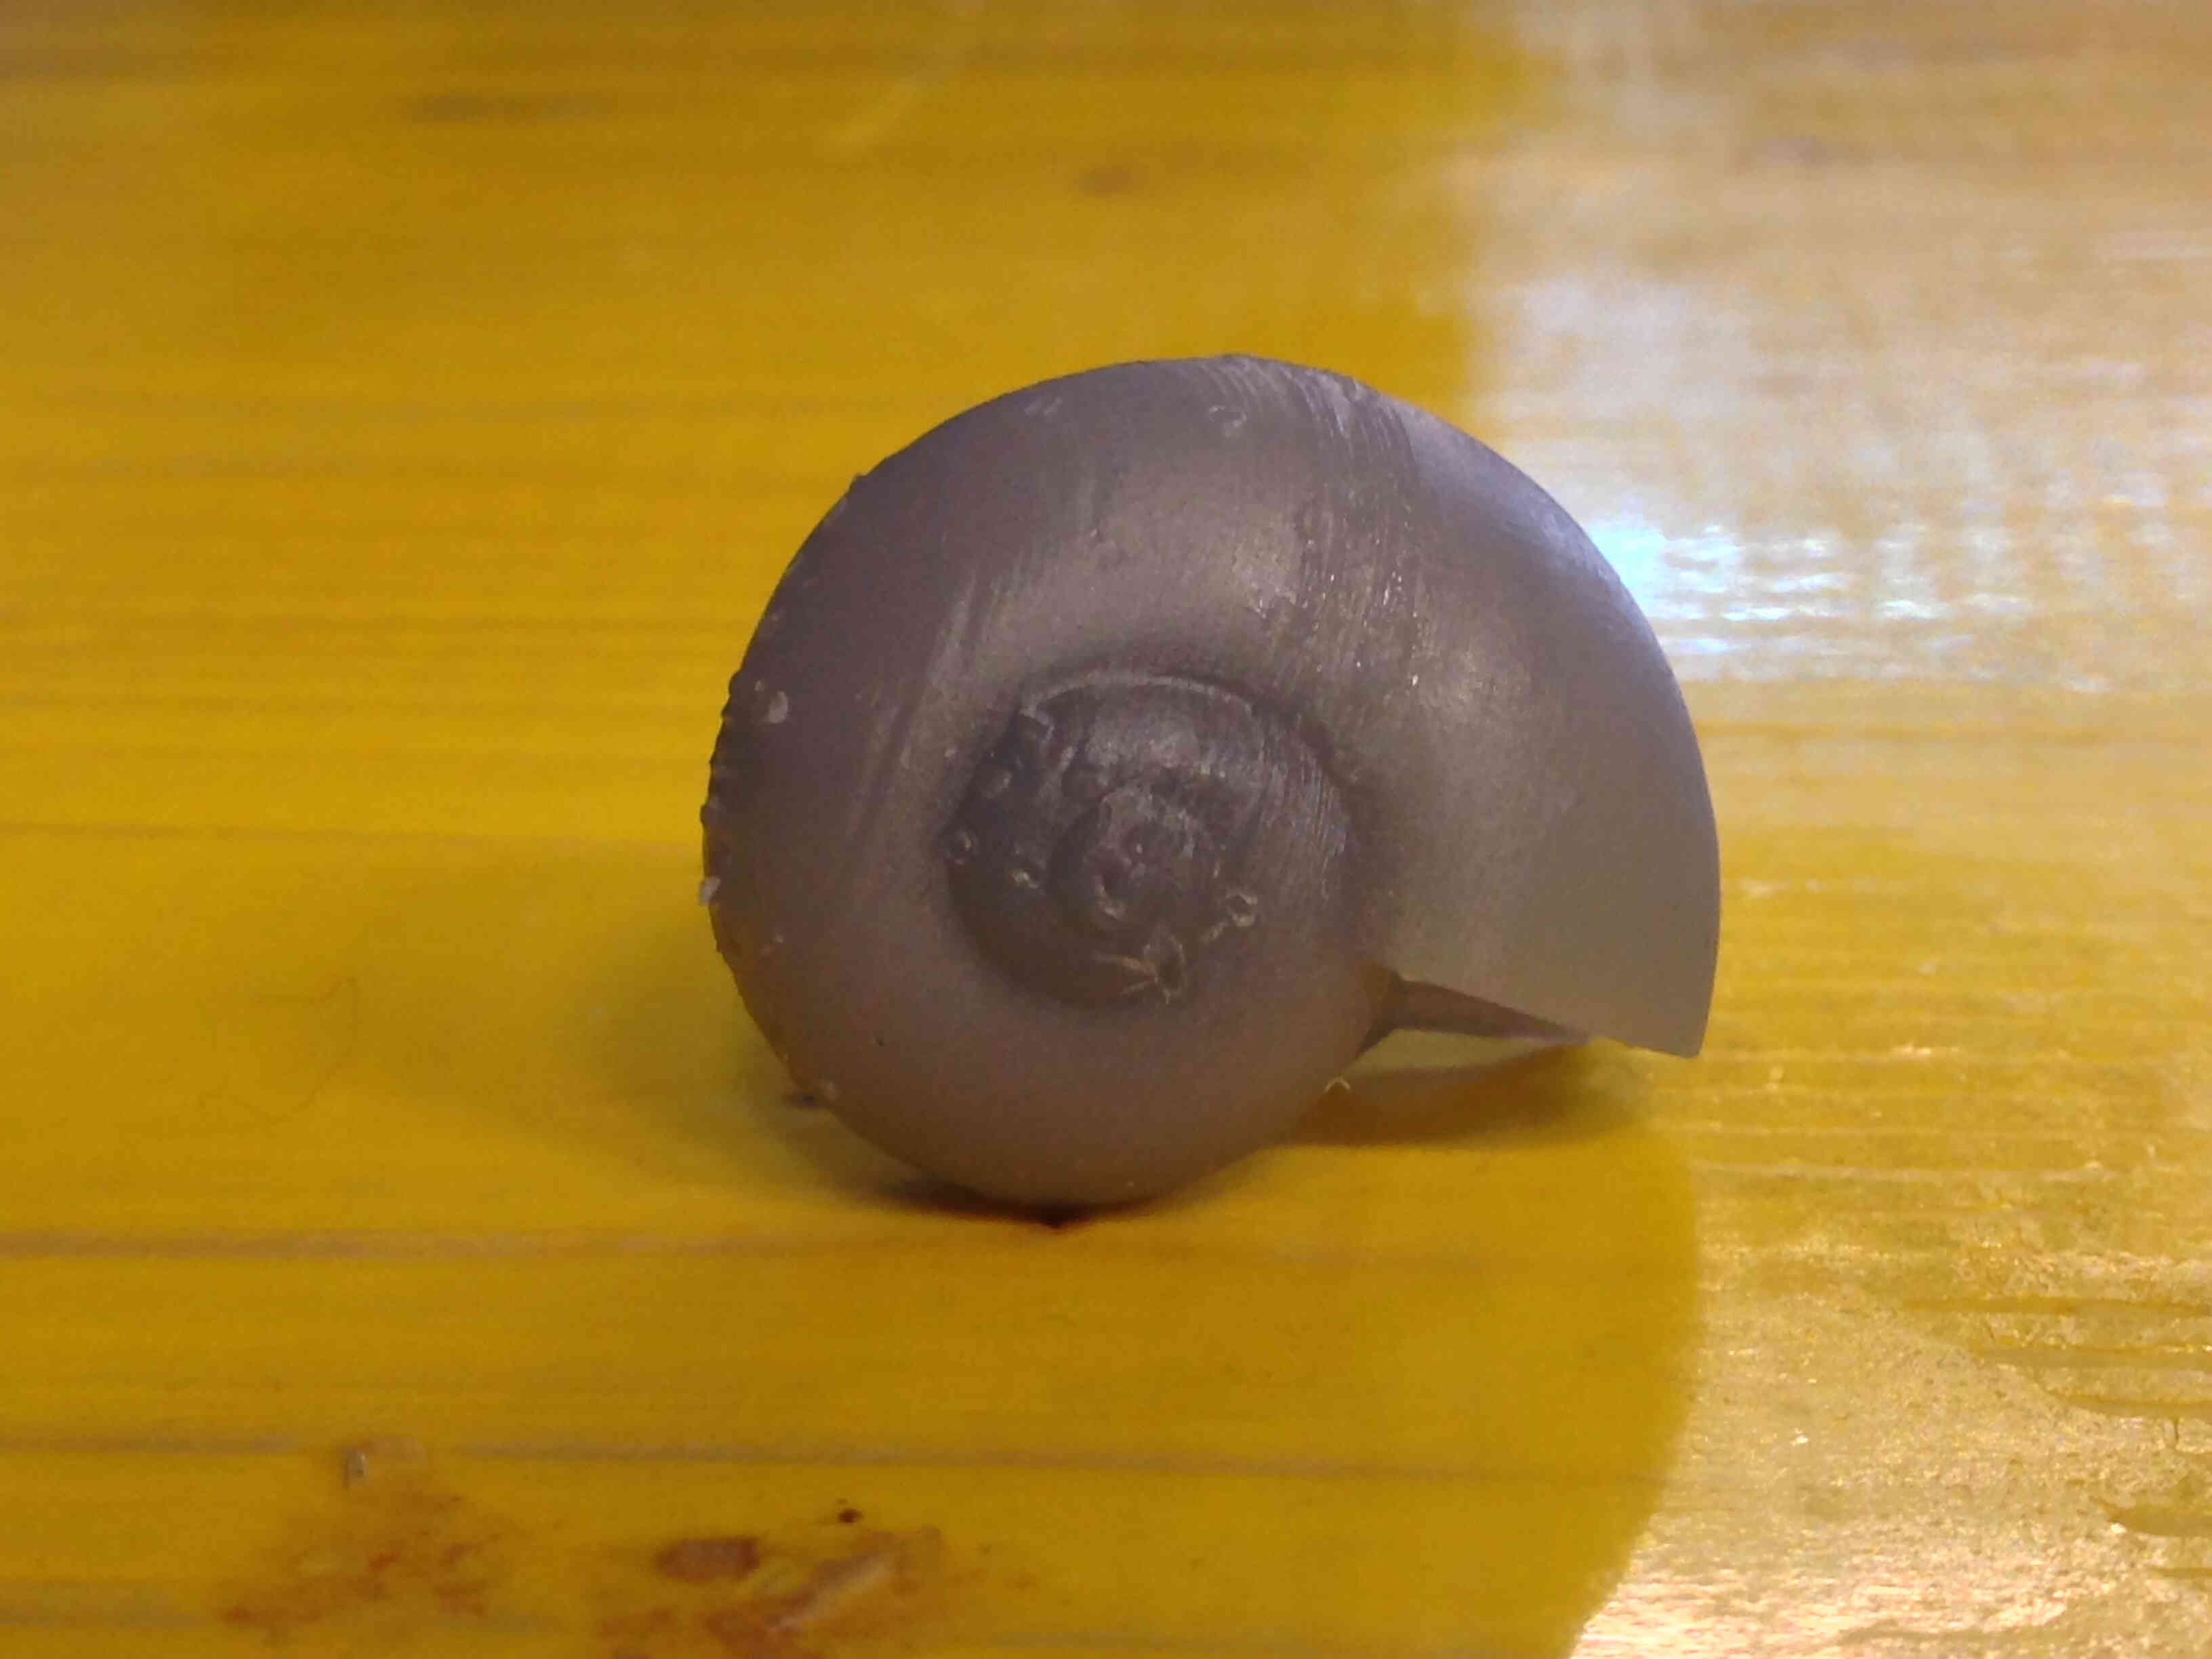
I've waited until the model dry completely and i've then started to cut away the supports.

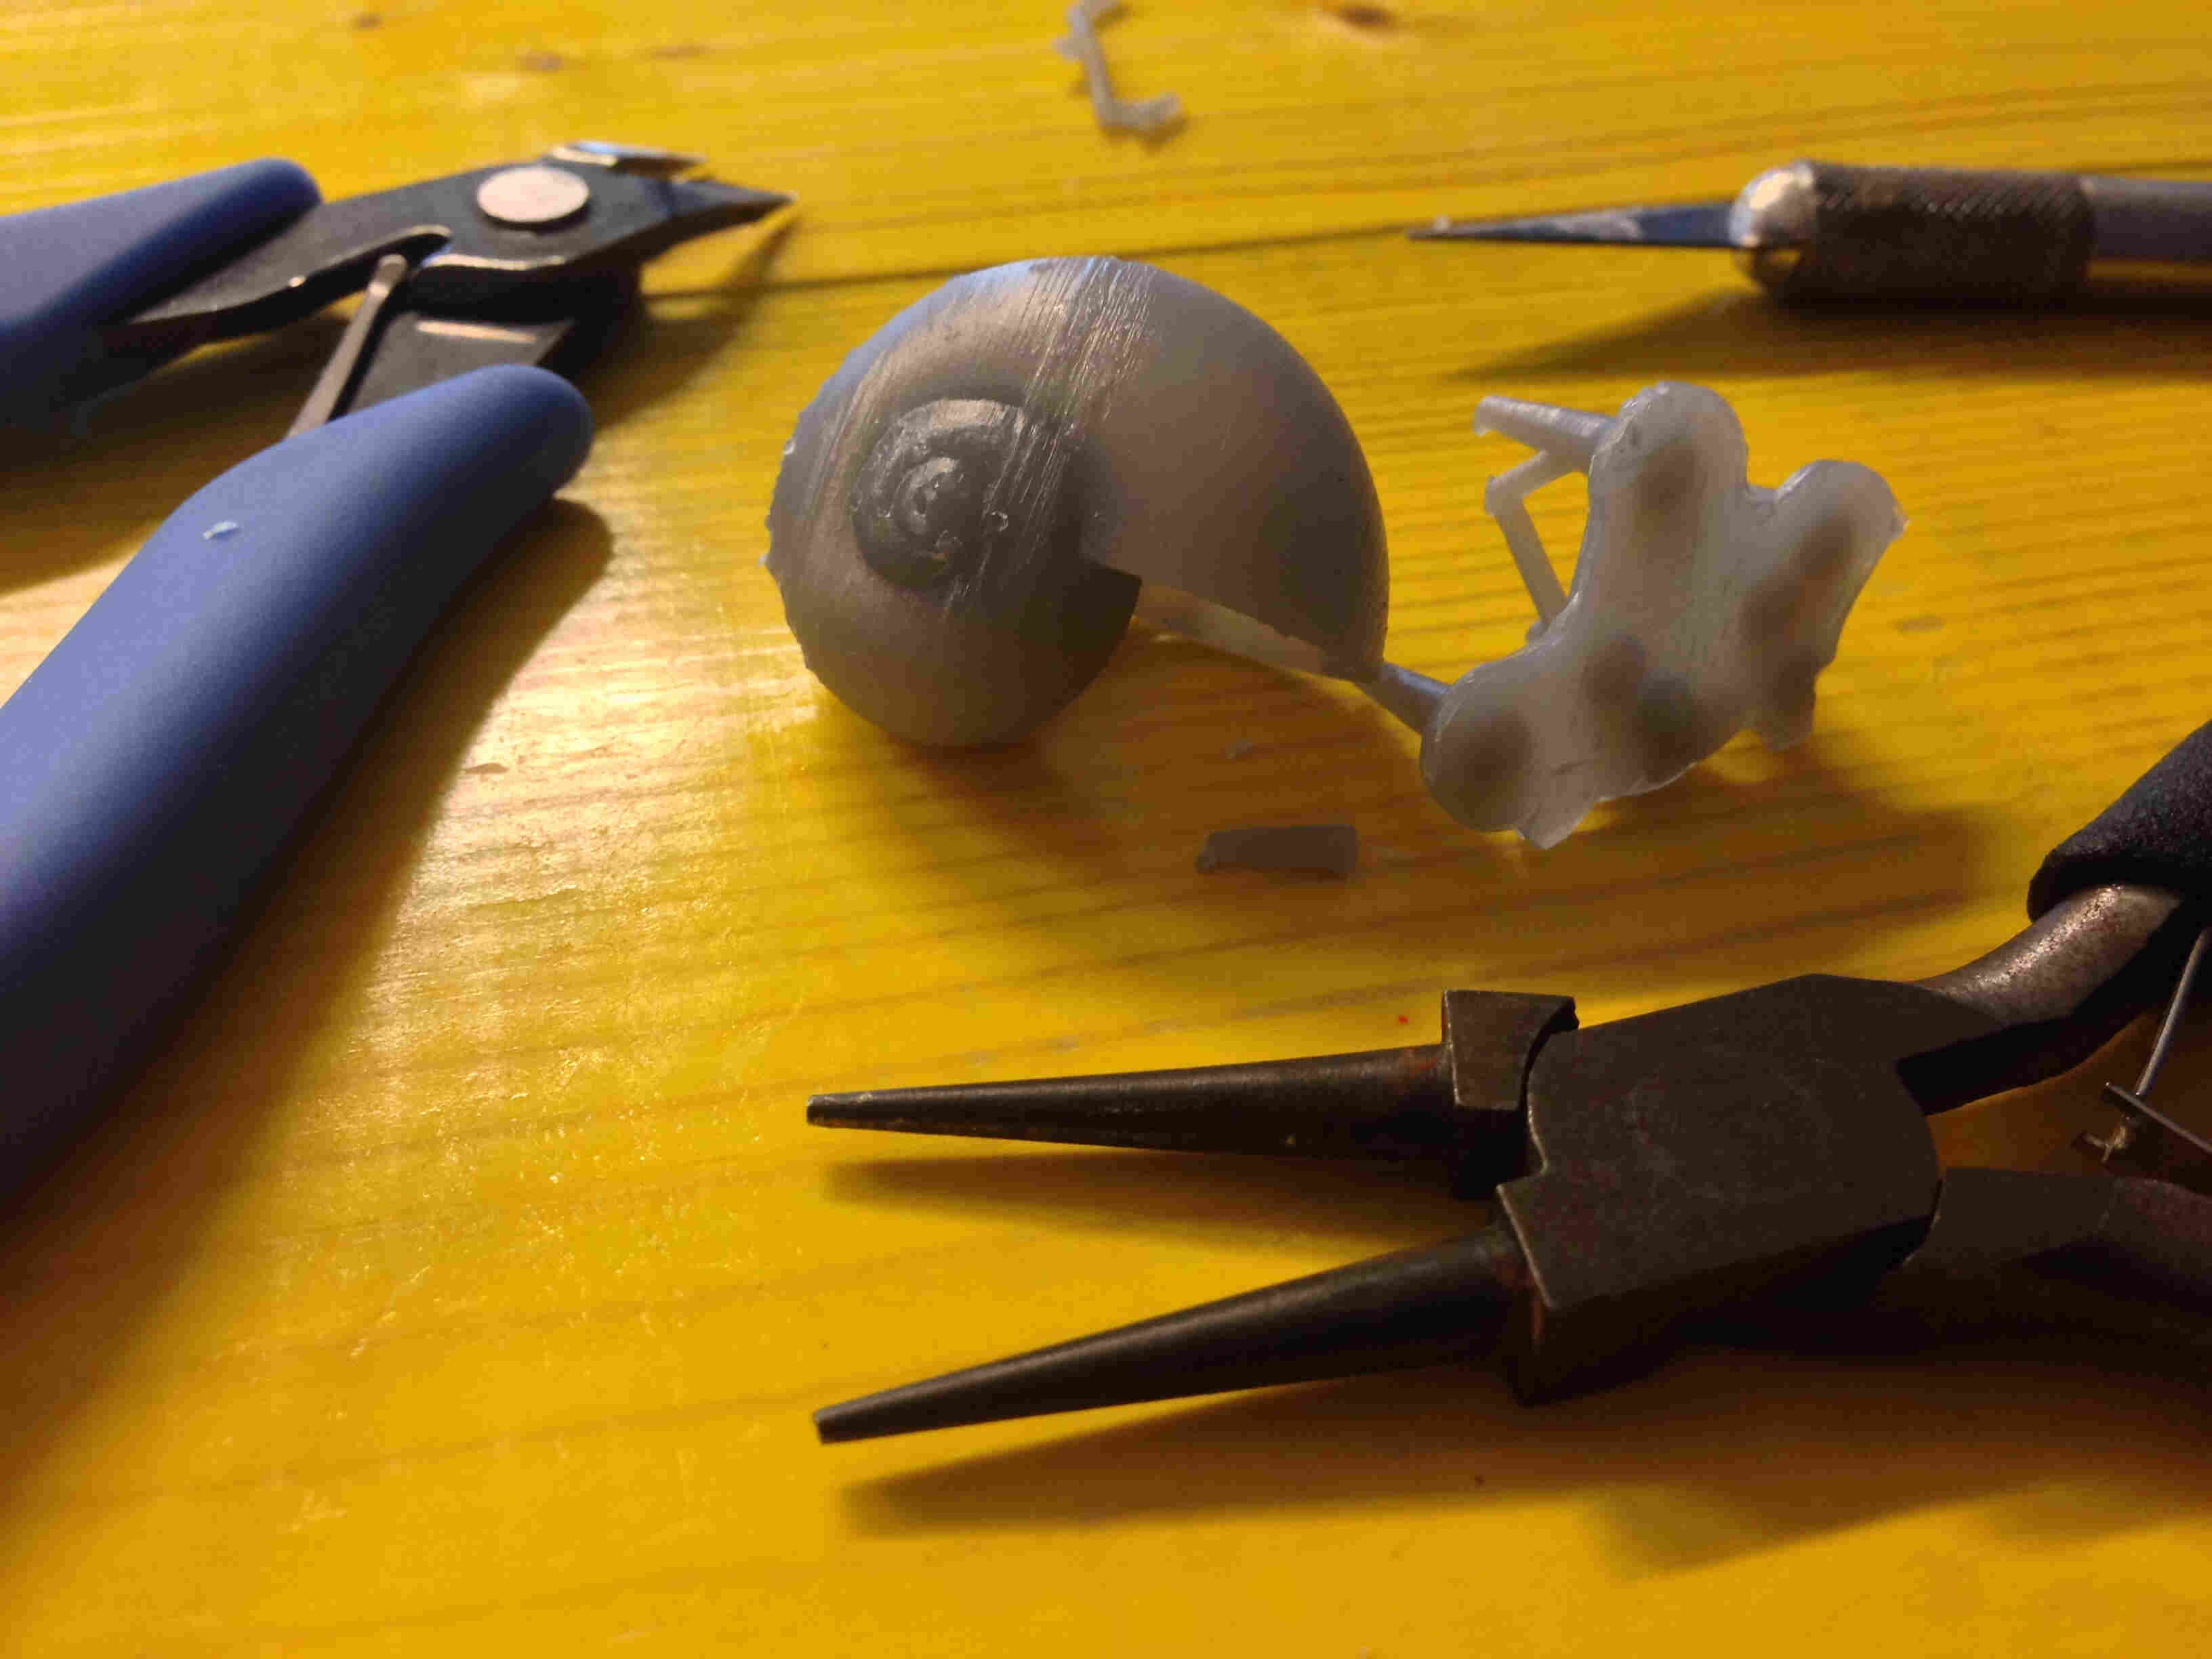
Here you can see the final result.
3D Scanning
Photogrammetry
For this assignment, i've tried different techniques. I would like to first talk about the ine that i've liked more: the photogrammetry.
I've decided to first test Photoscan. I've started by reading the User manual and i found any information needed to make the software working properly. I've found all the workflow to follow to extract a 3D model from the images. The main steps are (chapter 3 - general workflow):
- Loading photos into PhotoScan;
- Inspecting loaded images, removing unnecessary images;
- Aligning photos;
- Building dense point cloud;
- Editing dense point cloud;
- building mesh (3D polygonal model);
- editing mesh;
- generating texture;
- exporting results
I've scanned an archeological manufact from the archeological department of my University.
It was an old oil lamp.

I took 68 photos of the picture from 3 different angles (bottom, middle and top planes) and i've used the pictures to build the dense point cloud and the 3D model.
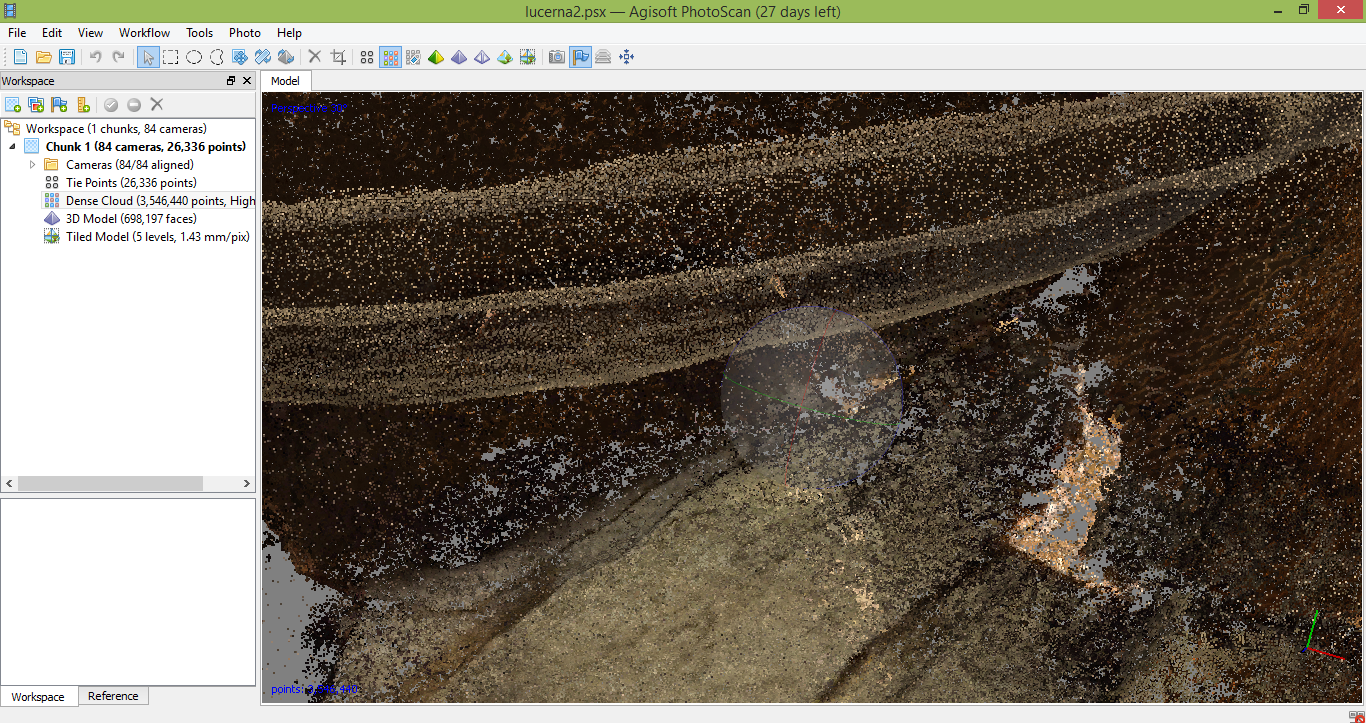
I've removed some points directly from the points cloud, but then it was still necessary to post-process the model to repair some bad meshes. I've tried two different softwares to edit the meshes and to repair the model: Meshlab and Meshmixer.
I've had a really bad experience with Meshlab due to continuos crashes and very low performance. So i've switched to Meshmixer.
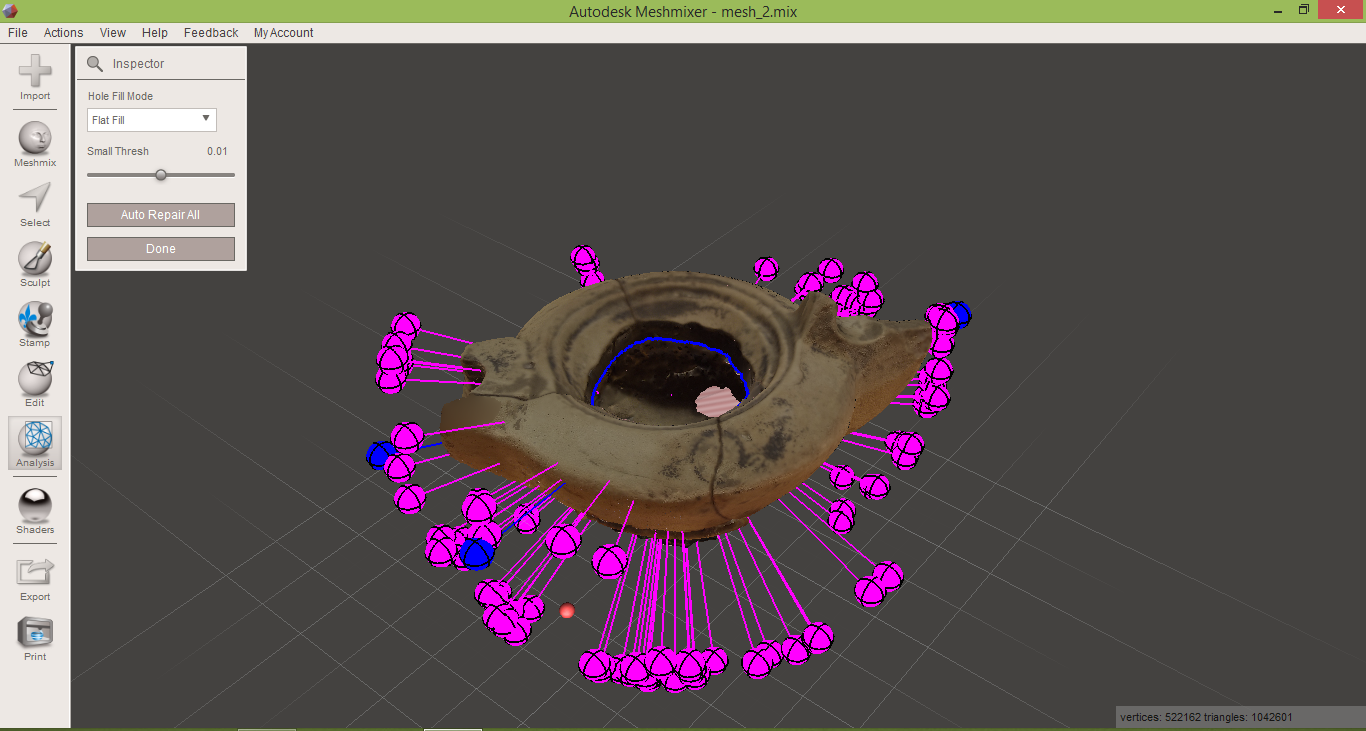
I found this software good enough...but i still had some crashes. One of the biggest problem that i've had to face was that, i could not use the Auto-fill holes function because, in the original models, there were some holes that i must preserve. So i've started to edit manually the meshes trying to fill only the right holes. I had some troubles especially for the internal part of the lamp because the walls were separated from the external contours
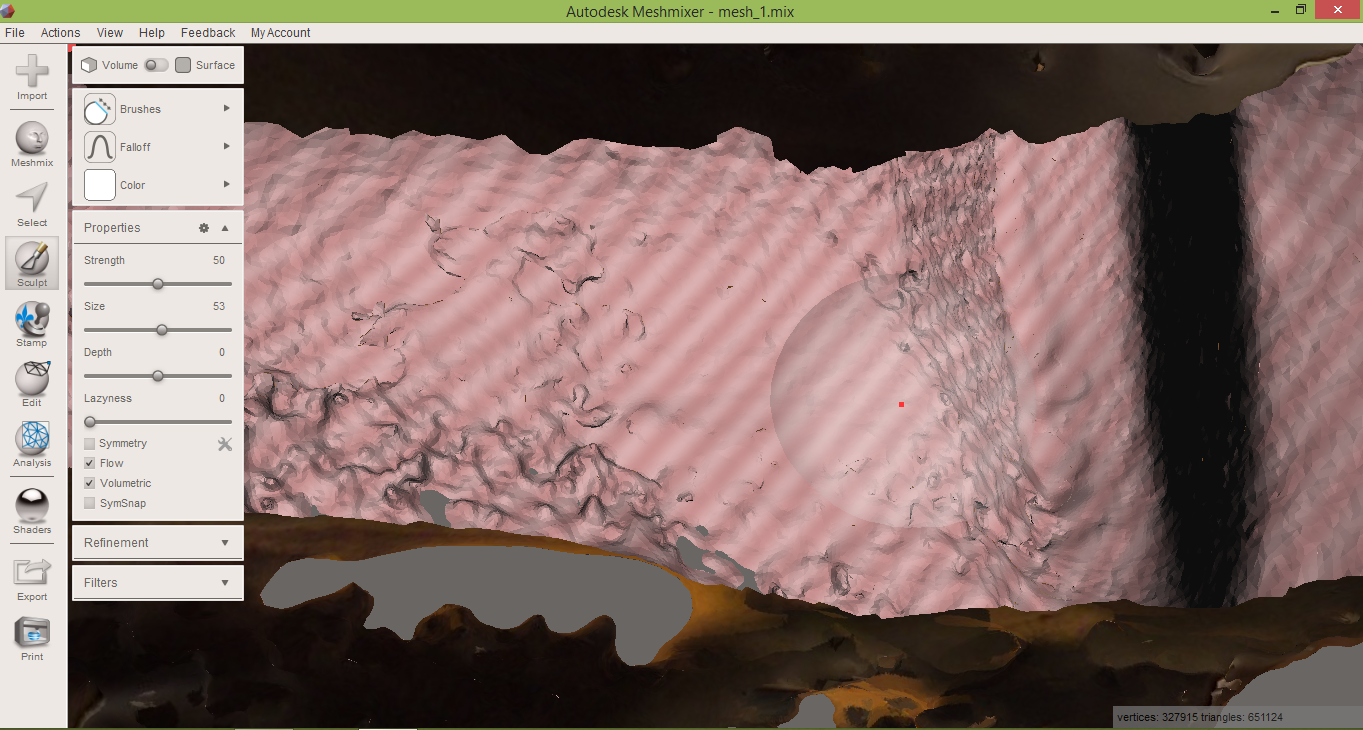
But i think that the result is good enough. I've spent some times on cleaning and repairing meshes in meshmixer but i think that with more time, the model will be better and suitable to 3D print.
as you can see, i've manually repaired some of the unexpected holes in the model but i need to smooth more the surfaces and to adjust some meshes.
Lucerna 1 by wakitowaki on Sketchfab
Kinect
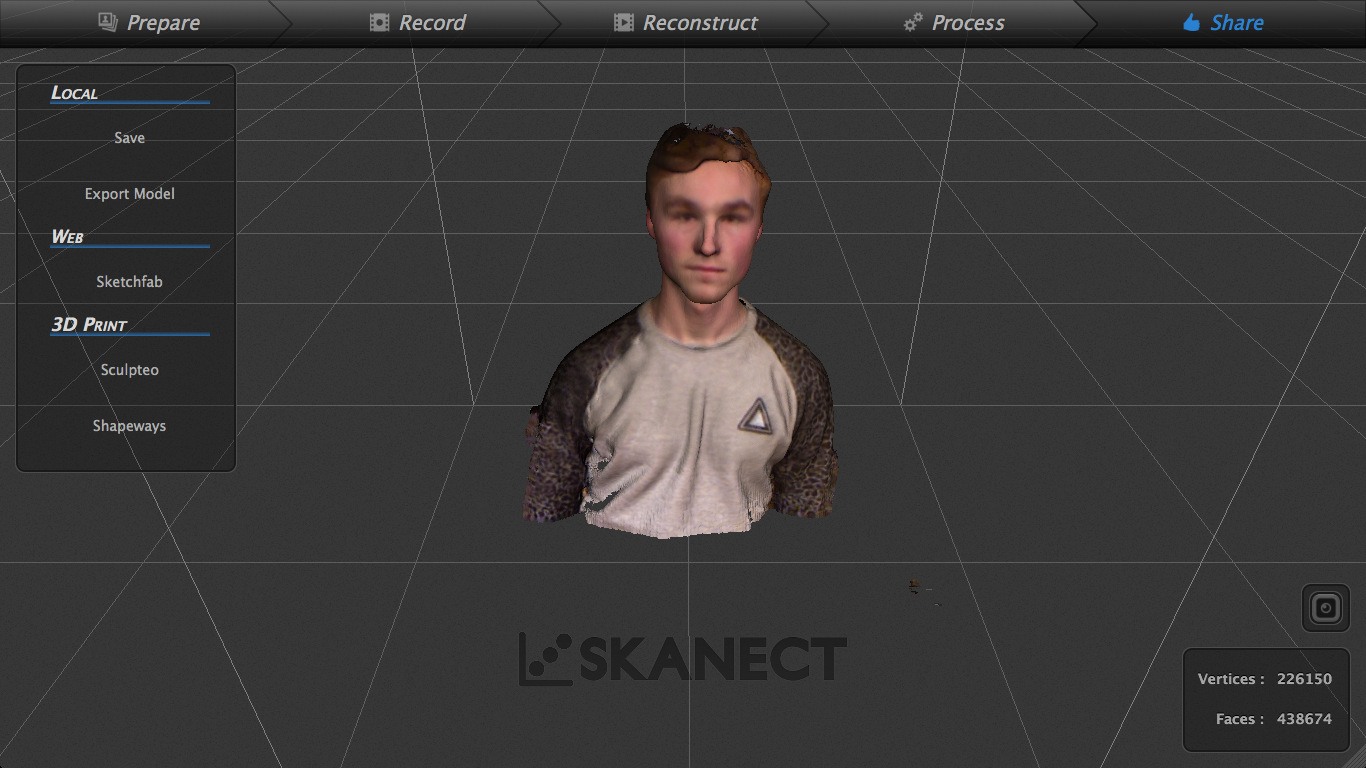
The second tool that i've tested is the Kinect with the Skanect software.
I've acquired a scan of a friend's body (Special thanks to Sam Van Gaal)
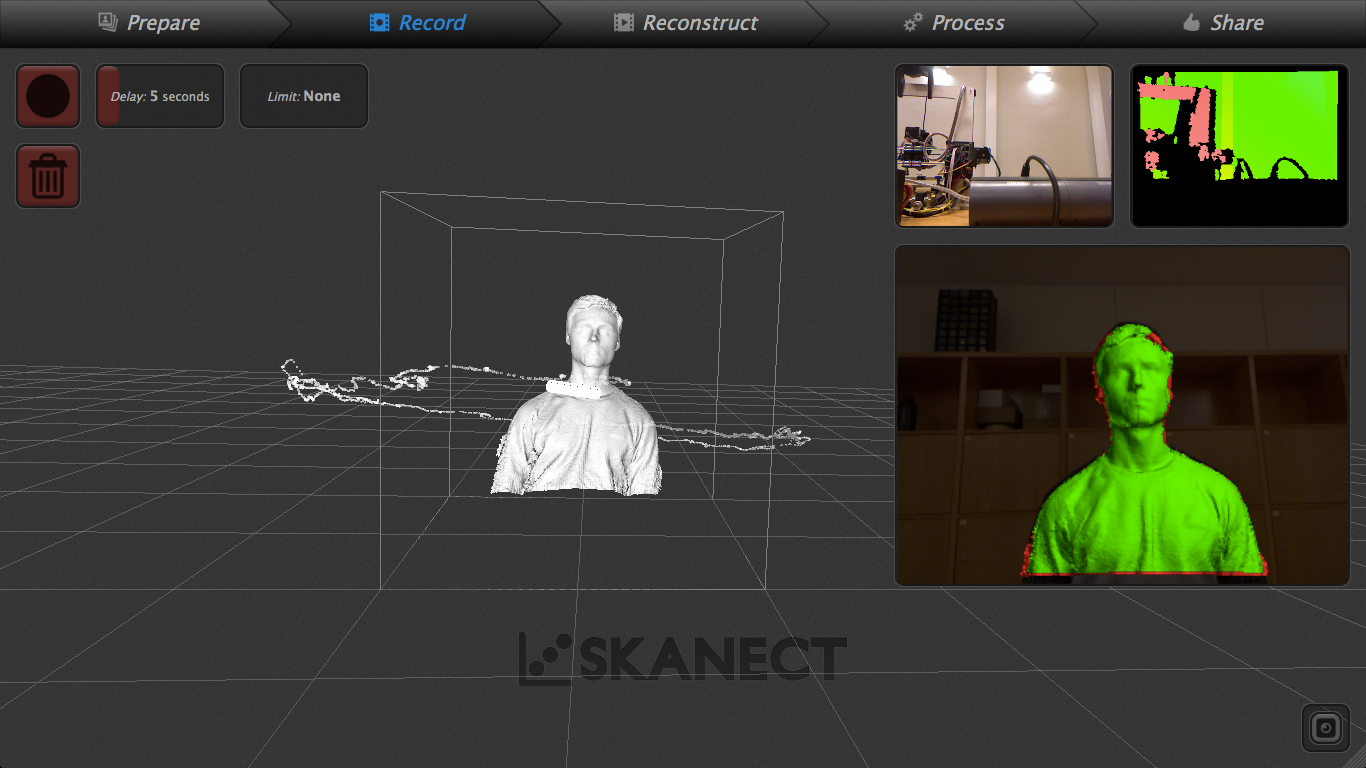
and the i've processed the model with scanect to obtain a textured model:
I did not like this metod. Using the kinect to walk around a static person is too much complicated because of the cables.
Moreover, a perfect light is needed to have an acceptable result otherwise the capturing operation lost the subject and is often not possible to re-align the scene and the kinect can not be used to scan small objects.
But I must admit that the ratio time_spent/quality_of_the_model is awesome. Is possible to retrieve a complete 3D model in less than a half of the time spent with photogrammetry.
The watertight funcion in the skanect software did not worked very well. The quality of the auto-filled holes is really poor. I think is better to edit the meshes as i did for the oil lamp with an external editor like Meshmixer or Meshlab.
Model Sam by wakitowaki on Sketchfab
123D Catch
I've used 123D catch to scan the same oil lamp used with photoscan to make a comparison between the software.
I've used the android application of 123D catch. The app guides you through the acquisition of the pictures showing from what angles you have to shot. Then the pictures are cloud-processed (long time process) and in the end you have the 3d model.
Here the result:
Djdjdj by wakitowaki on Sketchfab
Conclusions
I think that the 3D printing and scanning techniques are rellay powerful especially if they are combined.
Without any doubts, this technology is full of potential but i think that this has still to be considered as
a "support" technology in the sense that it can not be the main manufacturing technique in a project.
I think that 3D pieces and artifacts, are really good for prototyping purposes but if a robust, functional piece
is needed, is often better to build them with other machines (or processes).
Moreover, the time needed to build one single piece could be really really long and, if everything goes wrong
(and with 3D printers it could happen often) you have to throw away the piece and consequently all the time
that you have spent waiting for the print.
On the other hand, i found much more interesting the 3D scanning techniques. The photogrammetry is really accurate
also in recontructing tiny objects with a lot of irregularity. I am not an expert in photography but i think that
with the right conditions of ambient light and with the right lens the results could be much more precise.