Week 16
Interface and Application Programming.
ASSIGNMENT:
1.) write an application that interfaces with an input or output device that you made.
ASSIGNMENT:
1.) write an application that interfaces with an input or output device that you made.
This week we had to write an application that interfaces with a output or input device. In my case I decided to work with a pair of servos, because lately I've been working with these output devices for my final project.
It is the first time I use tools to develop software, for that reason I have recommended to start with "PROCESSING" because is a good software for beginners in software development.
In this assignment I used Arduino IDE + Processing.
With "Arduino IDE" I've written the code to load my Fabduino and control the servos.
And with "Processing" I have written the code to develop the interface that will allow me to manage servos from my computer and mouse.
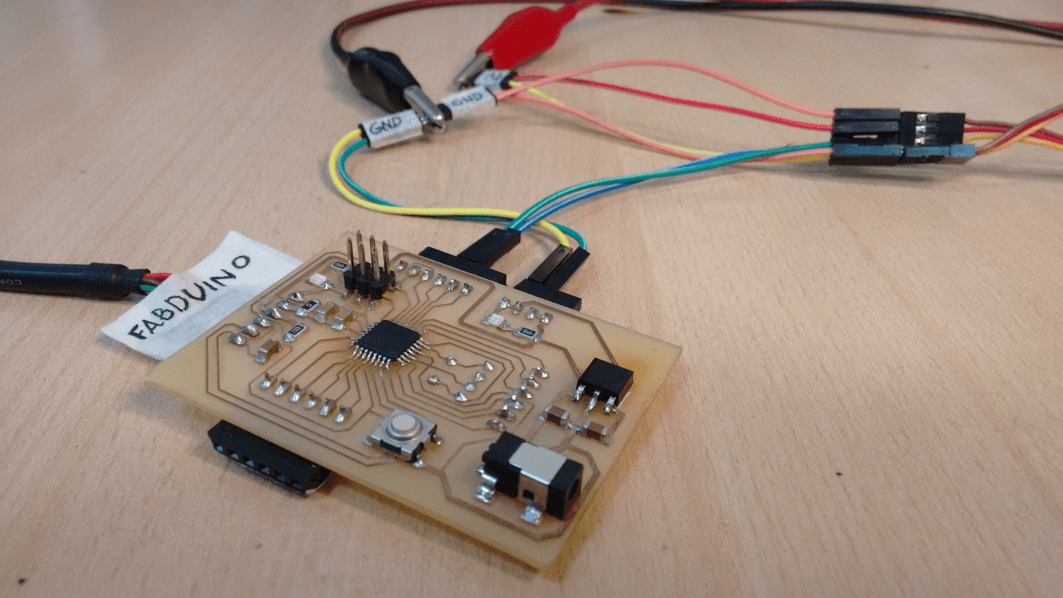
First in "ArduinoIDE" I had to upload the code to my Fabduino for the servo motors, then is important to close the serial monitor before to open "Processing".
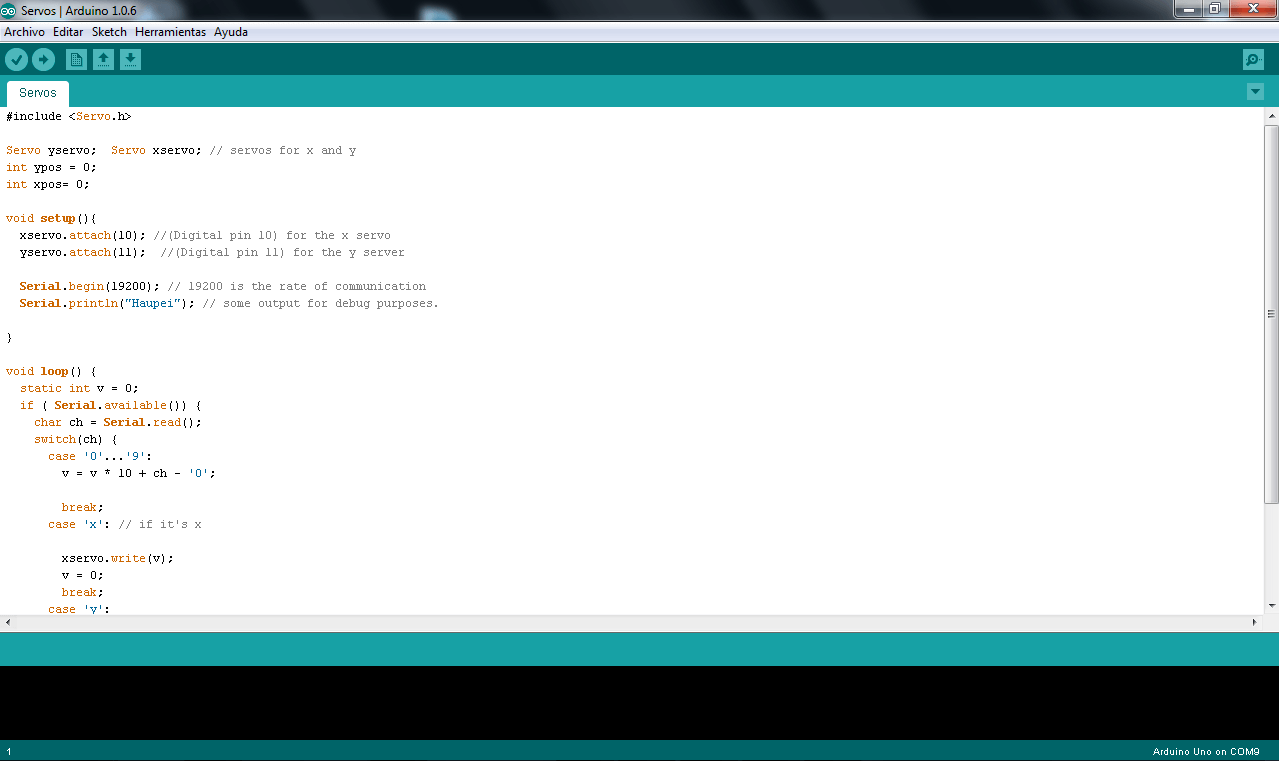
Arduino Code for servo motor:

I've started from basic examples, trying to undestand the code. At the beginning, very similar to Arduino CODE, there's a list of the mentioned libraries. As you can see, you should import several libraries, but the main important surely is the "import processing.serial" that basically it's a class for sending and receiving data using the serial communication protocol.
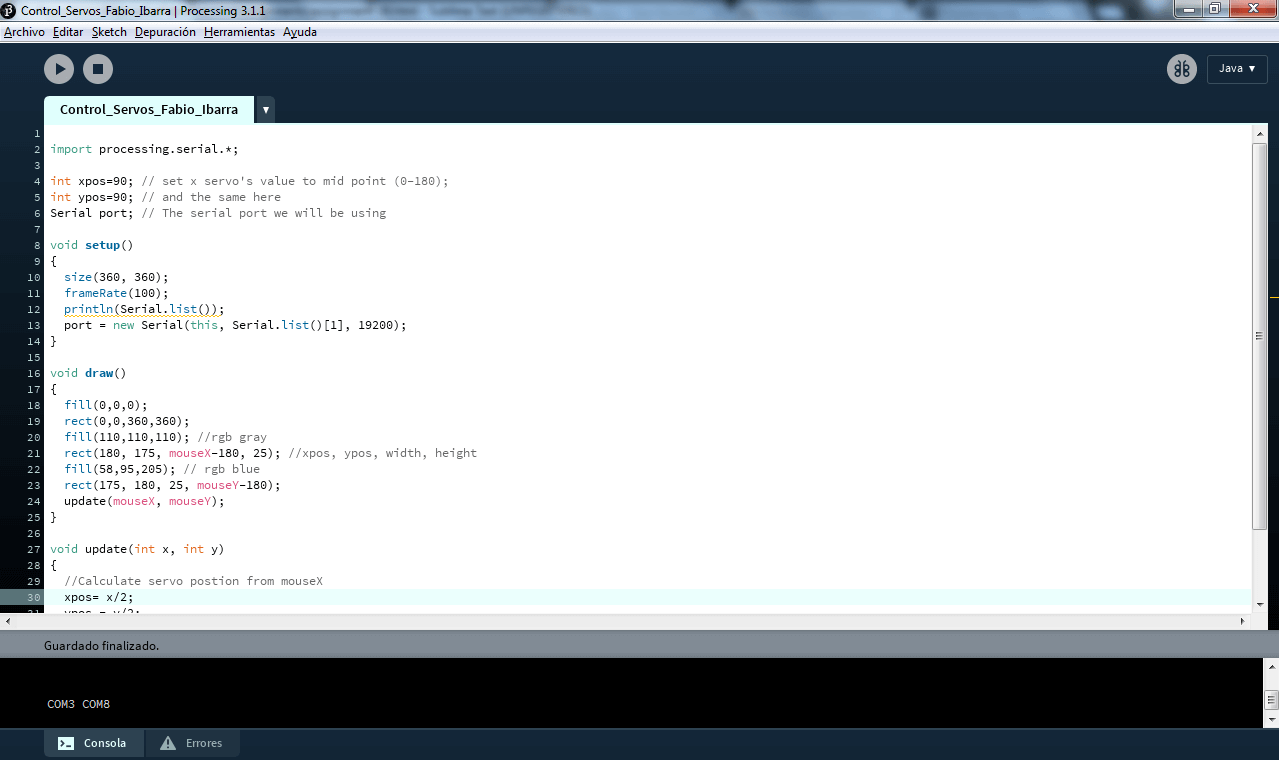
Processing Code for servo controller interface:
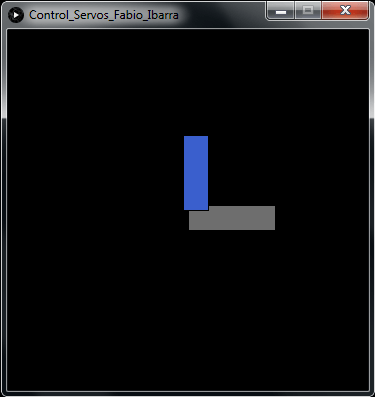
After some tests and the correct modification of certain codes, I got the following:
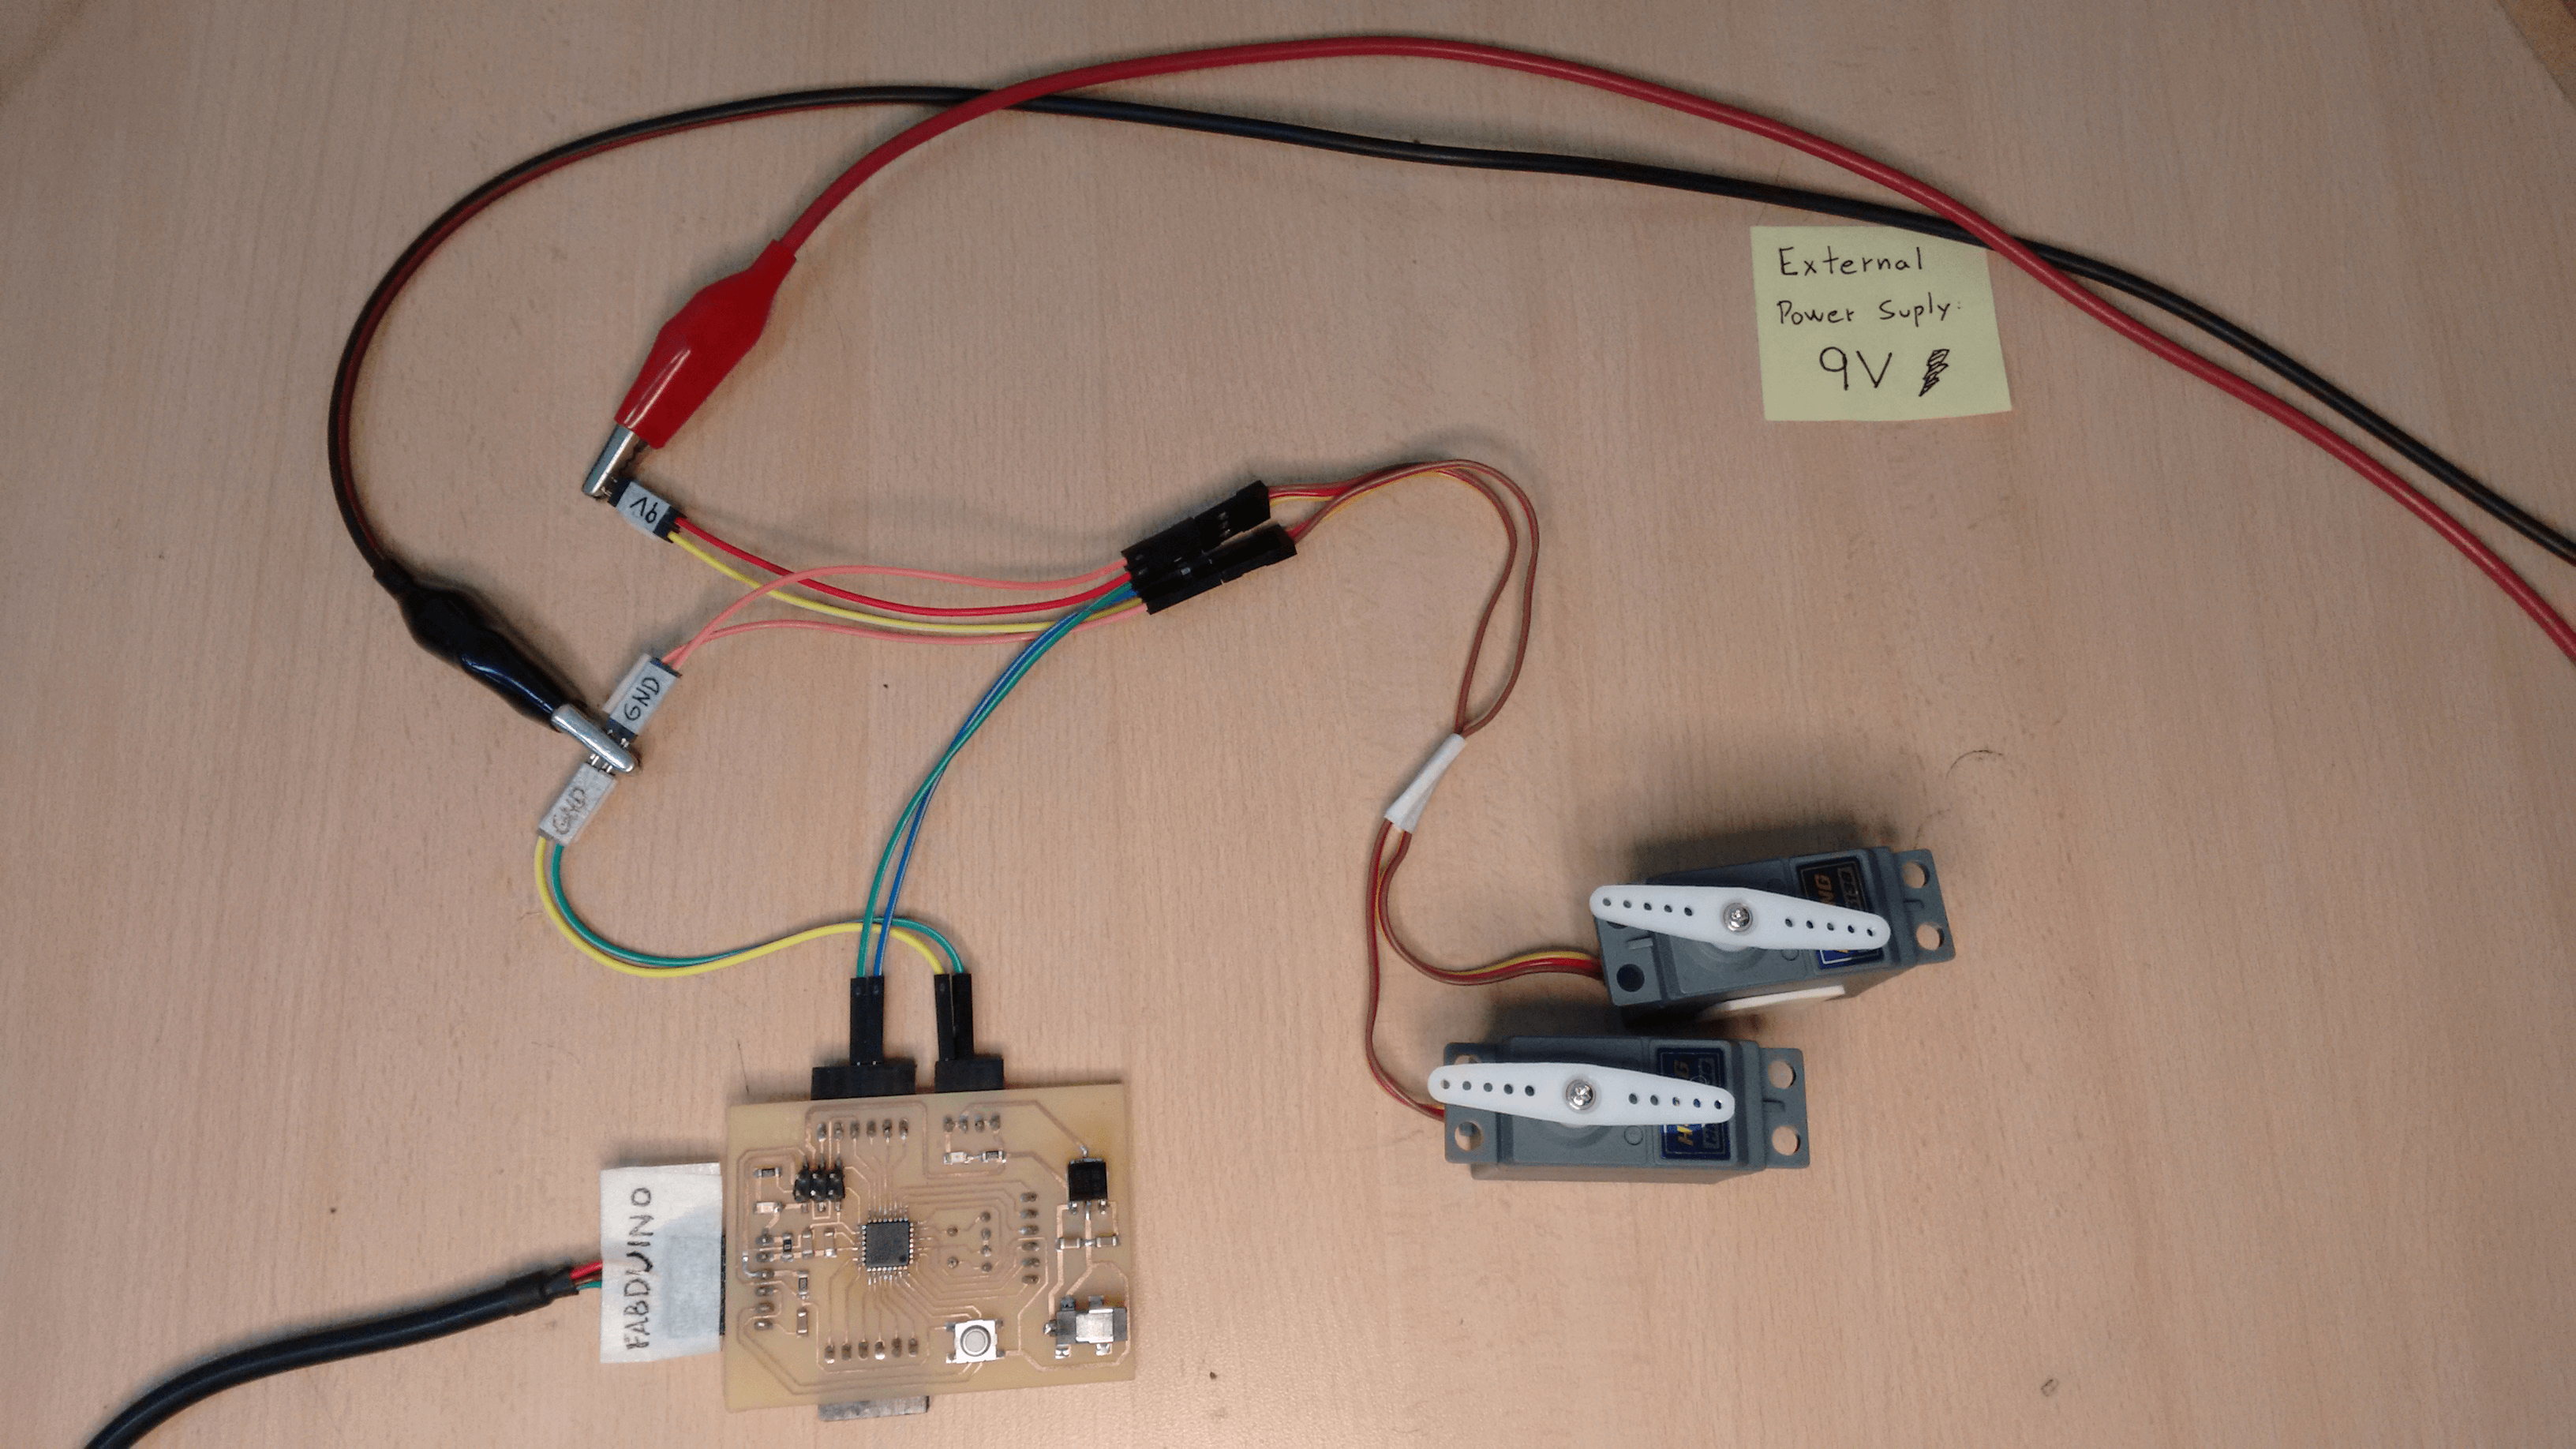
In the end, I got the following circuit to test my interface. The video shows the operation of the interface with the entire circuit.
- The servos operate between 4.5 V and 9V, but the 5 V provided by the Fabduino was not enough to make them work. That's why I had to resort to an external source of 9 V.
- Digital pins 10 and 11 of Fabduino are sending signals to the servos movement.
- To run the software in Processing , it is important that the "Serial Monitor" of Arduino IDE is closed.
- Only the power supply gnd and Fabduino are connected to each other.
- Move the servos through an interface on a computer.
- A code was achieved through a software that allows the control and movement of a servo.
- For a moment I could not feed the servos with integrated Fabduino 5V source, I had to resort to an external source.
- Because my first contact with the development of software, it took me some time to understand and apply the concepts of programming. That's why I could not achieve a more user friendly interface.
- Experiment more with programming and a more friendly and graphics to identify and understand the operating values servo interface.
I'm currently taking this course in FAB LAB TECSUP, in Lima-Perú, through CIDI FADA UNA with the support of CONACYT and PARQUE TECNOLOGICO ITAIPU FOUNDATION


©DESIGNED AND BUILD BY FABIO IBARRA - FAB ACADEMY 2016
EMAIL: fabioibarrab@gmail.com