Week 14
Design and fabricate a 3D mold (~ft2), and produce a fiber composite part in it.
About the main work of this week, I choose to plywood, epoxy resin and cotton as the main materials. Just like the work on Week 12, I designed the appearance firstly, and used CNC to carve out of the mold. Then, I mixed epoxy resin poured onto the fibers and putted it with the mold in a vacuum bag to extract air. After drying, I took off it. That is the finished work that can be used.
本周的複合材料我主要選擇以合板、環氧樹脂、棉布為主要材料。與week12相同,先設計外觀及使用CNC雕刻出模具。再來是混合環氧樹脂澆灌在纖維上,與模具一同在真空袋中抽氣,等乾燥硬化後取下做切割。即是可以使用的成品。
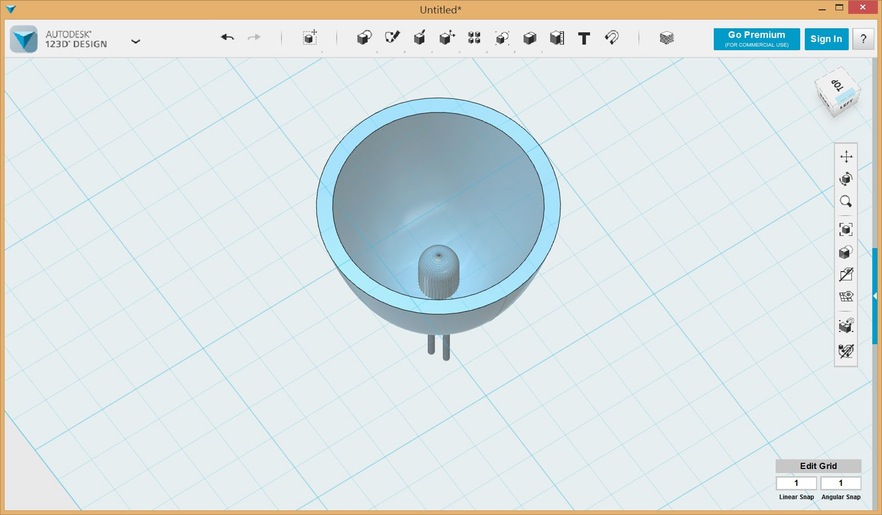
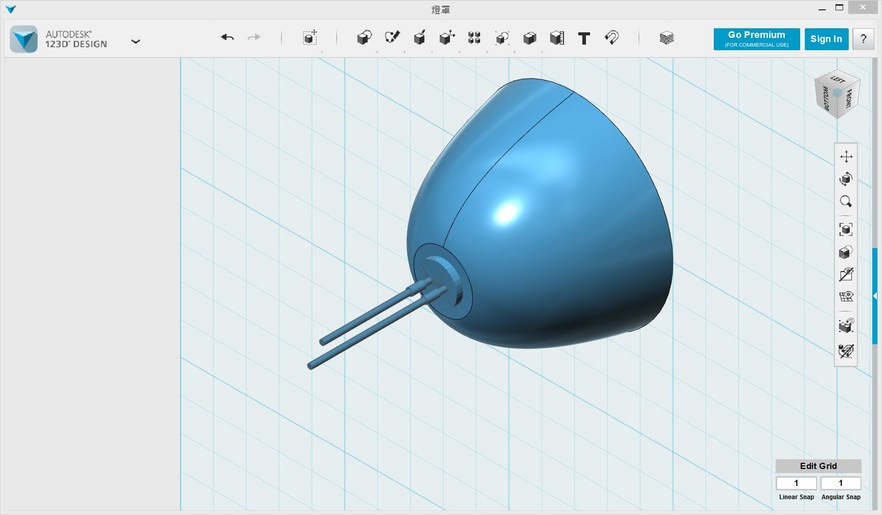
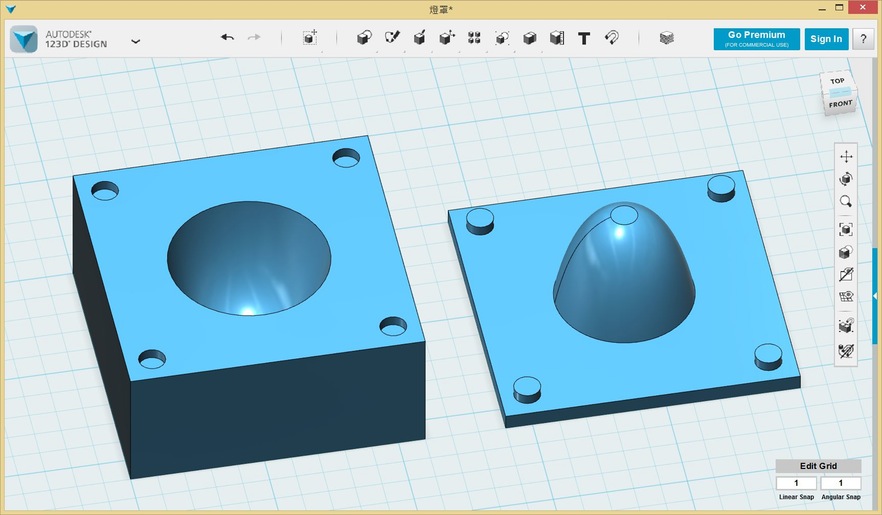
The first step is to design crafted items. I chose to make lamps commonly used to shade, but this shade than the mini. 5mm for the LED cover. Use 123D Design modeling. And leave the mold thickness interval in accordance with the needs shade. And the use of auxiliary latch to do to assist the registration.
第一步先設計所要製作的物品,我選擇製作燈具常用到的燈罩,不過此燈罩較迷你。用於5mm的LED燈罩。使用123D Design製作模型。並依照燈罩厚度需求留下模具的間隔。並使用輔助的卡榫來做協助對位。
Make Mould: Round 1
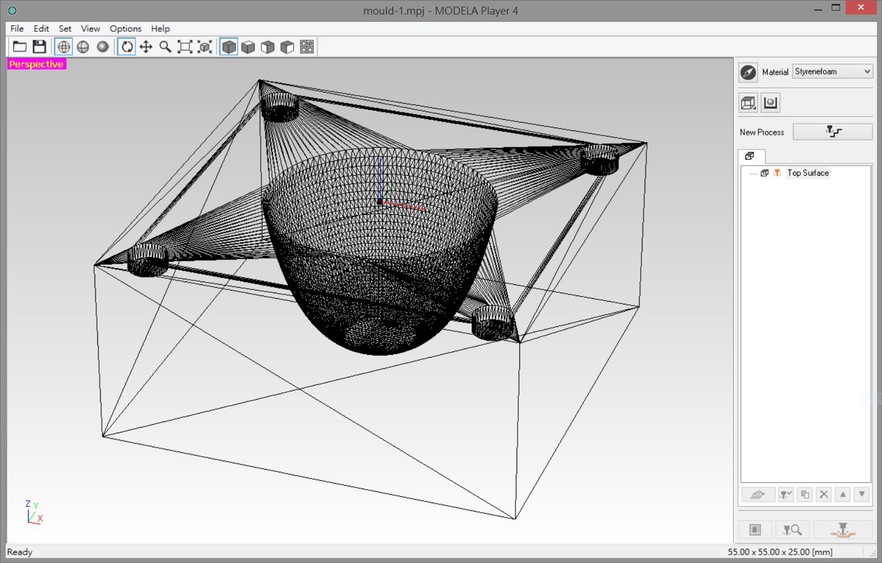
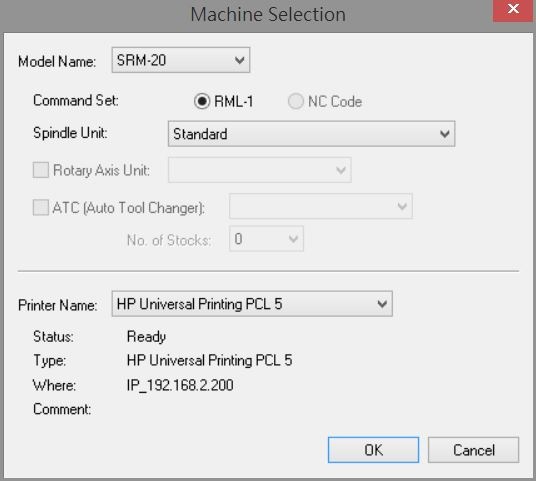
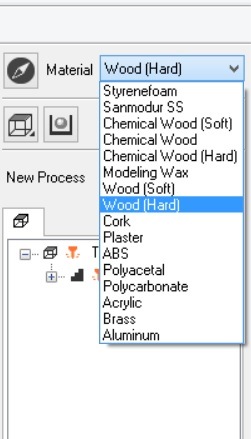
MODELA Player 4 software to enable 3D drawing, engraving machine and material selection. Selected using the corresponding tool and the parameters of sculpture and talents. I use a wood plywood, but I do not know why the hardness. To be safe, use a hard wood, the feed rate will be slower and spend more time working.
以MODELA Player 4軟體開啟3D圖檔,選擇雕刻機與材料。選對雕刻及才能使用對應的刀具及各項參數。我使用的是木頭合板,但不曉得硬度為何。為安全起見,選用硬木頭,進刀速度會較慢,花多一點時間加工。
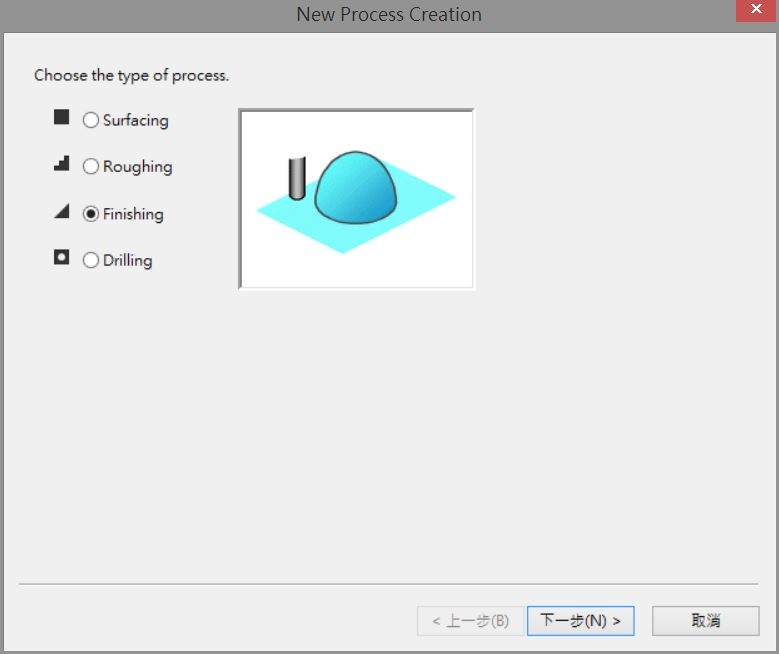
New Prpcess Creation
新增一個加工程序。
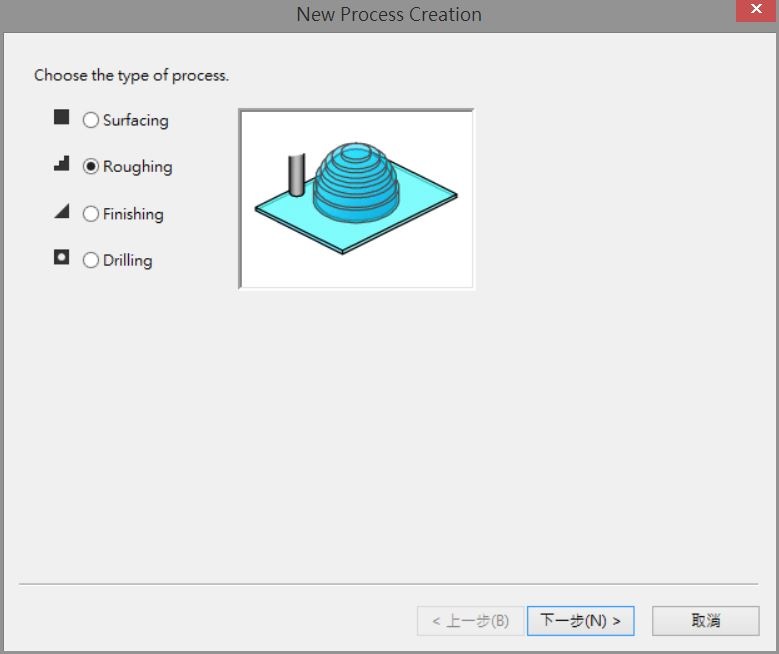
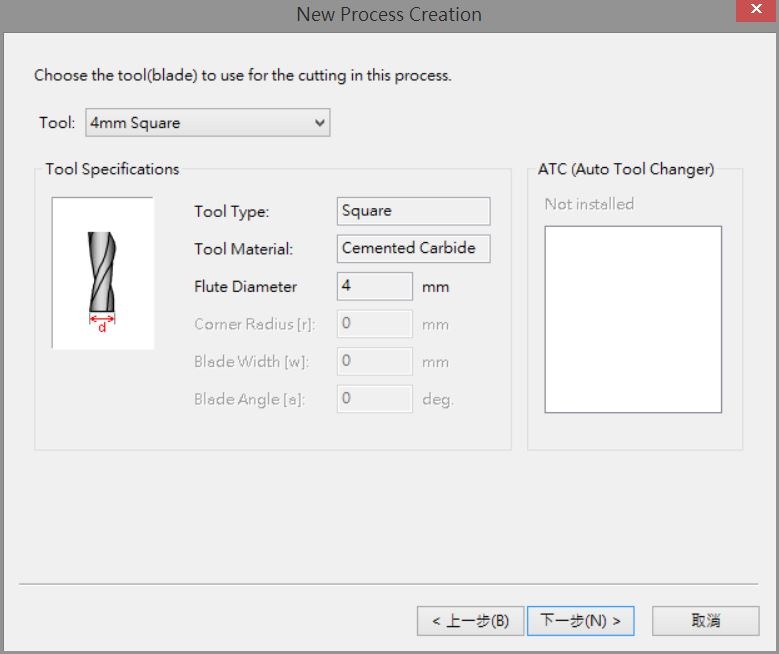
Choose to use the tool I use rough-cut 4mm Square.選擇使用刀具,我粗切割使用4mm Square。
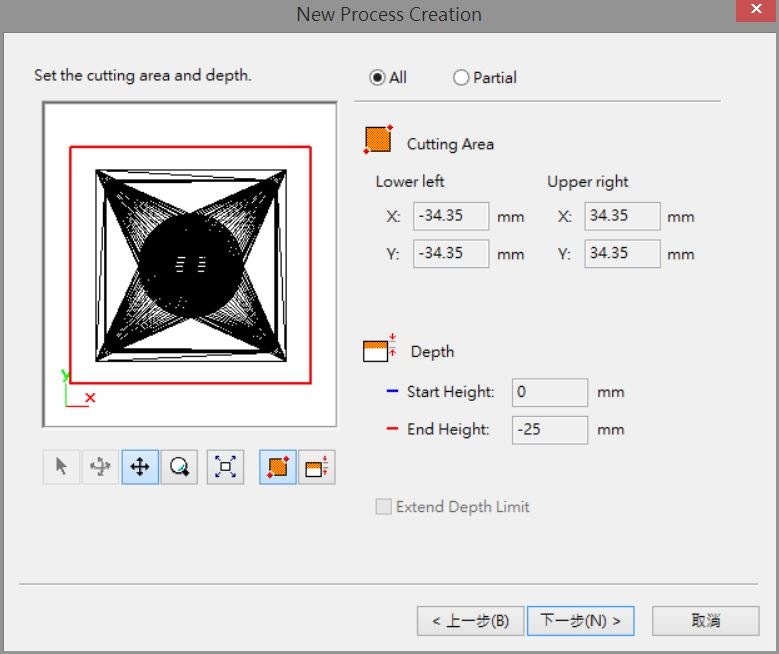
Select the engraving area.
選擇雕刻範圍。
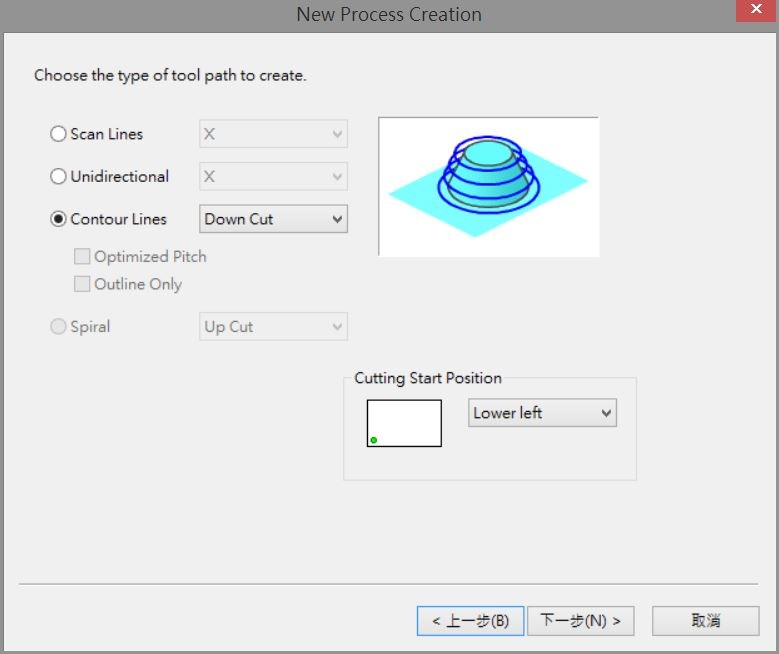
Select carving way. Crude carving three to choose from: "line scan", "one-way", "contour." Internal finer options can be adjusted, such as machining direction.
選擇雕刻方式。粗雕刻有三種可以選擇:"線段掃描"、"單向"、"輪廓線"。內部有更細的選項可做調整,如加工方向。
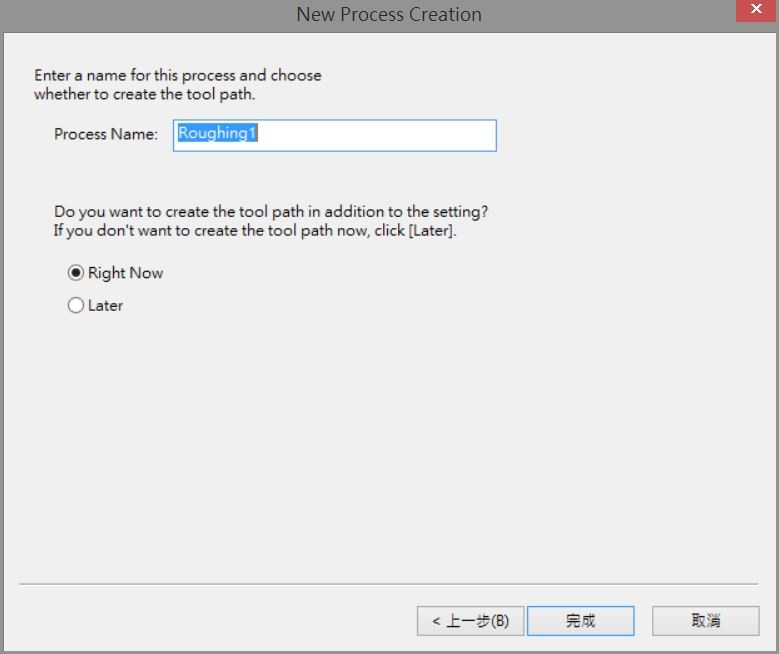
Finally, storage and processing machining path name.
最後儲存加工名稱及加工路徑。
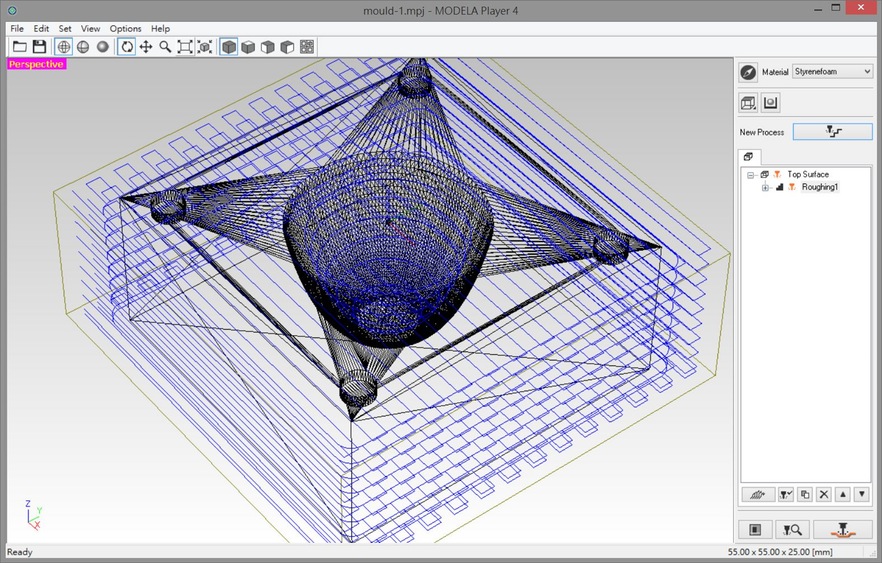
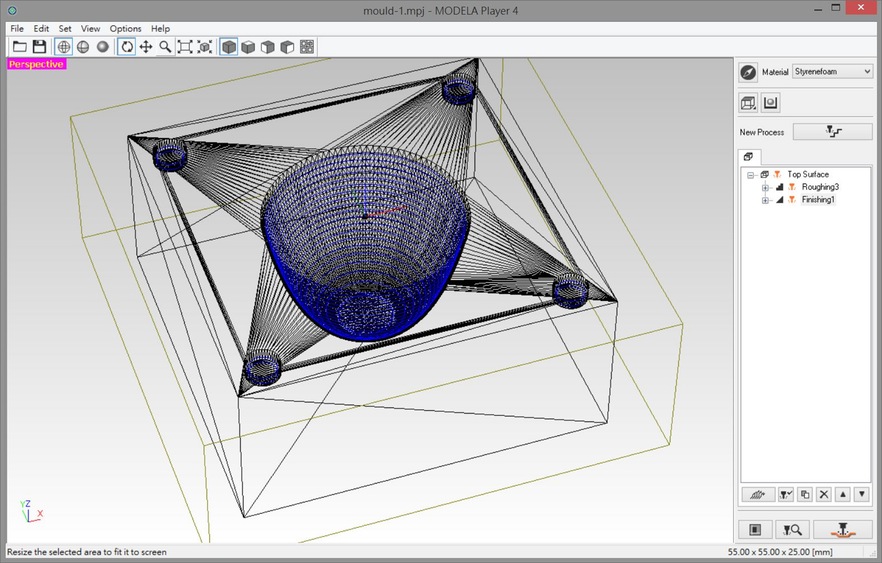
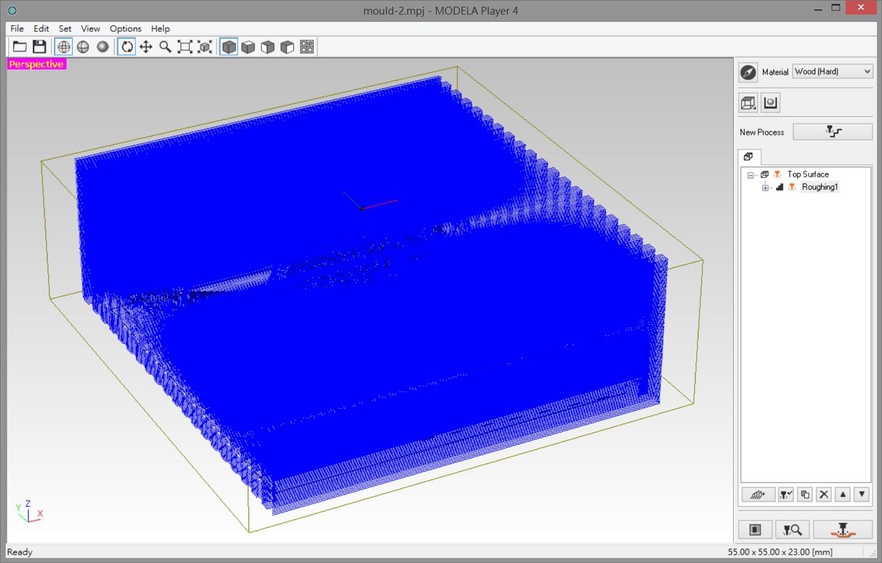
You can see the blue complete machining path, if not satisfied can be re-amended or deleted.
完成後可以看到藍色的加工路徑,若不滿意還可重新修正或刪除。
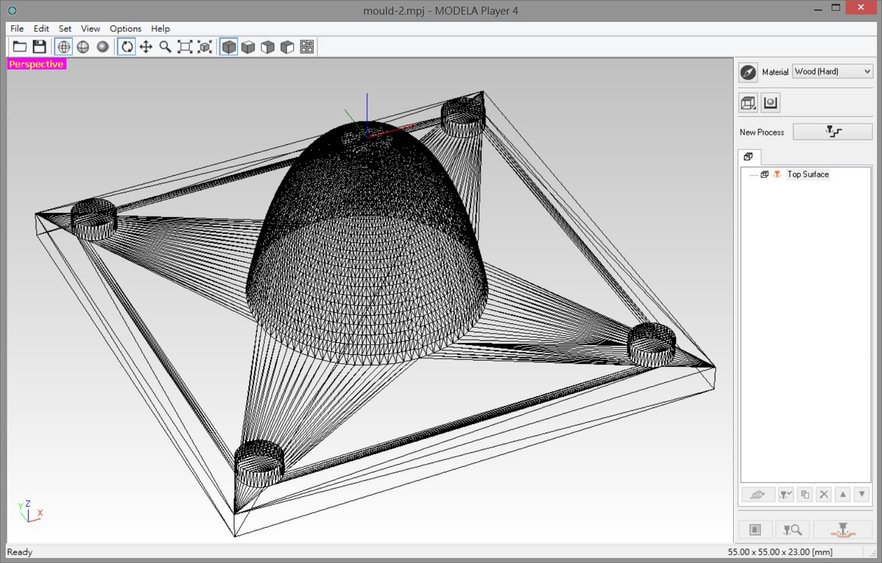
Choose finishing and calculate the path, it would render the machining path but more detailed.
選擇細加工並計算路徑,一樣會呈現加工路徑但比較細緻。
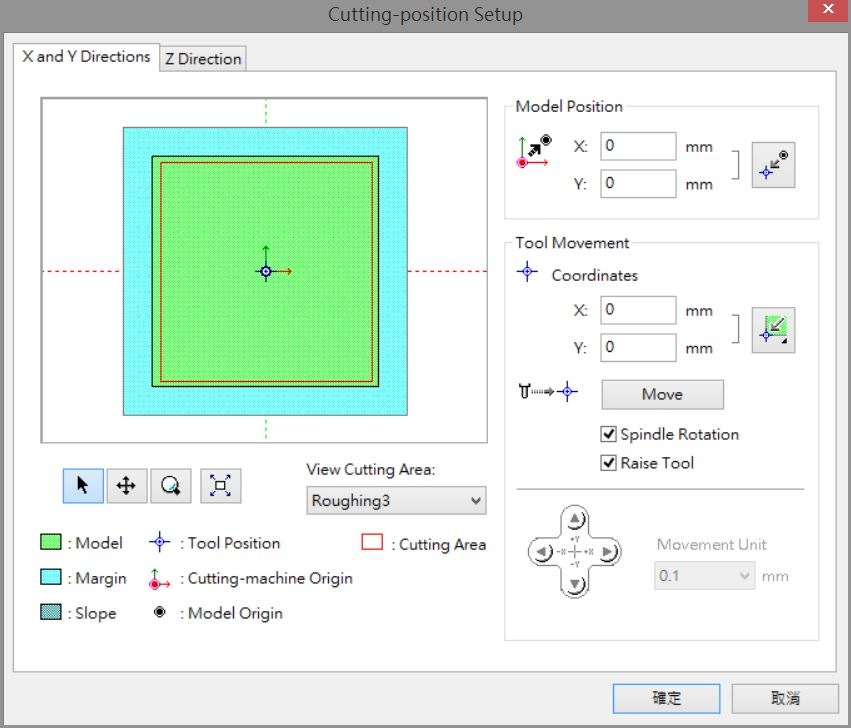
Setting processing origin. I received the processing center as defined in the object origin.
設定加工原點。此次加工我接定義在物件中心做為原點。
It can export the G-code is completed, use Roland software carving.
Similarly into another mold, the tool calculate the conversion.
完成後即可匯出G-code,使用Roland軟體進行雕刻。同樣匯入另一模具,進行刀具計算與轉換。
I use wood smaller than the outer diameter of the draw, the final and will not leave the border in the following figure.
我所使用的木塊小於所繪製的外徑,最後並不會留下如下圖的邊框。
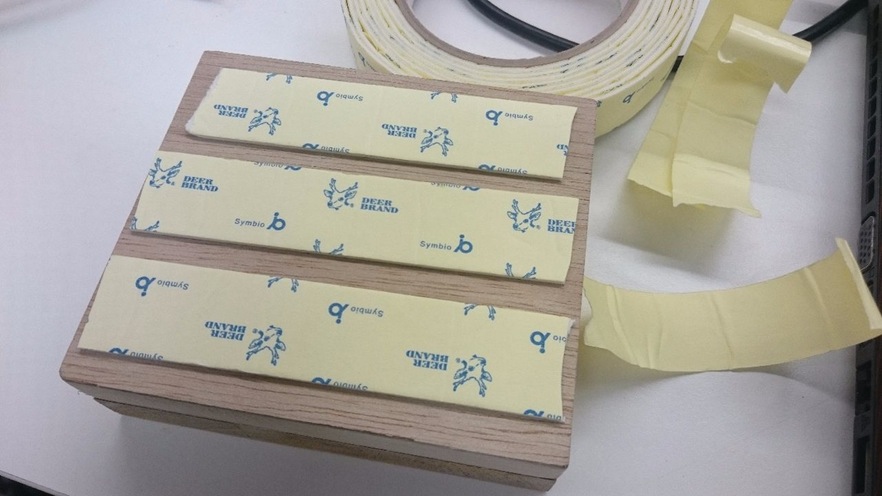
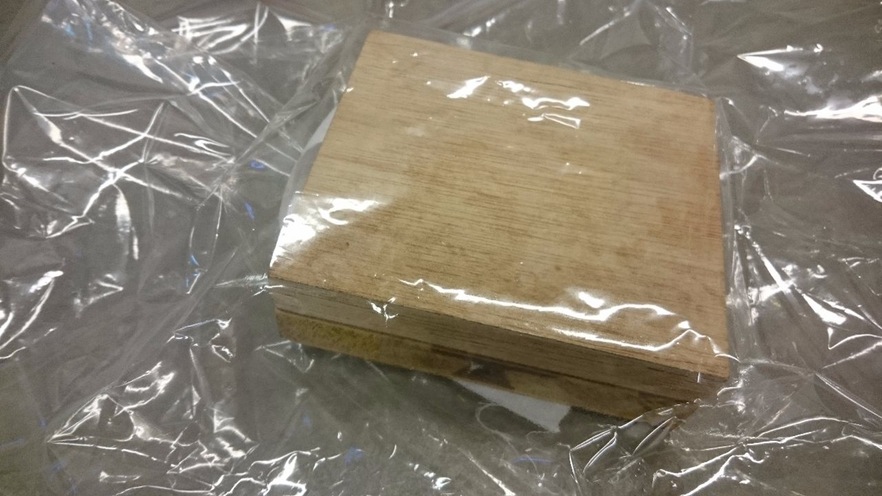
Only a block 17mm, so it must increase the thickness of the adhesive.
木塊一片只有17mm,所以須黏合增加厚度。
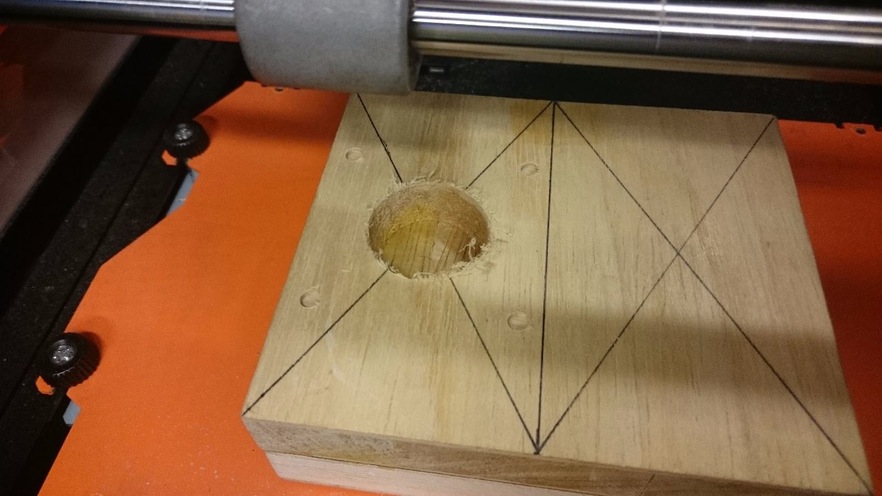
Use double-sided tape fixed to the wood carving table. Draw line segment marker center position.
使用雙面膠將木頭固定於雕刻台上。畫上線段標記中心點位置。
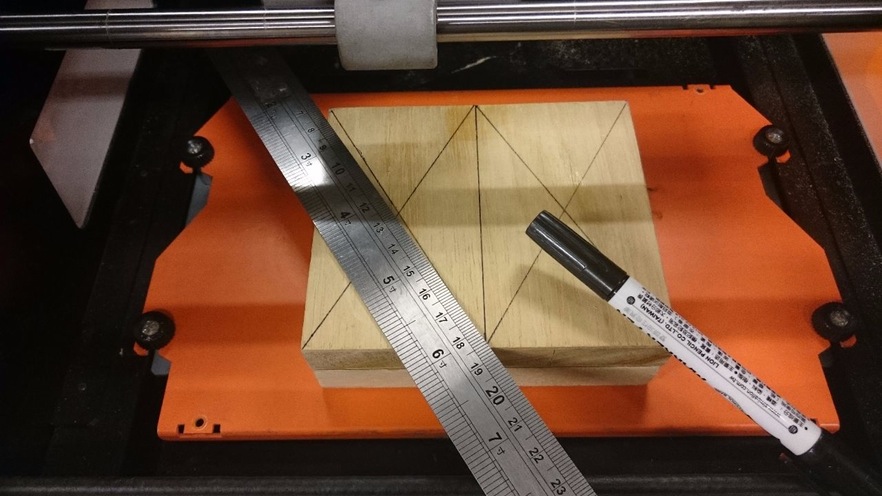
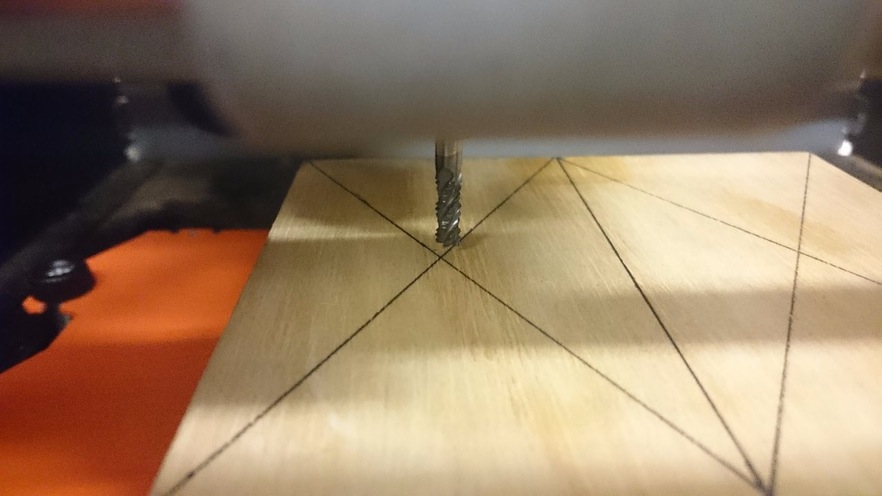
After setting start processing tool origin.
設定刀具原點後即可開始加工。
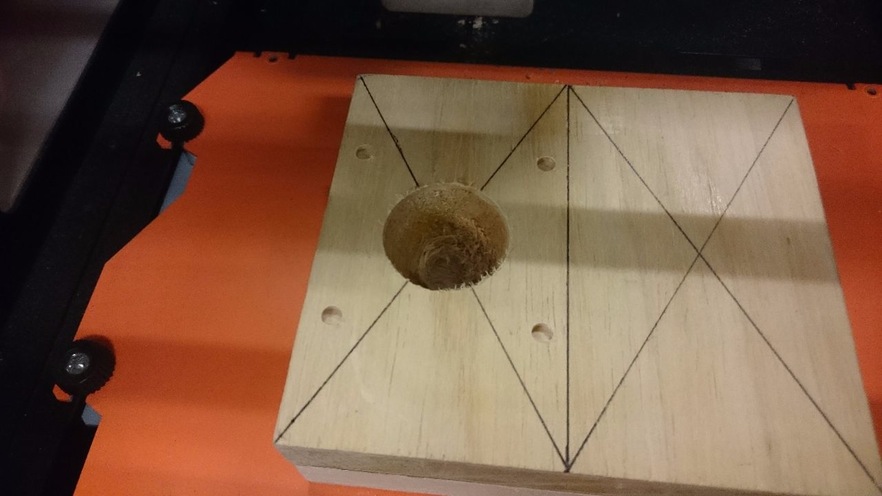
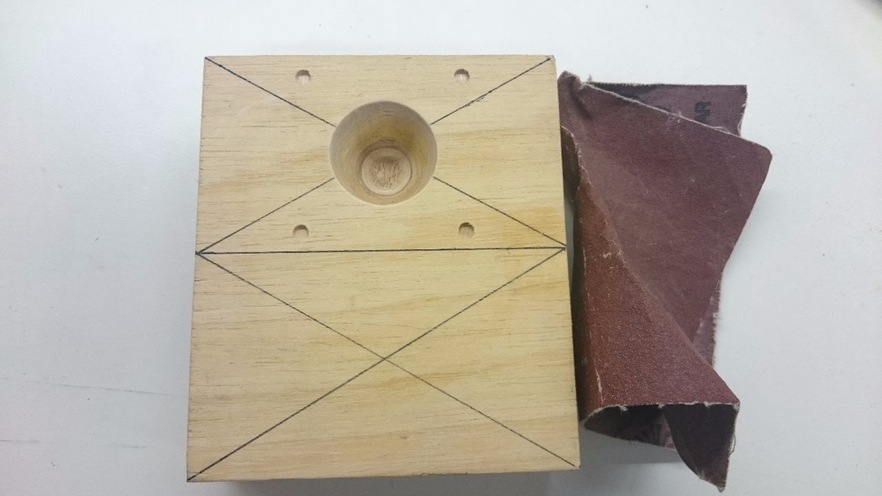
Upon completion of processing of thickness, the need to use a little sandpaper polished look. The edge in more detail.
完成粗細加工後,還須使用砂紙稍微打磨一下。使邊緣更細緻。
Composite processing
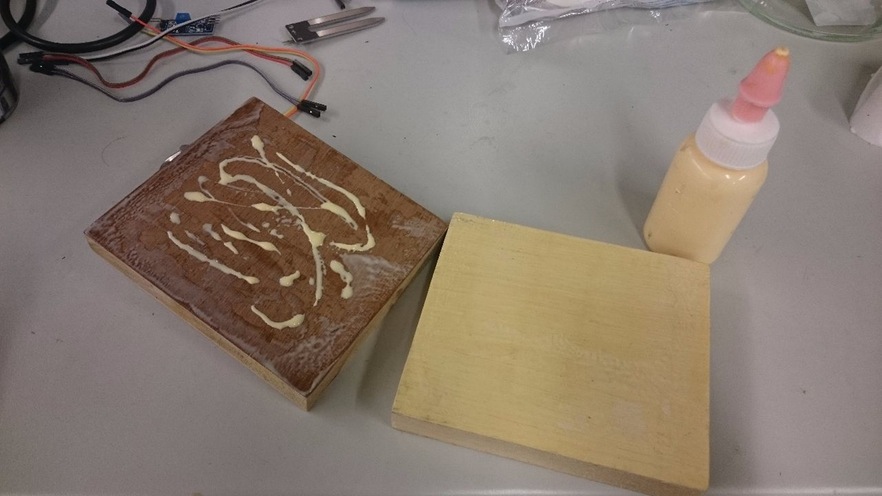
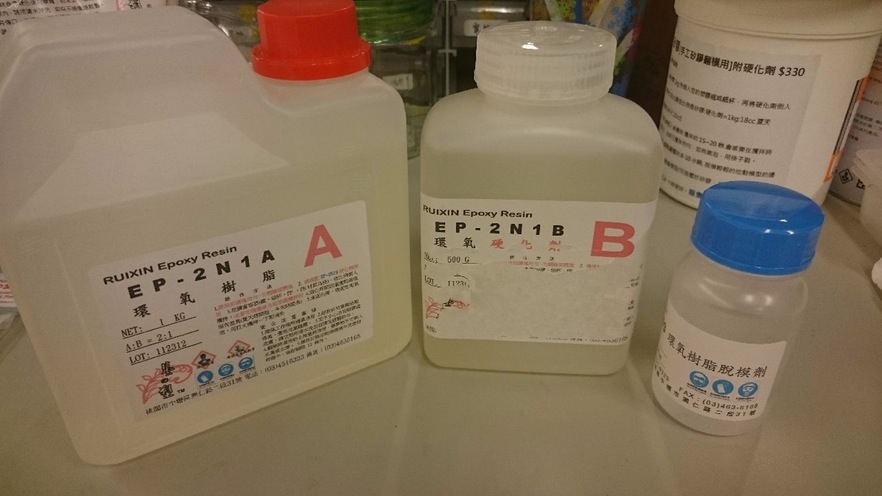
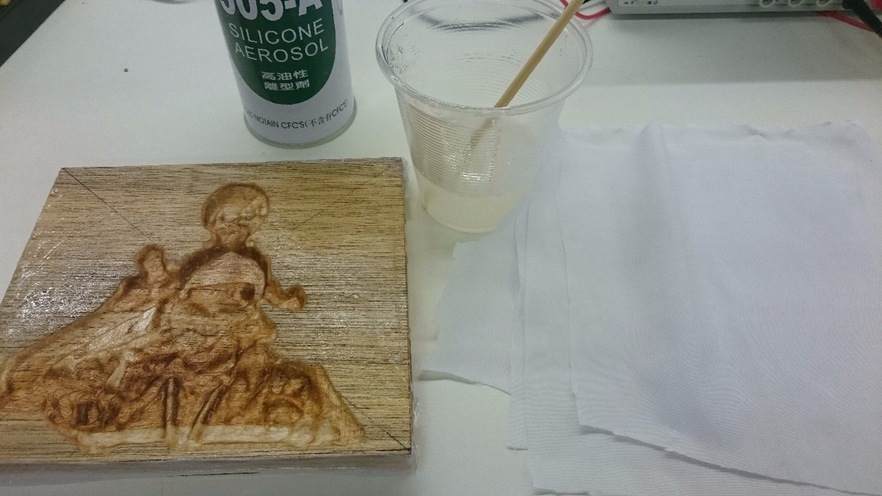
The other side of the mold after the same manner, the epoxy resin can be mixed, A and B agent is 2: 1. That is the right-most frequent special epoxy mold release agent.
另一側模具使用相同方式完成後,就可以混合環氧樹脂,A與B劑為2:1。最右側那瓶是環氧樹脂專用的脫模劑。
The first mold and vacuum coated with a release agent to prevent sticking.
先將模具及真空袋內塗上脫模劑,避免沾黏。
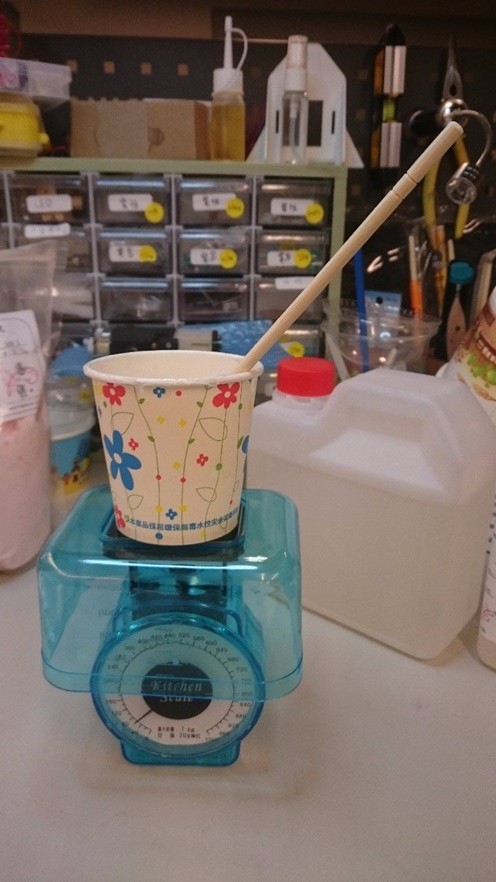
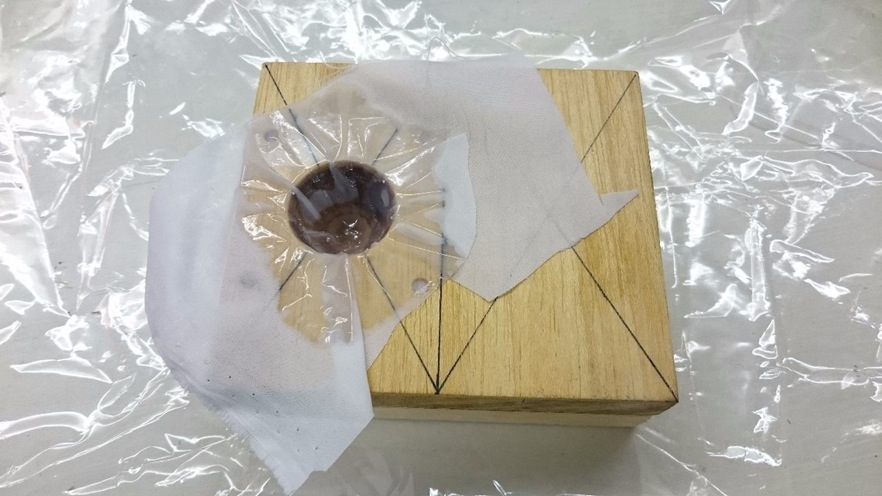
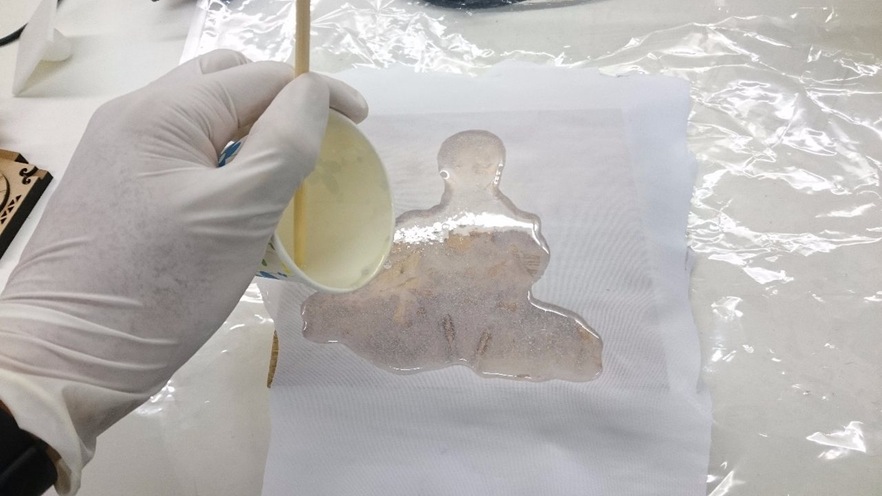
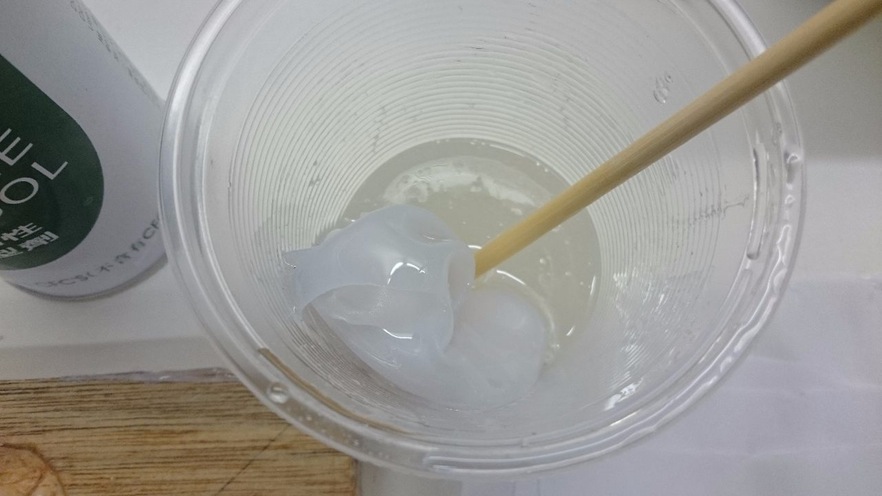
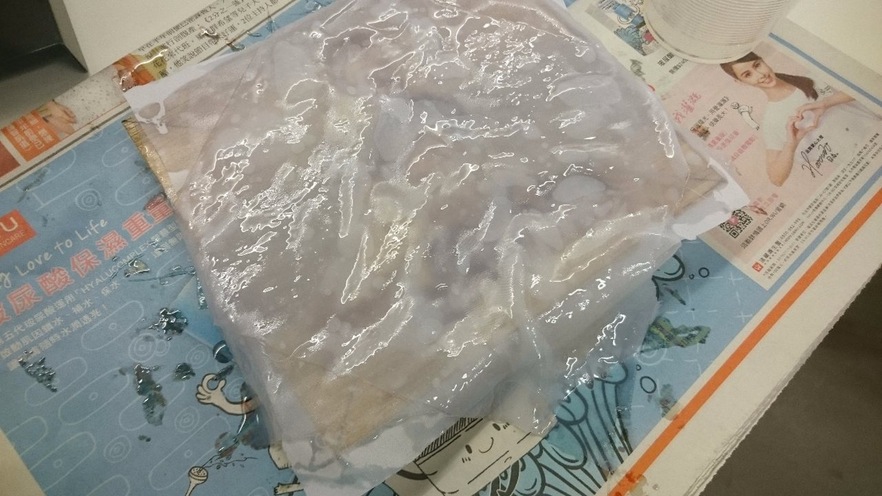
The cotton cloth into a mold, pour modulation epoxy resin and placed in a vacuum bag.
將棉布入模具中,倒入調製環氧樹脂,並放入真空袋。
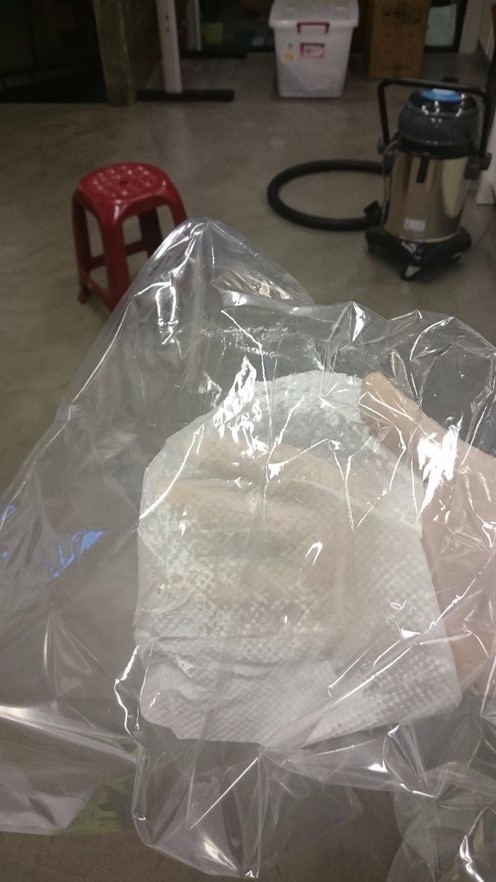
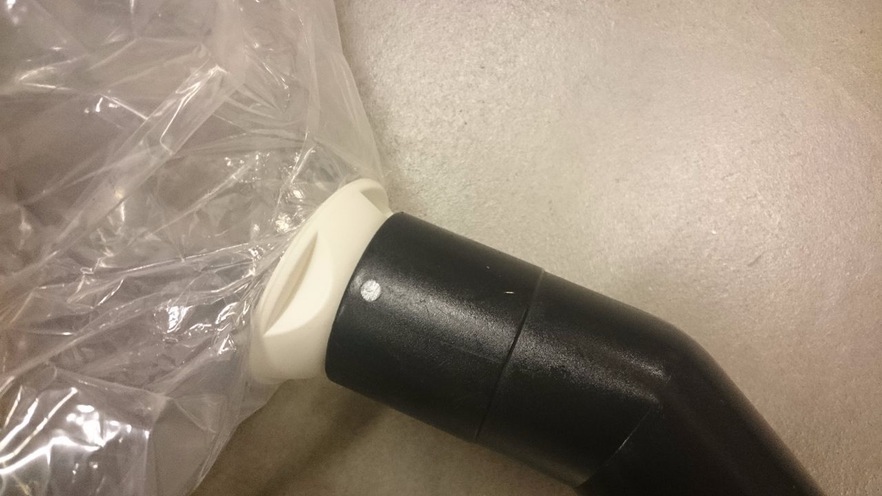
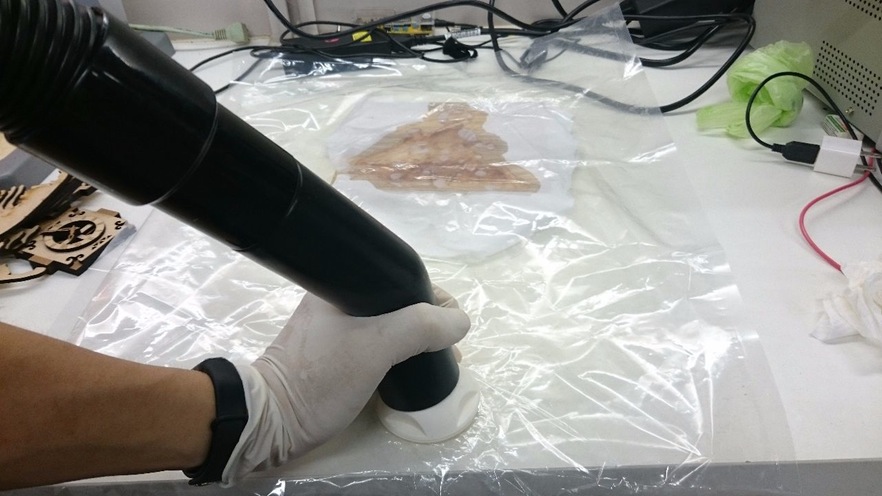
In the vacuum cleaner as a suction source connected to the vacuum valve. You can unscrew the valve evacuated after tightening the bag.
以吸塵器作為抽氣來源,接上真空袋閥門。抽到袋子緊縮後即可旋上閥門。
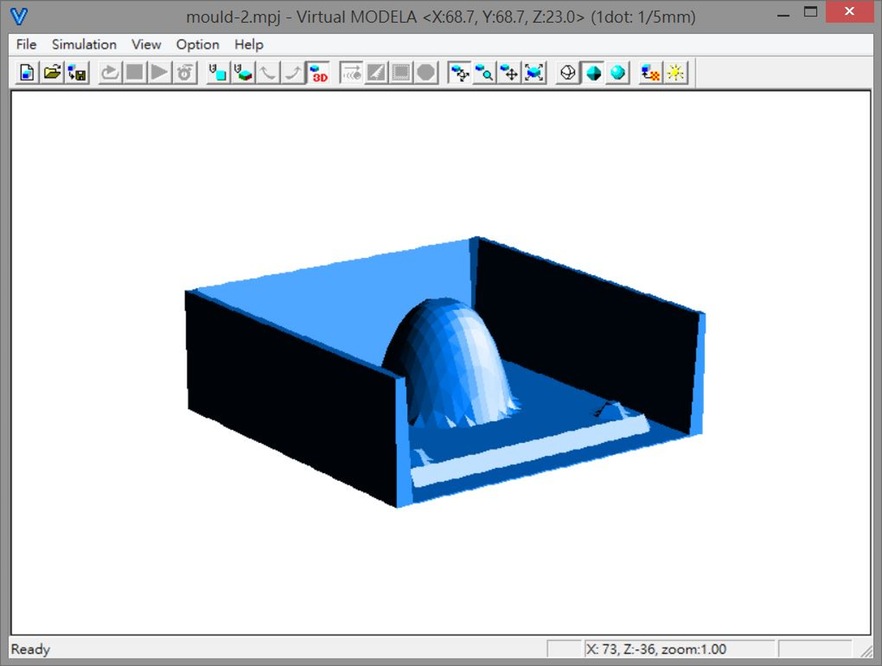
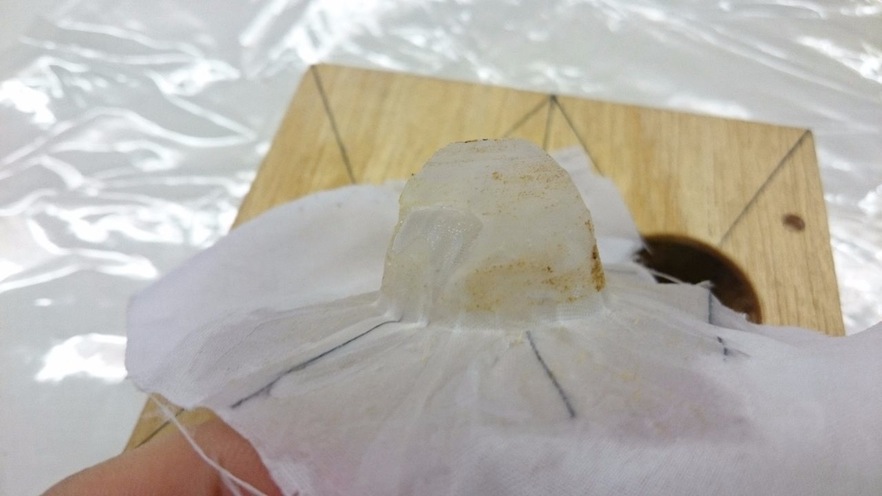
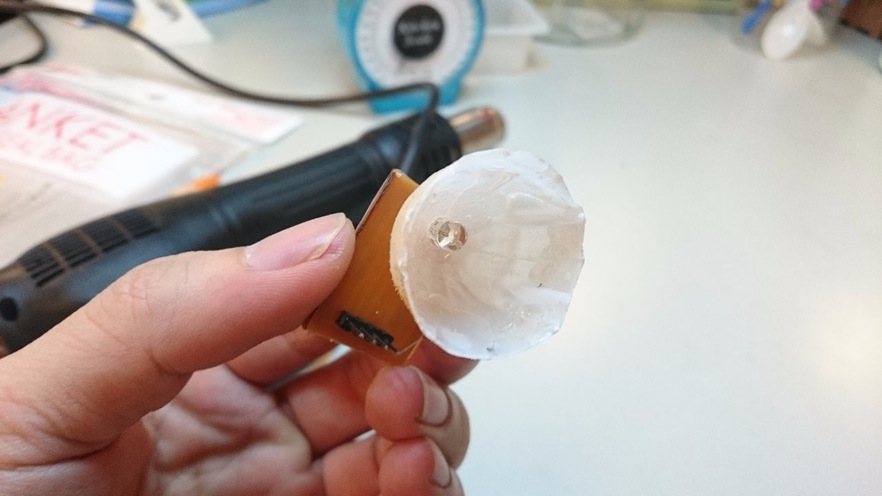
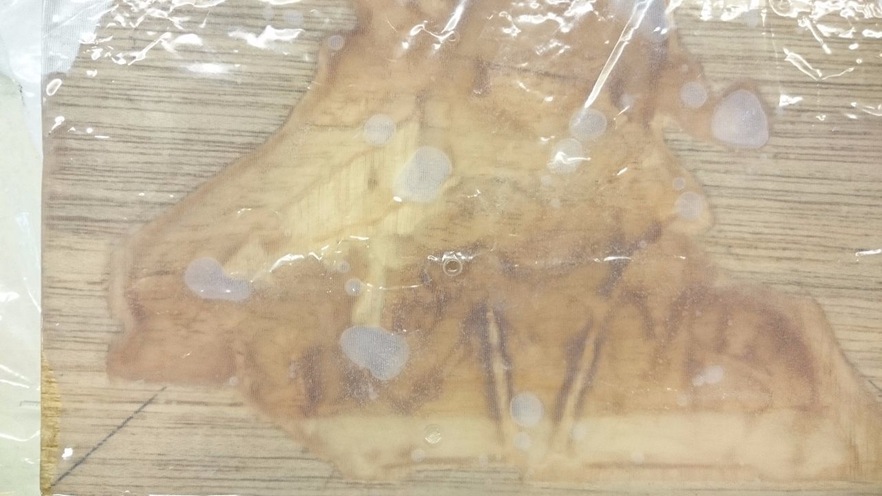
About 7hr harden completely removed from the vacuum bag. And part shade removed from the mold.
約7hr就完全硬化,從真空袋中取出。並將燈罩部分從模具中取出。
You can see part of not filled epoxy resin. It may be insufficient or inadequate degree of vacuum epoxy resin.
可以看到部分沒有填充到環氧樹脂。可能是真空度不足或是環氧樹脂不足。
Using it
Then cut the excess part of the center drilling, install the LED lights.
切下多餘部分後再中心鑽孔,安裝在LED燈。
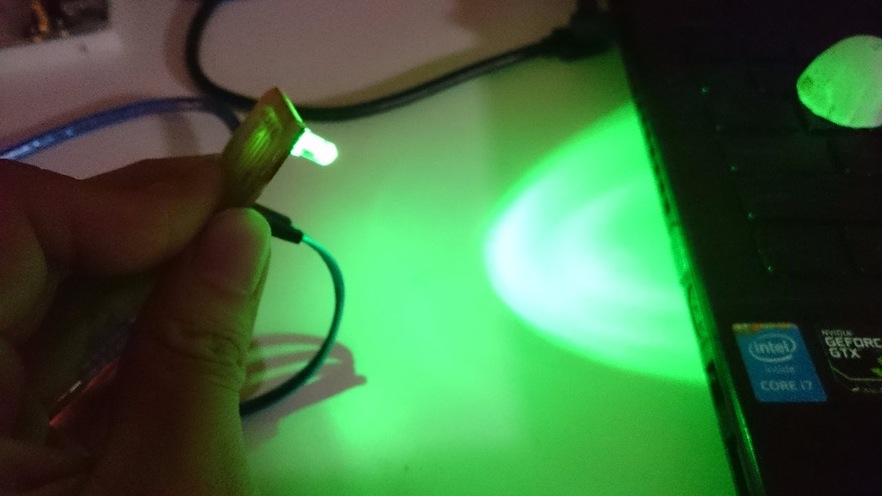
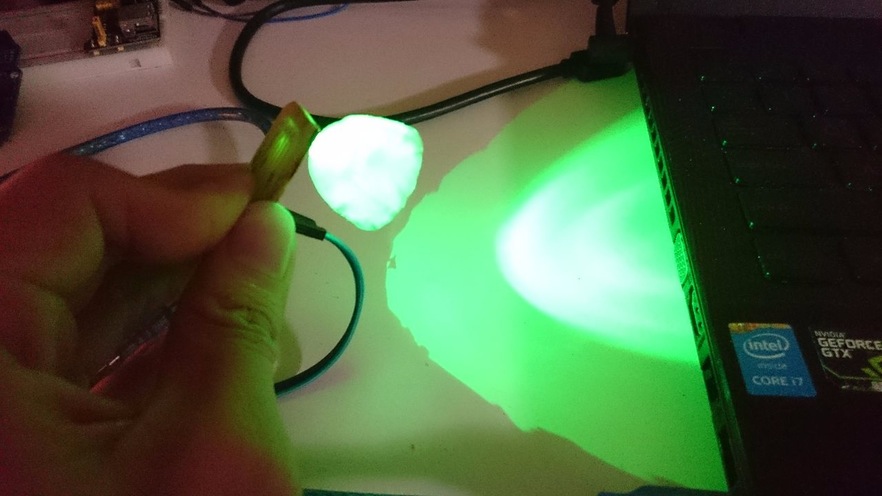
比較有燈具和沒有燈具的差異:有燈具光束較收攏,且有燈罩較不易直接看到燈所直射出的刺眼光線。
Make Mould: Round 2
The second production is a photograph of relief.
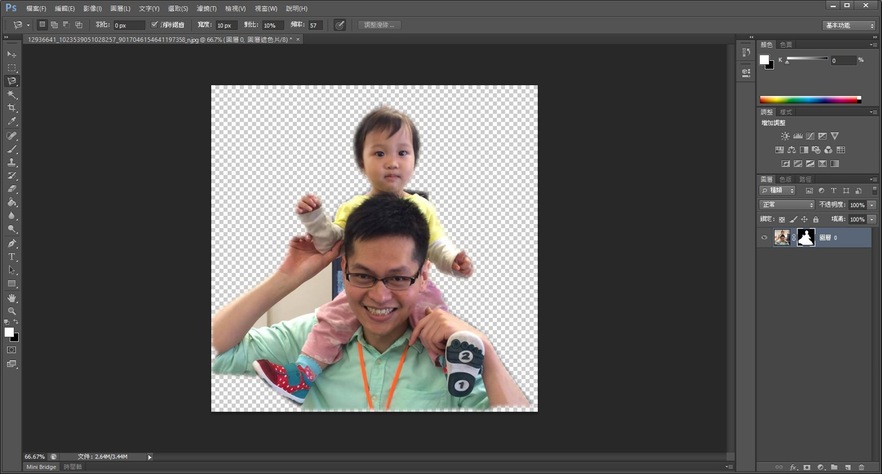
First picture simplification, remove excess background. Background removal by Adobe photoshop. Save as a new file backup. Picture characters are my friends cute little daughter.
第二個製作的是照片的浮雕。先將照片簡單化,去除多餘背景。由Adobe photoshop進行背景的去除。儲存成新的檔案備用。圖片人物是我與朋友可愛的小女兒。
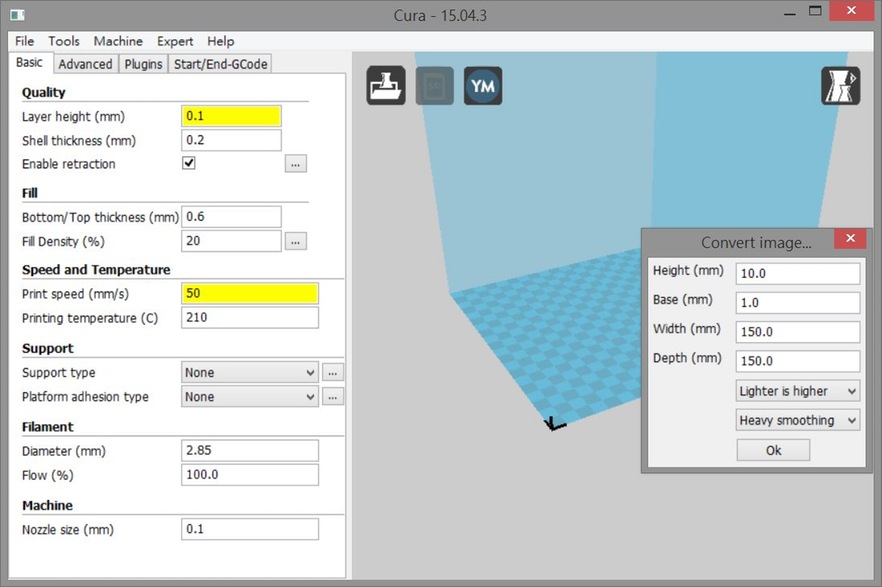
The use of software "Cura" Turning Photos into 3D drawing. Cura is a generic 3D printing software, you may be drawing with G-code conversion, or drawing the slice. Here is the use of one of the functions, convert photos to gray shades establishment thickness body. Simple steps are as follows:
Image Import "Cura" occurs when the parameter options. Overall height can choose to print, substrate thickness, size, the bright / dark portion of the protruding portion, smoothness. After confirming click "OK".
使用軟體"Cura"將照片轉成3D圖檔。Cura是一個通用的3D列印軟體,可以進行圖檔與G-code的轉換,或圖檔的切片。此處是利用其中一項功能,將照片的灰階深淺轉換成立體的厚度。簡易步驟如下:
圖片匯入"Cura"時,會出現參數選項。可選擇整體列印的高度、基底厚度、尺寸、亮部/暗部為突出部分、平滑度。確認後點選"OK"。
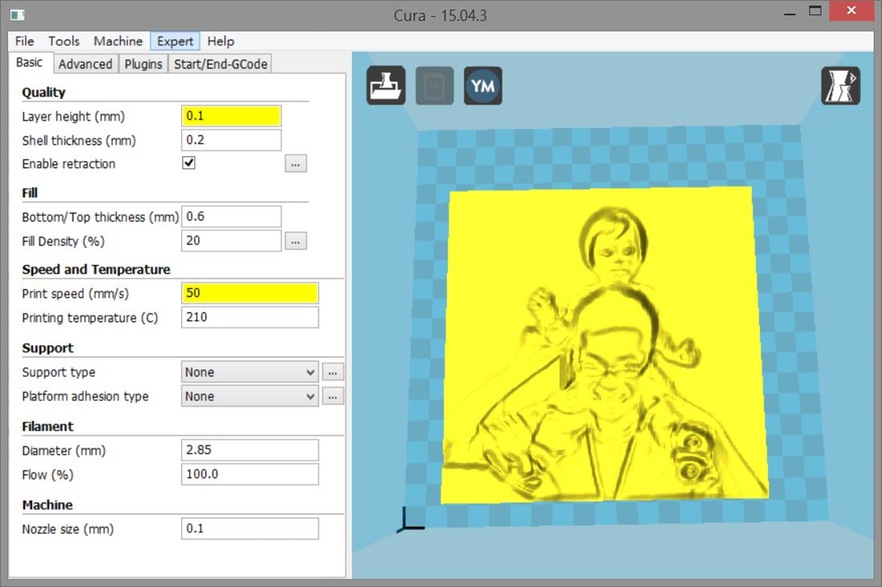
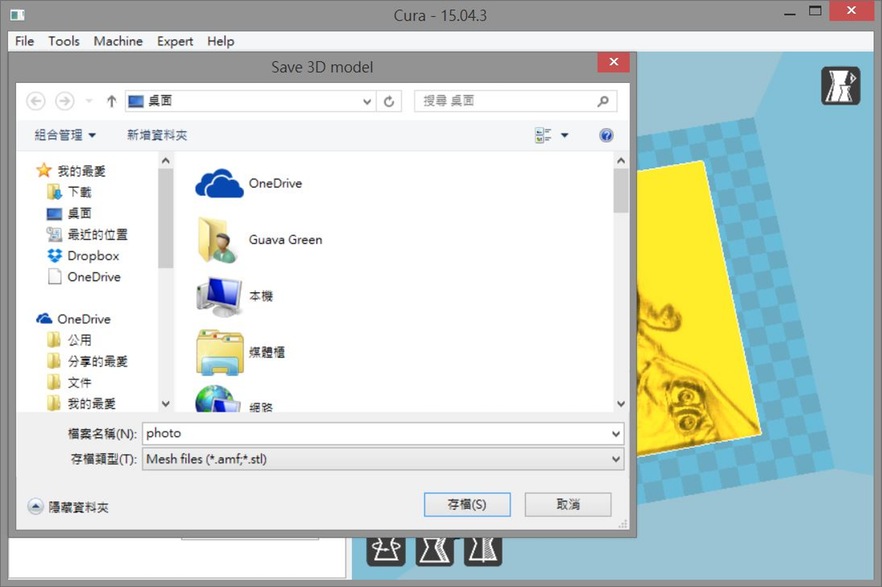
After the emergence of a perspective view can be observed there is no problem then adjusted until the most satisfactory drawing. Then save as * .stl file.
出現立體圖後,可觀察有沒有問題再進行調整,直到最滿意的圖檔。然後儲存成*.stl檔案。
The export of stl files open by the "MODELA Player 4", the roughing and finishing path converting the manner described above and stored.
將匯出的stl檔案由"MODELA Player 4"開啟,依上述方式將粗加工與細加工路徑轉換並儲存。
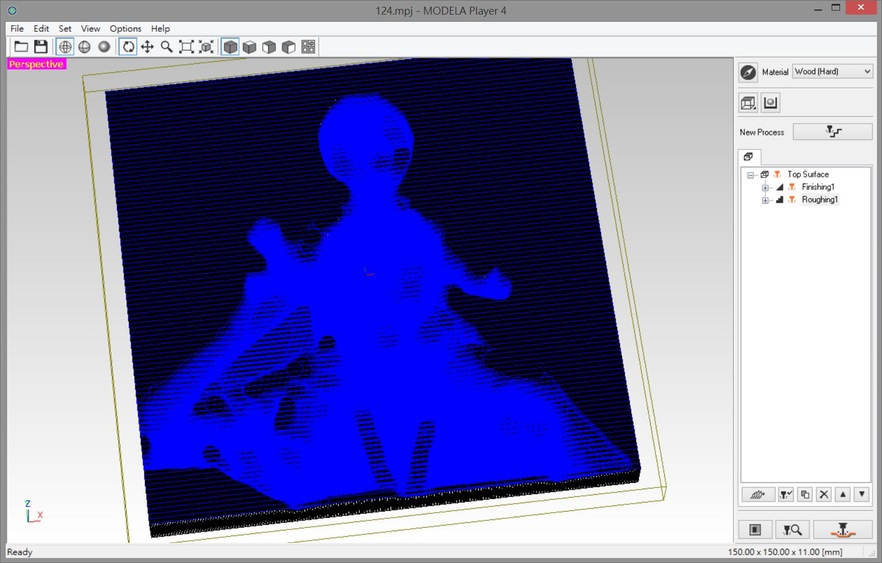
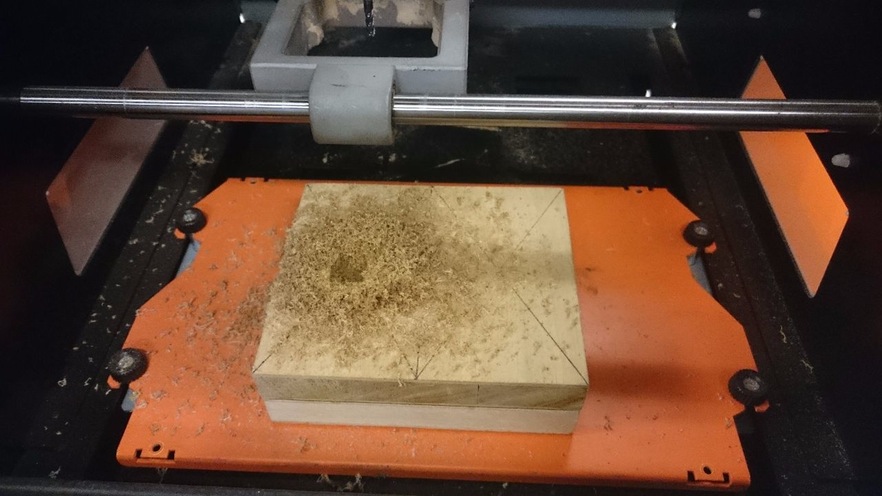
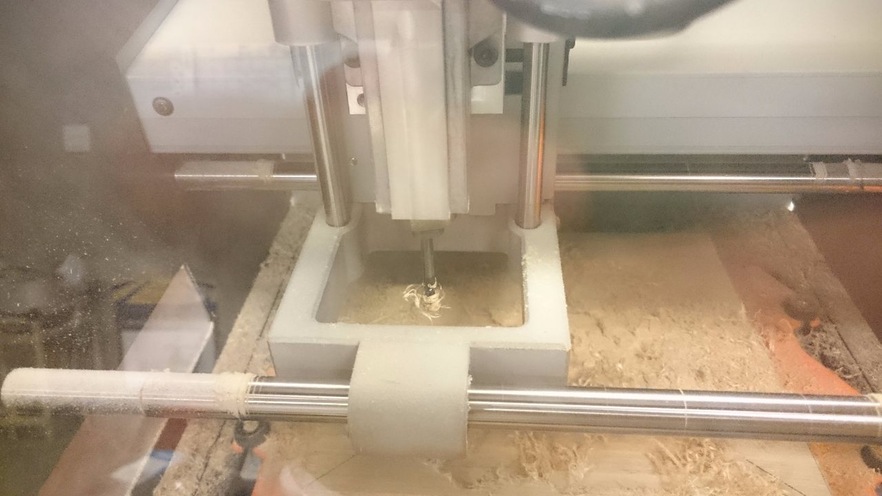
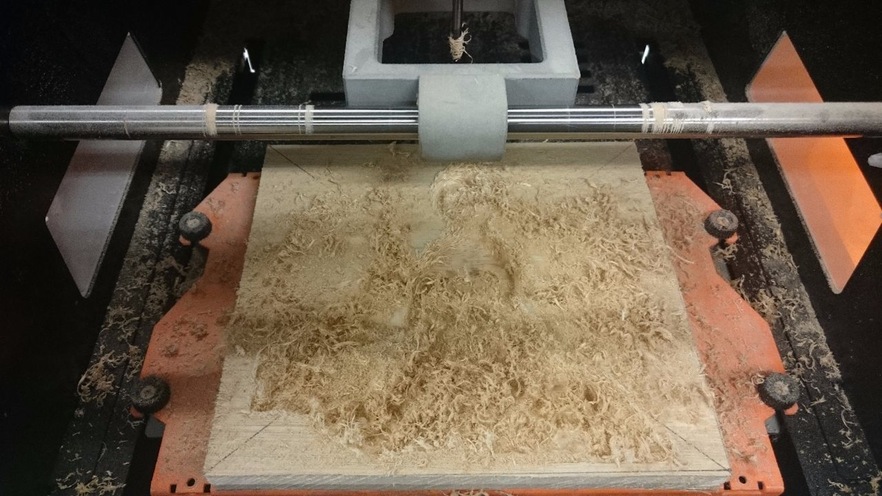
The entire processing time is very long, rough spent more than four hours. And a lot of fiber, often to stop and clean up debris.
整個加工時間非常漫長,粗加工就花了4個多小時。且纖維很多,時常要停下來清理屑屑們。
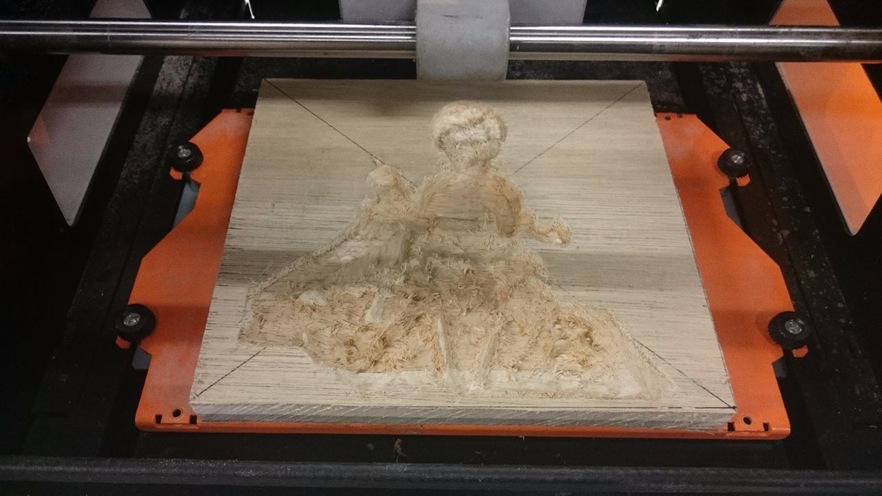
After finishing, there are still a lot of fiber and roughness, but to use sandpaper.
細加工後,還是有很多纖維及粗糙部分,只好使用砂紙打磨。
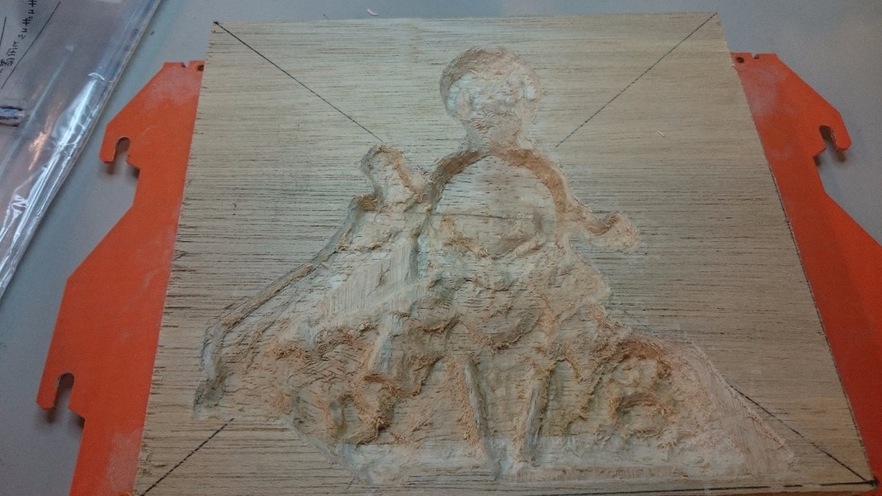
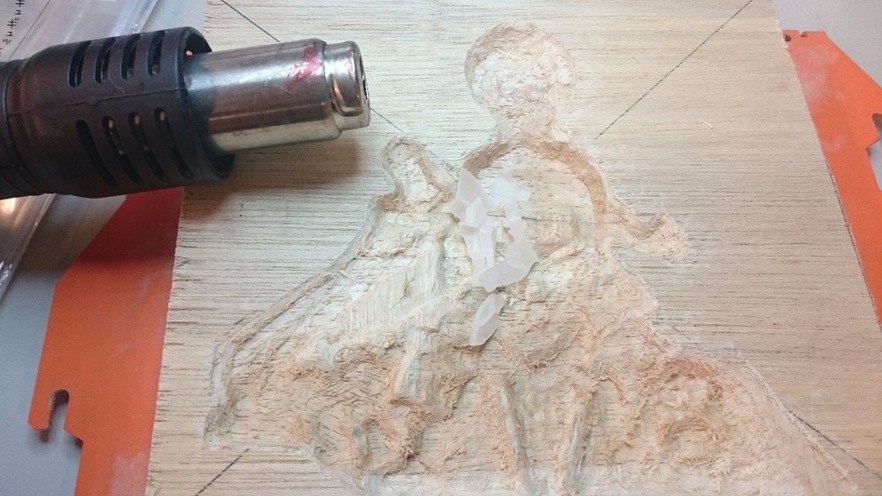
After sanding although improved, but based on previous experience, the epoxy will firmly seize these rough parts. So I use wax to seal the fibers and pores. Using a heat gun to melt the wax, and painted the entire block. Finally, the remainder of the wax mold is blown.
打磨後雖然有改善,但根據先前經驗(如week12),環氧樹脂將牢牢抓住這些粗糙部分。所以我使用蠟去封住這些纖維及孔洞。使用熱風槍將蠟融化,並塗滿整個木塊。最後將多餘的蠟吹出模具。

Composite processing
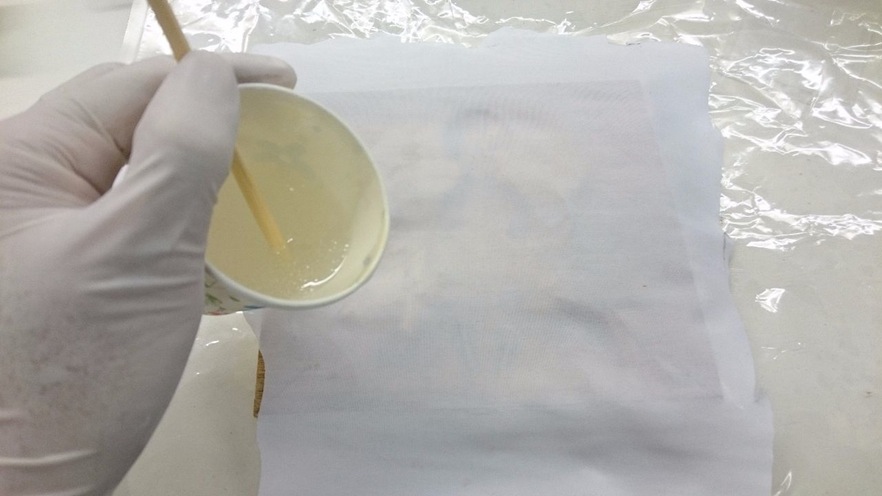
Preparing an epoxy resin, poured into a mold and cotton.
調製環氧樹脂,倒入模具與棉布。
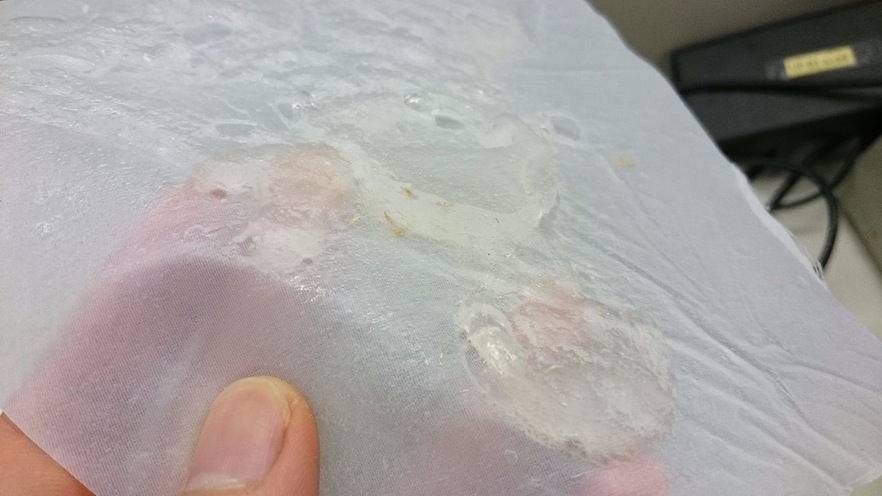
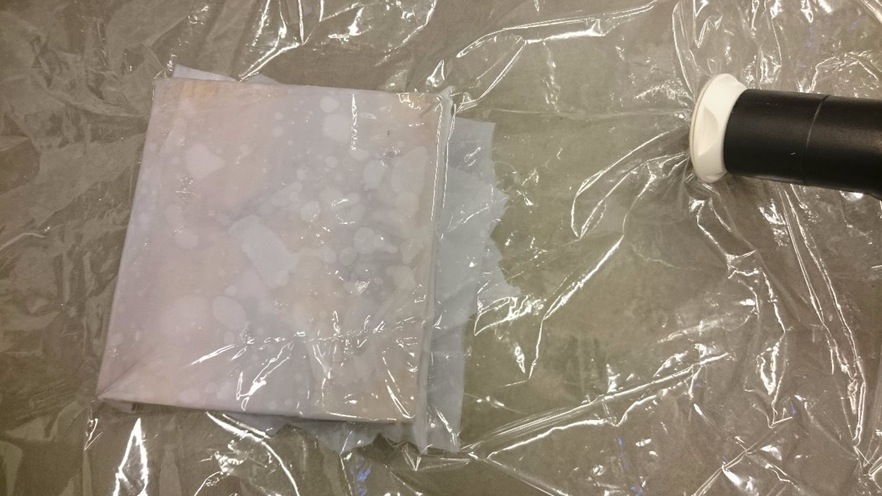
Placed in a vacuum bag vacuum. But I found that bubbles can not be withdrawn. Presumably a former part should also not fill this phenomenon. The most likely is that the degree of vacuum cleaner insufficient entire Remove excess air.
放入真空袋中抽真空。但發現有氣泡無法被抽出。推測前一個沒有填滿部分應該也是此現象。最有可能的是吸塵器真空度不足,無法將多餘空氣整個取出。
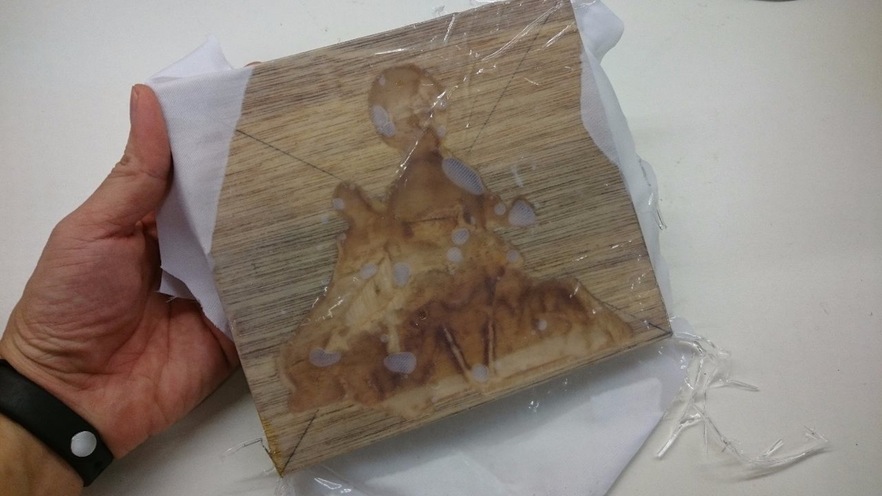
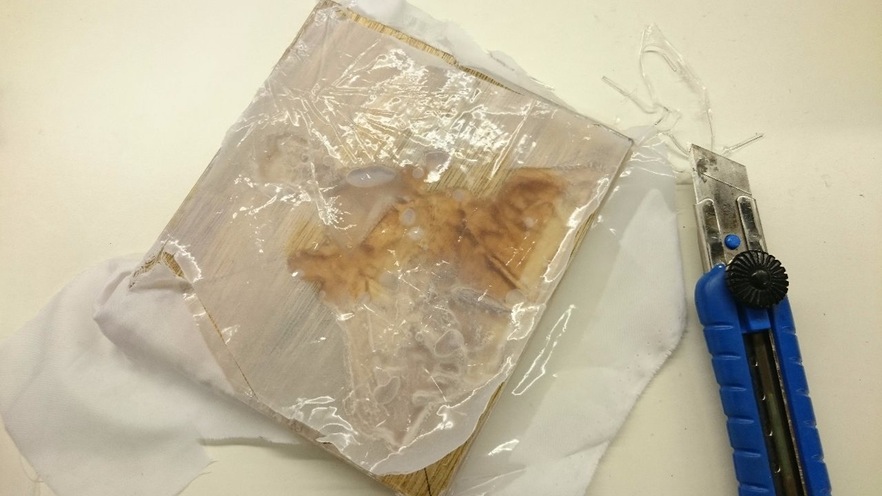
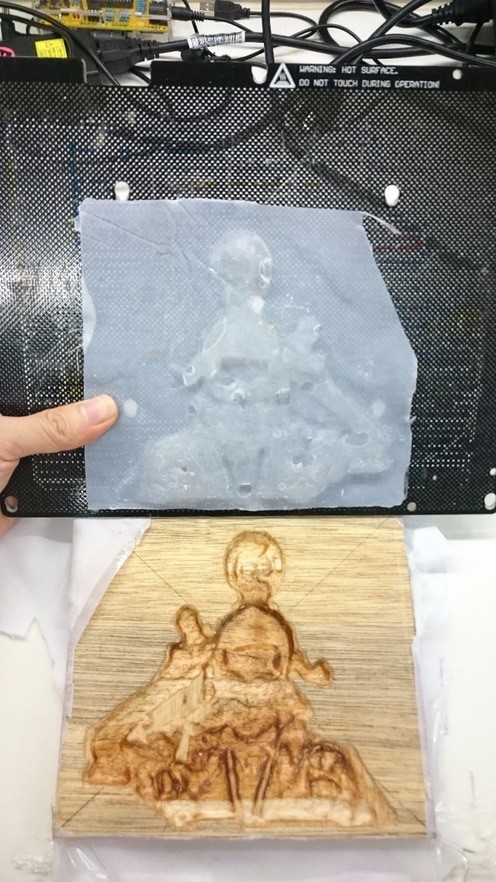
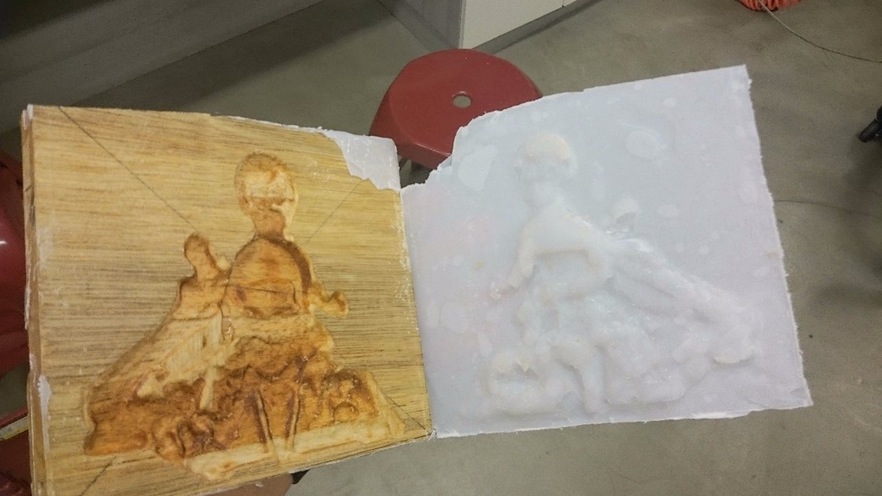
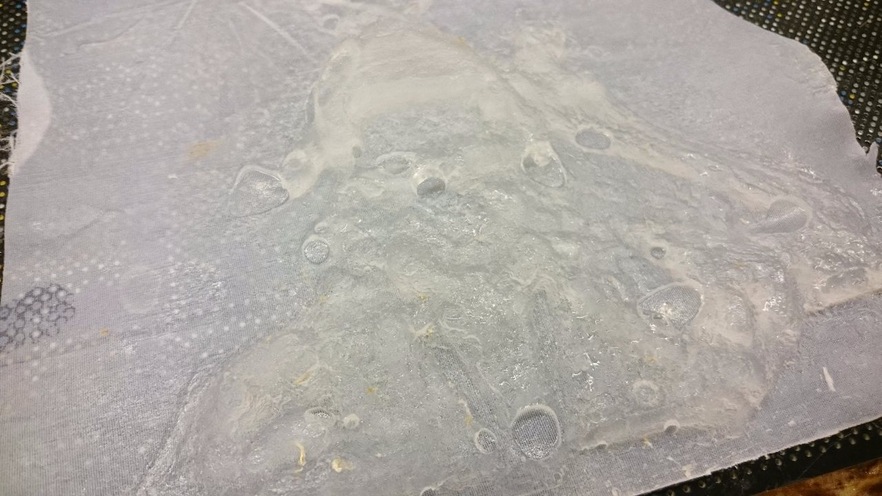
After hardening is removed from the vacuum bag, no adhesions. But stick to the overflow epoxy wood frame and pull it down. And we had to use a knife to cut the top surface. There are wax coated place is easy to remove, pull down the wood fibers are not many. Just inside the cavity caused by too much air. Resolution whole works well, not identified figures.
硬化後從真空袋中取出,沒有沾黏。不過溢出的環氧樹脂黏到木板邊框而拔不下來。最後只好使用刀子切開頂面。有使用蠟塗過地方很容易取下,拉扯下的木頭纖維也不多。只是內部有太多空氣造成的空洞。整個作品解析度不好,不好辨認出人物。
7/25 Update
Combining a single plies of fabric and epoxy is not definitely purpose of composite. I have to binding multi-layer fabric with epoxy to fill the entire pit. There will be a strong structure, against the destruction of many variety of external forces.
By the way, We have some carbon fiber in Fablab Tainan. I don't have enough protective equipment, so using cotton fiber finish this work.
只有環氧樹脂與單層布料結合確實不太符合複合材料宗旨。我應該要將環氧樹脂與多層布料作結合,填滿整個物件凹洞。使用纖維及聚合物組成的物品,將會有強大的結構,抵抗多種外力的破壞。Fablab中也有碳纖維布可以使用,但我沒有足夠的防護裝備所以改用布纖維。
The following is production process.
製作過程如下:
1.Preparing an epoxy.
調製環氧樹脂
2.Cutting the right size fabric.
剪裁出合適布料的大小
3.Spraying release agent on mold and vacuum bagging.
模具、真空袋噴塗脫模劑
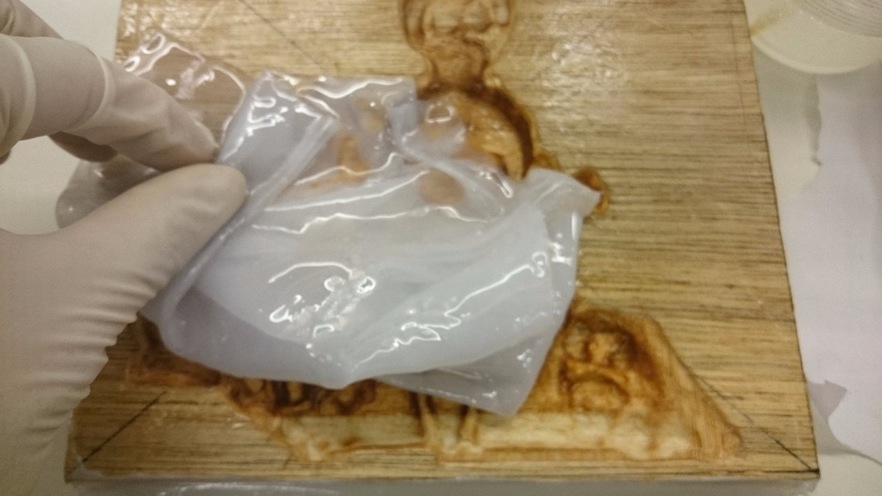
4.The cloth covered with thick epoxy paste to the mold.
將布料沾滿環氧樹脂後貼到模具上
5.Repeat the steps. Stick several layers of fabric.
重複將多層布料黏上
6.Vacuum step.
抽真空
7.Object removed after hardeningd.
物件硬化後取出
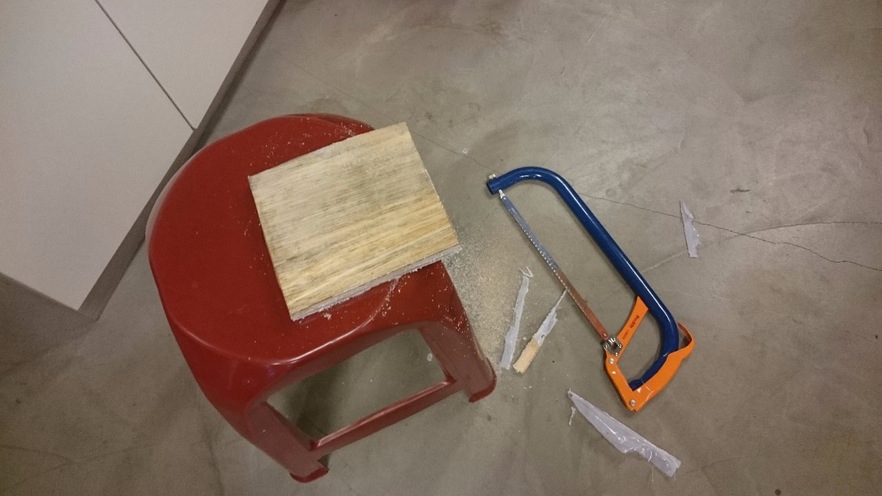
8.Cutting out the works by saw.
以鋸子切割出作品
Troubleshooting:
The first sculpture carved only half, no sculpture to the bottom of the cover. Carving deeper shade need to determine is the Z-axis positioning. There may be mechanisms to protect the head, so to a certain position that is not carved. New tool to adjust the height and Z-axis origin. Then we can successfully complete the mold.
第一次雕刻只雕刻了一半,沒有雕刻到燈罩底部。燈罩需要雕刻較深,判斷是Z軸定位問題。可能有保護刀頭的機制,所以到特定位置即不雕刻。成新調整刀具高度以及Z軸原點。之後就可以順利完成模具。
Has been the presence of air within the mold may need to vacuum pump or other vacuum test will be alerted lack of vacuum is not really due.
模具內一直有空氣存在,可能需要真空幫浦或是其他真空袋進行測試才會知曉真空度不足是不是真因。
Tools:
Roland SRM-20
MODELA Player 4
123D Design
File:
mould_buttom.stl
mould_top.stl
photo.stl
