VINYL CUTTER
Design and drawing
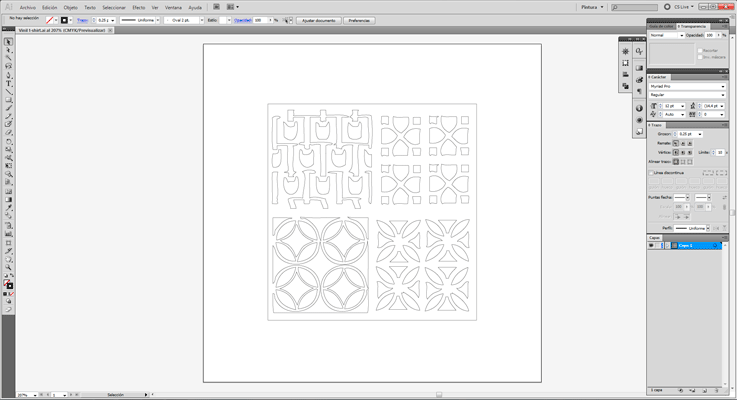
For the vinyl cutter practice I decided to do a T-shirts, I was inspired by some windows of the Italian architect Carlo Scarpa, I draw the window in Ilustrator, all the lines have to be vectors and I used a vector thick thin line. To draw it I used the pen tool. And I saved it as Ilustrator 8.
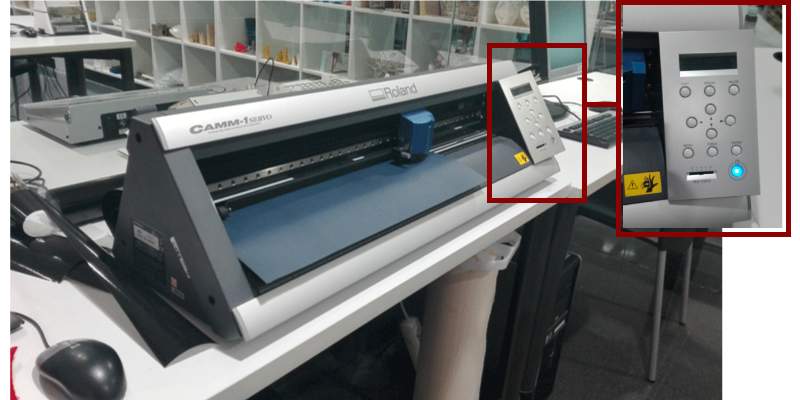
The machine and the program
The vinyl cutter machine that we have in our fablab is the Roland GX-24 and the program that we use to send the files to the machine is Cut Studio.
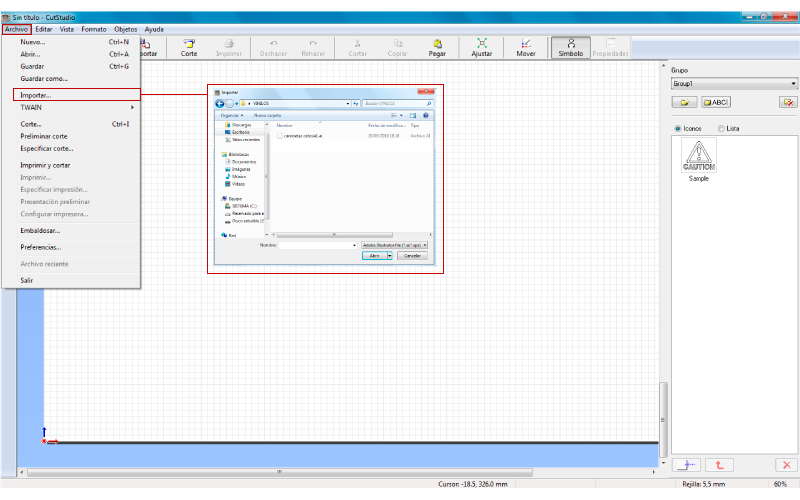
Once I opened the Cut Studio I import the Ilustrator 8 file.
- We have to press cut
- Choose the printer Roland GX-24
- Properties: size and write the size of the vinyl that I will use and the units, when it is a roll you just have to press “Get from the machine” and the width will be the real size and the length will be 1600mm
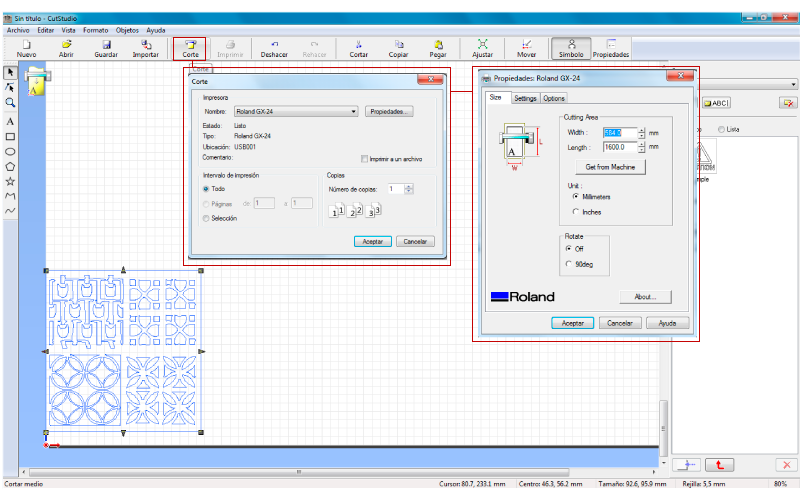
There are some things that we have to change directly in the machine as for example the speed the force and if we are going to use a roll or a sheet of vinyl.
The cut force that I used was 120gf 0,250 mm and the speed 5 cm/s.
When I had the file ready I send the cut to the machine.
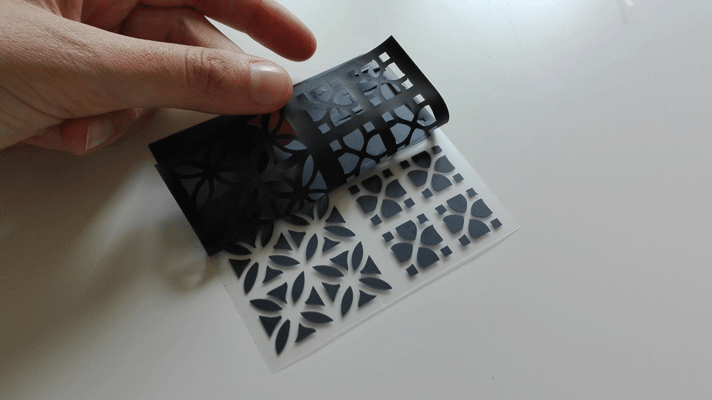
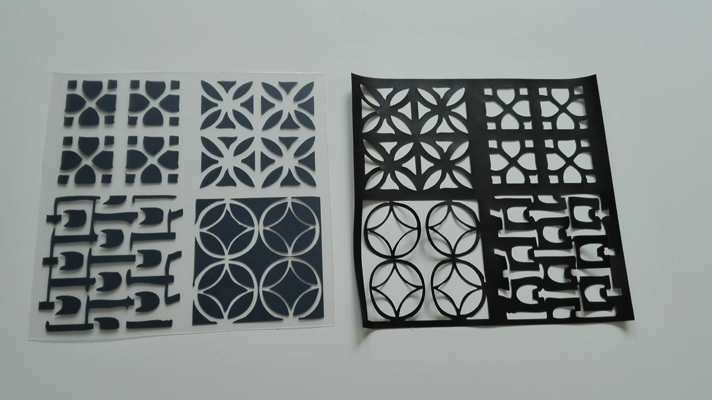
The vinyl
I got over the part that did not want from the transparent plastic.
I put the vinyl on the T-Shirt.
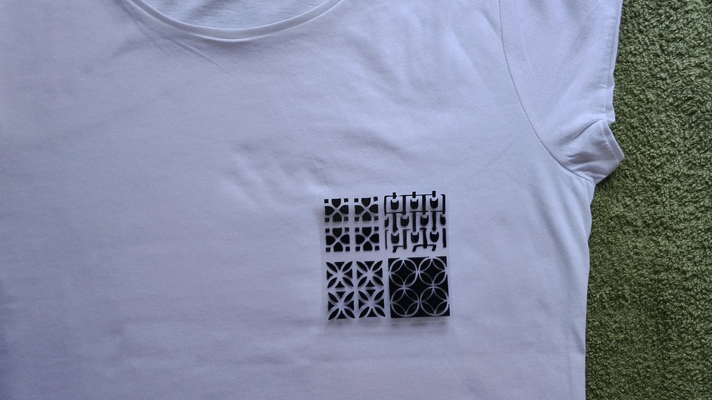
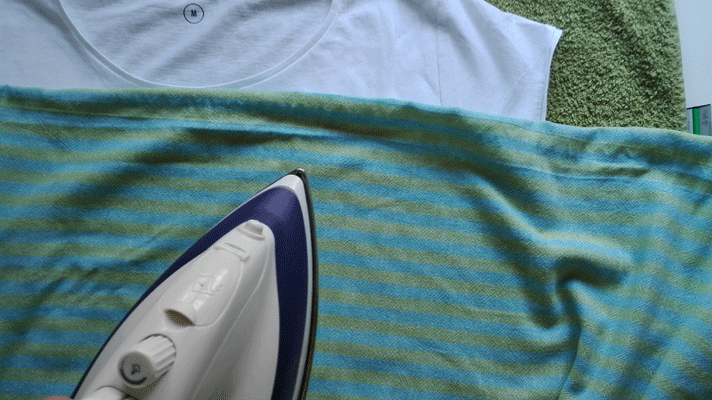
I put a thin cloth over the shirt and ironed carefully applying heat evenly.
I carefully remove the clear plastic.

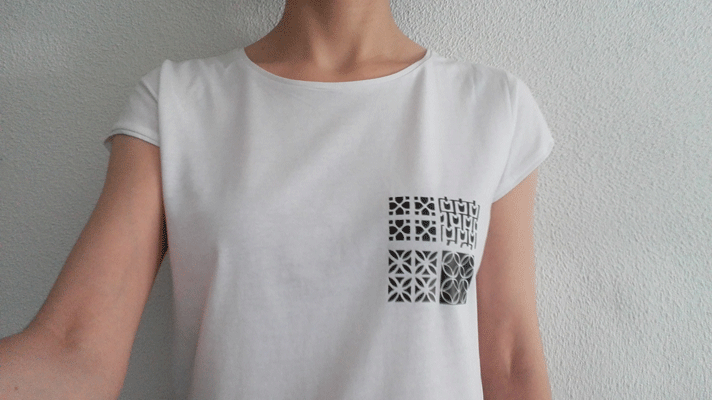
Final result
And this was the final result: