Week 7 : Computer-controlled machining (Mar 9)
Assignment
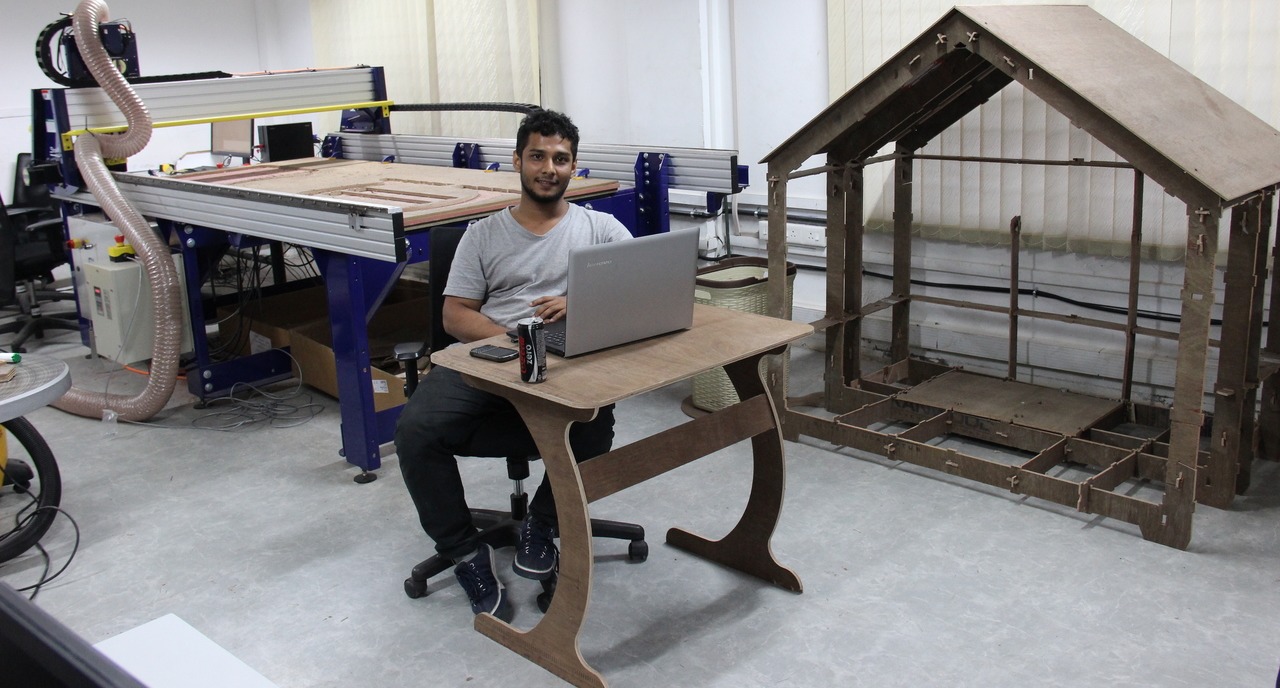
The assignment this week is something exciting, that is 'To Make Something BIG'. This week is the perfect time to start off with prototyping and building my smart furniture parts.
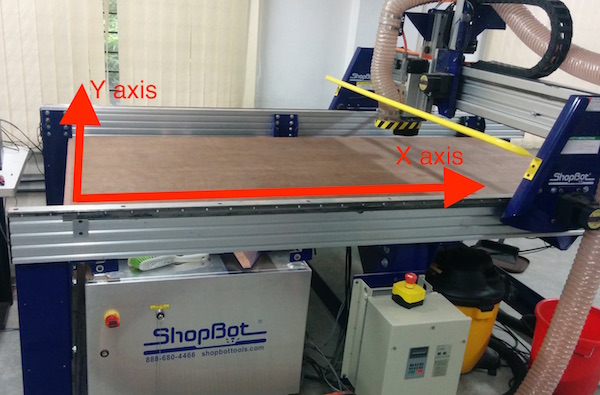
The machine present at our lab is Shopbot. ShopBot is a three axis machine CNC Machine. To send the design files to the machine, we use the software, V-Carve. I used Rhino to make the design for my furniture {it is still in CAD design process}. Hopefully, I would finish the designing today and probably do a cardboard prototype and make the furniture in the vacation break of fabacademy.
In this week I've try several things. I might had lose my eye if I did more mistake.
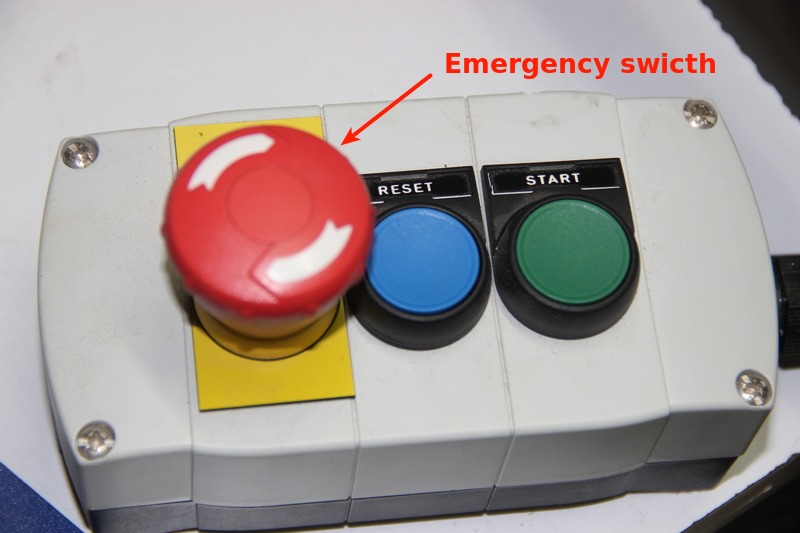
Always, Safety First!
You have to wear at least goggles when you operate CNC Router. When something fly right in to your eye while work on something it may make you blind.
Also there will be a lot of noise while you cutting and run Dust collector so, wear the ear protection to protect your ears. and the Mask is highly recommended. ;)
Plan
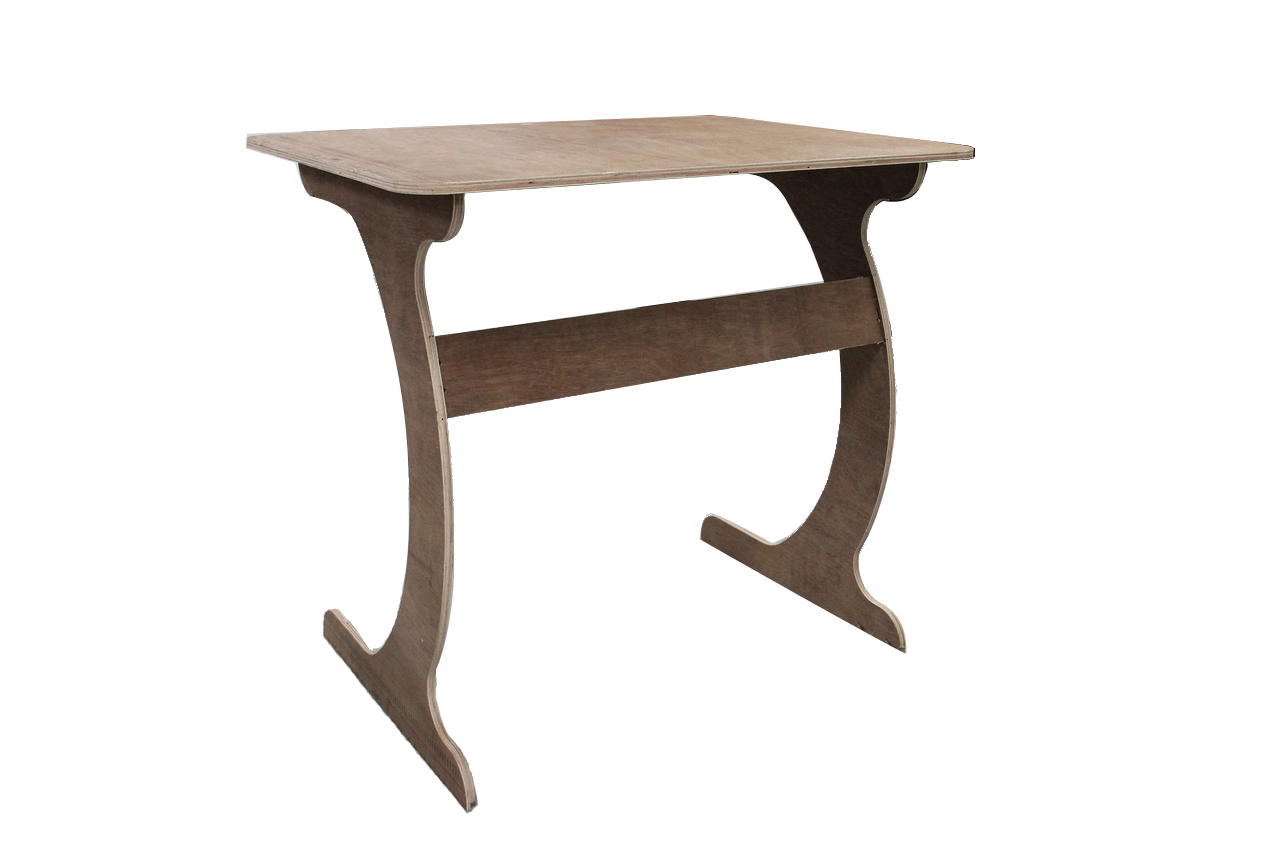
I am planning to make Study Table.
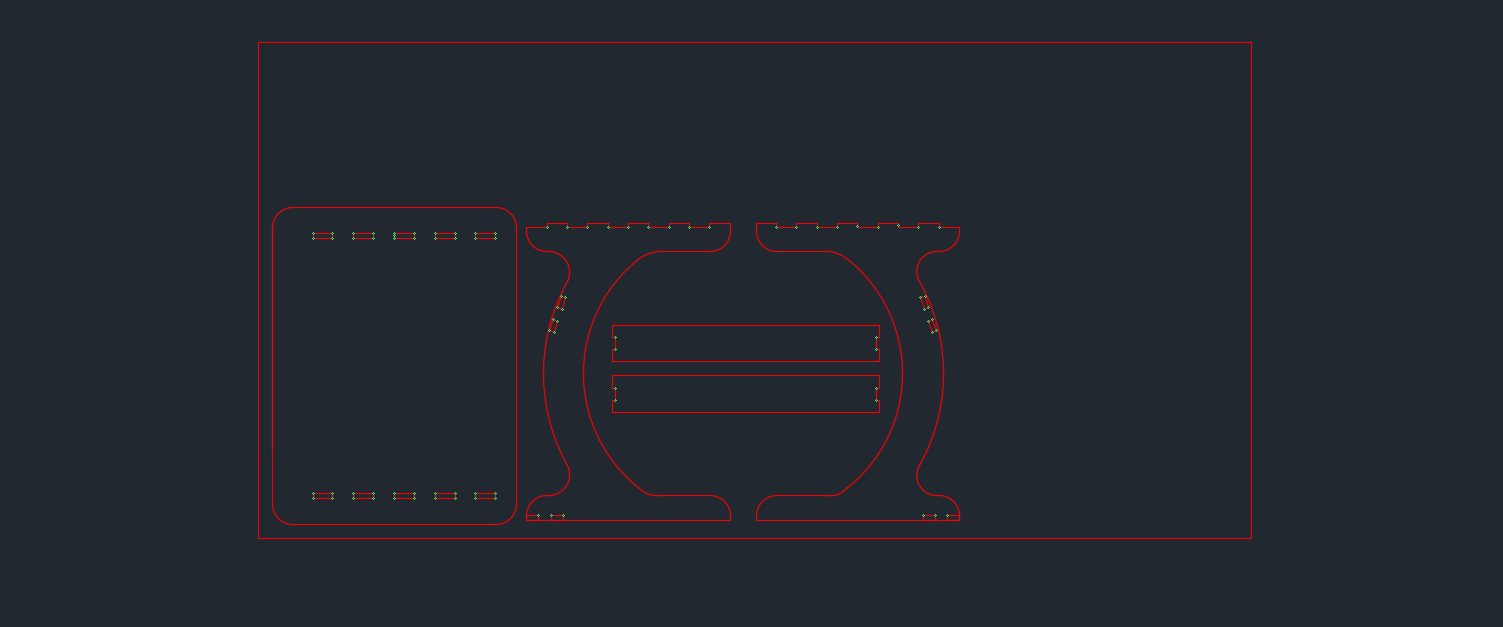
My design file
Step 2: Setting up the machine
Before using the machine, first you need to understand its orientation. The longer axis of the machine is X and shorter one is Y. Like in figure below:
Place the material you wish to use on top of the sacrificial layer and screw it down using power drills (impact drill).
Next, power ON the machine by switching ON the main power supply and the control board switch. Check to see if any of the emergency stops are engaged, release them if they are.

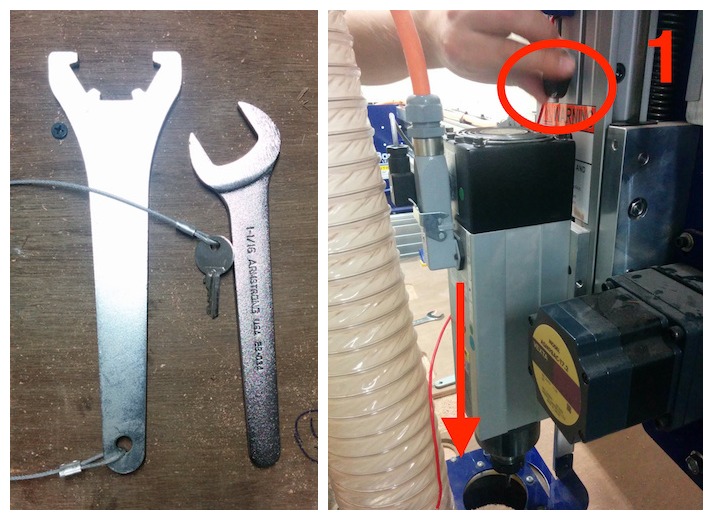
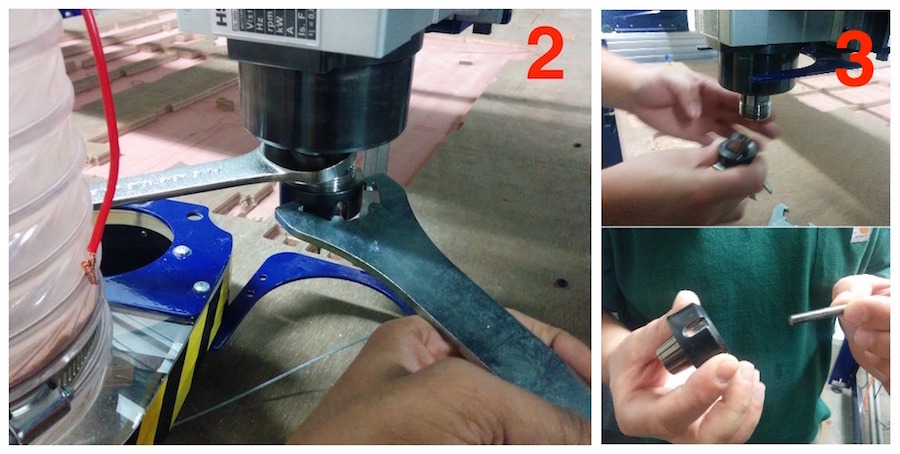
In order to change the mill bits, you need to do the following: Loosen the board above the spindle and let the brush cover slide down, then move it out of the way.Use the spanner and cullet tool (attached to the key on the control box, to prevent accidental turning ON of the spindle) to loosen the mill bit. Pull them together to loosen and apart to tighten. And then Remove the cullet and mill bit and replace it with the new bit. Next, tighten the mill bit onto the spindle and place the brush cover back.
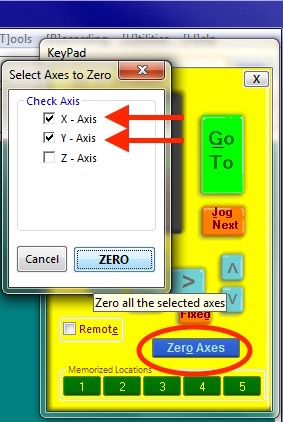
Now open the ShopBot software and use the arrow keys to move the spindle to the portion where you wish to cut.

Click X and Y axes. Move the spindle head to the portion which you want to set as the origin and click on Zero axes button and check X and Y axes.
Next,Set the Z axis origin. click on the Z axis option from the [Z]ero toolbar dropdown and follow the instructions. Remove the steel plate from the spindle block and clip the alligator clip on to the cullet. Place the steel plate below the mill bit and click “OK”
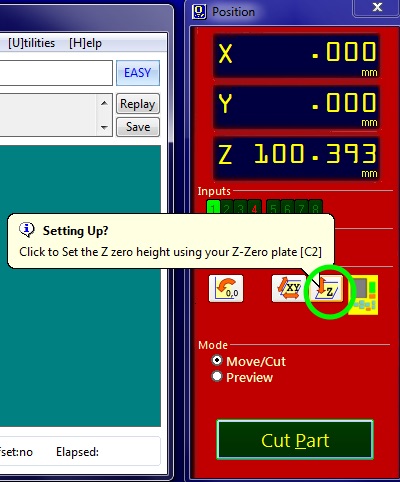
The machine makes the spindle move down and the mill bit touches the plate, this happens two times in order to figure out the exact Z axis height. After this, remove the alligator clip and place the metal plate back to its earlier position.
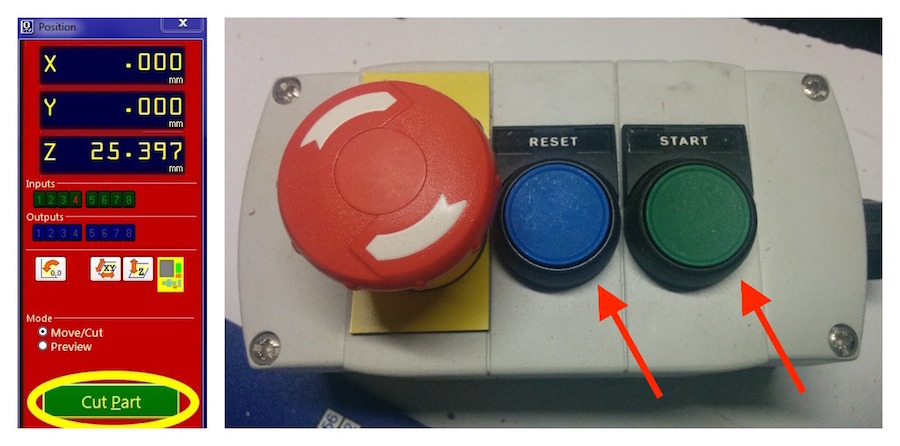
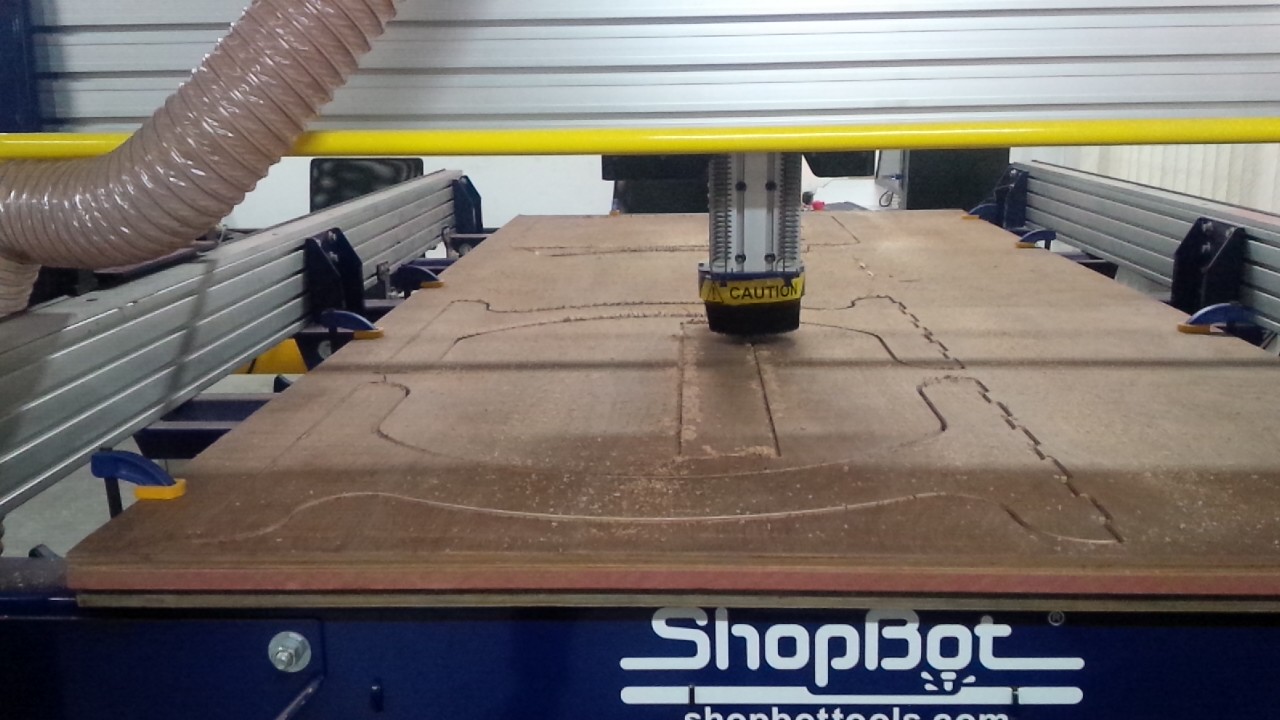
Now, we are ready to cut the part. Click on “CUT PART” and open the first drill toolpath that was created through Vcarve Pro. Press the REST button on the machine to reset it and press START button when the computer asks you to.
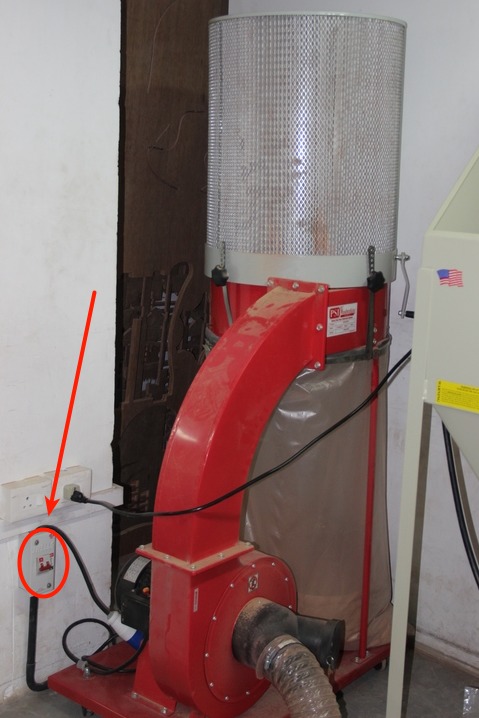
The spindle starts and begins drilling the paths, turn on the Vacuum pump to suck the dust from the machine.
After it completes. And then repeat the same steps for cutting the part by loading the next toolpath file for the pocket and profile operations and wait for the completion.
V-Software
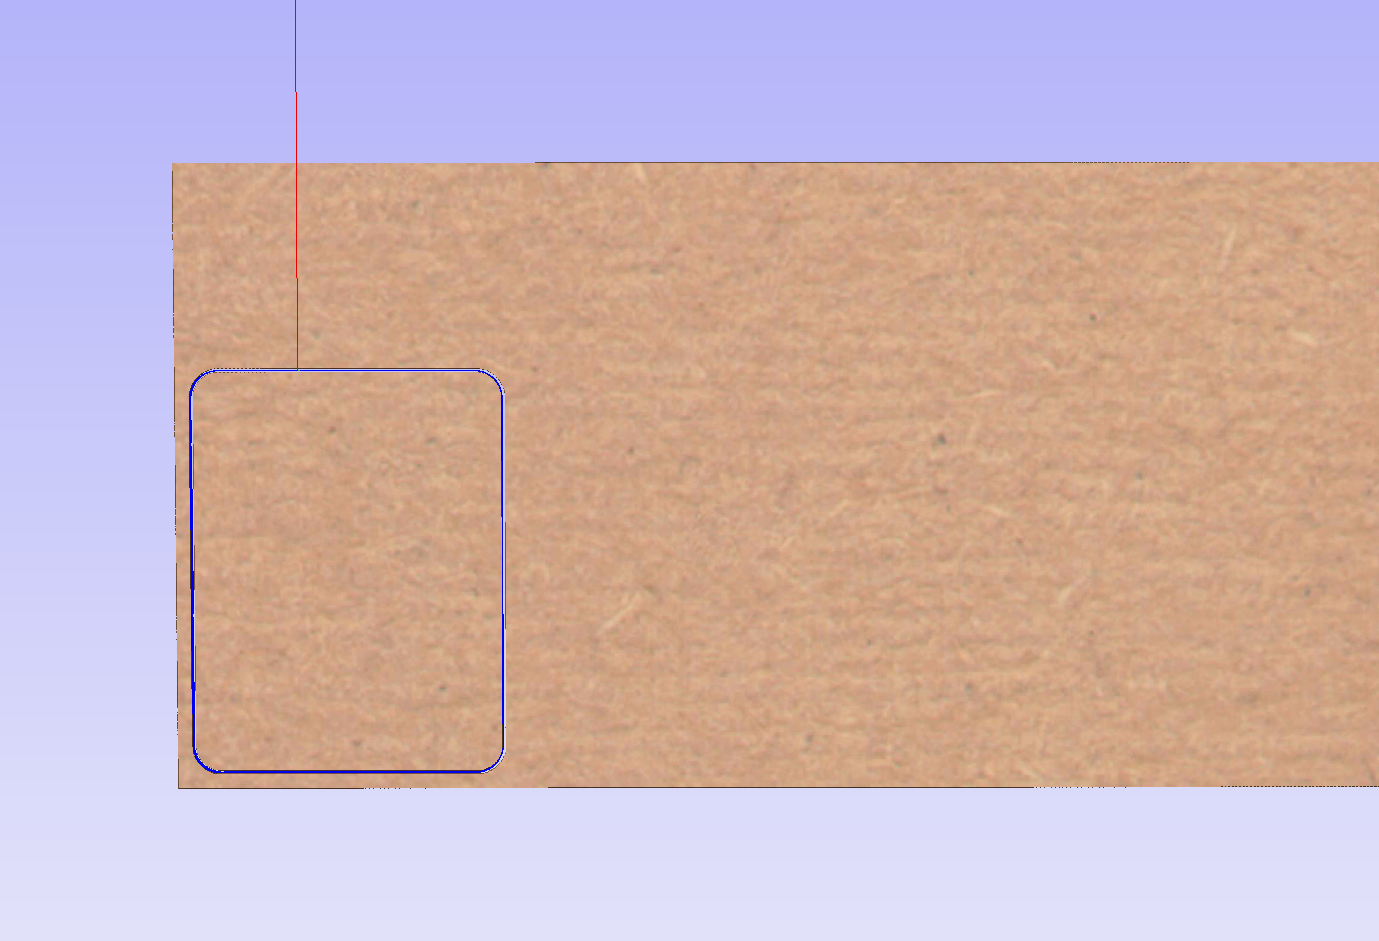
Then I opened my desined dxf file in v-curve software. first set the job setups. Job size 2440x1220 mm and the meterial thickness is 12mm. XY Datum position used left bottom corner. Then I arranged the profles.
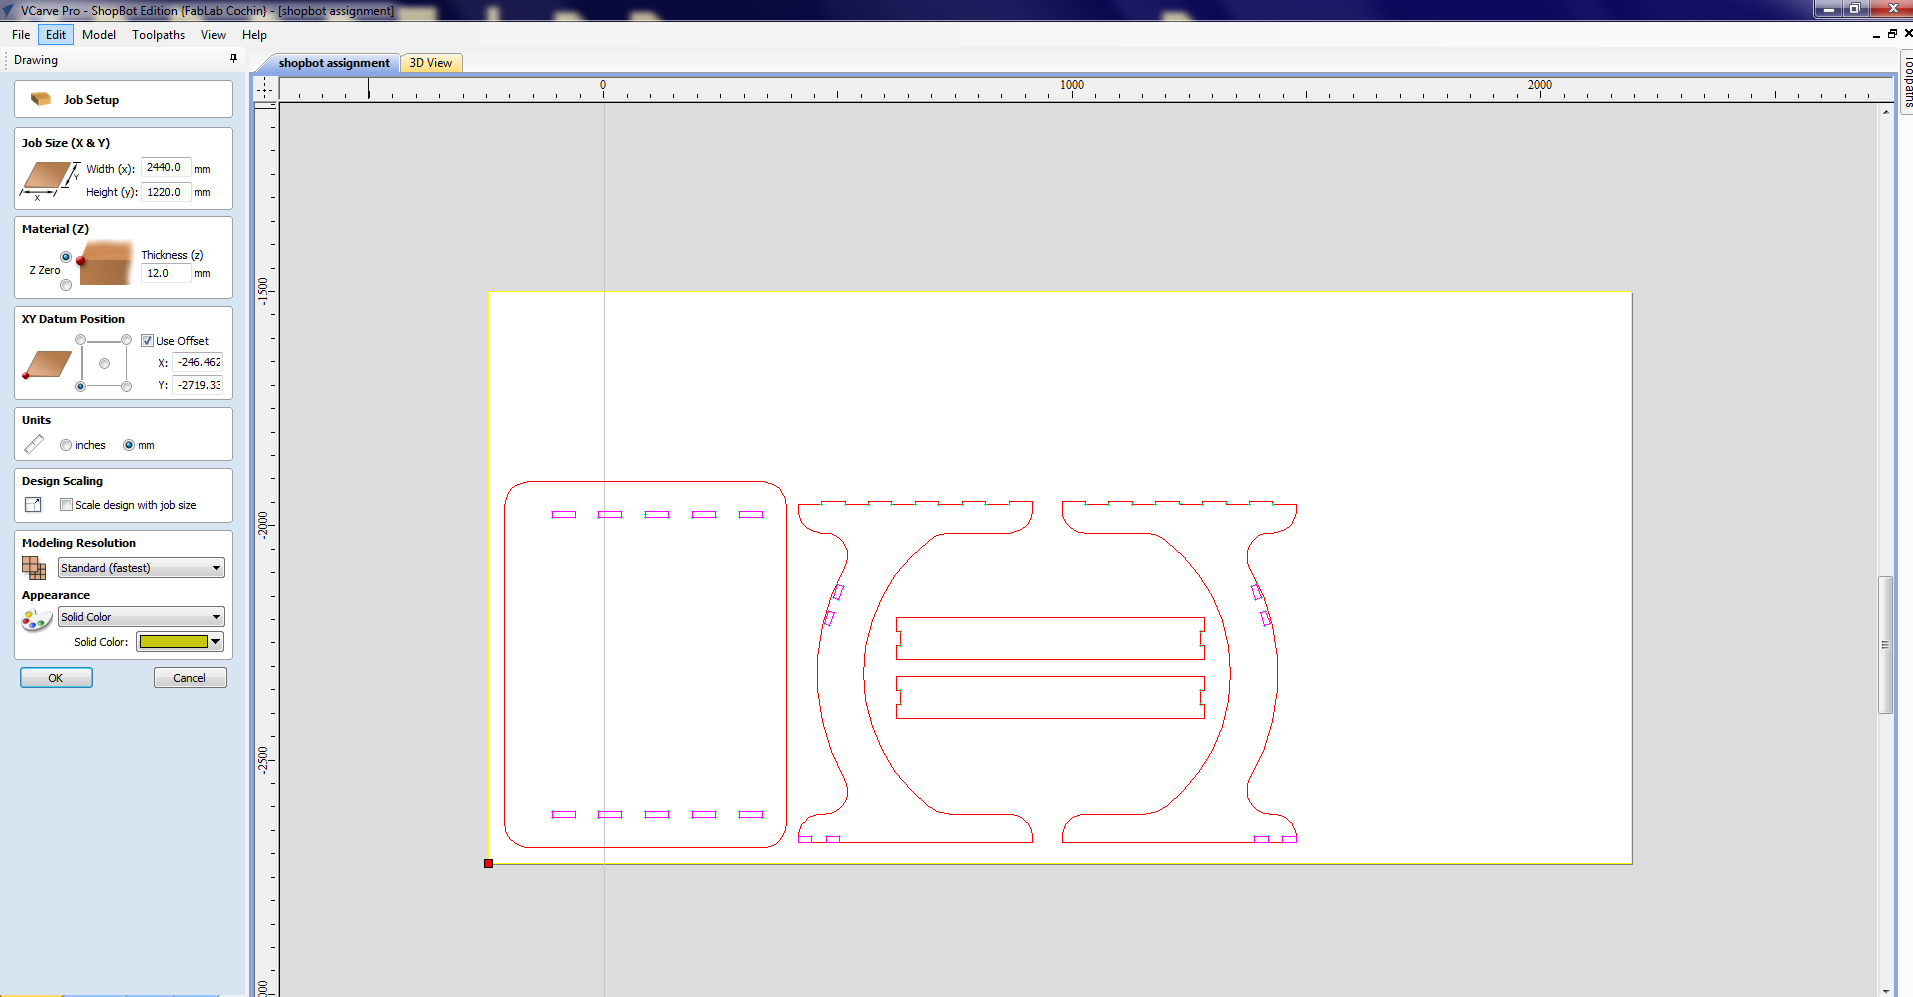
Then I create the drill holes. and then created pocket then the proflies. And cheked the render 3D veiw
Then I started the cutting. the generated toolpath opened by position software. Careful before you start you must spindle on.
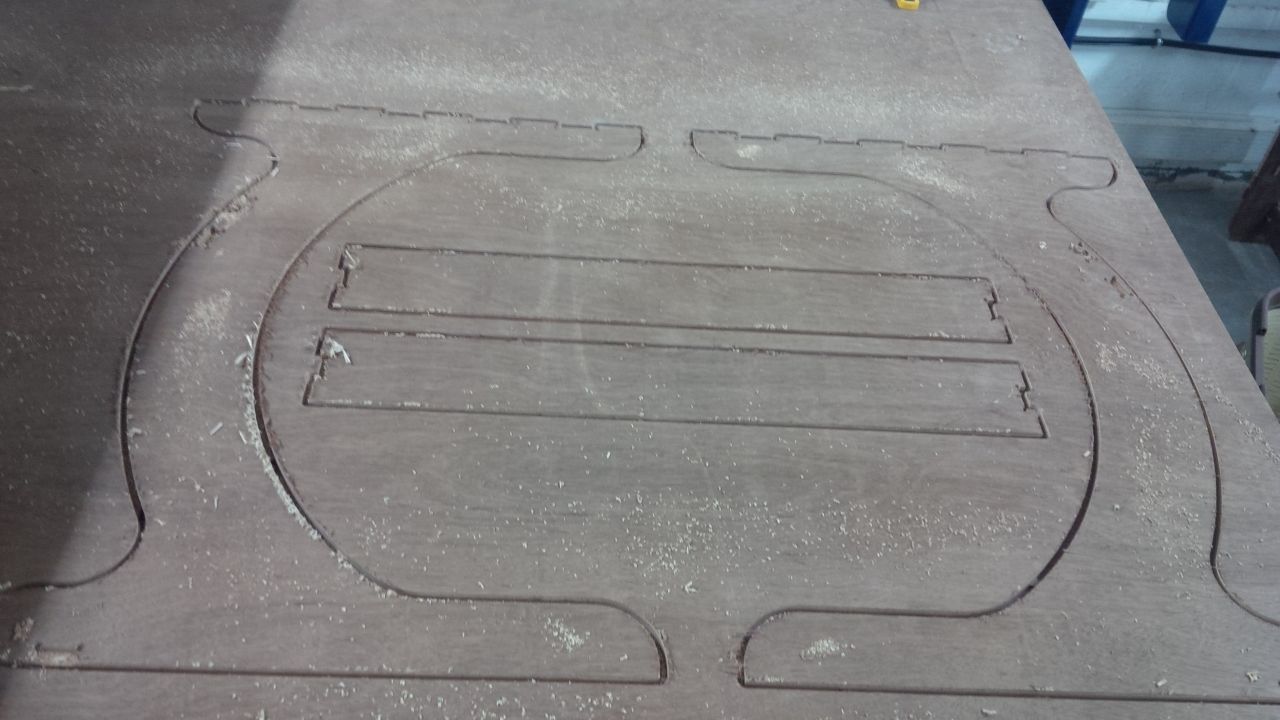
Fainally I made