Week 9
Make a Machine
The assignment this week was to make a machine as a group and document our individual contribution. We went with the normal MTM setup developed by Nadya and James, ultimately building individual stages.
We have the standard 24"x12" Epilog laser cutters in our lab, so unfortunately we could not work with the full scale original plans. Instead I downloaded the pre-formatted dxf for our cutter. These files are not set up to go straight to the laser cutter, so I spent some time cleaning them up and setting up separate files for each 12"x24" sheet. These files are all available in my File Repository
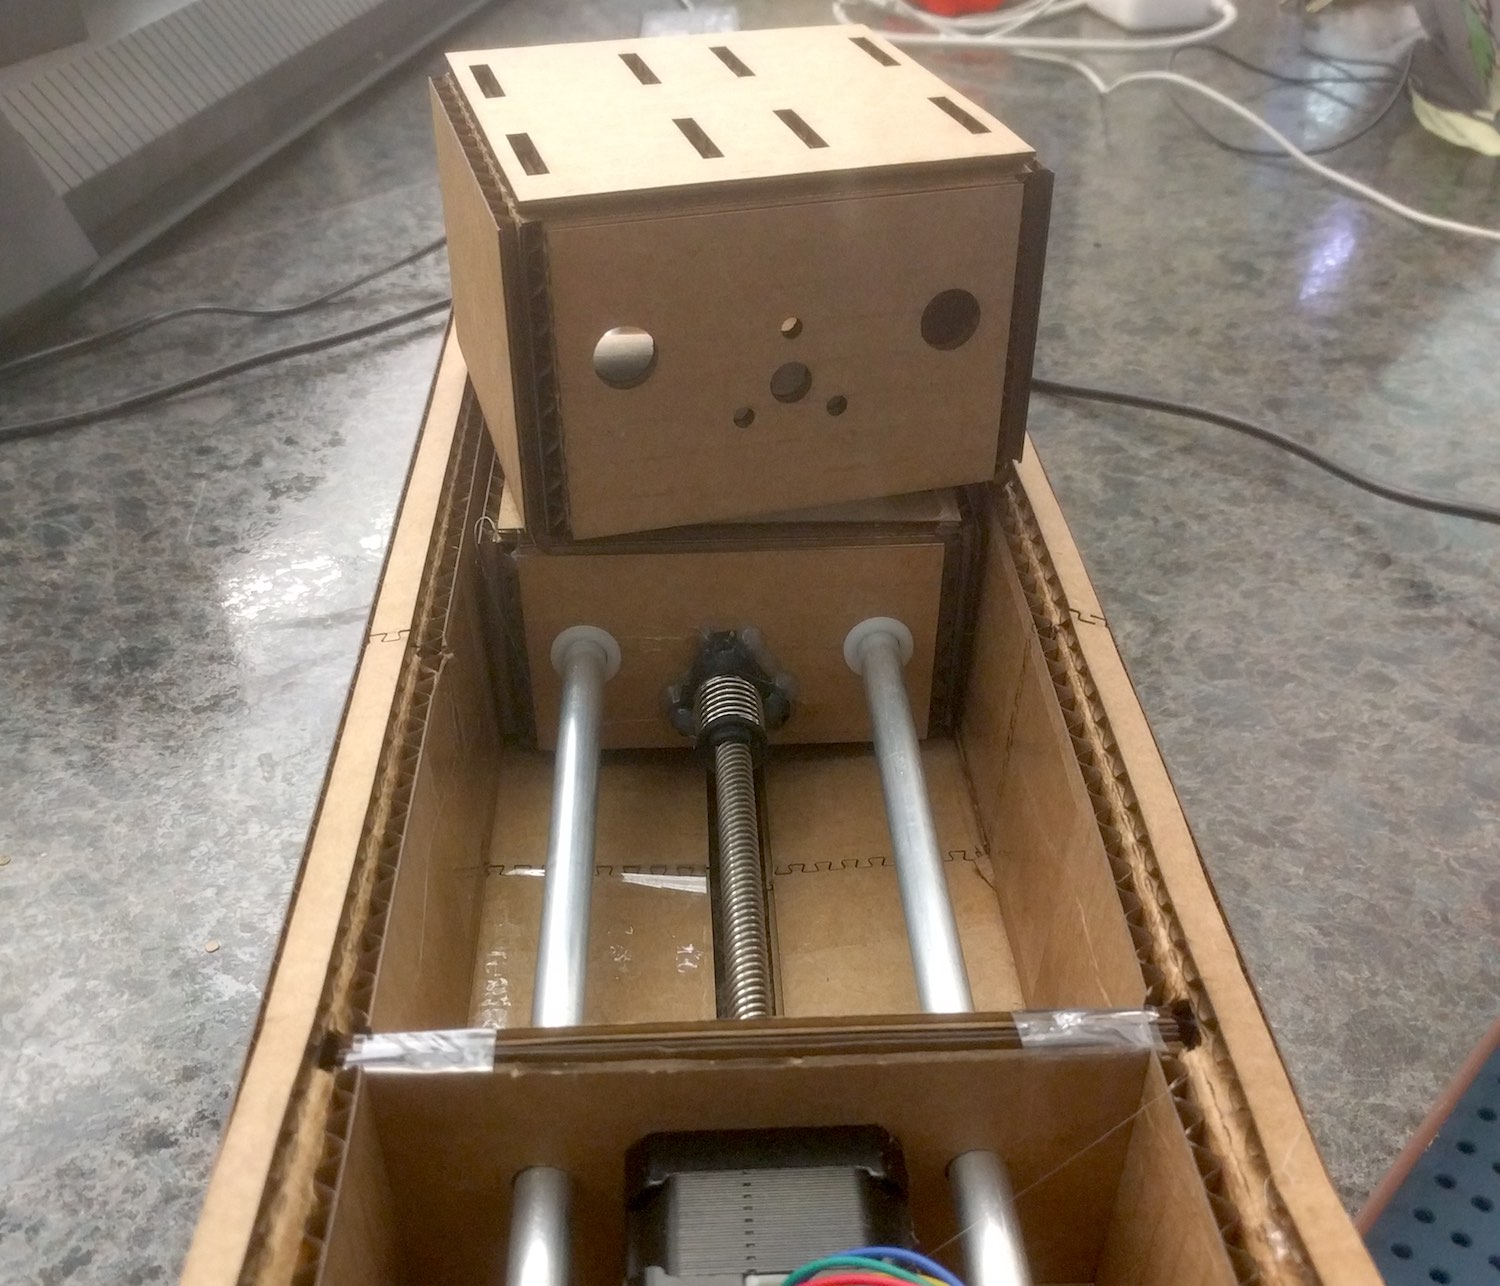
Once I had those cleaned up, I lasercut each panel and started working on assembly. I ran into a bit of difficulty with the carriage, the holes seemed to be in the wrong location and I could not insert either the rails or the lead screw from the stepper motor.
I ended up redesigning the carriage assembly, effectively cutting off 1 cm from the base to allow a bit more clearance. I believe the issue was our cardboard is slightly thicker than the schematic expected and raised the carriage up a little too much for the aluminum bars to align properly.
The other issue I ran into while constructing the individual MTM stage was that the screws were too short for our cardboard. Unfortunately the screws from the BOM are not long enough to provide clearance on the nut attached to the carriage. I temporarily overcame this issue by simply hotgluing it in place. I think this matches the cardboard aesthetic pretty well, but will definitely be looking for some longer bolts soon.
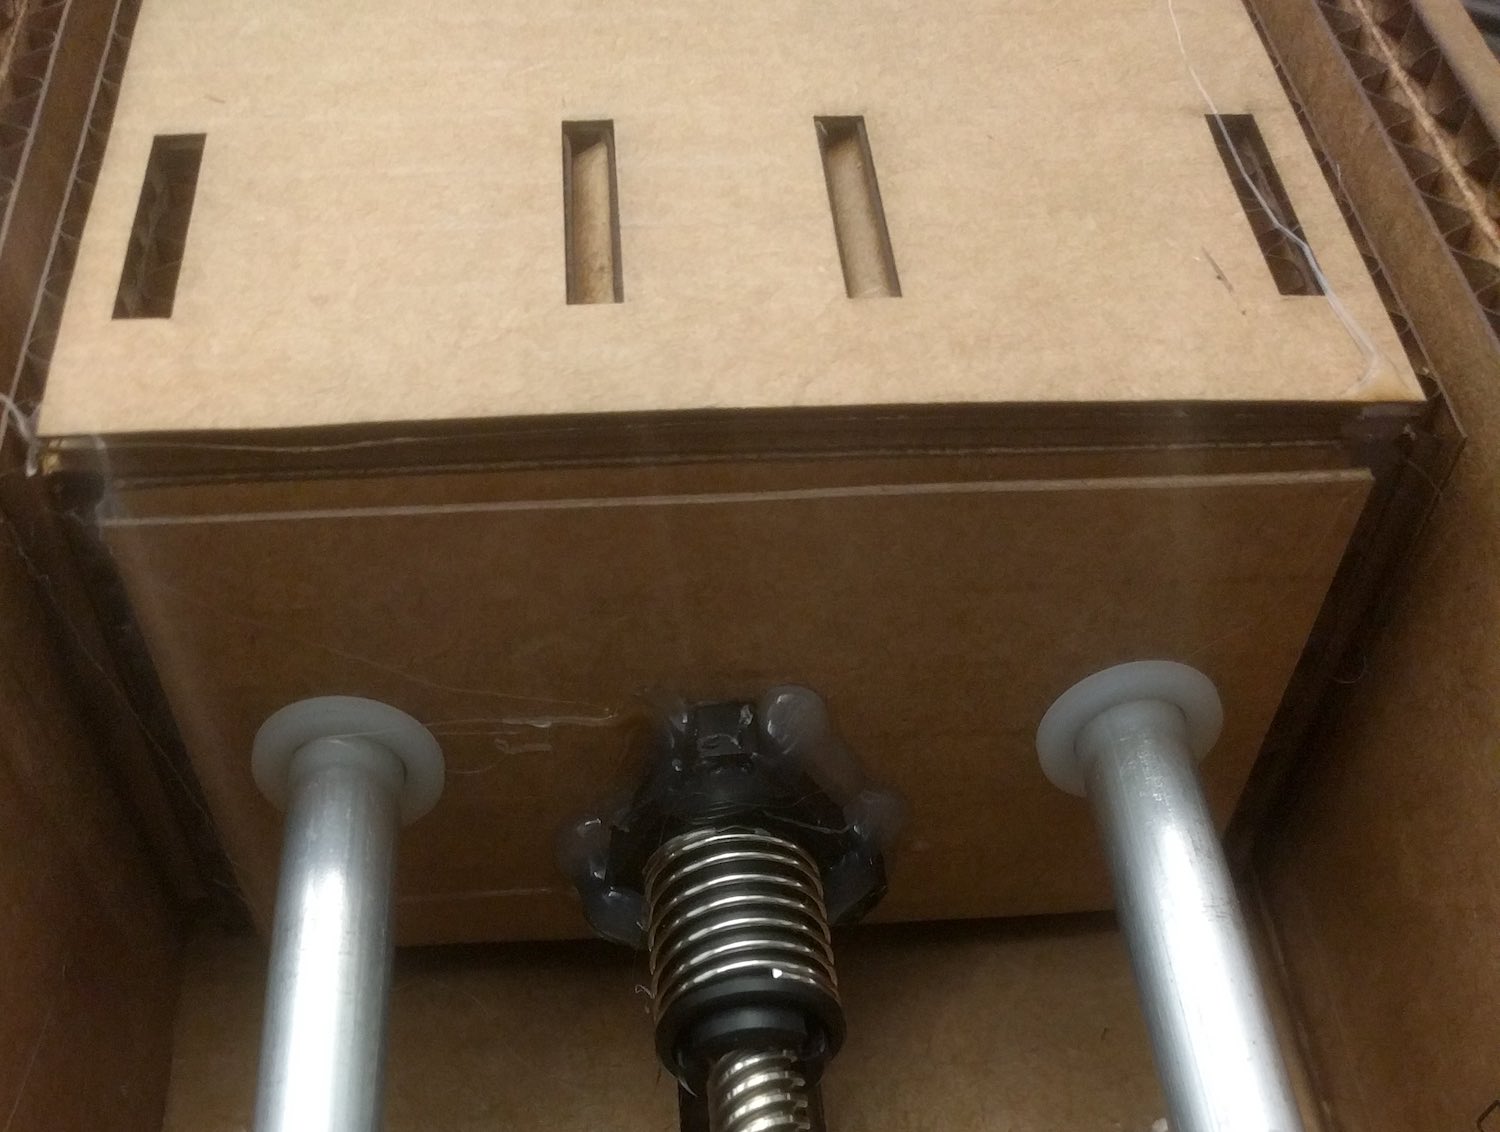
Hot Glue on the moving stage
All in all, I'm very happy with how the MTM stage turned out and am looking forward to getting it moving and combined with the other stages!