Week 10: Machine Design
Automate the Machine
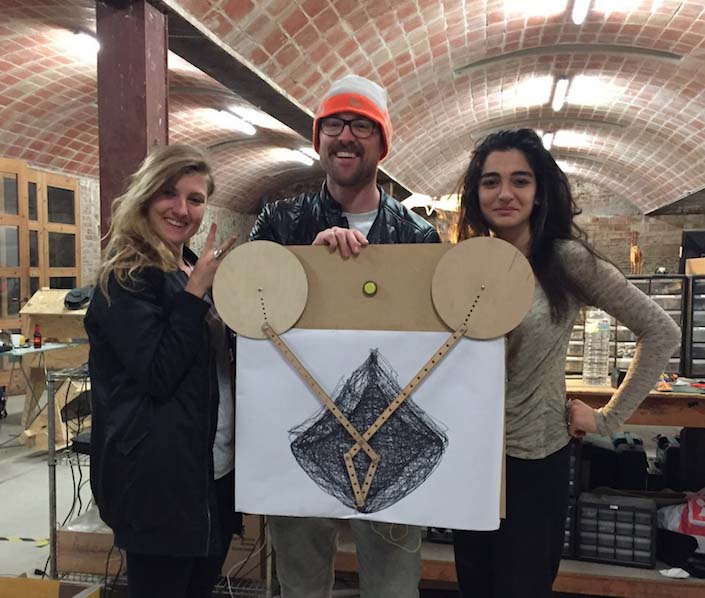
For this week´s assignment we have to automate the primograph machine we designed previously. We brainstormed the design and functioning of the Machine together and settled on a plan of action. I kept track of the work processes for our documentation and conceptualised further development of our automatic primograph. Eva and Elissa did most of the 3D modeling in Rhino and Blender, I contributed the boxoutline in Inkscape. Andreas prepared the two motors and explained to us how to incorporate them with Rasperry Pie and the gears. Together we did the laser cutting, 3D printing of parts and assembling.
Group Members:
* Elissa Assaf
* Eva Blsakova
* Norma Deseke
* Andreas Kopp
Software, Materials & Machines
Software: Rhino and Grasshopper; Inkscape; Blender
Machines: Multicam 2000 Laser Cutter; 3D printer
Materials: MDF Wood,3mm; Fillament
Other materials: screws, nuts, 2 DC motors, Raspberry Pie, button including a LED.
Improvement of Prototype Design
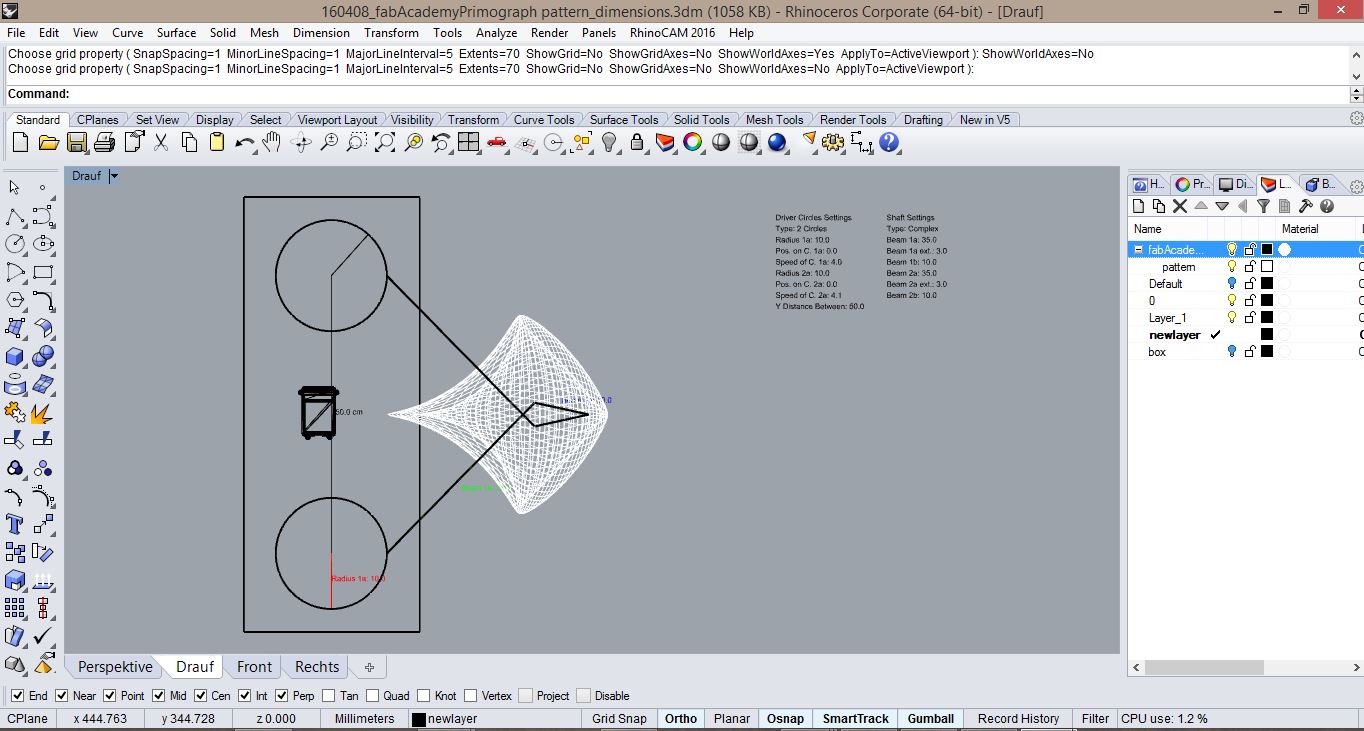
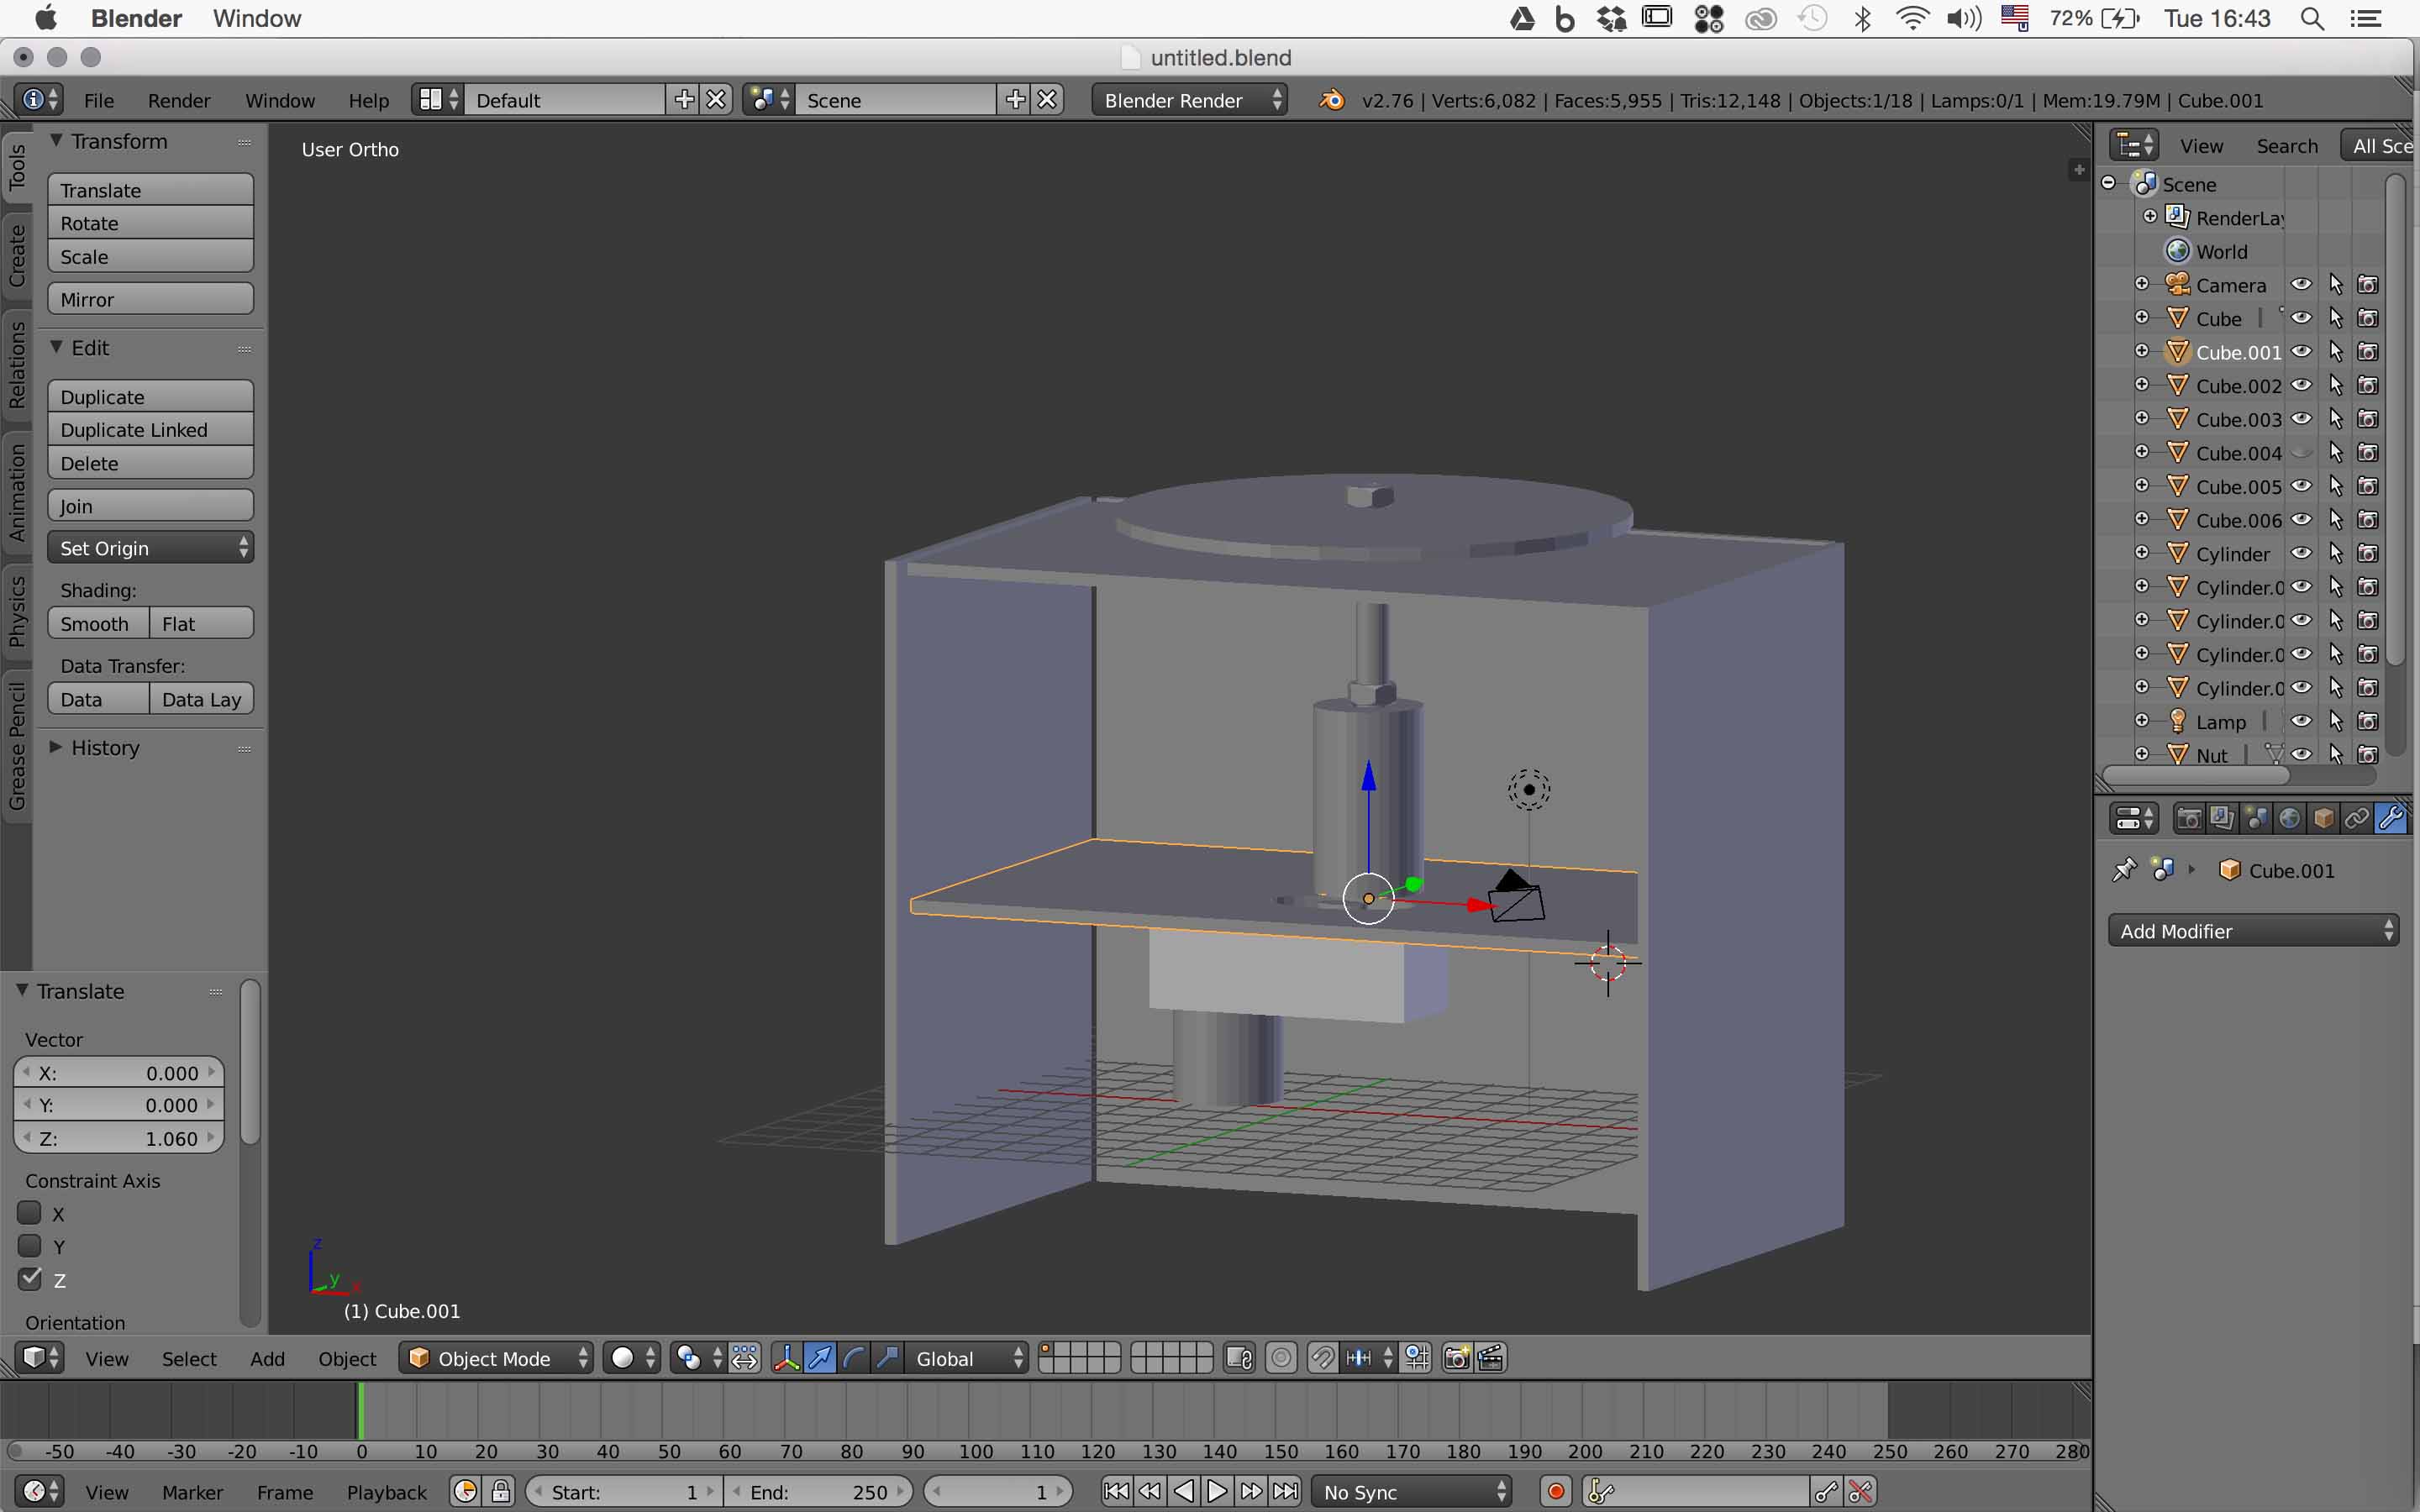
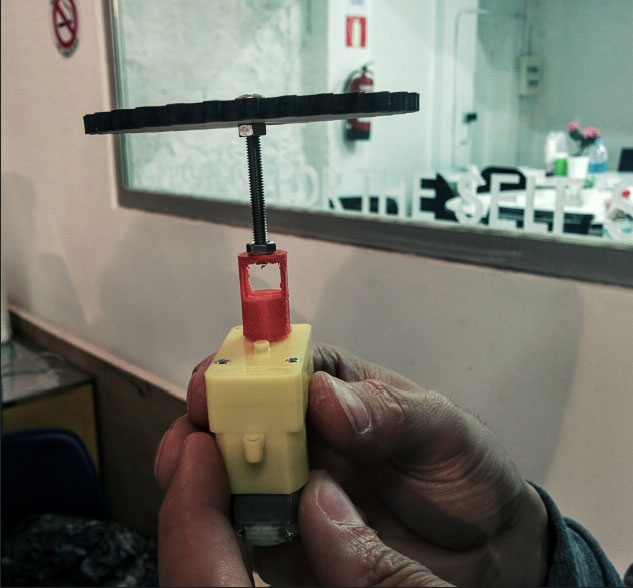
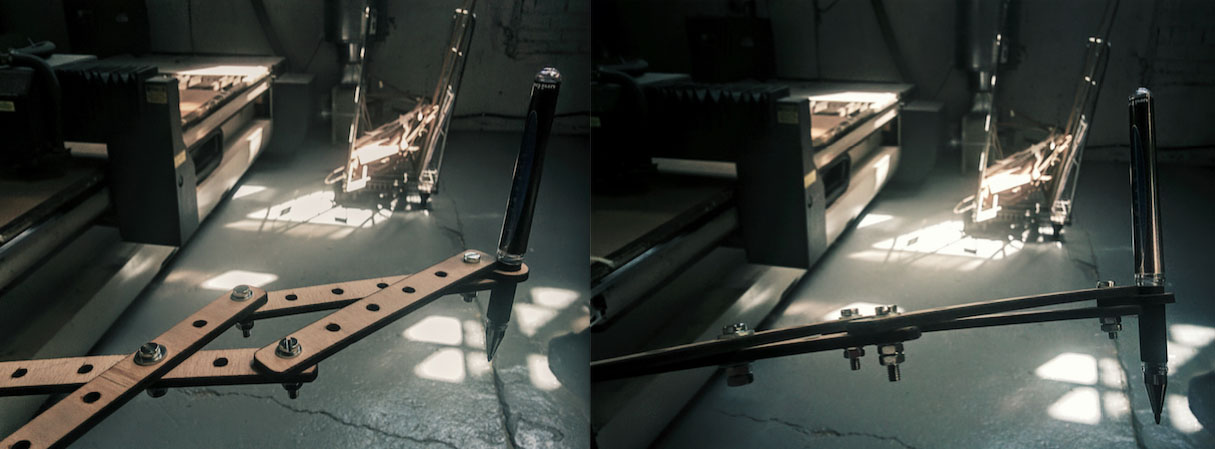
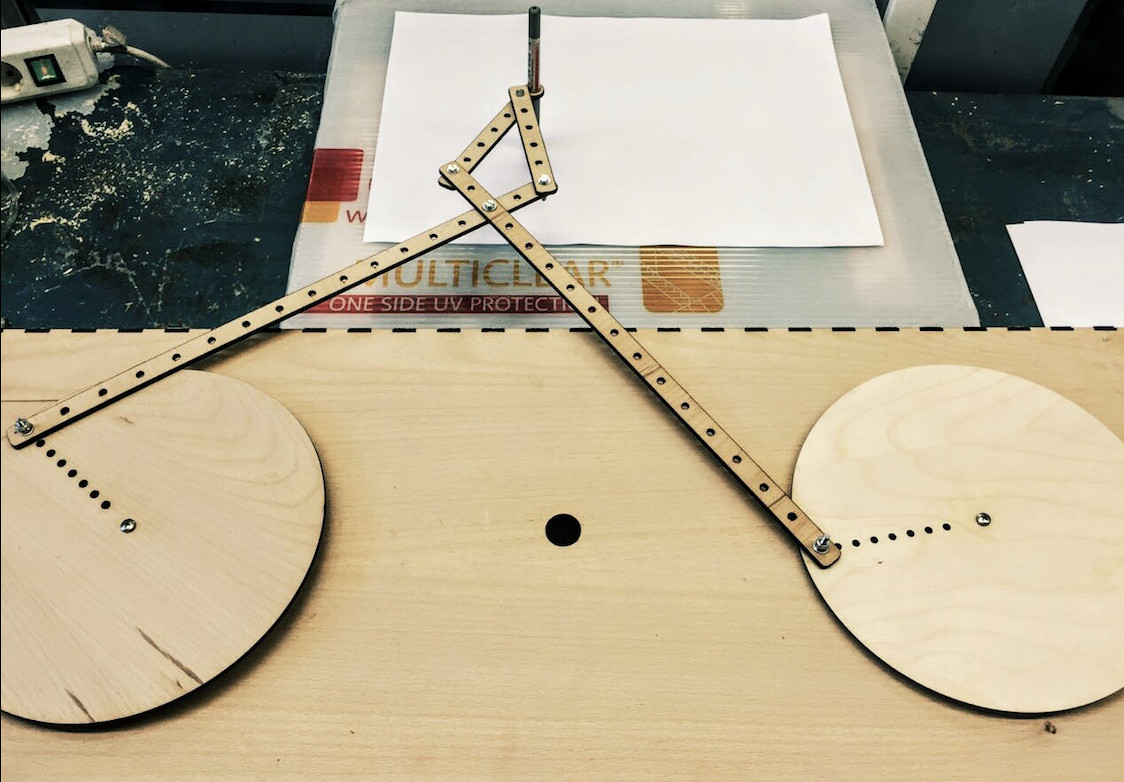
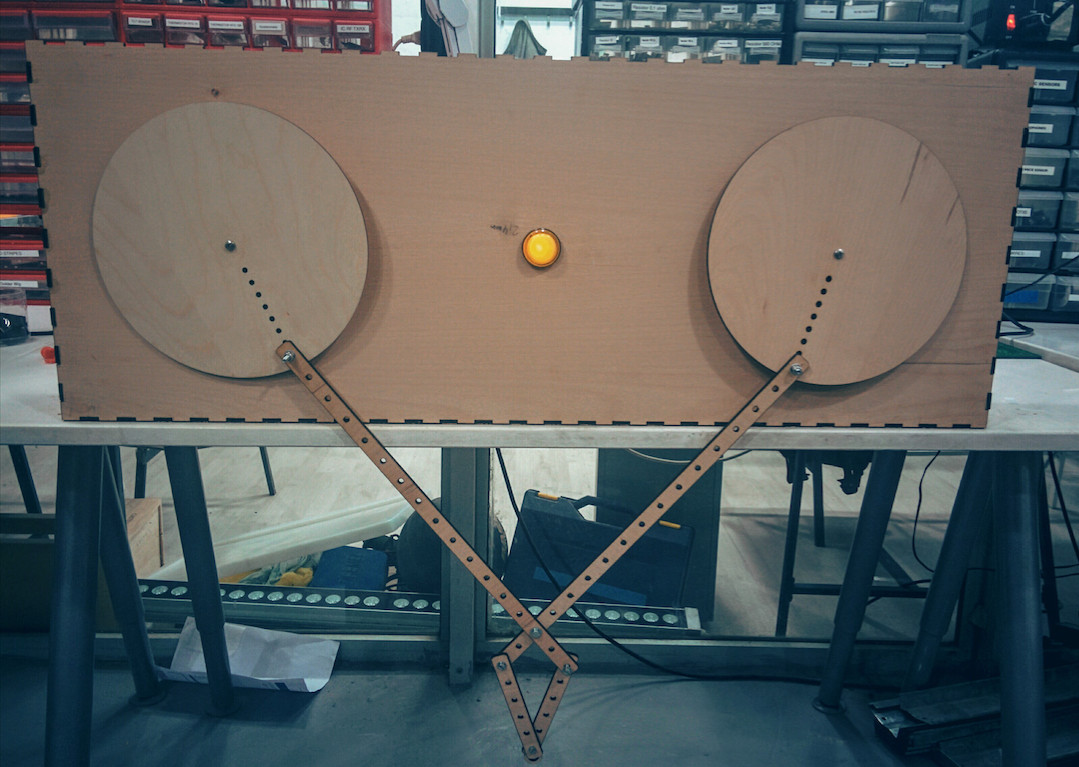
To improve the accuracy of our machine, we now have two detached gears, instead of three interconnected ones. We increased their size to 200mm in diameter. They are operated by two motors respectively, which increases the level of control. We can now change the speed of each gear independently. We decided to do this to create a certain drawing pattern, that we picked from Eva´s previous kinetic research at Angewandte University of Vienna and that we liked most. Additionally, we increased the length of the longer arms to 380mm each, and the shorter arms to 100mm each. The pen holder is now one piece only, with a polstering of foam. We further redesigned the size of the box container itself (800mm long - 300 mm wide - 150 mm high; material thickness 40 mm) to adjust to the new messurements of gears and arms. To include the motors and add stability, the box has three layers: the top layer has the one/off button and holds the gears, which are screwed to it. The second leyer stabilises the gears. The third layer is the bottom of the box, which has the motors attached, screwed onto it. The gears are connected to the motor with a 3D printed "pipe" system, that contains long screws. Additional 7 screws hold the top parts mechabism together, another 8 screws hold the middle and bottom layer and fix the motors in place.
Future Application: Concept
The idea is to let the primograph draw something specific. A friend of mine has generated a code with Python that visualises the density of Twitter usage in Barcelona. The digital visualisation of the regional Twitter activty is simple, displaying the areas of usage as different sized "bubbles" according to the amount of connections. Instead of a digital visualisation, it would be interesting to let the primograph physically draw the density of twitter usage in BCN on a map of the city. Each "bubble" would be drawn in the set pattern, however differing in size due to different speed settings corresponding to Twitter usage intensity. It would be even more interesting, if the Machine could move from "Bubble"(= place) to bubble to draw the twitter usage intensity automatically. As the mechanism is set now, we would need to move the arms manually from place to place to visualise the Twitter usage. I like the translation between the digital and the physical in this idea as well as the playing with representations of geography and maps.
Workflow
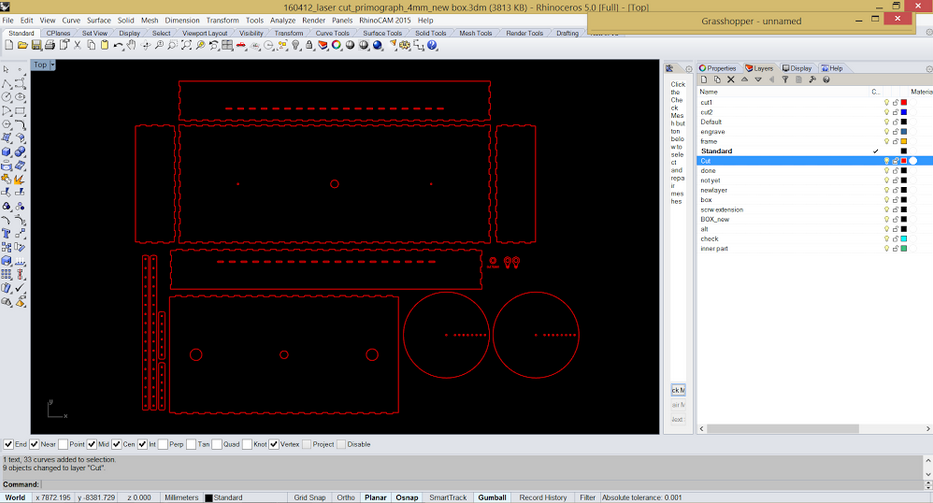
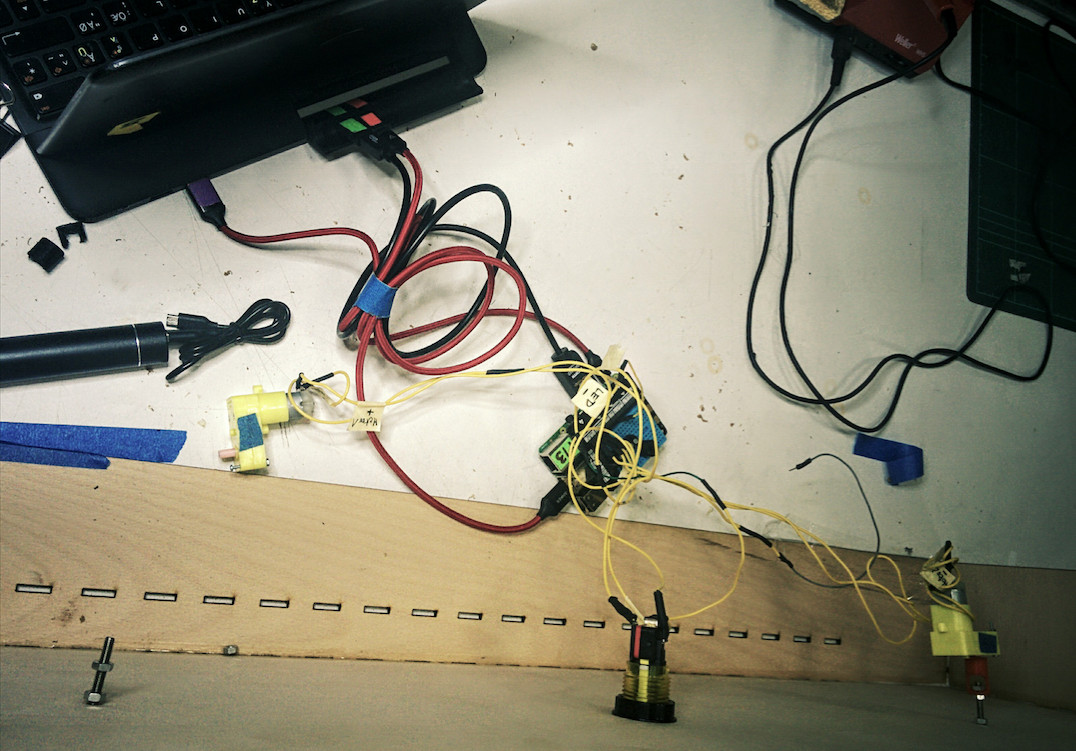
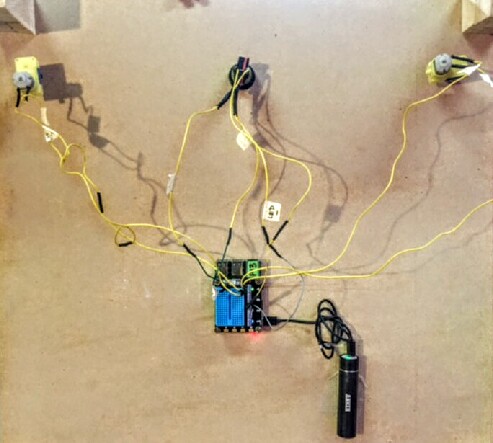
We discussed the design of the mechanism together. Andreas took charge of the electronics. He connected the two stepper motors with four cables to on7off button and the Rasberry Pie. He extedned the cables and modified the button, so it includes a led to display on/off mode. based on a previously designed app to controll the motor, he programs the Raspberry Pie with Pyhon, explaining what he is doing to the group. He further explores how to incorporate a slider in the app to controll the speed of the stepepr motor(pulse width modulation). Elissa was mainly busy with the design of the laser cut files of the box with its layers, the beams and the pen holder, working in Rhino. I made a box with finger joints in Inkscape to be incorporated by Elissa into our design file in Rhino, however, it was easier just to redraw it in Rhino directly. Eva designed the Blender model of the "pipe" system that connects the gears to the motor (screws inside). I took the measurments of the motor and passed them to Eva to generate this model. Eva also took charge of the 3Dprinting of parts, such as the holder for the Raspberry Pie (designed by Andreas previously), the connecting "pipe" system as well as Elissa´s design of the pen holder. She did so by exporting the .stl design file into the 3D printing software gura to generate the Gcode. I mainly move between group members, discuss upcoming problems and update everybody on everybody elses´ progress, while collecting and sorting work and documenation files. I also write the HTML documentation, so everybody has the outline of the process, which they can modify for their individual documentation.
Problems
* Design & Materials: Our design was based on MDF Wood with 4 mm thickness, but we ran out and had to redesign the Rhino files for laser cutting to get proper dimensions of 3mm material thickness instead.
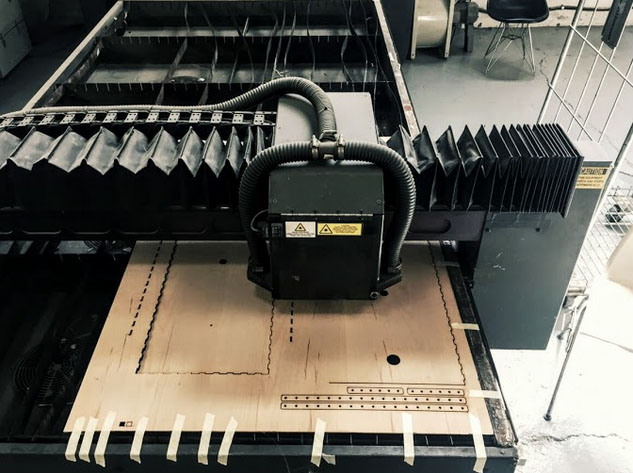
* Laser Cutting: Didn't cut through everywhere, because the board was bend. So we cut some pieces twice. However, now the screwholes on the arms were a little bit too big, which would result in a wobbly arm mechanism. So we cut the arms again.
* Design & 3D Printing: 3D printed parts broke in the assmebling process, it´s sides were too thin to withhold pressure
Assembling the Machine
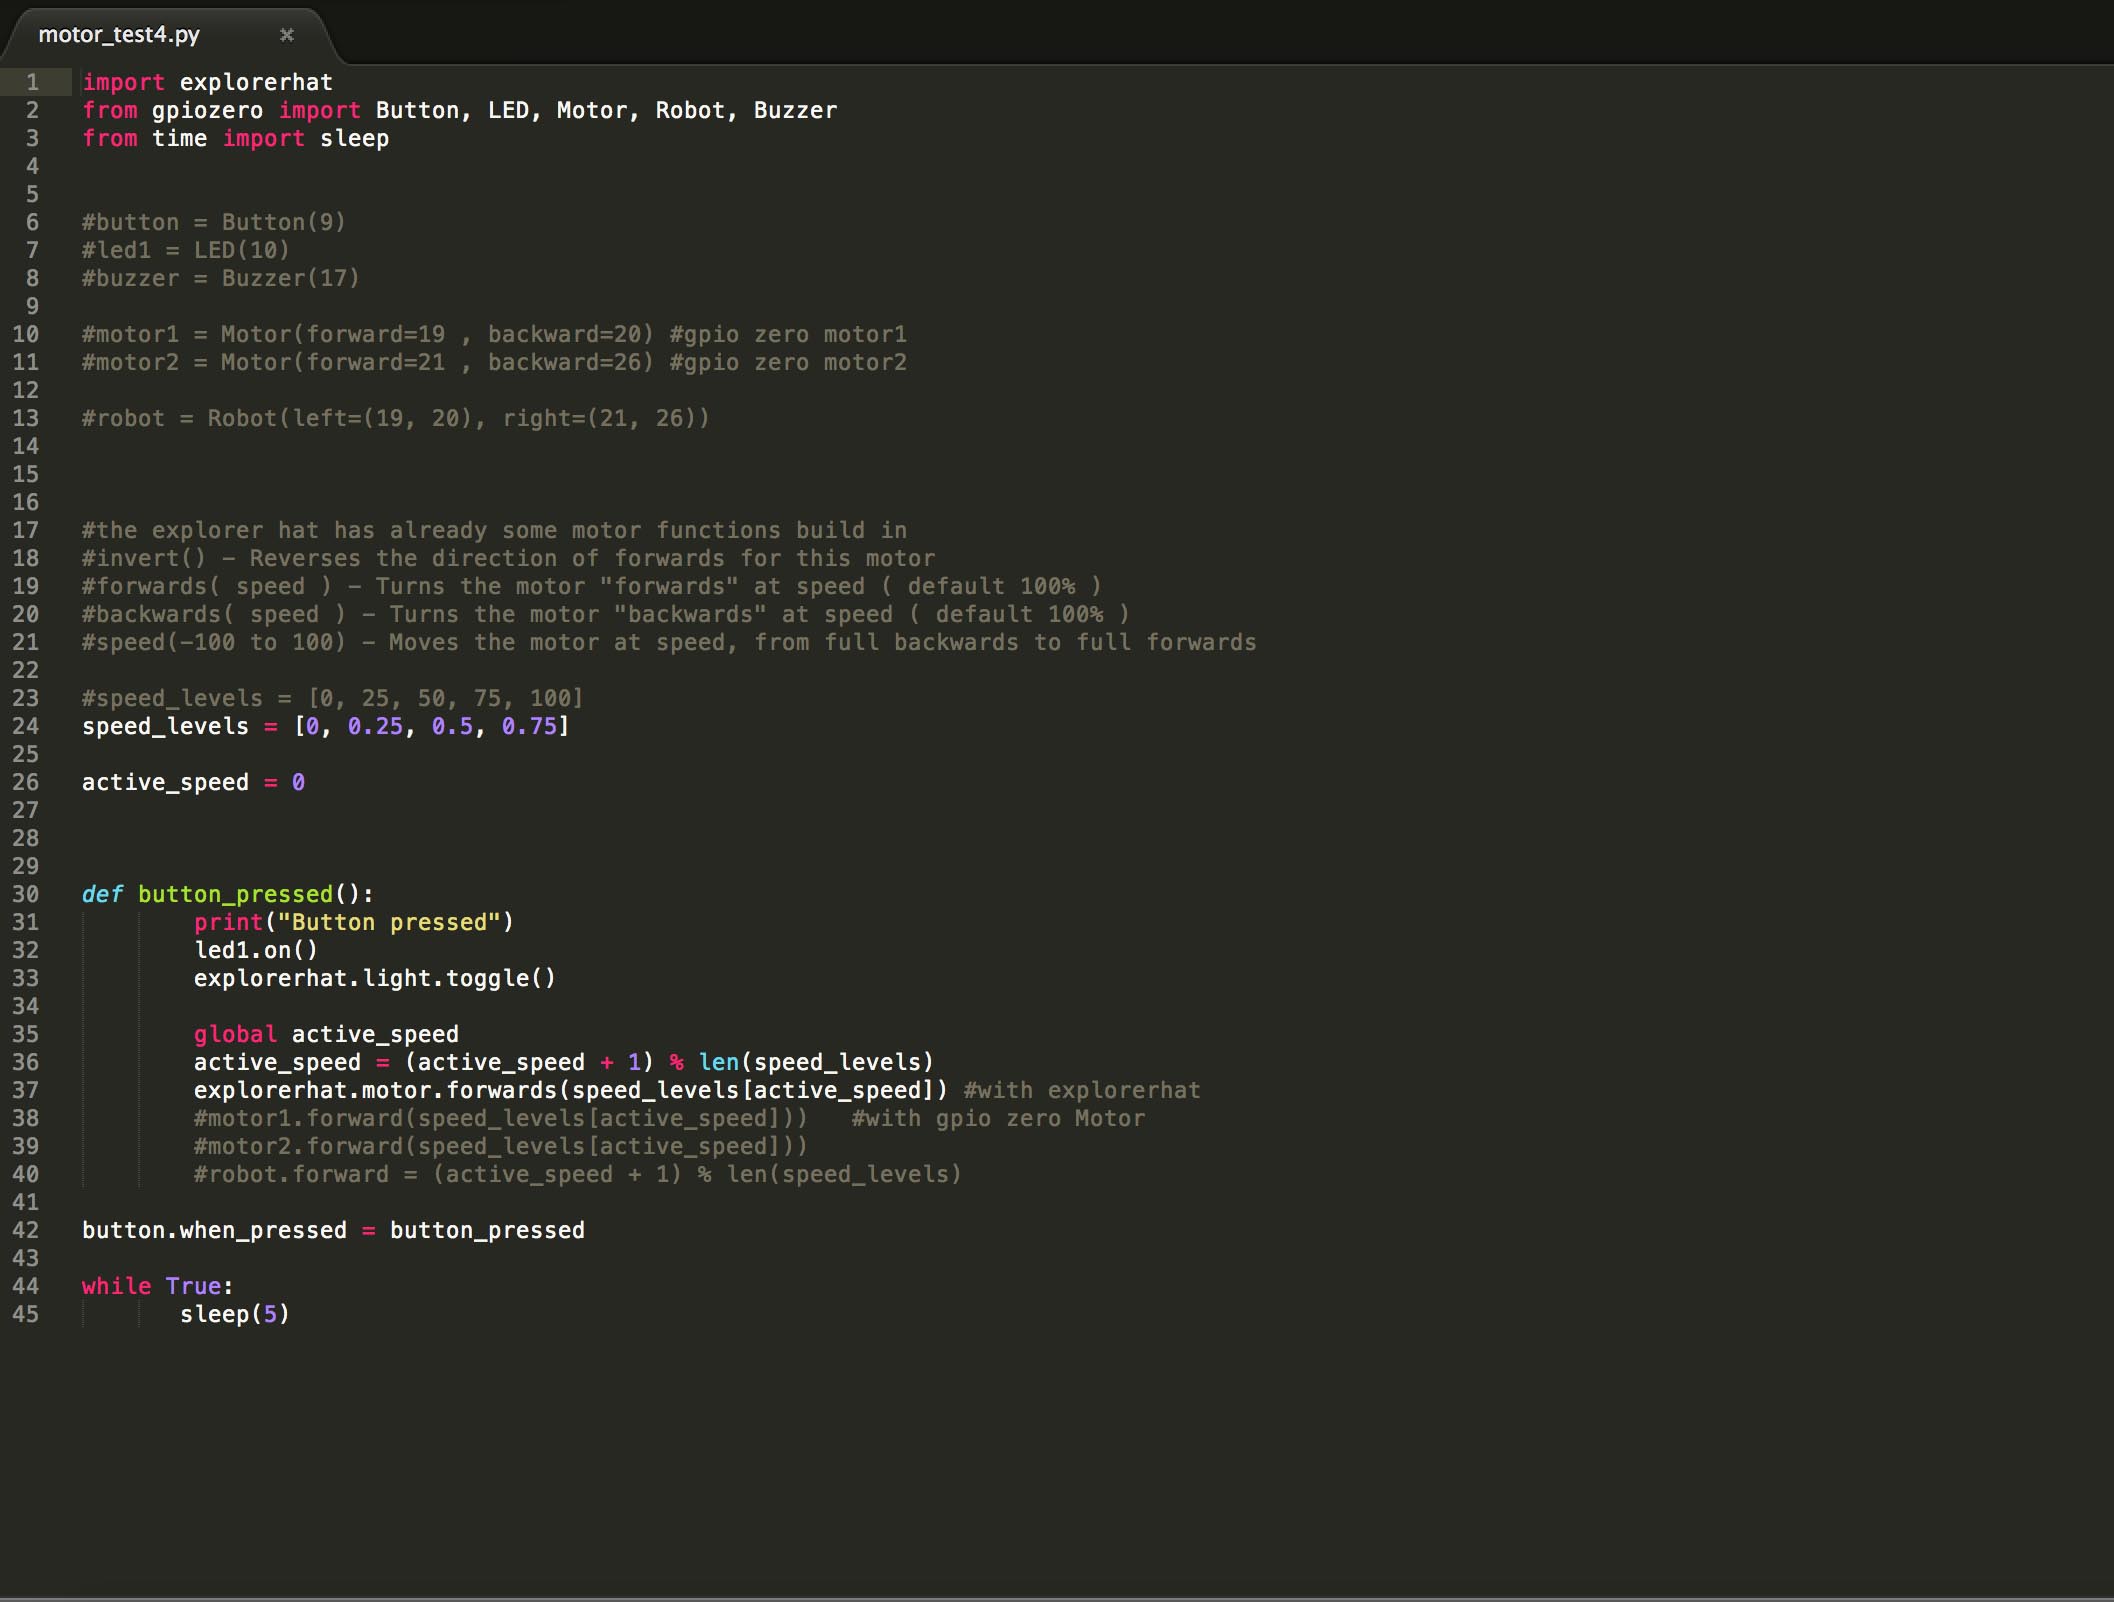
First test automating the Primograph using Python to program the servo motors
Final Result
Primograph Automated Machine from Elissa Sophia Assaf on Vimeo.
Download All Files