Week 8: Embedded Programming
Program the HelloWorld Board
* Neil´s lecture page
* Ani Liu has a helpful source collection to read about microprocessors and microcontroller programming
* youtube tutorial to see the workflow
* High-Low Tech was a research group at the MIT Media Lab from 2009-2014, project documentations under tutorial section
Setting Up
Using Arduino to program helloworld board to blink the LED:
* get arduino here
* download ATtiny microcontroller support for the Arduino IDE
* install it: my arduino folder sits in documents. make a folder "hardware", in it make a folder "attiny", in it make a fodler "avr". here you put the downloaded files.
* open arduino. if you had it open, close it and re-open. under arduino "tools"--> "boards" --> you should now have the attiny. select it. next select your processor. I use ATtiny44. next select your clock: my helloworld board has the 20mHz.

Now the programming
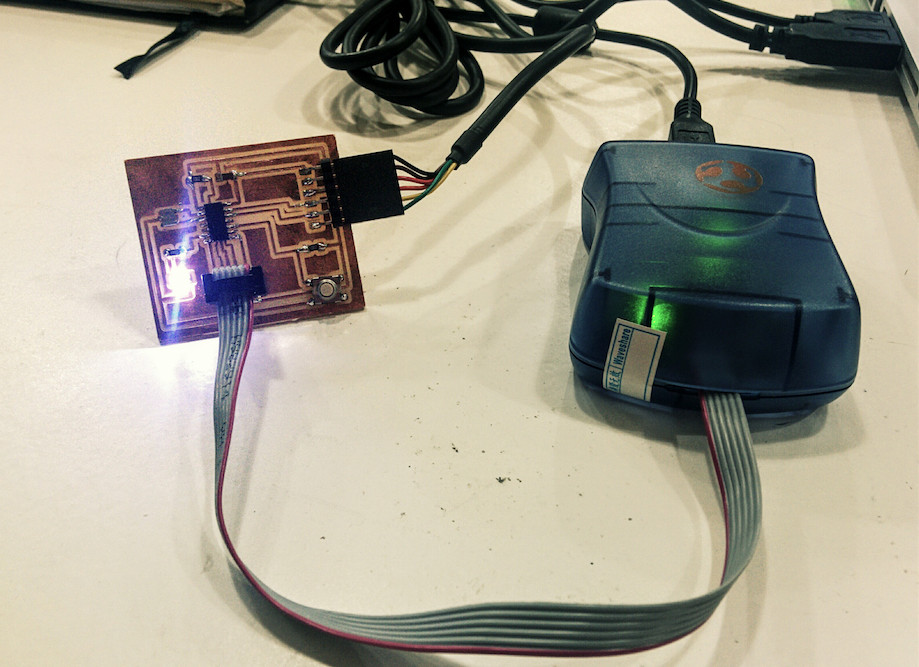
* connect hello-world to programer, making sure VCC (red cable) locks into VCC dock in AVR. also connect FTDI cable to FTDI connector on board, here making sure GND (ground = black) connects to GND spot.
* under tools in arduino menu select port as usbserial/...
* got error msg:
avrdude: stk500_recv(): programmer is not responding
avrdude: stk500_getsync() attempt 1 of 10: not in sync: resp=0x00
* had selected wrong programer: instead of AVRISP I needed AVRISP mkll
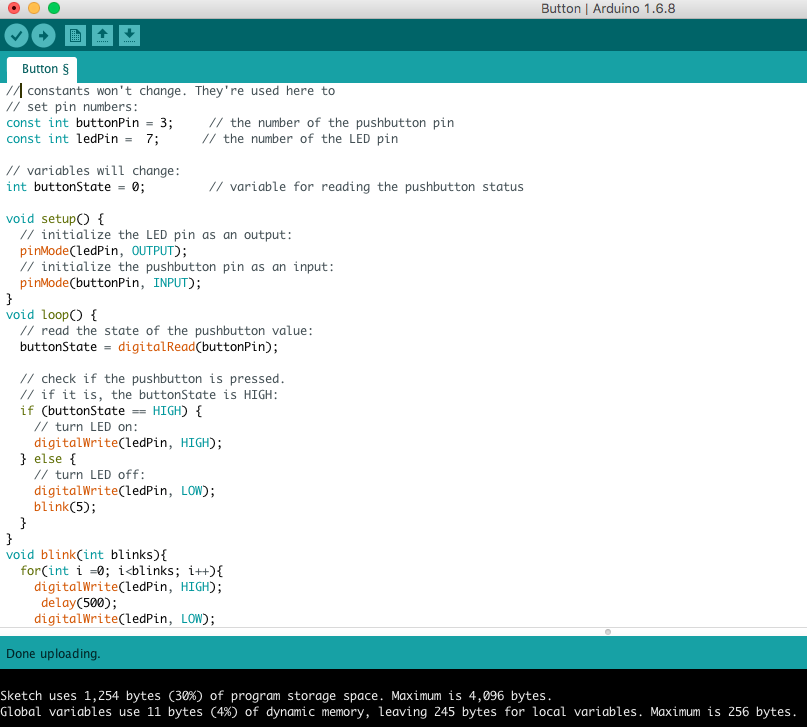
* next: open blink: enter number of pin to which you have connected the LED on your board
* run the skript - BLINGBLING tadaaa.
Fab Academy BCN 2016 week 8 from Norma D. on Vimeo.
Fab Academy BCN 2016 week 8.2 from Norma D. on Vimeo.
Download All Files