Week 7: Computer Controlled Machining
MAKE SOMETHING BIG
For the assignment we have to design and mill something big. I wanted to mill a topography of the Mediterranean sea basin in wood in a rough size of 250x500x100mm and by applying a double milling strategy in 2,5D. The file I wanted to generate from high resolution satellite images of the Mediterranean sea. The idea massively outdid my skills, so I designed a shelf with finger joints in Rhino and milled it with the Shopbot. With help from Santi and Ferdi I developed the model, but cannot realise the milling now due to time restrictions. Most interesting was the (un)availability of ocean geographic data to the public and learning more about measuring and visualisng techniques of the planet (often practiced with the assumption of "realistic reproduction") - while actually generating distorted fragmentations of nature according to the affordances of the tech tools employed (hello google).
Below follows first the assignment and then the documentation of the research and experientating for the Mediterranean sea project, although my actual workflow started with the topography.
Making a Shelf
Design
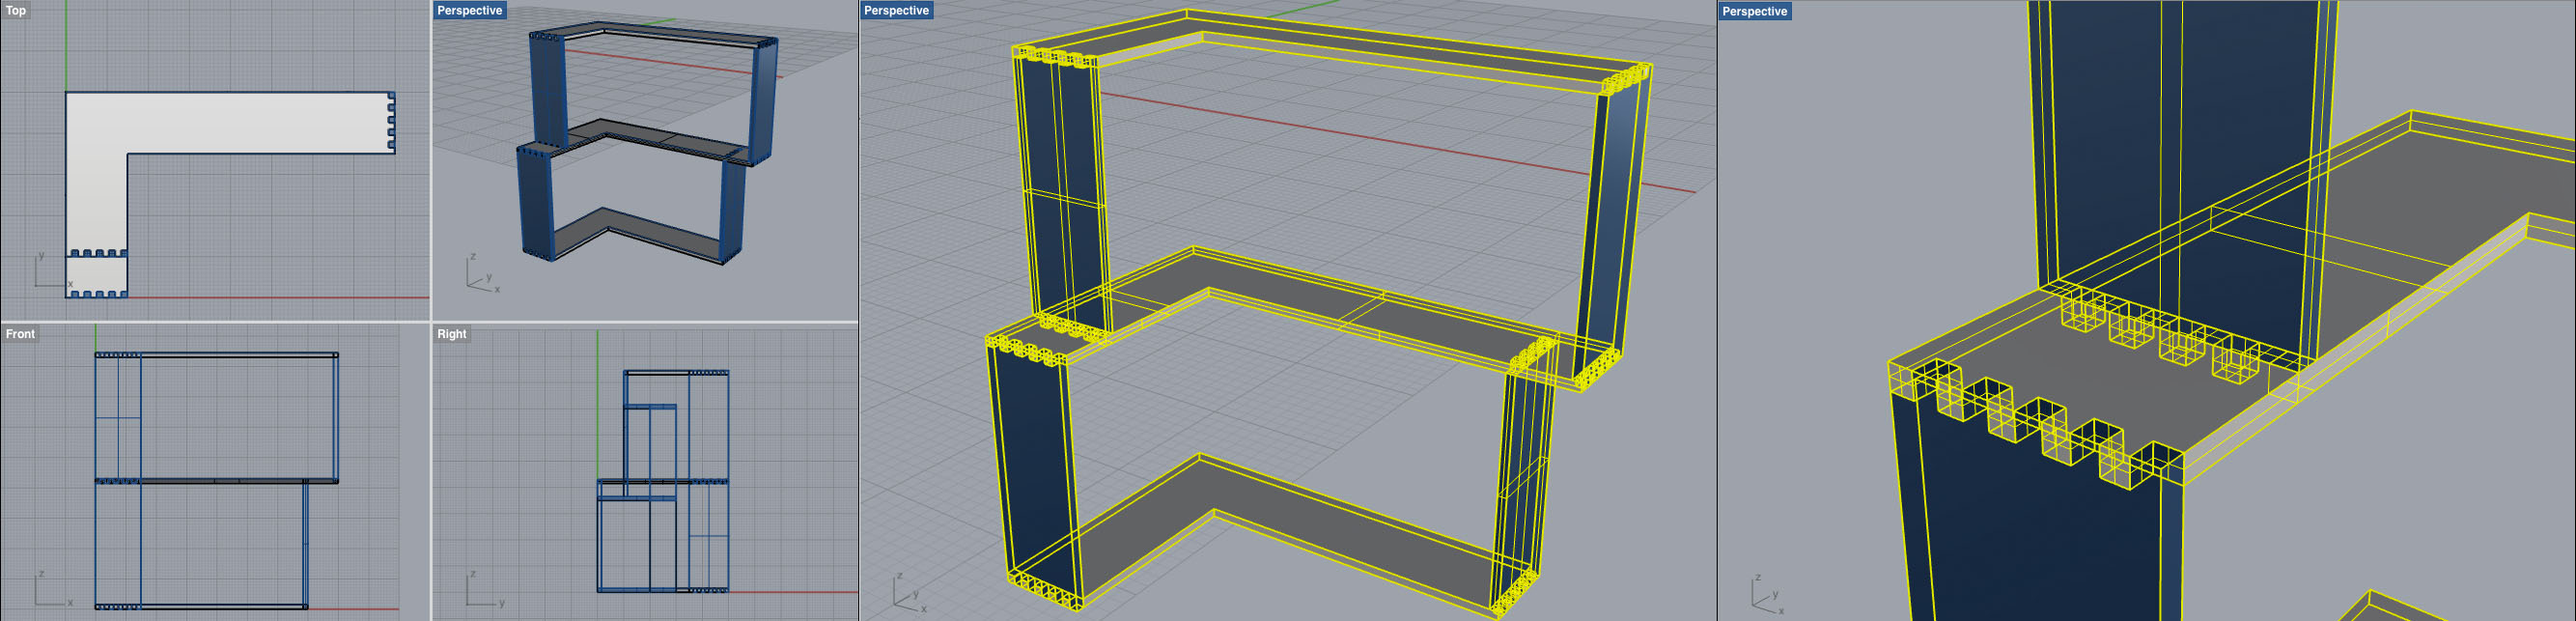
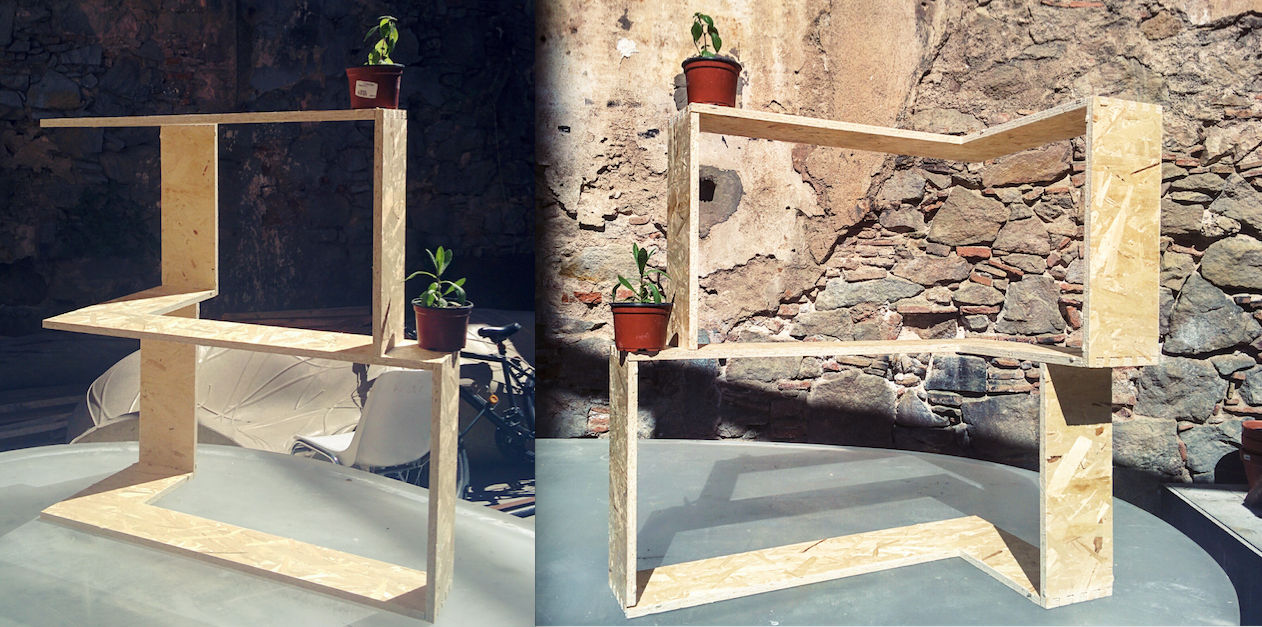
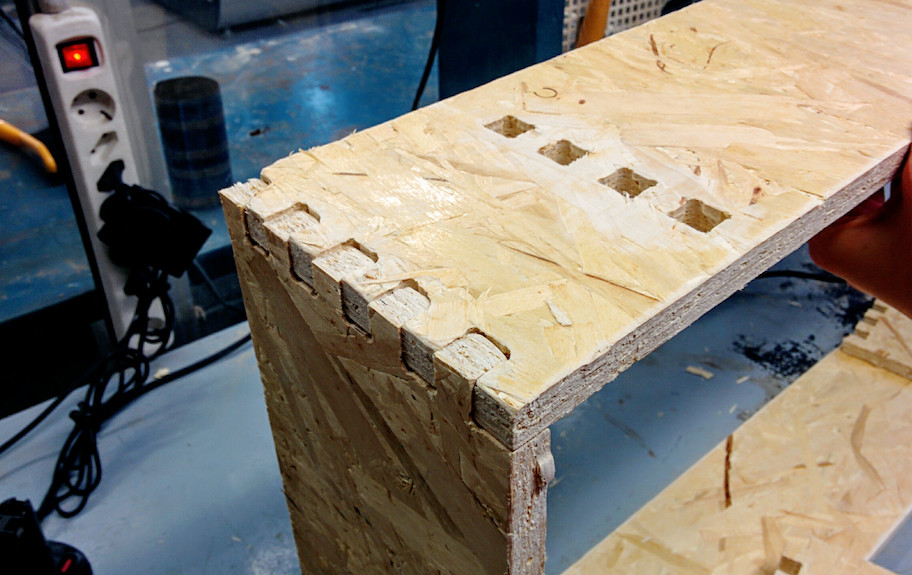
After deciding to realise an easier project than a 3D milling of the Mediterranean sea basin, I sketched a shelf and designed it in Rhino. Not having any spatial design training, I often lost orientation within the model. I drew the shelf with polylines, extruded it´s curves (solid --> extrude planar curve --> straight) and placed the five elements through the move command in their proper positions. I drew the finger joints (polylines and copy) and connected the boards with the boolean command (solid --> difference).
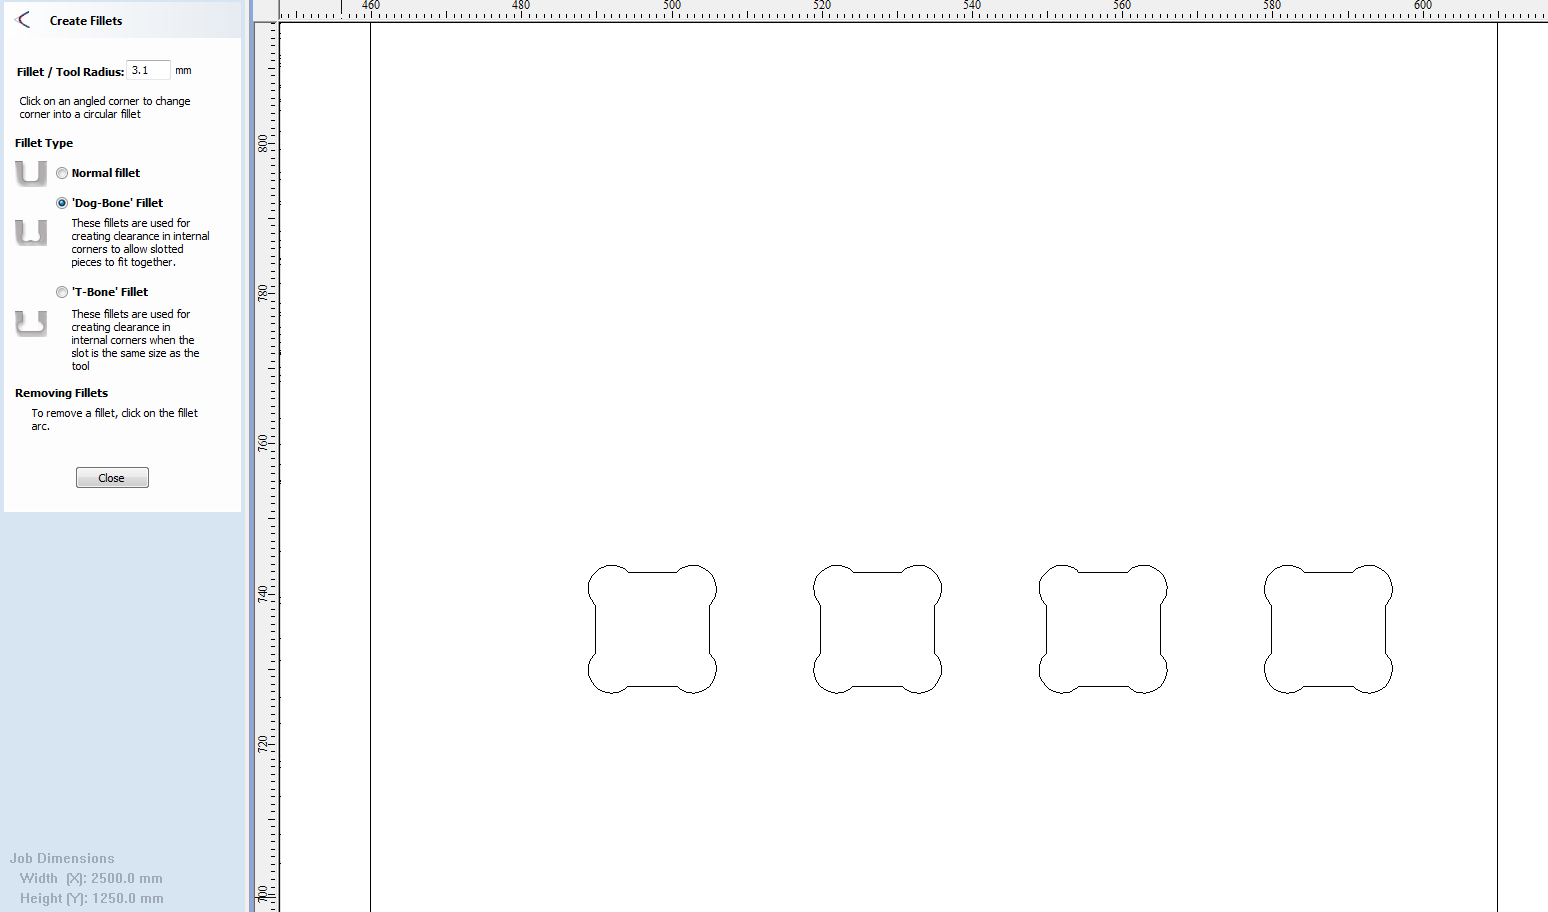
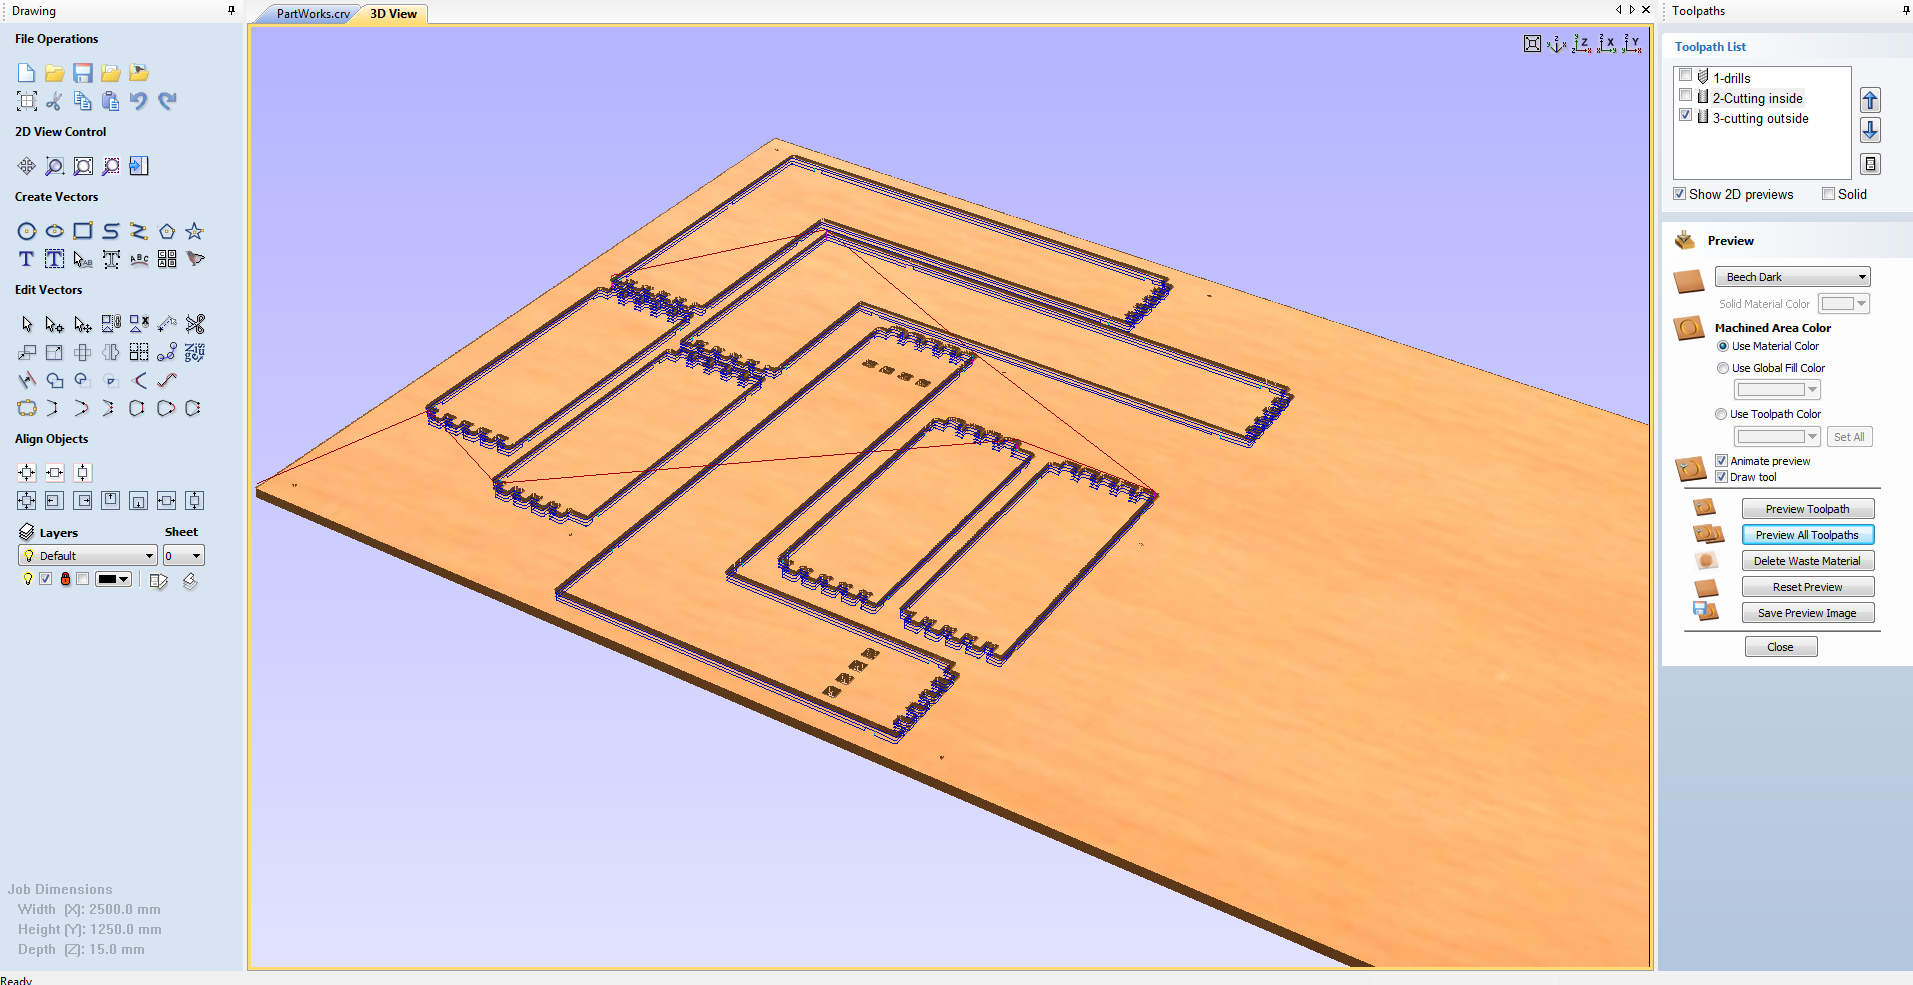
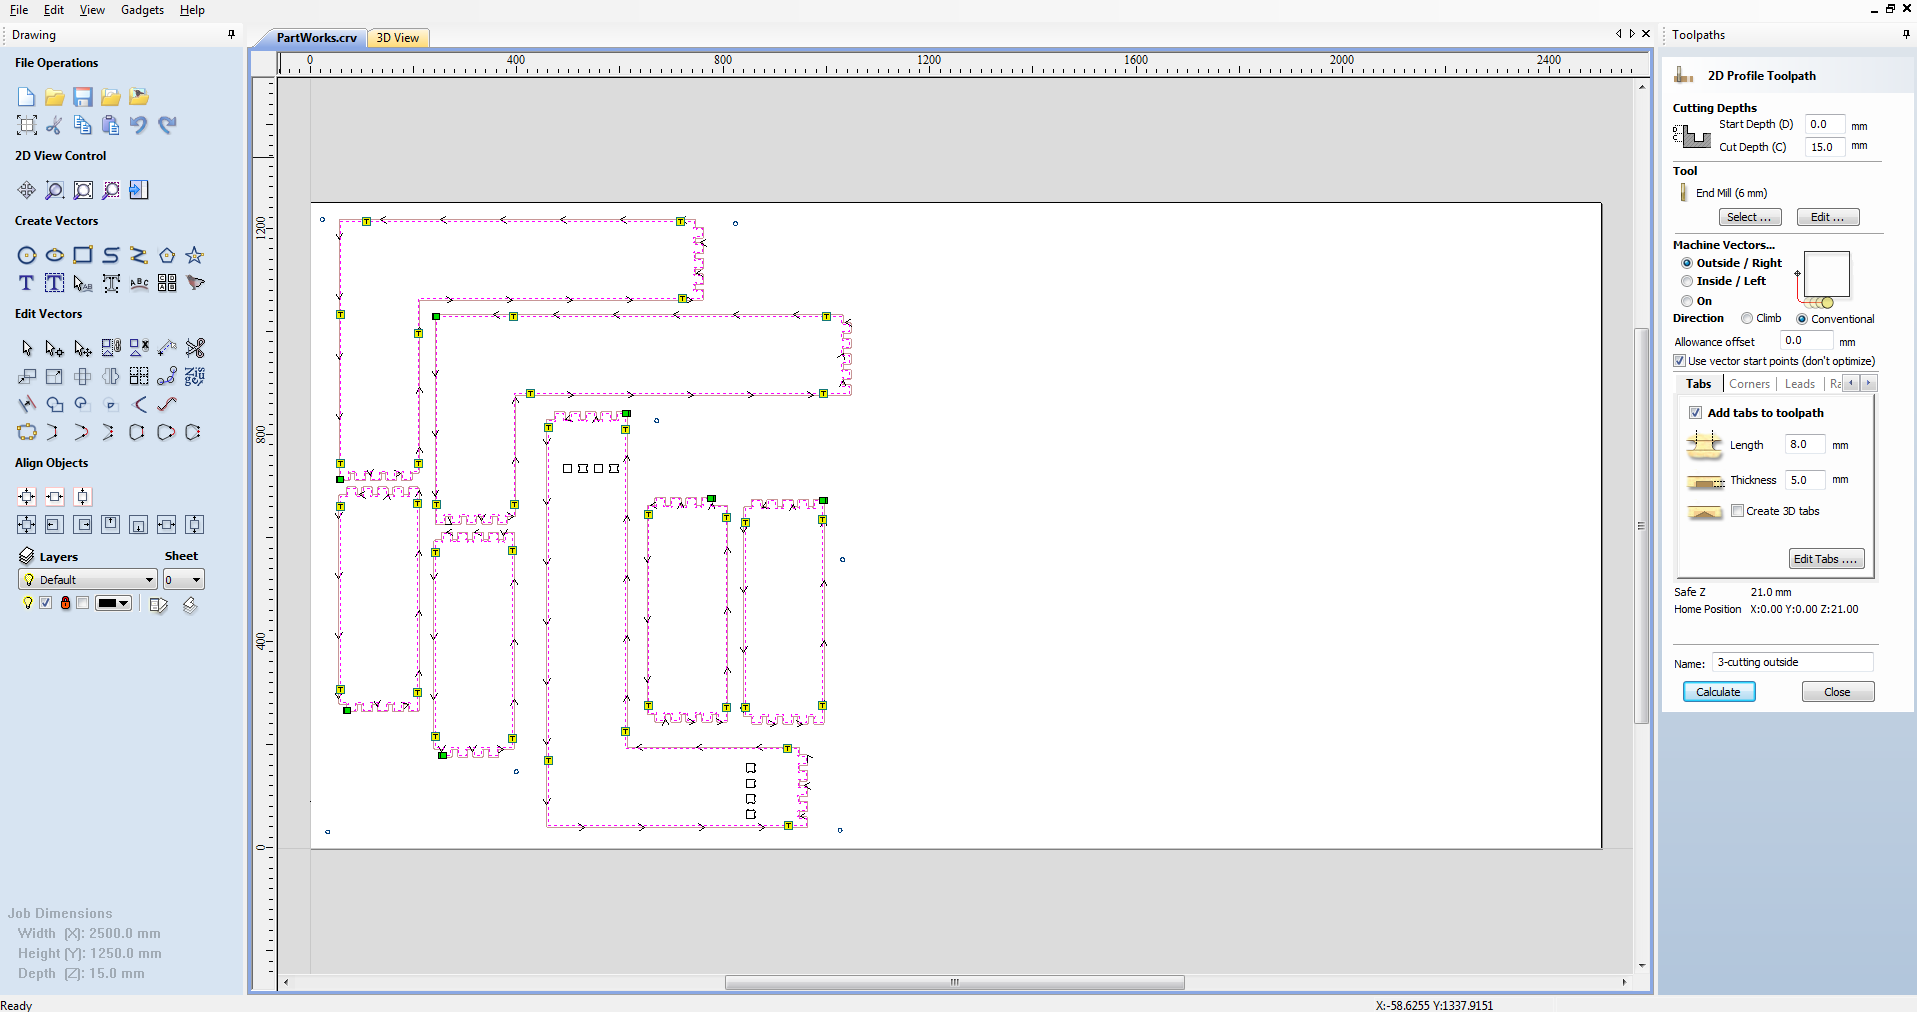
Milling
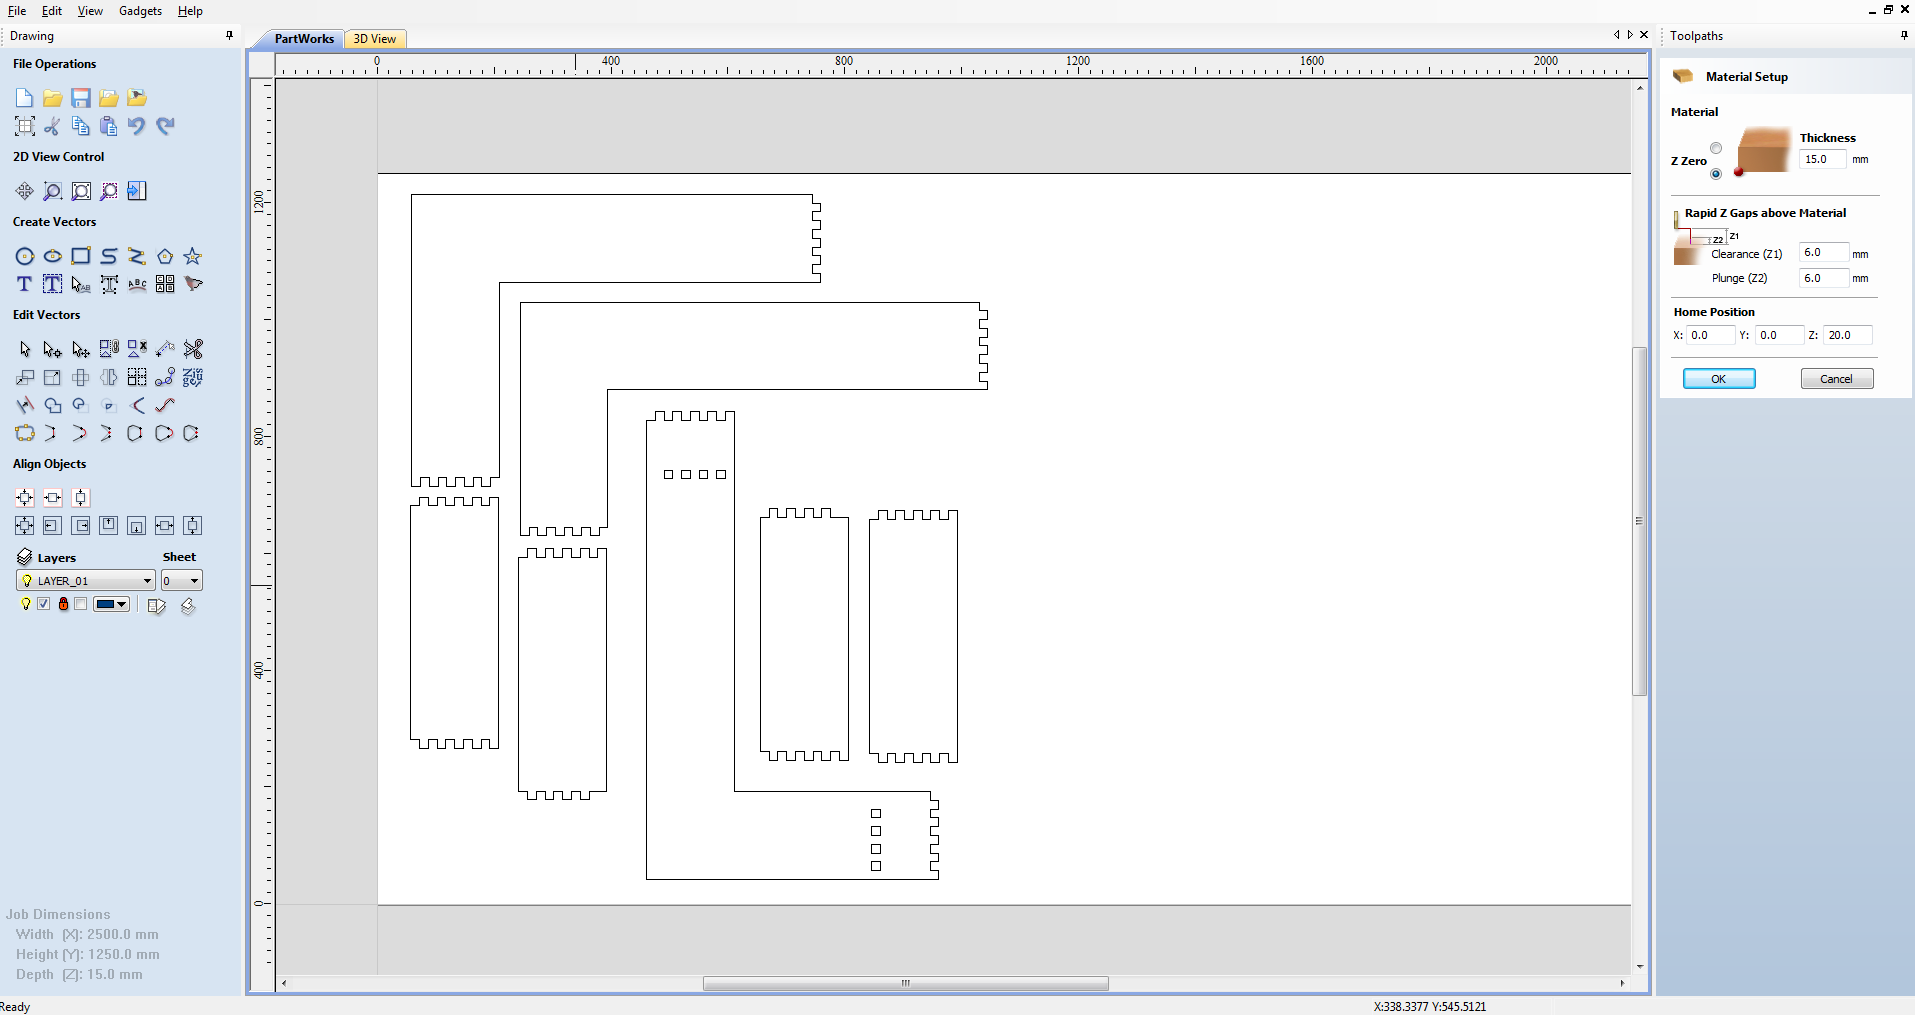
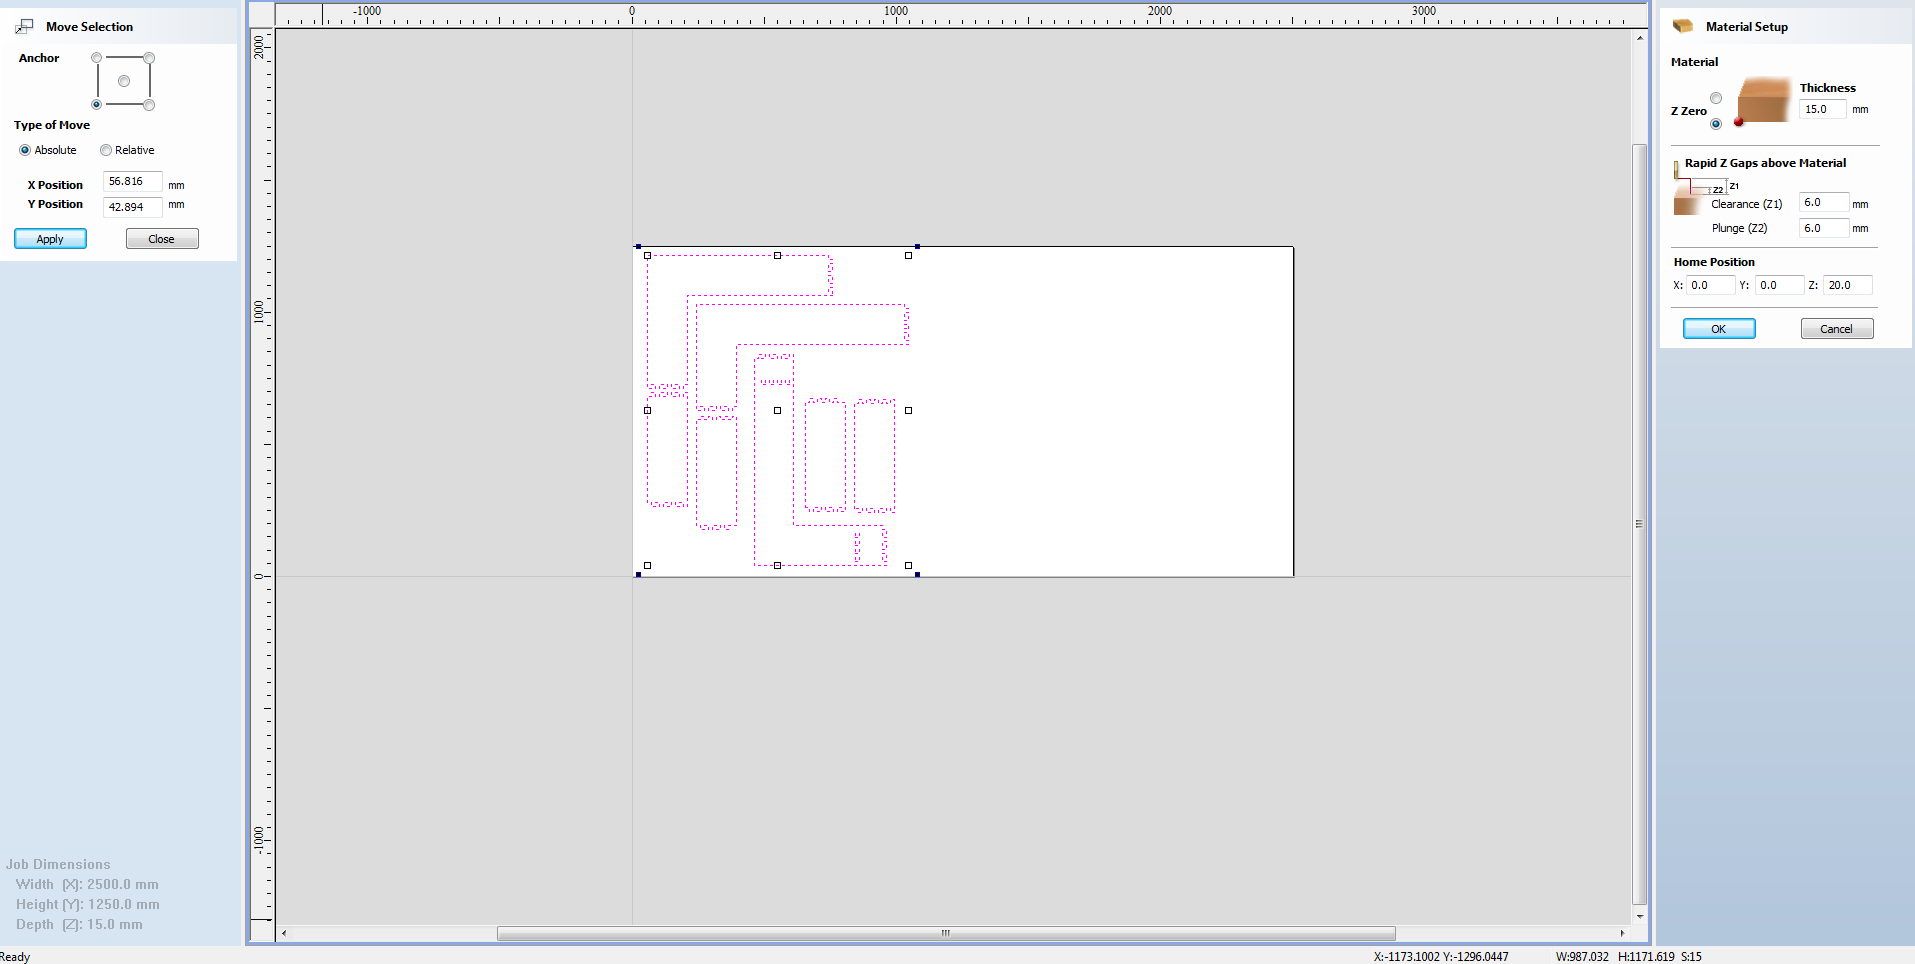
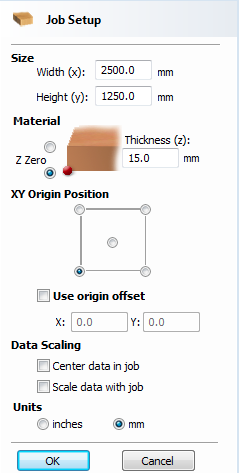
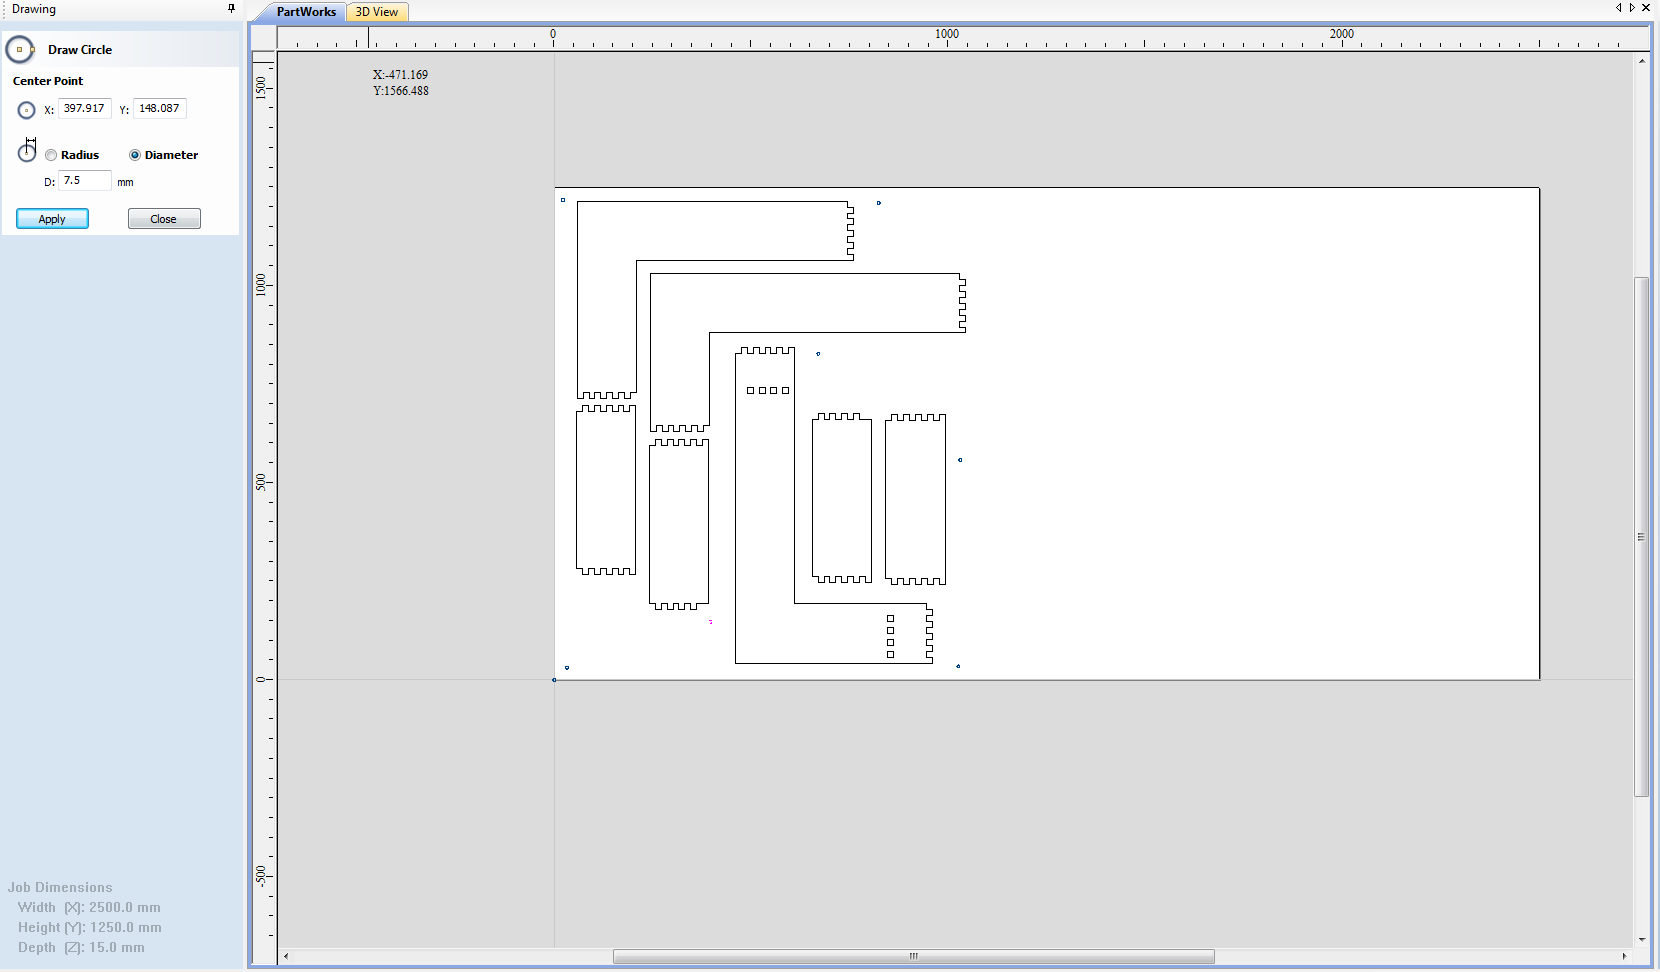
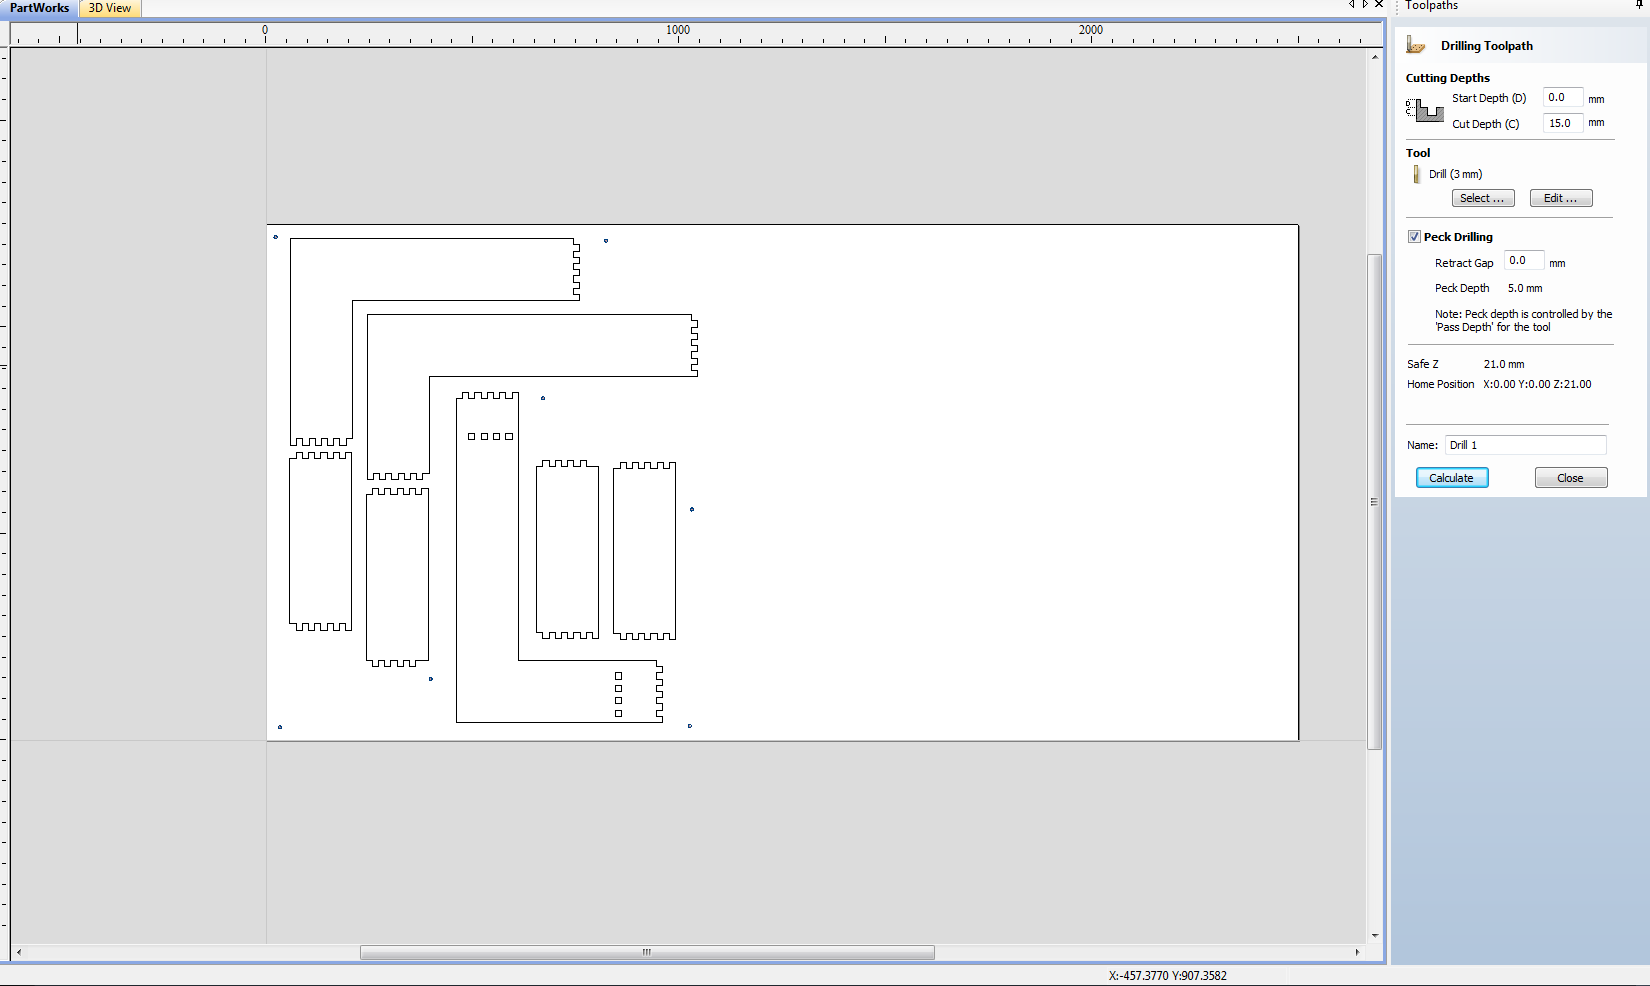
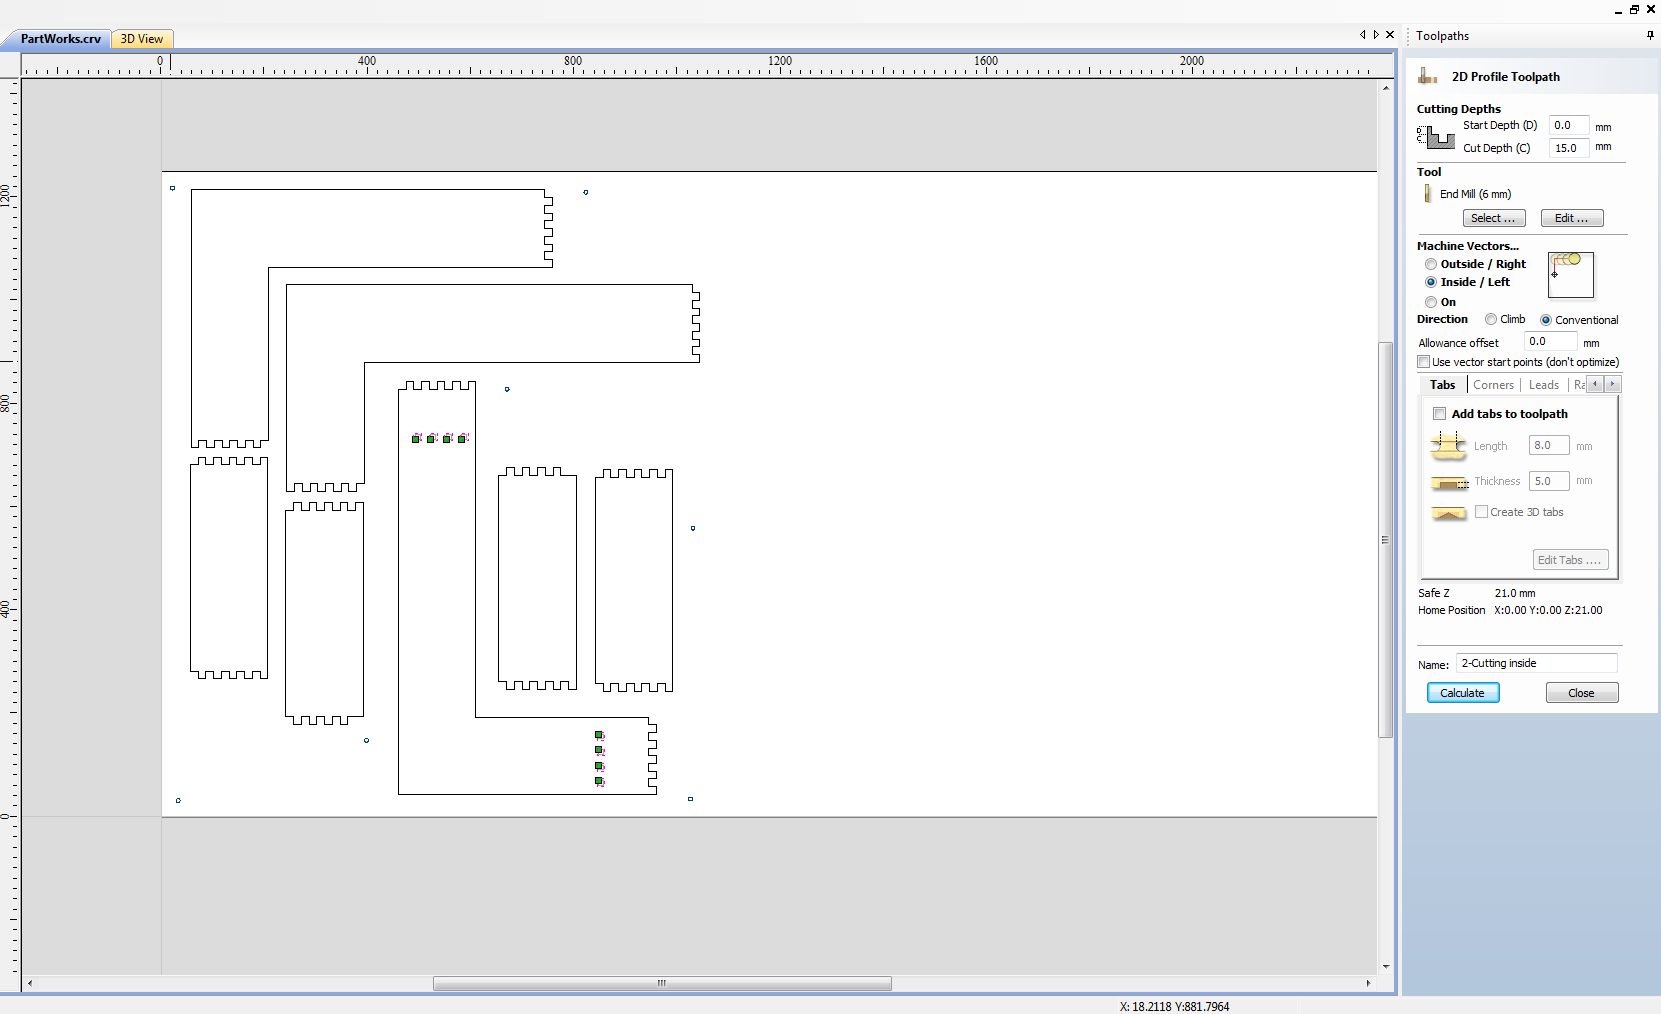
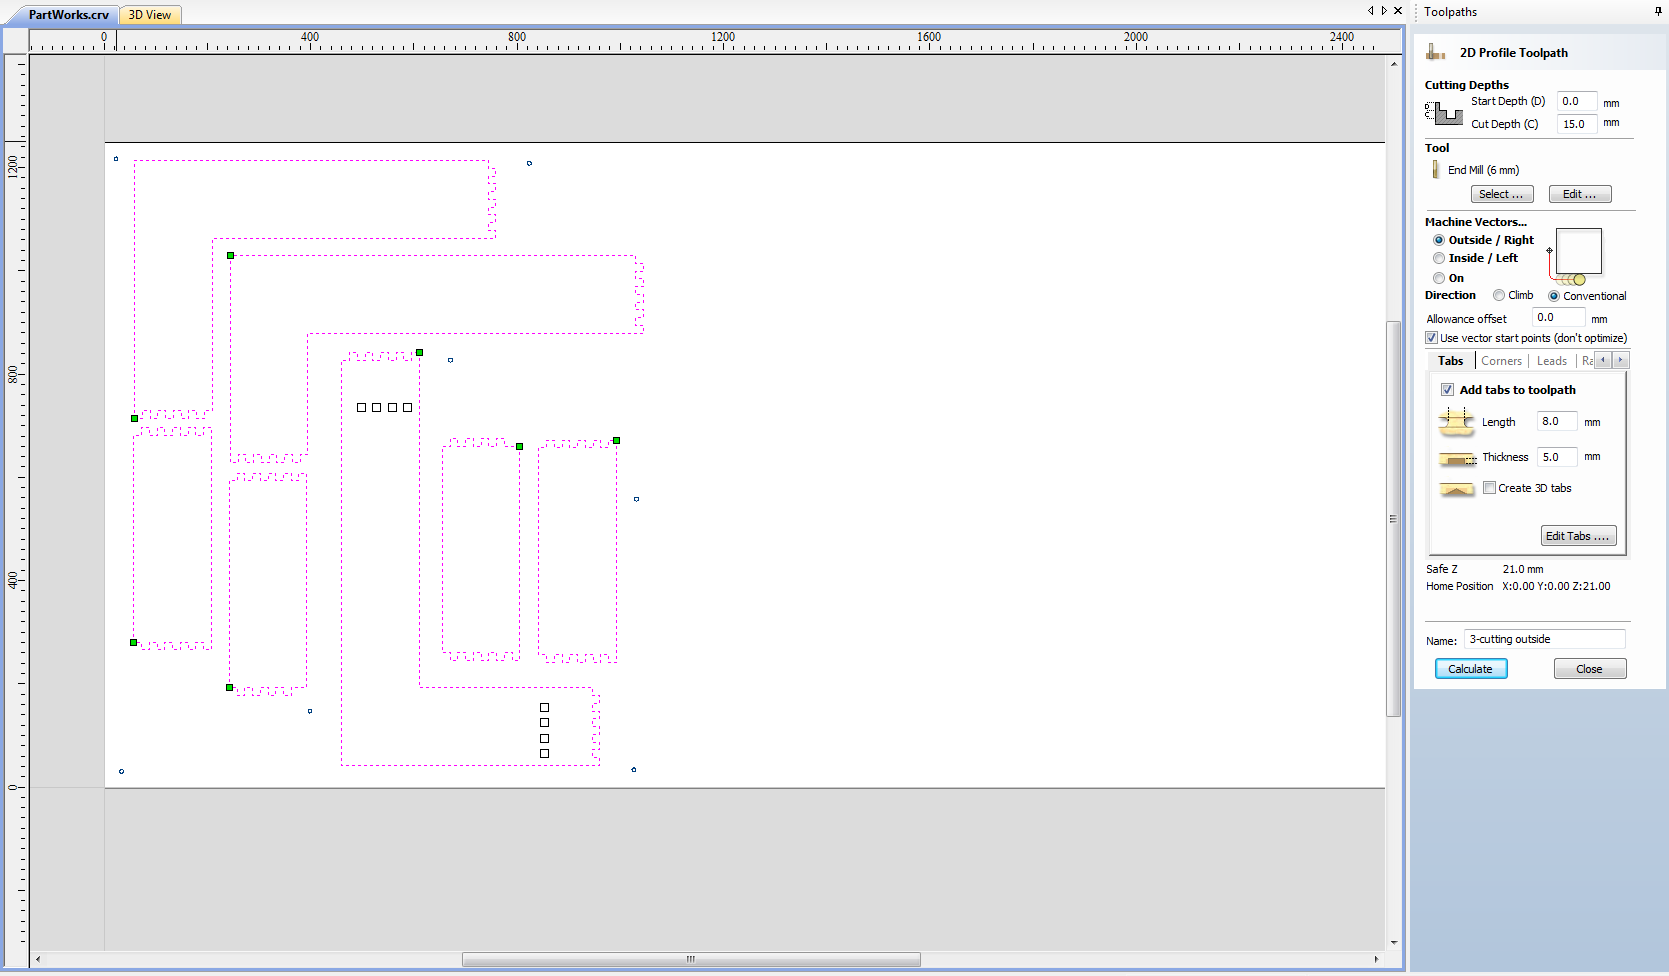
In order to mill the piece, I flattend out the model in Rhino and exported the Rhino file as an .dxf to set the milling strategies and generate the GCode in partworks.
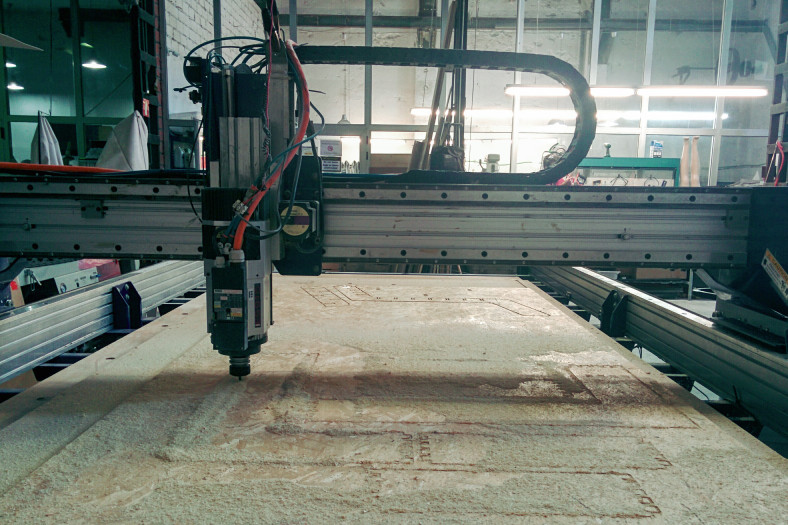
Result
Meditereanean Sea Topography
Working Process: Mill Depth Map of Mediterranean Sea
* generate high res 2D image from Google Satellite of selected area
* turn it into a grey-scale image (photoshop) and depth map (heightfield in Rhino)
* generate 3D model
* double milling
Material: Plywood
Software: Photoshop; RhinoWIP; SketchUp;
Extensions and Apps: Customise your map extension; AwesomeScreenshot Chrome Extension; Google Earth; Apple Maps;
Milling Machine: ShopBot
Step 1: Extract high res satellite image of Mediterranean Sea
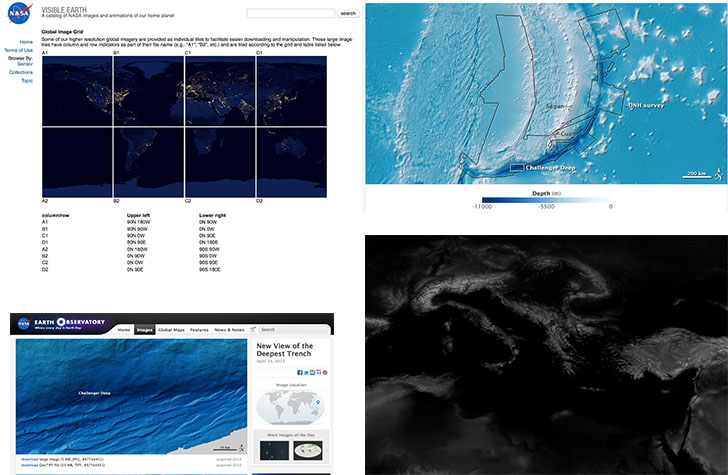
1) Strategy 1: Search for available 3D models and/or depth maps of Mediterranean Sea
Problems:
* NASA: provides only land topographies, oceans are blacked out
* Google Earth: didn´t find a way to extract selection
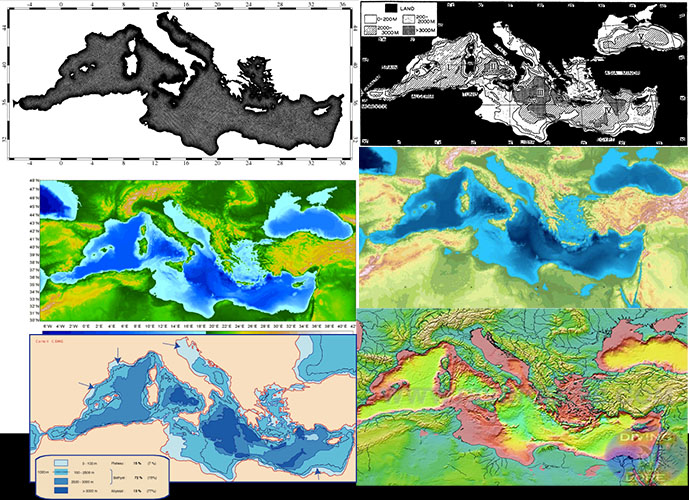
* Research Institutes: provide only fragments, no computer generated model capturing whole sea seems to be (publically?) available; provide different data seta, such as surface topography and currents. Hand drawn images are available based on old data..
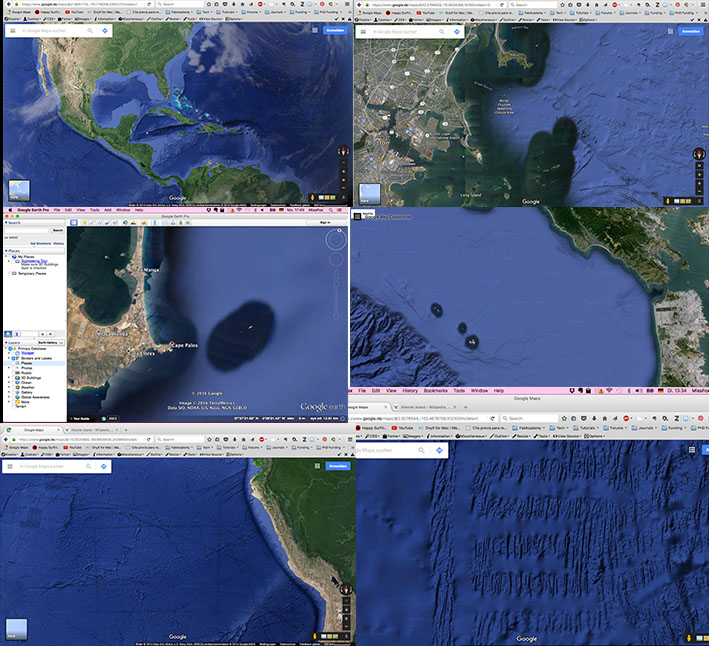
Strategy 2: Hack Google Satellite-Maps
Problems:
*Screenshots and Photoshop:
17 Screenshots of selected area in close up zoom to capture different coloring that indicate depth variations of the sea
Photoshop → file → automate→ photomerge → layout strategy: reposition. Result: map becomes crocked.
Instead tried → layout selection: perspective. Result: heavily distorted.
Instead tried → layout selection: collage. Result: unaligned fragmentation
*Screengrap! App for Google Map hack:
Screengrap! Tutorials here and here. Problem: only works with older firefox versions (43), so I downgraded my firefox. While it worked to capture the Mediterranean area selection in an .png file, still two problems persisted: cities/countries/borders maintained their name tags (despite having deactivated the function) and more importantly: the image result maintained low res
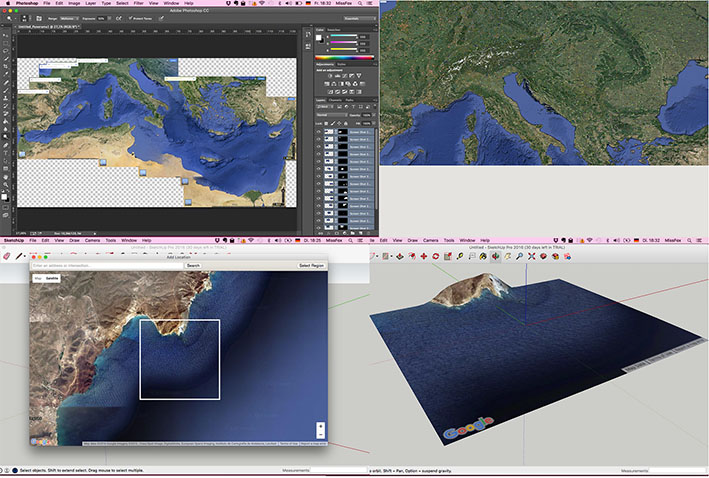
* SketchUp: allows import of google map selection, easily turned into depth map. Problem: selection area is tiny, size of selection not customizable; also automating not possible. Manual process would require many hours and selection would not merge accurately.
* Time is running out: Two ideas to simplify
* four images taken from Mediterranean, zooming in from larger to detail or
* four images, taken each from a different place in various zoom sizes to exemplify the oddity of the Google Earth data, e.g.
* Bermuda
* Boston Bay area
* Peruvian cost
* Mediterranean before Spain
Solution: to extract high res satellite image
Google Map Customizer: Grégoire Durrens, another BCN based Fab Academy student, found the customizer, which allows to download a selected area of the map in high resolution.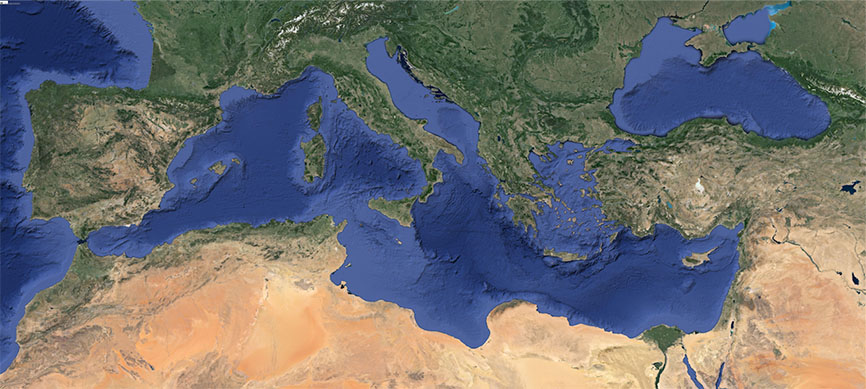
Step 2: Turn 2D Image into Greyscale and Depth Map
Finding Out: Strategies
Search for right software:
* Photoshop tutorials demonstrate manual development of depth map from 2D photo, not what I want.
* Tutorial on how to convert a 2d image into a 3d image using Gimp and DMAG4 (stereo conversion). Not practical for my task either. Or another tutorial demonstrating how to convert a depth map into 3D. Might be useful for later.
* SketchUp and Rhino tutorial: Tried it to double check on limitations of Sketch Up and learn Rhino: import cost/sea line into sketchup (file→geo-location→ add imagery. Then: file→ geo-location→ show terrain. Save file and import into Rhino). The sea is depicted as absolutely flat, hence it´s useless.
* Rhino command Heightfield and Typography from conturs.
So Rhino it is. However, as I am totally new to the program, I needed help from Santi, Ferdi and Anastasia for the following worksteps.
Solution
Turn 2D Image into a Greyscale with Photoshop and into a Depth Map in Rhino with heightfield command
Workflow
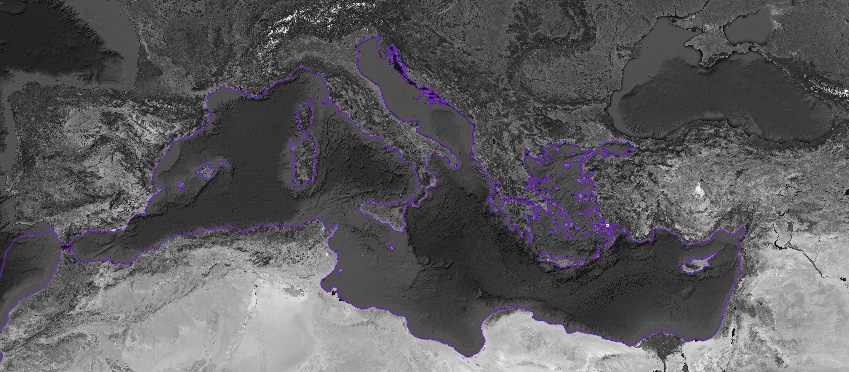
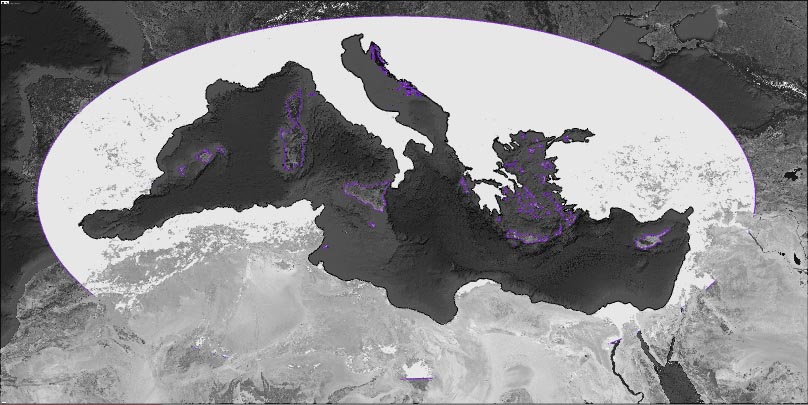
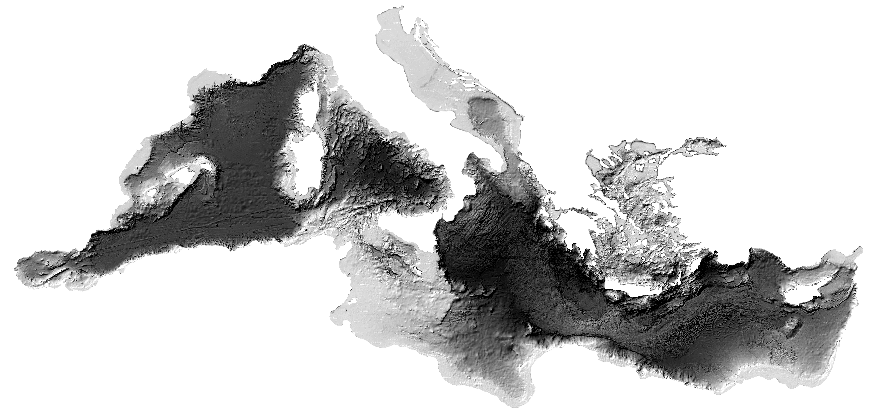
* Using high res Mediterranean image, turning it into greyscale, increase contrast in Photoshop
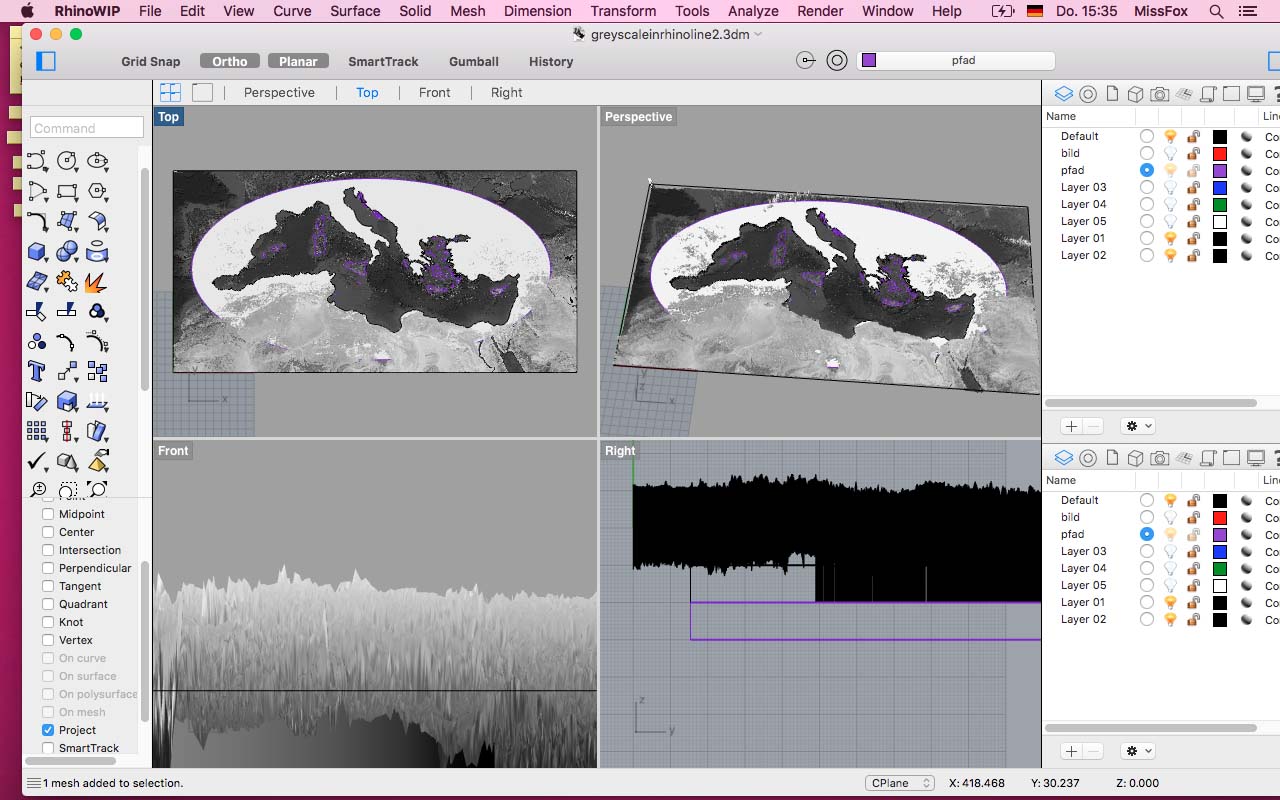
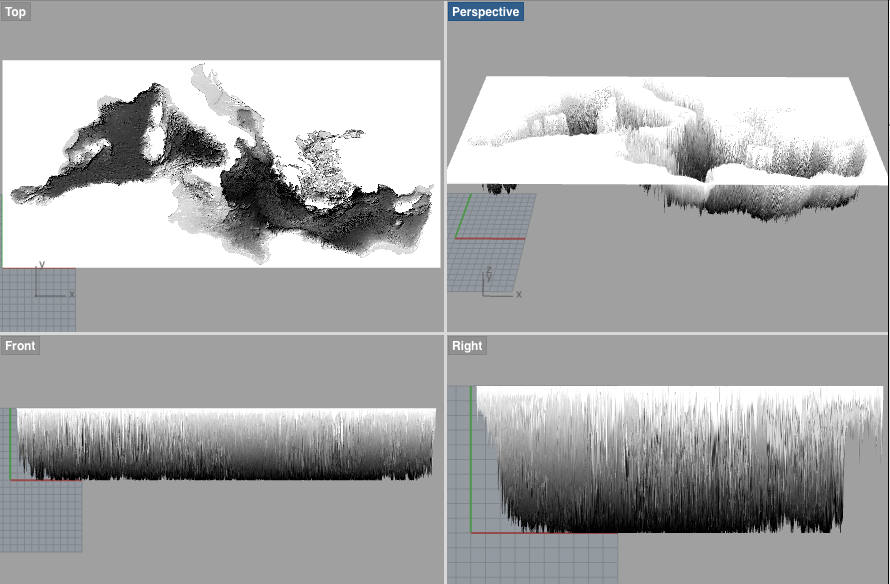
* Import into Rhino, file width 3527; height 1763. Rhino canvas adjusted to this.
* Command heightfield: sample points set the resolution, we tried out different heitghtfield
settings (100, 200, decided on 1000) to find the ideal res without crashing the computer.
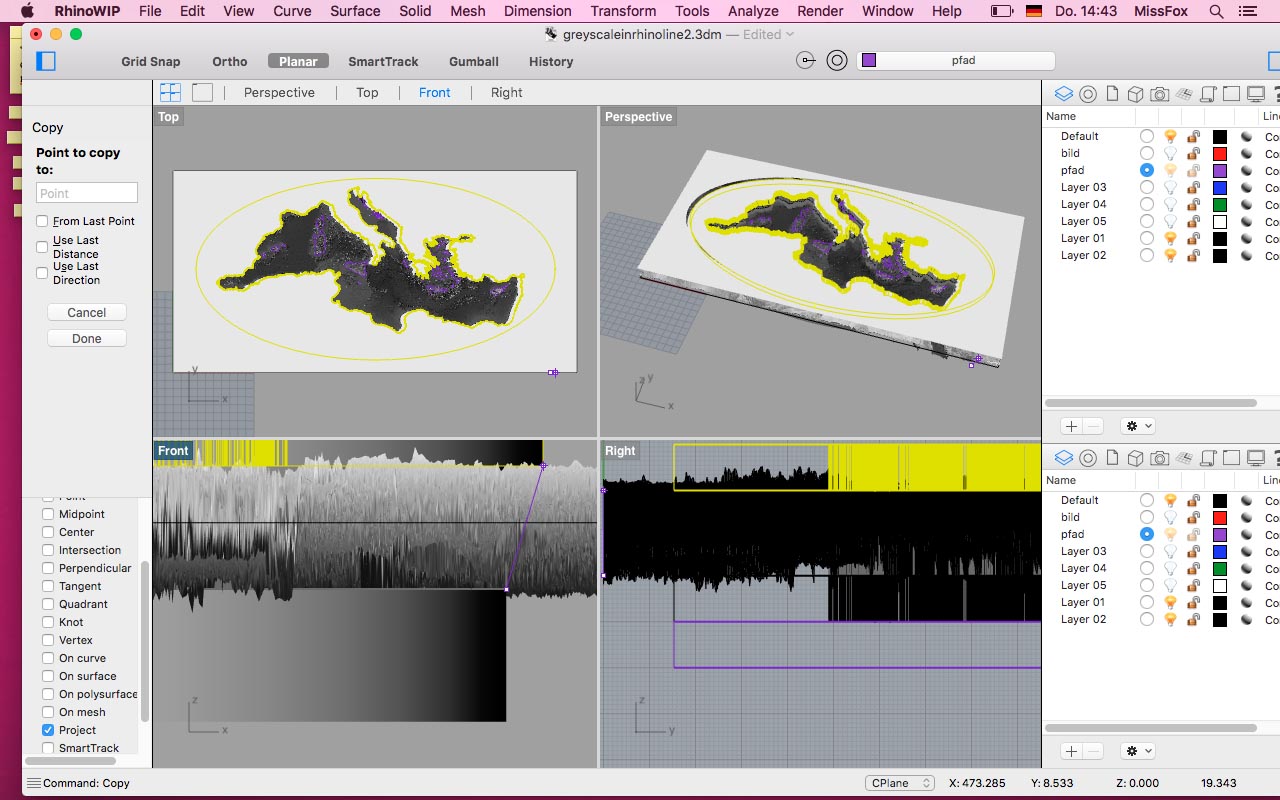
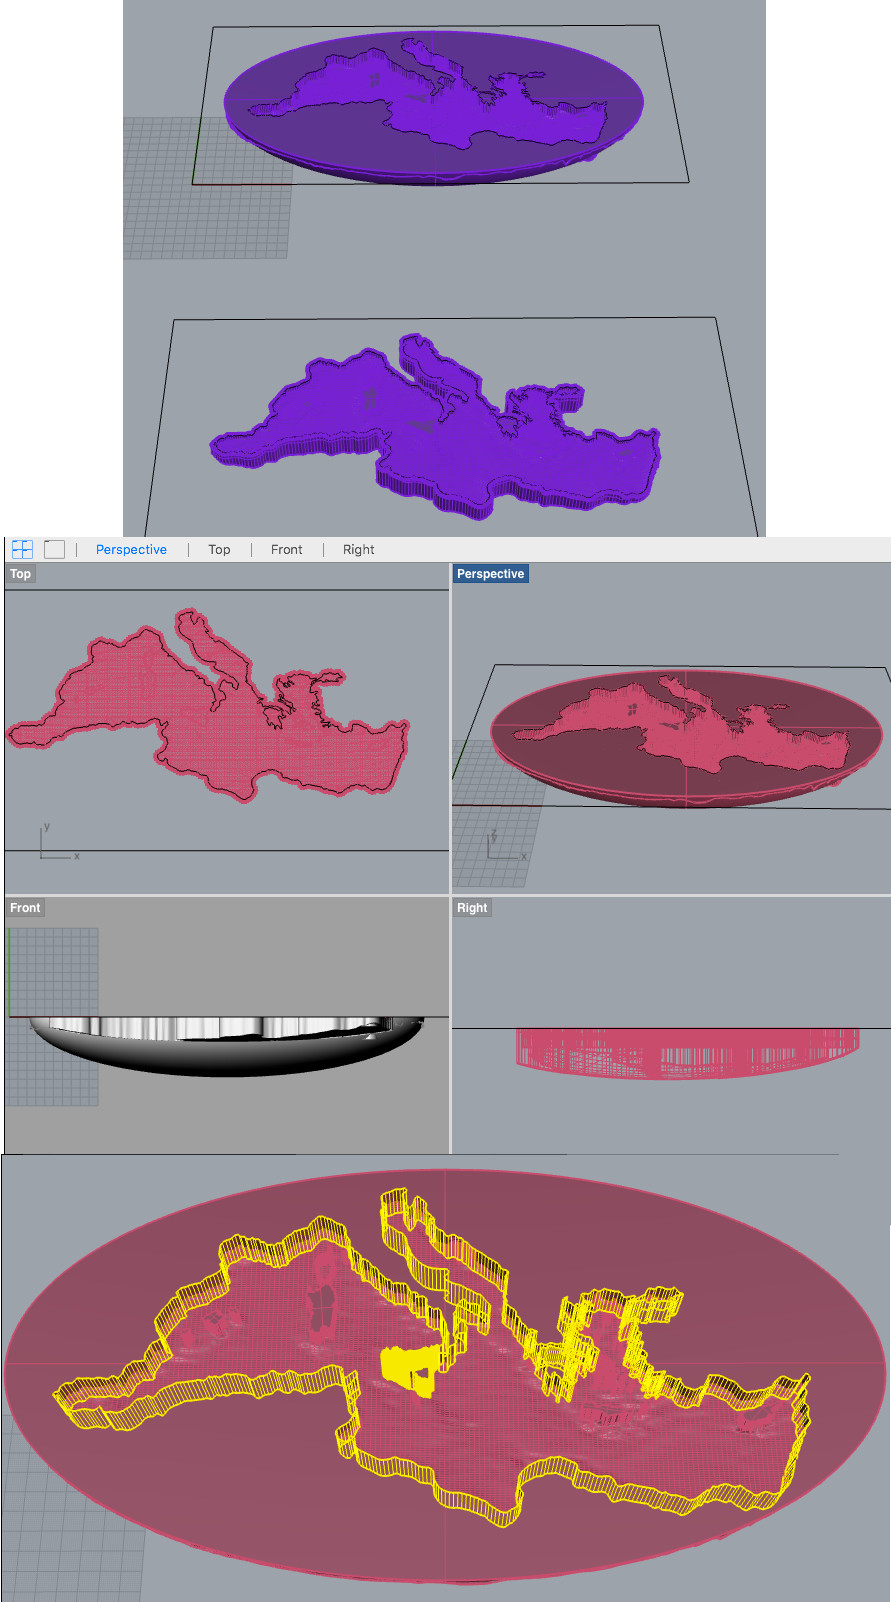
* Problem: To visualise basin topography, heightfield settings accelerate actual depth/heights, but now landmass displays extreme topography
* Solution: Seperate land from sea with a polyline tracing of the coastline and islands.
* Export into Inkscape to seperate land from sea; leaving land flat
* Hightfield command Rhino: Import modified image displaying fland land and sea basin topography
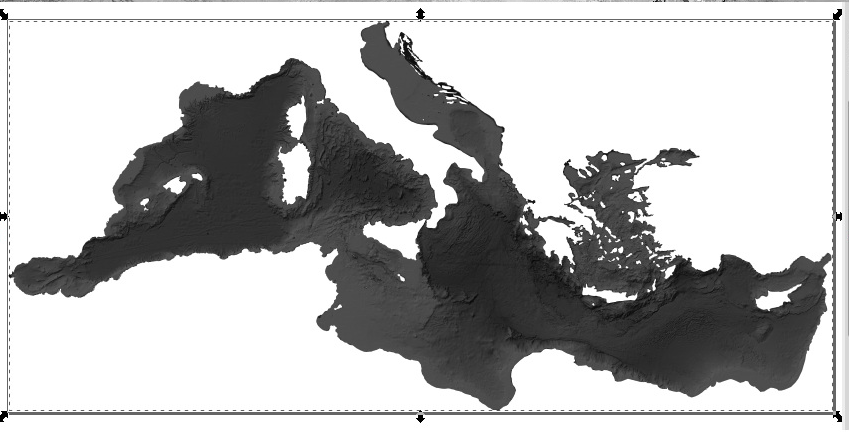
Two Design Options
Work In Process
I plan to do rough milling first, probably with a 12 mm milling bit, then changing to a 1 mm milling bit for the fine details. Additionally, we have to set on a double milling strategy. I need to find some wood other than the OSB for it, plywood might be nice although I am hoping for some actuall tree trunk parts.

: )
Download All Files