Week 5: 3D Printing & Scanning
Task
* test design rules of 3Dprinters (group project)
* design & 3D print an object
* scan an object
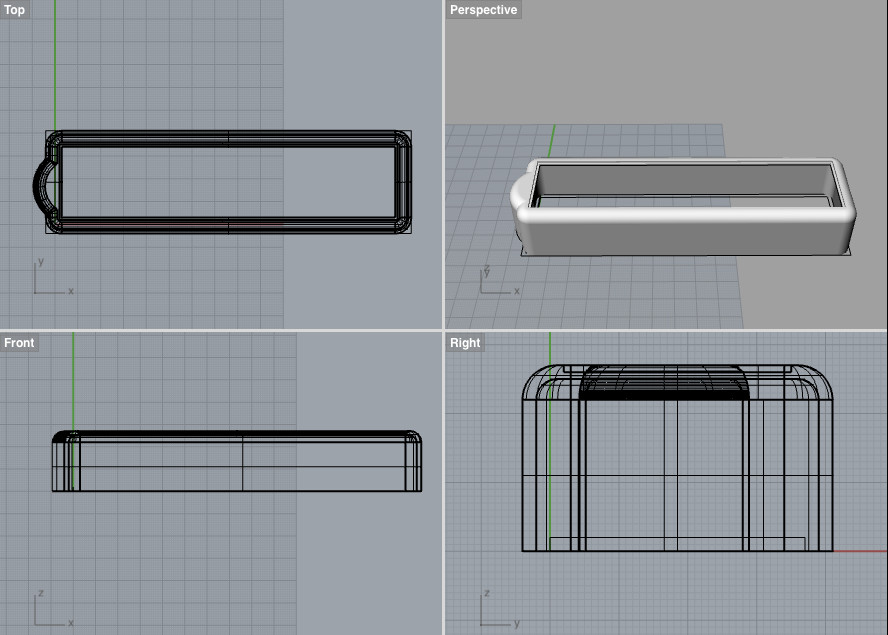
I designed a pcb protection case for my final project in Rhino and 3D printed it with a Formbyte 3D printer. For the second assignment I scanned a metal butterfly using the Modela MDX20 scanner, the Dr. Picza software on Windows and Blender to correct/tidy up the scan.
References
* Here is Neil´s lecture page and the video.
* online course on 3D printing
Tools: software, machines, materials
* 3D Printing: Rhino, Cura, Formbyte 3D printer
* 3D Scanning: Dr. Picza, Blender, Modela MDX20 scanner; Kinnect and Skanect
* Printing materials: ABS, PLA, HIPS (dissolvable in hot water), PVA (dissolvable in hot water)
* 3D lacque to help print stick to bed (glass), if unavaiable: hairspray (lasts for about 5 prints)
3D Printing
Design Rules
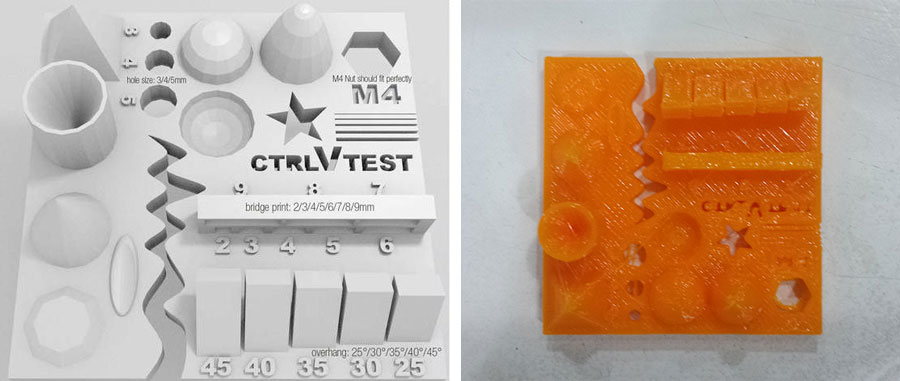
We used a standart 3D printing test piece from thingyverse. The printer settings should be set to its lowest possible leyer height (0.1 mm in most cases), with an infill of approximately 33%. This ensures details to come out nicely. The following is the test list of settings and printer calibration:
Methods to test finished 3D printed object:
* Size: the object is 4 x 50 x 50 mm ( the size of the baseplate) — measure with a caliper/drill
* Hole size: 3 holes (3/4/5mm) (control measure with caliper or drill)
* Nut size: M4 nut should fit perfectly — insert an M4 nut; it should need a little pressure
* Fine details: pyramid, cone, all numbers — check if all things look nice and smooth
* Rounded print: wave, half sphere — check if all things look nice and smooth
* Minimum distance between walls: 0.1/0.2/0.3/0.4/0.5 mm — depending on nozzle size and slicer settings you will get different results
* Overhang: 25°/30°/35°/40°/45° — depending on printed material/cooling, these will not be as seen on the rendering provided
* Flatness: all flat areas — these should be flat with no gaps
Common 3D Printing Problems
1) Warping: When the corners of the print start to bend.

Methods to reduce the warping effect:
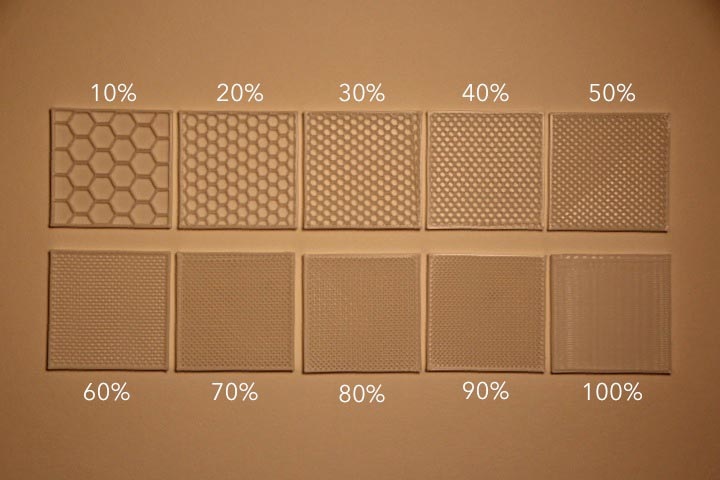
* Reducing the in fill(different sizes and patterns) the less dense the model gets (Choose different sizes and patterns, the hexagonal ones take longer not recommended)
* Reduce wall thickness
* Create pads in the corners of your model
* Brim - good to maintain the model on bed
* Raft - only good for model ta touch little the bed
* Heat platform of printer
* Hairspray
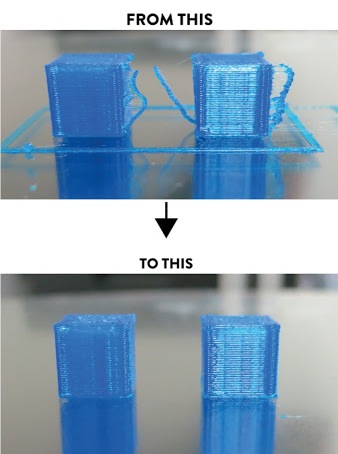
2)Retraction Fail: need to change retraction settings of the printer
Rhino, Cura & Formbyte 3D printer
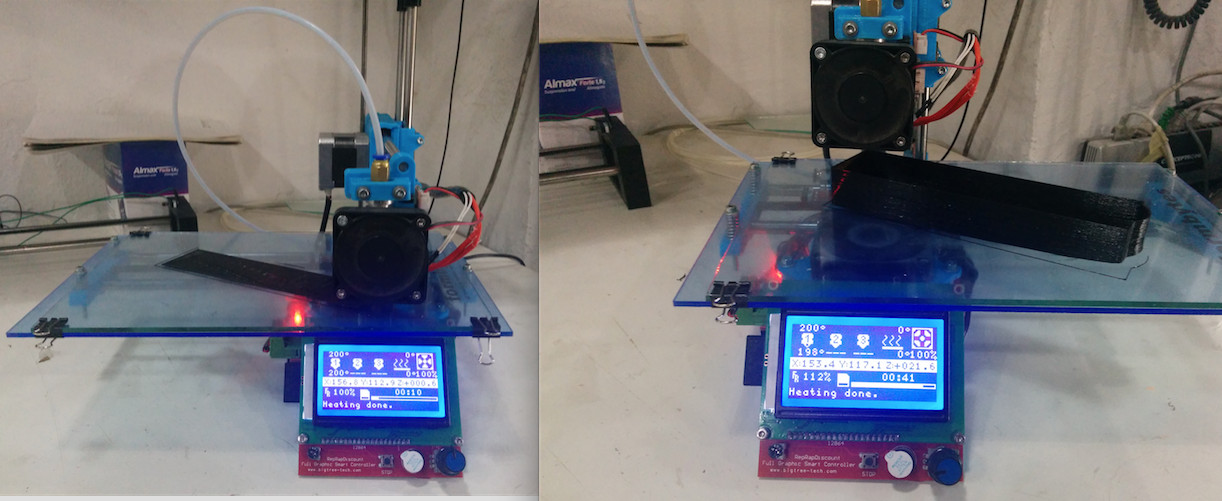
To get the 3D files ready for printing I exported the Rhino file as .stl file and used Cura to generate the GCode. I cleaned the plate and add lacquer spray to help the print stick to the base. With the SD card in the machine, I navigated through the menu to the print from sd option, select it and clicked ok. The machine starts preheating and the print starts.
Cura Settings:
* Leyer height: 0.2mm best, 0.3mm and increase temperature for good mechanical properties.
* Shell thickness - 2-3mm.
* Bottom top - 0.6mm.
* Infill - at least 20%.
* Print speed - the lower the better definition.
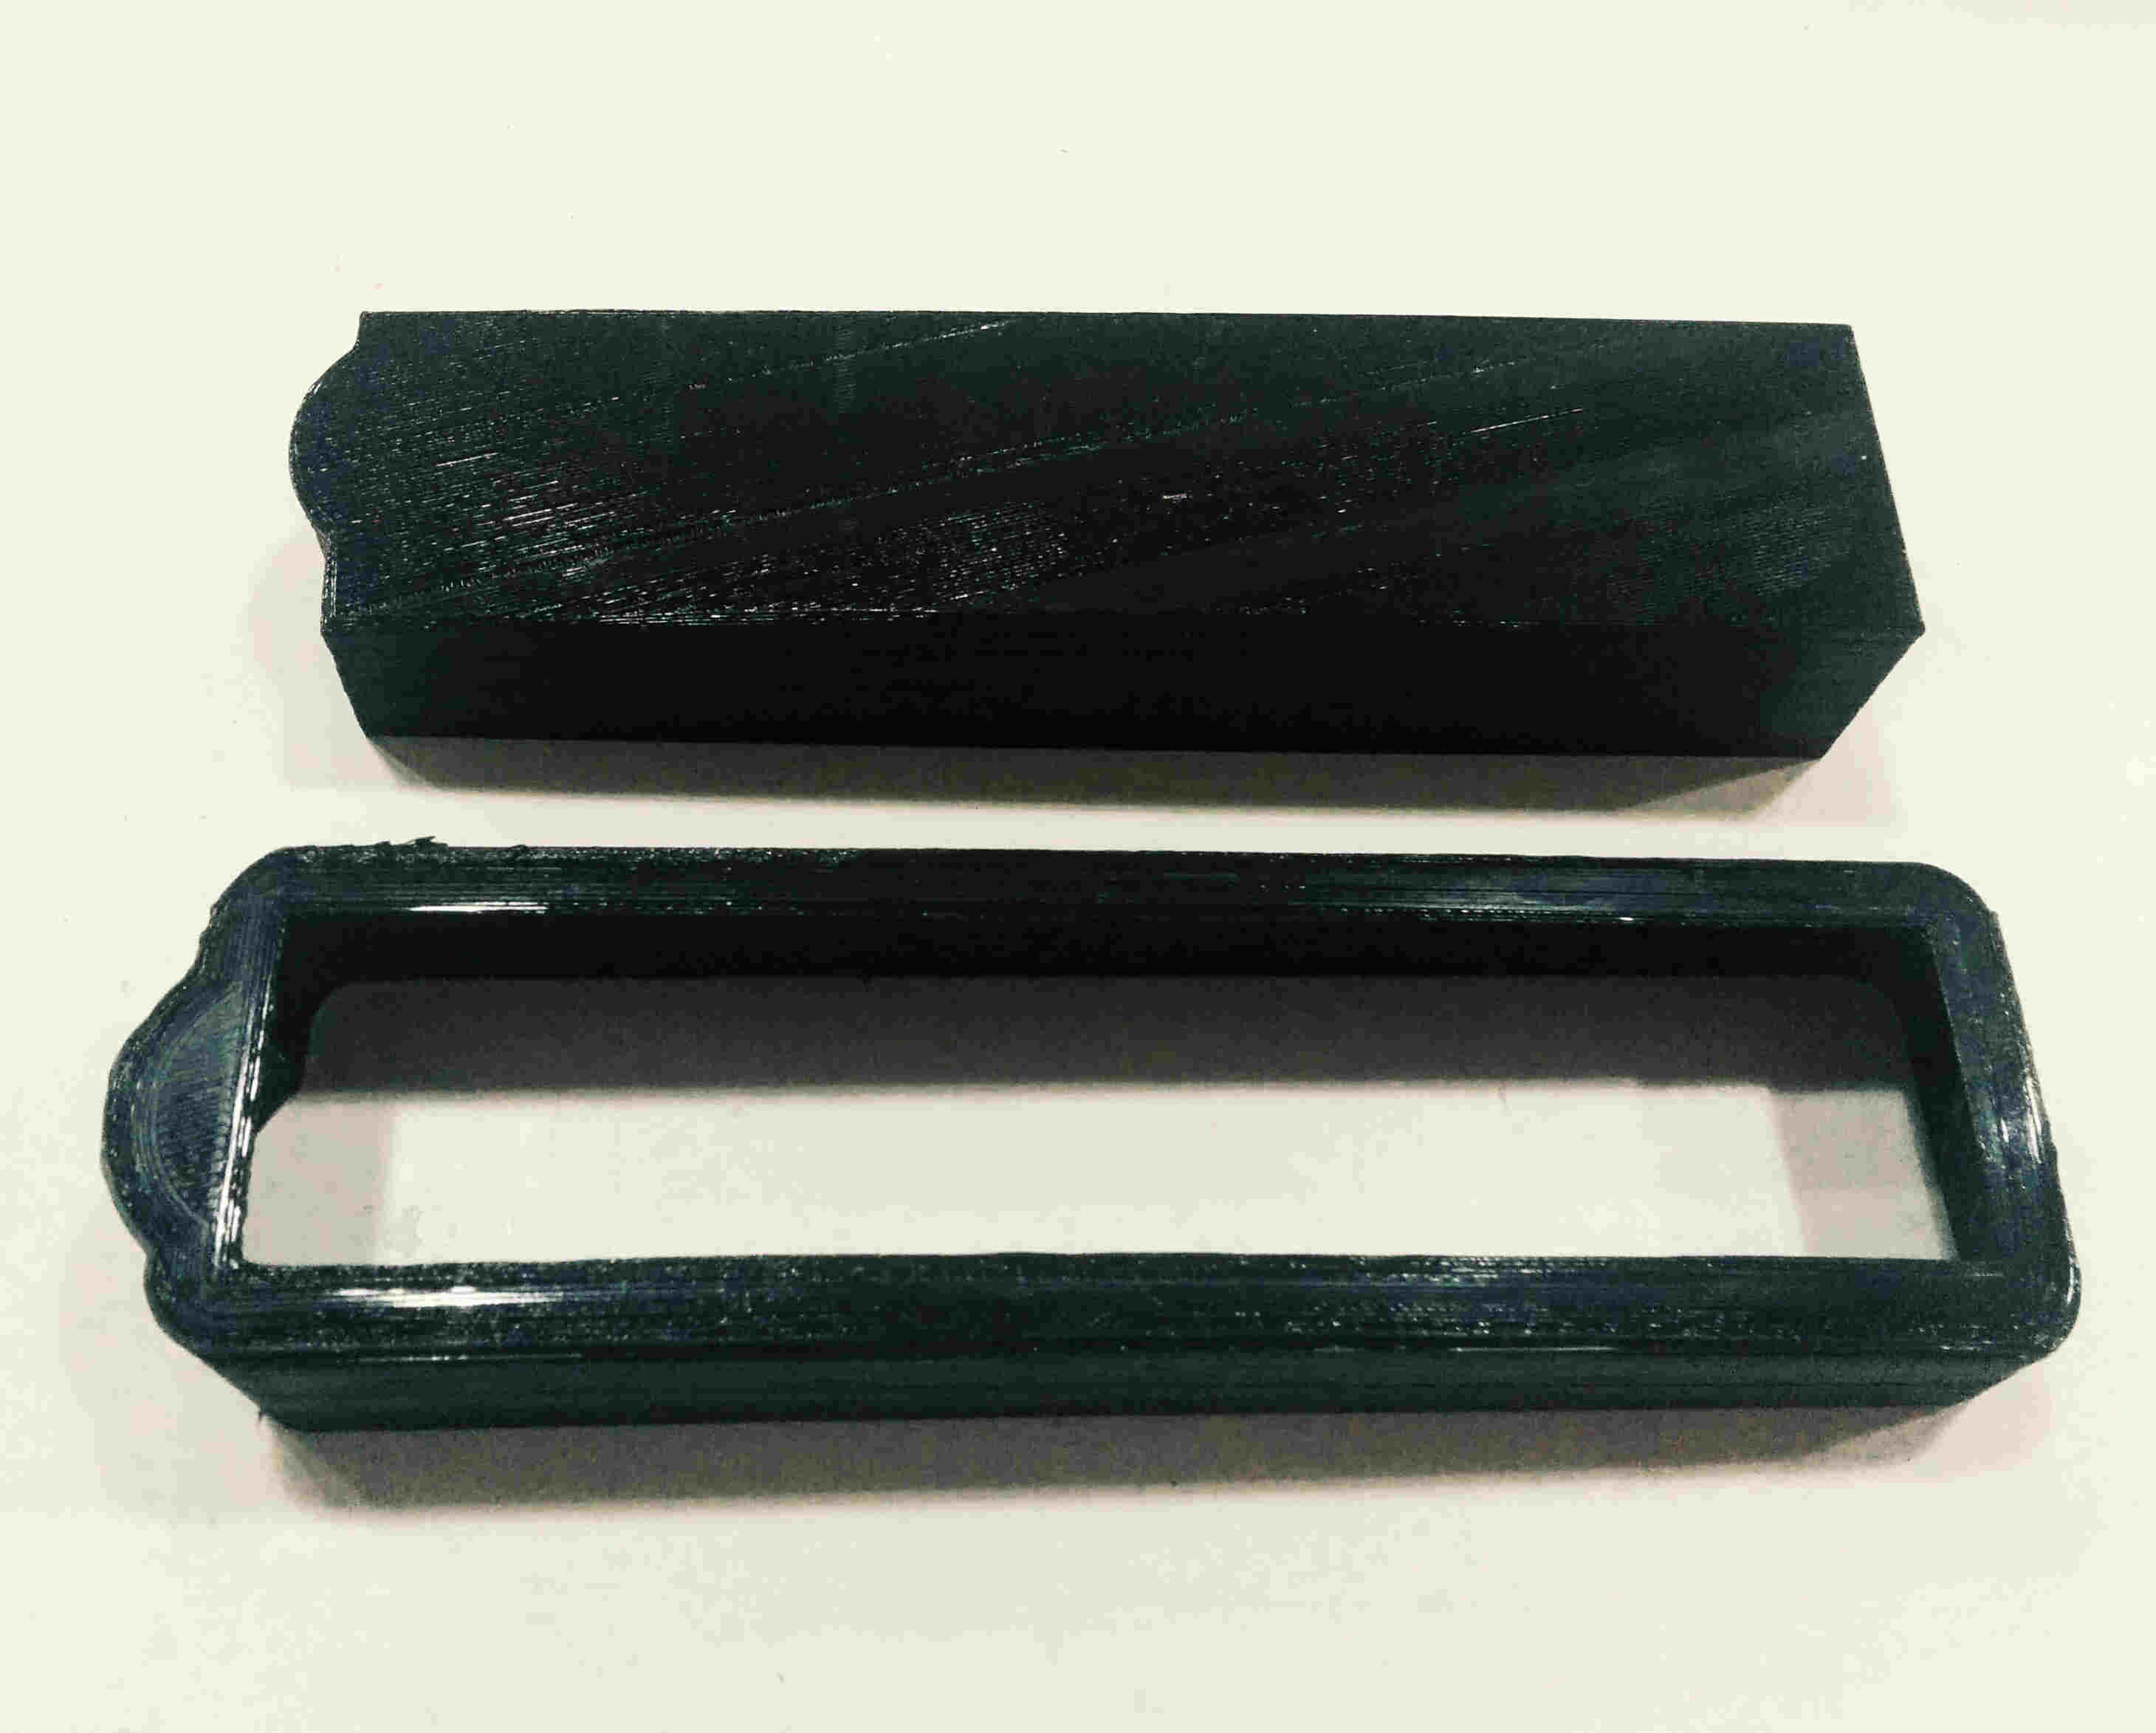
The first protection case print didn´t fit the pcb board of my final project. I had made a mistake in the measurements in Rhino. I also didn´t like the complete enclosure of the box. Below are the printed results, the mistake and the proper result below.
Why 3D print?
This case is meant to protect the PCB of my final project during transport, hence it needed to be custom-tailored. It could not be generated otherwise, eg through molding and casting; lasercutting or milling. I needed not only thin and light walls (difficult to achieve with a mold), but also a pressure resistent material. I thought about lasercutting the case with thin acrillic. However, this would not only result in a stockier look, the design also needs to bend to form the curve that encompasses the battery on the PCB. Combined with time pressure and the student-intensive machine usage, 3D printing the protection case was the best option.
3D Scanning
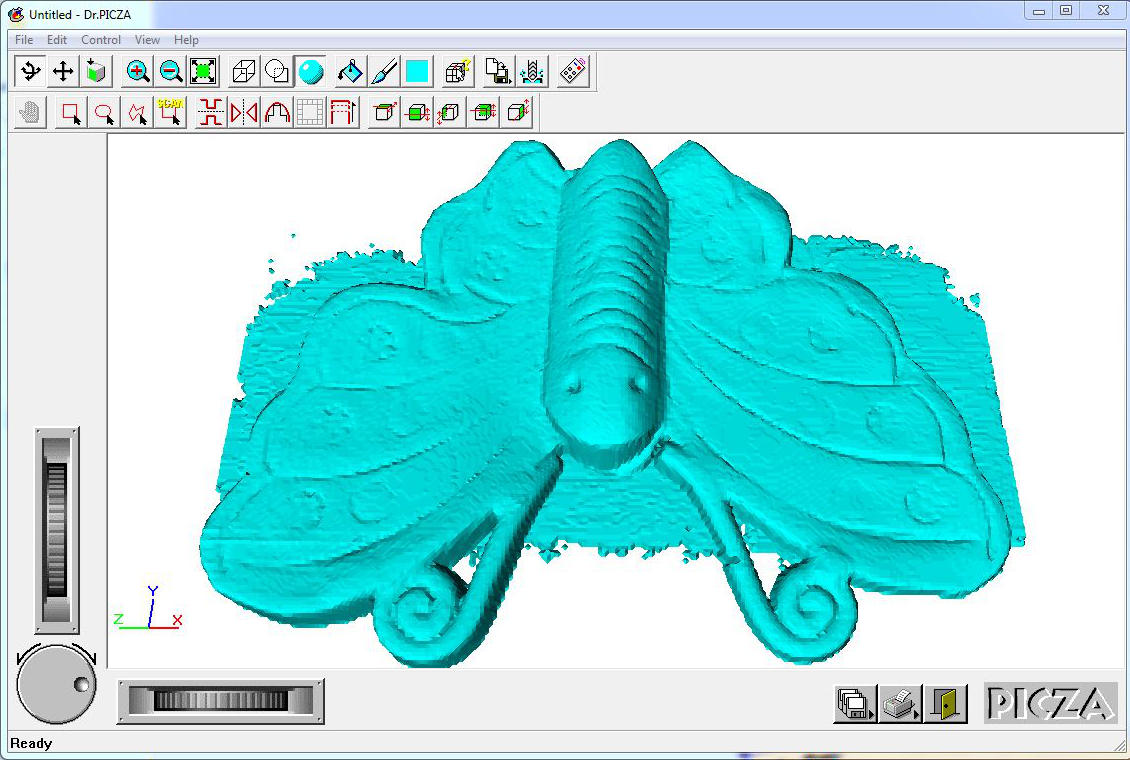
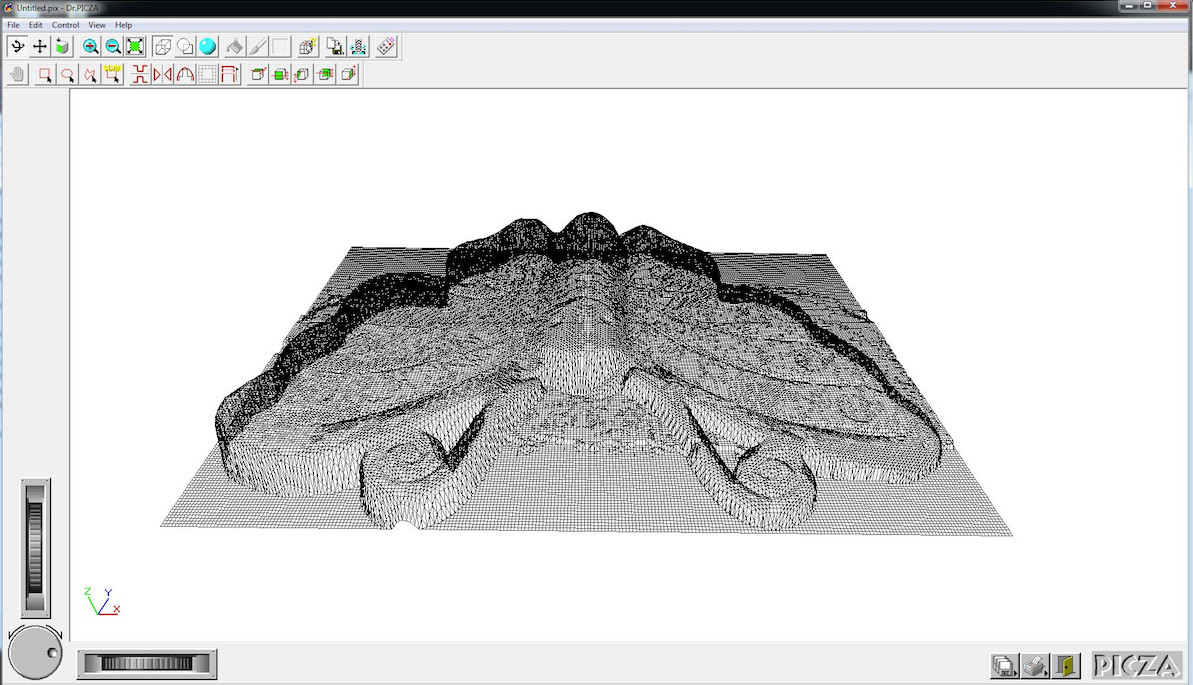
Dr. Picza, Modela MDX20 scanner & Blender
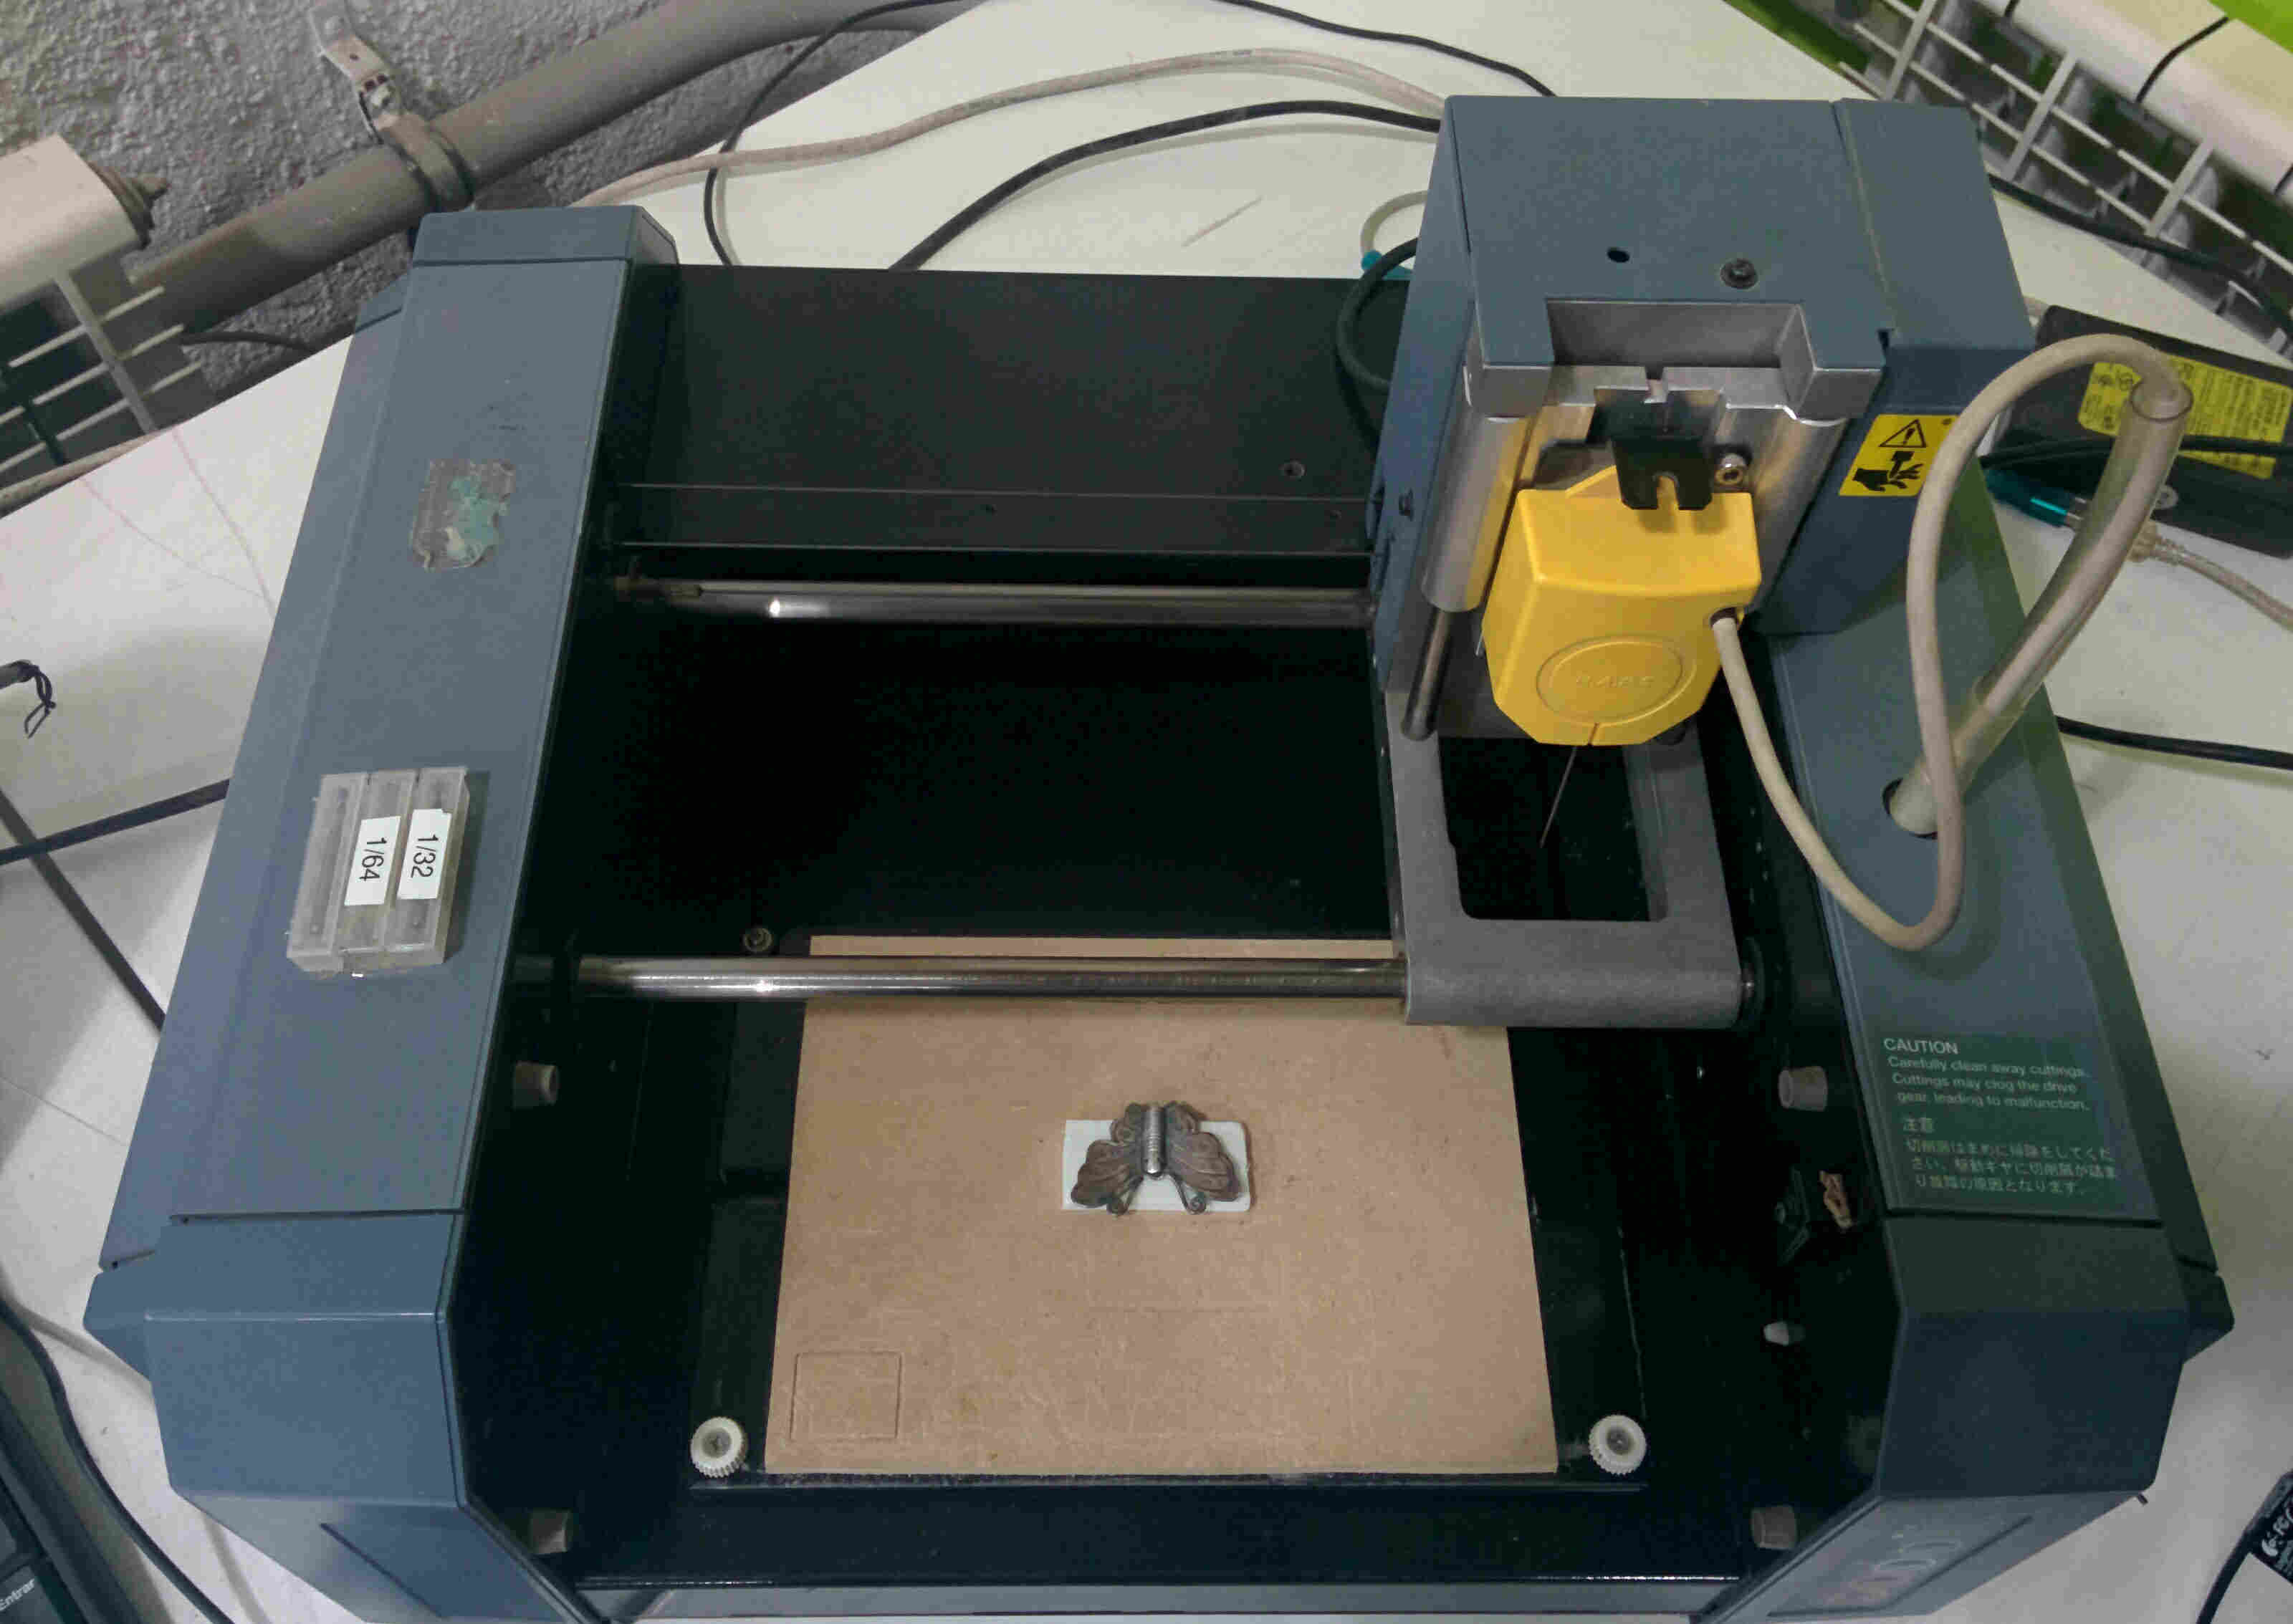
I placed the butterly figure in the middle of the Modela scanner and secured it with double sided tape. I used the Dr. Picza software (in mm not inches!) to locate object. By moving the handles of the selection square, I fit the selection box as tightly as possible around the butterfly object to minimise scanning time. Double click on boxes of selection area makes the machine move down to determine selection.
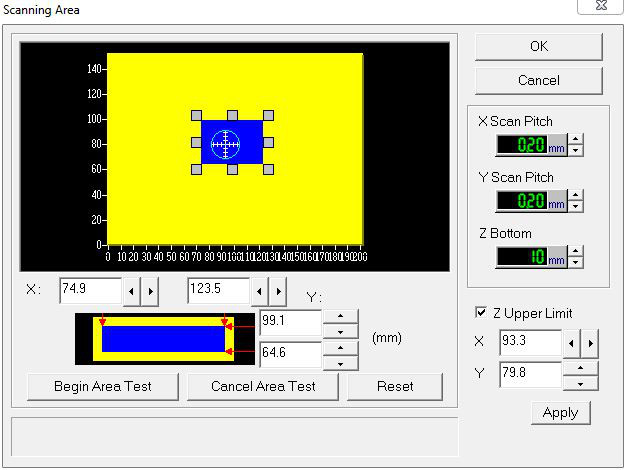
Measures:
x-scan and y-scan: both 0.2 mm (sets resolution)
z-scan: 10mm
Z upper limit: restricts how high the machine moves over the object, low setting is best to avoid time loss. (tick box; put paper over model; make machine move by hitting apply; machine will move down until it touches the paper = highest model point)


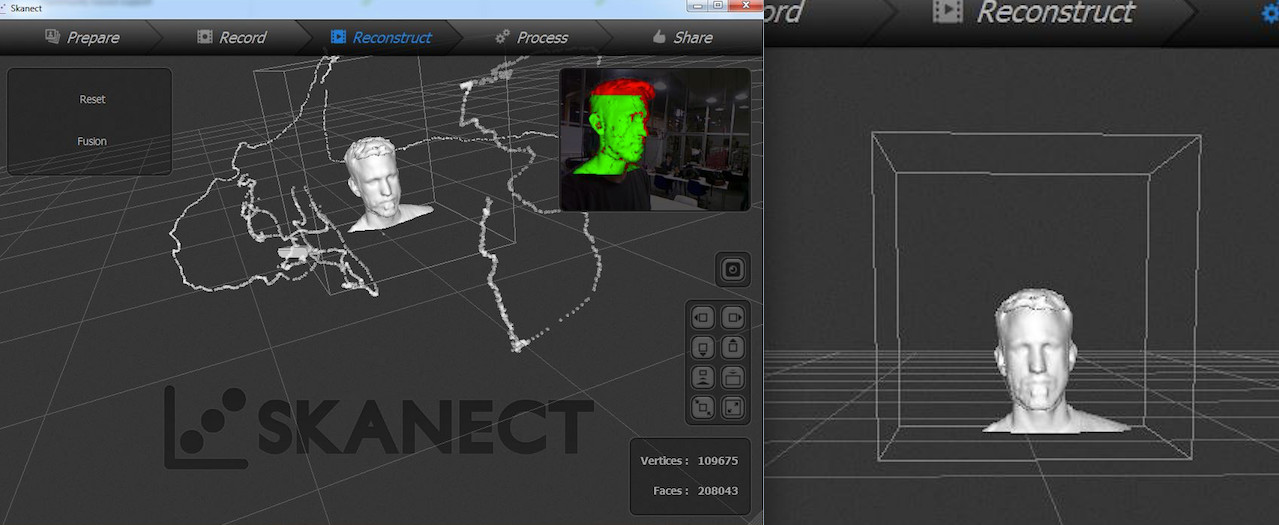
Kinnect & Skanect
I also tried the kinnect, used with the skanect software. The handling is quite easy - I worked on a computer which had everything preinstalled - plugging in the kinnect, opening the software. Set scanning size (eg for head and shoulders 0,5m is alright) then I slowly moved the kinect around Ferdi (my volunteer) until I had a nice 3D model of his head and shoulders. Then however the computer collapsed as the Modela butterfly scan was ongoing at the same time. The kinect is quite heavy and it seems to be better not to run any other processes on the same computer while handling the scan. I couldn´t safe the model, but this screenshot remains.
Download All Files