Week 14 - Composites
Assignment:
- design and make a 3D mold (~ft2), and produce a fiber composite part in it
- This week’s home work page
Sisal Coffee Bag - Upcycling:A completely different task, after so much eletronics.
By chance, Joe Galea asked me if I felt like having a coffee, an awesome coffee place just opened right some doors downs from IAAC.
Amazing coffee indeed, people and place. Check them out, they are Nomad Caffee.
Well, why am I mentioning them? Because they have amazing Sisal Coffee Bags, and they gave me two:

This is the material I'm planning to build my part.
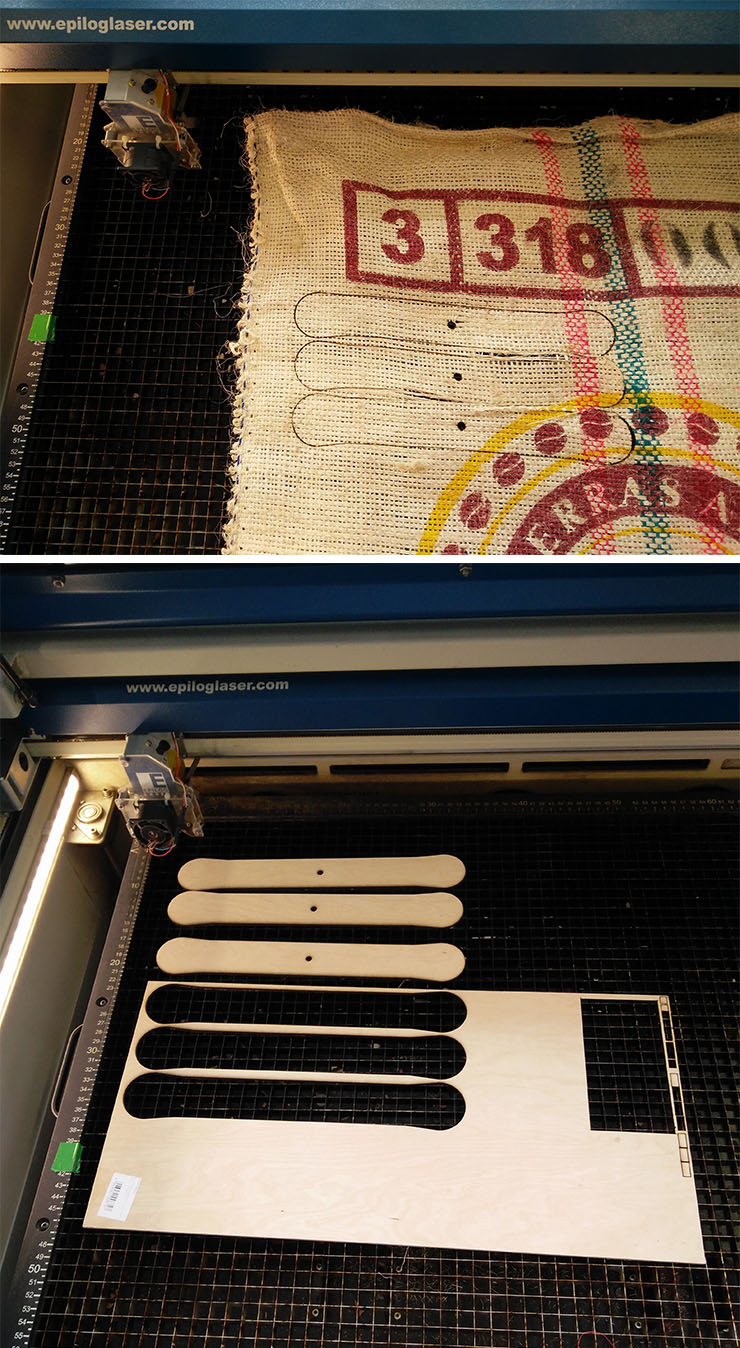
Decision and the design :As mentioned above, I'll use the coffee sisal bag, I thought about making flexures on mdf or plywood and combining them to test its resistence, but since as part of the task I must CNC a 3D mold, I decided then to not making flexures and instead, using 4 mm birch plywood, and the Sisal coffee bags (Sisal is an eco-friendly biodegradable product made from a plant called Agave Sisalana and results in natural fibers that is rugged and stiff.)
Finally, because I didn't know what to produce, I made a part that I could integrate in other designs but also use it to test the results of these materials combined, laminating it with polyester resin, not to forget to learn the techniques proposed this week.
The part ended up looking like this:
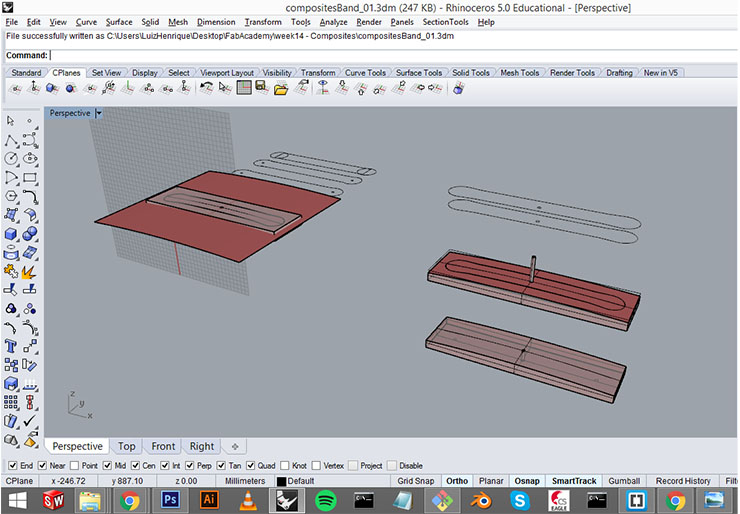
The lower right part is the mold, and the part on top of it will be the laminates of plywood and Sisal that I'll laser cut.
Alright, this went fine. Let's then get that mold milled. I got the mold I designed in Rhino and saved in STL to export it to Conda CAM 2.1
For week 14, I was in Kamp-Lintfort - Germany, the city where I study and in the fablab where I work. So I worked for my Composites Week there, at the "Fab-Lab Kamp-Lintfort". There they have this machine, the ElSign(Below), and they use it with the above mentioned Conda CAM.
Explaining how was the process in Conda Cam
Again, Conda Cam is another CNC milling software. At certain point you get to tell where the machine should start X,Y,Z. Z safe, tooling dimensions, feeds and speeds...
Daniele Ingrassia made a nice tutorial on Conda Cam. Daniele is now the fixed Fab Academy Guru of Fab Lab Kamp-Lintfort.
First of all, I opened the STL of the mold in Conda CAM:
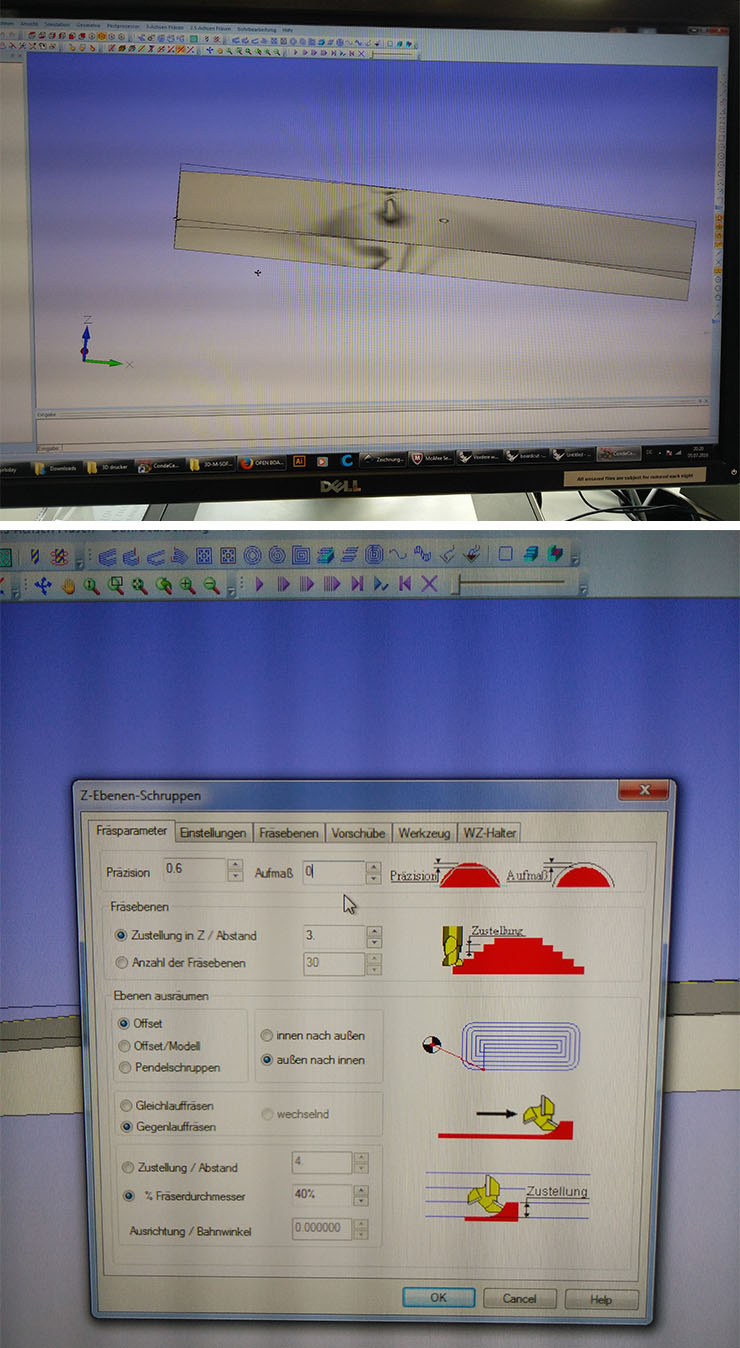
Next (Picture above) is to choose the strategy for the rough cut.
Set the rough cut settings part 1. Here you have to set the precision of the cut, the height of each step going down, the amount of removed material with each pass of the tool. As the rough cut you can try to obtain the maximum speed. Take into consideration the material kind and the tool diameter for the z axis step.
Daniele, in his tutorial, for cutting feed suggested was 700mm/min. But since I was cutting high dense Styrofoam, it could have gone much faster.
What I did was, after the job started and I noticed that the speed was too slow, what you can do in the CNC panel of the EasyWorker - Master is to increase the speed manually. And this is what I did. I went to 300% the 700mm/min, the limit you can increase in the panel. The job was supposed to have taken 2 hours but instead it took 1/3rd of it. That went to 2400mm/min, which was not yet fast enough. I could have gone faster. Suggestion, start with 2000mm/min (for dense styrofoam) and control it manually in the panel until you find your ideal speed.
Spindle speed I set to 1300 rpm and it went smooth. Plunge - 500; Approach - 700; Stepover - 50%; security height was 4 mm above the stock.
Below, set the rough cut settings part 2. Here you will set the start position of the tool before getting into material.
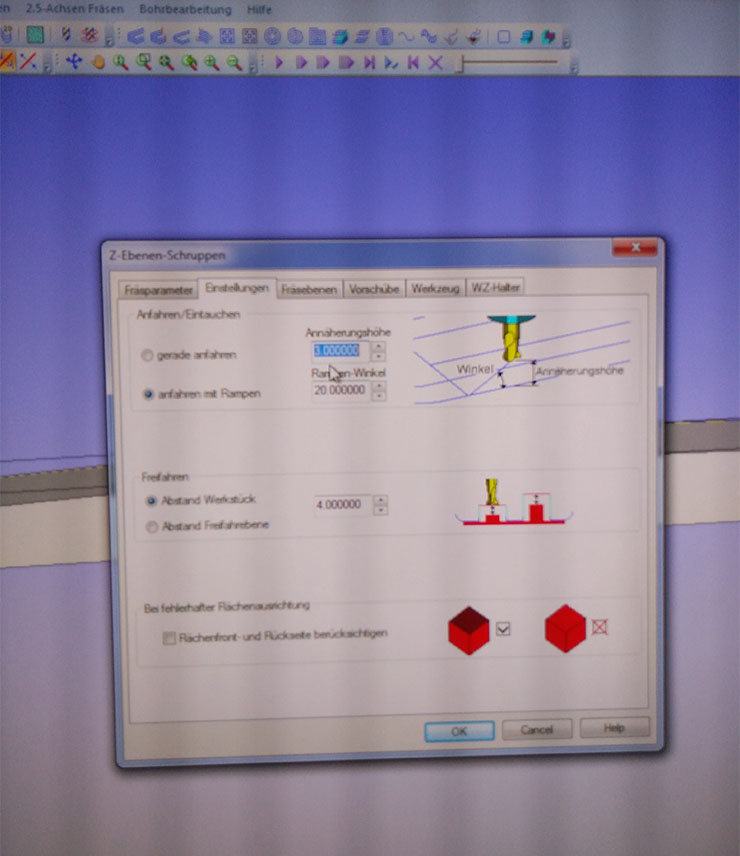
Set rough cut speed and rotation rpm of the spindle. Depending on the kind of material you can spindle and move faster/slower. A rough cut you will probably remove a lot of material, so you may want to go slower and increase the spindle speed.
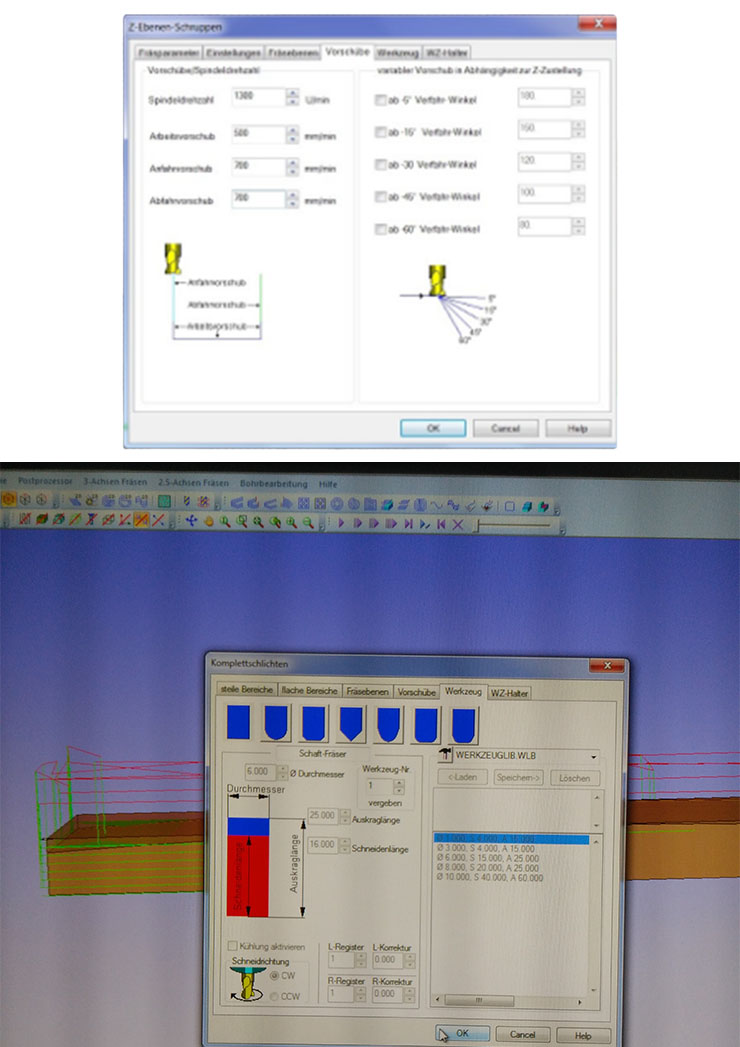
The picture above is where you set rough cut tool dimensions and shape. Most important parameters are:
Now it's time for a finishing cut strategy:
The images would repeat itself so I won't post them again. Its the same process, but now you want to obtain the maximum quality of the surface finish passes, reducing the step for going down with Z and increasing the precision.
Set finish cut speed and rotation rpm of the spindle. Depending on the kind of material you can spindle and move faster/slower. Remember that this is the finish cut, so you have to remove less material than the rough cut, but that you may want to obtain the best quality in finish surface.
Set finish cut tool dimensions and shape.
Open the postprocessor menu.
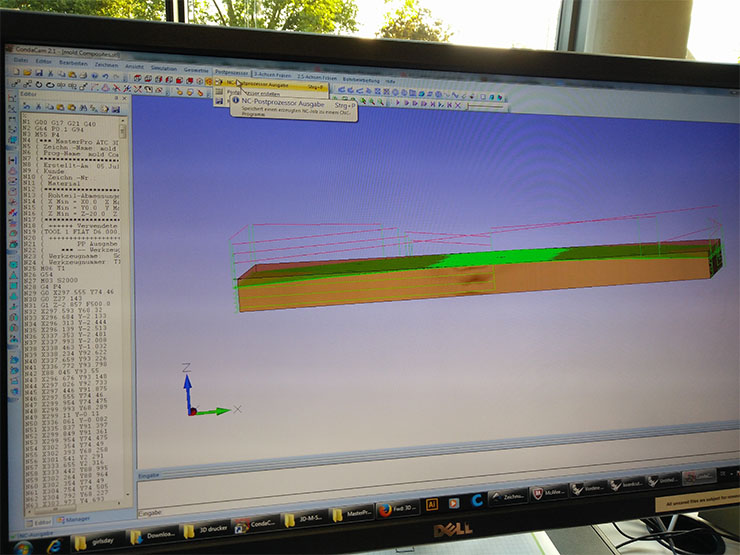
Load a post processor driver and choose the path where to save the .nc file that you later will open with the machine software. In our case the ATC driver. Before pressing start you may want to select/deselect the jobs you will do with the machine (on the left). This is useful for example if you want to make only the rough cut or the finish cut (for example to change the tool).
Run the simulation until the end. Look at the final result for collision (in red) and other problems, and eventually go back changing the parameters.
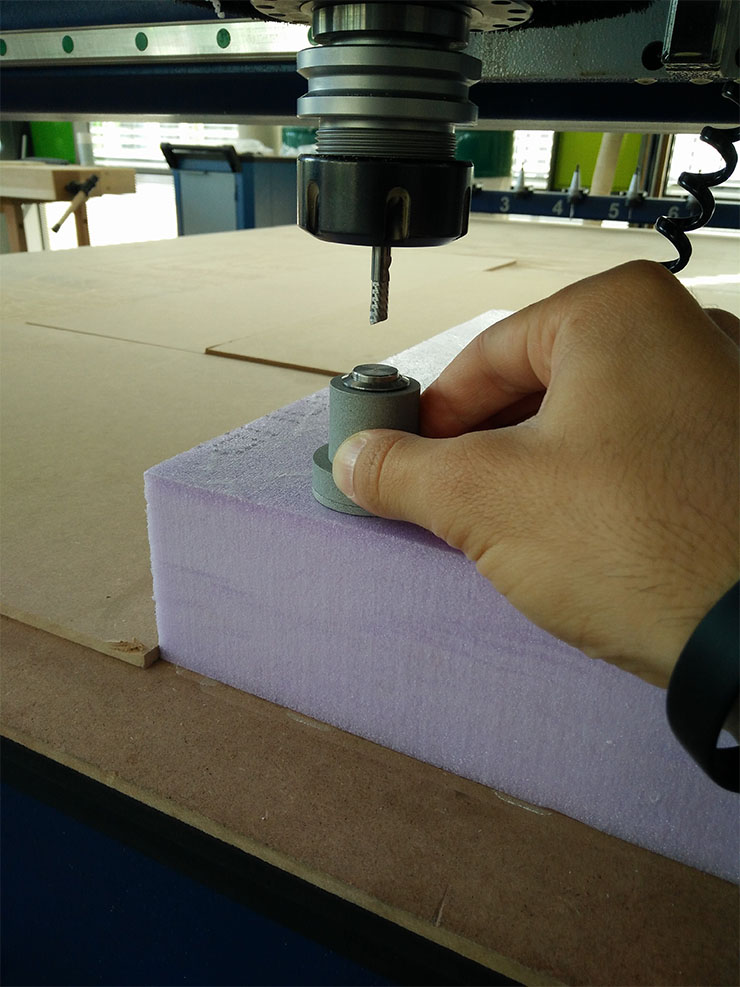
To the CNC machine:
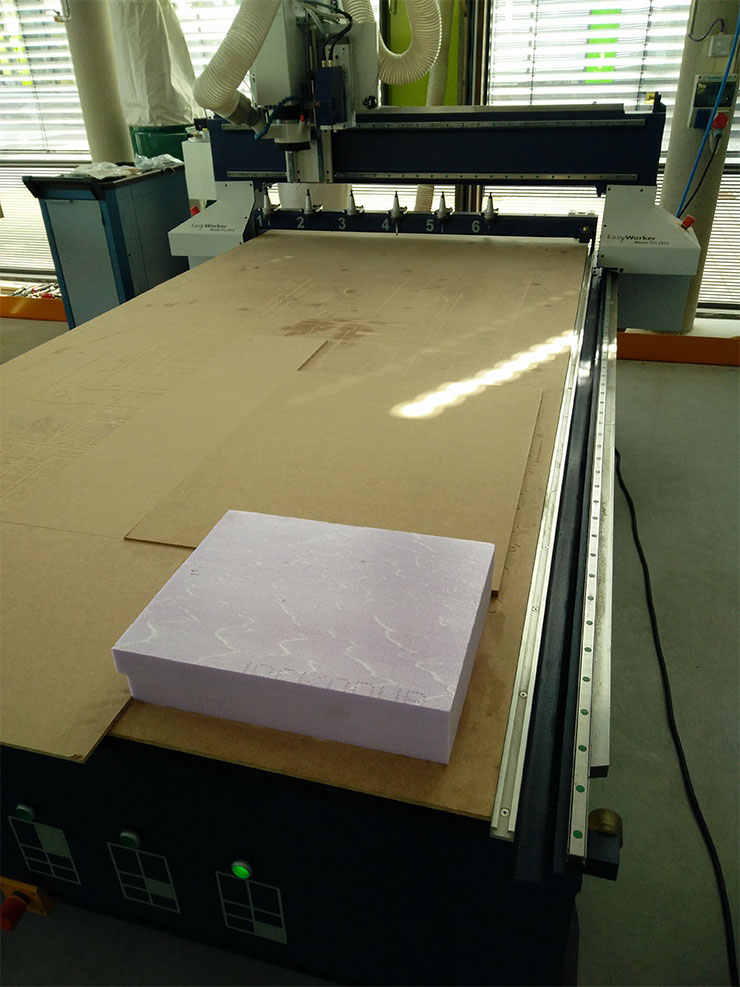
In FabLab KaLi (Kamp-Lintfort) we have an ElSign EasyWorker, 2600 x 1400 mm, automatic tool exchanger, vacuum table, 3 axis, laser pointer for X&Y, Z eletronically calibration, Exhaust system, ... top machine!
To better ensure that the vacuum table will hold the part in place, I covered the space free to focus the vacuum. Works great.
The material I'm milling is styrofoam for insulation. It mills easily and it is much more sturdy than normal styrofoam.
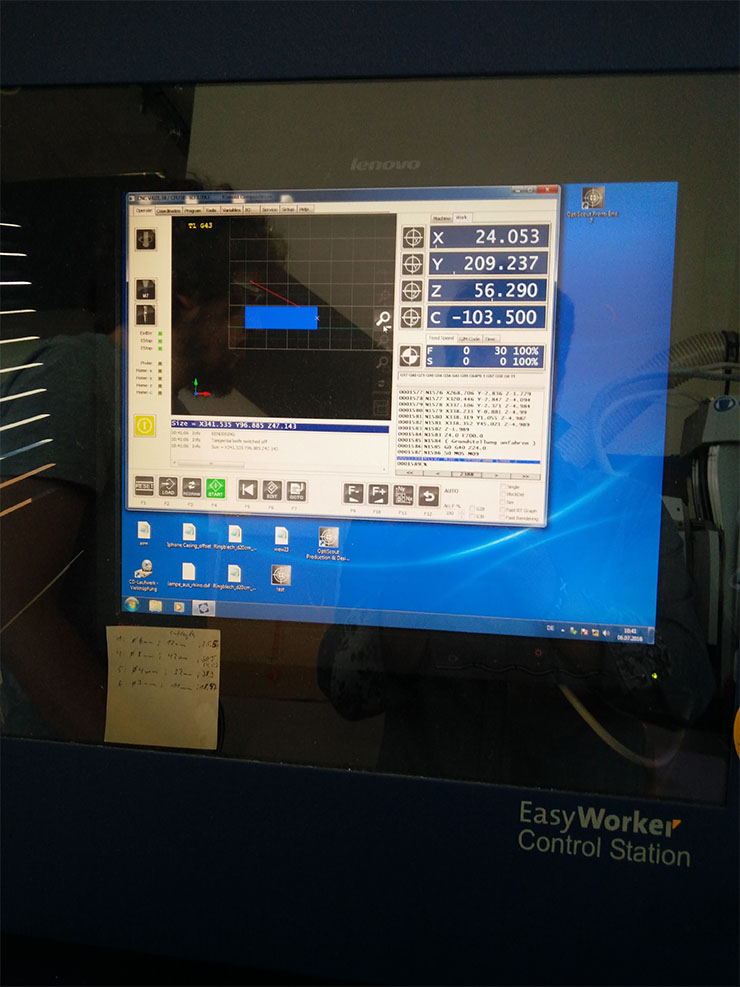
The machine has tool automatic exchanger, as I previously mentioned. The milling bit I needed was in tool number one. So I set, on the machine's monitor, tool number 1. It's a 6mm, S1, universal, 16mm cut-lengh, 65mm overall-lengh End-Mill.
Next steps are:
Before starting to mill, the machine has many Emergency buttons spread around it. But also, the start button - once clicked - becomes a STOP button. By clicking it, you stop the machine but are still able to restart afterwards. Once you press one of the emergency ones, the machine will shut off, all will be lost.
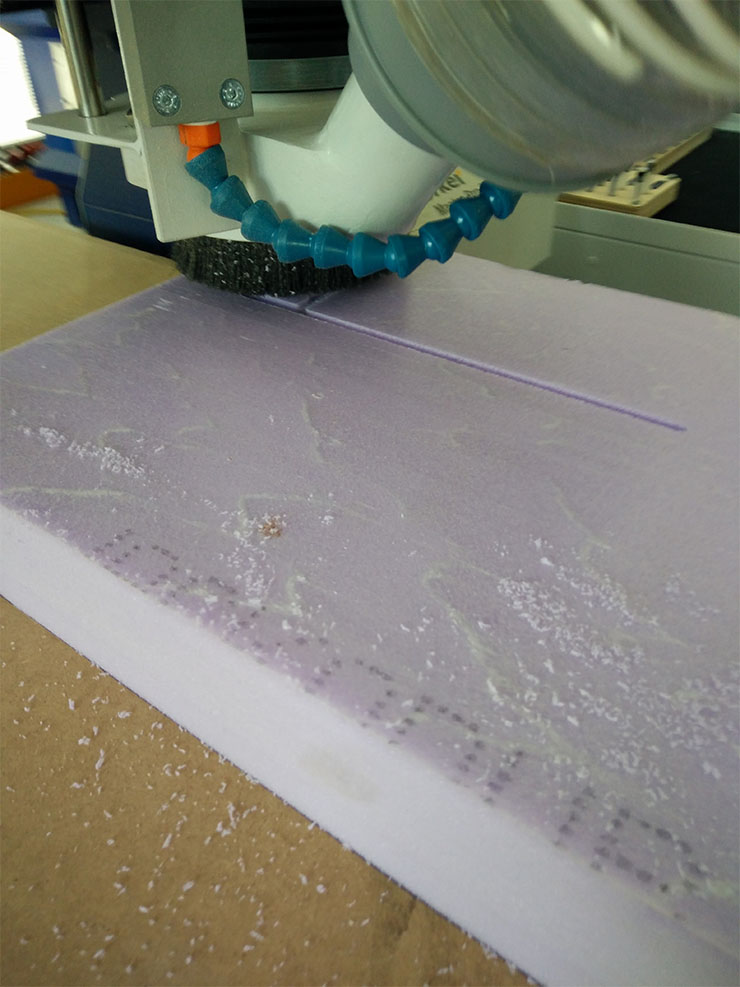
The job took 40 minutes, aprox.
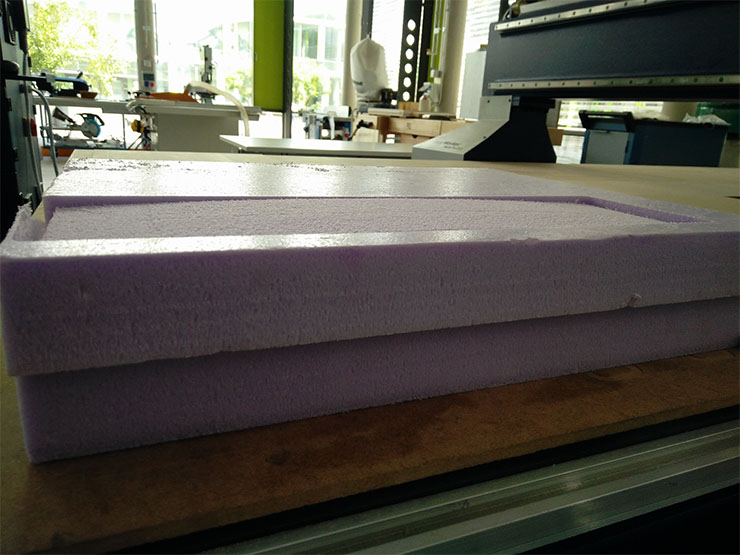
After that, I used a band-saw to cut it out of the styrofoam block.
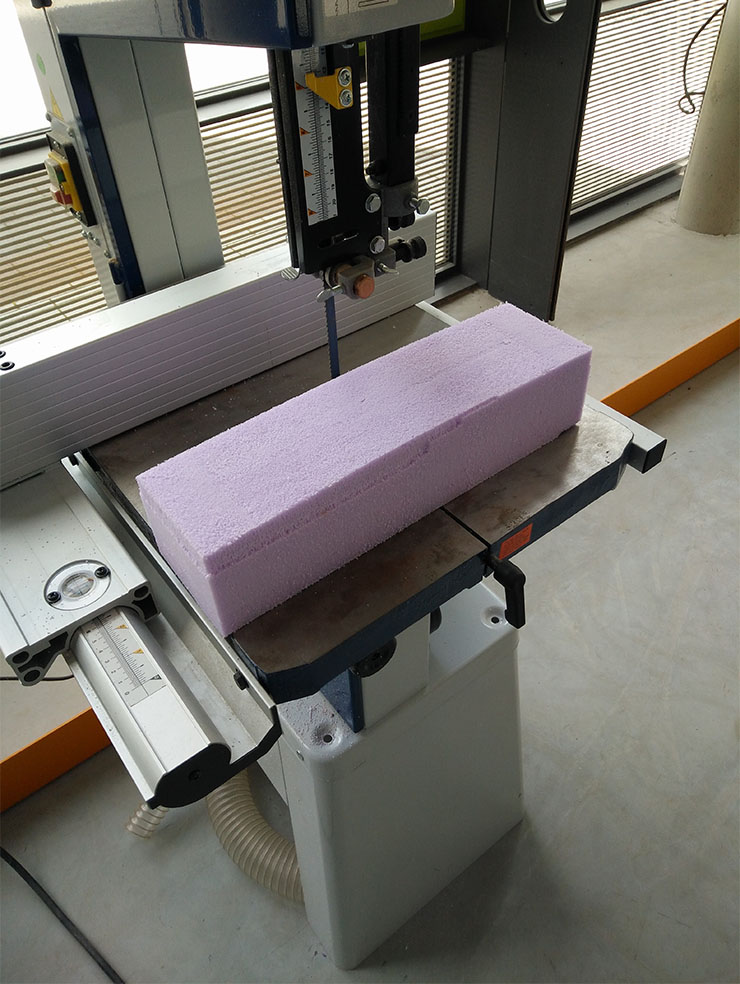
Mold ready!
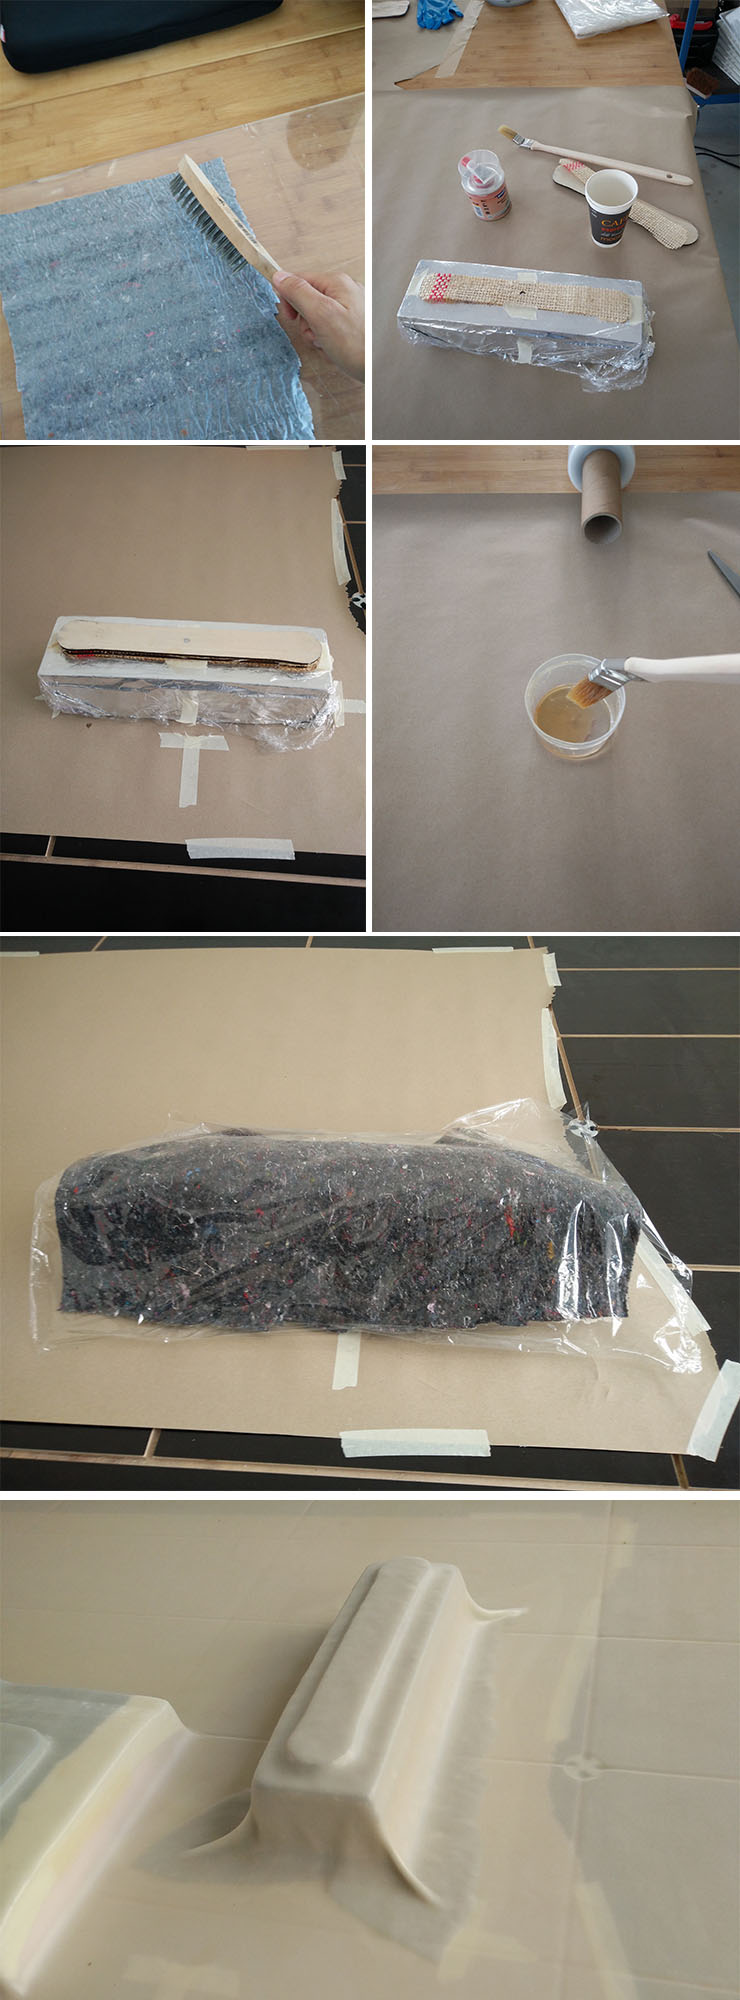
Let's laminate this thing! 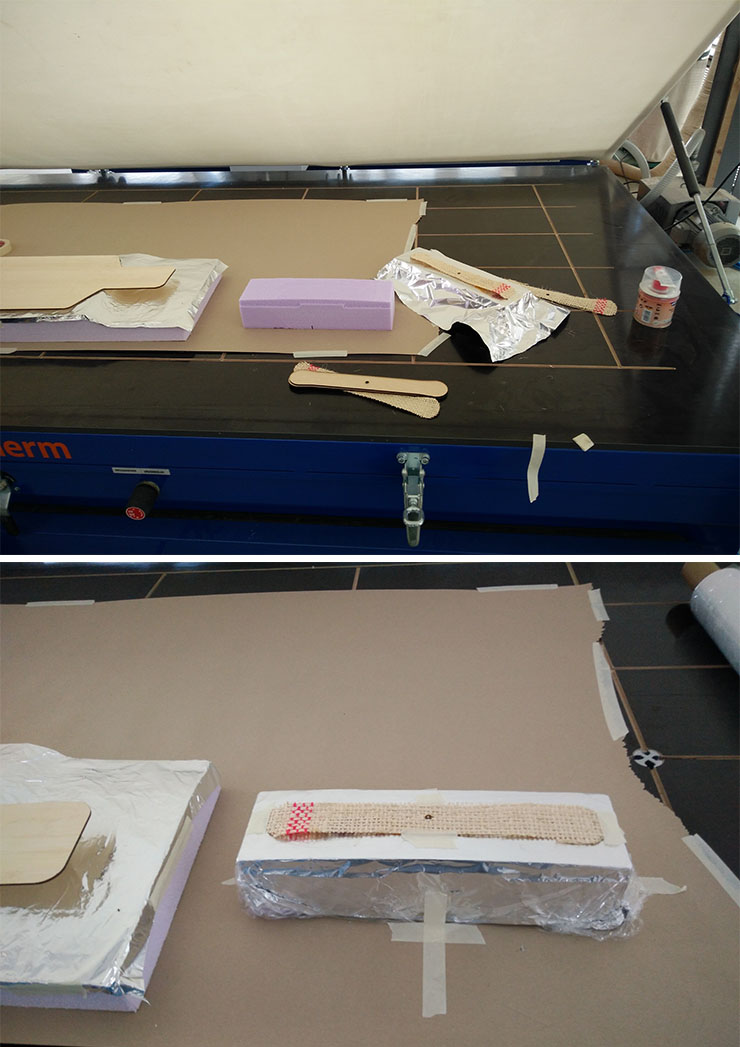
We have here at the lab this Vacuum-Pump machine with oven. It's big enough for what we needed. I did my assignment together with John that laminated a Long Skate board.
I first covered my mold with Aluminium foil, then with cling-film, then I paper-taped the first layer of Sisal fiber on the mold to hold it on place.
The polyester resin advices from 2 - 4% volume of catalyst.
Presto Polyester Resin.
In order to absorb the excess of resin, we used this type of felt with plastic coat at its back, normally used in construction sites. But this plastic has no holes in it so we pierced many by hitting it with that steel brush.
It worked.
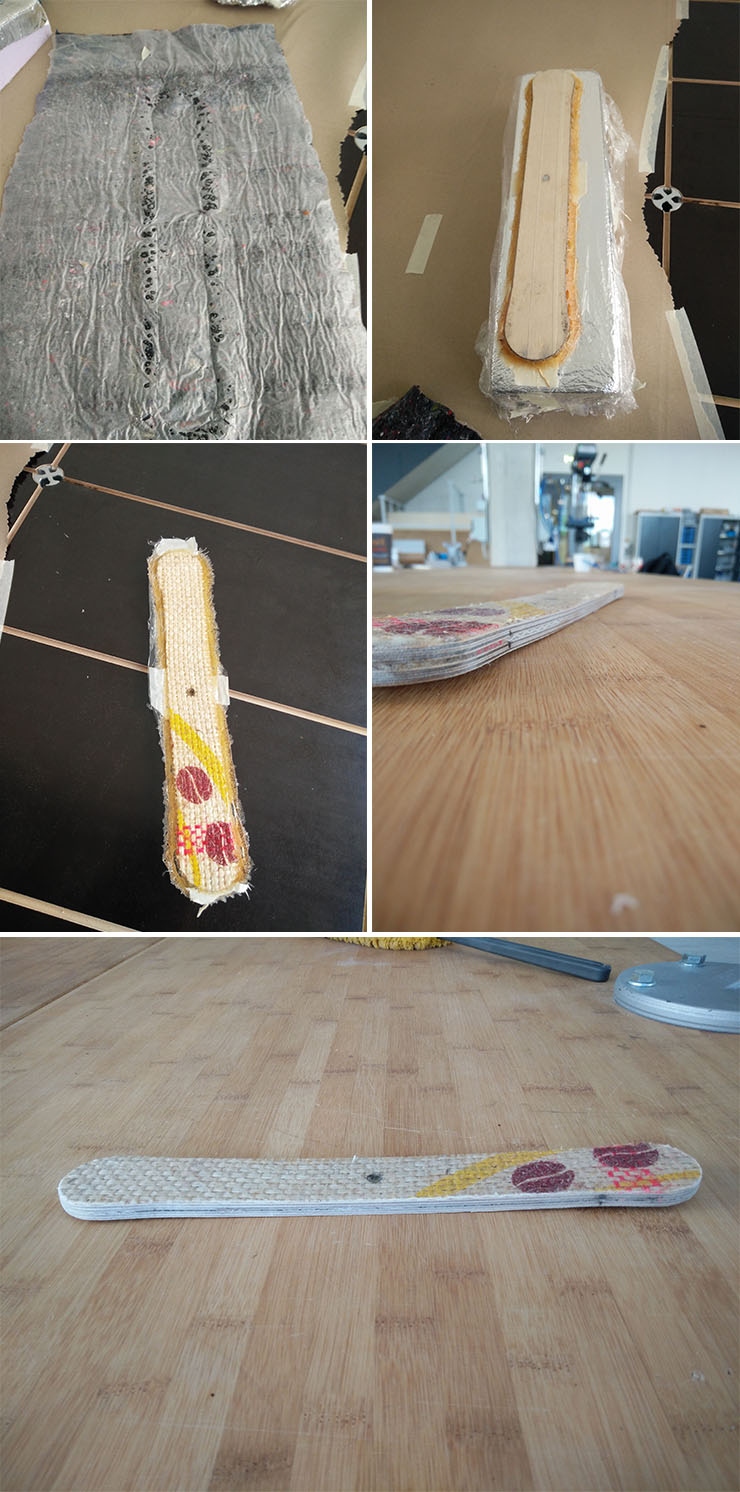
Around 1 hour later, touching the silicone membrane covering my composite, I noticed it was cold already. 30 after catalysed, the membrane was hot.
This resin is not as simple to work as epoxy. Polyester has a strong smell and Epoxy is more flexible.
But Polyester is way cheaper.
Nevertheless, I like the result:
-Download my files::-STL File Mold to import to Conda CAM
-CNC file of Mold - for milling machine ElSign EasyWorker